



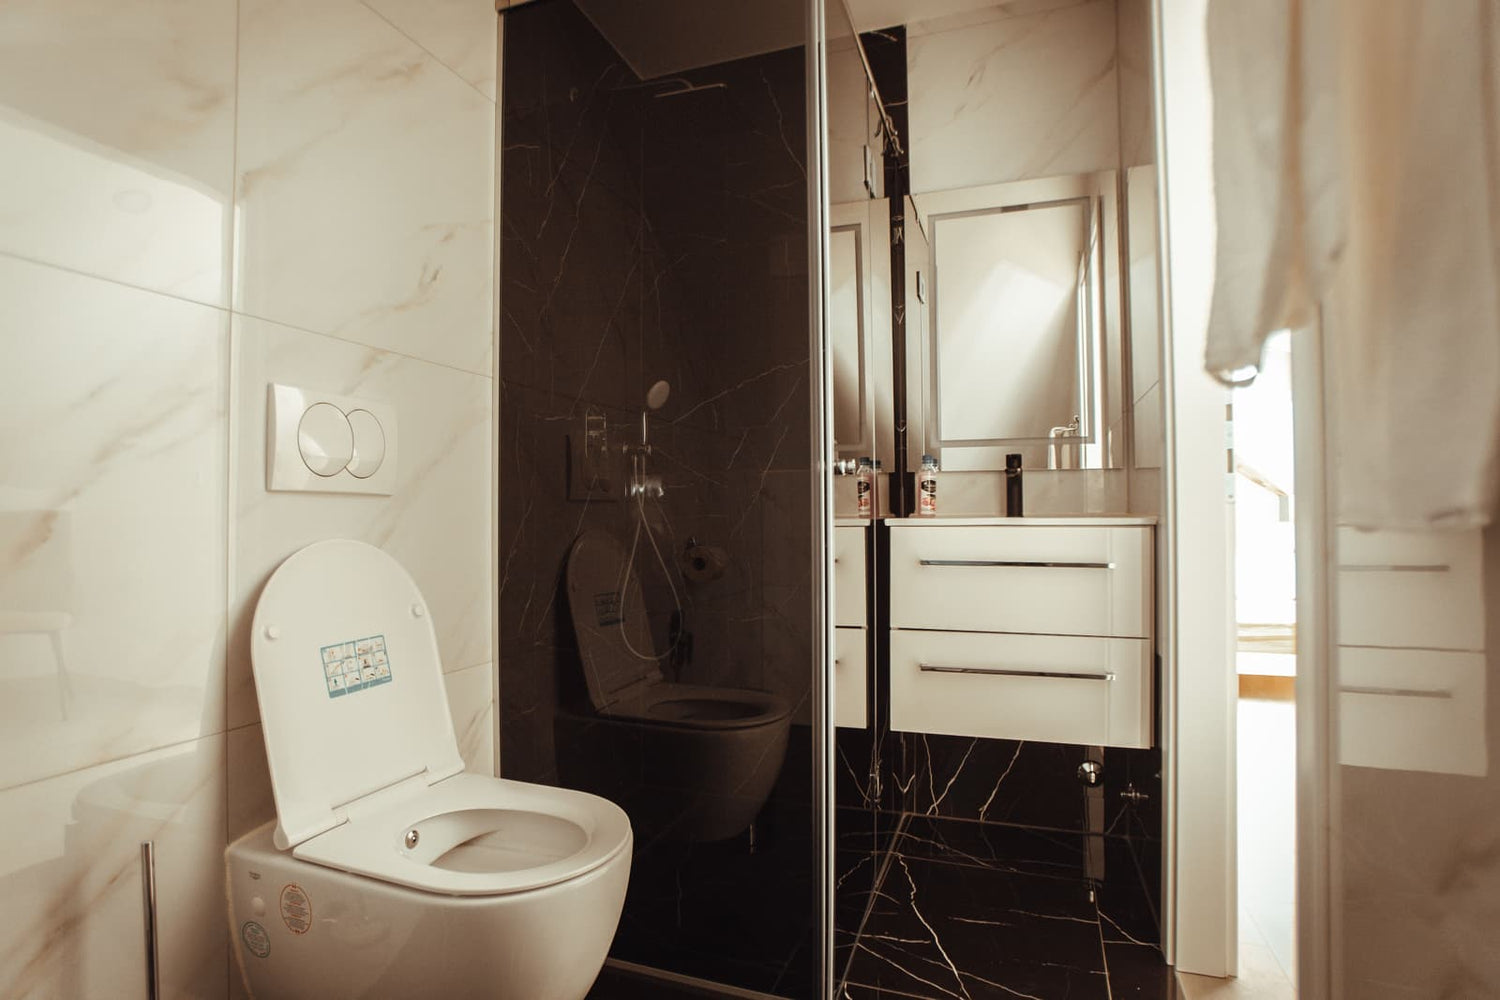
A smart toilet can work in an older home, but only when the bathroom matches the fixture’s installation requirements. The age of the house is not the deciding factor. Rough-in size, flange condition, water flow, drain performance, electrical service, floor stability, and usable clearances determine whether the project is a straightforward replacement or a remodel.
Do not order based only on the old toilet’s footprint or the presence of a nearby water valve. A smart toilet may have a larger rear housing, concealed mounting hardware, different connection locations, and powered features that expose problems the old fixture did not.
Use this checklist with the specification drawing and installation manual for the exact toilet you are considering.
Will a Smart Toilet for Old House Plumbing Work?
Decision Snapshot: Pass Every Fit and Utility Check
A smart toilet can be a practical retrofit for an older home when six basic conditions are confirmed:
- The rough-in matches the toilet’s approved installation range.
- The full fixture fits the room and leaves usable service access.
- The flange and floor are secure and suitable for installation.
- The shutoff valve and water supply meet the product requirements.
- The existing drain works reliably.
- The electrical connection, cord reach, GFCI protection, and circuit capacity are suitable for the selected toilet.
If any of these checks fail, resolve the issue before installation rather than improvising around it.
Choose It When Existing Connections Are Serviceable
Existing plumbing and electrical connections are useful only when they match the selected toilet’s installation requirements and remain accessible after installation.
Confirm the rough-in, flange position, shutoff-valve location, cord reach, mounting layout, and service clearances from the exact model’s specification drawing and installation manual. A toilet that physically fits but blocks routine shutoff, inspection, cleaning, or servicing is not a good retrofit.
You can compare general formats in the HOROW smart toilet collection, but use the exact product documentation for the final fit decision.
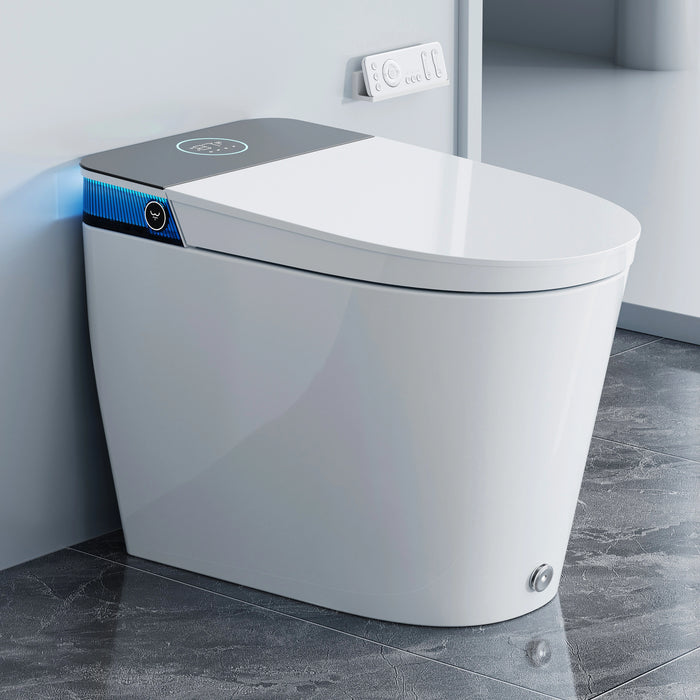
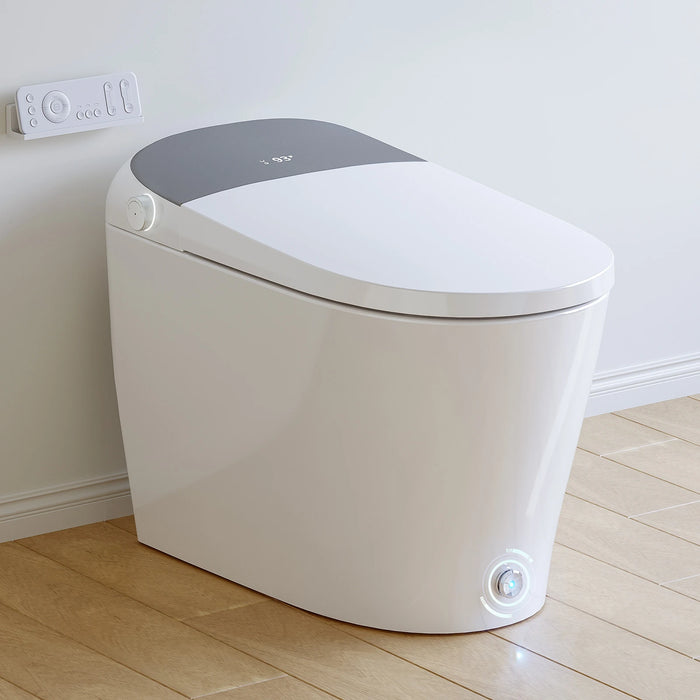
HOROW Smart Toilets to Compare for an Older-Home Retrofit
These verified HOROW models provide several configurations to compare. Before choosing one, confirm the measured rough-in, water supply, electrical setup, clearances, and installation requirements for the exact model.

House Age Alone Does Not Predict Compatibility
Do not assume that every old bathroom has a 10-inch rough-in, low water pressure, or unusable wiring. Some older houses have updated utilities and standard fixture positions. Others have renovated finishes covering original plumbing or electrical work.
A newer-looking bathroom can also fail the checklist. Added wall tile may reduce the effective rough-in, new flooring may leave the flange too low, or a replacement vanity may reduce side access.
Treat the age of the house as a reason to inspect carefully, not as a diagnosis.
What Trade-Offs Come With a Full Smart Toilet?
Consider a Bidet Seat When Several Systems Need Alteration
If the retrofit requires changes to several systems—such as drain relocation, flange rebuilding, floor repair, new electrical work, and valve replacement—compare that scope with keeping the existing toilet and adding a powered bidet seat.
A bidet seat still requires compatible bowl dimensions, water access, power, and adequate clearance, but it may avoid disturbing an existing toilet that already fits the room and drains reliably.

When Does Installation Become a Remodel?
Is This Still a Simple Replacement?
The work remains close to a normal replacement when the new toilet can use the existing drain, flange, water supply, floor, and suitable electrical connection without opening permanent surfaces.
It becomes remodel-level work when the plan includes one or more of the following:
- Moving or rebuilding the closet flange.
- Altering the drain below the floor.
- Repairing a soft or water-damaged subfloor.
- Cutting or replacing tile around the mounting area.
- Replacing concealed supply piping.
- Running new cable through finished walls or floors.
- Relocating a vanity, radiator, baseboard, or door.
- Correcting a significant floor slope or support problem.
The key difference is not who performs the work. It is whether permanent building systems or finishes need to be changed.

Cost Matrix: Outlet, Valve, Flange, and Floor Work
This matrix identifies relative cost exposure rather than estimating a price. Labor and disruption depend heavily on access and hidden conditions.
|
Existing condition |
Likely action |
Cost exposure |
Risk if ignored |
|
Suitable outlet, circuit, and cord path |
Verify protection, grounding, load, and reach |
Low |
Trips or unusable powered functions |
|
No suitable outlet within cord reach |
Install a permanent receptacle; assess circuit needs |
Medium to high |
Unsafe or unfinished cord arrangement |
|
Valve operates and fitting matches |
Install the specified connector |
Low |
Leakage if the valve or threads are damaged |
|
Valve sticks, seeps, or will not close |
Replace valve and inspect the connected pipe |
Medium |
Leak or inability to isolate the toilet |
|
Flange is secure and correctly positioned |
Install the specified seal and hardware |
Low |
Seal failure if condition or height is misjudged |
|
Flange is cracked, loose, or misplaced |
Repair, rebuild, or relocate it |
Medium to high |
Rocking, leakage, or outlet misalignment |
|
Floor is uneven but structurally sound |
Correct support using an appropriate method |
Medium |
Movement that stresses the seal or ceramic |
|
Floor is soft, stained, or damaged |
Open and repair affected materials |
High |
Continued deterioration and recurring leaks |
|
Rough-in falls outside the approved range |
Select another toilet or alter the drain position |
High |
Failure to seat or serious room interference |
Actual cost depends on access and hidden conditions. If several medium- or high-exposure items apply, obtain site-specific plumbing or electrical quotes before ordering the toilet.
Professional Help Becomes Necessary After Failed Checks
Ask a qualified electrician to assess the installation when grounding, GFCI protection, circuit capacity, receptacle condition, or outlet suitability cannot be verified. Existing wiring that trips, shows damage, or has an uncertain modification history should also be evaluated before a powered toilet is installed. The Electrical Safety Foundation International recommendsprofessional electrical inspections when the condition of existing wiring is uncertain, especially before adding new powered equipment.
Ask a plumber when:
- the shutoff valve leaks or will not close;
- the connected pipe moves when the valve is handled;
- the flange is damaged, loose, incorrectly positioned, or at an unsuitable height;
- the drain position does not match the selected toilet;
- the bathroom has recurring clogs, slow drainage, or sewer odors;
- available water flow does not meet the selected toilet’s requirement.
See the HOROW smart toilet plumber guide for additional installer-focused planning points.
Hidden Conditions Appear After Toilet Removal
The existing toilet conceals the flange, seal area, and part of the subfloor. Before removal, check for warning signs:
- Darkened or swollen flooring around the base.
- Movement when someone sits on the toilet.
- A persistent musty or sewer-like odor.
- Rusted, tilted, or loose closet bolts.
- Heavy caulk that appears to stabilize the fixture.
- Flooring built up around rather than beneath the base.
- Water marks on the ceiling below the bathroom.
These signs do not prove extensive damage, but they increase the chance that the flange, seal, or floor needs repair.
Plan for the bathroom to remain out of service until any hidden flange, seal, or subfloor damage found after toilet removal is properly repaired.
Will the Toilet Physically Fit?
Will a 10- or 14-Inch Rough-In Fit?
Only choose a toilet specifically documented for the measured rough-in. Older bathrooms may use 10-, 12-, or 14-inch positions, but house age cannot tell you which one is present.
A smart toilet designed for a 10-inch rough-in must be approved for that drain location. A compact body does not automatically make a toilet compatible. HOROW’s 10-inch rough-in toilet collectioncan help identify relevant formats, but verify that the exact product is a smart toilet and that its installation drawing matches the room.
A toilet designed only for a 12-inch rough-in may strike the wall when installed on a shorter position. On a longer position, it may leave a larger rear gap and project farther into the bathroom. Do not assume an offset flange is a simple universal correction; changing the drain path requires evaluation of the actual piping, floor structure, and mounting layout.
Measurement Diagram: Finished Wall to Drain Center
Measure from the finished wall surface—not the baseboard—to the center of the drain.
Top View (View from Above)
The rough-in measurement is the distance from the finished wall to the center of the toilet drain opening.
- Start from the finished wall.
- Measure horizontally along the finished floor to the drain center.
- The marked point X represents the toilet drain center.
- The distance between the wall and the drain center is the rough-in measurement.
With the existing toilet installed, the closet bolts often indicate the drain center, provided the installation does not use an unusual or offset arrangement. Confirm after removal if the first measurement is uncertain.
Account for tile, wall panels, or other finishes added during a previous remodel. The relevant starting point is the finished wall plane the new toilet will face. If plaster bulges or the wall is angled, take measurements at several nearby points and compare the body outline with the tightest location.
If the measurement falls outside the toilet’s stated installation range, the toilet fails the fit check even if the existing fixture looks standard.

Clearances Must Include Lid, Door, and Service Access
Use removable tape to mark the new toilet’s full width and depth on the floor. Include the widest rear housing rather than outlining only the bowl.
Compare the room with the specification drawing for:
- Rear clearance from the finished wall.
- Lid and seat opening paths.
- Door swing and user foot space.
- Side clearance needed for mounting.
- Water-hose and power-cord exit locations.
- Shutoff-valve position.
- Service-cover removal.
- Remote-control placement, if applicable.
Pay particular attention to the valve. A skirted body may conceal a shutoff that was accessible beside the old bowl. The valve should remain reachable for routine isolation and inspection.
Flange Height and Floor Flatness Must Both Pass
The flange must be firmly attached, aligned with the toilet’s outlet and mounting system, and suitable for the seal specified in the installation instructions.
Additional flooring layers can leave a flange low relative to the finished floor. Other alterations can leave it too high. Either condition may prevent the base from seating correctly or the seal from compressing as intended.
Do not correct rocking by overtightening the mounting hardware. Excess force does not flatten the floor and can damage the ceramic. The base needs even support using a correction method appropriate for the toilet and flooring.
Stop if the floor feels soft, moves under weight, or shows evidence of previous leakage. Repair the supporting surface before installing the new fixture.
Can Existing Plumbing Supply and Drain Reliably?
Will Low Pressure Disable Wash or Flush Functions?
Low water pressure or restricted flow can affect a smart toilet, but the result depends on its design. Washing, refill, and flushing may have different supply requirements, and some models rely more directly on incoming water than others.
Do not assume that old plumbing automatically means low pressure. Conversely, acceptable static pressure does not prove that enough water reaches the toilet while it operates. Corroded pipe, debris, a partly closed valve, a narrow connector, or simultaneous fixture use can restrict flow.
Compare the bathroom’s actual supply performance with the exact product requirements. For a well system, check performance during normal pressure variation rather than only when the system is at its strongest.
Bucket Flow Must Meet the Product Requirement
A bucket test can show the flow available at the toilet shutoff. The connector is disconnected, the valve outlet is directed safely into a container, and the valve is opened while the delivered volume and time are recorded.
Do not disturb a corroded or questionable valve solely to perform this test. Operating an old connection may cause it to seep or fail. Have a plumber test it when the valve is stuck, heavily corroded, painted over, or connected to piping that moves.
Compare the result only with the requirement in the selected toilet’s documentation. A general online threshold cannot establish compatibility for every design.
If flow is inadequate, locate the restriction before replacing the toilet. The cause may be the shutoff, connector, branch piping, whole-house supply, pressure equipment, or a filter.
Corroded Valves and Mismatched Fittings Raise Leak Risk
A valve can remain dry for years and begin leaking once its handle or stem is moved. Inspect it for corrosion, mineral deposits, paint, moisture, damaged threads, and movement at the connected pipe.
Confirm that the valve outlet matches the connector specified for the toilet. Do not force incompatible threads together or assemble a chain of improvised adapters. In older homes, it is also worth considering the condition and material of existing water supply components, especially if plumbing has not been updated for many years.
The EPA notes that older homes may contain plumbing materials that can contribute to lead in drinking water, particularly where older pipes, fixtures, solder, or fittings remain in service. If the toilet supply connection shows significant corrosion, leakage, damage, or movement, have it assessed before installation and address any necessary repairs while the connection is still accessible.
If the pipe turns, flexes, or shifts when the valve is handled, stop. The concealed connection may need assessment before any fixture is attached.
Drain Alignment Cannot Be Assumed
A smart toilet does not correct an unreliable drain. Recurring clogs, bubbling fixtures, slow drainage, or sewer odors should be investigated before installation.
The drain center, flange orientation, and mounting points must also suit the new fixture. Previous flange repairs or offset components may have worked beneath an open-base toilet but conflict with concealed brackets or a skirted body.
Confirm drainage performance first rather than using the new toilet to test an unresolved problem.
Can Old Wiring Power It Safely?
Can Old Wiring Handle Peak Heating Load?

Use the electrical rating in the exact toilet documentation. Seat heating, water heating, drying, and other powered functions may create a higher load than standby operation.
Identify which circuit supplies the proposed receptacle and what else is connected. Breaker trips, dimming lights, damaged receptacles, or unusual warmth during appliance use are reasons to stop and obtain an electrical assessment.
The HOROW smart toilet electrical requirements guide provides general planning guidance, but the product manual and a site-specific evaluation should control the installation.
GFCI, Grounding, and Cord Reach Need Verification
Plan for a suitable receptacle within reach of the unchanged factory cord. Confirm grounding, GFCI protection, outlet location, and other electrical requirements against the exact product instructions and requirements applicable to the installation.
A receptacle without visible test and reset buttons may receive upstream protection, so test or verify the circuit rather than guessing. Older two-slot receptacles and questionable replacement outlets require professional assessment.
Confirm where the cord exits the actual toilet. It should not be stretched, pinched behind the body, routed across a walking path, or left where it can rest on a wet floor.
Shared Circuits Create Trips During Concurrent Loads
A circuit may appear adequate until the toilet operates while another appliance is in use. Hair dryers, portable heaters, and equipment in other connected rooms can contribute to concurrent loading.
An electrician can determine whether the existing arrangement is suitable. Installing a larger breaker without confirming the wiring is not an acceptable shortcut; the conductors, connected loads, protection, and equipment must be evaluated together.
Extension Cords Are a Stop Signal
If the factory cord cannot reach a suitable receptacle, pause the installation and plan permanent electrical work. Do not base the retrofit on an extension cord routed behind the toilet or across the bathroom.
Resolve the outlet location before the existing toilet is removed.
What Fails or Frustrates Owners Over Time?
What Fails First Over Time?
There is no universal first failure. In an unsuitable retrofit, the first problem may come from the bathroom rather than the toilet: a seeping valve, rocking base, restricted spray, repeated power trips, or an inaccessible connection.
When comparing toilets, check whether commonly serviced parts and filters can be reached and cleaned. Also confirm the outage procedure and what remains usable without electricity.
Hard Water Requires Nozzle and Passage Descaling
Mineral buildup can reduce flow through nozzles, screens, and small water passages. Warning signs may include an uneven spray, declining wash performance, or deposits around water outlets.
Follow the care instructions for the exact toilet. Avoid cleaners or descaling methods not approved in its documentation because they may damage seals, plastics, coatings, or internal components.
Tight Access Turns Cleaning Into Disassembly
A smooth skirt can simplify wiping the visible exterior, but dust and moisture may still collect around hose connections, mounting points, cord exits, and the gap behind the body.
If routine inspection requires partially removing the fixture, maintenance becomes more disruptive. Preserve the access shown in the installation drawing even when a tighter placement appears possible.
Outages and GFCI Trips Require Manual Recovery
Keep the reset and power-loss instructions accessible. Household members should know whether the unit can flush without power and how to restore normal operation after an outage or trip.
Frequent power interruptions do not necessarily rule out a smart toilet, but they reduce the reliability of powered features and increase the importance of an understandable manual process.
Before You Buy
Complete these final checks using the exact toilet’s specification drawing and installation manual:
- Confirm the measured rough-in is supported.
- Check the full toilet outline, door swing, lid path, and service access.
- Verify that the flange and floor are secure and suitable for installation.
- Confirm the shutoff valve is usable, accessible, and compatible with the required connector.
- Compare actual water supply performance with the selected toilet’s requirements.
- Resolve recurring clogs, slow drainage, or sewer odors before installation.
- Verify receptacle location, grounding, GFCI protection, cord reach, and circuit suitability.
- Obtain plumbing or electrical quotes before ordering if permanent repairs or alterations are required.
If several building systems need modification, compare the scope with retaining the existing toilet and using a compatible powered bidet seat.
Frequently Asked Questions
Can you install a smart toilet in an old house?
Yes. A smart toilet can work in an older home when the bathroom meets the selected model’s plumbing, electrical, rough-in, floor, and clearance requirements. If several systems need alteration, the project may become more than a simple toilet replacement.
Will an old bathroom need rewiring?
Not always. Some older bathrooms may already have suitable electrical connections for a smart toilet. New electrical work may be needed if the outlet location, circuit capacity, or protection does not meet the product requirements. When the existing wiring is unknown or has been modified over time, it is better to have it checked before installation.
What rough-in size do older homes use?
Older homes can have different rough-in sizes, including 10, 12, or 14 inches. The correct size depends on the actual bathroom layout, not the age of the house. Measure from the finished wall to the drain center and choose a toilet designed for that specific distance.
Does old plumbing affect smart toilets?
Yes, old plumbing can affect smart toilet performance, but older pipes are not automatically a problem. A bathroom with reliable water supply, drainage, and properly working connections may still be suitable. Issues usually come from damaged components, poor fit, restricted flow, or existing plumbing problems.
What if the toilet fits but the outlet is too far away?
Do not rely on an extension cord as a long-term solution. The outlet should be positioned so the toilet’s original power cord can reach safely without creating a trip or moisture risk. If the current outlet location does not work, solve the electrical issue before installing the new toilet.
References
https://www.epa.gov/ground-water-and-drinking-water/basic-information-about-lead-drinking-water


Leave a comment
This site is protected by hCaptcha and the hCaptcha Privacy Policy and Terms of Service apply.