



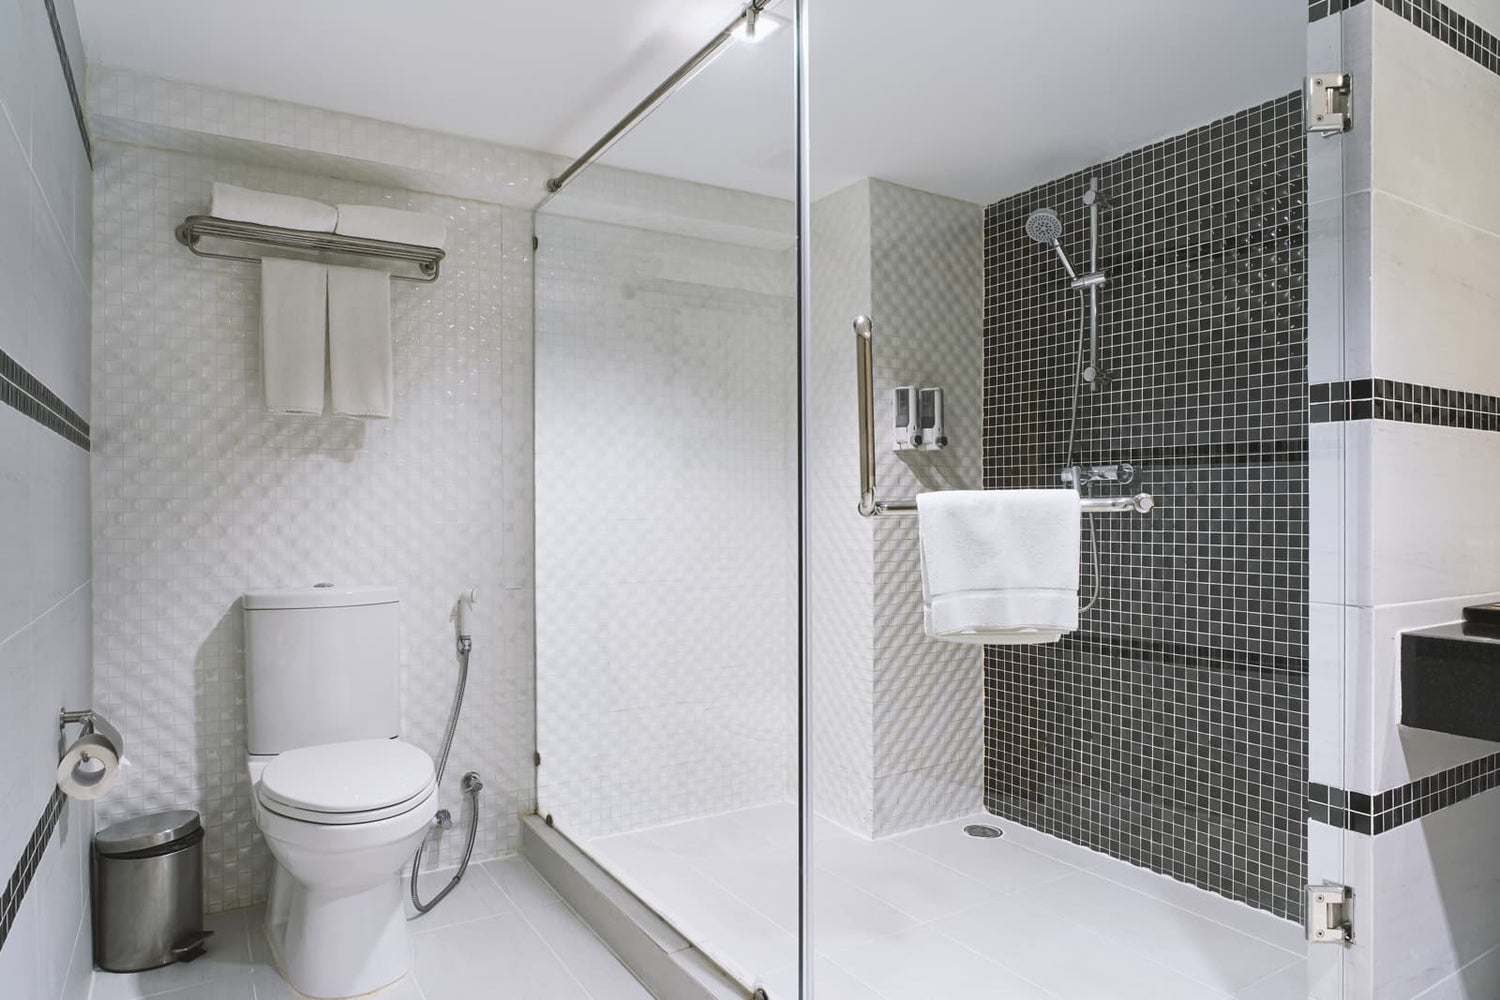
A 46 inch shower door may fit an opening close to that size, but the product name alone does not confirm compatibility. “46 inch” is generally a nominal size or product category. The actual finished-opening range, adjustment options, and wall-tolerance limits vary by model.
Measure after tile, wall panels, trim, and the shower base are finished. Then confirm that every width measurement falls within the model’s published limits. You must also check the walls, curb, mounting support, clear entry, swing or sliding path, and exposure to shower spray.
Before ordering, read the complete technical drawing and installation manual. Those documents—not the nominal size—determine whether the door fits and how it must be installed.
Who Should Choose a 46 Inch Shower Door?
Decision snapshot: suitable bathroom conditions
A 46 inch door is a practical candidate when all of the following are true:
|
Check |
Requirement |
|
Finished opening |
Bottom, middle, and top measurements fit one published range |
|
Wall geometry |
Lean and local bowing remain within the model’s allowance |
|
Curb or base |
Stable, correctly shaped, and wide enough for the specified track, guide, or sweep |
|
Mounting support |
The required substrate is present behind load-bearing attachment points |
|
Door movement |
The swing arc or sliding layout clears nearby fixtures |
|
Clear entry |
The actual walk-through opening works for intended users |
|
Water control |
The showerhead does not direct spray at vulnerable seams or gaps |
|
Control access |
The valve can be reached without an awkward step into the spray |
|
Installation access |
The glass can be carried, turned, lifted, and positioned safely |
Framed and semi-framed doors may provide useful adjustment through wall channels or telescoping components. Frameless hinged assemblies generally depend more heavily on accurate finished geometry. In either case, use only the adjustment method stated in the manual.
Avoid doors in marginal openings
A borderline fit happens when the opening is only slightly within the listed size range, one measurement falls outside it, or the hardware must also compensate for crooked walls.
Width adjustment does not always solve uneven wall conditions. A channel that expands the assembly may not correct a wall that leans or bows. Similarly, an opening can be the correct width at the curb but too wide or narrow near the top.
Do not order based on the most favorable measurement. If any required reading falls outside the published range, treat the door as incompatible unless the manufacturer’s instructions expressly allow that condition.
Other reasons to stop before buying include:
-
Measurements were taken before the finished surfaces were installed.
-
The curb flexes, slopes toward the bathroom, or lacks a suitable mounting surface.
-
The installation would require unusually thick shims, new unapproved holes, or wide caulk joints.
-
The substrate behind the tile is unknown at critical attachment points.
-
A hinged panel would nearly touch a toilet, vanity, or bathroom door.
-
A slider’s published clear entry is too narrow for intended users.
Will it work in a small bathroom?

It can, but the overall opening width is only one part of the decision.
A hinged door requires a clear swing path and a safe place for the user to stand while operating it. A panel may fit perfectly between the shower walls yet strike a toilet tank, vanity corner, towel bar, radiator, or open bathroom door.
A sliding door avoids an outward swing, but overlapping panels and hardware reduce the walk-through opening. A 46 inch wall-to-wall opening does not provide 46 inches of clear entry.
Create a simple test layout with cardboard or mark the door path on the floor with painter’s tape. Test the layout with nearby doors, drawers, and cabinets open. Stand where the user would actually stand while pulling the shower door toward them.
Simpler options for difficult alcoves
Do not force a stock door into an opening that requires extensive modification to sound tile or uncertain structural repairs.
A properly measured custom assembly may be the more controlled choice for an irregular opening that is otherwise stable. Custom glass can accommodate measured geometry, but it cannot correct loose tile, weak walls, a flexing base, or faulty drainage.
A lighter framed system may be more practical where its approved mounting method and adjustment range suit the site. A shower curtain may also be preferable when the room lacks swing space, the curb is irregular, or a rigid narrow entrance would restrict use.
What Usability Trade-Offs Come With This Width?
Slider overlap limits entry width
Sliding systems use part of the opening for overlapping glass. Wall profiles, guides, handles, and bumpers may reduce the passage further.
Look for a specification labeled “walk-through,” “entry width,” or “access opening.” If it is not listed, use the panel dimensions and layout in the technical drawing. Do not estimate clear entry from the nominal door width.
This distinction matters for larger users, people with mobility limitations, shower stools, and caregiver assistance. If accessibility is required, evaluate the entire bathroom layout against applicable standards instead of relying on product descriptions alone.
Hinged panels require clear swing space
A hinged panel may create a more open entrance, but only if it can travel through its full approved arc. Account for the glass width, hinge location, handle projection, fixed panels, and nearby fixtures.
Do not reverse the hinge side or swing direction unless the instructions identify the door as reversible. Sweeps, magnetic seals, and deflectors may be designed for one orientation.
Also consider water on the moving glass. An outward-opening wet panel can drip onto the bathroom floor. Correct seals and threshold geometry can manage normal water, but they cannot compensate for a curb that drains outward.
Control placement affects safe entry
The preferred opening side usually allows the user to reach the valve without stepping fully under the showerhead. A reversible slider may provide this option, while a fixed panel on the control side may make daily access awkward.
Confirm the relationship among the moving panel, fixed panel, valve, and showerhead. Spray directed at a sliding overlap, hinge gap, or entrance is more likely to escape than spray aimed toward a solid wall.
Narrow passages restrict accessible use
Evaluate the complete route into the shower, not only the door opening. A user may need to pass a vanity, turn beside a toilet, reach the handle, and step over a curb before entering.
A passage that feels adequate for one person may not work for a walker, shower chair, or caregiver. If accessibility is a project requirement, use the applicable accessibility standards to evaluate whether the shower area meets the intended requirements.
What Extra Work and Cost Can Installation Create?
Retrofit cost table by site condition
Installation cost depends more on site conditions than on the nominal door width. The following table identifies conditions that can add labor, materials, or reconstruction without relying on unsupported price estimates.
|
Site condition |
Likely extra work |
Cost effect |
|
Finished opening comfortably within range |
Normal fitting, alignment, and sealing |
Lower complexity |
|
Approved minor wall variation |
Manufacturer-permitted channel adjustment or packing |
Added fitting labor |
|
Excessive lean or bowing |
Wall correction, different hardware, or custom glass |
Higher complexity |
|
Unknown backing behind tile |
Investigation or reinforcement |
Potentially substantial |
|
Old door holes remain |
Surface repair and waterproofing assessment |
Added finish work |
|
Rounded or narrow curb |
Different threshold system or door configuration |
May change product choice |
|
Flexing shower base |
Base assessment and possible repair |
Can expand project scope |
|
Fixture inside swing arc |
New hinge orientation or sliding design |
Often requires reselection |
|
Opening outside stock ranges |
Custom fabrication or alcove correction |
Higher upfront scope |
Assess the site before ordering nonreturnable glass. Buying a stock kit first can lead to avoidable tile repairs, wall work, or a second door purchase.
Existing tile limits safe modification
Drilling finished tile requires more than choosing a bit. The installer must avoid cracking the finish, damaging the waterproofed assembly, striking concealed services, and fastening into an unsuitable substrate.
Existing holes can also complicate a replacement. New jambs may not cover them, and a surface patch may not address a penetration through the waterproofing behind the tile.
Do not treat tile grinding, improvised frame cuts, or extra holes as routine sizing adjustment. Such modifications can damage the finish, weaken components, or conflict with the installation instructions.
Heavy glass requires verified wall support
Heavy hinged glass places concentrated loads at the hinge attachments. Tile is a finish surface and does not, by itself, prove that suitable structural backing is present.
The approved support might be framing, blocking, masonry, or another substrate identified in the door instructions. If support cannot be verified, stop before drilling and determine what is behind the finished wall.
Sliding systems distribute loads differently, but their wall channels, guides, headers, and other attachments still need secure support. A loose surround or flexing base can allow movement that later appears as rattling, changing gaps, or failed sealant.
Custom sizing may prevent costlier reconstruction
Custom glass can be a practical option when a finished opening is stable but does not match standard stock sizes. It may cost more than a stock kit, but that expense should be compared with tile removal, wall correction, refinishing, and possible plumbing disruption.
Custom sizing is not a remedy for defective conditions. Repair weak backing, loose tile, base movement, and poor drainage before measuring for custom glass.
Will the Finished Opening Fit the Door?
Measure finished walls at three heights

Measure only after tile, wall panels, trim, and the shower base are complete. Take wall-to-wall measurements:
-
Near the bottom at the intended door line.
-
At the middle of the opening.
-
Near the intended top of the door.
Keep the tape in the same plane where the assembly will sit. Decorative tile bands, trim edges, and local wall bows can reduce usable width even when an adjacent area measures wider.
Record all three readings separately. Do not average them. An average can hide a narrow point that prevents assembly or a wide point that the seals cannot cover.
Also record the available height and usable curb depth. Check for ceiling slopes, soffits, projecting trim, niches, or fixtures that could conflict with the top hardware or handle.
For an overview of the fitting sequence, review HOROW’s glass shower door installation guide before ordering or drilling.
Match every width to published limits
What size shower door fits a 44- to 47-inch opening? The answer depends on the exact product range, not the number in its title.
-
A 44 inch shower door may be a nominal model that fits more than one finished width.
-
A 45 inch shower door may have either a narrow or broad adjustment range.
-
A 46 inch shower door is not necessarily made for an opening measuring exactly 46 inches.
-
A 47 inch shower door may overlap the range of a neighboring nominal size.
The correct shower door for a 44 to 47 inch opening is one whose published finished-opening range includes all three width readings and whose separate wall-variation allowance covers the measured geometry.
Confirm which components provide adjustment. A top rail may be cut to length, jambs may telescope, or wall profiles may allow limited correction—but only if the specific instructions say so. When comparing HOROW shower door options, use each product’s technical documents rather than relying on its nominal category.
HOROW Shower Door Options to Compare
HOROW offers shower doors with different configurations and finishes. These models can be compared when planning a shower door installation, but nominal product names alone do not confirm fit. Check the published opening range and installation requirements for the specific model before ordering.
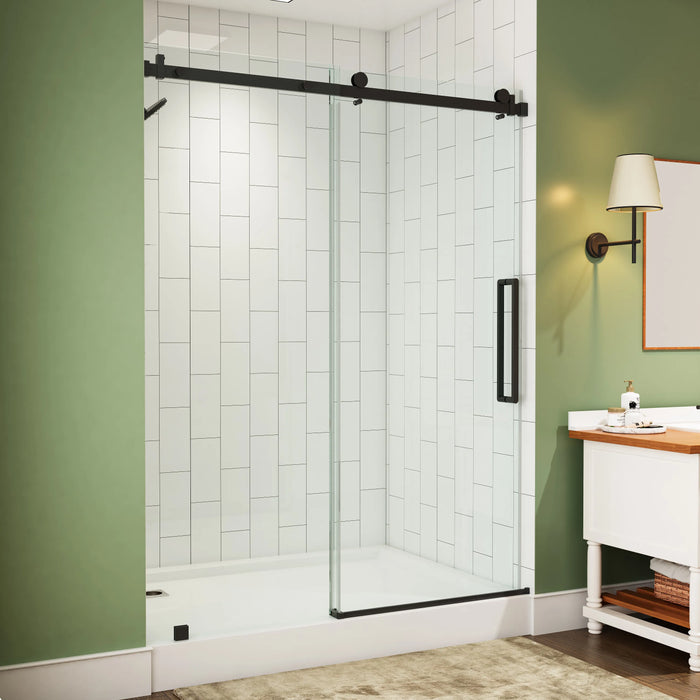
HOROW TE6076-MB
A black sliding shower door model from HOROW. Compare its published opening requirements and installation documents with your finished shower measurements before selecting it.
View TE6076-MB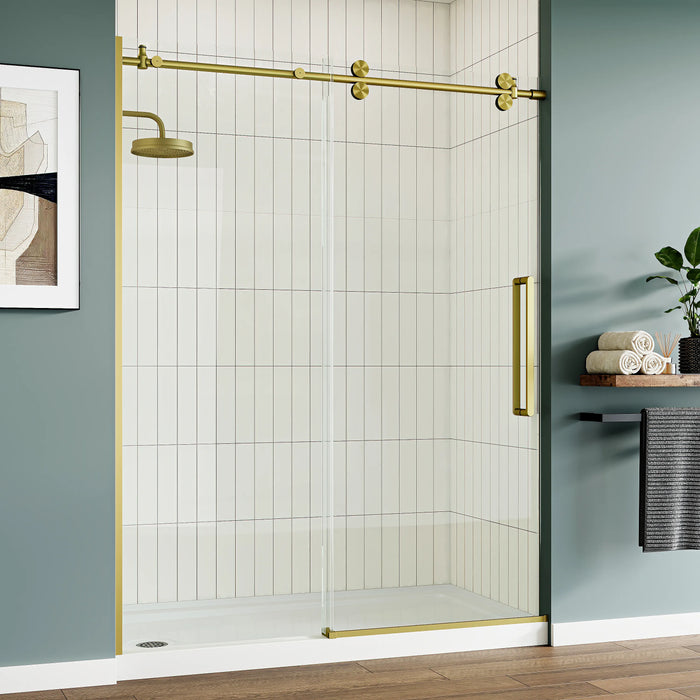
HOROW MI6076-SG
A brushed gold frameless sliding shower door with 8 mm glass. Review the model-specific opening requirements and installation documents against the finished shower area before ordering.
View MI6076-SG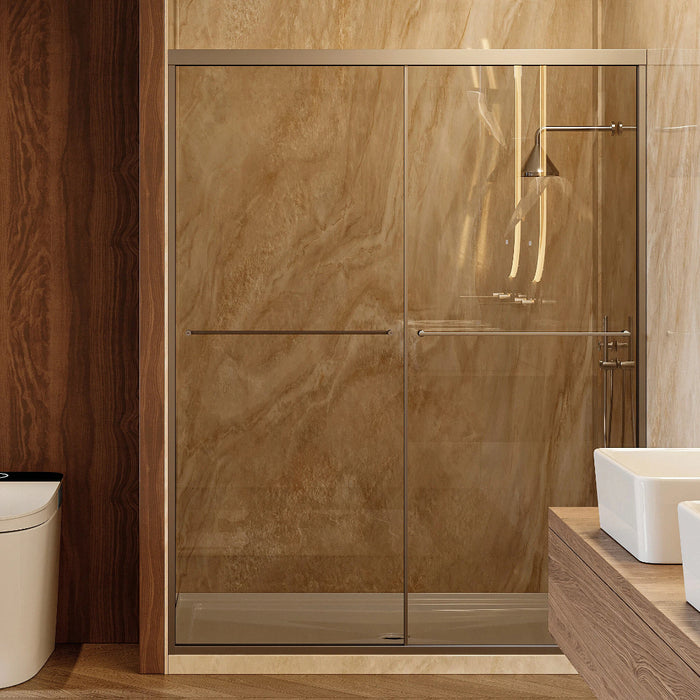
HOROW K2-BN
A brushed nickel HOROW shower door option identified as the K2-BN ultra-narrow model. Confirm its published opening range and installation requirements against the completed shower before selection.
View K2-BNAlways compare the finished opening at the bottom, middle, and top with the published requirements for the specific shower door. A nominal product size or model name does not by itself confirm compatibility with a 46-inch opening.
Edge-of-range fits require extra margin
How much adjustment should a shower door provide? It must cover the actual opening while preserving the component engagement and fastening arrangement required by the manual.
There is no universal adjustment allowance. Framed doors may provide more field adjustment than some frameless designs, but the usable amount is model-specific. Adjustment also cannot automatically absorb tile lippage, local bows, an unstable wall, or an unlevel curb.
A reading at the exact limit of the range deserves additional caution. Recheck it with a second tape, confirm that the tape is straight, and inspect the wall for projections. If the fit consumes all available adjustment before wall variation is considered, choose a more suitable range.
What if measurements span two sizes?
If the bottom measurement suggests one product size and the top suggests another, the opening is tapered rather than simply “between sizes.”
Compare the difference with the model’s stated out-of-plumb allowance and sizing method. If that allowance covers the opening, follow the specified procedure. If it does not, select hardware designed for greater correction, repair the opening, or obtain custom glass.
Do not choose by the middle measurement alone. The narrow point can stop assembly, while the wide point can leave a gap beyond the seals’ reach.
Fit rule: One product range must contain every required width under the manufacturer’s stated installation method. Otherwise, a stock door is not a verified fit.
Can the Walls, Curb, and Base Support It?

Out-of-plumb walls exceed hardware adjustment
Check each wall vertically at the door line with a suitable level. Look for overall lean and local bowing. A wall can appear plumb from top to bottom while a projecting tile in the middle reduces the opening.
Excessive variation can prevent hinges from aligning, make rollers drift, create uneven magnetic-seal contact, or change the bottom gap across the panel.
Use wedges, packing, or trim only when the instructions permit them. Thick improvised packing increases leverage on fasteners and creates exposed edges where water and residue can collect.
Unlevel curbs create binding and leaks
Check the curb along the door line and across its depth. Its geometry must suit the specified track, guide, sweep, or threshold.
An unlevel curb can make a hinged panel rub at one side and leave an excessive gap at the other. On a slider, poor geometry can affect guide and track alignment or cause panels to move when they should remain stationary.
The curb should also manage water as part of the complete shower assembly. If water runs toward the bathroom, fitting a new door does not correct the underlying condition. If the shower base, liner, or drainage is being modified, verify the applicable local code requirements before proceeding. The 2021 IPC includes specific requirements for shower lining where that code applies.
Curved bases require matching threshold geometry
A curved or molded shower base may need a door designed for that exact threshold shape. Correct wall-to-wall width does not make a straight track compatible with a curved curb.
Compare the base profile and available flat mounting area with the door’s technical drawing. Rounded edges may not provide adequate contact for a guide, track, or sealant joint.
Compatibility rule: If the threshold profile does not match the installation drawing, width compatibility is not enough.
Can existing tile support heavy hinges?
Existing tile should not be treated as proof of load-bearing support. Confirm that the complete wall assembly meets the fastening requirements at every hinge or load-bearing attachment.
In a retrofit, the required locations may miss existing framing or blocking. Depending on the wall and door design, the solution may involve accessing the wall from the opposite side, removing finishes, reinforcing the structure, or choosing a configuration with different mounting requirements.
Do not substitute anchors merely because they fit an existing hole. Fastener type, embedment, location, and substrate must follow the applicable installation instructions.
Will the Installed Door Function Properly?

Swing Clearance Can Reveal Fixture Conflicts
Use a plan-view clearance test before selecting a hinged shower door. Identify the hinge location, then mark the full door-panel width and handle projection on the bathroom floor to represent the door’s swing path. Check whether that path overlaps with nearby fixtures such as a vanity, toilet, bathroom door, or open drawers.
During the test, open nearby drawers and the bathroom door to their normal positions. Confirm that the glass and handle can move through the full swing without hitting any fixture. Also make sure there is enough standing space for the user to reach the handle, open or close the door comfortably, and move around the panel without being trapped between the glass and nearby fixtures.
Sliding layouts determine clear entry
Identify which panel moves and where it stacks. Some systems have one fixed panel; others allow more than one panel to move. These arrangements produce different entry positions and clear widths.
Use the published walk-through dimension whenever available. Confirm that handles and wall profiles do not obstruct the passage and that the entry side works with the valve location.
Shower spray must avoid door seams
Seals are intended to manage normal splash, not direct spray. Avoid aiming the showerhead at the center overlap of sliding panels, the hinge edge, or the entrance gap.
For sliding doors, install the inner and outer panels in the specified order. Reversing their relationship to the spray can direct water through the overlap. Fit sweeps, seals, and deflectors in their documented orientation.
Panel installation requires maneuvering space
The glass must reach the bathroom and be positioned without striking hard surfaces. Check doorways, hallway turns, stairs, ceiling restrictions, and the working area beside the shower.
Remove movable obstructions before delivery or installation. If a panel cannot be carried and rotated safely in the available room, select a different panel configuration or installation approach.
What Fails After a Marginal Installation?
Overextended hardware sags and loosens
Hardware used beyond its intended adjustment may have inadequate engagement. Early signs include changing gaps, dragging sweeps, roller misalignment, loose attachments, or a panel that will not remain aligned.
Repeatedly tightening hardware does not correct an incompatible opening or inadequate wall support. Investigate the geometry, attachments, and component engagement before readjusting the door.
Improvised shims create cleaning traps
Excessive shims and cover strips create ledges that collect water, soap residue, and grime. Caulk around these irregular edges can also discolor or separate.
Manufacturer-approved packing may be appropriate. Warning signs include unstable jambs, exposed wedges, excessive thickness, or sealant being used to conceal a large geometric gap.
Incorrect caulking traps frame water
More caulk does not necessarily improve water control. Some framed systems include drainage paths that must remain open. Sealing every visible joint—or sealing both sides where the manual specifies only one—can trap water inside the frame.
Follow the model’s caulking diagram exactly. Caulk is neither structural adhesive nor a substitute for correct sizing.
What fails first over time?
The first visible symptom is often a changing panel gap, dragging sweep, rattling glass, loose handle, or wet corner outside the shower. These signs can point to movement, alignment problems, incorrect seal orientation, or direct spray at a vulnerable seam.
If the glass contacts a hard surface, a hinge moves at the wall, or a panel becomes loose or misaligned, inspect the installation and follow the manufacturer’s service or installation instructions before making further adjustments.
Before You Buy
-
Tile, wall panels, trim, curb, and base are complete.
-
Bottom, middle, and top widths fit one published product range.
-
The out-of-plumb allowance covers the actual wall variation.
-
The threshold shape matches the technical drawing.
-
The curb and base are stable and manage water correctly.
-
Approved mounting support is verified at load-bearing attachments.
-
The actual clear entry works for intended users.
-
A hinged panel clears fixtures throughout its swing.
-
Controls remain practical to reach.
-
The showerhead will not direct spray at seams or the entrance.
-
Panels can be carried and positioned safely.
-
The plan does not depend on excessive shims, grinding, or caulk.
-
Applicable permit, building code, and accessibility questions are resolved before installation.
Frequently Asked Questions
Is a 46 inch shower door exactly 46 inches wide?
No, a 46 inch shower door is usually not exactly 46 inches wide. The number often refers to a product category rather than the exact glass measurement or installation size. The actual dimensions depend on the door style, adjustment range, and the opening requirements listed by the manufacturer.
Which opening measurement should be used when walls are uneven?
Use all three measurements: bottom, middle, and top. Do not average them or select only the smallest or largest unless the manufacturer’s instructions specifically direct that method. Every reading must work with the product’s range and wall-correction allowance.
Can I select the door before tiling?
You can choose a general door style before tiling, but wait until the finished surfaces are complete for final sizing. Final sizing depends on the completed shower area because installation materials can affect the finished dimensions. Final measurements taken after installation help avoid choosing a door that does not match the completed shower.
Should I choose a sliding or hinged door?
Choose based on how the bathroom layout affects movement, access, and daily use. A sliding door can work well where swing space is limited, while a hinged door needs enough room for the panel to move safely. Both options should be checked against the surrounding fixtures and shower layout before installation.
Can an adjustable shower door size correct crooked walls?
Only limited wall variation can usually be handled through the adjustment features of a shower door. Adjustment systems are designed for specific conditions and cannot replace structural repairs or major corrections. If the opening has significant shape issues, a different door configuration or a custom solution may be needed.
References
https://www.access-board.gov/ada/#ada-standards-for-accessible-design


Leave a comment
This site is protected by hCaptcha and the hCaptcha Privacy Policy and Terms of Service apply.