


What to Know Before Starting Shower Door Installation
- Function and design matter: A properly fitted shower door prevents leaks, protects walls and flooring, and adds resale value.
- DIY vs. professional installation: DIY saves money but requires patience. Professionals ensure accuracy and usually offer warranties.
- Time required: Installing a shower door usually takes 2–4 hours. A first-time DIY job could stretch to 3–5 hours.
- Cost range: Most homeowners spend $532–$1,376, with an average close to $946.
- Tools you'll need: Tape measure, drill, screwdriver, level, silicone sealant, safety goggles, and gloves.
- Safety first: Shower glass is tempered. It won't shatter easily, but improper drilling or handling can cause cracks. Always wear gloves and goggles.

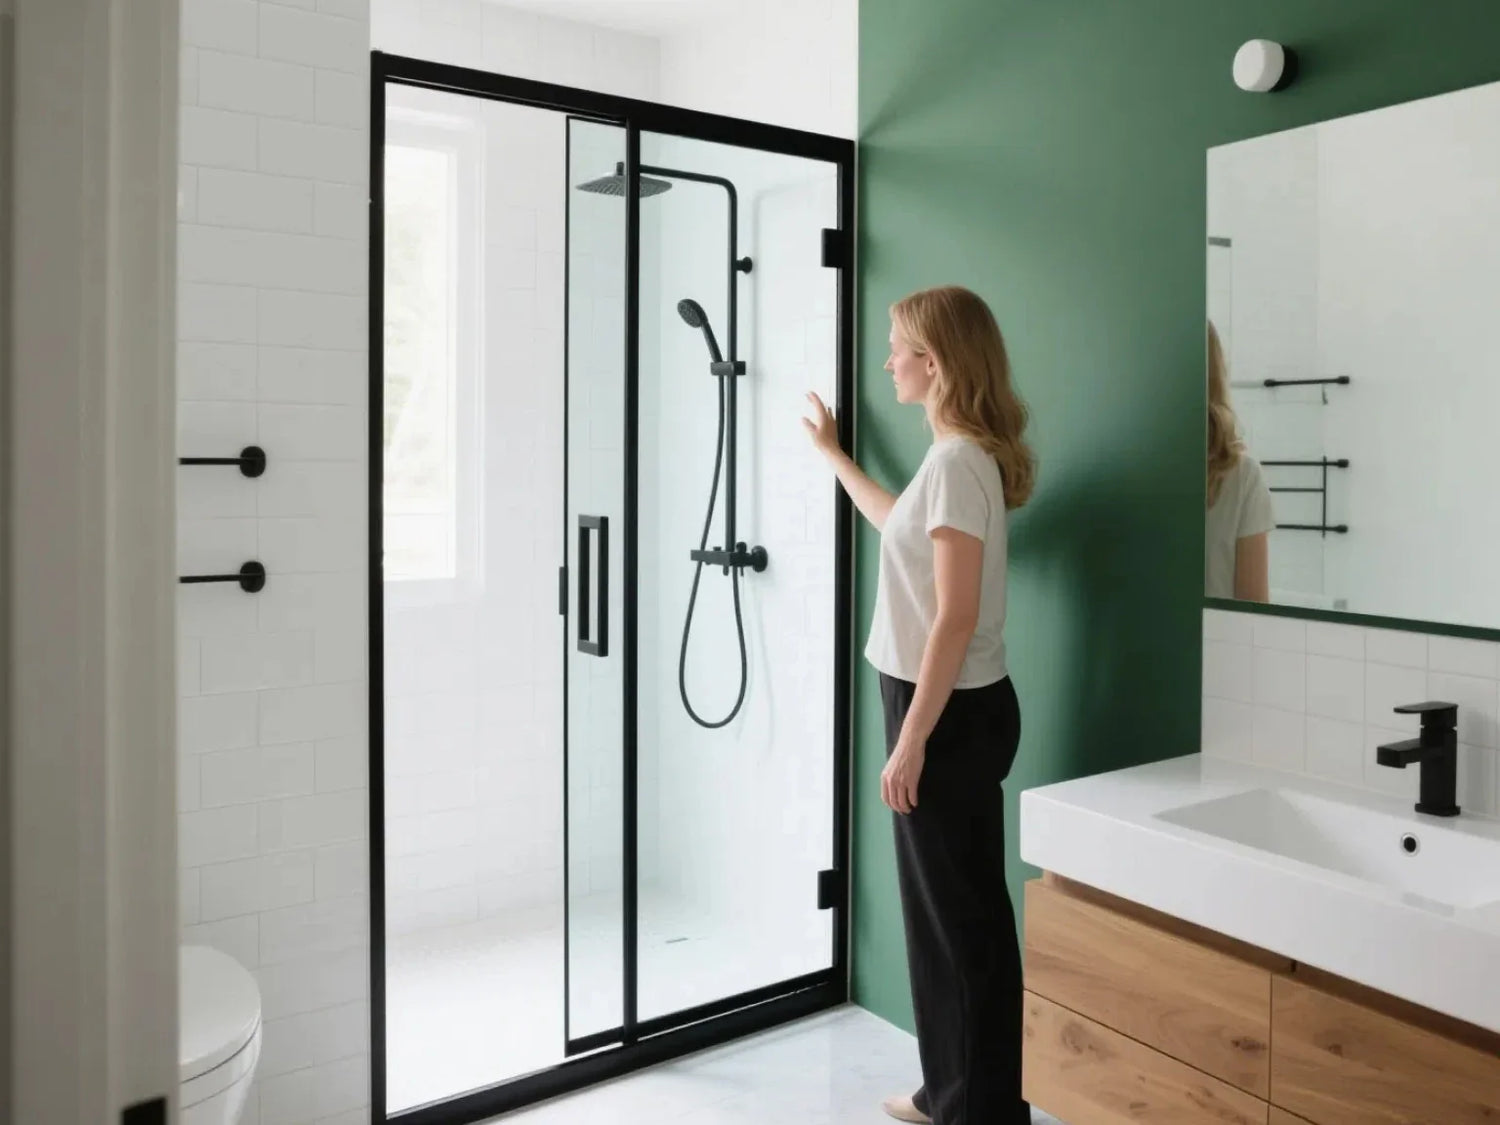
Choosing the Right Type of Shower Door
Framed vs. Frameless Shower Doors
Framed Shower Door
Pros: These are more affordable and easier to put in place. Because the frame supports the glass, it's lighter.
Cons: The downside is that the frame can trap dirt and the seals often collect mold.
They work well if you're keeping costs low or have a smaller, more traditional bathroom.
Frameless Shower Door
Pros: Sleek, modern, and easy to keep clean. They make the bathroom feel bigger and brighter.
Cons: On the flip side, they need thick tempered glass (3/8–1/2 inch thick), which makes them heavier and pricier. Installation usually needs a professional.
They're a great fit if you want a modern, high-end look.
Common Door Types
- Sliding (Bypass) Doors – Perfect for smaller bathrooms since the panels slide instead of swinging out. The tracks, however, can hold water and need regular cleaning.
- Pivot (Swinging) Doors – These swing outward like a regular door. They look classic and are nice in larger bathrooms. While the catch is they need space to open, so they're not the best in tight spots.
- Bifold Doors – These fold inwards to save space, making them handy for compact bathrooms. But the durability and sealing can be weaker compared to other options.
- Neo-Angle Doors – Specifically made for corner showers. They make good use of awkward spaces but often need custom installation.
Glass Thickness Matters
- Frameless doors need thicker tempered glass to stay strong.
- Most use 3/8 to 1/2 inch glass thickness, giving you both safety and durability.

Step-by-Step Shower Door Installation Guide
Preparation & Setup
- Remove any old shower door carefully.
- Clean all soap, caulk, or grime off walls and the shower base.
- Use a level to check walls and shower threshold. If it's uneven, fix it before moving on.
- Measure twice, cut or drill once. Mark all drill holes carefully.
Installing the Hardware
- Position the bottom track or shower frame along the threshold. Secure it using screws or adhesive as instructed.
- Attach wall jambs (side rails). Drill pilot holes first, which prevents cracking tile or fiberglass.
- For frameless units, install hinges and brackets directly into wall studs if possible for stability.
Hanging & Aligning the Door
- Lift and hold the glass panels with care. This job often takes two people.
- Hang door panels on hinges or attach them to sliding tracks.
- Adjust so the door fits perfectly and swings or slides smoothly.

Sealing & Finishing
- Apply a thin, even bead of silicone sealant along edges of the frame and corners of the shower enclosure.
- Let the sealant cure for 24 hours before using the shower.
Final Inspection & Clean-up
- Test the door by gently opening and closing it.
- Check for small leaks around the edges.
- Clean glass surfaces with a non-abrasive cleaner.
Common Problems & Troubleshooting Tips
- Misaligned doors: If doors don't close properly or swing unevenly, it's usually due to hinge or track issues. Loosen the hinge screws slightly, adjust the door until it fits correctly, then retighten. For sliding doors, make sure tracks are level and free from debris.
- Water leakage: Gaps along the shower base or walls can let water escape. Check the bottom track and side seals, then apply a continuous bead of silicone sealant. If leaks persist, ensure the base is level and consider adding extra sealing strips.
- Glass cracks: Always use tempered glass and avoid drilling into panels. If a crack appears, replace it immediately for safety.
- Sticky sliding doors: Soap scum or mineral buildup on rollers can jam doors. Clean rollers and tracks, lubricate with silicone, and check alignment.
- Loose hardware: Regularly inspect and tighten handles, brackets, and screws to keep the door stable and secure.
Installation Cost and Time Breakdown
| Type of Door | Average Total Cost (Materials + Labor) | Range | Time | Labor Rate (per hr) |
|---|---|---|---|---|
| Framed Shower Door | $300–$1,200 | Typical range $350–$800 | 2–3 hours | ~$60 |
| Frameless Shower Doors | $900–$2,300 | Typical range $1,000–$2,500 | 3–4 hours | ~$60 |
| Overall Average Cost | $946 | $532–$1,376 | 2–4 hours | ~$60 |
- A framed shower door is the more affordable choice, usually running between $300 and $1,200, with installation taking about 2–3 hours.
- Frameless doors are on the higher end because they need thick tempered glass and detailed hardware. They typically cost $900 to $2,300 and take 3–4 hours to install.
- With labor averaging around $60 per hour, most homeowners end up spending somewhere between $500 and $1,000 overall.
DIY vs. Professional Shower Door Installation
DIY Advantages
- Save on labor costs.
- Flexible schedule.
- Great learning experience.
DIY Disadvantages
- Misalignment could cause leaks.
- Heavy glass is hard to handle alone.
- Mistakes may void product warranty.
Professional Advantages
- Ensures a precise, secure fit with a warranty and a quicker turnaround.
- Minimizes any chance of leaks.
- Handles heavy glass and sharp hardware safely.
Professional Drawbacks
- Costs more upfront.
- You may need to wait for an available appointment.
- Limited flexibility for small tweaks during installation.
Maintenance & Long-Term Care
Daily care:
- After every shower, wipe the glass dry with a wiper.
- This effectively prevents the accumulation of water stains, limescale, and soap residue.
- Even small amounts of residue can affect the cleanliness and shine of the glass over time, so it's important to develop a daily cleaning habit.
Weekly cleaning:
- Clean the glass, tracks, and door frame with mild soapy water, diluted vinegar, or a non-abrasive glass cleaner.
- Avoid using strong acids or bases or harsh brushes to avoid scratching the glass or damaging the seals.
- Pay special attention to corners and edges, as these are the most prone to dirt accumulation.

Sealant check:
- Inspect the silicone seal every 6 to 12 months.
- If cracks, peeling, or gaps are found, remove the old silicone and reapply a continuous strip of sealant to maintain waterproofing.
Track and Roller Maintenance:
- Clean the rollers and tracks of sliding doors monthly to remove hair, soap residue, and dust.
- Lubricate the rollers with a silicone-based lubricant to ensure smooth sliding.
Framed doors:
- Regularly inspect the metal frame for rust or corrosion.
- Be sure to dry thoroughly after cleaning, and consider applying a thin layer of protective agent to prevent oxidation.
Insights & Resources
DIY Community Reports: First-timers often need 3–5 hours. Common mistakes include misaligned tracks or not applying enough sealant.
Professional Insights: Many installers report almost 100% first-time accuracy if walls and base are level. Calls for rework are usually due to customer adjustments, not installation errors.
Basic Tools List: Tape measure, pencil, level, drill, bits, masking tape, silicone sealant, screwdriver, gloves, and goggles.
Preparation Checklist:
- Measure shower opening carefully.
- Decide on framed or frameless.
- Gather tools before starting.
- Inspect walls and shower base for level.
Conclusion
FAQs
1. Can I install a shower door myself?
2. What holds a frameless shower door in place?
3. Do plumbers install shower doors?
4. How long before I can use the shower after shower door installation?
5. What type of shower door is easiest to install?
-
When you're installing it, use a level to get the track aligned right.
-
Mark the spots for drilling with tape.
-
And use a tile drill bit to stop the tiles from cracking.
-
What's more, you've got to use the sealing strips in the right way.

Leave a comment
This site is protected by hCaptcha and the hCaptcha Privacy Policy and Terms of Service apply.