



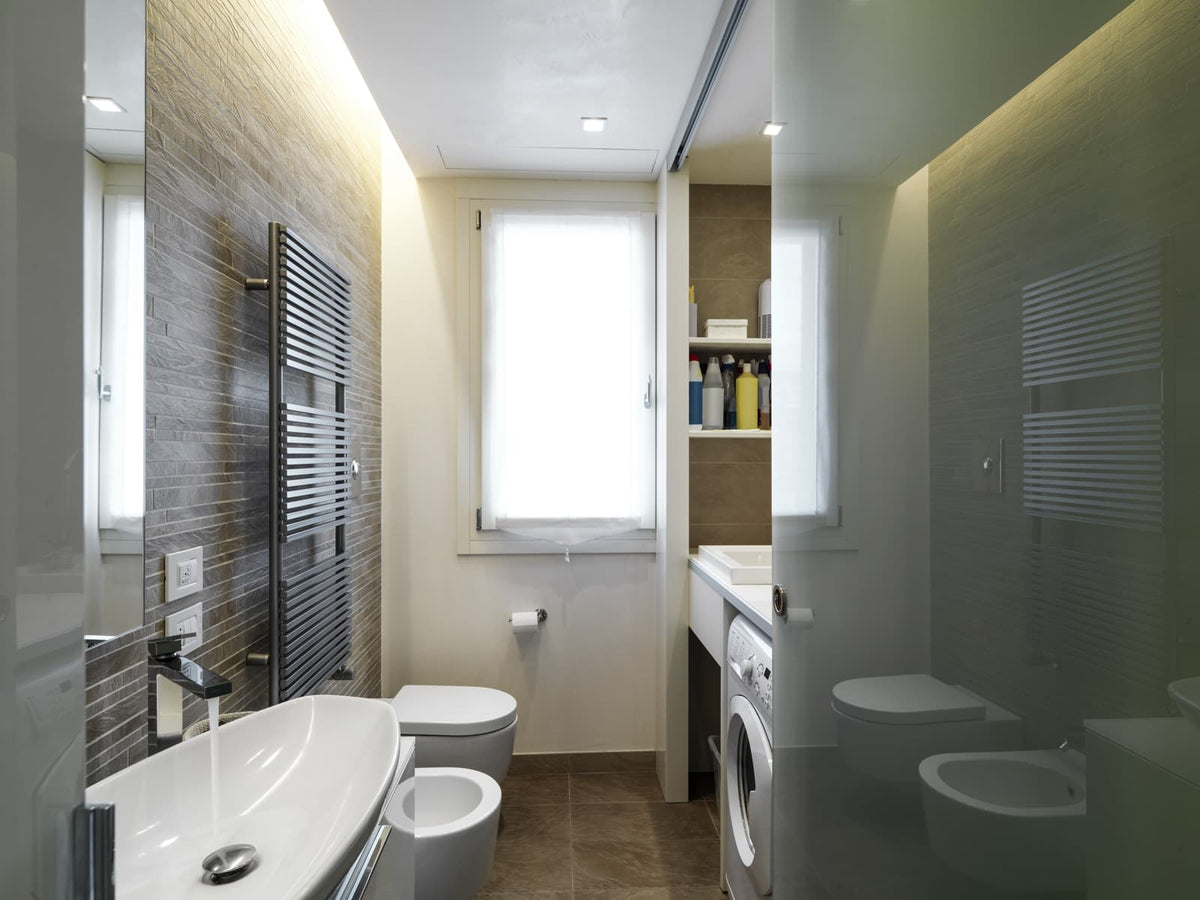
A smart toilet can work well in a small bathroom, but the ceramic footprint is only the first fit check. The rough-in, rear housing, door swing, water connection, power supply, lid movement, and maintenance access must all suit the room and the exact model.
Many replacement problems occur because buyers compare only the listed width and depth with the old toilet. After removal, they may discover that the new housing covers the shutoff valve, the flange does not match the mounting system, the cord cannot reach safely, or the toilet projects too far into the doorway.
A smart toilet combines a toilet with powered features that may include bidet washing, seat heating, electronic controls, or automatic operation. It can eliminate the need for a separate bidet fixture, but it also introduces utility and service requirements that conventional toilets may not have.
The practical question is:
Will the toilet fit, remain comfortable, connect correctly, and still be serviceable after installation?
Is a Smart Toilet Right for Your Home?
A smart toilet for a small bathroom is easiest to install when the existing rough-in matches the model, the plumbing connections remain accessible, and suitable electrical service is already available. It is also easier to specify during a remodel, when the outlet, shutoff valve, door, and surrounding fixtures can be positioned around the selected unit.
A compact smart toilet becomes a weaker choice when every measurement is at its limit. Clearing a vanity by a narrow margin does not guarantee enough room to sit, clean the floor, operate the controls, or remove a service panel.
Decision Snapshot: Ready-to-Install Conditions
A bathroom is generally ready for the proposed smart toilet when:
- The measured rough-in matches the model’s installation drawing.
- The full installed projection leaves usable front clearance.
- The toilet centerline has sufficient clearance from both side obstructions.
- The door can open and close without entering the toilet or user space.
- The rear housing clears trim, walls, valves, hoses, and other projections.
- The shutoff valve remains reachable after installation.
- The receptacle meets the unit’s instructions and is within actual cord reach.
- The water supply performs adequately while other fixtures are being used.
- Filters, plugs, hoses, fasteners, and service panels remain accessible.
- The flange and surrounding floor are stable and properly aligned.
- The toilet can be delivered, lifted, and positioned without damaging the room.
These conditions must be checked against the exact product documentation. Similar-looking smart toilets may have different mounting systems, connection points, and service-access requirements.
Reconsider When Clearances or Utilities Fail
Reconsider the installation if the toilet fits only when pressed against a wall, trim, valve, or vanity. A small allowance is necessary for wall irregularities, connection routing, installation movement, and future service.
Other warning signs include:
- The bathroom door sweeps through the required user space.
- The rear skirt traps the water shutoff or compresses the hose.
- The cord needs an extension or must cross an exposed floor area.
- The outlet becomes inaccessible behind a fixed part of the toilet.
- The flange is cracked, loose, offset, or incorrectly positioned.
- The lid or seat cannot open fully.
- Routine filter or hose service would require removing the toilet.
If both plumbing and electrical service must move, treat the project as a bathroom renovation rather than a simple fixture replacement. That distinction affects planning, trades, wall or floor repairs, and the total scope of work.
Choose Simpler Options for Marginal Retrofits
A compatible bidet seat may be easier to install when the existing toilet is secure, comfortable, and correctly positioned. Powered seats still require suitable water and electrical connections, and compatibility depends on bowl shape, hinge spacing, mounting area, and clearance behind the seat.
A non-electric bidet attachment can avoid powered features, although it is not equivalent to an integrated smart toilet. A standard compact toilet may also be more practical when front clearance, electrical access, or maintenance space is the main constraint.
Do not assume every conventional toilet accepts a bidet seat. Some one-piece designs provide too little mounting space between the bowl and the raised rear section. Check the seat template and toilet dimensions together.
What Trade-Offs Come With a Compact Design?
“Compact” describes reduced dimensions, not guaranteed comfort or easy installation. A shorter model can still have a wide rear enclosure, a small seat opening, or limited access around the base.
Compact Dimensions Can Reduce Usable Comfort
A compact smart toilet may save floor space by shortening the bowl or moving the seat closer to the wall. Taller or larger users may notice less thigh support, reduced knee room, or a tighter seat opening.
Seat height is another functional measurement. A higher seat may help some people stand, while shorter users may be unable to place their feet comfortably. Select the height for the regular users rather than treating it as an appearance choice or assuming a taller toilet is suitable for everyone.
Compare the proposed seating position with the current toilet. Measure from the finished wall to the front of the existing seat, then note whether users already feel crowded. The new toilet’s shorter exterior does not necessarily mean its usable seating area will feel larger.
Rear Housings Increase the Installation Envelope
Integrated valves, electronics, filters, and connections are often enclosed beneath or behind the seat. This housing may be wider than the bowl and shaped differently from an old toilet tank.
Published product depth also may not show how closely the toilet can sit against the actual wall. Baseboards, tile trim, pipes, or a bowed wall can push the unit forward. Any added rear gap reduces the usable clearance at the front.
Use the maximum installed dimensions in the exact installation drawing. Measure from the finished wall surface rather than from the face of a baseboard.
Minimal Clearances Restrict Cleaning and Service
A narrow gap may look acceptable on a floor plan but fail during installation or maintenance. The installer needs room to align and fasten the toilet. The owner needs access to clean the floor, close the valve, disconnect the water, reach the plug, and service filters or screens.
Skirted bases can conceal mounting hardware and connections. Before ordering, identify which panels are removable and the direction in which they must move. A side service panel offers little value if that side will sit directly beside a vanity.
What Extra Cost Can a Retrofit Create?
The toilet’s purchase price does not represent the full project cost. The largest surprises usually come from modifying a finished room to accept the unit.
Potential cost drivers include:
|
Existing condition |
Possible additional work |
|---|---|
|
No suitable receptacle |
New wiring, wall access, circuit changes, or finish repair |
|
Water valve behind the housing |
Supply relocation and wall or floor work |
|
Unsupported rough-in |
Another toilet, flange assessment, or drain relocation |
|
Loose or damaged flange |
Flange, fastener, floor, or subfloor repair |
|
Restricted supply components |
Shutoff valve, hose, or supply-pipe work |
|
Heavy one-piece construction |
Additional installer and handling time |
|
Tight doorway or alcove |
More difficult delivery, positioning, and removal |
|
Finished surfaces must be opened |
Tile, drywall, paint, or trim repair |
Obtain the installation drawing before requesting plumbing or electrical quotes. A contractor cannot confirm connection locations or access requirements from a general product description alone.
Missing Power Requires Electrical Upgrades
A nearby receptacle is not automatically suitable. Its location, protection, circuit capacity, accessibility, and relationship to wet areas must satisfy the model’s instructions and applicable local requirements.
The cord should reach along a practical route without being stretched, pinched, trapped, or routed across the floor. Do not plan on an extension cord as a substitute for a correctly located receptacle.
An electrician should compare the toilet’s listed electrical requirements with the existing circuit and other connected loads. Complete this review before delivery, particularly in an older bathroom or where the circuit already serves multiple devices.
Misplaced Plumbing Requires Wall or Floor Work
A conventional toilet may leave its shutoff valve exposed beside the bowl. A compact smart toilet with a broad rear skirt may cover that same valve or collide with the supply line.
A flexible hose does not correct every conflict. A compressed or sharply bent hose may restrict flow, conceal leakage, or prevent proper positioning. Relocating the valve may require opening the wall or floor and repairing the finished surface afterward.
Damaged Flanges Turn Swaps Into Repairs
The closet flange connects the toilet to the drain and helps secure it to the floor. It must be stable, aligned, and compatible with the toilet’s specified mounting and sealing method.
Removing the old toilet may reveal a cracked flange, corroded fasteners, an uneven finished floor, or moisture-damaged material. Adding extra seal material is not a dependable correction for poor alignment or an unstable flange. The underlying defect should be repaired before the new toilet is secured.
Heavy Units May Require Two Installers
Integrated toilets can be bulky and difficult to grip. In a narrow bathroom, one installer may not have enough room to guide the unit over the waste connection without disturbing the seal or striking nearby fixtures.
Check the entire delivery route, including doors, turns, stairs, vanity projections, and floor protection. Safe handling may require another installer even when the toilet itself fits the final location.
Will a Smart Toilet for Small Bathroom Fit?
Start with the installation drawing for the exact model, not a category-level dimension or a photo. When browsing HOROW smart toilets, compare each candidate’s documentation with your recorded measurements. Do not assume models with similar exterior shapes use the same rough-in, mounting points, or utility locations.
HOROW Smart Toilets to Compare
If you are comparing HOROW smart toilets for a limited bathroom space, review the exact product page and installation documentation for each model before ordering. Confirm the rough-in, installed projection, connection locations, power requirements, and service access against your own measurements.

HOROW T38
Review the product page and installation documentation to confirm whether the T38 matches your bathroom measurements and existing utility locations.
View T38
HOROW T05
Compare the T05 product documentation with your available floor space, plumbing connections, electrical setup, and required service access.
View T05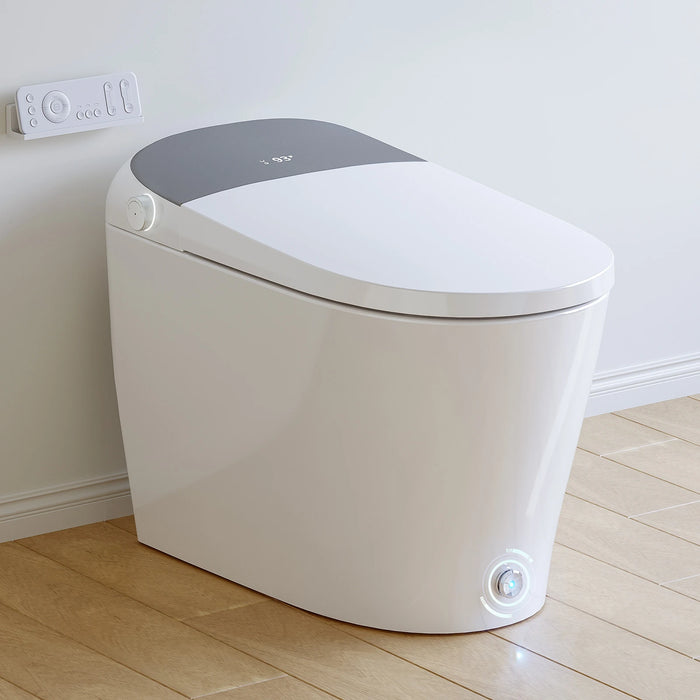
HOROW T03Pro
Check the T03Pro product page and installation documentation against the room layout before deciding whether it fits your planned installation.
View T03ProWhat Happens With a Nonstandard Rough-In?

Rough-in is measured from the finished wall to the center of the toilet’s closet bolts or flange. Do not begin at the baseboard. If new wall tile or panels will be installed, measure from the future finished surface.
Never infer rough-in from the appearance of the old toilet. Measure it directly and compare it with the exact model’s supported installation position. If the wall is uneven, check from more than one point.
Also confirm that the flange is centered within the available side space. A compatible wall-to-flange measurement does not solve a flange that leaves the toilet crooked, too close to a vanity, or misaligned with the mounting hardware.
If the model does not support the measured rough-in, choose another unit or have a plumber assess the required drain work before ordering.
Front Clearance Must Include Door Swing
Mark the proposed toilet’s maximum projection from the finished wall. Measure the remaining space to the nearest wall, vanity, tub, door, or other obstruction.
Then test the door through its complete swing. A door can clear the ceramic while still blocking the user’s feet, making entry awkward, or preventing someone from standing in front of the toilet.
Use painter’s tape or a cardboard template to represent the full footprint. Stand inside the marked area, turn around, simulate sitting, and operate the door. Apply the manufacturer’s requirements and applicable local rules rather than relying on a general planning measurement.
Side Clearances Must Protect User Access
Measure from the toilet centerline to the nearest obstruction on each side. Include vanity tops, drawer pulls, radiators, tub edges, trim, and other projections—not just the walls.
Side clearance must support both the user and the installation. Consider shoulder and elbow room, access to controls, and space for mounting hardware or service panels. A toilet can offer enough sitting room while still leaving its filter or fastener inaccessible.
Uneven Walls Require Additional Fit Tolerance
Older walls may bow, lean, or meet at an imperfect angle. Tile, wainscoting, baseboards, and trim can also project into the rear installation area.
Measure the wall at several heights and use the tightest available dimension. Avoid selecting a toilet that fits only with zero tolerance. The unit may need extra space for its hose, cord, rear fittings, and installation movement.
Check vertical clearance as well. The lid or seat may strike a shelf, cabinet, window sill, grab bar, or wall-mounted accessory even though the base fits.
Can Existing Water and Power Support It?
A connection that exists is not necessarily a connection that will perform adequately. Water and electrical suitability must be evaluated under normal household use.
Is Low Water Pressure a Deal-Breaker?
Smart toilets do not all use water in the same way. Some designs store flushing water, while others depend more directly on the incoming supply. Minimum and maximum supply requirements must come from the exact model documentation.
Restricted angle stops, aging hoses, corroded pipes, clogged screens, filters, or pressure-control equipment can reduce available flow. These conditions can make a newly installed toilet appear defective even when the problem is upstream.
Homes with variable supply conditions require particular care. Ask a plumber to compare observed performance with the manufacturer’s requirements rather than assuming acceptable sink flow proves compatibility.
Dynamic Pressure Matters During Simultaneous Use
Static pressure describes the supply when water is not flowing. Daily performance also depends on what happens while a shower, washing machine, or other fixture is operating.
Observe nearby fixtures during simultaneous use. A noticeable drop in flow warrants further assessment before selecting a toilet that depends heavily on the incoming supply for flushing or washing.
A successful physical connection does not guarantee reliable operation. Verify the required pressure and flow using the model documentation and an appropriate on-site assessment.
Outlet Location Must Match Cord Reach

Find the power-cord exit point in the installation drawing. Measure from that point to the receptacle along a realistic path around the housing. A straight-line measurement through the toilet body is not useful.
Confirm that the plug can be connected, disconnected, and inspected after installation. Reject layouts that pinch the cord, trap the plug behind a fixed enclosure, or expose the cord across a walking or wet-floor area.
Shared Circuits May Exceed Electrical Limits
A bathroom circuit may already serve lighting, fans, receptacles, or grooming devices. The smart toilet’s heating and powered functions add another load.
Have an electrician compare the product’s electrical information with the existing circuit and applicable requirements. Repeated tripping can disable powered functions and may indicate that the electrical installation was not adequately planned.
What Must Be Verified Before Installation?
Use the exact installation drawing and, when available, a full-size template. Painter’s tape can show the outer footprint, while cardboard can represent a bulky rear housing more effectively.
Before installation:
- Record the rough-in, maximum projection, rear width, bowl width, and total height.
- Mark the door swing, vanity, tub, trim, shelving, and other obstructions.
- Identify the valve, hose route, receptacle, cord path, and connection points.
- Inspect the flange position, stability, height, fasteners, and surrounding floor.
- Test sitting, standing, turning, and entering the room.
- Confirm that the seat, lid, controls, and sensors can operate.
- Locate every filter, service panel, mounting point, plug, and hose connection.
- Read the instructions for operation during a power interruption.
- Plan who will complete plumbing, electrical, lifting, and finish repairs.
Dry-Fit Before Installing the Toilet Seal
Dry-fit the toilet before installing the final seal, provided this can be done in accordance with the manufacturer’s installation procedure. This check can expose contact with the wall, blocked plumbing, misaligned fasteners, or an unexpected door conflict.
If the unit does not sit in the specified position, stop and identify the cause. Do not force it against the wall or use improvised sealing materials to compensate for poor alignment.
Supply Valves Must Remain Reachable
The water shutoff must remain practical to operate after installation. Confirm that a hand and any necessary tool can reach it without removing the entire toilet.
Also check whether the hose can be inspected and disconnected without damaging the housing. A hidden valve is especially problematic when a leak requires the water to be stopped quickly.
Lids and Controls Need Operating Clearance
Open the seat and lid through their full movement. Check for shelves, windows, cabinets, and wall accessories above or behind the toilet.
Side controls must remain reachable, and a remote needs an accessible mounting location. In a narrow room, also determine whether automatic sensors can be adjusted if nearby traffic causes unwanted activation.
Manufacturer Requirements May Exceed Code Minimums
Four separate standards affect a successful installation:
- The manufacturer’s installation requirements
- Applicable plumbing and electrical requirements
- Functional room for regular users
- Access for cleaning, inspection, and service
Meeting one does not guarantee the others. Follow the strictest applicable requirement and preserve additional room where needed for practical use.
What Can Fail During Long-Term Ownership?
A successful installation must remain maintainable after the installer leaves. Consider future cleaning, filter service, leak inspection, outage operation, and eventual removal before committing to a tight layout.
Inaccessible Filters Turn Maintenance Into Removal
Some smart toilets include inlet screens, filters, or other serviceable components. If a component faces the wall or vanity, routine maintenance may require loosening or removing the toilet.
Locate each service part in the manual and confirm its removal direction. If the documentation does not clearly show access, resolve that question before purchase.
Poor Flange Alignment Causes Leaks and Odors
A toilet that rocks, sits unevenly, or fails to align with the flange can lose its seal. Moisture may damage the surrounding floor, while an ineffective waste seal can allow persistent odors.
Caulk should not be relied on to stabilize an improperly mounted toilet. The flange, floor, fasteners, approved shimming method, and specified seal must work together.
Will It Flush During Power Outages?
Do not assume every smart toilet operates like a conventional toilet without electricity. Outage behavior varies by design. A unit may provide a manual or limited flushing method while losing bidet washing, heating, drying, sensing, or automatic controls.
Read the exact outage procedure before purchase and make sure regular users understand it. If reliable operation during an outage is a priority, treat that capability as a model-selection requirement.
Tight Gaps Increase Cleaning and Repair Difficulty
Narrow spaces around the base collect dust and moisture and make leak inspection more difficult. A smooth skirt can simplify cleaning visible surfaces, but it does not solve an unreachable rear gap.
Check whether a cleaning tool can pass around the base and whether the hose, valve, and floor remain visible enough for inspection. Future removal should also be possible without dismantling nearby fixtures.
Before You Buy
Check the following against the exact installation manual:
- Measure from the finished wall to the flange or bolt center.
- Confirm that the model supports the measured rough-in.
- Mark the maximum installed projection and rear-housing width.
- Test the complete door-swing path.
- Measure from the toilet centerline to both side obstructions.
- Allow for baseboards, tile, trim, and uneven walls.
- Confirm full lid, seat, and control movement.
- Inspect the flange and surrounding floor.
- Verify the water-supply position and hose route.
- Keep the shutoff valve reachable.
- Evaluate water performance while other fixtures operate.
- Confirm receptacle suitability, circuit capacity, and cord reach.
- Verify access to filters, fasteners, and service panels.
- Read the power-outage instructions.
- Check the toilet’s weight and delivery route.
- Dry-fit before installing the final seal.
- Obtain trade quotes before ordering if utilities must move.
A compact smart toilet can be worthwhile when it fits with practical clearance and the existing utilities support it. If installation requires hiding the shutoff, improvising the power connection, or sacrificing necessary user and service space, a conventional compact toilet or compatible bidet seat will usually be the simpler retrofit.
Frequently Asked Questions
What is a smart toilet for a small bathroom?
It is an integrated toilet designed to provide powered features—such as bidet washing, seat heating, or electronic controls—within a footprint suitable for a limited room. “Compact” does not guarantee compatibility; the installation envelope and utility requirements still need to be checked.
Is a smart toilet for a small bathroom worth it?
It may be worth it when the room has compatible plumbing, appropriate power, comfortable clearances, and accessible service points. It becomes less practical when substantial drain, water, electrical, wall, or floor work is required solely to make the unit fit.
Can a smart toilet replace any standard toilet?
No. The rough-in, flange, mounting method, water-supply position, electrical requirements, and available clearance must match the specific model. A bathroom that accepts a conventional toilet may still require modifications for an integrated smart toilet.
How do I know whether a smart toilet is truly compact?
Check the maximum installed depth, widest rear-housing point, seat dimensions, required wall spacing, and operating clearance. Do not rely only on bowl length or the word “compact.” Mark the complete installation envelope on the floor and test the room around it.
Does a smart toilet need a dedicated electrical circuit?
That depends on the model’s electrical demand, the existing circuit, other connected loads, and applicable requirements. Have a qualified electrician compare the product documentation with the actual bathroom circuit before installation.
Should I choose a bidet seat instead?
A bidet seat may be simpler when the existing toilet is comfortable, stable, and compatible. Confirm bowl shape, hinge spacing, rear mounting room, water access, power needs, and lid clearance before treating it as an equivalent alternative.
Reference
https://codes-conv.iccsafe.org/content/IPC2024V2.0/chapter-4-fixtures-faucets-and-fixture-fittings


Leave a comment
This site is protected by hCaptcha and the hCaptcha Privacy Policy and Terms of Service apply.