



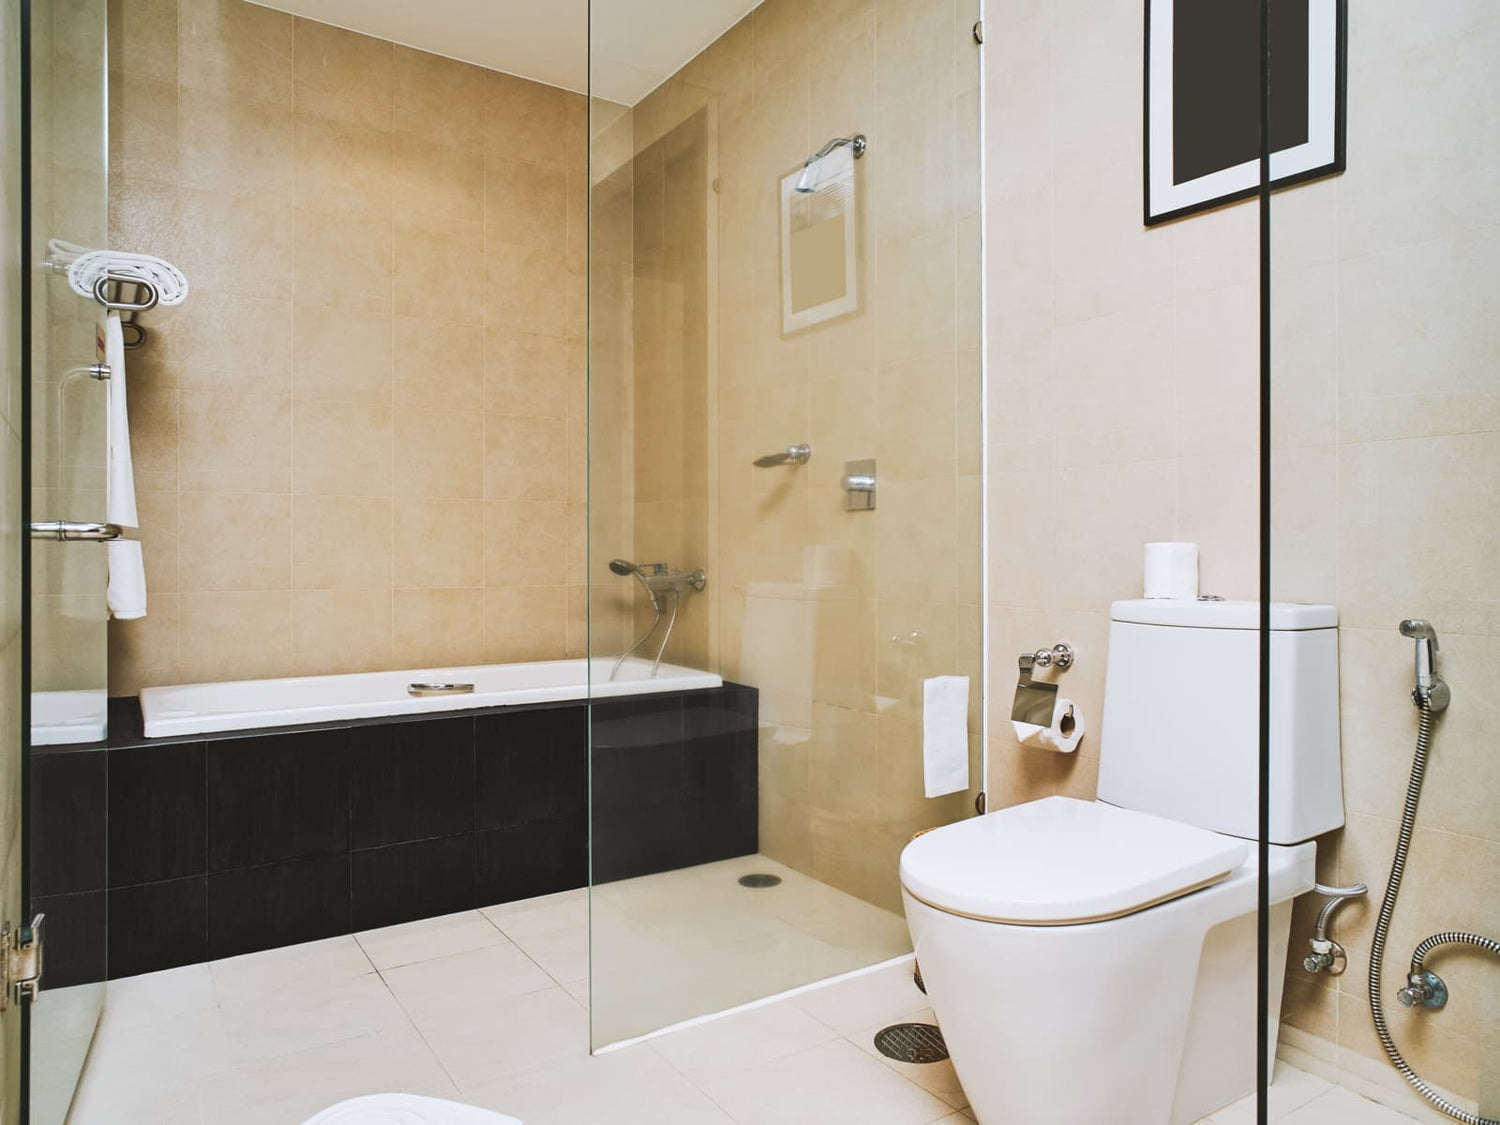
Yes, a shower door can work with a pony wall when the finished opening, structural support, waterproofing, and hardware layout are compatible with the selected enclosure. It is a good fit for a reinforced wall assembly with proper waterproofing and a simple fixed return panel; it is less suitable for an unverified retrofit or a door that must meet glass at a complex stepped corner.
Do not order from framing dimensions or a single width measurement. Measure after tile, cap, curb, and wall finishes are complete, then have the exact door-and-return configuration approved by the enclosure manufacturer or glass fabricator.
Will a Shower Door for Pony Wall Work Here?
A pony wall changes a rectangular shower opening into multiple planes. The door occupies the full-height entry, while fixed glass may sit above the shorter wall and turn across the end of the enclosure. Those planes must align correctly for the glass, hardware, and seals to function properly.
The most straightforward arrangement places the door hinges on a reinforced full-height wall and uses fixed glass on the pony wall. Risk increases when the door, hinges, seals, or tracks intersect the stepped corner.
Decision Snapshot: Verified Conditions Determine Fit
|
Site condition |
Fit judgment |
Next step |
|
Reinforced wall with a simple fixed return |
Usually workable |
Confirm finished dimensions and hardware locations |
|
Hidden framing or blocking cannot be confirmed |
Not ready to order |
Have an installer establish an approved support plan |
|
Several glass joints meet at the stepped corner |
Higher fit and sealing risk |
Consider site-measured custom glass |
|
Cap is flat or slopes toward the bathroom |
Poor drainage condition |
Correct it before the final glass measurement |
|
Door hinges from one reinforced plane |
Simpler load path |
Verify fastener locations and swing clearance |
|
Track ends at a curb-and-wall corner |
Higher maintenance risk |
Confirm drainage and cleaning access |
Pause the project if the pony wall moves under hand pressure, the waterproofing path is uncertain, or the seller cannot match all finished measurements to one technical drawing.
Good Fit: Purpose-Built, Waterproofed, Reinforced Walls
A purpose-built pony wall allows the glass centerline and hardware locations to be established while the framing is exposed. The wall can then be reinforced for the selected mounting method, and the waterproofing can continue over the face, cap, and base transition.
A simple design usually includes:
-
A door supported by one full-height wall or an engineered fixed panel.
-
Fixed glass centered on the pony-wall cap.
-
Minimal hardware at the stepped corner.
-
A cap that drains toward the shower.
-
A pan or tiled-floor transition planned with the wall waterproofing.
Tile provides a finished surface, but it should not be treated as proof that suitable structural support or continuous waterproofing exists behind it.
Poor Fit: Unverified Retrofits or Complex Corners
A retrofit may still be possible, but finished tile can hide important construction details. These include framing, substrate conditions, and waterproofing layers that affect whether hardware can be installed correctly. If those conditions cannot be verified, the installer may need to relocate the hinges, add a brace or header, change the panel layout, or open a limited area of the wall.
A poor-fit layout often combines several complications: unknown blocking, a moving wall, an outward-draining cap, and a door edge that must close against glass at the pony-wall corner. Do not expect channels, sealant, or wider sweeps to compensate for structural movement or incompatible geometry.
Door-and-Return Layout Trade-Offs
A shower door with a return panel contains at least two glass planes. The inline section closes the entry, while the return section turns across the end of the shower or sits above the pony wall. Even when the plan is intended to form a right angle, framing and finished surfaces may not meet at that exact angle.
Corner Turns Increase Alignment and Sealing Risk
A stepped corner brings several variables together. These include wall height, cap level, curb position, glass alignment, hardware clearance, and door sealing. Small variations that would be manageable in a single-plane enclosure can become more difficult when two panels must meet.
Complexity rises when:
-
The moving door closes directly against the return-panel edge.
-
Hinges are positioned near the change in wall height.
-
A seal must cross from the curb to the higher cap.
-
Multiple small panels are introduced to correct an awkward opening.
-
Hardware must bridge surfaces that are not aligned.
Every additional panel edge or connector creates another dimension that must be verified. If the design depends on notched glass or unusual hole locations, have the fabricator approve the finished opening before fabrication.
Will a Stock Enclosure Fit Stepped Openings?

Possibly, but an adjustable entry width does not mean a stock enclosure can adapt to an L-shaped or stepped opening. The complete system must support the return-panel orientation, corner connection, wall heights, door handing, and track path.
Check the exact technical drawing for:
-
Finished width at each specified measuring height.
-
Required mounting surfaces and wall heights.
-
Return-panel depth and orientation.
-
Permitted out-of-plumb adjustment.
-
Door handing and opening direction.
-
Threshold or track location.
-
Approved panel and corner connections.
When comparing HOROW glass shower door configurations, treat photos as layout examples only. Compatibility depends on the technical information for the specific enclosure and the measurements of the finished site.
HOROW Shower Door Options to Compare
If your finished opening can use a stock enclosure, these HOROW shower door models provide different frame, finish, and sliding-door configurations to compare. For a pony-wall or stepped layout, confirm the exact technical drawing, mounting surfaces, finished dimensions, and complete panel arrangement before ordering.
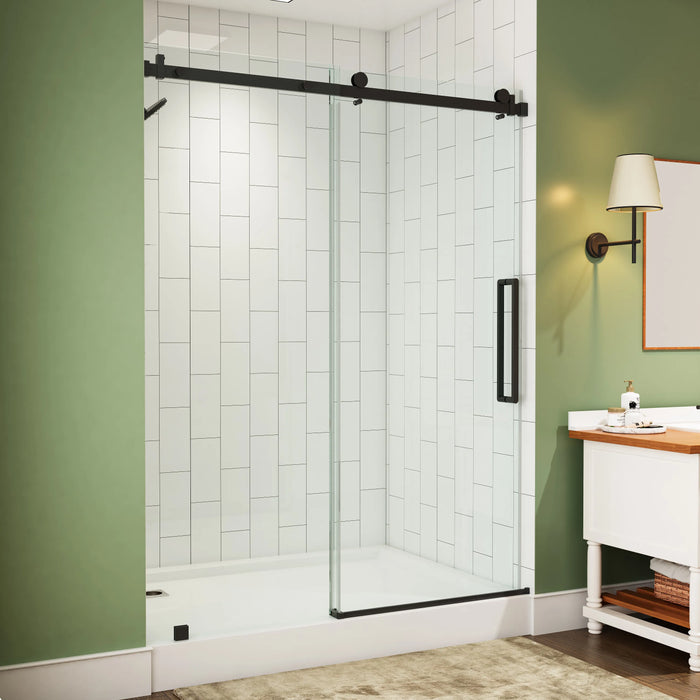
HOROW TE6076-MB
A black frameless sliding shower door with an adjustable 56–60 in. width, 5/16 in. clear tempered glass, dual handles, and reversible sliding installation. Compare its technical drawing with the finished opening before selecting it for a stepped shower layout.
View TE6076-MB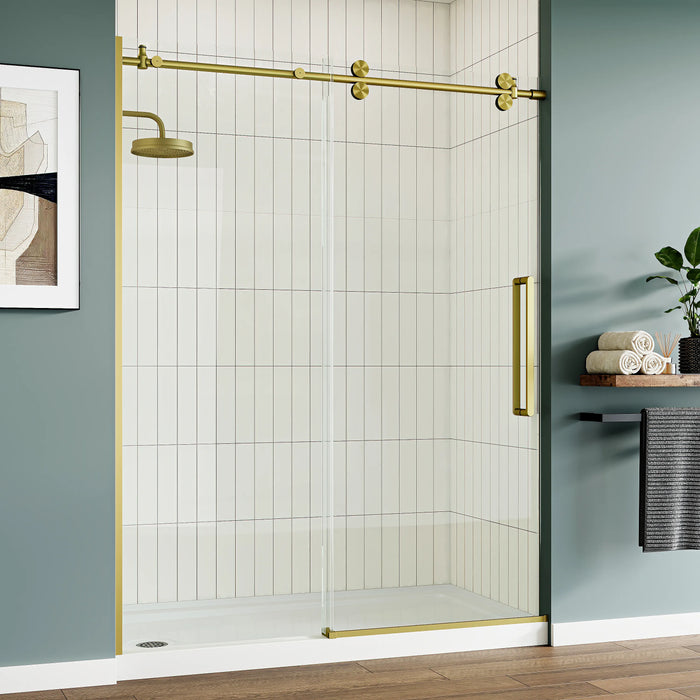
HOROW MI6076-SG
A brushed gold frameless sliding shower door with 8 mm tempered glass and an adjustable 56–60 in. width. Its reversible installation provides another layout option to compare after the finished opening and required mounting conditions have been checked.
View MI6076-SG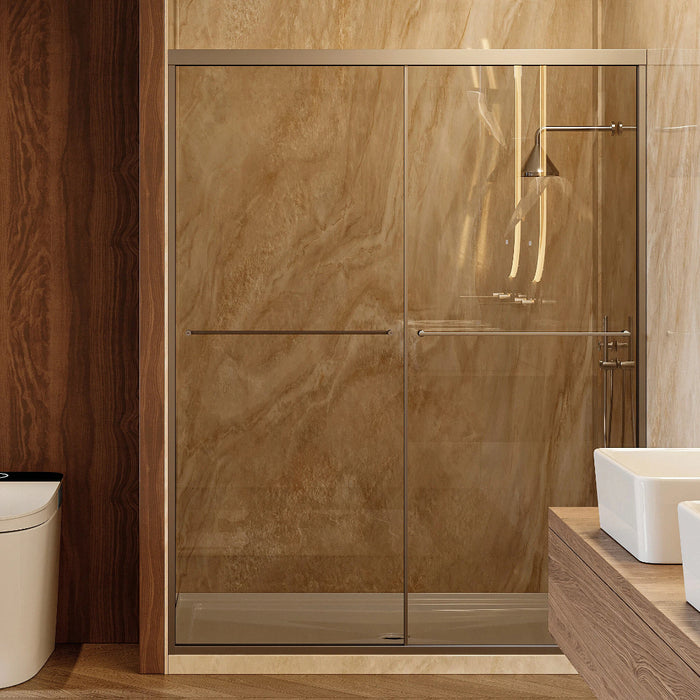
HOROW K2-BN
A brushed nickel shower door with an ultra-narrow frame, 5/16 in. tempered glass, a magnetic catch, and a tilted bottom rail designed to direct water toward the shower. Check its system drawing and mounting requirements against the complete finished opening.
View K2-BNA shower door shown here should not be assumed to fit a pony wall or stepped opening from its nominal size or product image alone. Confirm the exact technical drawing, finished dimensions, mounting surfaces, panel arrangement, and installation requirements for the selected model before ordering.
Simpler Fixed Panels Reduce Hardware Conflicts
A fixed glass panel on the pony wall usually creates fewer hardware conflicts than a short panel that must support a moving door. The fixed panel still requires a suitable attachment and stabilization method, but it is not repeatedly loaded by door movement.
Where space allows, favor the fewest practical glass joints and keep the door away from the stepped corner. If plumbing, fixtures, or entry direction prevent that arrangement, ask the fabricator to identify exactly how the door load and fixed-panel support will be handled.
Custom Glass and Retrofit Cost Triggers
A pony wall does not automatically require custom glass. Custom fabrication becomes more likely when the finished geometry falls outside a complete stock system or when hardware must be positioned for site-specific support.
Stepped Openings Can Defeat Stock-System Geometry
A stock door may fit the entry width yet fail at the return because the cap height, return depth, corner angle, or connector position differs from the system drawing. Walls that lean, bowed tile surfaces, and uneven cap overhangs can further reduce the usable adjustment range.
Site-templated glass may be appropriate when the opening contains several interacting variations. Do not assume fabricated glass can be drilled, notched, or resized at the job site; confirm all allowances and alteration limits with the fabricator before ordering.
Finished Tile Makes Structural Corrections Costly

Corrections are generally less disruptive while framing and waterproofing remain exposed. After tile installation, reaching the same location may require removal and replacement of the cap, tile, substrate, or waterproofing.
Common rework triggers include:
-
Adding support at a hinge or clamp location.
-
Rebuilding a cap that drains outward.
-
Moving a fixture that blocks the door swing.
-
Changing from a stock system to site-measured glass.
-
Adding a brace or header after panel movement is discovered.
-
Replacing glass ordered from incomplete measurements.
These conditions do not make the design impossible, but they should be resolved before the final glass order.
Rework Before Glass Ordering Limits Added Cost
Use this sequence to reduce avoidable rework:
-
Choose the basic door, inline-panel, and return-panel arrangement.
-
Mark the intended glass and hardware centerlines.
-
Confirm framing support while it is accessible.
-
Plan the pan and waterproofing transitions.
-
Complete tile, cap, curb, and wall finishes.
-
Measure the finished opening in every required plane.
-
Match the measurements to the exact hardware system.
-
Obtain installer or fabricator approval before ordering.
If the cap, support, or swing path is wrong, correct it before final measurement. Do not order glass based on a planned repair that has not been completed.
Simple Openings May Avoid Custom Glass
A stock or adjustable enclosure may work when the entry is regular and the manufacturer offers a compatible fixed return for the measured layout. All components should belong to an approved configuration shown in one technical drawing.
Do not combine unrelated door, panel, and connector parts simply because their nominal dimensions appear compatible.
Is the Pony Wall Ready for Glass?
Fit is only one part of readiness. The wall must also remain stable, direct water back into the shower, and provide an appropriate mounting condition for the selected hardware.
Continuous Waterproofing Must Cover Cap and Base
The pony-wall top is within the shower’s wet area. The waterproofing approach should account for the wall face, cap, vertical corners, and connection to the shower floor or base. The exact materials and sequence depend on the selected waterproofing or pan system, so follow its current technical instructions.
Visible sealant around channels or clamps is a serviceable joint, not a substitute for the concealed waterproofing assembly. If the membrane path cannot be confirmed in a finished retrofit, consult a qualified waterproofing professional before drilling through the cap.
Inward Cap Slope Prevents Standing Water
The finished cap should direct water toward the shower rather than hold it around the glass and hardware or drain it into the bathroom. Check the completed surface with a level before the final glass measurement.
Inspect the entire cap, not only its general direction. An otherwise inward-sloping surface can still contain a low point beside a channel or clamp. Correct drainage problems before hardware is installed.
What If Hidden Blocking Cannot Be Confirmed?
Do not assume tile and backer alone provide the support required by hinges, clamps, or channels. Use construction drawings, framing photographs, or other project records when available, then have the installer confirm whether the proposed fastener locations match the hardware requirements.
If support remains uncertain, possible design responses include:
-
Moving hardware to confirmed framing.
-
Replacing a hinge location with fixed glass.
-
Using a compatible channel or stabilizing brace.
-
Opening a limited section to inspect or add support.
-
Redesigning the enclosure around a reliable support plane.
Avoid exploratory drilling through the wall cap without a repair and waterproofing plan.
Pan Flanges Must Integrate with Wall Waterproofing
A prefabricated shower base may include flanges that must meet the wall finish and waterproofing in a specific way. A pony wall can complicate that transition, particularly where the wall begins beside or within the base perimeter.
Review the selected pan’s technical drawing before framing the wall. Proper shower construction depends on coordination between the shower base, wall assembly, and waterproofing details. The National Association of Home Builders (NAHB) highlights that moisture management is a critical part of durable bathroom construction, especially where multiple building components meet. For an existing installation, have any uncertain wall-to-flange transition assessed before adding glass. A correctly fitted door cannot repair a concealed water path below the enclosure.
Measure the Opening Before Choosing Hardware

Use rough dimensions only for early planning. Final sizing should be based on the completed tile, cap, curb, and wall finishes.
The HOROW shower door installation guide provides general sequence information, but the instructions for the exact enclosure control its measuring and installation requirements.
Measure Width at Base, Middle, and Top
Measure the finished entry width near the base, at the midpoint, and near the top of the intended enclosure. Record all readings rather than selecting one number.
Differences between the readings indicate that a jamb may lean, bow, or vary in finish thickness. Do not automatically order from the smallest or largest measurement. The exact enclosure instructions should state which measurement controls and how its adjustment system accommodates variation.
Also record the opening height at both sides. Different readings may indicate an out-of-level curb or an uneven upper reference point.
Return Panel Measurement Uses Finished Surfaces
Return panel measurement begins at the intersection of the finished door or inline-panel plane and the finished return plane. Measure to finished tile, stone, or wall panel—not to concealed framing.
Record:
-
Return depth at each relevant height.
-
Pony-wall height at both intended glass edges.
-
Cap depth and any overhang at both ends.
-
The corner angle between the entry and return planes.
-
The curb-to-pony-wall intersection.
-
Trim, ledges, raised edges, or other obstructions.
-
Proposed glass and hardware centerlines.
Do not deduct for channels, gaps, hinges, or seals unless the exact product instructions direct you to do so. These allowances vary by enclosure and hardware design.
Check Plumb, Level, and Out-of-Square Variation
A tape measure cannot show whether the opening is square. Check both jambs for plumb and the curb and pony-wall cap for level and drainage direction. Verify the angle where the return meets the entry plane.
Label each measurement on a simple plan and identify the shower side, bathroom side, hinge side, and return. This is clearer than relying on “left” and “right,” which can become ambiguous when door handing changes.
For complex custom glass, use homeowner measurements to evaluate feasibility and let the selected glass company complete or approve the fabrication measurements.
Confirm System-Specific Opening Tolerances
There is no universal opening tolerance for every shower enclosure. Framed channels, frameless hinges, sliding systems, and custom fixed panels accommodate site variation differently.
Compare every finished measurement with the exact system drawing. If the variation is outside the published range, correct the surface, choose a system designed for that geometry, or obtain custom glass.
Do not order if the seller cannot confirm the complete finished opening—not just its nominal width—against the selected enclosure.
Can Hinges, Tracks, and Swing Clear?
A door can fit between the walls and still be difficult to operate. Shower doors are also subject to safety-glazing requirements intended to reduce injury risk if glass breaks. The Consumer Product Safety Commission (CPSC) identifies tempered glass as a common safety glazing material used in applications where ordinary glass could create a hazard when broken. The selected enclosure should use glass that meets applicable safety standards for the intended installation. Check the movement of the door, handle, user, and nearby fixtures before choosing the handing or hinge position.
Can the Door Safely Turn the Corner?

A swing door beside a return panel needs room to open without hitting the fixed glass, connector hardware, wall, or fixtures. Its closing edge also needs a compatible sealing surface.
Mark the hinge point and full door arc on the floor with painter’s tape. Include the handle projection, toilet, vanity, controls, towel bars, and expected standing area. If the selected hardware permits movement in both directions, test both paths rather than assuming either will work.
Hinge Loads Need One Reliable Support Plane
The simplest arrangement keeps all door hinges on one support plane: either a properly reinforced full-height wall or a fixed glass panel designed by the enclosure supplier to carry the door. Avoid improvised layouts that split support across unrelated wall and glass surfaces.
Fixed glass on a pony wall does not automatically require ceiling support. Stabilization depends on the panel dimensions, glass specification, attachment method, adjoining panels, and whether it carries a door. The glass supplier should determine whether channels and clamps are sufficient or whether a brace, header, or ceiling connection is required.
Will the Swing Clear Fixtures and Entry?
Test the proposed entry from both sides. A user should be able to reach the handle and pass through the opening without the door striking the toilet, vanity, controls, showerhead, hoses, bench, or grab bars.
Also consider where a person must stand to turn on the shower. Changing the hinge side or moving the opening may produce a more usable layout even when both arrangements technically fit.
Bottom Tracks Need Drainage and Cleaning Access
A sliding door avoids a large swing arc but may place a bottom track close to the pony-wall corner. Before selecting it, confirm:
-
How water leaves the track.
-
Whether the track crosses a change in height.
-
Whether the wall-end corner can be reached for cleaning.
-
Whether guides and seals remain accessible for service.
-
Whether installation requires penetrations in the cap or curb.
If drainage or cleaning access is unclear, simplify the track path or choose another compatible layout.
What Fails After Installation?
Problems commonly begin at glass edges, fasteners, seals, and corners rather than in the center of a panel. Early investigation can prevent a minor alignment or moisture problem from damaging surrounding finishes.
What Fails First Over Time?
Watch for a changing door gap, loose hardware, rubbing sweep, shifting fixed panel, cracked sealant, or water remaining on the cap. These signs may indicate hardware adjustment needs, movement in the support assembly, or an enclosure that is no longer aligned.
Do not repeatedly force a dragging or binding door. Stop using it and ask the installer to identify the cause before the glass edge, hinge, or tile is damaged.
Cap Penetrations Become Hidden Leak Paths
Some channels or clamps require fasteners through the cap. If the penetration or surrounding waterproofing detail is unsuitable, moisture may enter below the visible finish.
Possible warning signs include persistent dampness, stained grout, loose tile, or swelling in nearby trim. Moisture may travel within the assembly, so the visible symptom may not appear directly below the hardware.
Tight Track Corners Trap Moisture and Debris
A narrow space between the track, return panel, and pony wall can collect soap residue and debris while remaining difficult to reach. This is primarily a layout problem.
Confirm cleaning access during product selection or dry fitting. If a cloth or small brush cannot reach the corner before installation, routine cleaning will not become easier afterward.
Ceiling-Height Glass May Require Better Ventilation
Extending glass close to the ceiling can stabilize certain layouts, but it may also retain more steam. The effect depends on the remaining openings and the bathroom’s ventilation.
Before using ceiling-height glass solely as a support solution, ask whether a brace, header, or different panel arrangement could provide the required stability while leaving more open space. If tall glass is necessary, include ventilation in the project review.
Before You Buy
-
The pony wall remains firm under moderate hand pressure.
-
Suitable backing is confirmed at every proposed hinge, clamp, and channel location.
-
The waterproofing plan covers the cap, face, corners, and base transition.
-
The cap directs water toward the shower without low spots around hardware.
-
The pan or tiled-floor waterproofing integrates with the pony wall.
-
Entry width is recorded at the base, middle, and top.
-
Opening height, pony-wall height, and return depth are measured at both sides.
-
Jamb plumb, curb level, cap drainage, and corner angle have been checked.
-
One technical drawing supports the complete door-and-return layout.
-
All hinges use one approved support plane.
-
The door, handle, and user path clear nearby fixtures.
-
Tracks have a defined drainage path and reachable cleaning access.
-
The installer or fabricator has approved the final measurements and layout.
-
The glass order does not rely on assumptions about hidden framing.
Frequently Asked Questions
Can a shower door be installed on a pony wall?
Yes, a shower door can be installed on a pony wall when the wall construction and enclosure design work together. The setup is usually easier when the pony wall supports fixed glass instead of the moving door itself. The final choice depends on the hardware layout, glass size, and how the shower opening is built.
Does glass on a pony wall need top support?
Not always, but some layouts may need additional stabilization. Smaller fixed panels may work with approved clamps or channels, while larger panels or door-carrying glass may require extra reinforcement. The right support method depends on the enclosure design and should be confirmed before installation.
How do you measure a shower enclosure with a return panel?
Measure the enclosure after the final surfaces are installed, so the glass matches the actual shower layout. Check the width, return depth, wall height, and corner conditions so the glass matches the actual space. The measurement method can vary by product, so follow the requirements for the specific enclosure.
Can a stock shower door fit a half wall?
Yes, a stock shower door may fit a half-wall layout if the complete system is designed for that configuration. The opening shape, panel connection, and available adjustment range all need to match the product requirements. A door that fits the width alone may still be incompatible with the return section.
What should I do if blocking behind the tile is unknown?
Do not place the glass order until the support condition is checked. An installer can review the available mounting options and decide whether adjustments, added support, or a different layout is needed. Confirming this early can help avoid changes after the glass has been made.


Leave a comment
This site is protected by hCaptcha and the hCaptcha Privacy Policy and Terms of Service apply.