



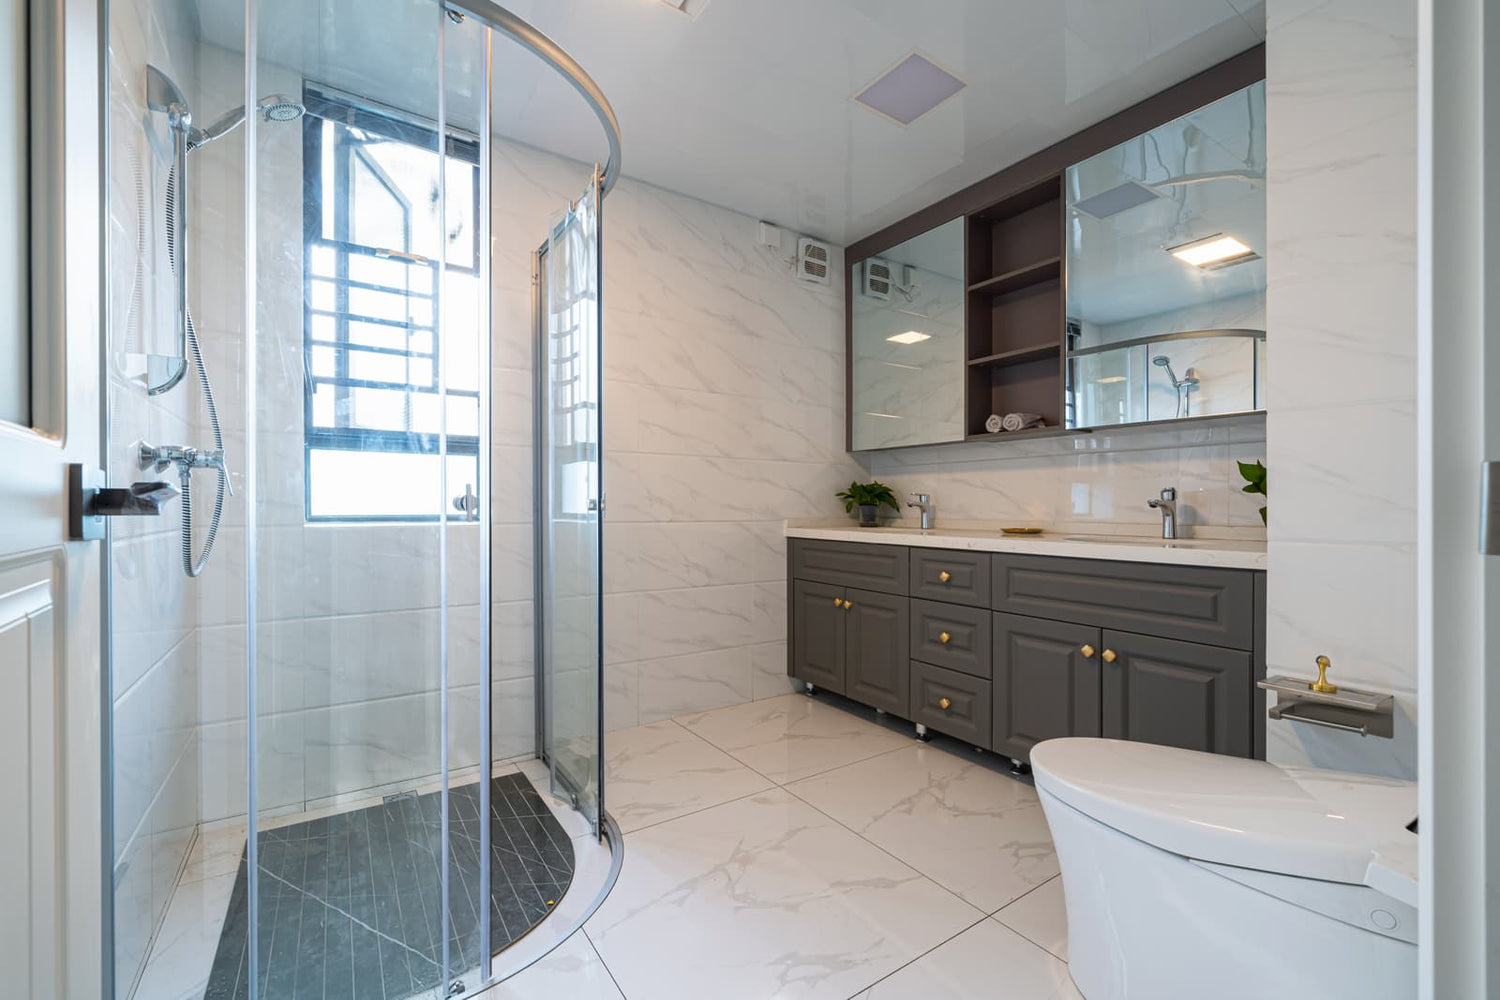
A 55 to 60 inch shower door fits only when your finished shower opening matches the adjustment range listed for that specific model. A “60-inch shower door” label alone does not confirm compatibility with a 55-, 57-, 58-, or even exact 60-inch opening.
Before ordering, measure the finished opening at the top, middle, and bottom. Then verify wall plumb, threshold shape and depth, mounting support, door height, panel movement, and usable entry width against the installation manual.
Decision Snapshot: Is This Range Right for Your Bathroom?
Works Within the Documented Finished-Opening Range
Use the documented finished-opening range for the exact model—not the product name—to determine whether the door fits. Confirm the opening width, wall condition, threshold, mounting support, and clearance before ordering.
A compatible installation also requires:
-
Wall variation within the model’s stated tolerance
-
A threshold suitable for its track, guide, or sweep
-
The specified support at each mounting point
-
Sufficient clearance for moving glass and handles
-
A practical walk-through after accounting for fixed panels and overlap
-
The correct door height and configuration for a shower or bathtub
Do not assume that all products advertised in the same size category share the same adjustment range. Compare your measurements with the specifications for the exact door.
Measure Only After Wall Finishes Are Complete

Measure from finished wall to finished wall after tile, wall panels, the shower base or tub, and the threshold are installed. Framing dimensions do not account for the thickness or unevenness of finished materials.
If the door must be selected before finishing the enclosure, the contractor should build to the product’s technical drawing and plan the final dimensions accordingly. A nominal 60-inch framed alcove is not a confirmed 60-inch finished opening.
Decision: If the final finished dimensions cannot be confirmed, the door is not ready to order.
Common Fit Problems: Wall, Threshold, and Clearance Issues
Width is only one part of fit. Installation can become unsuitable when wall alignment, threshold condition, mounting support, or surrounding fixtures prevent the hardware from being installed as designed. Common issues include bowed walls, uneven thresholds, missing support, or clearance conflicts with nearby fixtures.
Adjustment can accommodate only the variation allowed by the product design. It cannot correct improper enclosure construction, missing support, or unstable surfaces.
How Much Adjustment Range Is Actually Useful?
An adjustable shower door only works within the finished-opening range and tolerances specified for that model. A wider adjustment range can help with normal variation, but it cannot correct unstable surfaces, missing support, severe wall bowing, or incorrect enclosure construction.
When the opening is near the minimum or maximum limit, verify the technical drawing carefully. Sliding doors may have increased overlap at the narrow end, while channels, seals, or stops may have less adjustment margin at the wide end.
Which Door Configuration Creates the Least Compromise?
Will This Work in a Small Bathroom?

Check the space outside the shower before choosing a sliding or pivot door. Mark the glass edge and handle projection on the floor using the product drawing. Confirm clearance from:
-
The toilet and vanity
-
Nearby walls and doors
-
Towel bars or radiators
-
Users standing outside the enclosure
-
Controls, benches, and grab bars inside the shower
A panel may clear a vanity while the projecting handle still strikes it. A door can also complete its swing yet leave too little standing space for comfortable entry and exit.
Sliding Doors: Opening Size Does Not Equal Entry Width
A sliding or bypass door keeps moving glass within the enclosure footprint, which can help when swing clearance is limited. However, the usable entrance is reduced by fixed panels, overlap, guides, stops, and handles.
Check the walk-through dimension at the actual installed width instead of assuming a 60-inch opening creates a 60-inch entry.
Sliding systems also require proper roller, guide, seal, and threshold compatibility. Review sliding shower door configurations only after recording the finished opening and available threshold surface.
Pivot Systems Require Clear Swing Geometry
Pivot doors require enough clearance for the glass panel, handle, and user movement. Check the full swing path before installation. Mounting loads must be supported according to the product instructions.
Tub and Shower Heights Are Not Interchangeable
A bathtub door and a full-height shower door are not interchangeable simply because their widths match. Panel height, handle placement, seals, and mounting layouts may differ.
Bathtub decks can also be rounded or too narrow for hardware intended for a shower curb. Controls and spouts may interfere with the door line. Select a product documented for the actual installation type and confirm whether its drawing permits installation on a tub, shower base, or tiled threshold.
What Extra Work and Cost Can Retrofit Require?
Fixing Out-of-Plumb Walls Before Installation
Minor wall variation may be accommodated if it remains within the door’s stated tolerance. Greater variation can create tapered gaps, prevent seals from meeting, or prevent hardware from aligning correctly.
Do not force a jamb against a bowed wall. The enclosure must provide the surface and support required by the installation instructions.
Threshold and Mounting Surface Requirements
The threshold and wall surfaces must provide the mounting conditions required by the selected door. Measure the flat, usable threshold area—not only the total curb width—and confirm that brackets, tracks, pivots, or sweeps can sit as designed.
Uneven, damaged, or unstable surfaces can affect alignment and sealing. Sealant should not be used as structural support for an unstable track or mounting surface.

Retrofit work becomes more invasive when mounting points do not align with the support method specified by the manufacturer. Where wall access is practical, support may be added from the opposite side. Otherwise, changing the door configuration may be less disruptive than removing finished tile.
Older installations may include unsupported tile, previous mounting holes, raised edges, narrow curbs, or unstable thresholds that require correction before installation.
Correct these enclosure defects before installing the glass. Sealant should not be expected to stabilize loose tile or support a track over an uneven surface.
Moisture problems behind finished bathroom surfaces can remain hidden and may lead to long-term building damage if not properly managed. The EPA moisture control guidance for building design, construction, and maintenance explains the importance of controlling water intrusion and managing moisture during construction and renovation.
Retrofit Work Depends on Enclosure Condition
The work required depends on the existing enclosure condition. A compliant opening may need only standard installation, while missing support, damaged surfaces, or an opening outside the documented range may require additional correction before installation.
Replacement Risk After Incorrect Measurement
Large glass panels can be difficult to repack and return. Cutting a rail, drilling a component, or discarding protective packaging may also affect return eligibility under the seller’s terms.
Before making irreversible changes:
-
Recheck the opening against the installation manual.
-
Confirm the orientation of every rail and panel.
-
Dry-position components where the instructions allow.
-
Verify which rail end may be cut.
-
Review the return policy.
A rail cut from the wrong end can place factory holes, connectors, or finished edges in the wrong position.
Will a 55 to 60 Inch Shower Door Fit?
It will fit only if the exact model covers the completed enclosure’s measurements and satisfies the wall, threshold, mounting, and clearance requirements. A product described as a 60 inch shower door may have an adjustment range below 60 inches, but that range must be confirmed in its specifications.
Three-Height Finished-Opening Measurement Diagram
Measure the finished shower opening at three heights: the top, middle, and bottom. At each point, measure horizontally from one finished wall surface to the opposite finished wall surface, keeping the tape measure level. Record all three measurements separately rather than assuming the opening is the same width from top to bottom. Use these finished-surface measurements when checking the opening range and adjustment requirements for the shower door you are considering.
Use this process:
-
Record the top, middle, and bottom widths separately.
-
Check both walls vertically with a reliable level.
-
Check the threshold along the proposed hardware line.
-
Measure the flat, usable threshold depth.
-
Confirm the available installation height.
-
Compare every measurement with the exact product manual.
-
Map panel movement, handle projection, and user entry space.
-
Confirm that the specified wall-mounting method is possible.
Do not average the widths. An average can conceal a top that is too narrow, a bottom that is too wide, or a middle bow that interferes with the frame.
For an overview of the installation sequence, see HOROW’s glass shower door installation guide. The manual supplied with the selected door remains the controlling source for model-specific measurements and procedures.
Fit Checks for 55-, 57-, and 58-Inch Openings
For 55-, 57-, and 58-inch openings, confirm that the exact model’s finished-opening range includes the measured width. Also check panel overlap, walk-through space, and wall conditions. A nominal 60-inch door does not guarantee fit.
An opening measuring exactly 60 inches still requires verification. If 60 inches is the maximum permitted width, a bowed wall or measurement error could place part of the enclosure outside the range.
HOROW’s 60-inch shower door collection can help you compare configurations. Confirm compatibility using the specifications and instructions for the individual product.
HOROW Sliding Shower Door Examples for 56–60 Inch Openings
If your finished shower opening measures within 56 to 60 inches, these two HOROW sliding shower doors are documented for that width range. Use them as product examples after measuring the finished opening, then confirm the exact installation requirements for the selected model.
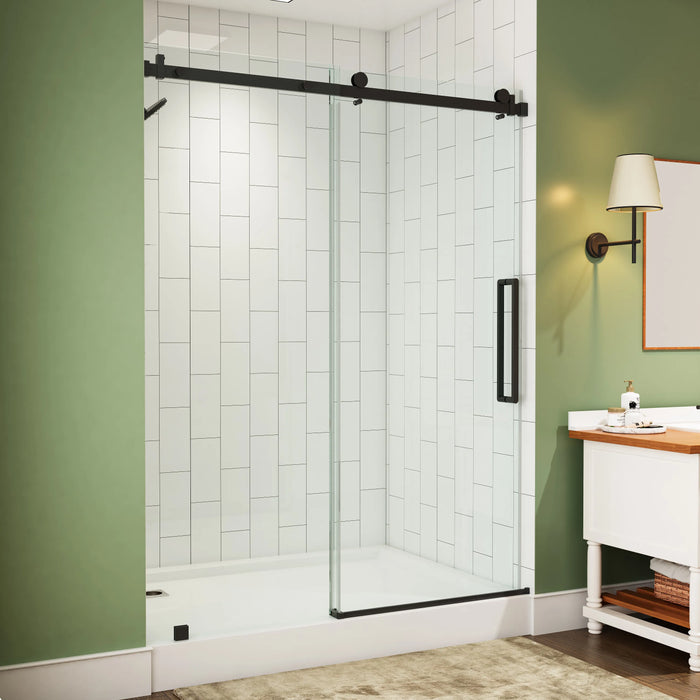
HOROW TE6076-MB
A black frameless sliding shower door documented for 56–60 inch finished openings. Its top track can be trimmed to fit within the specified range, and the listed walk-in opening is 26-5/16 inches. Confirm the finished width, wall condition, threshold, and installation instructions before ordering.
View TE6076-MB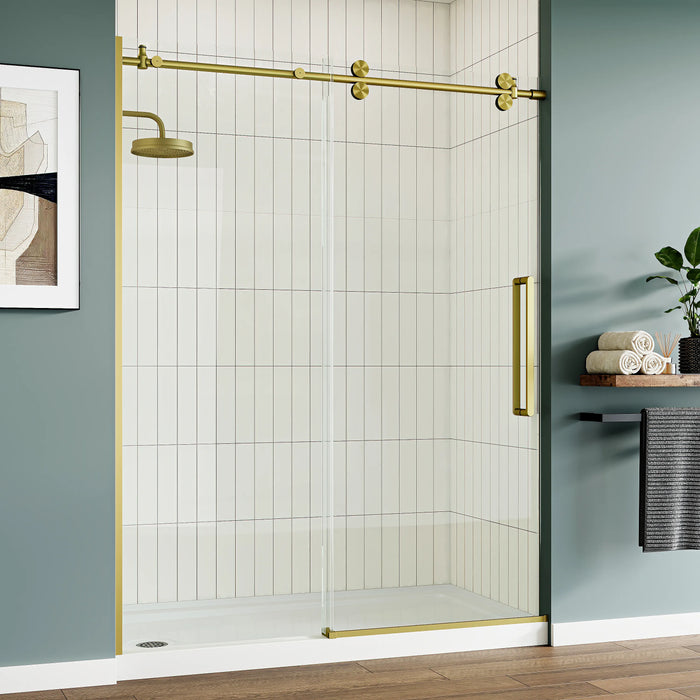
HOROW MI6076-SG
A brushed gold frameless sliding shower door documented for 56–60 inch finished openings. Its top rail can be trimmed within the specified adjustment range, and the listed walk-in width is 26-5/16 inches. Compare your completed enclosure measurements with the product specifications and installation instructions before ordering.
View MI6076-SGThese examples are documented for 56–60 inch finished openings. Confirm the finished opening at the top, middle, and bottom and check the exact model specifications, wall conditions, threshold requirements, and installation instructions before purchase.
Can the Bathroom Support Safe Installation?
What Fails Without Stud Backing?
Inadequate mounting support can allow jambs or brackets to move. Warning signs can include loosening fasteners, changing panel gaps, sagging glass, or seals that stop meeting correctly.
Stud backing is not required in the same way for every shower door. Some designs specify framing at mounting locations; others permit particular fasteners for suitable wall construction. Use only the mounting method stated for the product and wall type.
If the required support is unavailable, consult a qualified installer about adding support or select a compatible door configuration. Do not substitute an unspecified anchor solely because it fits the drilled hole.
Drilling Conflicts with Plumbing and Niches
Plumbing, wiring, and niche framing may be concealed near proposed mounting points. Review construction photographs when available and inspect both sides of the wall for fixtures or other clues before drilling.
A recessed niche can change the framing near a wall jamb even when it does not appear directly beside the door. Existing holes can also weaken or complicate a new mounting location.
Do not drill into the threshold unless the product instructions call for it and the enclosure construction is suitable for that mounting method. If the concealed layout or waterproofing detail is uncertain, have the area assessed before drilling.
Mounting-Point and Threshold Compatibility Checklist
|
Check |
Pass condition |
|
Finished width |
Each required measurement is within the documented range |
|
Wall plumb |
Variation is within the stated allowance |
|
Wall surface |
Jambs or brackets can sit as designed |
|
Threshold |
Shape and usable depth suit the bottom hardware |
|
Mounting support |
The specified fastening method is available |
|
Door movement |
Glass and handles clear surrounding fixtures |
|
Entry space |
The resulting walk-through is practical |
|
Installation type |
Door is intended for the shower or tub |
|
Drilling area |
No known pipe, wiring, or niche conflict |
|
Service access |
Rollers, seals, guides, and fasteners remain reachable |
If several conditions remain uncertain, inspect the enclosure before ordering rather than relying on the advertised width.
How Much Imperfection Can the Door Absorb?
Out-of-Plumb Tolerance Must Match Specifications
There is no universal out-of-plumb allowance for shower doors. An adjustable framed channel may accommodate a different amount of variation than a minimally framed hinge or bracket system.
Measure each wall separately. The difference between the top and bottom widths does not identify every defect because a wall can bow in the middle and return to nearly the same width at both ends.
When the measured lean or bow is close to the model’s stated limit, have the opening reviewed before purchase. Grout lines, tile edges, and local surface irregularities can complicate alignment.
Out-of-Square Openings Create Uneven Gaps
An enclosure may have acceptable widths but still be out of square. Both walls can lean in the same direction, or the threshold can be uneven relative to the glass.
Possible results include:
-
A tapered gap beside a seal
-
Uneven contact with a bumper
-
A sliding panel that drifts or binds
-
A pivot door that scrapes or sags
-
A visible wedge between the frame and wall
Sealant can close specified stationary joints, but it should not be used to disguise poor alignment or replace structural support.
Can Track Trimming Rescue a Narrow Opening?
Track trimming works only when the model is designed for it and the opening remains within the approved adjustment range. A cut rail cannot turn every 60-inch kit into a door for any smaller opening.
Before cutting, confirm that:
-
The manual provides a trimming procedure
-
The intended opening is within the documented range
-
The correct rail and rail end have been identified
-
Factory holes, stops, and connectors will remain usable
-
Panel overlap stays within the designed arrangement
-
The final entrance remains practical
Measure and verify orientation before making the cut. Do not cut hardware merely to test whether the glass might fit afterward.
Sloped or Crowned Thresholds Compromise Sealing
A crowned threshold can leave the center of a track unsupported. Side-to-side tilt can affect roller or pivot alignment, while an inconsistent surface can cause a bottom sweep to drag in one area and leave a gap in another.
If the glass is level but the threshold rises beneath it, the seal may rub. If the threshold falls away, the seal may not maintain contact. These conditions can lead to recurring adjustment and leakage complaints even when the nominal opening width is correct.
What Fails or Frustrates Owners Over Time?

What Fails First Over Time?
The first sign of trouble is often a minor alignment change rather than broken glass. A handle may loosen, a seal may stop making contact, a roller may need adjustment, or a guide may begin rubbing.
These issues are more likely to recur when the opening was forced into range, mounting surfaces move, or the threshold does not support the bottom hardware correctly. Address the enclosure conditions instead of repeatedly compensating at the door.
Binding, Roller Wear, and Glass Misalignment
Sliding panels can bind when guides collect debris, rollers move out of adjustment, or the frame shifts. A misaligned panel may rub a guide or contact a stop unevenly.
Pivot doors can scrape or sag if mounting hardware moves. Do not repeatedly force a binding panel. Check the alignment and fasteners using the product’s instructions, or arrange service if the cause is unclear.
Before buying, consider whether replacement rollers, seals, sweeps, handles, and guides are available for the selected product.
Leakage from Gaps and Failed Seals
Leaks commonly appear at panel overlaps, bottom seals, wall transitions, and corners. Failed caulk is only one possible cause. Misalignment, an uneven threshold, incorrect seal placement, or shower spray directed at a moving-panel gap may also allow water to escape.
Do not seal drainage openings or moving components unless the instructions specifically direct it. Excess sealant can interfere with movement or prevent water from draining as designed.
Track Cleaning and Replacement-Part Burden
Bottom tracks and guides add edges that collect residue and need routine cleaning. Minimally framed designs may reduce some frame surfaces, but they still use seals, rollers, brackets, or guides.
Check whether both sides of the glass are reachable and whether service parts can be removed without interference from a toilet, vanity, or fixed panel. Limited service access can make a door that fits physically frustrating to maintain.
Before You Buy
Before ordering, confirm:
-
Finished opening width at the top, middle, and bottom
-
Wall alignment and threshold condition
-
Required mounting support
-
Door configuration and clearance
-
Walk-through space at the actual installed width
-
Compatibility with plumbing, wiring, niches, and existing holes
-
Installation limits, trimming rules, and return requirements
Building-code requirements can vary by jurisdiction because model codes may be adopted and amended by the authority having jurisdiction. Before making structural changes during a bathroom renovation, check the requirements that apply in your area. The International Code Council (ICC) provides information on how jurisdictions adopt and amend model codes.
Frequently Asked Questions
What shower door fits a 55- to 60-inch opening?
The right shower door is the one whose adjustment range matches your actual finished opening. Measure the opening at the top, middle, and bottom because each point can affect compatibility. The wall condition, threshold space, and mounting requirements also need to match the installation instructions. A door labeled as “60 inch” may still be unsuitable for smaller openings.
Should I measure before or after tile?
You should measure after tile, wall panels, the shower base or tub, and the threshold are finished. Finished surfaces can change the final opening size compared with the original framing. If you order before construction is complete, the enclosure should be built according to the selected door’s specifications. Final measurements are needed to avoid fit problems during installation.
Can an adjustable shower door correct uneven walls?
An adjustable shower door can handle minor wall variations only within the model’s allowed tolerance. It cannot solve major bowing, unstable surfaces, missing support, or incorrect enclosure construction. Using adjustment to force a poor fit may lead to gaps, alignment problems, or hardware stress. If the walls are significantly uneven, the opening may need correction before installation.
References
https://www.iccsafe.org/advocacy/code-adoption-resources/


Leave a comment
This site is protected by hCaptcha and the hCaptcha Privacy Policy and Terms of Service apply.