



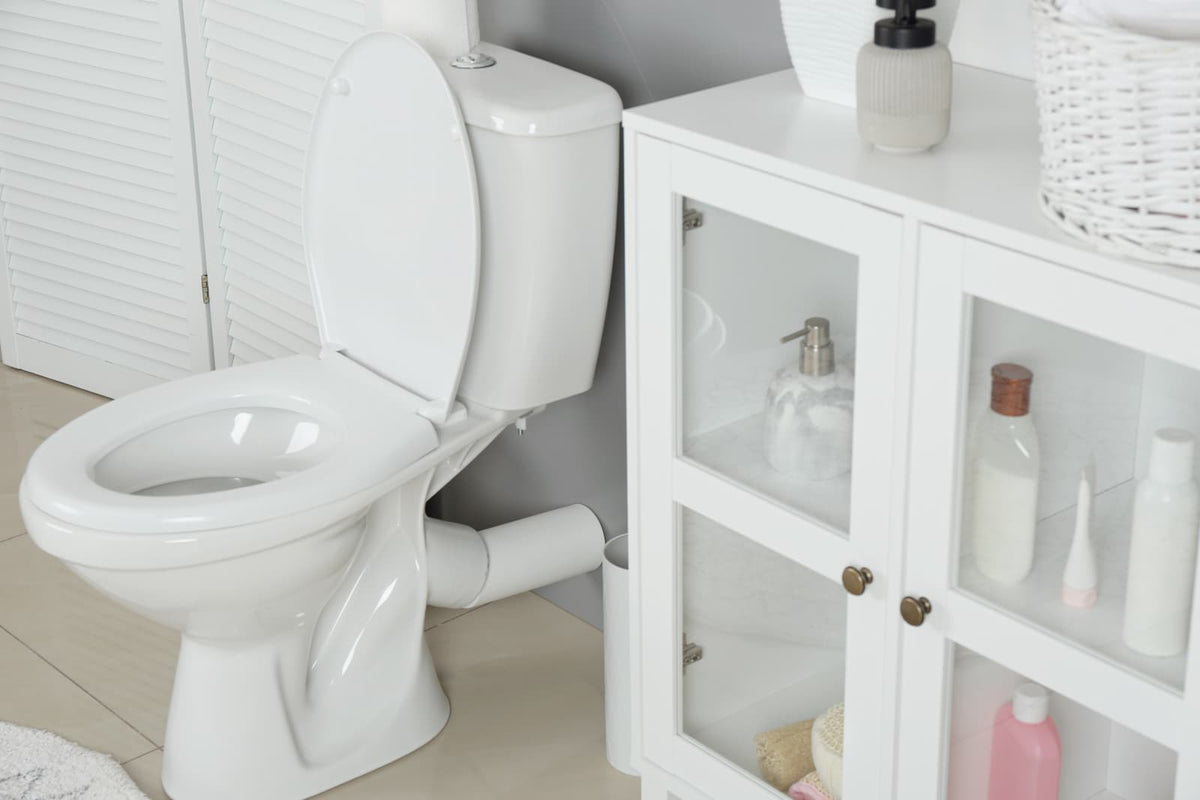
To install toilet tank bolts correctly, place each inner rubber washer directly against the porcelain inside the tank, center the tank-to-bowl gasket, and tighten the nuts in small alternating steps. The goal is even gasket compression and a stable tank—not maximum bolt tightness or forced porcelain contact.
This procedure applies to two-piece toilets with a separate tank and bowl. Before starting, verify that the porcelain is intact, the tank and bowl are compatible, the gasket fits the flush-valve outlet, and every nut is accessible with hand tools.
Who Should Replace Toilet Tank Bolts?
Replace the tank-to-bowl hardware when a bolt is badly corroded, an inner rubber washer is hardened or split, or testing confirms water is escaping through a bolt hole. Replacement also makes sense when the tank is already being removed for a failed tank-to-bowl gasket.
Do not assume rust proves that a bolt seal is leaking. Condensation, splash water, a leaking supply connection, or water traveling from the central gasket can also corrode the exposed hardware. Dry the toilet and trace the water before disassembly.
Decision Snapshot: Suitable and Unsuitable Conditions
|
Toilet condition |
Proceed? |
Primary concern |
|
Matched two-piece tank and bowl with intact porcelain |
Usually |
Correct gasket fit and even tightening |
|
Corroded bolts with safe cutting access |
Usually |
Avoiding tool contact with porcelain |
|
Leak confirmed at an old bolt washer |
Yes |
Replace aged seals and inspect the main gasket |
|
One-piece toilet |
No |
This tank-to-bowl procedure does not apply |
|
Mismatched or unidentified tank and bowl |
Uncertain |
Outlet alignment, hole spacing, and contact geometry |
|
Cracked or chipped bolt hole |
Stop |
The washer may not seal, and tightening may spread damage |
|
Tank rocks after moderate, even tightening |
Stop and inspect |
Wrong gasket, trapped material, or incompatible porcelain |
|
Shutoff valve does not stop the water |
Stop |
The tank cannot be isolated safely |
|
One or more nuts cannot be reached |
Poor DIY candidate |
Hardware cannot be tightened or checked evenly |
Two-Piece Toilets with Matched Tanks and Bowls
This repair is for a two-piece toilet, where the tank is a separate porcelain component attached to the rear deck of the bowl. If you are uncertain about the design, see the differences between one-piece and two-piece toilets.
A typical two-piece tank has two or three bolt heads visible through its floor. Those bolts pass through mounting holes in the bowl deck and are secured from below.
Proceed only when:
- The tank and bowl are a matched pair.
- The tank outlet aligns centrally with the bowl inlet.
- The bolt holes line up without pulling the tank sideways.
- The tank can be lowered into place without being forced.
- All lower nuts are accessible with hand tools.
A replacement tank that looks similar is not necessarily compatible. Matching bolt spacing alone does not confirm that the outlet, gasket seat, and porcelain contact surfaces will align.
Cracked or Mismatched Porcelain Requires Reconsideration
Inspect the inside and underside of the drained tank with good lighting. Pay particular attention to each bolt hole and the area around the flush-valve outlet.
Stop if you find a crack extending from a bolt hole or across the tank floor. A new washer or added sealant does not restore the strength of cracked porcelain. Tightening over the damaged area can extend the crack.
A minor casting irregularity is not necessarily damage, but the rubber washer still needs a sound, sufficiently flat sealing surface. Do not continue if part of the hole’s sealing edge is missing or a fracture line is visible.
Stop condition: If the rubber washer cannot make complete, flat contact around the bolt hole, replacing the bolts is not a dependable repair.
Will a Universal Bolt Kit Fit?
A universal kit may fit many common toilets, but it is not guaranteed to fit every tank and bowl. Compare the replacement hardware with the original parts and the toilet’s model-specific instructions when available.
Confirm that:
- The bolts pass through the tank and bowl holes without binding.
- The bolts are long enough for the complete washer-and-nut stack.
- The nuts can engage securely without omitting required washers.
- The inner rubber washers fully cover the tank holes.
- The tank-to-bowl gasket fits the flush-valve outlet.
- Bolt tails and nuts clear the wall, supply line, valve, and bowl casting.
Do not use extra, unrelated washers to compensate for an incorrect bolt length. Changing the specified stack can alter both sealing and load distribution.
What Trade-Offs Come With Bolt Replacement?
The hardware is only one part of the tank-to-bowl connection. Removing the tank can expose a hardened central gasket, restricted tool access, or deteriorated water-supply components.
Complete Hardware Replacement Versus Bolt-Only Repair
If one bolt seal has failed because of age or corrosion, the remaining bolts and rubber parts have usually experienced similar conditions. Replacing all tank bolts, sealing washers, and the tank-to-bowl gasket together reduces the likelihood of another teardown.
Bolt-only replacement may be reasonable when the other hardware and central gasket were installed recently, remain undamaged, and are confirmed compatible. It is less suitable for an older toilet with an unknown repair history.
Do not mix random washers and nuts from multiple kits. Differences in washer diameter, thickness, and shape can prevent full coverage or cause a bolt to sit at an angle.
Stable Gasket Compression Versus Porcelain Stress
The tank bolts compress the large central gasket and keep the tank positioned on the bowl. Too little compression can leave the tank unstable or allow water to escape. Excessive or uneven compression can concentrate stress around a bolt hole or porcelain contact point.
The correct result is:
- A centered tank and gasket
- Even resistance at the bolts
- A tank seated as its manufacturer intended
- No leak during standing-water and flush tests
- No significant movement during normal use
Some toilet designs use specific porcelain contact pads; others may retain a small, even gap. Follow the toilet’s instructions rather than assuming every visible gap must be closed.
Minor Movement Versus Forced Porcelain Contact
The tank should not sway during normal use, but bolts should not be used to force incompatible or uneven parts together.
If one corner touches the bowl while the opposite side remains noticeably separated, stop tightening. Check whether the gasket is centered, the bolts are evenly adjusted, and the tank and bowl belong together.
Do not insert hard, improvised shims between the tank and bowl unless the toilet’s instructions specifically provide for them. A hard object can create a concentrated load against the porcelain.
Simple Retightening Only Suits Sound Seals
Retightening may correct minor looseness when the bolts, washers, gasket, and porcelain are all sound. Make only small, alternating adjustments.
Do not rely on retightening when:
- A rubber washer is brittle, split, or distorted.
- Corrosion has reduced a bolt or nut.
- One bolt is already significantly tighter than the others.
- The central gasket is displaced.
- A chip or crack is visible.
- Water returns after a small, balanced adjustment.
Repeated tightening cannot repair an incorrectly seated or deteriorated seal.
What Extra Work Can This Repair Trigger?
Access and plumbing condition often determine whether this remains a straightforward hardware replacement.
Can Rusted Bolts Be Removed Safely?
Severely corroded nuts may spin with the bolts or require cutting. Cutting is reasonable only when there is enough room to protect the porcelain and control the tool.
Do not pry against the tank or bowl. If the blade or tool cannot be kept away from the glazed surface, stop and arrange professional removal. Replacing damaged porcelain will create far more work than leaving a seized bolt for someone with suitable access and tools.
Will This Work in Tight Bathrooms?
Before draining the tank, confirm that you can reach every lower nut and see the tank from enough angles to assess alignment. A nearby wall, vanity, shelf, or supply valve may prevent even tightening.
A low-profile hand wrench or socket may improve access, but it does not solve a completely blocked fastener. Do not tighten the accessible side more heavily to compensate for a nut you cannot reach.
Also confirm that you can lift the tank vertically and place it on a padded, stable surface. Rocking or twisting the tank against the bowl to clear an obstruction can chip either component.
Corroded Shutoffs and Supply Lines Expand Scope
Operate the toilet shutoff before taking the assembly apart. If the valve does not stop the water, do not disconnect the supply line. The water-control issue must be resolved first.
Inspect the supply connector for corrosion, stiffness, kinks, or signs of leakage. Prevent the fill-valve body inside the tank from twisting when loosening the connector. A damaged connector or unreliable shutoff can turn a bolt replacement into a broader plumbing repair.
Repair Scope and Cost Escalation Thresholds
Stop treating the project as a simple bolt replacement when:
- The water supply cannot be isolated.
- Safe cutting access is unavailable.
- Compatible hardware or a matching gasket cannot be identified.
- The tank and bowl appear mismatched.
- Porcelain is cracked or chipped at a sealing surface.
- The toilet must be moved to reach the hardware.
- The bowl itself moves at the floor.
These conditions require additional repair, replacement parts, or professional help before the tank can be mounted reliably.
Will the Hardware Fit Your Tank and Bowl?
Verify the complete assembly before installing any new fasteners. A bolt that fits through the hole can still be too short, too long, or paired with an undersized washer.
Matched Parts and Hand-Tool Requirements
You will generally need hand wrenches or sockets, towels, a bucket, a sponge, good lighting, and a padded surface for the removed tank. Seized bolts may require a controlled cutting tool and a way to shield nearby porcelain.
The tools needed for toilet installation and replacement can help you plan for access before disassembly.
Confirm that you can:
- Hold each bolt steady while loosening its nut.
- Reach every nut without leaning heavily against the tank.
- Disconnect the supply without twisting the shutoff or fill valve.
- Lift the tank straight up.
- Inspect beneath the tank during leak testing.
Use hand tools for final tightening. Do not use a drill or impact driver on tank bolts.
Bolt Length and Thread Engagement Limits
Consider the entire bolt path: the tank floor, any retaining hardware specified by the kit, the bowl deck, the lower washers, and the final nut. The bolt must provide enough usable thread for the nut to engage securely.
A bolt can also be excessively long. Check whether its tail will contact the bowl casting, wall, shutoff valve, or supply connector. If the supplied bolts are incompatible, obtain the correct hardware rather than omitting washers or improvising the stack.
Start each nut by hand. If a nut does not turn easily, check for cross-threading, damaged threads, or an angled bolt before using a wrench.
Hole Geometry and Washer Coverage Requirements
Each bolt should hang squarely through the tank hole. A tilted bolt can pull the rubber washer off-center and create a leak path beneath the bolt head.
Before assembly, place the new washer over the hole and confirm that it covers the opening on every side. Clean away mineral deposits and old sealant carefully so the washer can lie flat. Do not scratch, chip, grind, or enlarge the porcelain hole.
If the hole is too irregular or damaged for full washer contact, do not try to overcome the problem with extra tightening.
Gasket Size and Outlet Alignment Limits
The large tank-to-bowl gasket fits around the flush-valve outlet beneath the tank. It must match the outlet’s size and profile and seat against the bowl inlet as intended.
Dry-check its fit before mounting the tank. If the gasket is tapered or otherwise directional, install it in the orientation shown in the toilet or kit instructions.
When the tank is lowered, the outlet should align with the bowl inlet without using the bolts to drag it into position. Misalignment suggests an incorrect gasket, an off-center tank, or an incompatible tank-and-bowl combination.
Remove Old Bolts Without Damaging Porcelain
Working Shutoff Required Before Disassembly
Close the shutoff valve, flush the toilet, and hold the flush mechanism open to drain as much water as possible. Remove the remaining water with a sponge and bucket.
Watch for water entering the tank. If it begins refilling, the shutoff is not providing reliable isolation. Do not continue with the supply disconnected.
Supported Tank Lifting Requires Clear Space
Disconnect the supply line while preventing the fill-valve body from rotating. Support the tank as the nuts are loosened.
Release tension gradually across all bolts instead of removing one side while another remains tight. Once the hardware is free, lift the tank vertically. Avoid aggressive rocking against the bowl if the old gasket is stuck.
Place the tank on a padded, stable surface. After removal, clean and inspect the underside, the central outlet, and every bolt hole.
Controlled Cutting for Seized Fasteners
If a nut cannot be loosened, protect the porcelain before cutting. Use a tool that can be controlled in the available space, and avoid striking, prying against, or overheating the tank.
Stop if the tool cannot be positioned without contacting porcelain. A seized fastener is a reason to change the removal method, not apply more side force.
Chipped Holes End the Repair Attempt
Old washers can conceal damage. Once the bolts are out, inspect both sides of every opening.
Do not reinstall the tank if you uncover a crack, a fresh chip, or a missing sealing edge that prevents complete washer contact. Sealant and larger washers are not dependable substitutes for intact structural porcelain.
How to Install Toilet Tank Bolts Correctly
The exact stack can vary by toilet and hardware system. Keep the supplied diagram and follow model-specific instructions where they differ from the common arrangement below.
Rubber Washers Seal Directly Against Porcelain
For the common through-bolt arrangement, the wet-side sequence starts with:
- Bolt head
- Rubber sealing washer
- Tank floor

The rubber washer sits directly against the porcelain inside the tank. Do not place a metal washer between the rubber seal and the tank.
Insert the bolts squarely and center every rubber washer. Do not apply putty or sealant unless the toilet or hardware instructions specifically require it. Added sealant can conceal poor washer contact without correcting the fit.
Metal Washers Stay Outside the Water
In the common arrangement, metal washers and retaining nuts remain outside the water-holding area. The full stack may be:
- Bolt head
- Inner rubber washer
- Tank floor
- Optional external retaining washer and nut, if specified
- Bowl deck
- Lower rubber washer, if specified
- Metal load-spreading washer
- Final nut or wing nut
The metal washer spreads the nut’s load. It does not replace a required rubber washer. If the toilet or kit uses a different proprietary sequence, its official instructions override this generic stack.
Tank-to-Bowl Gasket Must Sit Centered
Install the new gasket around the flush-valve outlet in its specified orientation. Make sure it is fully seated and centered before lifting the tank.
Lower the tank vertically while guiding the bolts through the bowl holes. Do not drag the gasket across the inlet or use the bolts to pull a misaligned outlet into place.
Center the tank from the front and sides, then start every nut by hand before tightening any of them.
Alternating Tightening Maintains Even Compression
Apply gentle downward pressure over the center of the tank while taking up the slack. Tighten one nut slightly, then move to the opposite side. For a three-bolt system, work around the pattern in short, even steps.

As you tighten, confirm that:
- The tank remains centered.
- The gasket compresses evenly.
- The tank does not twist.
- One corner is not contacting before the others.
- No washer slips off-center.
- Bolt resistance increases at a similar rate.
Stop and reseat the tank if the gasket bulges heavily on one side or one bolt becomes tight while another remains loose.
How Tight Is Safe for Porcelain?
There is no universal torque value for every toilet tank bolt. Tank geometry, gasket material, and mounting design vary. Follow the toilet manufacturer’s tightening method or limit when one is provided.
Without model-specific torque instructions, use a small hand wrench and make controlled, alternating adjustments. Stop when the gasket is evenly compressed, the tank is seated as designed, and it remains stable under normal light pressure.
Do not interpret “hand-tight” as finger-tight only, but do not apply a long, forceful wrench pull. The correct endpoint is determined by alignment, stability, gasket compression, and the manufacturer’s intended contact pattern.
Manufacturer Limits Override Generic Tightening Advice
If the toilet’s instructions specify a tightening sequence, contact pattern, or acceptable gap, follow that guidance. Do not continue tightening merely because another toilet you have installed made full porcelain contact.
Resistance that rises sharply, visible tank twisting, or hard contact at only one corner are signals to stop.
What If the Tank Still Rocks?
Determine whether the tank or the entire toilet is moving. If the bowl shifts at the floor, the tank bolts cannot correct the underlying problem.
If the bowl is stable but the tank rocks, inspect for:
- An off-center or incorrect gasket
- Uneven bolt adjustment
- A trapped object or old gasket material
- Incompatible tank and bowl geometry
- Damaged contact surfaces
- Insufficient or uneven thread engagement
Do not keep tightening until the movement disappears regardless of resistance. Drain and reseat the tank if moderate, balanced tightening does not stabilize it.
Leveling Cannot Correct Bowl or Floor Problems
Judge tank alignment relative to the bowl and the toilet’s intended assembly. The tank bolts are not leveling screws.
Pulling one side down to compensate for an unstable bowl, uneven floor, or mismatched porcelain creates uneven gasket compression and concentrated stress. Correct the underlying condition instead.
Power Tools Create Uncontrolled Crack Risk
Do not use a drill or impact driver for final tightening. Power tools can apply force too quickly to detect changing gasket resistance or uneven porcelain contact.
Use hand tools so you can alternate between bolts, monitor alignment, and stop as soon as the tank seats correctly.
What Fails After Installation?
Is the Leak Really From the Bolts?
Water found near a bolt may have originated elsewhere. Common paths include:
- A bolt washer below the tank’s standing waterline
- The central tank-to-bowl gasket
- The supply connection
- The fill-valve connection
- Condensation on the tank exterior
Water from the central gasket can travel along the bowl deck and drip near a bolt. Identify the source before tightening anything.
Dry-Surface Flush Tests Separate Leak Paths
Dry the tank exterior, bowl deck, bolt ends, supply connection, and floor. Dry tissue placed near suspected areas can help reveal a small amount of water.
Reconnect the supply without placing side tension on the fill-valve connection. Open the shutoff gradually and allow the tank to fill. Before flushing, inspect the bolt holes, supply connection, and underside of the tank.
A leak that develops while the full tank stands may indicate a seal below the waterline. Water that appears mainly during flushing is more likely associated with the central tank-to-bowl connection.
Perform several controlled flushes and trace any water upward to its highest visible point. Do not assume the nearest bolt is the source.
Settled Gaskets Require Safe Reinspection
After the toilet returns to service, recheck the bolt areas, supply connection, and tank stability. Rubber parts may settle after installation.
If a small adjustment is necessary, preserve the alternating pattern and tank alignment. Repeated loosening or seepage indicates a fit or seating problem rather than a need for progressively more force.
Cracks or Persistent Rocking End the Repair
Stop using the toilet if a crack appears, the tank develops persistent movement, or a leak returns after the hardware has been correctly reseated.
Continuing to tighten damaged or incompatible components can worsen the problem. Replace the damaged component or obtain qualified help before returning the toilet to service.
Before You Buy
- Confirm that the toilet has a separate tank and bowl.
- Verify that the tank and bowl are a matched pair.
- Inspect every bolt hole and the tank outlet for cracks or chips.
- Match the number and spacing of bolts.
- Confirm that the rubber washers fully cover the tank holes.
- Match the central gasket to the flush-valve outlet and bowl inlet.
- Verify bolt length through the complete required stack.
- Check clearance for nuts, bolt tails, plumbing, and tools.
- Make sure every nut can be reached for alternating tightening.
- Confirm that the shutoff valve stops the water.
- Inspect the supply connector for corrosion, stiffness, and kinks.
- Prepare a padded place for the removed tank.
- Use hand tools rather than a drill or impact driver.
- Keep the toilet or hardware instructions available.
- Plan both standing-water and repeated-flush leak tests.
Frequently Asked Questions
How do you install bolts between a toilet tank and bowl?
Place each bolt head over a rubber sealing washer inside the tank, with the rubber directly against the porcelain. Guide the bolts through the bowl, install the specified lower washers and nuts, and tighten in small alternating steps. Keep the central gasket centered throughout the process.
How tight should toilet tank bolts be?
Tighten them only enough to compress the gasket evenly and stabilize the tank in its intended position. There is no universal torque for all toilets. Follow model-specific instructions and stop if the tank twists, resistance rises sharply, or one corner contacts before the others.
Why are my new toilet tank bolts leaking?
The inner washers may be off-center, undersized, damaged, or installed in the wrong order. The leak may also be traveling from the central gasket or supply connection. Dry every surface and compare what happens while the tank stands full with what happens during a flush.
Can I replace toilet tank bolts without removing the tank?
It may be physically possible in limited cases, but removing the tank provides better access to clean and inspect the holes, verify washer coverage, and replace the central gasket. Plan to remove it if the bolts are seized, the seals are old, or the source of the leak is uncertain.
What should I do if a toilet tank bolt will not come out?
Stop applying side force if the bolt spins or the nut will not move. The fastener may require controlled cutting with the porcelain shielded from the tool. If there is insufficient access to cut safely, arrange professional removal rather than prying against the tank or bowl.


Leave a comment
This site is protected by hCaptcha and the hCaptcha Privacy Policy and Terms of Service apply.