


How to Set Up and Install Your HOROW T38 Smart Toilet at Home
Ready to upgrade your bathroom with the HOROW T38? This installation guide helps you set up your new smart bidet toilet step by step. You can handle the process yourself, but you’ll need to work with both plumbing and electrical connections. Before you start, grab your user manual and make sure you have all the tools you need. Many users run into leaks or smart feature glitches during installation, so double-check connections and settings for smooth operation.
Tip: You’ll want a second person to help lift the toilet. This keeps you safe and prevents damage to your new technology.
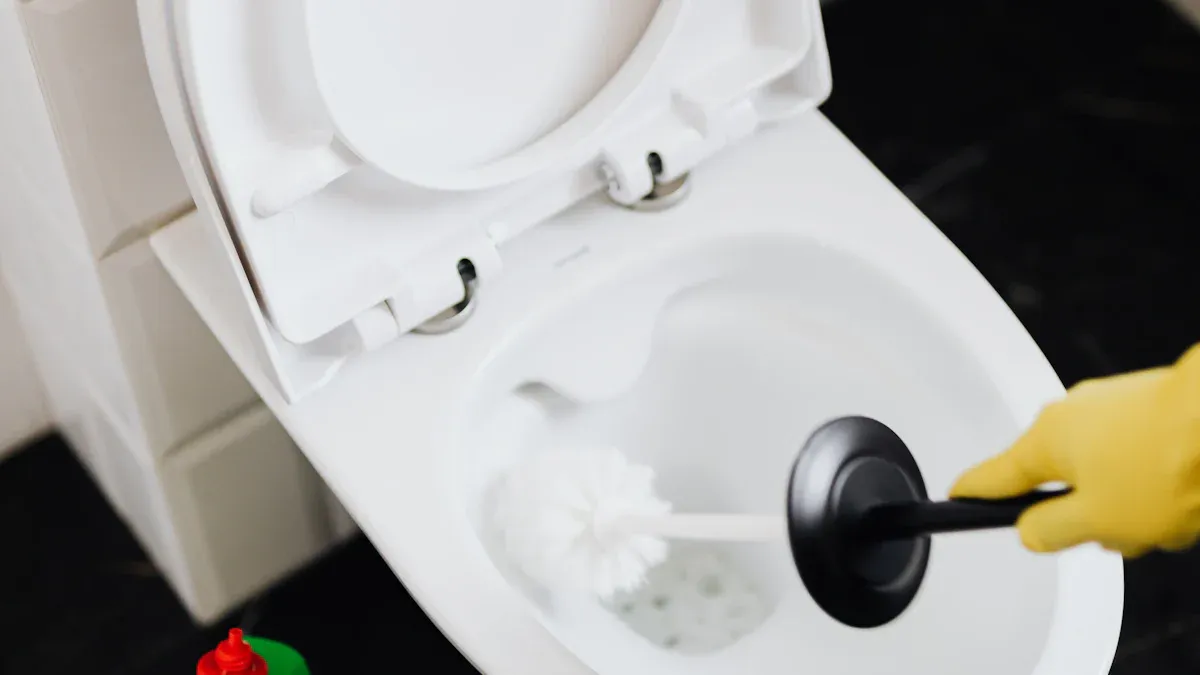
A clean toilet means better hygiene for your home!
Key Takeaways
-
Look at all the parts before you start. This helps you see if anything is missing or broken. Missing or broken parts can slow down installation.
-
Measure your bathroom space first. Check the rough-in distance too. This makes sure the HOROW T38 will fit right. You will not need extra plumbing work.
-
Turn off the water before you begin. Turn off the power too. This keeps you safe when you work with plumbing and wires.
-
Use the mounting hardware that comes in the box. Follow the instructions step by step. This helps you attach the toilet tightly. It also stops leaks.
-
Try all the smart features after you finish installing. Clean and take care of your toilet often. This helps your toilet work well for a long time.
Unboxing
Parts Check
When you open your HOROW t38 box, excitement kicks in. You want to make sure everything you need for installation is right there. Start by laying out all the parts on a clean towel or mat. This helps you see each piece clearly and keeps them safe from scratches.
Here’s a quick checklist to guide you:
-
Main toilet unit
-
Seat and lid (usually attached)
-
Remote control and wall mount
-
Water supply hose
-
T-valve connector
-
Mounting bolts and covers
-
Floor flange and wax ring (if included)
-
User manual and quick start guide
Tip: Keep the packaging until you finish the setup. If you find a missing part, you might need to return or exchange the toilet.
Check off each item as you go. If you notice something missing, contact customer support before you start the installation. This saves you time and frustration later.
Damage Inspection
Now, take a close look at every part. Look for cracks, chips, or dents on the toilet body. Run your hand along the edges to feel for rough spots or sharp areas. Inspect the seat and lid for scratches or broken hinges. Check the remote for any loose buttons or missing battery covers.
If you spot any damage, snap a few photos with your phone. This makes it easier to explain the problem to the seller or manufacturer. Do not try to install a damaged toilet. You want your HOROW t38 to work perfectly and look great in your bathroom.
A careful inspection now means fewer headaches later. Once you confirm everything looks good, you’re ready to move on to the next step.
Bathroom Prep
Area Measurement
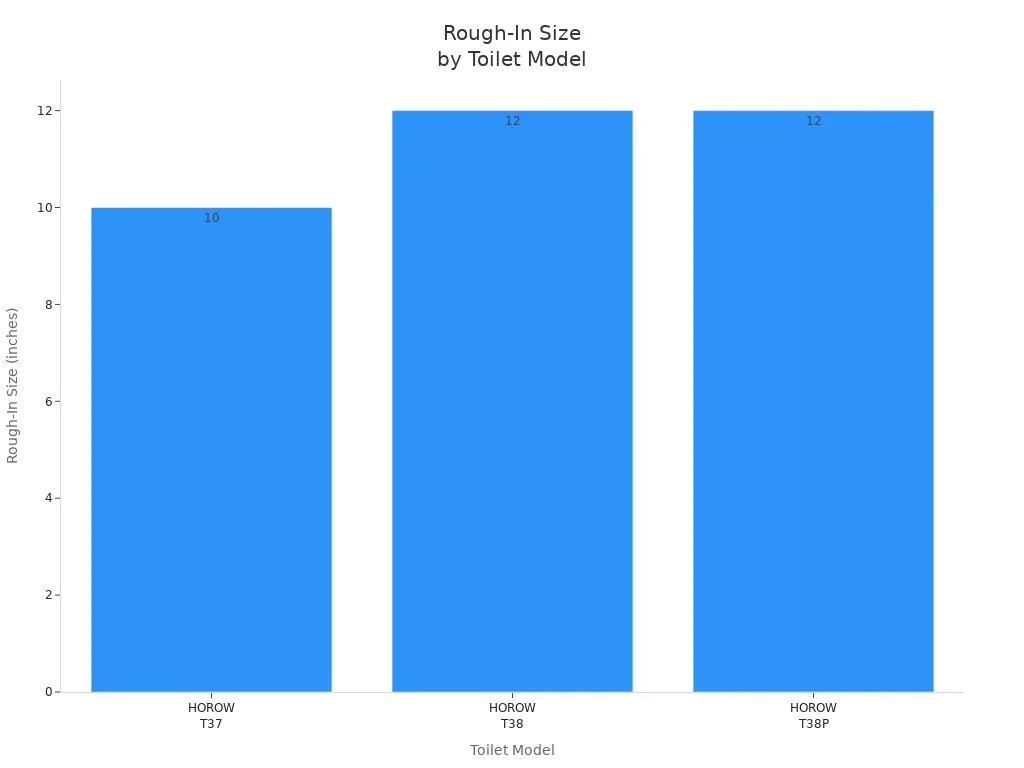
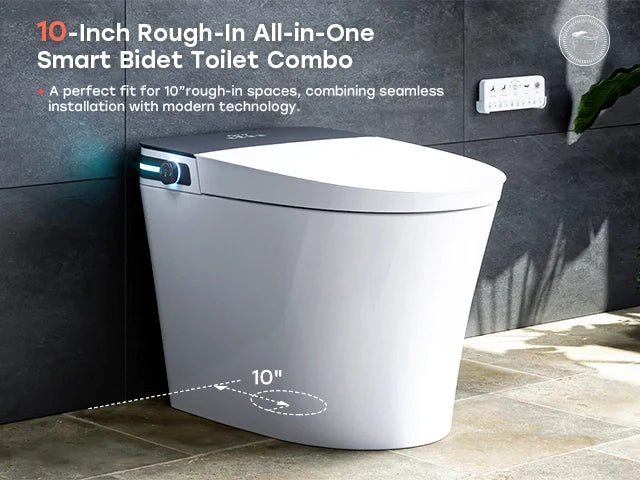
Before you bring your new HOROW t38 into the bathroom, you need to make sure the space fits. Grab a tape measure and check the distance from the wall to the center of the drain hole on your floor. This is called the "rough-in." The HOROW t38 works best with a 12-inch rough-in, which is standard in most homes.
Measure the width and depth of the spot where you want to place the toilet. Leave enough room on both sides so you can clean and move around easily. If you have shelves or cabinets nearby, make sure the lid can open all the way. Write down your measurements. Double-check them before you move the toilet into place.
Tip: If you find your rough-in is not 12 inches, you may need an adapter or help from a plumber.
A quick checklist for your area measurement:
-
Wall to drain hole: 12 inches
-
Enough space for the toilet sides
-
Room for the lid to open
-
No obstacles for water and power lines
Water & Power Off
Safety comes first when you install a smart toilet. Before you do anything else, turn off the water supply to your old toilet. Look for the shut-off valve near the wall. Turn it clockwise until it stops. Flush the old toilet to empty the tank and bowl.
Next, unplug any electrical outlets near the toilet area. If your bathroom has a dedicated circuit for the toilet, switch it off at the breaker box. This keeps you safe while you work with wires and water.
Note: Never work on plumbing or electrical parts when the power or water is still on. Take your time and double-check everything.
Now your bathroom is ready for the next step. You can move forward with confidence!
HOROW T38 Installation
Toilet Placement
You’re ready to bring your new horow t38 into the bathroom. Before you do, check the rough-in measurement one more time. The horow t38 is designed for a 12-inch rough-in, which matches most homes. This means you don’t need to change your plumbing. The compact design fits well in smaller bathrooms, and the elongated bowl gives you extra comfort.
You’ll want two people for this step. The toilet is heavy and awkward to move alone. Lift it together and gently set it down, lining up the drain hole with the flange on the floor. Make sure the back of the toilet sits flush against the wall. If you have a tight space, check that the seat and lid can open all the way.
Tip: Always lift with your legs, not your back. This keeps you safe and protects your new smart toilet.
Mounting Hardware
Now it’s time to secure the toilet. The horow t38 comes with all the hardware you need for installation. Lay out the bolts, plastic brackets, and wax ring. You’ll also need a few hand tools and some Teflon tape for sealing.
Here’s a quick list of what you’ll use:
-
Mounting bolts and covers
-
Plastic brackets for flange bolts
-
Long threaded screws
-
Wax ring (if included)
-
Hand tools (wrench, screwdriver)
-
Teflon tape
Place the wax ring on the flange. This creates a watertight seal. Slide the plastic brackets onto the flange bolts. Lower the toilet straight down so the bolts go through the holes in the base. Angle the screws downward to catch the brackets, then tighten them with your wrench. Don’t overtighten—just make sure the toilet feels stable and doesn’t rock.
Note: If you feel any movement, double-check the brackets and screws. A secure fit prevents leaks and keeps your toilet working well.
Floor Flange Drilling
Sometimes, you need to drill new holes for the mounting blocks. Check the base of the toilet and the flange on your floor. If the holes don’t line up, mark the spots where you need to drill. Use a masonry bit if you have a tile floor. Drill slowly and carefully to avoid cracking the tile.
Once you finish drilling, clean up any dust. Set the mounting blocks in place and attach them with screws. This step locks the toilet down and keeps it from shifting. Make sure everything lines up before you tighten the screws.
Callout: The horow t38 offers flexible rough-in sizes, so you can install it in most bathrooms without extra work. Just follow the instructions and check your measurements.
After you finish these steps, your toilet is secure and ready for the next part of installation. You can move on to connecting the plumbing and power, and soon you’ll enjoy all the smart features your new toilet offers.
Plumbing & Electrical
T Valve Connection
Now that your HOROW t38 is in place, you can connect the T valve. This small part lets you split the water supply between the toilet and the bidet functions. Find the shut-off valve on your wall. Remove the old water line from the valve. Attach the T valve to the shut-off. Make sure it fits snugly. Use your hand to tighten first, then finish with a wrench. Do not overtighten. The T valve should point up and to the side so you can reach both outlets. One side connects to the toilet tank, and the other goes to the bidet inlet.
Tip: Wrap the threads with Teflon tape before you screw on the T valve. This helps prevent leaks.
Water Line Attach
Next, you need to connect the water lines. Take the hose that came with your HOROW t38. Attach one end to the T valve and the other to the bidet inlet on the toilet. Hand-tighten both ends, then give each a gentle turn with a wrench. Check that the hose does not kink or twist. If you see any bends, adjust the hose so water flows smoothly. Once everything is tight, turn on the water supply. Watch for leaks around the T valve and hose connections. If you spot a drip, turn off the water and tighten the fittings.
Callout: A steady water supply is key for the bidet spray and other smart features.
Power Supply Setup
The HOROW T38 needs electricity for its smart features. Before you plug in the toilet, check the outlet. You need a GFCI outlet close to the toilet, no more than 4 feet away. This type of outlet protects you from shocks. Never use an extension cord. Plug the toilet’s three-prong plug into the GFCI outlet.
Here’s a quick table of what you need for safe power:
|
Electrical Component |
Requirement/Specification |
|---|---|
|
Voltage |
|
|
Frequency |
60 Hz |
|
Outlet Type |
GFCI (Ground Fault Circuit Interrupter) |
|
Amperage Required |
10 to 15 amps |
|
Power Consumption |
600W – 1400W |
|
Plug Type |
3-prong grounded plug (Type B) |
⚡ Safety First:
Turn off the power at the breaker before you start.
Use a voltage tester to make sure the outlet is off.
Always follow local codes and the National Electrical Code.
If you feel unsure, call a licensed electrician.
Once you finish these steps, your toilet and bidet are ready for action. You can now enjoy all the smart features of your HOROW t38 with peace of mind.
Bidet Toilet Combo Features
Remote Control Setup
The HOROW t38 has a remote control. This makes using your bidet toilet combo simple and fun. First, open the battery compartment on the back of the remote. Put in the batteries from the box. Match the plus and minus signs. Close the cover until you hear a click. You can put the remote on the wall or keep it nearby. The remote lets you use all the smart bidet toilet features without touching the toilet.
Tip: For easier access, mount the remote on the wall within reach of your toilet. This keeps it secure and makes it simple to adjust settings anytime you need.
The easy-to-use control panel and remote help you change settings for your hygiene. You can adjust the water pressure and pick the spray type. You can also set the water temperature. The remote turns on the mood light, heated seat, and hands-free dryer.
Smart Function Test
Now you can test the smart features of your bidet toilet combo. Sit down and try the motion-activated lid and seat. The lid opens and closes by itself. Use the remote to start the bidet spray. Pick front or rear wash. Try the oscillating or bubble wash. You can also switch between warm and cool water. The self-cleaning nozzle uses special hygiene technology to stay clean.
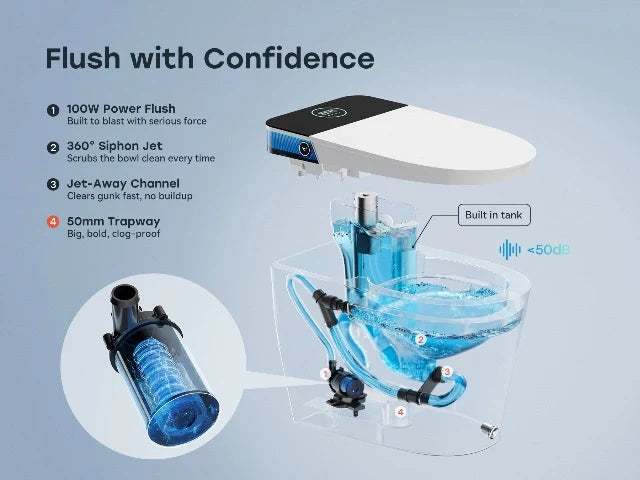
Check the heated seat. It gets warm quickly and saves energy with smart temperature control. Try the built-in dryer for hands-free drying. The deodorizer turns on after each use to keep the bathroom fresh. The mood light has four colors to set the mood. Test the dual-flush system and see the strong 360-degree flush. It works well even with low water pressure.
-
Key functions you can test:
-
Built-in bidet with different wash options
-
Heated seat that saves energy
-
Automatic flush and deodorizer
-
UV sterilization for better hygiene
-
The HOROW t38 bidet toilet combo gives you comfort, smart technology, and good hygiene. Enjoy a new level of cleanliness with these smart features.
Troubleshooting
Leak Check
Leaks can happen during or after you install your HOROW t38. You want to catch them early. Start by looking around the base of the toilet and the water connections. If you see water pooling, check the T valve and water line. Tighten any loose fittings with a wrench, but do not overtighten. Sometimes, leaks come from the wax ring under the toilet. If you notice water on the floor, you may need to reset the toilet and replace the wax ring.
-
Common leak spots:
-
Water supply hose
-
T valve connection
-
Base of the toilet
-
Tip: Place a dry paper towel under each connection. If it gets wet, you know where the leak is.
Electrical Issues
The HOROW t38 needs power for its smart features. If the bidet or seat heater does not work, check the power cord first. Make sure it is plugged into a GFCI outlet. If the outlet has a reset button, press it. Sometimes, a tripped breaker causes the problem. Go to your breaker box and flip the switch off and on again. If the toilet still does not power up, try another device in the same outlet to see if the outlet works.
-
Quick electrical checklist:
-
Is the power cord plugged in?
-
Is the GFCI outlet working?
-
Did the breaker trip?
-
Are all connections secure?
-
⚡ Always turn off the power before checking wires or outlets.
Feature Problems
You might notice some features do not work as expected. Maybe the toilet does not flush, or the bidet spray feels weak. These are common issues with the HOROW t38, but you can fix most of them yourself.
-
If the toilet keeps running, check the fill valve and flapper. Adjust or replace them if needed.
-
If the bidet spray is weak, clean the nozzle using the self-cleaning function. For stubborn clogs, brush the nozzle or soak it in vinegar.
-
If the water flow is low, clean or replace the filter.
-
If the bidet does not work at all, check the power and make sure the circuit breaker is on.
-
If flushing stops halfway or does not start, review the installation steps or watch the manufacturer’s tutorial video.
Most repairs need only basic tools like a wrench or screwdriver. The HOROW t38 uses durable parts, so you can handle many fixes without calling a plumber.
Maintenance
Cleaning Tips
Keeping your HOROW t38 fresh helps you enjoy better hygiene every day. You want to clean the nozzle and seat often. Here’s a simple way to do it:
-
Use the remote to extend the nozzle.
-
Unplug the power cord for safety.
-
Gently scrub the nozzle with a soft brush and a mild cleaner.
-
Rinse the nozzle with clean water and dry it.
-
Use the remote to retract the nozzle.
For the rest of the toilet, wipe the seat and lid with a damp cloth and a gentle soap. Avoid harsh chemicals. They can damage the finish and affect hygiene. Always dry surfaces after cleaning to prevent water spots.
Tip: Clean the nozzle at least once a week to keep everything working smoothly.
Regular Checks
You want your smart toilet to last. Regular checks help you spot problems early. Here’s what you should do:
-
Clean the bidet nozzles often.
-
Check the filters and replace the deodorizer when needed.
-
Use a surge protector to protect the electronics.
-
Look for leaks or worn seals.
The HOROW t38 uses a smart water system. You should check the fill valve and float system every few months. This keeps water levels right and helps prevent running water. If you notice anything odd, fix it before it becomes a bigger issue.
|
Maintenance Task |
How Often |
|---|---|
|
Weekly |
|
|
Check filters |
Monthly |
|
Inspect for leaks |
Monthly |
|
As needed |
Professional Help
Sometimes, you need an expert. If you plan to install, repair, or do any electrical work on your HOROW t38, call a licensed plumber or electrician. This keeps your warranty safe and protects your home. Never try to fix electrical parts or remove the lid by yourself. If you see leaks you can’t stop, or if the toilet stops working, contact HOROW Customer Service or a qualified professional.
Note: Always unplug the power and turn off the water before any repair or maintenance.
Taking care of your HOROW t38 means you get great hygiene and comfort for years to come.
You now know how to install your HOROW t38. You measured your space and set up the toilet. You tested each feature to make sure it works. This smart bidet toilet gives you comfort and new technology at home. Keep your bidet toilet combo clean for the best results. Check it often to make sure everything works right. If you have a problem you can’t fix, get help from customer support. You can call or email them, or look at the warranty and help pages for answers.
-
Customer support: support@horow.com, +1 209 200-8033 (Mon-Fri, 6AM-11AM PST)
-
Warranty: 1-year coverage, more info on the official site
FAQ
How do I reset the HOROW t38 if it stops working?
Unplug the HOROW t38 for 30 seconds, then plug it back in. This simple reset often fixes minor glitches. If the problem continues, check the power outlet or contact customer support.
Can I use regular toilet paper with the HOROW t38?
Yes, you can use regular toilet paper. The HOROW t38 has a built-in bidet, so you may find you need much less paper for drying.
What should I do if the bidet spray feels weak?
Check the water supply valve and make sure it is fully open. Clean the nozzle using the self-cleaning function. If the spray still feels weak, inspect the filter and hose for blockages.
Is the HOROW t38 safe for kids and seniors?
Absolutely! The HOROW t38 has safety features like a slow-closing lid and temperature controls. The remote is easy to use, so both kids and seniors can enjoy the smart functions safely.

Leave a comment
This site is protected by hCaptcha and the hCaptcha Privacy Policy and Terms of Service apply.