


A tub overflow drain is the small opening near the tub rim that prevents overfilling by routing extra water into the waste-and-overflow plumbing. When it leaks, clogs, or doesn’t match your tub depth, you can end up with slow drainage, recurring odors, or—worst—water damage behind walls or on the ceiling below. This guide starts with the fastest answers (what it is, what to buy, what fails most), then moves into materials, stopper mechanisms, sizing and compatibility, step-by-step installation, and troubleshooting. You’ll also get real-world installer-style case studies, simple maintenance intervals, and a buyer checklist so you can choose the right assembly with confidence.
What a Tub Overflow Drain Does
Before diving into the nuts and bolts of how a tub overflow drain works, it helps to understand why it exists in the first place. Think of it as your tub’s safety net: it keeps water from spilling all over your bathroom if you get a little too relaxed with the faucet. In the sections below, we’ll break down where it drains, how it connects to the main plumbing, and the parts that make the whole system tick.
Quick definition: what it is and where it drains
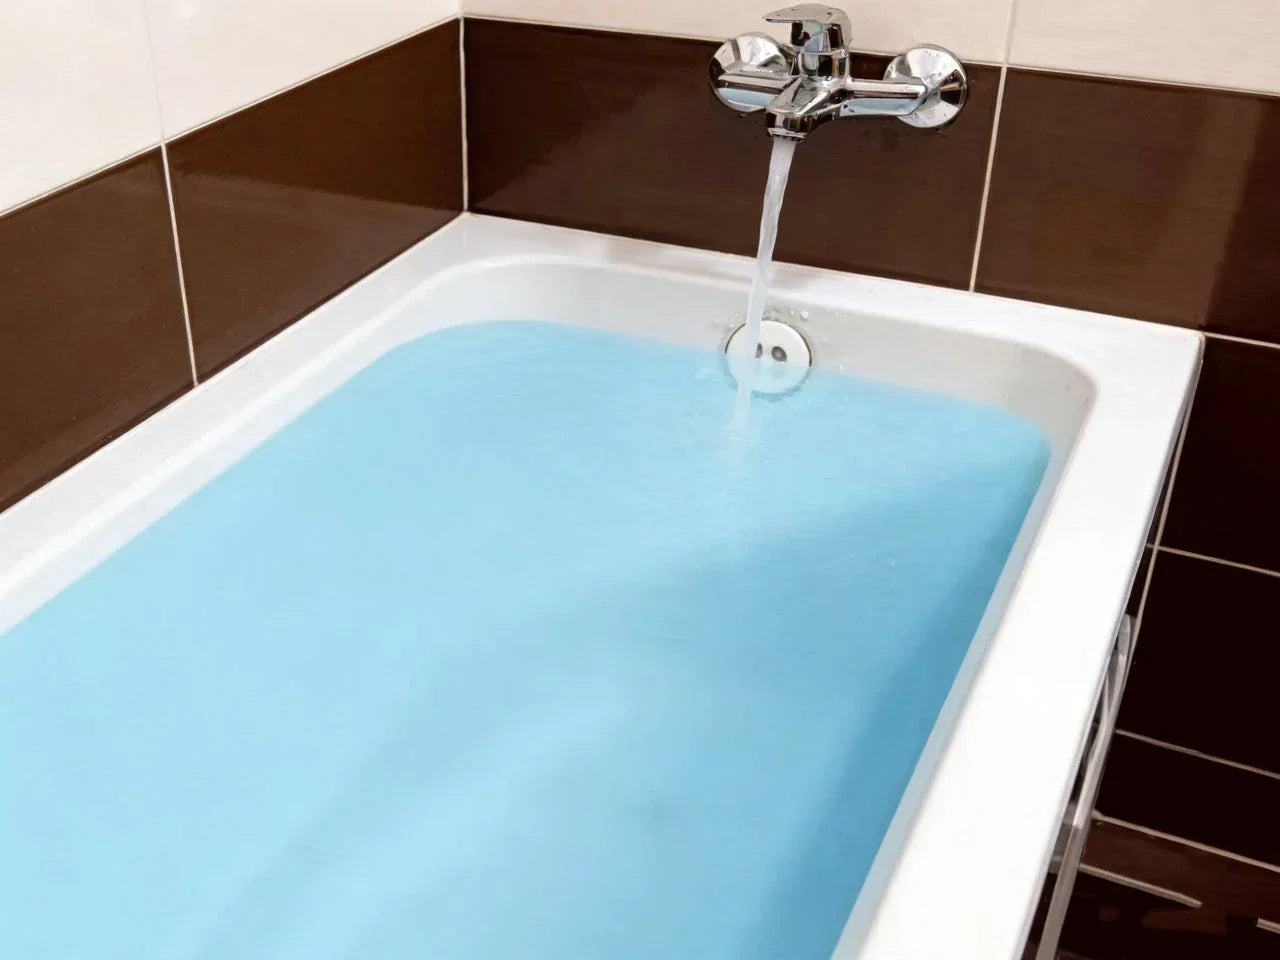
Your bathtub has two main openings: the tub drain at the bottom and the bathtub overflow opening on the tub wall near the top. That upper opening is the overflow drain. It’s there for one reason: when the water level rises too high—maybe you get distracted while filling the bathtub — it gives water a safe path out before it spills onto the bathroom floor.
Where does the bathtub overflow drain to? It drains into the same plumbing system as the main tub drain. Inside the wall or under the tub, an elbow connects to the overflow, leading from the top opening to a tee fitting that also connects to the drain at the bottom. From there, wastewater flows through the waste arm into the P-trap, then onward to the home’s drainpipe and sewer or septic system.
How the overflow elbow connects to the main drain
To put it simply, the overflow is a secondary drain that ties into the main drain line. When water enters the overflow opening, it runs down the overflow pipe, into a tee, and then joins the flow from the tub’s bottom drain. The main drain is also connected to the overflow pipe via a tee fitting, so both paths end up at the P-trap.
If you have ever wondered how does a bathtub drain work, think of it as two inlets feeding one outlet. The lower drain handles normal draining. The upper overflow steps in when the tub water gets too high.
Key parts
A typical waste-and-overflow assembly includes the bath drain, overflow elbow, gasket, and tee that work together to manage water flow.
-
Overflow plate (the cover you see inside the tub)
-
Gasket (a rubber seal behind the overflow plate)
-
Overflow elbow (the curved fitting behind the tub wall)
-
Tee (joins the overflow line and the main drain line)
-
Shoe drain (the drain body under the tub bottom)
-
Waste arm (pipe that runs to the trap)
-
Trap / P-trap (holds water to block sewer gas)
Where it sits on most tubs
On many tubs, the overflow opening is about 1.5–2 inches below the rim. That placement controls the level of water, preventing overflow while allowing a comfortable fill.
If a tub has no overflow (some deep soaking designs do), you lose that safety margin. If the faucet keeps running, the tub can overtop the rim. Water can soak the floor, slip under baseboards, and collect behind the walls of the tub. In older homes, that can mean stained drywall ceilings below, hidden rot, or mildew buildup that keeps coming back.
Most common failure points
When people search “tub overflow drain leaking,” these are usually the culprits:
-
The gasket behind the overflow plate isn’t centered or compressed evenly.
-
The overflow plate is slightly tilted, so the rubber seal never seats flat.
-
A trip-lever linkage is worn or the plunger doesn’t match the tub’s depth.
-
The kit is the wrong pipe size (common mismatch: 1 ½ inch vs 2 inch).
-
Old gaskets were reused, so the rubber seal can’t “bounce back” anymore.
If you are seeing water damage, the key point is to treat it as urgent. A slow drip behind the overflow plate can run for weeks before anyone notices.
Tub Overflow Drain Types (Stopper Mechanisms & How They Work)
Your overflow can be “just an overflow,” or it can also control the stopper. The mechanism you choose affects clog resistance, how easy it is to service, and how often it sticks.
Trip-lever overflow
A traditional overflow setup uses a trip-lever: the lever is on the overflow plate, and moving it raises or lowers a linkage inside the overflow pipe. That linkage moves a plunger that changes how water flows through the drain assembly.
This style can seal well, and it also acts like a strainer system because the linkage tends to catch hair and other debris before it reaches the trap. That sounds nice—until the linkage becomes the clog.
Trip-lever systems are also sensitive to sizing. Installers often report that small changes in rod length or plunger fit can cause sticking, poor sealing, or a stopper that never fully opens. In real bathrooms, “close enough” is not always close enough.
Lift-and-turn vs push-pull vs toe-touch
These stoppers sit at the drain opening at the bottom of the tub. The overflow opening is still there, but it doesn’t control the stopper.
People often choose these because they’re easy to understand. You can see whether the drain is open or closed, and you can replace the stopper without opening the wall.
Table: stopper mechanism comparison
| Stopper type | Seal quality | Clog resistance | Ease of repair | Typical cost (parts) |
| Trip-lever (lever on overflow) | High when correctly sized | Medium (can catch hair) | Medium (linkage service) | Medium |
| Lift-and-turn | Medium | Medium | High | Low–Medium |
| Push-pull | Medium | Medium | High | Low–Medium |
| Toe-touch | Medium | Medium | High | Low–Medium |
Which bathtub drain stopper type is most reliable?
In many homes, the most “reliable” is the one you can service quickly. A simple bottom-mounted stopper (like push-pull or toe-touch) often wins because it’s easy to replace when the rubber seal wears. A trip-lever can last a long time too, but only if the linkage matches the tub depth and stays clean.
If you hate mystery problems, ask yourself this: do you want to remove one stopper at the drain, or do you want to pull a long linkage out of the overflow pipe when it clogs?
Why does my trip-lever overflow keep sticking or not sealing?
A sticking trip-lever usually comes down to three issues. First, hair and soap buildup can thicken on the rods and inside the overflow channel, so the linkage drags. Second, mineral deposits can roughen the plunger and inner pipe. Third, the linkage length may be wrong, so the plunger is always half-engaged. If the lever feels “springy” or doesn’t hold position, check for a bent rod or a worn pivot at the faceplate.

Tub Overflow Drain Materials: PVC vs Brass vs Stainless
The hidden part of the overflow system matters just as much as the trim you see. Material choice affects service life, leak risk during installation, and how forgiving the fittings are if your rough-in is slightly off.
Material comparison for waste-and-overflow assemblies
Here’s a practical comparison for most homeowners deciding between plastic and metal.
Table: PVC vs brass vs stainless
| Material | Price range (parts) | Typical service life (est.) | DIY friendliness | Best use case |
| PVC (Schedule 40 style) | $20–$60 | 10–15 years | High (light, easy to cut) | Budget projects, rentals, quick repairs |
| Brass | $60–$180 | 20+ years | Medium (heavier, threaded joints) | Long-term reliability, frequent use |
| Stainless (often trim + some bodies) | $90–$250 | 15–25 years | Medium | Premium baths, finish longevity |
Numbers vary by water chemistry and how often the tub is used, but the pattern is consistent: plastic is easier and cheaper, while brass tends to last longer.
Finish and trim: chrome, brushed nickel, matte black
The trim is what you touch and clean. In busy bathrooms, harsh cleaners and constant wiping matter. Some finishes can peel if the coating is thin. If you want fewer surprises, choose a finish you can maintain with mild soap and water and avoid abrasive pads.
Also consider the screws and the overflow plate. A small rust stain under the faceplate can be the first hint that water has been sitting behind it.
When “universal” kits aren’t universal
Many kits are labeled “universal,” but tubs vary in three annoying ways:
-
Faceplate hole patterns (one-screw vs two-screw overflow plates)
-
Thread standards and slip-joint styles at the shoe drain
-
Tub thickness and the exact angle behind the overflow opening
If your existing overflow plate has two screws, don’t assume a one-screw replacement will line up without an adapter. And if your tub is cast iron or a thick composite, the “reach” of the parts can matter.
Standards and specs
According to IAPMO, exposed or accessible overflow and waste fittings must be made from approved materials such as seamless brass, PVC, or ABS, and meet UPC dimensional standards. For plastics and metals, you’ll often see references to material standards and code expectations. You don’t need to memorize them, but it helps to buy parts made to recognized specifications and to check local plumbing codes before changing pipe sizes.
Sizing, Compatibility & Codes
Most overflow problems that show up after a “simple replacement” start with one issue: the assembly doesn’t match the tub, the drain opening, or the plumbing pipe size.
Standard pipe sizing: 1.5" vs 2"
Most tubs use a 1.5-inch drain line. Some setups use 2-inch piping in parts of the run, especially in certain remodels or where local codes or existing plumbing dictate it. Size mismatches are common in retrofits, and they can create slow drains or joints that never stop weeping.
Table: quick sizing notes
| Item | Common size | Why it matters |
| Tub drain (waste outlet connection) | 1.5" | Matches most bathtub drains and traps |
| Overflow opening placement | 1.5–2" below rim | Sets max water level before overflow engages |
| Retrofit risk | 1.5" vs 2" mismatch | Can cause leaks or poor fit without proper adapters |
Tub style fit: alcove, drop-in, soaking, freestanding
An alcove tub (three walls around it) often hides plumbing behind a wall, so access is limited. A drop-in tub may have an access panel, which makes replacement far easier. Deep soaking tubs sometimes use a special overflow system, including an integral overflow channel built into the tub body.
Freestanding tubs can be tricky because the overflow and drain may need a custom kit that matches the tub’s design and exposed piping. If the drain is meant to be seen, alignment matters more, and shortcuts show.
Code reality check: overflows and exceptions
Does a bathtub need an overflow drain? In many places, yes—building codes often require a bathtub overflow for standard tub installations because it is a safety precaution that helps prevent flooding. Some deep soaking designs may have different rules or approved alternatives, and codes may require specific fill levels or special designs.
The safest move is simple: check local requirements before you remove an existing overflow or install a tub without one. Even if you never plan to overfill the tub, code is about “what could happen,” not just what you intend.

How to Install an overflow drain on a tub
If you’re searching how to install a tub overflow drain, the goal is not just “installed.” The goal is watertight under real use, including when the tub slowly fills and the water level rises to the overflow opening.
Most DIY installs take 1–2 hours if you have access. If the tub is boxed in with tile and no access panel, time and difficulty go up fast.
Tools and materials checklist (and where DIY goes wrong)
This is one of those jobs where the right small tool saves a lot of frustration.
Tools/materials (typical):
-
Screwdriver (for overflow plate screws)
-
Pliers or adjustable wrench
-
Tub drain wrench (for the drain flange)
-
Utility knife and rags (for cleanup)
-
PVC cutter or fine-tooth saw (if using plastic pipe)
-
Primer and cement (for PVC; follow product directions)
-
Sealant: plumber’s putty or silicone (choose based on tub and drain material)
-
Test plug (to hold water for a leak test)
Important callout: Avoid plumber’s putty on some plastics (especially ABS) because it can cause compatibility problems. When in doubt, use a silicone sealant that is labeled for kitchen/bath and compatible with plastics, and follow the drain manufacturer’s guidance.
Step-by-step: fastest path to watertight results
Use this sequence because it reduces rework. You dry-fit first, then seal and tighten once.
-
Prep and remove the old assembly Remove the overflow plate and drain stopper. If you’re doing a full replacement, remove the drain flange at the bottom. Clean old putty, grime, and mineral crust from the tub surface so the new seal can sit flat. If you’re learning how to remove overflow drain from bathtub parts safely, go slow—old screws strip easily, and forcing the plate can crack a fiberglass tub.
-
Set the shoe drain (bottom drain) first From inside the tub, apply a ring of sealant under the drain flange, then thread it into the shoe drain body below. Tighten snugly with the tub wrench, but don’t overdo it. Overtightening can squeeze out the sealant and warp gaskets.
-
Fit the overflow elbow and gasket Place the rubber seal (gasket) behind the overflow elbow so it seals against the tub wall. Align the elbow so its outlet points toward where the tee will sit. Then install the overflow plate and tighten the screws evenly, alternating between them so the gasket compresses evenly. Many leaks start because one screw is tight and the other is loose, which twists the plate.
-
Dry-fit the tee and pipe runs Before any cement, assemble the pipes dry. This is where you set the angles and confirm the pieces “want” to sit in place without being forced. Forced piping is a common reason joints crack later.
-
Cut, chamfer, and cement Cut pipes to length. Lightly chamfer (bevel) the cut ends so they slide into fittings smoothly. For PVC, use primer and cement as directed. For ABS, follow the instructions for ABS cement and do not use PVC primer unless the product calls for it. Hold each joint together for a few seconds so it doesn’t push back.
-
Leak-test above the overflow This step catches the leaks that cause ceiling stains. Plug the drain, fill the tub until the water level is above the overflow opening, and let it stand while you inspect from below (or from an access panel). Then drain it and watch joints under full flow.
Tolerance and compression: why small misalignment causes leaks
It’s important to ensure overflow gaskets seal by compression. If the overflow elbow is even slightly angled or the tub hole cut is a hair off, one edge of the gasket compresses more than the other. That leaves a thin path for water to sneak through. Sometimes the leak only appears when the tub is filled high and water pressure at the overflow rises. That’s why a fill test above the overflow matters.
Can you replace a tub overflow drain without access behind the tub?
Sometimes you can replace the overflow plate, gasket, and stopper from inside the tub. But replacing the full waste-and-overflow piping usually requires access—either from an access panel, a ceiling below, or an open wall behind the tub. If your tub is surrounded by tile with no panel and no access from below, you may be limited to small repairs unless you open a wall.

Troubleshooting & Common Tub Overflow Drain Problems
When something goes wrong, most people want one thing: the fastest safe fix. Start with symptoms and work backward.
Symptom → cause → fix matrix
Table: quick troubleshooting
| Symptom | Likely cause | Fix-first action |
| Leak behind overflow plate | Gasket misaligned, plate not even, cracked gasket | Remove plate, replace gasket, tighten screws evenly |
| Drips under tub only when tub is full | Shoe drain seal/gasket not seated, drain flange not sealed | Reseat shoe gasket; reseal flange; retighten carefully |
| Slow drain + gurgle | Clog in tee/trap, venting issue, hair and other debris | Clear hair; snake the tub drain; check venting if persistent |
| Odor from drain | Biofilm buildup, dry trap from non-use | Clean stopper and overflow channel; run water to refill trap |
How to snake a tub drain (without making a mess)
If the tub drains slowly, the clog is often a rope of hair mixed with soap. Remove the stopper first. On a trip-lever tub, you may need to remove the overflow plate and gently pull out the linkage to clear hair. Then feed a small drain snake into the drain opening or overflow opening (depending on access) and work it past the tee toward the P-trap.
After snaking, flush with hot water. Some homeowners also use baking soda and vinegar, followed by hot water, as a light cleanup. Just avoid mixing chemicals, and don’t rely on harsh drain cleaners as your first step because they can damage parts and create a splash hazard if you later open the drain.
When to replace the whole assembly vs just the gasket/stopper
If the leak is at the overflow plate, a new gasket and correct alignment often solves it. If the leak is at a glued joint, the shoe drain body, or a corroded metal section, replacing the full waste-and-overflow is usually safer than chasing drip after drip.
A simple rule: if you fix one seal and the next weak spot starts leaking, you’re near the point where a full replacement saves time and prevents water damage.
Mineral buildup and gasket aging: realistic intervals
In many homes, gaskets harden over time from heat, soap, and minerals in the water. A practical interval is to expect gasket replacement about every 3–5 years, sooner if the tub sees extensive use or hard water. If the overflow plate screws are rusty or the gasket looks flattened, treat that as a sign to replace it.
Why is water leaking from behind the overflow plate?
Most of the time, it’s either a tired gasket or uneven compression. The leak may only happen when the tub is filled high, because that is when water reaches the overflow opening and pressure increases behind the plate. Removing the plate, cleaning the surface, installing a new gasket, and tightening evenly fixes many cases.
Case Studies (Real-World Installs & What They Teach)
These are the situations that come up in real homes—the ones that don’t feel like a perfect diagram.
Retrofit: adding an overflow to an overflow-less tub
A homeowner I spoke with had a deep tub in an older home and no overflow. They loved the extra soak depth, but one night they left the faucet running while helping a child and came back to water spreading across the bathroom floor. That was the moment they realized why the overflow drain important — it prevented serious water damage.
The challenge was routing the new overflow pipe around framing and existing plumbing pipes without opening more wall than necessary. The fix was careful pre-fitting: they measured the tub depth, mapped the run to the tee, and chose fittings that allowed left/right adjustability. The lesson was simple: plan the pipe path first, because once you glue parts, “almost fits” becomes “doesn’t fit.”
New tub install: dry-fit overflow first, then test-fill
Another install involved a brand-new tub where everything looked perfect—until the first fill test. A tiny misalignment between the overflow elbow and the hole cut in the tub wall caused a slow drip that would have landed on the ceiling below. The installer loosened the faceplate, re-centered the gasket, and tightened the screws in small turns, alternating sides.
The lesson: gasket compression and alignment matter more than muscle. Overtightening can warp parts, but even tightening can make a clean seal.
Repair scenario: reusing old gaskets leads to repeat leaks
A common “quick fix” is reusing the old gasket because it looks fine. The problem is that rubber can take a set. Once it stays flattened for years, it may not spring back to seal a fresh connection. In this scenario, a homeowner replaced only the overflow plate, reused the gasket, and got a repeat leak within weeks. Replacing the gasket—and later the full waste-and-overflow assembly when another joint started weeping—ended the cycle.
The lesson: if you already have the assembly open, replacing a cheap gasket can prevent a costly water damage repair later.

Maintenance & Prevention
A bathtub overflow drain is easy to ignore because it sits quietly until it doesn’t. The best maintenance is light, quick, and regular.
A simple monthly/quarterly routine
Once a month, wipe the overflow plate and rinse it. Every few months, remove the stopper and clear hair from the drain opening. If you have a trip-lever, remove the overflow plate once in a while and pull the linkage carefully. You’ll often find hair wrapped around it. Cleaning that out prevents clogs and helps the lever move smoothly.
If you notice slow drainage, don’t wait. A partial clog holds gunk in place, and the smell can creep up even when the trap is working.
Trip-lever care: preventing sticking
Trip-lever parts can bind when coated with soap scum. Warm water and mild cleaner usually work. Avoid heavy oils or grease inside the drain because they can collect more debris and make clogs worse. If something needs lubrication, use only a product meant for plumbing and use it sparingly.
Long-term prevention: proactive gasket and trim replacement
If your tub gets daily use, plan on replacing wear items before they fail. A new gasket costs far less than repairing a wet floor or ceiling. If you see corrosion on the screws, cloudy trim that won’t clean up, or recurring leaks after tightening, it may be time to replace parts instead of chasing the same problem.
Buying Checklist + Quick Recommendations
Choosing a waste-and-overflow assembly feels simple until you’re holding parts in the aisle and wondering if they’ll match your tub. This is where a short decision path helps.
Buyer decision tree: choose what fits your tub and your access
If you have easy access under the tub (an access panel or open ceiling below), you can choose almost any standard kit that matches your sizes. If you have no access, prioritize serviceability from inside the tub—because you may not get a second chance without opening a wall.
Think through these questions before you buy:
-
Is your drain line 1.5 inch or 2 inch?
-
Is the overflow plate one-screw or two-screw?
-
Do you want a trip-lever, or do you want a simple stopper at the drain?
-
Is your tub alcove, drop-in, or freestanding?
-
Are you matching a specific finish, and will it be cleaned often?
Best-fit recommendations by scenario
For a budget repair or rental, a PVC-style assembly is often fine, especially when you can inspect it later and replace it if needed. For long-term reliability in a forever home, many homeowners prefer brass because it tends to handle time and frequent use better. For premium looks, stainless trim can hold up well when cleaned gently, but compatibility still comes first—pretty trim doesn’t help if the gasket doesn’t seat.
Final pre-install checklist
Before you start installing an overflow drain, confirm:
-
Drain size and overflow opening size
-
Tub thickness at both holes
-
Tub depth (important for trip-lever linkage length)
-
Left/right outlet direction and space around framing
-
Access plan (panel, ceiling below, or none)

FAQs
Where does the bathtub overflow drain to?
The bathtub overflow drain connects to the same plumbing as the main tub drain at the bottom. Basically, think of it as a safety backup. When water reaches the overflow opening, it travels down a pipe called the overflow elbow, then joins a tee fitting that merges with the main drain. From there, water flows through the waste arm into the P-trap, which holds a small amount of water to block sewer gas, and finally moves on to your home’s main drain line, sewer, or septic system. So, it’s not just an empty hole—it’s part of the system that keeps water moving safely without flooding your bathroom.
Does a bathtub need an overflow drain?
In most cases, yes. The overflow drain helps prevent flooding and protects floors and ceilings if you get distracted while filling it. Building codes in many areas even require it for standard tubs. Without it, deep soaking or custom tubs can still work, but you lose that safety margin. If you accidentally leave the water running, it can overflow, soak your floor, seep under baseboards, or even cause damage to ceilings below. So, even if you never plan to overfill the tub, having an overflow drain is like having a little insurance policy for your bathroom.
Can you replace the overflow in a bathtub?
Yes, you can replace it, but how much work depends on what exactly needs replacing. If it’s just the overflow plate or gasket, you can often do it from inside the tub—no wall access needed. But if you need to replace the whole waste-and-overflow assembly (the pipes behind the tub), you usually need access from a panel, the ceiling below, or the wall behind the tub. Some tubs, like drop-in or alcove tubs with access panels, make this easier. Freestanding tubs or tubs boxed in with tile may be trickier and might require more planning before starting the job.
Can I fill my tub past the overflow drain?
Technically, you can, but the overflow will start diverting water as soon as it reaches its level. If your faucet is running faster than the overflow can handle, or if the overflow pipe is partly clogged, water could still spill onto the floor. Covering or blocking the overflow opening is very risky—it defeats the purpose of that safety feature, and any water that escapes could damage your bathroom floor or walls. So it’s best to treat the overflow as your “safe max fill line.”
How to fix an overflowing drain in a tub?
If your tub is overflowing, it usually means the drain can’t handle the water fast enough. Start by checking the stopper for hair, soap, or debris and remove anything blocking it. For a trip-lever tub, you might need to pull out the linkage from the overflow to clear hair wrapped around it. If the problem persists, use a small drain snake to clear deeper clogs in the drain, tee, or P-trap. Make sure to flush with hot water afterward. Occasionally, a venting issue can also slow drainage, so if snaking doesn’t fully solve it, the vent may need inspection. Avoid harsh chemical cleaners as your first step—they can damage the plumbing and create hazards if you need to open the drain later.
How does a bathtub overflow drain work?
The overflow drain works like a backup drain. Your tub has a main drain at the bottom and the overflow near the top. When the water level rises too high, water enters the overflow opening, flows through the overflow elbow, and meets the main drain at a tee fitting. From there, it goes through the P-trap and into the home’s drain system. Some overflows also connect to a trip-lever stopper that lets you open or close the main drain from the overflow plate. This setup helps prevent flooding while still allowing normal draining through the main drain.
How to install a tub overflow drain?
Installing a tub overflow drain is a bit like solving a puzzle, but it’s doable for most DIYers if you have the right tools. Start by removing the old overflow plate and drain stopper, and clean the surfaces so gaskets can sit flat. Install the shoe drain (bottom drain) first with a proper sealant. Next, fit the overflow elbow with a gasket behind the plate, align it toward the tee, and tighten screws evenly to avoid leaks. Dry-fit all pipe runs first to ensure angles match. Cut, chamfer, and cement pipes carefully if using PVC or ABS. Finally, do a leak test by plugging the drain and filling water above the overflow level, checking from below or an access panel. Small misalignments or uneven gasket compression are the most common reasons leaks show up, so take your time with alignment and even tightening.
References


Leave a comment
This site is protected by hCaptcha and the hCaptcha Privacy Policy and Terms of Service apply.