


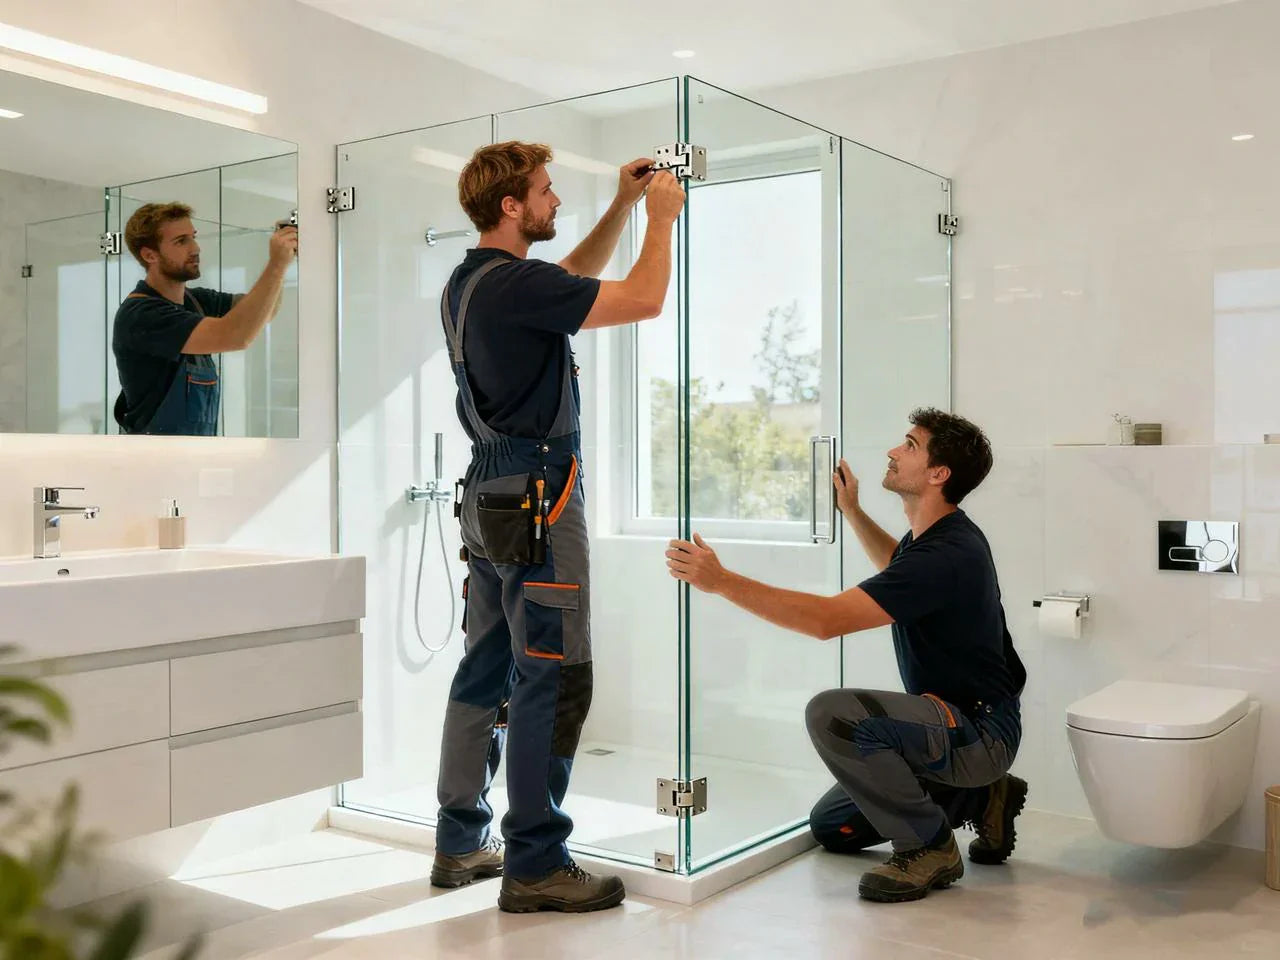
Installing a frameless shower door can instantly modernize your bathroom, improve water control, and boost resale value. The clean lines of the shower doors frameless style and thick tempered glass bring elegance and a sleek look to any bathroom, combining style and functionality without bulky frames. This guide walks you through a safe, step-by-step installation process, from planning and precise measurement to sealing and leak control. You’ll learn when DIY is realistic, when to call a pro, how to handle uneven walls, and how to keep your seals and hardware in top shape. You’ll also see cost and time comparisons, a quick-start checklist, and practical tips for a leak-free, long-lasting frameless glass shower door installation.
If you’re wondering “Are frameless shower doors easy to install?” the short answer is: they can be for a confident DIYer with measuring and drilling skills, a helper to lift the glass, and solid walls. But if your shower is out of plumb, tile is cracked, or the panels are oversized, it’s safer and faster to hire a pro. By the end, you’ll know exactly how to install frameless shower doors the right way—or how to set a clear plan if you outsource it.
Installing Frameless Shower Door: Quick-Start Summary
Before diving into the detailed steps, it helps to get a quick overview of what installing frameless shower door really involves. This high-level roadmap gives you a sense of the flow, the order of tasks, and the key precautions—so you’re not caught off guard halfway through. Think of it as your go-to reference while prepping, measuring, and setting each panel safely. Even if you’re new to glasswork, following this guide to install the frameless shower door can make the process more predictable and less stressful.
8-step overview (flowchart + checklist)
Use this high-level map as your flowchart. Keep it nearby during your workday.
-
Prep the area
-
Measure the opening (width/height/plumb)
-
Install the bottom track or U-channel
-
Mount side jambs or glass clips
-
Set fixed glass panel(s) safely
-
Install hinges or pivots on the door/wall
-
Hang the door, align, and test swing
-
Silicone seal, add sweeps, and do final checks
Checklist for each step:
-
Power off any nearby outlets. Clear the shower area, making sure you allow room for cleaning the shower area and safe movement while installing the frameless door.
-
Take accurate measurements at three heights, and check walls and curb for level and plumb.
-
Dry-fit hardware before drilling. Mark the screw holes with tape. Drill slowly with the right bit.
-
Use a level and shims to keep reveals even. Tighten hardware gradually.
-
Lift the glass with suction cups and a helper. Never set the glass on a sharp corner.
-
Adjust hinges until the door opens and closes smoothly with proper clearance.
-
Apply neutral-cure, mold-resistant silicone. Let it cure before using the shower.
-
Inspect for leaks, tighten loose screws, and confirm seals and sweeps sit flat.
Tools and materials at a glance (table)
Use this as your short shopping list. Adjust counts to your exact door kit and wall type.
| Item | Purpose | Notes |
| Drill + variable speed | Drilling into tile/stone | Use a clutch to avoid overtightening |
| Tile/masonry bits (carbide/diamond) | Clean holes in tile | Diamond for tough porcelain |
| 4-ft level + torpedo level | Check plumb/level | Longer level = better accuracy |
| Tape measure + pencil | Measure and mark | Mark through painter’s tape |
| Painter’s tape | Prevent tile chipping | Also helps mark hole centers |
| Suction cups (glass-rated) | Lift and hold glass panels | Two cups per panel minimum |
| PPE: gloves, safety glasses, long sleeves | Tempered glass handling | Follow OSHA PPE basics |
| Nylon shims + setting blocks | Level panels and protect edges | Do not use wood shims under glass |
| Screwdriver set + hex keys | Hardware adjustments | For hinge and clip tuning |
| Anchors (stainless/nylon/toggle) | Secure hardware to walls | Choose for wall type; avoid rust |
| Silicone sealant (ASTM C920, neutral-cure) | Seal joints to prevent water leaks | Mold-resistant, bathroom-grade |
| Sweep/seal strips | Control water at door edges | Door bottom sweep and strike seal |
| U-channel or glass clips | Hold fixed glass panels | As specified by your kit |
| Hinges/pivots and screws | Hang the door | Check weight rating and spacing |
Safety first: tempered glass handling and PPE
Tempered glass is strong, but it can shatter if mishandled. Keep kids and pets away during work. Wear gloves, safety glasses, and long sleeves. Always lift with suction cups and a helper. Carry panels upright. Never set glass on a hard tile corner—use cardboard or pads. Avoid banging the edges with tools. Work slow and keep your workspace clear so you can set the glass panel down safely if needed, based on OSHA personal protective equipment guidelines.
Standards worth knowing:
-
ANSI Z97.1 covers safety glazing (tempered glass).
-
OSHA PPE basics explain eye, hand, and body protection around glass and power tools.
When not to DIY (red flags)
Skip DIY or consult a licensed installer if you see these:
-
Walls out of plumb by more than about 3/8 in. across the door height
-
Cracked tile, soft or damaged backer, or signs of water damage
-
Non-waterproofed shower walls or curb (no membrane or liner)
-
Custom angles (neo-angle) or heavy, oversized frameless glass panels
-
No solid anchoring in the wall where hinges must attach
-
Flexible fiberglass base that deflects when you step on it
If you proceed anyway, you risk cracked tile, loose hardware, leaks, or a broken panel.
Planning and Measurements That Make or Break the Install
Accurate measurement and site prep decide the rest of your project. A small measuring error can create a rubbing door, poor seals, or water leaks. Slow down here.
Measure width, height, and plumb (3-point method)
Take accurate measurements of your shower opening in three places: at the shower curb, mid-height, and at the top to ensure a proper fit for your frameless glass door. Write each measurement down to the nearest 1/16 in. If the opening varies, note the smallest width and the difference between points. Use a 4-ft level to check each wall for plumb. A wall that leans can cause your door to bind or leave a growing gap at the top. Also check the shower curb with your level. You want at least 1/4 inch of slope per foot toward the drain to prevent water from standing near the door.
Tip: If you already have the door kit, compare your opening to the kit’s required tolerances. Some kits allow a little out-of-plumb adjustment (via U-channel or hinge play). Others need nearly perfect walls.

Choose your configuration: sliding vs swinging vs neo-angle
The best frameless setup depends on your space, budget, and comfort level.
| Type | Space needed | Difficulty | Hardware | Maintenance | Accessibility |
| Swinging (hinged) door + fixed panel | Clear swing area outside | Moderate | Hinges, handle, sweep, seals | Simple seals and hinges | Wide opening; ADA-friendly if sized |
| Sliding (bypass) | Less swing space | Higher | Top rail, rollers, guides, seals | More parts to clean/adjust | Narrower clear opening |
| Neo-angle (corner) | Corner layouts | Higher | Multiple panels, angles, clips | More joints to seal | Good in tight corners |
If you want the simplest install, a hinged door with one fixed panel is often the most straightforward. Sliders can be great in tight rooms but require careful rail alignment and roller tuning.
Do frameless shower doors need studs or blocking?
Anchoring hinges or clips into solid blocking is best practice. Hinges carry the full weight of the glass, so mounting directly into tile without solid backing can fail. If your wall lacks blocking:
-
Use approved heavy-duty anchors rated for your wall type, and follow your kit’s instructions.
-
Place hinges where you can hit solid framing when possible.
-
For larger or heavier doors, plan to add blocking from the backside if you are remodeling.
Can you install a frameless shower door without a stud? Sometimes, with the right anchors and a lighter setup, but it adds risk. When in doubt, choose a design that spreads load (for example, more channel, fewer heavy point loads) or hire a pro.
Tolerances and reveals for clean lines and no rub
Crisp, even gaps look great and help water control. As a rule of thumb:
-
Aim for 1/8–3/16 in. reveals between glass edges and walls or fixed panels.
-
Keep the door bottom clearance at about 1/2 in. (final gap varies by sweep design).
-
Target at least 1/4 in. of curb pitch per foot toward the drain.
-
Follow hinge manufacturer guidance for minimum edge distance and required clearance at the hinge side so the door does not bind.
These small numbers matter. Use shims during dry fit to “micro-adjust” before you drill any holes.
Tools, Materials, and Site Prep for Success
Good tools and prep prevent headaches. If you only remember one thing: drill slow, cool your bit, and never force hardware into tile.
The right drill bits and anchors for tile, stone, and masonry
Porcelain tile is very hard. Use diamond-tipped or high-quality carbide bits, add painter’s tape on the drill point to reduce walking, and drill at low speed. Keep the bit cool by pausing often. Do not hammer-drill tile; switch to hammer mode only after you are through the tile and into masonry backing if needed.
Choose anchors that match your wall:
-
Dense tile over cement board: nylon or stainless anchors sized for the screw.
-
Drywall or hollow spaces: toggle anchors or chemical anchors, if approved for your kit.
-
Masonry: appropriate masonry anchors.
Use stainless screws in wet areas to avoid rust. Vacuum dust from holes before inserting anchors so they seat well.
U-channel vs clips vs continuous hinges (pros/cons)
| Hardware | Pros | Cons | Best use |
| U-channel | Most forgiving for out-of-plumb walls; protects glass edge; easier waterproofing | More visible line than clips | Uneven walls; DIY-friendly installs |
| Glass clips (brackets) | Clean, minimal look; fewer lines | Less adjustment range; precise drilling needed | Very square, plumb openings |
| Continuous hinge (piano-style) | Spreads load; smooth motion | Visible hardware; alignment matters | Heavy doors; when you want strong support |
A channel can hide small wall waves and helps with waterproofing. Clips look very minimal but demand very accurate drilling and flat surfaces. Choose what fits your skill and your walls.
Silicone sealant, shims, and setting blocks that last
Use neutral-cure, mold-resistant silicone that meets ASTM C920. Neutral-cure avoids reacting with stone or metal finishes. Color-match to tile or go clear. Keep nylon or neoprene setting blocks under fixed panels to protect glass edges and create the right reveal. Use hard plastic shims to tune plumb and level—never soft wood that can compress or swell.
Can you install on uneven tile or a fiberglass base?
Small tile variations can be shimmed. Larger humps and dips should be fixed first, or your glass will twist and stress. On fiberglass, press around the curb to check for flex. If the base deflects under your weight, add reinforcement per the base maker or change your plan. Flexible curbs can break a seal, rattle hardware, and cause leaks.

Step-by-Step Installation: From Channels to Door Hang
Follow these steps in order. Read the entire process first so you know the flow. Keep a helper with you for all glass lifts.
Install bottom track/U-channel and side jambs/clips
-
Dry-fit the channel or track on the curb. Use your level to make sure it’s perfectly level and aligned along the edge of the curb. Add thin shims if needed to achieve level while maintaining curb pitch toward the drain.
-
Mark hole locations through painter’s tape. Remove the track and double-check measurements.
-
Drill pilot holes at low speed. Vacuum dust. Insert anchors.
-
Run a thin bead of silicone under the channel to prevent water from wicking below. Set the channel and fasten snug, not overly tight.
-
For side jambs or clips, hold them plumb against the wall. Mark holes on tape, drill carefully, insert anchors, and fasten. Keep checking with the 4-ft level.
Pro tip: Confirm your target reveal by placing temporary spacer shims where the glass will go. This keeps the channel and clips aligned to your final glass position.
Set fixed glass panel(s) safely and square
-
Place setting blocks inside the channel so the glass panels in place rest on soft supports. This ensures seamless installation and proper alignment before you secure the door hinges and mounting brackets.
-
With your helper and suction cups, lift the fixed panel into place. Lower it into the channel and up against the wall or clips.
-
Use a level to check plumb and adjust shims until reveals are uniform.
-
If using clips, snug them evenly and recheck alignment after every screw. Do not over-tighten onto the glass.
-
Confirm gaps to the curb and adjacent walls match your plan (about 1/8–3/16 in. typical).
Hinge/pivot placement and hanging the door
-
Mark hinge positions along the vertical edge. Many doors space hinges roughly 8–10 in. from top and bottom, but follow your hardware guide.
-
Attach door hinges to the wall or fixed panel first, keeping them plumb and level. Hold the glass in position using clamps if needed, following the frameless shower door installation guide. Insert gaskets as directed so metal does not touch glass edges.
-
With the door still in a protected place, attach the hinge leaf to the door glass on the ground or a padded bench, or follow your kit’s sequence.
-
Lift the door with suction cups. Hang it on the hinges and insert hinge pins or screws per the hardware design.
-
Check reveals at top, bottom, and strike side. Adjust eccentric bushings or hinge alignment until the door swings smoothly and does not rub.
-
Install the handle and test the motion again. The door should open and close without drifting when left partly open.
Sealing, sweeps, and final adjustments
-
Apply silicone on the outside verticals where glass meets walls or channel, along the curb-to-panel junction, and at the ends of the bottom track. Keep a dry rag to clean smears right away.
-
Do not seal any designed weep paths. These let trapped water drain out of channels.
-
Press the door sweep onto the bottom edge and set the angle so it just kisses the curb. Add strike-side seals if included.
-
Wipe the glass clean and do one final level and reveal check. Let silicone cure for 24–48 hours before using the shower.

Troubleshooting, Adjustments, and Leak Control
Even careful installs need a little tuning. These fixes solve the most common issues.
Fix out-of-plumb walls and uneven curbs
If a wall leans, use tapered shims behind the U-channel to bring the glass plumb. If you used clips and can’t make up the difference, you may need to switch to a channel on that side or adjust hinges to “split the difference” in the reveals. For a crooked curb, set the channel level for the fixed panel, then rely on the bottom sweep to follow the slight curb angle. In extreme cases, add a low-profile tapered threshold to guide water back in.
Stop water leaks without over-caulking
Over-caulking traps water and can make a mess. Instead:
-
Re-check curb pitch. If water sits, that’s the root cause.
-
Tune the door sweep so it touches but does not drag hard.
-
Add or re-seat the strike-side seal so spray can’t shoot through the gap.
-
Seal only the outside of vertical joints and curb meets. Leave interior seams that are meant to weep unsealed.
-
For splash from a shower head aimed at the door, add a small deflector strip on the fixed panel edge.
How do you keep a frameless shower door from leaking over time? Maintain seals, check the sweep yearly, verify the curb slope is still draining correctly, and re-caulk joints that have gaps or mold. Simple annual care stops most leaks before they start.
How long should silicone cure before using the shower?
Most neutral-cure silicones need 24–48 hours to reach a safe cure before water exposure. Cooler, wetter rooms slow cure time. Warmer, drier air speeds it up. Check your product’s technical data sheet and give it extra time if your bathroom is humid or cold.
Repair stripped anchors, cracked tile, or micro-chips in glass
If an anchor spins or strips, step up to the next size anchor and fill the old hole with epoxy. For cracked tile at a hole, stop and replace the tile before re-drilling, or shift the hole slightly if safe to do so. Tiny glass edge micro-chips near hardware can sometimes be protected by proper gaskets; do not grind or sand tempered glass edges at home. If you notice any crack running through the pane, replace the panel.

DIY vs Professional Frameless Shower Door Installation
Time and money vary with your layout and wall condition. Here’s what most homeowners see.
2025 cost breakdown and timelines
| Path | Typical total cost | Time to complete | What that includes |
| DIY | $300–$600 (tools/supplies; not including glass kit) | 4–8 hours spread over 1–2 days | Bits, anchors, silicone, shims, PPE; your labor |
| Professional installation | $800–$1,500 (labor; glass kit separate) | ~3 hours on site + cure time | Measurement, drilling, installation, tuning |
How much does it cost to have a frameless shower door installed? Labor alone often runs from $800 to $1,500 in 2025 for a standard hinged door with one fixed panel. Complex sliders or custom angles can be higher.
How long do shower doors take to install? A trained installer often completes a standard setup in about three hours, then you wait 24–48 hours for silicone to cure. DIY projects commonly take 4–8 hours across two days, including careful measuring and cleanup.
Simple cost calculator (estimate your project):
-
Add your expected labor (DIY $0 or pro quote).
-
Add materials: bits/anchors/silicone ($80–$150) + sweeps/seals ($20–$60).
-
Add glass/hardware kit price from your supplier.
-
Add 10–15% for unforeseen items (extra bits, replacement anchors).
This gives a realistic total to compare against professional installation.
Risk matrix: glass breakage, water damage, warranty
The big risks with a frameless door are cracked tile from drilling, glass breakage from edge stress, leaks that lead to mold or damaged drywall, and voided warranties from improper installation. Homeowner insurance may not cover poor workmanship. If your walls lack blocking, are badly out of plumb, or your glass panels are large and heavy, the risk increases. That’s why some homeowners choose a pro even if they’re handy.
Is a building permit required for a shower door?
Most areas do not require a building permit for a door-only project. If you’re changing plumbing, moving walls, or altering structure, that’s different. Always check your local building department website. Condo and HOA rules may require approval even for small upgrades.
When to hire a pro and how to choose one
Hire a pro if your walls are uneven, your curb is not pitched, you have a complex slider or neo-angle, or you have no studs at hinge points. Choose someone who:
-
Has recent frameless door experience
-
Carries liability insurance and worker safety coverage
-
Provides clear warranty terms for both glass and labor
-
Can show photos of similar installs and explain how they handle out-of-plumb walls and leak prevention
Performance, Care, and Long-Term Maintenance
A frameless enclosure stays clearer and cleaner if you set a simple routine. Small habits pay off in the long run.
Daily and weekly care to prevent hard water spots
After each shower, run a squeegee down the frameless shower doors and shower enclosure to prevent mineral spots. Wipe hardware with a soft cloth. Each week, clean with a non-abrasive, pH-neutral cleaner. Avoid harsh ammonia or bleach on metal finishes and seals. If you have very hard water, consider a rinse aid or a softener to reduce limescale. This helps keep the frameless glass crystal-clear.
Annual inspection checklist for hardware and seals
-
Check hinge screws and clip fasteners for snug fit. Do not overtighten.
-
Inspect the bottom sweep for tears or warping; replace if worn.
-
Look for silicone gaps or mold; cut out and reapply as needed.
-
Make sure seals still touch fully when the door closes.
-
Confirm there’s no glass rattle or movement in channels—replace setting blocks if compressed.
Glass protection options and coatings
Some panels come with a factory-applied coating that repels water. These reduce spotting and make cleaning easier. Aftermarket sealants can help too; plan on reapplying every 6–12 months. Coatings are not magic, though. You still should squeegee daily to prevent buildup.
How do you keep a frameless shower door from leaking over time?
Focus on three things:
-
Keep the door sweep straight and in contact with the curb.
-
Maintain silicone at exterior seams, especially at the curb-to-panel joint.
-
Confirm curb slope is adequate and seal any grout cracks that collect water.
When water sneaks under a frameless shower door, it’s often because the sweep angle is off or the curb is flat. A new sweep and a careful reset usually solve it.

Real-World Case Studies and Data Insights (2024–2025)
Homeowners and installers keep sharing similar timelines and lessons learned. These quick summaries can help you plan.
DIY experience: about 6 hours over two days
One common DIY pattern is a two-day install: day one for layout, drilling, and setting the fixed panel; day two for hanging the door, fine adjustments, and silicone. The biggest pinch points are keeping the bottom track level, getting exact reveals with shims, and managing panel weight with a helper. People often say a second set of hands was the best “tool” they had.
Pro install: about 3-hour completion
Skilled installers often measure and mount hardware quickly because they know where walls hide issues. They put extra care into hinge alignment and silicone placement. The job looks fast from the outside, but it’s the planning and sequence that keep it smooth.
Market trends and stats to know
Demand for frameless shower doors keeps rising because of the minimalist look and easy cleaning. Many homeowners try DIY to save cost, then call a pro for tricky adjustments. The most asked questions are about water leaks, hinge alignment, and whether studs are required for hinges.
Top 5 mistakes and how to avoid them
-
Rushing measurements: Take readings at three heights and write them down.
-
Drilling too fast: Use the right bit, low speed, and tape to avoid chips.
-
Skipping shims: Small shims make perfect reveals and prevent rubbing.
-
Sealing the wrong edges: Seal exterior verticals and curb seams; leave weep paths open.
-
Ignoring curb slope: Fix pitch first; no seal can fight against standing water.
Conclusion
If you want a modern, seamless look with real function, installing a frameless shower door is a smart way to lift the style and functionality of your bathroom. With careful planning, precise measuring, the right tools and materials, and patient adjustments, your enclosure can look like it was made for the space—and keep water where it belongs.
FAQs
1. Are frameless shower doors easy to install?
For someone who measures carefully, can drill into tile without cracking it, and has a helper to hold the glass, frameless shower doors are fairly straightforward to install. That said, if your walls aren’t perfectly straight or you don’t have solid spots to anchor the hardware, things can get tricky and even risky. Many homeowners still choose to hire a professional—they can finish the job faster, avoid mistakes, and you get the added benefit of a warranty if anything goes wrong. So while it’s doable as a DIY, having some experience and a helping hand really makes it easier.
2. What are the disadvantages of a frameless shower?
Frameless shower doors look sleek and modern, but they do come with a few trade-offs. First, they usually cost more than framed doors. They depend on precise sealing and a correctly sloped curb to keep water from leaking. Uneven walls can make installation harder and more expensive. The glass itself is heavy and requires careful handling, plus precise drilling is needed. So, while they’re beautiful, you have to be ready for the extra attention and care they need.
3. Can you install a frameless shower door without a stud?
In some situations, yes, you can install a frameless door without hitting a stud, especially if the door is smaller or lighter. You’d need the right type of anchors, and even then it adds some risk—heavier doors or the main hinge locations really should be secured to solid blocking for safety. So technically it’s possible, but for long-term durability and safety, hitting solid support is always the safer bet.
4. How much does it cost to have a frameless shower door installed?
As of 2025, hiring a pro to install a standard hinged frameless door with a fixed panel usually costs between $800 and $1,500, depending on your area. If your shower has a more complicated layout, multiple panels, or unusual angles, the price can go higher. Labor covers precise glass placement, drilling, anchoring, and proper sealing, so it’s worth budgeting a bit extra to make sure it’s done right.
5. How do I stop water from coming under a frameless shower door?
Water getting under a frameless door is usually a matter of detail. Make sure the door sweep touches the curb properly, and check that your curb slopes enough toward the drain. Adding a strike-side seal can help, and use silicone only where it’s meant to block water—never seal weep paths, as those let excess water escape safely. Paying attention to these small details can really make a big difference in keeping your bathroom floor dry.
6. How long does it take to install a shower door?
If a professional handles a standard frameless shower door, they can usually finish the installation in about three hours. After that, you’ll need to let the silicone cure for 24–48 hours before using the shower. If you’re doing it yourself, expect the process to take a bit longer—anywhere from four to eight hours, often spread over a day or two, depending on your skill and whether you have help. Taking your time ensures the glass is perfectly aligned and sealed.
References

Leave a comment
This site is protected by hCaptcha and the hCaptcha Privacy Policy and Terms of Service apply.