



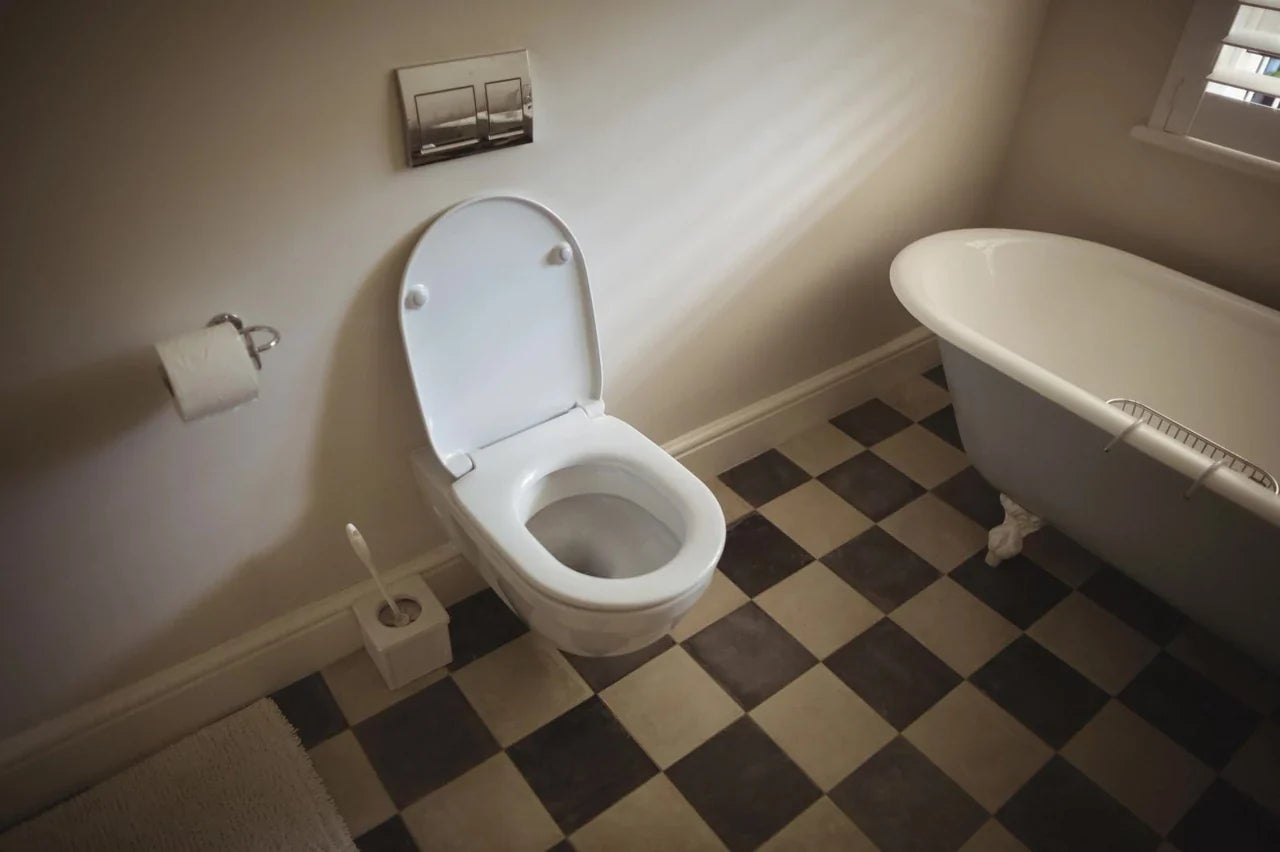
Buying a new toilet is usually easy—until it isn’t. Most “it didn’t fit” stories come from one of three places:
-
the rough-in was measured from the wrong reference (baseboard, studs, old tank)
-
the rough-in is “almost standard” (11–11.5") and the new toilet’s tank hits the wall
-
the toilet technically fits the rough-in, but the room clearances (front/side) become miserable
This toilet rough-in measurement guide is focused on execution: how to measure toilet rough-in correctly, when the numbers lie, and what gets expensive or annoying when you force a fit.
Decision Snapshot: will a new toilet actually fit here?
Works well when your finished-wall-to-flange-center is 10", 12", or 14" and the floor/flange are solid and level. According to the EPA, toilets that meet modern high-efficiency standards not only save water but often follow these common rough-in sizes to fit existing bathrooms efficiently.
A straightforward replacement usually works when:
-
You can measure from the finished wall to the center of the toilet flange (or the closet bolts) and it lands close to 10, 12, or 14 inches.
-
The flange is not cracked, loose, or sunk below the floor.
-
The floor is reasonably level where the toilet sits.
-
Minimum clearance constraints: centerline-to-side obstacles ≥15" (target 18") and front clearance ≈21"+. Check both before purchase.
Callout: If your rough-in is 11–11.5"
Verify the “behind-the-toilet” clearance on the toilet spec sheet before buying. Many “12-inch rough-in” toilets will not tolerate this smaller spacing.
Avoid/rethink when:
-
You’re measuring to studs, baseboards, or unfinished walls instead of finished walls.
-
Your floor slopes at the flange, or the old toilet rocked even a little.
-
Clearances are already tight: front < 21" or side < 15–18" from the toilet centerline.
Stop and plan more carefully if (“Not for you / pause” triggers):
-
Measuring from studs, backer board, or unfinished wall (your finished rough-in will shrink).
-
Sloped or rocking old toilet.
-
Cracked, loose, or concrete-set flange that cannot be adjusted.
-
Already tight clearances: front under ~21", side under ~15–18" from centerline.
-
Rough-ins near 11–11.5", non-standard offsets in concrete, or choosing elongated bowls in shallow alcoves.
Where people usually get burned:
-
A rough-in that’s not truly 12"—for example 11", 11¼", 11½". Many “12-inch” toilets won’t fit.
-
A flange set in concrete that’s off by 1" and can’t be nudged.
-
Choosing an elongated bowl where only a round front would fit.
Fast rule: measure from the finished wall to flange center twice, then map side + front clearances before you buy anything.
Do this before purchase:
-
Measure finished wall → flange center (or bolt center) in two spots.
-
Measure centerline → side obstacles and bowl front → opposite wall/door swing using a simple floor mock-up.
If those two steps check out, most installs go smoothly. If not, this guide shows what breaks and what it costs.
Toilet Rough-in Measurement Guide: who this works for (and who it doesn’t)
Before diving into who this guide works for, it’s important to understand that the toilet rough-in is more than just a number. Accurately measuring the distance from the wall to the center of the toilet’s flange ensures the new toilet fits properly, avoids tank-to-wall collisions, and keeps installation straightforward. Even small errors in rough-in distance can affect the toilet bowl placement, front clearance, and how the toilet connects to existing plumbing. Learning how to measure your toilet rough-in the right way saves time, frustration, and unnecessary adjustments.
Best fit: replacement toilets where the existing flange is in the right spot and you’re not changing wall finishes
This rough-in measurement guide works best when you’re doing a like-for-like replacement:
-
Same bathroom layout
-
Same finished wall thickness (no new tile build-up or furring strips)
-
Flange is solid, at the right height, and not repaired with odd spacers
-
You’re not moving the toilet, just replacing it
In that scenario, measuring your toilet rough-in is mainly about confirming you’re ordering the correct rough-in size (10/12/14) and not creating a tank-to-wall collision.
High-risk homes: older bathrooms with 10" rough-ins, cast-iron plumbing, or prior “creative” flange/joist notching
Older homes are where the “standard toilet rough-in sizes” assumption fails.
Here’s what tends to show up:
-
10-inch rough-in bathrooms that were common in some eras/regions
-
Cast-iron closet bends and flanges that are rusted, cracked, or not anchored well
-
Past remodels where someone notched framing, offset the flange, or used spacers to “make it work”
-
Bathrooms where the wall isn’t plumb, so the “finished wall line” varies over the height of the tank
If you’re in this category, the rough-in measurement is only one part. Flange condition and floor flatness matter just as much.
Remodel trap: any project where tile/drywall/baseboard thickness will change the finished-wall reference line
Rough-in refers to the distance from the finished wall to the center of the toilet flange.
So if you measure from:
-
studs (unfinished), or
-
old drywall that will be replaced, or
-
an old tile wall that will be built out,
…your measurement can be off by ½" to 2"+, which is enough to turn a “fits fine” toilet into a constant wall-contact problem.
A very common failure is ordering a 12-inch rough-in toilet because the flange is 12" from studs, then finishing the wall and discovering the rough-in is really 10½–11½". The toilet may still bolt down, but the tank can press into the wall, the bowl may sit slightly forward, and the front clearance can become the next problem.
Buyer doubt: will this work in a small bathroom with a 5-foot width or a tight shower/vanity layout?
It can, but small bathrooms punish small measurement errors.
In tight layouts, you don’t just need the right rough-in distance—you need:
-
enough side clearance so you’re not shoulder-to-cabinet every day
-
enough front clearance so knees aren’t hitting the door or vanity
-
enough space to install and service shutoff valves and supply lines
If your bathroom is tight, treat the rough-in as step one, not the final answer.
Trade-offs you accept when you “match the rough-in” (10 inch vs 12 inch rough-in and beyond)
Measuring from the wall to the center of the floor flange ensures the new toilet will fit correctly, the bolts hold it securely, and the toilet sits at the right height and position. Even small variations in rough-in distance can impact front clearance, toilet bowl placement, and overall usability. Taking a few minutes to measure a toilet rough-in accurately can save time, frustration, and costly plumbing changes.
Buyer doubt: what happens if my rough-in measures 11" or 13"—is “rounding” safe, or does it cause bolt/drain misalignment?
This is where “measure twice” matters.
-
11–11½" rough-in: Do not assume a 12-inch rough-in toilet will fit. Many will, but many won’t—especially if the tank design is tight to the wall.
-
13" rough-in: A 12-inch toilet will likely install, but you may get a rear gap and lose front clearance.
The rough-in number alone doesn’t tell you flange height, flange condition, or floor flatness—these are the factors that cause leaks and callbacks.
If your measurement is “almost” a standard size, treat it as a warning flag and confirm the toilet’s “behind the toilet” clearance requirement before committing.
12-inch rough-in is common, but it doesn’t guarantee fit if the flange is off-center, the wall isn’t plumb, or the floor isn’t level
A 12-inch rough-in is the most common, but “common” isn’t “universal.”
Three ways a “12"” space still fails:
-
Off-center flange: The flange might be 12" from the back wall but not centered between side walls. Side clearance becomes lopsided, and the tank may not sit square visually.
-
Wall not plumb: The tank is tall; the wall may bow. You can have clearance at the bottom and contact at the top.
-
Floor not level: A rocking toilet slowly works the seal. The rough-in can be perfect, and you still get leaks months later.
So yes—choose a toilet that matches the rough-in size. But confirm the flange and floor conditions before you trust that measurement.
10-inch rough-in toilets solve tank-to-wall contact, but can force tighter bowl clearance in compact rooms
A 10-inch rough-in toilet is often used when the flange is closer to the wall. It can solve the big issue (tank hitting wall), but it can create a smaller daily annoyance: the bowl may sit differently in the room.
In practice:
-
If your bathroom is shallow, switching rough-in sizes can change the “usable space” in front of the bowl.
-
If your toilet is already close to a vanity or door swing, moving the bowl position by even 1" can matter.
Other considerations: 10" rough-in toilets exist, but you typically have fewer model choices and may wait longer for delivery. That’s not a deal-breaker—just plan for it if your toilet is currently out of service.
14-inch rough-in can create wasted rear gap (or door conflicts in shallow rooms) unless the room was designed for it
A 14-inch rough-in means the flange is farther from the wall. If you install a 12-inch rough-in toilet on a 14-inch rough, you often end up with a visible gap behind the tank. That gap:
-
Looks odd
-
Collects dust
-
Can make the toilet feel like it’s sitting too far forward
Shallow bathrooms: That forward shift can reduce front clearance or create door conflicts. Some people ignore it; others hate it every time they clean.
Cost and practical constraints before you commit (what changes if it doesn’t fit)
Before committing to a new toilet, it’s important to understand how your toilet’s rough-in and floor flange distance from the wall affect installation. Even small differences in rough-in dimensions or the toilet’s position can require plumbing changes, adjustment of bolts that hold the toilet, or modifications to the floor. Taking a few minutes to measure a toilet rough-in size accurately ensures the toilet will fit, the bowl will sit correctly, and you avoid costly surprises during installation.

Decision gate: rough-in edge cases and likely cost tier
Before diving into detailed measurements, consider your rough-in situation:
-
11–11.5" rough-in or slightly off-center flange in concrete → high-risk scenario. Expect medium to high-cost fixes if the toilet doesn’t fit as planned.
-
Standard 10", 12", 14" rough-in with solid, level flange → low-cost fixes likely sufficient.
-
Treat in-between rough-ins as high alert: bolt-slot tolerance may not save you, and offsets can become a long-term compromise.
Knowing your cost tier early prevents surprises. If your rough-in is borderline, plan for potential flange repair, subfloor adjustments, or even drain relocation.
Low-cost fixes: adjusting supply line, swapping stop valve position, bolt-slot tolerance, minor trim changes (when you have slack)
These are fixes you can often do without opening walls or floors:
-
Supply line changes: Different length or routing so it doesn’t kink behind the bowl.
-
Shutoff valve tweaks: Sometimes a different angle stop or placement keeps it from hitting the toilet.
-
Bolt-slot tolerance: Closet bolt slots have a little play; that can help small alignment issues, but don’t count on it to solve a full inch.
-
Trim/baseboard adjustments: In rare cases, a thick baseboard prevents the toilet from sitting back. Trimming the baseboard behind the tank area can help—but only if you measured correctly from the finished wall line, not from the baseboard face.
Typical cost impact: small parts and an extra trip to the store, plus time.
Medium-cost fixes: flange repair/replacement, subfloor patching, leveling compounds, correcting a rocking toilet before sealing
This is the zone where you’re still “repairing,” not “remodeling,” but it’s real work:
-
Flange repair rings for a flange that’s cracked or won’t hold bolts
-
Flange replacement if the flange is broken, too low, or too high
-
Subfloor patching if you pull the old toilet and find rot or delamination
-
Leveling: If the floor dips at the flange, you may need leveling compound or localized floor repair so the toilet doesn’t rock
Cost impact: usually a service call or a few hours DIY if accessible, but it can climb fast if the flange is tied into older piping or concrete.
High-cost fixes: moving the drain line, opening concrete, reframing/retiling the wall, correcting rot from prior leaks
This is where a “simple toilet replacement” turns into a project:
-
Moving the drain because the rough-in is wrong for the toilet you need
-
Concrete work to relocate a flange set in a slab
-
Opening walls to recess a tank area, change the wall thickness, or fix incorrect framing
-
Repairing structural rot from long-term leaks (common when toilets rocked or wax rings were reused)
Cost impact: this can become one of the more expensive “small” plumbing jobs because it affects finished surfaces (tile, flooring, drywall).
When an offset flange is the “least bad” option vs when it becomes a permanent compromise
A toilet offset flange guide is useful because offset flanges can save a layout—but they are not magic.
Offset flanges can help when:
-
You need to shift the toilet location slightly (typically around ½"–2") to meet a rough-in or clearance requirement.
-
The alternative is tearing out tile or concrete.
Hard limit: treat any required correction beyond ~2" as a high-cost fix—expect subfloor, flange, or concrete work before installation.
Offset flanges become a long-term compromise when:
-
You’re trying to correct a big rough-in error and the toilet ends up awkwardly placed.
-
The offset creates a tighter turn that can contribute to clogs in some drainage situations.
-
The flange height and sealing surface end up stacked with spacers in a way that’s hard to keep leak-free.
The key point is: an offset can solve “won’t physically fit.” It doesn’t automatically solve “will perform well and stay dry for years.”
Fit reality: how to measure toilet rough-in correctly (so your “match” is real)
Before you start measuring, remember that accurate toilet rough-in dimensions are key to a smooth toilet installation. Knowing the distance between the wall and the center of the toilet flange ensures your toilet will fit properly, the bowl will sit level, and you avoid surprises with the bolts that hold the toilet. Taking a few minutes to measure from the finished wall—not baseboards—helps you find the rough-in the right way and confirms the correct toilet type and height for your space.

How to measure toilet rough-in: finished wall to the center of the toilet flange (or closet bolts), not baseboards or tank
Rough-in measurement is simple, but people measure the wrong thing.
Correct method (most reliable):
-
Find the finished wall behind the toilet. This is the painted drywall, finished tile, or other final surface.
-
Measure from that finished wall to:
-
the center of the toilet flange, or
-
the center of one closet bolt (those bolts are set on the flange centerline)
Tolerance warning: Closet bolt slots have very limited lateral play—usually not enough to correct ~1" errors. Treat any in-between rough-in (e.g., 11–11.5") as high risk. Verify the toilet spec sheet for “behind-the-toilet” clearance before purchase.
If the toilet is still installed and you can’t see the flange:
-
Pop the bolt caps at the base.
-
Measure from the finished wall to the center of the closet bolt.
Do not measure:
-
To the baseboard face (it sticks out and can mislead you)
-
To the tank (tank shapes vary)
-
To the front of the bowl (that’s about clearance, not rough-in)
Key takeaway: always measure from the finished wall.
Buyer doubt: I only have studs/unfinished wall—how do I measure so the finished rough-in won’t end up 1–2" short?
If your wall isn’t finished yet, you have to predict the finished wall line.
Do this:
-
Add up what will be installed on that wall:
-
Drywall thickness (commonly ½")
-
Tile backer (often ¼–½")
-
Tile + thinset (often ⅜–½" total, sometimes more)
-
-
Then measure from the studs to the flange center and subtract the build-up thickness.
Example: if you measure 12" from studs, and you’re adding ½" drywall + ½" tile build-up, your finished rough-in could become about 11". That can be the difference between a normal install and a tank-to-wall problem.
Safer approach if wall finish isn’t final:
-
Delay the final toilet purchase until the finished wall is in place, or
-
Choose a toilet that tolerates tighter “behind the toilet” clearance (verify the spec sheet).
Edge cases: baseboard thickness, wavy walls, bowed drywall, and how to “project” the finished wall line with a straightedge.
Real bathrooms aren’t perfect rectangles
Common edge cases:
-
Baseboards: Measuring from baseboard face can be off by ½–1". Thick baseboards may prevent the toilet from sliding fully back.
-
Wavy walls: The wall may bow. Measuring at one height can create a conflict higher up with the tank.
-
Bowed drywall: Rough-in may be correct at the floor but tight near the tank.
A practical method:
-
Hold a straightedge (or a level) against the wall above the baseboard to “project” the wall plane down.
-
Measure from that plane to the bolt center.
-
If a clean measurement isn’t possible, assume it’s tight and plan for worst-case clearance.
Visual: measurement diagram showing finished wall → flange center, plus where to place a tape measure behind the toilet.
Imagine looking from above:
-
Draw a straight line for the finished wall.
-
Find the center of the flange (same as the bolt line).
-
Your rough-in is the straight distance between them.
Where to place the tape measure:
-
Hook the tape on the finished wall surface (not the baseboard).
-
Pull the tape to the bolt center (or flange center if exposed).
-
Read the measurement at the center point, not the edge of the bolt.
-
Measure straight along the floor—if angled because the tank is in the way, your number will be wrong.
High-risk reminder: If your rough-in falls between standard sizes (e.g., 11–11.5"), don’t assume closet bolt play will save the install. Treat it as a high-risk scenario and verify the spec sheet carefully.
Installation realities that cause failure even when the measurement is “correct”
Even when your rough-in is measured accurately, real-world installation can trip you up. Floor flange distance from wall, toilet height, and how the toilet will sit on the floor all affect whether the bowl rocks or seals properly. Before purchasing a new toilet, it helps to check flange condition, toilet parts, and clearance so your step-by-step guide to installation doesn’t end with leaks or awkward spacing.
Floor not level at the flange: rocking bowls, wax ring compression, and leaks that can show up months later
This is one of the most expensive “small” mistakes because it doesn’t always fail immediately.
What tends to happen:
-
The toilet installs and seems fine.
-
The bowl rocks slightly when someone shifts weight.
-
The wax ring (or other seal) compresses unevenly.
-
A small leak starts—sometimes only when flushed—and it wets the subfloor.
Months later, you notice:
-
A smell
-
Soft flooring
-
Staining on the ceiling below (upper floors)
-
Caulk that looks dirty because it’s trapping moisture
Tip: If your old toilet rocked, don’t assume a new one will be better. Fix the floor contact first:
-
Confirm the flange is anchored
-
Shim correctly (solid, non-compressible shims)
-
Don’t use caulk as a structural fix
Flange condition and height: cracked/rusted flanges, flange below/above finished floor, and why the toilet may never seal reliably
A correct toilet rough-in measurement won’t save a bad flange.
Problems that cause repeat leaks:
-
Cracked flange ring: bolts won’t stay tight
-
Loose flange: the whole assembly shifts
-
Flange too low (below finished floor): the seal may be marginal unless corrected
-
Flange too high: the toilet may rock because it hits the flange before it hits the floor
A quick check with the toilet removed:
-
The flange should be solidly fastened.
-
The top of the flange is typically intended to sit at or slightly above the finished floor (local practice varies). The key is that the toilet must sit firmly on the floor while compressing the seal correctly.
If you’re already buying a new toilet, this is the moment to fix the flange. Skipping it is how “new toilet, same leak” happens.
Clearance mapping: centerline-to-sidewall 15–18", front clearance ~21" minimum, and why elongated bowls commonly break tight layouts
Rough-in only tells you wall-to-drain placement. It says nothing about whether you’ll hate the bathroom afterward.
Clearance checks that prevent regret
-
Measure from the center of the flange to each side wall/cabinet/vanity.
-
15" is a common minimum requirement in many rulesets.
-
18" feels noticeably better in daily use if you have the space.
-
-
Measure from the front of the bowl (projected) to the opposite wall/door/vanity.
-
~21" minimum is a common planning number; more is better.
-
Directive: Before selecting a rough-in size or model, check whether a round vs. elongated bowl will fit this front clearance. Elongated bowls require more space and can reduce usable front clearance in tight layouts.
-
Where elongated bowls cause trouble
-
In shallow alcoves, an elongated bowl can push into your front clearance.
-
In tight layouts, that can mean knees hitting the door, or the door can’t open fully.
Tip: If you’re on the edge, mock it up on the floor before buying.
Visual: clearance template (cardboard footprint) to mock up door swing, vanity drawers, radiator/sink interference, and knee space.

A fast, low-tech method that saves returns
-
Find the toilet’s “footprint” dimensions (or measure your current toilet).
-
Cut cardboard to match the bowl outline and tank projection.
-
Place it with the centerline on the flange center.
-
Open the door. Pull out vanity drawers. Stand up and sit down in the space.
This sounds simple, but it catches the real problems: door swings, toe-kicks, radiator pipes, and the “my knees are in the vanity” issue.
Long-term ownership: what fails first when rough-in and setup are marginal
Even if your toilet rough-in is technically correct, marginal setups can create long-term headaches. Small misalignments—whether the toilet to the floor isn’t level, the flange isn’t square, or the bowl sits slightly off-center—can stress seals and bolts over time. Before you install a toilet, it’s worth checking toilet dimensions, clearance front of the toilet, and local plumbing so your step-by-step installation actually holds up for years.
Slow leaks and subfloor rot: how misalignment + rocking turns into water damage, especially on upper floors
The most costly failures are often slow.
If the rough-in is forced (tank pressed to wall, bowl not fully seated, flange not square), you can get:
-
a seal that’s slightly stressed
-
bolts that loosen over time
-
movement that breaks the seal
On upper floors, the damage can show up below first. By the time you see it, you’re no longer doing a toilet swap—you’re repairing flooring, ceiling, maybe framing.
If you have any doubt about rocking or flange integrity, correct it before the toilet goes in and gets caulked and “forgotten.”
Repeat clogs or weak performance: when drain alignment and long horizontal runs create “fits but flushes poorly” outcomes
Sometimes the toilet fits and seals, but performance is disappointing.
Contributors include:
-
an offset flange that creates an extra bend
-
partial obstructions or old pipe scale in older lines
-
a toilet outlet that doesn’t align cleanly to the flange opening (less common, but it happens when things are forced)
If your old toilet clogged often, don’t assume a new toilet fixes that. Confirm the drain line is clear and venting is adequate. A replacement toilet is not a drain repair.
Maintenance friction: tight rear gaps, recessed-wall “fixes,” and why cleaning access matters in corner/alcove installs
Even if you avoid leaks, a tight installation can become a daily annoyance.
Common friction points:
-
A tank jammed close to the wall makes it harder to service fill valves and flush valves.
-
A visible rear gap (like a 12" toilet on a 14" rough-in) becomes a dust shelf.
-
Tight side clearances make cleaning and even replacing the toilet seat harder than it should be.
If you’re already working in a tight room, prioritize service access. Toilets are simple machines, but they do need occasional parts.
Buyer doubt: if I “make it fit” with an offset or tight clearances, what problems am I signing up for over 1–5 years?
Usually one (or more) of these:
-
replacing seals more often
-
chasing minor leaks that stain floors or ceilings
-
recurring rocking that loosens bolts
-
more clogs if the drain path is compromised
-
constant annoyance cleaning around a too-tight footprint
Sometimes “it works” is fine. The risk is when “it works” requires constant little exceptions: special shims, re-caulking, bolt tightening, or being careful how you sit.
Before You Buy checklist
-
Measure finished wall → center of flange/bolt (not baseboard), and write it down.
-
If the wall is unfinished, subtract the full planned wall build-up (drywall + tile/backer).
-
Confirm centerline → side clearance is at least 15", and check if 18" is possible.
-
Confirm front clearance is roughly 21" or more to the next wall/door/vanity.
-
Check water supply / shutoff valve position: ensure it won’t interfere with the tank or bowl. Recommended planning numbers: roughly 4–8" from flange centerline horizontally, 6–12" above finished floor, depending on tank design and shutoff type.
-
Check whether the old toilet rocked; if yes, plan to correct floor/flange issues first.
-
Inspect the flange if you can: cracked, loose, too low/high means extra work.
-
If your rough-in is 11–11.5", don’t guess—verify the toilet’s rear clearance requirement or choose the correct rough-in size.

FAQs
1. Where do I measure from for rough-in?
When you’re measuring for a new toilet, the most reliable approach is to measure from the finished wall to the center of the flange or closet bolts. This is the true toilet rough-in distance, and it tells you exactly where your toilet will sit once installed. Don’t rely on the old toilet’s edge or guesswork—accurate rough-in size matters for ensuring the toilet fits without tank-to-wall or bowl clearance issues. Even small miscalculations can affect how different toilet models fit. Using a toilet rough-in measurement guide can make sure you find the right toilet for your bathroom layout and avoid surprises.
2. Is rough-in measured to the wall or baseboard?
Always measure to the finished wall, not the baseboards. Baseboards stick out and can make the rough-in appear larger than it really is, which can lead to ordering the wrong toilet. Focus on the surface that will exist when the toilet is installed—painted drywall, tile, or other finished wall material. Pop the closet bolt caps if needed and measure to the center. This step ensures you’re getting an accurate toilet rough-in size. Following a toilet rough-in measurement guide helps you avoid mistakes, confirms your existing toilet’s spacing, and ensures the toilet to fit aligns with your floor flange location.
3. Can I put a 12" toilet on a 10" rough?
Generally, a 12-inch toilet won’t fit properly on a 10-inch rough-in without modifications. The tank might press into the wall, or the bowl could sit too far forward, creating clearance issues. If your rough-in is truly 10 inches, you’ll need a 10-inch toilet or plan for adjustments like moving the flange or altering the wall. Measuring accurately is crucial here—use a tape to measure to the center of the flange and check the specs of different toilet models. Following a toilet rough-in measurement guide ensures you pick the right toilet and prevents frustrating trial-and-error when trying to install a toilet to fit your space.
4. Is a 14-inch rough-in common anymore?
Fourteen-inch rough-ins aren’t as common these days, mostly appearing in older or custom bathrooms. You can often install a 12-inch toilet on a 14-inch rough, but this usually leaves a noticeable gap behind the tank and can reduce front clearance. Accurate rough-in measurement is key—measure to the center of the flange to confirm the toilet will sit comfortably. Different toilet models handle this gap differently, so it’s important to know what you’re buying. Using a toilet rough-in measurement guide helps you evaluate whether your existing toilet will fit or if you need to consider adjustments to get the right toilet for your layout.
References


Leave a comment
This site is protected by hCaptcha and the hCaptcha Privacy Policy and Terms of Service apply.