


A sunken tubbase can turn an ordinary bathroom into a calm, spa-like space. The tub sits down in a recessed floor “pit,” so the rim looks flush with the finished floor or just slightly above it. That clean look is real—but it also changes the structure, waterproofing, plumbing access, safety, and cost.
Quick Answer: What You Should Know First
A sunken tub is a bathtub installed into a recessed floor opening, supported by a framed, load-bearing tubbase (the support platform) with continuous waterproofing around it. It’s best for new builds and full-gut remodels, because the floor structure and drain heights can be planned early. The biggest watch-outs are hidden leaks, hard-to-reach plumbing, slip and trip risk at the opening edge, and higher structural labor—especially on framed floors upstairs. Many retrofit projects land around $8,000–$20,000+ all-in, while new construction is often less because the work is planned from the start.
Sunken tubbase: What It Is and Why It Matters
A sunken tubbase is more than a design detail—it’s the hidden structure that determines whether a sunken tub looks seamless and performs safely over time. Understanding how a tub is recessed into the floor, supported underneath, and integrated with the surrounding structure helps explain why some sunken tubs feel solid and spa-like, while others become costly maintenance problems. Before diving into costs, installation, or safety, it’s worth getting clear on what a sunken tubbase actually is and why it matters.
Definition: The Core Concept
What is a sunken tub? A sunken tub is a bathtub that is recessed into the floor so the rim ends up level with, or slightly above, the surrounding bathroom floor. The point is a built-in look that feels seamless, like the tub “belongs” to the architecture instead of sitting on top of the floor.
People often say “sunken tubbase” when they’re really talking about the hidden work that makes the tub possible: the support frame and setting bed underneath. To put it simply, the tubbase is the structure that holds the tub steady and spreads its weight safely into the floor system. That includes the framing, any leveling layer (often mortar or a leveling compound), and the way the rim is supported so it doesn’t crack under stress.
Key Variations You’ll See
A fully sunken tub is the most dramatic look. The rim is flush with the floor, and you step down into the tub opening. A semi-sunken tub lowers the tub into the floor but keeps a small “reveal” above the floor—often paired with one step, two steps, or a short deck ledge. Many people who worry about safety choose semi-sunken because the opening is easier to see and the edge is less of a surprise in low light.
You may also hear about Japanese-inspired soaking wells (often called ofuro-style). These are deeper and more “sit-and-soak” than “stretch-out-and-soak.” The feel can be amazing, but the depth and water volume can raise the weight and waterproofing stakes.
Is a Sunken Tub Right for Your Bathroom? A Quick Decision Snapshot
A sunken tub can look stunning in the right space—but it’s not a universal upgrade. Before committing, it helps to understand when a recessed tub truly fits your layout, budget, and lifestyle, and when a semi-sunken or standard option may be the smarter call. This quick decision snapshot breaks it down so you can judge at a glance whether a sunken tub makes sense for your bathroom.
Best-Fit Scenarios
If you’re building a new home, a sunken soaking tub can be planned into the structure from day one. That matters because a recessed tub needs the right drain height, venting path, and a clear plan for access to the pipes. When the builder can design around those needs, the project tends to be cleaner and less stressful.
A sunken tub can also work in a major remodel where you are already opening the floor and walls. In fact, I’ve seen sunken tub projects go well when the homeowner decided early, before tile was chosen and before the plumber rough-in started. The moment you try to “make it work” after the floor is finished, costs and compromises pile up fast.
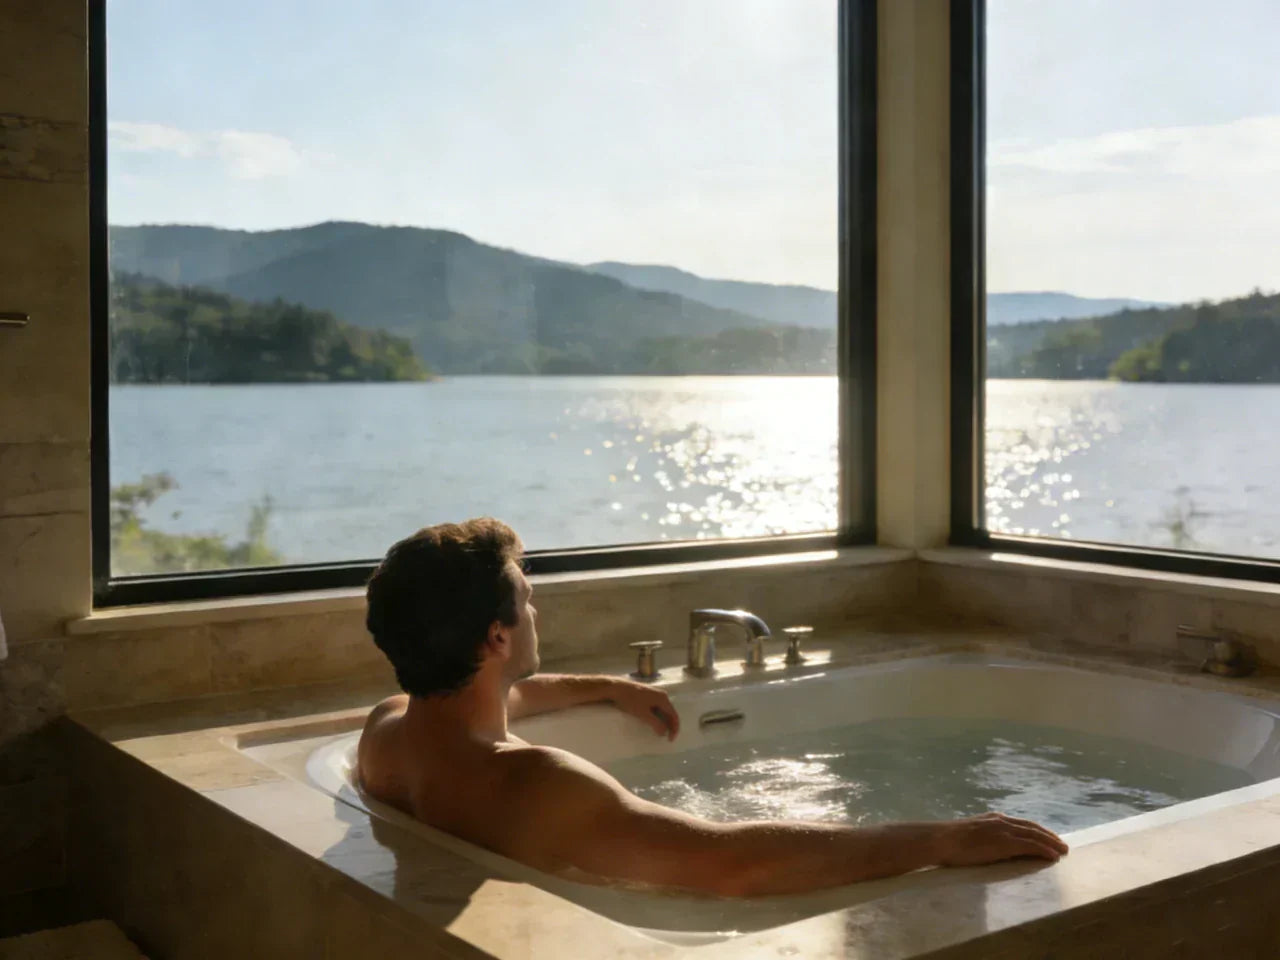
Design-wise, sunken tubs often shine in master bathrooms where the goal is a calm, open look. Because the tub sits low, it can make a compact bathroom feel less crowded than a tall freestanding fixture. It also photographs well near a window or as a center-of-room feature—if the room is large enough and the edge is made safe.
When to Avoid or Choose a Semi-Sunken Option Instead

If you want a quick bathroom update with minimal demolition, a fully sunken bathtub is rarely a good match. The work often means cutting floors, reframing, moving drains, and sometimes opening the ceiling below.
Also think about who uses the space. Do you have small children? A fully flush opening can be harder to notice, especially when the bathroom is dim or the tub is filled. Do you live with anyone who has limited mobility? A sunken tub with steps and grab bars can help some people, but wet steps are still a real slip risk if the surfaces are smooth.
If you love the look but want fewer regrets, semi-sunken is often the middle path: you still get that “submerged” feel without creating a flush opening that can act like a trip hazard.
Design and Layout Planning for a Successful Sunken Tubbase
A good sunken tubbase isn’t just about how the tub looks once it’s finished—it’s about what’s planned before the floor is ever opened. Space allowances, rim design, materials, and structural support all quietly determine whether the result feels luxurious or becomes an expensive lesson. This section focuses on the layout decisions that make or break a sunken tub installation.
Space and Clearances That Prevent Costly Rework
Before anyone cuts the bathroom floor, plan the “invisible” space, not just the tub footprint. The tub frame is thick. The tub needs room for the drain and overflow. If you want jets or an air system, you need service clearance for the pump and controls.
A question to ask yourself early is simple: do you want the rim fully flush, or do you want a small reveal? Flush rims look sleek, but they leave less margin for edge detailing and water control at the seam. A small reveal can make the opening easier to see and can reduce the chance that water runs straight into the floor joint when people get in and out.
Here’s a simple way to picture the two common profiles:
Flush Rim vs. Semi-Sunken Tub Design
| Feature | Flush Rim (Fully Sunken) | Semi-Sunken (Small Reveal) |
| Rim position | Completely flush with the finished floor | Slightly above the finished floor |
| Visual effect | Seamless, minimalist, built-in look | Clean and low-profile with subtle definition |
| Tub body placement | Entire tub recessed below floor level | Mostly recessed, with a small portion exposed |
| Waterproofing difficulty | High — requires precise detailing | Moderate — easier to manage transitions |
| Drainage planning | Critical to prevent standing water | More forgiving with proper slope |
| Maintenance access | Limited and harder to plan | Easier to integrate service access |
| Structural requirements | Highest structural demand | Lower than fully sunken designs |
| Slip / trip risk | Higher if floor is wet and edges are invisible | Reduced due to visible edge |
| Best for | Luxury, spa-style bathrooms with professional construction | Residential projects balancing design and practicality |
Materials, Heat Retention, and Everyday Comfort
Also think about how you’ll use the rim area. Many homeowners want a small deck ledge for a towel, a book, or a bath tray. That can be a smart move because it encourages a wider rim zone where you can build slip-resistant flooring and better lighting, instead of walking right at the edge.
If you are considering a sunken shower bath (a layout where the tub and shower share a recessed wet zone), plan drainage and splash control very carefully. This style can look seamless, but it asks more from waterproofing and can feel slippery if the floor finish is glossy.
A Plan-Before-You-Cut Checklist
Before demolition, confirm four things: where the drain will sit after the tub is lowered, where the overflow will connect, where the access panel will be located, and how the tubbase will transfer weight into the structure. If any of those answers is “we’ll figure it out later,” that’s a warning sign. Sunken designs punish late decisions.
Structural Engineering and Load Basics Behind a Sunken Tubbase
A sunken tub may look calm and effortless once finished, but structurally it is one of the most demanding fixtures you can put into a bathroom floor. The tubbase has to manage concentrated weight, movement, and moisture at the same time. Whether your home sits on a concrete slab or a framed floor largely determines how complex—and risky—the work will be.
Concrete Slab vs. Framed Floor: The Biggest Structural Divide
A recessed tub in a concrete slab can mean saw-cutting and removing part of the slab, digging down, then re-pouring with the right reinforcement. This can be noisy, dusty, and pricey, but the end result can be very solid. The main risks are cutting something you didn’t expect (like plumbing) and getting waterproofing wrong at the cold joint where new concrete meets old.
On a wood-framed floor—especially an upper story—installing a sunken tub often means cutting joists and building a new framed opening. Many projects also need added beams, posts, or other support below to handle the load. This is where a structural engineer is worth the fee. I’ve worked on remodels where the bathroom looked simple on paper, but once the subfloor came up, the framing told a different story and the plan had to change.
Support Frame Essentials Every Tubbase Must Handle

A tubbase is not just a “box” to hold a tub. It needs to carry a heavy, shifting load without flexing. Water moves. People move. If the base flexes, grout cracks, tile cracks, and seals fail.
A practical way to think about weight is to remember that water is heavy, and deep soaking tubs hold a lot of it. The numbers below are not exact for every model, but they show why support matters.
| Load item | Typical range |
| Water weight (full tub) | ~300–900+ lb |
| Tub weight (empty) | ~60–350+ lb |
| 1–2 bathers | ~150–450+ lb |
| Total working load | ~600–1,700+ lb |
The key point is not the exact number. The key point is that a sunken bathtub can act like a small, moving water tank sitting in your floor system. That is why “winging it” with framing is risky.
Plumbing, Drain Height, and Service Access That Can Make or Break a Sunken Tubbase
A sunken tub rarely fails because of how it looks. It fails because of what you can’t see. Drain height, overflow routing, venting, and service access are often the real deal-breakers. If these are not solved early, even a beautifully designed tubbase can turn into a long-term maintenance problem.
Drain and Overflow Realities You Must Plan First
How do you do a sunken tub in real life? You plan the plumbing first, then build the recess around it. When a tub drops down into the floor, the drain and overflow elevations change. The drain may need to be lowered and rerouted. The overflow may need a different path. Venting may need adjustment. If the bathroom is over another finished space, this can affect the ceiling below.
This is where many homeowners get surprised: the tub itself is often not the hardest part. The drain height and access plan are.
Service Access Is Not Optional
If you only take one idea from this guide, let it be this: plan service access as if a future leak is guaranteed. Because even if the tub is installed perfectly, seals age and parts fail.
A good access plan means you can reach the drain and overflow without breaking tile. Common options include a removable panel on an adjacent wall, a closet-side access door, or access from the ceiling below (if there’s a room under the bathroom). For a jetted tub, you also need access to the pump and any electrical service point.
I once got called into a repair where the homeowner had a slow leak under a sunken tub. The tub looked perfect. The tile work was beautiful. But there was no access panel. The fix ended with tile demolition anyway because the leak source couldn’t be reached. The lesson was painful and expensive: hidden plumbing without access is a “pay later” decision.
Waterproofing a Recessed Tubbase With Leak Prevention as the First Priority
Sunken tubs raise the stakes for waterproofing. The recessed design can hide early warning signs of leaks, allowing moisture to collect in the floor cavity, soak framing, and promote mold growth before anyone notices. With a standard tub, problems often reveal themselves sooner. With a sunken tubbase, damage can stay invisible until it becomes far more serious.
When people ask, “What is the purpose of a sunken tub?” the honest answer is that it’s primarily about the bathing experience and the seamless, built-in aesthetic. It is a design-driven choice. And because it’s a design choice rather than a functional necessity, it demands a waterproofing strategy that is at least as robust as what you’d expect in a properly built shower pan.
Why Sunken Tub Installations Carry Higher Risk
Sunken designs can hide problems. If water gets past the surface layer, it can sit in the floor cavity, soak framing, and grow mold before anyone notices. The U.S. Environmental Protection Agency (EPA) notes that mold can begin growing on damp materials within 24–48 hours, particularly in enclosed or poorly ventilated spaces. In a recessed tubbase, this kind of hidden moisture can persist much longer than in a standard above-floor tub installation. With a standard tub, a leak often shows itself faster. With a recessed tubbase, the wet area can stay out of sight until damage is greater.
So when people ask, “What is the purpose of a sunken tub?” the honest answer is that it’s mainly about the bathing experience and the seamless aesthetic. It’s a design choice. Because it’s a design choice, it must be protected with a waterproofing system that is treated as seriously as a shower pan.
A System Approach Professionals Use to Reduce Failure
A safer approach is to think of the whole recess as a waterproof “container,” not just a hole in the floor. In some designs—especially sunken shower bath layouts—builders borrow proven concepts from shower pan systems, such as continuous membranes and pre-sloped bases, to help manage water movement and reduce long-term leak risk in recessed wet zones. That usually means a continuous waterproofing layer on the surfaces of the recessed area, sealed corners, and carefully sealed penetrations for plumbing.
The floor-to-tub edge needs a movement-friendly joint, because tubs and buildings move slightly. Hard grout jammed into a change-of-plane joint is a common failure point. In many bathrooms, a flexible sealant designed for wet areas is used at that seam.
Before finishes go in, a flood test (when allowed and done correctly) can cause problems early. This is one of those checkpoints that feels slow in the moment but can prevent months of regret.
Installation Overview for a Sunken Tubbase Using a Practical Step-First Approach
Installing a sunken tub is not a simple “set the tub and tile around it” job. It’s a sequence-driven process where early decisions lock in everything that follows. Most successful projects follow the same core logic: confirm structure and plumbing first, build the tubbase second, waterproof thoroughly, and only then move on to finishes.
A Realistic Seven-Step Installation Sequence
Installing a sunken tub is not just “set tub, tile around it.” The steps below are a practical sequence many contractors follow. The exact order can vary, but the idea is consistent: confirm structure and plumbing first, then build the tubbase, then waterproof, then finish.
-
Measure and confirm structural feasibility
-
Plan plumbing routes and access panels
-
Demo and verify utilities (wiring, ducts, pipes)
-
Build or reinforce the tubbase frame (engineered as needed)
-
Set the tub, connect drain/overflow, and leak test
-
Confirm rim alignment (flush or planned reveal)
-
Finish surfaces, seal, and do a final functional test
Step-by-Step Risk Summary and Prevention Checklist
| Step | What can go wrong | How to prevent it | Inspection checkpoint |
| 1. Measure + feasibility | Tub doesn’t fit after framing and tile | Include framing thickness and finish layers in drawings | Pre-demo site measure |
| 2. Plan plumbing + access | Drain too high; no service route | Confirm drain elevations; choose access location early | Plumbing rough plan review |
| 3. Demo + verify utilities | Cut a wire/pipe/duct in the floor | Locate utilities before cutting; open carefully | Pre-cut visual check |
| 4. Build/reinforce tubbase | Floor flex; rim stress; squeaks | Engineer joist changes; add blocking; keep base level | Framing inspection |
| 5. Set tub + leak test | Slow leak hidden under tub | Test drain/overflow; check all connections | Leak test sign-off |
| 6. Rim alignment | Rim not flush; trip edge; poor tile line | Shim and level; confirm finish height | Level check before tile |
| 7. Finish + seal | Cracked grout; water at seam | Use correct movement joint; slip-resistant rim zone | Final wet test + drain test |
Costs and Budget Ranges for a Sunken Tubbase Project
When people ask, “How much does a sunken tub cost?” they’re usually thinking about the price of the bathtub itself. In reality, the tub is only one line item. The real cost of a sunken installation lives in the tubbase—structural changes, waterproofing, plumbing adjustments, and finish work that a standard tub doesn’t require.
For many retrofit projects, a realistic order-of-magnitude budget lands around $8,000–$20,000+ all-in. New builds can come in lower because framing, drains, and access are planned from the start instead of being modified after the fact.
How Much Does A Sunken Tub Cost
People usually ask this thinking about the price of the bathtub. But the tub is only one piece. The recessed tubbase changes structure, waterproofing, tile work, and plumbing. That is where the real budget lives.
A typical order-of-magnitude range for many retrofit sunken tub projects is $8,000–$20,000+ all-in. New builds can be less because the framing and plumbing are planned, not rebuilt.

What Drives the Budget the Most
The biggest cost swing is the floor type. Cutting and repairing a slab is one kind of project. Cutting and reframing joists on an upper floor, possibly adding support below, is another.
The finish level matters too. A simple tile surround is different from large-format porcelain, stone, heated floors, or a full wet-room build. Plumbing relocation can be minor if the drain is already close, or major if the layout forces rerouting and vent changes.
Here are common budget bands, shown as ranges (not quotes), to help you plan a conversation with a contractor:
| Cost item | Typical range (USD) | What makes it go up |
| Tub (mid-range) | $1,000–$3,000 | premium materials, deeper soak, special shapes |
| Structural/framing work | $3,000–$10,000+ | upper floors, joist changes, added beams/posts |
| Waterproofing + finishes | $2,000–$5,000+ | high-end tile/stone, complex detailing, heated floor |
| Typical retrofit all-in | $8,000–$20,000+ | unknown conditions, access work, luxury finishes |
A Quick Budget Estimator by Scenario
This is a simple planning tool. Real bids vary by region, site conditions, and finish choices.
| Scenario | Budget band (USD) | Why |
| New build, semi-sunken, standard finishes | $6,000–$12,000 | planned framing and drain heights reduce rework |
| New build, fully sunken, higher-end finishes | $10,000–$18,000+ | more detailing and waterproofing care |
| Retrofit on slab, semi-sunken | $8,000–$16,000 | saw-cut and patch, plus finishes |
| Retrofit on framed floor, fully sunken | $12,000–$25,000+ | reframing, possible work below, higher risk |
Safety and Accessibility Considerations for Sunken Tubs
Sunken tubs are not inherently unsafe—but they are unforgiving of poor design. Safety has to be intentional, not assumed. The most common risks come from the opening edge itself and from stepping onto wet surfaces, especially when visibility or traction is limited.
Are Sunken Tubs Safe in Everyday Use?
They can be safe, but you have to design for safety instead of hoping for it. The most common hazards come from the opening edge and wet stepping surfaces.
A fully flush sunken tub can create a tripping hazard because the opening is at floor level. At night, or for guests, it may not “read” as a tub. According to the U.S. Centers for Disease Control and Prevention (CDC), falls are one of the leading causes of injury in the home, and bathrooms are among the highest-risk areas due to water on the floor, smooth surfaces, and sudden changes in level. This makes slip resistance, clear edge definition, and adequate lighting especially important around a sunken tub opening. Slip risk is also real when stepping down into a wet basin, especially if the floor tile is smooth or the step edge is sharp.
Visibility matters for children too. A sunken bathtub can be less visually obvious than a raised tub, and that can increase risk if a child wanders in. If you have young children, think hard about barriers (like a door lock), a cover, or choosing a semi-sunken option that signals “tub here.”
Practical Mitigations That Meaningfully Reduce Risk
Safety improves when the rim zone is treated like a wet entry, not like a living-room floor. Slip-resistant flooring near the rim is one of the highest-value upgrades you can make. Good lighting also matters more than people expect. Bright, high-quality light makes edges easier to see and reduces missteps.
If you want a sunken tub with steps, design the steps like you would in a pool: stable, wide enough to use comfortably, and finished with slip-resistant surfaces. Don’t rely on a narrow, decorative step that looks good but feels sketchy when wet.
Grab bars can feel like something only hospitals use, but in real homes they can be subtle and still helpful. The key is planning blocking in the walls early so you can place handholds where they make sense. Accessibility guidelines published by the U.S. Access Board under the Americans with Disabilities Act (ADA) emphasize stable entry points, secure handholds, and predictable level changes in wet environments. While most private homes are not required to meet ADA standards, these principles provide a useful reference when designing safer sunken tub steps, rim heights, and grab bar placement.
If mobility is a priority, a semi-sunken tub with one low step and a grab bar is often safer than a fully flush opening.
Maintenance and Repair Planning to Avoid Tile Demolition Repairs
Sunken tubs rarely fail in dramatic ways. Most issues start quietly—slow leaks at the drain, overflow, or a fitting that loosens over time. In jetted systems, the pump and related connections add another layer of components that eventually need service.
The frustrating part is that the first visible sign of trouble may appear far from the tub itself, such as a stain on the ceiling below the bathroom. That delay is exactly why recessed tub installations need a maintenance plan that assumes future service will be required.
What Fails Most Often in Sunken Tub Installations
Most problems are not dramatic floods. They are slow leaks at the drain, overflow, or a fitting that loosens over time. With jetted systems, access to the pump area matters too.
The frustrating part is that the first sign of a problem might be far away, like a stain on the ceiling below the bathroom. That’s why recessed installs need a plan that assumes future service.
Design-for-Maintenance Details That Save Money Later
A removable access panel is the difference between a simple repair and a messy one. If you can open a panel and reach the drain and overflow, you can often fix a small leak quickly. Without it, repairs may require pulling tile or even lifting the tub.
Take photos before walls and floors close up. It sounds almost too simple, but it helps you (or the next homeowner) know where pipes and wires run. Keep those photos with your home records.
Also ask your contractor to show you the “service map” before tile goes in: what parts can be reached, from where, and with what tools. If the answer is vague, pause the job until it’s clear.
Choosing the Right Tub Model for a Sunken or Drop-In Installation Without Regret
Choosing a bathtub for a sunken or drop-in installation is different from choosing a tub for a standard bathroom. Many buying guides focus on style, size, and comfort, but recessed installs introduce additional constraints. Not every tub shape is easy to support at the rim. Not every model allows practical drain access. And not every material behaves well once it’s locked into a tight opening. Instead of shopping by appearance alone, it’s smarter to shop by sunken tubbase compatibility. That means asking a few critical questions upfront: Does the manufacturer provide clear support and installation instructions? Is there a realistic access route for the drain and overflow? And does the tub’s rim and shape allow safe, durable edge detailing?
What to Look For That Many Buying Guides Skip
Many bathtub buying guides focus on style and comfort, but sunken installations require a different way of thinking about bathtub design, because the tub becomes part of the floor structure, not just a fixture you place on top of it. Not every tub shape is easy to support at the rim. Not every tub makes drain access simple. And not every tub material behaves the same once it’s built into a tight opening.
Instead of shopping by looks alone, shop by “sunken tubbase compatibility.” That means asking: does the tub have clear support instructions, does it allow an access route for the overflow and drain, and does its shape allow safe edge detailing?
Practical Comparison for Sunken Install Compatibility
| Feature to compare | Better for sunken installs | Watch-outs |
| Installation type | drop-in / undermount designs meant for deck installs | tubs meant only for freestanding placement |
| Material behavior | materials that don’t flex much and hold heat well | very flexible shells that can move and crack grout lines |
| Drain/overflow design | standard parts with reachable connections | proprietary parts with hard-to-find service access |
| Rim shape | wide or stable rim for clean finishing | thin rims that are easy to chip or stress |
| Warranty clarity | clear install requirements for recessed builds | vague language that can void coverage |
If you’re trying to choose between a sunken tub vs freestanding tub, this is often the turning point. Freestanding tubs can be easier to service because the plumbing is often reachable from outside the tub. Sunken tubs can look more seamless, but that seamless look can hide the very parts that sometimes need attention.

Design Trends and Real-World Use Cases for Sunken Tubs Without Regret
Sunken tubs are often chosen for their spa-like appearance, but the designs that age best are the ones that balance visual calm with everyday usability. Trends come and go, but placement, lighting, finishes, and ventilation determine whether a sunken tub still feels good to live with years later.
Common Placements That Work Well in Real Homes
Sunken tubs are often placed near windows, where natural light makes the low profile feel calm and intentional. They also work as a center feature in larger master bathrooms, especially when the floor finish is continuous so the tub reads as part of the room, not a separate object.
Concrete-look surfaces and large-format tile are popular because they reduce visual breaks. But keep function in mind: large tile can be slippery, and fewer grout lines doesn’t always mean safer footing. Choosing a slip-resistant finish is more important than matching a photo online.
Details That Improve Daily Use as Much as They Improve Looks
Soft perimeter lighting around the tub edge can make a big difference at night. It helps guests see the opening and helps you avoid stepping too close to the rim when the floor is wet.
A small deck ledge can also be more than decoration. It can act as a safe staging area for towels and toiletries so you’re not reaching across wet surfaces. If you like plants in the bathroom, choose ones that don’t drop lots of leaves into the recessed area, because cleaning a tight rim zone gets old fast.
Ventilation matters too. A deep soak plus a warm room creates lots of humidity. If the bathroom fan is weak or poorly vented, you can end up with peeling paint, foggy mirrors, and mold risk. If you’re already remodeling a bathroom, upgrading ventilation is often money well spent.
Permits, Codes, and Professional Help for Sunken Tub Projects
A sunken tubbase is not a weekend cosmetic project. If joists will be cut, if beams might be added, or if a slab will be altered, it’s time to involve a structural engineer or a contractor who has done recessed installs before. This protects both safety and resale value.
Permits vary by city, but many areas require permits for structural changes and plumbing changes. Inspections often happen at key points: framing (before it’s covered), plumbing rough-in, and sometimes waterproofing, depending on local rules.
When you interview a contractor, ask direct questions. Have they installed a sunken bathtub before? Where will the access panel be? What waterproofing system will they use in the recess? Will they do a leak test before tile? Clear answers usually signal a better outcome.
Conclusion
A sunken tubbase delivers a premium, built-in bathing experience by recessing the tub into the bathroom floor for a seamless look. But the success of the project depends less on the tub you pick and more on the hidden work: engineered support, continuous waterproofing, and a real plan for plumbing access. If you want the look with fewer downsides, semi-sunken designs can reduce trip risk and make maintenance easier. Budget honestly for structural labor, treat leak prevention as the main goal, and make access non-negotiable so a future repair doesn’t turn into tile demolition.
FAQs
1. Is a Sunken Hot Tub a Good Idea?
A sunken hot tub (indoors or outdoors) can look clean and feel easy to step into, but the risks and costs scale up. Hot tubs weigh much more than a typical bathtub when full, and the equipment needs regular service access. Moisture control is also a bigger deal indoors because hot tubs create steady steam and humidity. If you’re thinking about an indoor sunken hot tub, treat it like a small pool project: serious structure, serious waterproofing, and serious ventilation. Outdoors, a sunken hot tub still needs drainage planning so rainwater doesn’t flow into the opening and so the equipment bay stays accessible. In many cases, people get a similar “low profile” look with a partially recessed design that keeps service panels reachable.
2. Can you put a sunken tub on a second floor?
Yes, it’s possible—but it’s rarely simple. A filled tub weighs a lot, and when you add a person (or two), the load can exceed what a standard second-floor structure was designed to handle. That often means modifying joists, adding beams, or reinforcing the floor system. Because of the safety risks, a structural engineer is usually involved to calculate loads and specify reinforcements. Skipping this step isn’t worth it—floor deflection, cracks, or long-term structural damage can cost far more to fix than doing it right upfront.
3. What are the cons of sunken bathtubs?
The biggest downsides tend to show up over time rather than right away. Hidden leaks are harder to spot because plumbing is buried below floor level, and access for repairs is more limited. That alone can turn a small issue into a major renovation. There’s also more structural work involved compared to a standard alcove or freestanding tub, which raises both cost and complexity. Finally, if the tub opening is flush with the floor, there can be a higher slip or trip risk—especially in wet bathrooms—so edge detailing and non-slip surfaces really matter.
4. Do sunken tubs make the bathroom feel bigger?
Often, yes. Because the tub sits lower than the surrounding floor, it doesn’t visually dominate the room the way a tall freestanding tub can. Sightlines stay more open, which can make the bathroom feel wider and calmer, especially in modern or spa-style designs. That said, the effect depends on the overall layout. Good lighting, clean lines, and uncluttered finishes are what really amplify that “bigger bathroom” feeling.
5. Is a sunken shower bath harder to waterproof?
Usually, yes. When you combine a shower with a recessed tub zone, you increase splash, runoff, and the chance of standing water. That means waterproofing details—like membranes, slopes, and drain placement—have to be done perfectly. If corners are cut, water can seep into the structure below, leading to long-term damage that’s expensive to fix. With the right planning and professional installation, it can work well, but it’s definitely less forgiving than a standard above-floor tub or shower setup.
References


Leave a comment
This site is protected by hCaptcha and the hCaptcha Privacy Policy and Terms of Service apply.