



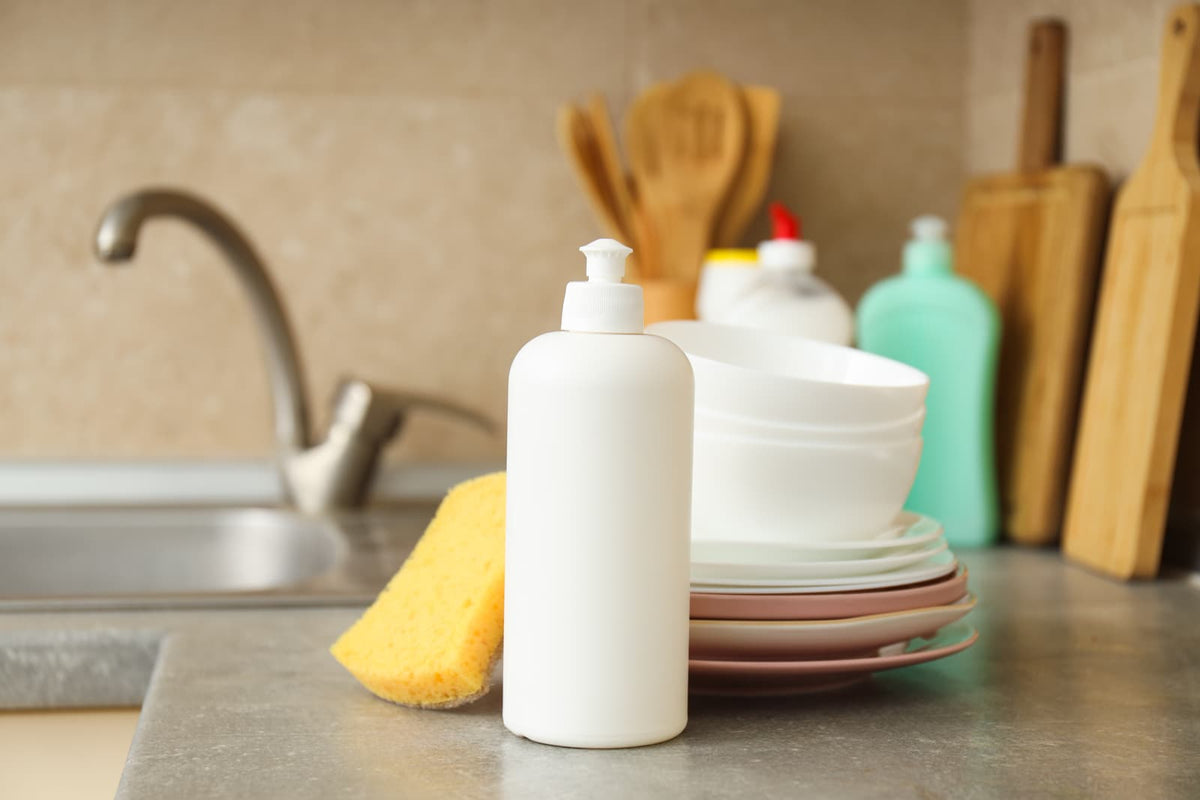
A built-in soap dispenser can clear a loose bottle from the counter and place dish soap within one-handed reach. However, not every sink or countertop can accept one without modification.
Before buying, confirm four things: a suitable mounting hole, compatible deck thickness, enough space below for the bottle or tube, and a spout position that works with your faucet and washing area. If you are replacing an old dispenser, measure the cutout rather than assuming the new unit will fit.
Is a Built-In Dispenser Right for You?
A built-in dispenser makes the most sense for households that use dish soap frequently and have an existing accessory hole or a straightforward installation path. It is less compelling when hand-washing is occasional, under-sink access is poor, or drilling would add significant risk and expense.
Decision Snapshot: Best and Worst Use Cases
|
Sink or household situation |
Better choice |
Why |
|
Frequent hand-washing with a spare accessory hole |
Built-in dispenser |
Convenient and easy to justify |
|
Crowded cabinet with difficult bottle access |
Top-fill dispenser or compatible tube kit |
Reduces under-sink handling |
|
Mostly dishwasher use |
Countertop bottle |
Avoids dedicating a hole to an occasional task |
|
Stone countertop with no opening |
Countertop bottle unless drilling is professionally reviewed |
Avoids an unnecessary permanent modification |
|
Existing failed built-in dispenser |
Measured replacement |
Reuses the cutout without changing the layout |
|
Sink deck needed for another fixture |
Countertop bottle |
Preserves the opening for a higher-priority accessory |
A built-in model is a good fit when you want a permanent, uncluttered setup and accept occasional cleaning and priming. A countertop bottle is better when you value flexibility, change soap frequently, or cannot service the area below the sink.
Is It Worth It for Dishwasher-First Homes?
Owning a dishwasher does not make a built-in dispenser unnecessary. Cookware, knives, cutting boards, and delicate items may still be washed by hand. The better question is how often you reach for dish soap at the sink.
If you cook daily and regularly wash or pre-clean greasy cookware, a built-in pump may still earn its place. If soap is used only for occasional cleanup, the accessory hole may be more valuable for another fixture. Soap that sits unused in the pump may also dry around the outlet or become harder to prime.
Who Should Keep a Countertop Bottle?
A countertop bottle is usually the more practical option if you:
- Rent or expect to change the kitchen layout
- Have no suitable accessory opening
- Cannot comfortably reach the mounting hardware below
- Switch between thick, foaming, or specialty soap formulas
- Need the available hole for a filter faucet, sprayer, or other fixture
- Want the simplest possible cleaning and replacement process
A countertop dispenser is not an inferior solution. In a low-use or difficult-access kitchen, it can be the better long-term decision.
Weigh the Key Trade-Offs
The main benefit of a built-in dispenser is visible simplicity. The main drawback is that refilling, suction, and mounting problems are largely hidden under the sink.
Cleaner Counters Versus Added Maintenance
A built-in pump removes a loose bottle that may drip or leave rings on the counter. It also lets you dispense soap with one hand while holding a sponge, brush, or pan.
In return, expect occasional maintenance. Common problems include dried soap in the pump, lost prime after the reservoir runs empty, air entering through a loose tube connection, and a mounting nut that loosens after repeated use.
Service access matters as much as appearance. A dispenser that looks tidy above the sink can become frustrating if the bottle is trapped behind a disposal, filter, or pull-out bin.
Small Reservoir Versus Bulk-Bottle Tube
A standard built-in dispenser usually draws from a dedicated bottle attached below the deck. This keeps the system compact and limits the amount of soap that can leak if a connection fails. The trade-off is more frequent refilling.
A soap dispenser for a kitchen sink with a tube kit draws from a larger container stored in the cabinet. It can reduce refill frequency, but the longer suction path introduces additional connections that must remain airtight. The tube also needs protection from sharp bends, moving pull-outs, and stored items.
Choose an attached reservoir when access is easy and soap use is moderate. Consider a compatible tube kit when soap use is heavy and there is a secure place for the larger container.
Dedicated Hole Versus Other Sink Accessories
Each opening in the sink or countertop has value. Before assigning one to soap, consider whether you may want that location for:
- A filtered-water faucet
- A separate side spray
- A hot-water fixture
- Another sink or appliance control
More fixtures also create more bases to clean around. If you are planning a new sink, review the complete deck layout rather than treating the dispenser as an isolated purchase. HOROW’s workstation kitchen sink buying guide provides additional context for evaluating sink layout and working space.
Stainless Finish Does Not Guarantee Quality
A stainless soap dispenser for kitchen sink use may have a stainless exterior, a stainless-colored finish, or only selected metal components. The description does not automatically tell you what the pump, threaded shank, retaining nut, or bottle connector is made from.
Review the product documentation for:
- Pump, shank, and mounting-hardware materials
- Bottle and connector construction
- Replaceable pump or tube components
- Compatible soap types
- Finish-care instructions
- Availability of replacement bottles and seals
Matching the faucet finish can create a coordinated appearance, but internal construction and serviceability have more influence on long-term satisfaction.
Understand Costs and Practical Constraints
The hardware is only one part of the cost. Installation becomes more involved when a new opening must be drilled, equipment blocks access, or the dispenser does not match an existing cutout.
Compare Built-In and Countertop Costs
A countertop bottle has no installation cost and can be cleaned or replaced without tools. A built-in dispenser adds mounting hardware, a reservoir or tube system, and possible future replacement parts.
The built-in option offers better value when an unused hole already exists and the cabinet is accessible. It becomes harder to justify when installing it requires permanent countertop work for a feature that will see little use.
Budget for Hardware, Drilling, and Labor
Potential cost drivers include:
|
Cost factor |
Lower-complexity condition |
Higher-complexity condition |
|
Mounting opening |
Existing compatible hole |
New opening required |
|
Surface |
Predrilled, compatible sink deck |
Hard or fragile surface requiring professional review |
|
Cabinet access |
Open area below the hole |
Disposal, plumbing, filters, or storage in the way |
|
Refill design |
Attached bottle |
Bulk container and routed tube |
|
Replacement |
New shank fits the old cutout |
Cutout or deck thickness is incompatible |
|
Installation |
Hardware is easy to reach |
Other components must be moved for access |
Do not buy the dispenser first and treat drilling as a minor detail. Confirm whether the sink or countertop can be modified and who should perform the work before committing to the hardware.
Cabinet Space Can Increase Installation Costs
Deep sink bowls and rear-mounted fixtures can leave little room to reach the retaining nut. A bottle may fit beneath the proposed hole yet still be impossible to remove once the drain, disposal, or filter is installed.
Whenever possible, assess access before other under-sink equipment is permanently positioned. If components need to be disconnected or moved merely to tighten the dispenser, professional installation may be the more practical choice.
Will a Soap Dispenser for Kitchen Sink Fit?
A sink can accept a built-in dispenser only when the mounting area, cutout, deck thickness, and space below are all compatible. The visible flange covering the hole is not enough to prove a proper fit.
Can Any Sink Accept a Dispenser?
No. Some sinks have predrilled accessory openings covered by caps. Others have manufacturer-designated accessory locations. Sinks without either may require drilling through the sink rim or through the countertop behind an undermount bowl.
The mounting surface must allow the dispenser base to sit flat. A narrow, curved, ribbed, or sloped area may prevent the gasket from seating evenly. The hidden washer and retaining nut also need a flat, solid surface below.
Before ordering, remove any existing hole cover and inspect both sides of the deck. Look for reinforcing plates, clips, brackets, or sink features that could obstruct the shank or mounting nut.
Measure Hole Diameter and Deck Thickness
There is no universal answer to “What size hole is needed for a sink soap dispenser?” The correct opening is determined by the threaded shank and mounting design of the specific dispenser.
Measure the existing hole across its inside diameter, then compare the result with the accepted range in the product instructions. Three conditions must be satisfied:
- The shank must pass through the opening without being forced.
- The top flange must fully cover the cutout.
- The washer and retaining nut must clamp against solid material below.
Deck thickness determines how much of the threaded shank remains available for the washer and nut. A dispenser intended for a thin sink deck may not provide enough usable thread for a thick countertop. Gaskets, reinforcing layers, and mounting plates can further reduce the available thread.
A hole that is too large may be hidden by the flange but still fail to support the dispenser. Excessive tightening does not correct an incompatible opening and may damage the gasket, threads, or mounting surface.
Check Bottle and Hand Clearance Below
Measure the space beneath the proposed hole and compare it with the full assembled dimensions supplied for the dispenser. Include the bottle, mounting nut, shank, straw, and any tube connection—not just the visible pump.

Check for conflicts with:
- Sink bowl depth
- Faucet supply lines
- Drain piping
- Garbage disposal
- Water filtration equipment
- Shelves and cabinet framing
- Trash or recycling pull-outs
- Stored cleaning products
Allow room for your hand as well as the bottle. If you cannot grip and turn the reservoir, routine refilling may require removing other cabinet contents.
For a tube system, choose a stable location for the soap container and route the line where it cannot be pinched or pulled. A washable tray under the soap supply can make drips easier to detect and contain.
Match Spout Reach to Your Washing Zone
The spout should deliver soap onto a sponge, brush, or into the bowl—not onto the deck. At the same time, it should not interfere with the faucet handle, large cookware, sink covers, or cutting boards.
Before drilling, make a simple paper or cardboard outline of the pump head. Test the proposed location while:
- Holding a pan with one hand
- Pumping onto a sponge
- Rotating the faucet
- Moving accessories across the sink
- Reaching from your usual working position
Avoid relying on a generic distance from the faucet. Sink size, faucet design, handedness, and washing habits determine the best location.
Plan Installation and Prevent Leaks
Most built-in dispensers use a pump and flange above the deck, a threaded shank through the opening, and a gasket, washer, and retaining nut below. The bottle or supply tube connects after the body is secured.
Follow the hardware order in the product instructions. Similar-looking washers may have different functions.
Can You Reuse an Accessory Hole?
An old sprayer or accessory hole can often be reused when it matches the new dispenser’s requirements. Remove the old fixture and clean the surface before measuring.
Confirm that:
- The hole falls within the dispenser’s accepted range
- The flange fully covers the cutout
- The surrounding deck is flat
- The shank works with the total deck thickness
- The washer and nut fit below
- The previous fixture is no longer needed
If removing an accessory connected to the faucet, follow the faucet’s instructions for disconnecting or reconfiguring it. Do not leave an unused connection unresolved.
Drill Stone Only After Professional Review
Drilling granite, quartz, marble, porcelain, or another hard surface is a permanent modification that can chip or damage the material. Existing supports, edge clearance, and product warranty terms may also affect whether a proposed location is suitable.
Ask the countertop fabricator or another qualified professional to evaluate the material and location before drilling. A sink with a designated accessory opening or manufacturer-approved knockout should be modified only according to its instructions.
Seat Washers and Tighten Without Damage
Clean and dry the mounting area. Install every gasket, washer, and nut in the specified order, making sure the flange sits evenly without rocking.
Tighten the retaining hardware enough to prevent rotation, but do not use extra force to compensate for an oversized hole or uneven surface. Excess pressure can deform a gasket, strip plastic threads, or stress a thin sink deck.
After installation:
- Press the pump from different angles
- Confirm that the base does not rotate
- Check the washer and nut below
- Inspect the bottle or tube connection
- Wipe the area dry and watch for new water or soap residue
What Causes Leaks or Wobbling?
Water around the base may be splash water entering through a folded, missing, or poorly seated gasket. Soap below the sink more often comes from an overfilled reservoir, loose bottle connection, cracked component, or leaking tube joint.
Wobbling commonly results from:
- A loose retaining nut
- Incorrect washer placement
- An uneven mounting surface
- An opening that is too large
- Insufficient thread engagement
- A damaged shank or nut
Find the cause before tightening further. If the mounting parts cannot clamp squarely against solid material, the dispenser may not be compatible with the cutout.
Choose the Right Refill System
Refill design can determine whether a dispenser remains convenient after installation. Consider how you will add soap while the cabinet is fully equipped and in everyday use.
Top-Fill Versus Under-Sink Refilling
A true top-fill dispenser allows the pump head to be removed so soap can be poured through the deck opening. This avoids unscrewing a bottle in a crowded cabinet.

Confirm the refill method in the instructions rather than relying only on the “top-fill” label. Determine whether the reservoir remains attached below and how you can avoid overfilling it.
An under-sink bottle can still be practical when it sits near the cabinet front and is easy to grip. It is less suitable when hidden behind plumbing or storage.
When a Tube Kit Makes Sense
A tube kit is useful for heavy soap use or when removing a small reservoir would be difficult. It should be designed to work with the pump rather than assembled from unrelated parts.
Check for:
- Compatible tubing and connectors
- An airtight connection at the pump
- Enough tube length without excessive slack
- A stable pickup position in the soap container
- Clear routing and valve instructions
- A secure location for the bulk container
A long tube will not perform reliably if a connection draws air or the line is pinched.
Check Valves Help Maintain Pump Prime
A compatible check valve allows flow in one direction and may help keep soap from draining back through a longer tube between uses. It must be installed in the direction shown by the kit instructions.
A valve cannot compensate for a cracked tube, loose fitting, clogged pump, or incompatible soap. Treat it as part of a sealed system, not as a universal cure for priming problems.
Match Soap Viscosity to Pump Design
The best dish soap dispenser for kitchen sink use is one designed for the liquid you intend to dispense. Thick concentrated products may move slowly through a narrow pump or long suction tube. Soaps containing particles, scrub additives, or formulas made for foaming pumps may be unsuitable for a standard dispenser.
Check the dispenser’s care and compatibility instructions. Do not dilute soap unless both the dispenser and soap directions permit it. If you prefer formulas the pump cannot handle reliably, keep a countertop bottle instead.
Prepare for Replacement and Long-Term Ownership
Treat a soap dispenser for kitchen sink replacement as a new fit check. A similar-looking finish or flange does not guarantee that the hidden shank, bottle connection, or mounting hardware will match.
Match Replacements to Existing Cutouts
If practical, remove the failed unit before ordering the replacement. Measure the hole and total deck thickness, and record the available clearance below.
Also check:
- Flange width and coverage
- Shank length and accepted hole range
- Included washers and mounting hardware
- Bottle and straw compatibility
- Tube-connection requirements
- Availability of replacement pumps, bottles, or seals
Do not reuse the old reservoir merely because its threads appear similar. Connections that do not match exactly may leak or draw air.
Will Thick Soap Clog the Pump?
It can. Thick or dried soap may restrict the pump outlet, straw, or tube, particularly when the dispenser is used infrequently. In a bulk-container system, a viscous product also has farther to travel.
Use only soap types accepted by the dispenser manufacturer. If flow repeatedly slows with your preferred formula, changing the dispenser or returning to a countertop bottle may be more practical than frequent cleaning.
Diagnose Lost Prime Before Replacing
A dispenser that pumps only air may not need replacement. Check the system in this order:
- Confirm that the reservoir contains soap.
- Make sure the straw or pickup tube reaches the liquid.
- Inspect the tube for cracks, loose joints, or sharp bends.
- Confirm that the bottle is attached as instructed.
- Look for dried residue at the pump outlet.
- Prime the pump according to its care instructions.
If the manufacturer permits it, removable pump parts may be flushed or soaked in warm water to loosen residue. Replace the dispenser when the pump no longer returns, the body or threads are damaged, connections continue to leak, or compatible service parts are unavailable.
Maintenance Checklist for Reliable Pumping
- Wipe residue from the spout and pump base.
- Avoid leaving the system empty for extended periods.
- Check bottle and tube connections for leaks.
- Keep stored items from pulling or crushing the tube.
- Clean the pump as directed when flow slows.
- Recheck the mounting nut if the head begins to rotate.
- Use liquids compatible with the pump design.
A dispenser should not require constant troubleshooting. Repeated clogging, leakage, or loss of prime despite correct assembly usually indicates a mismatch among the pump, soap, or refill system.
Before You Buy
- Decide whether frequent hand-washing justifies a dedicated hole.
- Measure the cutout and total deck thickness.
- Compare both measurements with the dispenser instructions.
- Check bottle, mounting-nut, and hand clearance below.
- Mock up the spout position before drilling.
- Choose among top-fill, attached-bottle, and tube systems.
- Verify compatible soap types and component materials.
- Check whether pumps, bottles, and seals can be replaced.
- Arrange professional review before modifying a hard countertop.
Questions Homeowners Ask
Can you add a soap dispenser to any kitchen sink?
No. The installation requires a suitable opening, a flat mounting area, compatible deck thickness, and sufficient clearance below. A sink or countertop without an existing hole must be evaluated before drilling.
What size hole is needed for a sink soap dispenser?
There is no universal size. Measure the opening and compare it with the accepted hole range in the specific dispenser’s documentation. The flange and lower mounting hardware must also fit the cutout.
Can an old sprayer hole be reused?
Often, provided the hole diameter, deck thickness, flange coverage, and lower clearance are compatible. Any connection left by the old sprayer should be handled according to the faucet instructions.
How do you replace a kitchen sink soap dispenser?
Remove the bottle or tube, retaining nut, washers, and dispenser body. Clean and measure the opening, then install a compatible replacement using the specified hardware order. Check for movement and leakage before filling it.
Why does a sink soap dispenser pump only air?
The reservoir may be empty, the pickup tube may not reach the soap, or a tube connection may be drawing air. Dried soap can also block the pump. Inspect, clean, and reprime the system as directed before replacing it.


Leave a comment
This site is protected by hCaptcha and the hCaptcha Privacy Policy and Terms of Service apply.