


“Shower installation” is one of those projects where you can hear five different prices from five different people. In 2025, the average shower installation cost runs about $7,000–$8,200, while the full range can be anywhere from $1,000 to $20,000+, depending on your choices. No wonder many homeowners feel lost when they try to plan a bathroom remodel, a walk-in shower installation, or a tub-to-shower conversion.
This guide starts with quick answers to the big questions: how much is a shower, how long it takes, and who you may need to hire. Then it moves into deeper sections on types of showers, materials, DIY vs. professional work, the step-by-step process, hidden costs, and real-world examples. All numbers come from recent national cost data and professional installer estimates, brought together here in one clear, practical guide.
2025 shower installation cost at a glance
Before diving into specific shower types, materials, and installation methods, it helps to start with a quick snapshot of what homeowners can realistically expect to spend in 2025. This overview sets the baseline for comparing options later in the guide.
How much does it cost to install a shower in 2025?
Here is the quick snapshot many people want first. These numbers cover installing a new shower or replacing an existing unit in 2025:
-
Total range: about $1,000–$20,000+
-
National average: about $7,000–$8,200 for a standard shower installation
-
Walk-in shower: $3,170–$11,495, with an average around $7,500
-
Prefab shower stall: $1,000–$8,000
-
Custom walk-in shower: $3,000–$20,000+
Most homeowners end up somewhere between $5,000 and $10,000, but smaller prefab projects can be much cheaper, and custom luxury builds can be much higher.
Typical timelines: how long does shower installation take?
Time matters almost as much as cost, especially if this is your only bathroom. Typical timelines for installing showers look like this:
-
Prefab / simple remodel: about 1–3 days
-
Custom tile walk-in shower: about 1–2 weeks
-
Full bathroom remodel with shower relocation: up to 2–3 weeks
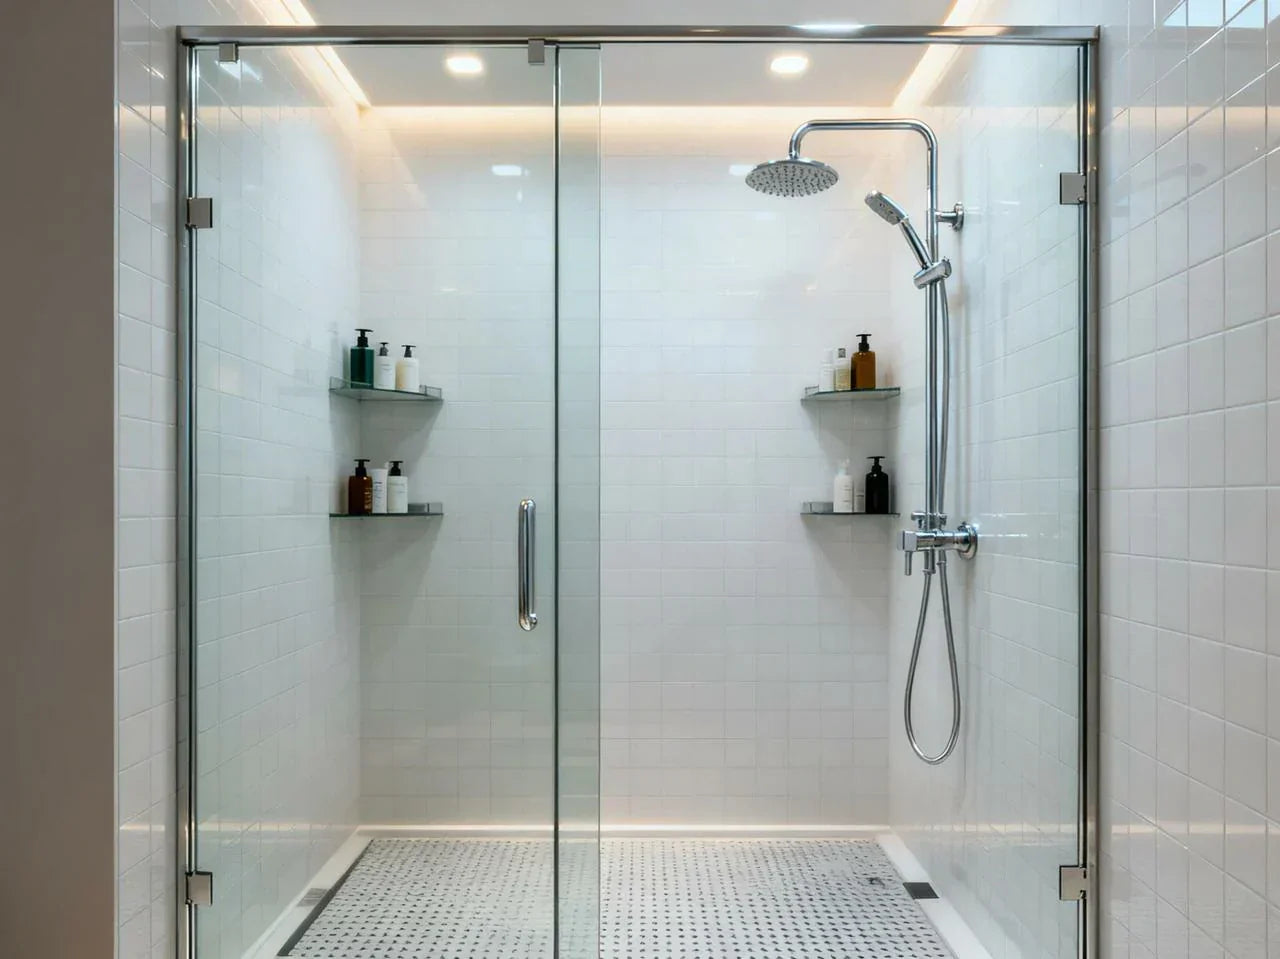
Choosing the right shower type for your bathroom
Choosing the right type of shower sets the tone for the whole bathroom. It affects cost, layout, safety, resale value, and how your shower feels every day.
Walk-in shower vs. tub-shower combo: which is better?
If you are planning a bathroom remodel, one of the first questions is whether to keep a tub-shower combo or move to a walk-in shower installation.
A walk-in shower usually works better if you want easy access, a clean modern design, and you do not use the tub often. It can make a small space feel bigger, especially with clear glass and light tile. Walk-ins are also easier for people with mobility limits and for aging in place.
A tub-shower combo is helpful if you have young kids, like to soak, or want at least one tub for resale. In many areas, buyers prefer at least one tub in the home, often in the main bathroom or primary suite.
In simple terms:
-
A walk-in shines for accessibility, ease of use, and modern style.
-
A tub-shower combo shines for flexibility for families and long baths.
Many homes end up with one tub-shower combo in a hall bath and one walk-in shower in the primary bath as a good balance.

Prefab shower stall vs. custom tile shower
When people look for the least expensive way to install a shower, the answer is almost always a prefab shower kit or stall. The contrast with a custom tile shower is big, in both cost and complexity.
Here is a simple comparison:
| Feature | Prefab Shower Stall | Custom Tile Shower |
| Typical cost | Lower ($1,000–$8,000) | Higher ($3,000–$20,000+) |
| Install time | Faster (1–3 days) | Longer (1–2+ weeks) |
| DIY potential | Good for skilled DIYers | Hard; better for pros |
| Design options | Fixed sizes and limited styles | Nearly unlimited layouts, colors, and patterns |
| Maintenance | Fewer seams; easier to clean | Grout needs care; more joints to maintain |
| Repair | Whole panels may need replacing | Individual tiles can be replaced |
A prefab unit is made from acrylic or fiberglass panels and a matching base. They are ideal in rental units, small baths, and tighter budgets. A custom tile shower lets you set the exact size, shape, and look you want, often with built-in benches and niches, but it adds labor and material cost and needs very careful waterproofing.
When a tub-to-shower conversion makes sense
A tub-to-shower conversion means removing a bathtub and installing a new shower in the same spot. This is common in small homes where you want a walk-in shower but do not have room for both a tub and a separate shower.
It makes good sense when:
-
You rarely take baths and mostly shower
-
You want better access for older adults or anyone with limited mobility
-
You have a second bathroom that still has a tub
-
You want to open up the space and make your bathroom feel bigger
These projects usually range from $1,200 to $12,000, with many landing around $7,000. Costs are lower if you keep the drainage and plumbing in place and use a prefab base and panels. They rise when you choose custom tile, move pipes, or fix hidden water damage.
Is it worth converting a tub to a walk-in shower? If you will use it every day, plan to stay in the home, and improve safety, the answer is often yes.
Planning and budgeting your shower installation project
Good planning is what turns a stressful remodel into a smooth project. A little measuring and budgeting up front can protect you from surprise costs later.
Measuring your space and choosing a layout
Before you choose a shower design, you need accurate measurements. You do not need fancy tools; a tape measure, pencil, and notepad work fine.
Measure:
-
Length and width of the floor where the shower will sit
-
Height from floor to ceiling
-
Location of the drain, existing plumbing, and any vents or windows
-
Door swings for both the bathroom door and any nearby closet doors
-
Any tight spots where glass or panels will need to pass through
Think about whether the shower will be alcove (three walls), corner, or neo-angle (angled front). In small bathroom walk-in shower designs, corner or alcove layouts often save the most floor area and make making your bathroom feel larger.

Setting a realistic budget (and 10–15% contingency)
A clear budget will guide your material selection and design choices. Here are simple budget tiers for 2025:
-
Budget prefab: about $1,000–$3,500
-
Mid-range walk-in: about $5,000–$10,000
-
Luxury custom: about $12,000–$25,000+
No matter your target, add a 10–15% contingency. Hidden issues like rotten subfloor, mold behind walls, or outdated plumbing are common. Many homeowners share that they regret not saving a little extra for these surprises.
Professional shower installation process: step-by-step
Even if you do not plan to do the work yourself, it helps to understand the process your contractor will follow. This makes it easier to check quality and ask the right questions.
Demolition, disposal, and site preparation
The first step is to remove the old tub or shower. A good crew will protect the rest of your home with plastic and floor covers, then:
-
Shut off water and verify there are no live lines in the demo area
-
Remove fixtures, doors, walls, and the old base or tub
-
Inspect framing, insulation, and subfloor for mold or rot
-
Haul away debris and keep the space clean enough to work
Demolition for a standard bath usually takes half a day to one full day. Costs can vary from a couple hundred dollars to more if there is a lot of tile or heavy cast-iron to remove.
Plumbing, electrical, and waterproofing sequence
Once the space is open, the crew focuses on the “hidden” work that you rarely see but that matters the most:
-
Adjust or reroute supply lines and the shower valve
-
Set the drain at the right height and location with proper slope
-
Run electrical for lights, an exhaust fan, or steam and digital controls if needed
-
Install backer board that is made for wet areas, not standard drywall
-
Add waterproofing systems such as sheet membranes, liquid-applied membranes, or liners under the shower floor
-
Seal seams, corners, and fastener holes so water cannot get into walls
Industry groups publish standards that show the correct order of these steps and how to waterproof the shower. Many leaks come from skipping or rushing this stage.
Installing the shower base, walls, doors, and fixtures
Next comes the part you see and touch every day:
-
The shower pan or base is set level with the proper slope to the drain. This may be a prefab base or a “mud pan” built from mortar and then waterproofed.
-
Walls go up. This can be large acrylic or fiberglass panels, solid-surface sheets, or tile on top of waterproofed backer board. Tile takes longer because it needs setting and grouting time.
-
Glass doors or enclosures are measured and installed if you are not using a curtain. Frameless glass looks clean but costs more and needs careful alignment.
-
Fixtures and trim go in last: showerhead, handheld unit, valve trim, grab bars, niches, and any controls.
During this stage, your input on height, placement, and style matters. Speak up if something feels off before everything is sealed.
Final inspection, testing for leaks, and walkthrough
Before you sign off on the job, there should be a clear check of the finished work. A solid final step often includes:
-
A water test of the pan and walls, watching for leaks, drips, or damp spots below
-
Checking that the floor slope sends water to the drain and not toward the door
-
Confirming that doors swing and seal properly and do not rub on tile
-
Looking over caulk lines and grout for gaps or cracks
-
Running the fan to be sure moisture has a way out of the room
-
Reviewing warranties and care instructions for your fixtures, glass, and surfaces
Many homeowners like to use a printable checklist during this walkthrough so nothing gets missed.

DIY shower installation vs hiring a pro
Once you understand the core process and major cost drivers, the next big question is whether to tackle parts of the project yourself or bring in a professional. Each path has clear advantages—and risks—that can shape your budget, timeline, and long-term results.
DIY-friendly projects: what’s realistic for homeowners?
Here are parts of installing a new shower that many homeowners can handle:
-
Swapping out showerheads and trim
-
Installing or replacing shower doors if the opening is already framed
-
Doing cosmetic updates like new caulk, paint, or accessories
-
Assembling and installing some prefab shower kits, especially “direct-to-stud” units that include clear instructions
Tasks like waterproofing, tiling, and plumbing changes carry much more risk. A small mistake with a membrane or slope can cause slow leaks that damage floors and framing.
If you do tackle DIY work, basic tools may include:
-
Drill and impact driver
-
Level, tape measure, and square
-
Utility knife and saw suited to your wall material
-
Trowels and tile tools if you use tile
-
Waterproofing products and rollers/brushes
-
Safety gear like gloves, glasses, and a mask
Many pros share that they earn a lot of their income fixing DIY waterproofing and tile that failed. If you are not fully sure, it is safer to hire a pro at least for critical steps.
What professionals do differently (and faster)
Experienced installers and contractors bring more than just speed. They:
-
Handle complex plumbing reroutes, custom tile patterns, and structural repairs
-
Follow code and manufacturer instructions so your warranties stay valid
-
Know how to build proper slopes, protect drainage paths, and keep water out of walls
-
Work with inspectors and pull the right permits
-
Carry insurance in case something goes wrong
-
Offer warranties on labor, which you will not have if you do it yourself
Is paying for professional shower installation worth it? For many people, the answer is yes, especially if you care about long-term value, safety, and peace of mind.
Cost comparison: DIY prefab kit vs professional install
Here is a simple side-by-side look at doing a prefab stall yourself vs. hiring a pro.
| Item | DIY Prefab Shower Kit | Professional Install |
| Materials (kit, caulk, etc.) | $800 – $2,000 | $800 – $2,000 |
| Extra tools & supplies | $150 – $500 (if you do not own tools) | Included in labor |
| Labor cost | Your time (weekend or several days) | $1,500 – $4,000 depending on scope |
| Total typical range | $950 – $2,500 | $2,300 – $6,000+ |
| Timeframe | 2–4 days for many homeowners | 1–2 days once scheduled |
| Warranty & risk | No labor warranty; higher risk of leaks | Labor warranty; lower risk if work is proper |
You might save 30–40% on labor with DIY, but there is a higher chance of mistakes that cost more to fix later.

Materials, finishes, and features that impact cost & comfort
Your choice of material has a huge effect on both cost and care. Some options cost more up front but are easier to maintain; others are cheap but need more cleaning or repairs.
Comparing tile, acrylic, fiberglass, stone, glass, and cultured marble
Here is a quick material comparison for common shower surfaces in 2025.
| Material | Approx. Cost per sq. ft. | Durability & Maintenance | Style & Feel | Slip Resistance |
| Porcelain/ceramic tile | $2 – $30 | Durable; grout needs cleaning and sealing | Many colors, shapes, patterns | Depends on tile texture |
| Natural stone | $5 – $100 | Can last long; needs sealing and care | High-end, warm, unique look | Varies; textured is safer |
| Glass tile | $20 – $50 | Hard surface; grout lines to maintain | Bold accents, modern | Usually used on walls |
| Acrylic panels | Moderate (varies) | Easy to clean; few seams | Simple, clean, modern | Needs textured base |
| Fiberglass | Lower to moderate | Light and easy to install; can scratch | Basic; good for rentals | Textured bases common |
| Cultured marble | $40 – $65 | Solid surface; fewer joints; polish needed | Smooth, upscale panels | Usually paired with pan |
Large-format tile and panel systems mean fewer grout lines, which makes cleaning easier. Small mosaics on the floor can improve grip because there are more grout joints, but they also need more cleaning.
Popular add-ons and their price tags
Many features can raise comfort and style without changing the whole layout. Typical add-on ranges include:
-
Built-in bench: about $250–$1,000, depending on size and material
-
Niches and shelves: a few hundred dollars each, more with detailed tile work
-
High-end showerheads and rain showers: around $650–$1,500+ installed
-
Body jets and extra heads: often $900–$1,000+ for parts and labor
-
Steam shower systems: from about $2,900–$16,500+, based on size and controls
These extras often give the most day-to-day comfort, but they also add plumbing, water use, and sometimes electrical needs.
Water-saving vs luxury fixtures: finding the balance
Many people worry that luxury shower fixtures will use a lot more water. That can be true if you run several heads at once for long showers, but you can still plan a system that respects your water bill.
Water-saving (WaterSense-style) fixtures keep flow rates low while still giving good pressure by using air mixing and smart spray patterns. If you want multiple heads or a rain shower, you can:
-
Use a water-saving main showerhead
-
Keep body jets on separate controls so they are not always on
-
Limit the number of heads running at the same time
The EPA has clear info on water-efficient fixtures, which you can find in the references.
Hidden issues, common mistakes, and how to avoid them
Even with good planning, shower installation can reveal surprises behind the walls or under the old tub. Knowing the most common mistakes and hidden problems ahead of time can save you thousands and help you prevent leaks, mold, and future repairs.
What are the most common shower installation mistakes?
Many common shower installation problems appear months or years later, not during the build. Examples include:
-
Poor slope to the drain, causing puddles
-
Incomplete or patchy waterproofing behind tile or panels
-
Using the wrong backer board, such as plain drywall in wet zones
-
Using mastic instead of thinset to set tile in wet areas
-
Skipping required permits and inspections, leading to unsafe or non-compliant work
These mistakes often lead to leaks, loose tile, and mold inside walls.
Hidden damage: subfloor rot, mold, and outdated plumbing
When the old shower or tub comes out, it is common to uncover hidden damage. Slow leaks can lead to:
-
Rotten subfloor under the old pan or tub
-
Moldy insulation and studs
-
Old plumbing with corroded pipes or valves that no longer meet code
Fixing these can add $1,000–$2,500 or more to your project, depending on how far the damage has spread. While this is never fun to hear, it is safer and cheaper to fix it now than to cover it up and face a much bigger repair later.

Waterproofing errors that lead to leaks and mold
Most serious shower problems trace back to poor waterproofing. Common errors include:
-
No continuous membrane behind or under the tile
-
Punctured or folded pan liners that let water escape
-
Bad seams around corners, benches, and niches
-
Missing or blocked weep holes in certain drain types
-
Not sealing joints around the drain, valve, and plumbing openings
Good installers follow tested systems and often use a combination of pans, membranes, and sealants. Industry handbooks give step-by-step details for these systems.
Real-world shower installation case studies and examples
To put all of these concepts into perspective, it helps to see what actual homeowners spend and what their projects look like. These real-world examples show how different budgets, materials, and goals translate into finished results.
Budget prefab shower installation under $3,500
Imagine a small hall bath with an old tub-shower combo. The homeowner wants a fresh, simple shower without a huge cost.
They choose:
-
A prefab shower stall with an acrylic base and three wall panels
-
No plumbing moves; the drain and valve stay in the same place
-
A curtain instead of glass doors
-
Basic fixtures and no bench
A realistic cost breakdown might look like:
-
Prefab kit: $900–$1,500
-
Extra materials (backer board, caulk, trim): $200–$400
-
Limited pro help for plumbing tie-ins and final testing: $600–$1,000
-
Total: around $1,700–$2,900
A skilled DIYer could lower the labor costs more but would need to handle more risk.
Mid-range walk-in shower installation around $7,500
Now think about a primary bathroom with a tired, small shower. The owners want a walk-in with tile, a glass door, and better storage.
They hire a professional contractor and choose:
-
A new porcelain tile shower with a custom pan
-
Built-in niche and small corner bench
-
Clear glass door with a simple frame
-
New valve and showerhead, plus a handheld
-
No major layout changes; the shower stays in the same corner
A sample cost story might be:
-
Demo and disposal: $500–$800
-
Plumbing and rough-in: $800–$1,200
-
Waterproofing and tile labor: $2,000–$3,000
-
Tile, grout, and materials: $1,200–$1,800
-
Glass door and install: $1,000–$1,500
-
Fixtures and trim: $600–$900
-
Permits and misc.: $200–$400
That adds up to about $7,300–$9,600, with many landing close to $7,500.
High-end custom steam shower at $20,000+
For a high-end case, picture a large, fully tiled steam shower with:
-
Natural stone on walls and floor
-
A steam generator and digital controls
-
Multiple showerheads and body jets
-
A wide bench and custom glass enclosure
-
LED lighting in niches and a built-in sound system
Here, costs escalate because of:
-
Expensive materials like stone and high-end fixtures
-
Extra waterproofing and vapor barriers for steam use
-
Specialty electrical and plumbing work
-
Longer install time and more trades on site
It is easy for a project like this to reach $20,000–$30,000+, especially in high-cost areas or in homes where structural work is needed.
FAQs
1. How much does a shower cost to install?
The cost of installing a shower varies widely depending on size, materials, layout changes, and whether you hire a general contractor. Most homeowners spend $1,000–$20,000+, with mid-range projects averaging around $7,000–$8,200. Labor is often the biggest factor, so explore how much work involves plumbing reroutes, waterproofing, or custom tile. A key tip is to create a budget that includes a 10–15% contingency for hidden issues like rot or outdated piping. If you’re comparing quotes, make sure each contractor lists materials, demo, and finish details so you can learn what you’re truly paying for. Getting pro advice early often helps you avoid unnecessary expenses.
2. Can I install a shower by myself?
You can install some types of showers yourself—especially prefab kits—but consider your skill level before you’re committed. DIY is reasonable if you’re comfortable with basic tools, measuring, and following manufacturer instructions. However, tasks like waterproofing, plumbing changes, and tile work require precise technique. A key tip: explore which steps you feel confident doing and which may need a professional or general contractor. Many pros say waterproofing mistakes are the most expensive to fix, so learn as much as possible before starting. If you get stuck, pro advice on critical steps can protect you from leaks and long-term damage.
3. What is the least expensive way to install a shower?
The most budget-friendly option is a prefab shower kit, which typically costs far less than custom tile. These systems reduce labor time, require fewer specialized tools, and help you create a clean, functional shower without major structural changes. If you’re aiming to minimize cost, explore keeping the drain and plumbing in the same location, as relocating lines quickly increases labor. Another key tip is to consider handling simple tasks—like demo or trim work—yourself while letting a pro handle waterproofing. With the right planning and pro advice, you can learn how to control costs without sacrificing safety or durability.
4. Do I need a plumber to install a shower?
You may not always need a plumber for every part of a shower installation, but you should consider hiring one if you’re moving the drain, adjusting supply lines, or replacing the valve. A licensed plumber ensures everything meets code and prevents leaks that could create long-term damage. If you’re working with a general contractor, they typically coordinate plumbing as part of the project. One helpful tip is to explore which tasks fall under plumbing versus general installation so you’re not paying for services you don’t need. For complex projects, professional involvement is key, and pro advice can help you learn where DIY is safe and where expert skills matter most.
References


Leave a comment
This site is protected by hCaptcha and the hCaptcha Privacy Policy and Terms of Service apply.