


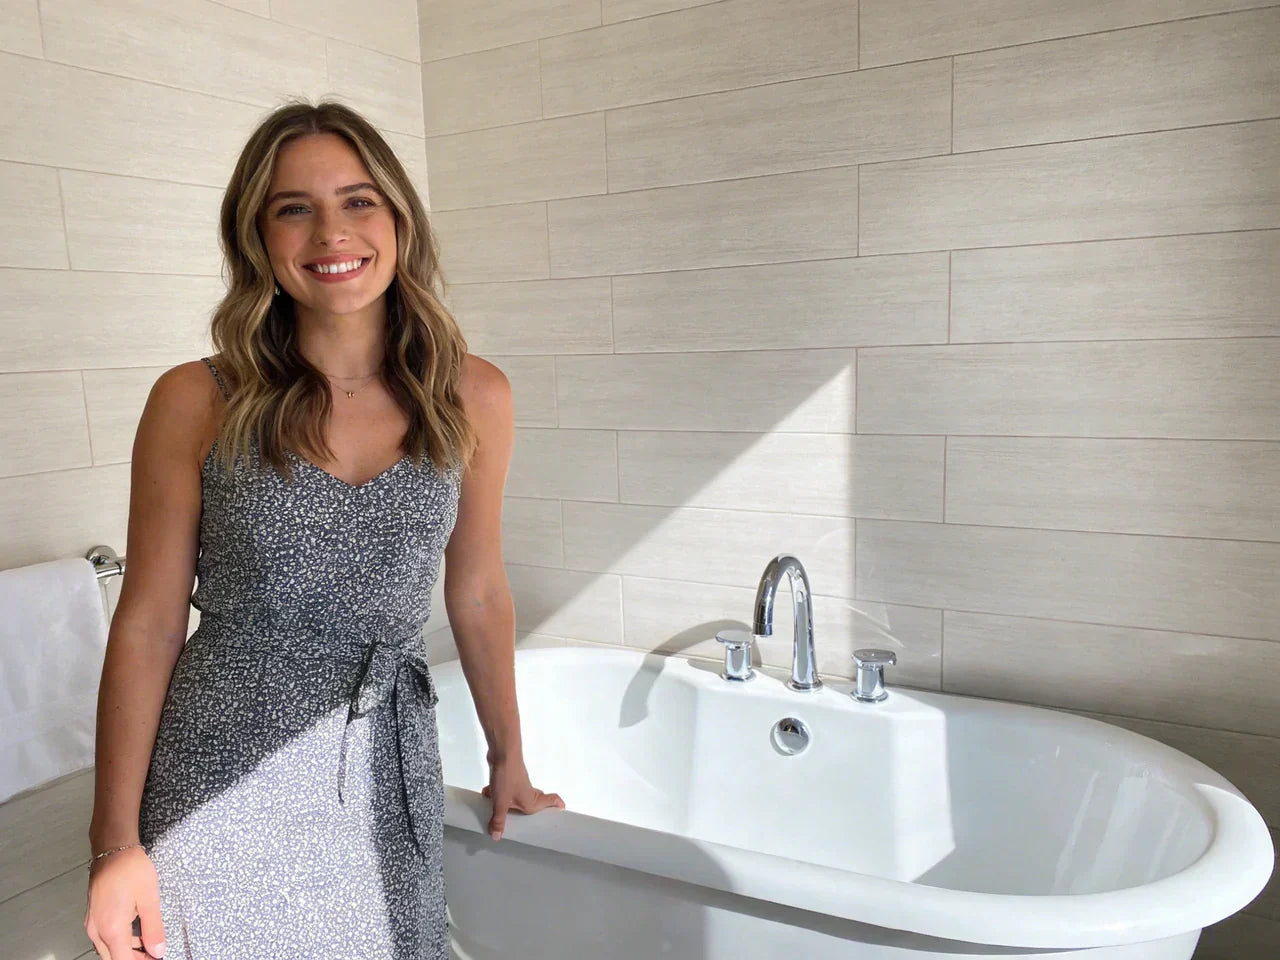
A porcelain bathtub is a durable, glossy, easy-to-clean tub made by fusing porcelain enamel to a steel or cast-iron base. If your current tub stains easily, feels flimsy, or never looks “clean” for long, porcelain is often the fix because the surface is hard and non-porous. This guide answers the big questions first: what porcelain tubs are, whether they’re worth it, how long they last, and what to watch for before you buy. Then you’ll get a practical comparison against acrylic and cast iron, a size and style checklist (including the common 60" alcove standard), a step-by-step installation roadmap (mortar bedding + silicone sealing), and simple care tips to keep the shine for decades.
Porcelain Bathtub Basics (What It Is & Why It Matters)
If you’re looking for a tub during a home improvement project, it helps to pause and understand how different bathtubs are made before comparing pros and cons. Many homeowners weighing porcelain versus alternatives like acrylic or fiberglass focus on surface appearance, but the real differences lie in materials on the market, long-term durability, proper maintenance, and how each option fits a modern bathroom or a budget-conscious plan. Knowing why porcelain tubs are prone to chipping when hit with a heavy object, why lightweight acrylic is easier to work with, or how choices like standard acrylic sheets compare to porcelain-enamel construction makes it much easier to choose the option that best suits your bathroom space, lifestyle, and the lifespan you expect from your tub.
What “porcelain enamel” means (steel vs. cast iron core)
People say “porcelain” in a few different ways, so it helps to clear it up. In most homes, a porcelain tub is really a tub coated with a layer of porcelain enamel. That enamel is like a glassy coating that gets fused to the tub at very high heat. The result is a smooth, hard finish that water can’t soak into, which is why it resists staining better than many lightweight bathtub materials available.
Under that enamel, the tub body is usually one of two materials:
A porcelain-enameled steel tub has a steel core. It’s strong for its weight, usually more budget-friendly, and common in the standard alcove bathtub layout. The trade-off is that steel can dent if the tub is not supported well, and dents can stress the enamel.
A porcelain-enameled cast iron tub has a cast iron core. It’s much heavier, feels very solid, and resists dents extremely well. Because the base is thick, it tends to hold heat longer too. The trade-off is the weight, which can affect delivery, handling, and sometimes flooring support during a bathroom remodel.
So when you ask, “How can I tell if my tub is porcelain or enamel?” the honest answer is that most “porcelain” tubs you see are actually enameled bathtubs. Porcelain enamel is the finish; steel or cast iron is the structure underneath.
Key benefits homeowners actually notice
In day-to-day life, the benefits are simple and practical. First, a well-installed porcelain tub feels steady underfoot. If you have ever stood in a thin tub that flexes, you know how unsettling that can feel. The “solid” feel is one reason many homeowners call porcelain the best bathtub material for busy family bathrooms.
Cleaning is another big win. Because porcelain enamel is non-porous, soap scum and grime tend to sit on the surface instead of soaking in. That doesn’t mean it stays clean by magic, but it does mean you can often get great results with gentle cleaners and a soft sponge.
Heat is the third benefit people notice fast. When you fill the tub for a soak, porcelain over cast iron usually has the best heat retention. Porcelain over steel can still feel warmer than many thin plastic tubs, especially when installed with a proper mortar bed that reduces air gaps and vibration.
If you are wondering, “Is a porcelain bathtub good?” it usually is—when you want a long-lasting surface, a classic look, and easier cleaning than many plastic tubs.
Main drawbacks (and how to avoid them)
Porcelain tubs are tough once installed, but they can be vulnerable during delivery and setup. The most common problems come from impact and poor support.
A hard hit from a heavy tool, a dropped tile, or even a bad bump on a stair edge can chip or crack the enamel. That’s why installers often keep the packaging on as long as possible and protect the tub with cardboard or canvas during work. A small chip might not look serious, but on a steel-core tub it can turn into a rust spot if water reaches the metal.
Another drawback is noise and movement when the tub is not supported correctly. If a tub is set directly on the subfloor with gaps underneath, you may hear creaks, or feel slight flex as you shift your weight. Over time, that movement can stress the drain seal and raise the risk of a leak. The fix is simple but important: mortar bedding (described in the installation section) plus careful leveling.
So yes, porcelain is durable, but it rewards careful handling and a correct install.
Diagram—cross-section of a porcelain-enameled tub
A simple cross-section of a bathtub helps illustrate what you are really paying for. On the bathroom side, inside the tub, the surface you see and touch is a glossy layer of porcelain enamel. This glass-like coating acts as the protective skin, providing a smooth finish, water resistance, and easy cleaning.
Beneath the enamel is the structural substrate, made from steel or cast iron. This hidden layer supplies the tub’s strength, rigidity, and load-bearing capacity. Together, the enamel and the metal base form a system in which appearance and durability depend on both layers working properly.
Along the edge where the tub meets the wall is the tub flange, a raised rim designed to keep water from seeping into the wall cavity. The side wall of the tub includes the overflow opening, which prevents overfilling, while the bottom contains the drain opening, sealed with a drain shoe and gasket to connect safely to the plumbing.
The key idea is simple: the enamel functions as the bathtub’s “skin,” while the steel or cast iron acts as its “skeleton.” Proper installation is essential because it protects both layers and determines how long the tub will last.
Pros and Cons vs Acrylic, Fiberglass, and Cast Iron
Before comparing materials side by side, it helps to step back and look at how tubs are made and what those differences mean in everyday use. Porcelain tubs are made by fusing a glossy finish to a metal core, while alternatives often rely on lightweight plastic shells, sometimes reinforced with fiberglass. For homeowners seeking budget-friendly options or a wider range of sizes, it may be tempting to choose acrylic tubs, but factors like ease of cleaning, vulnerability to scratches, repair options (including how to repair porcelain tub damage), and the expected lifespan of your tub—often 10 to 15 years for lighter materials—can change the decision. Each material has its own strengths and weaknesses, and the result is a bathtub that suits different families, floor structures, and long-term expectations.
Comparison table—porcelain vs acrylic vs cast iron vs fiberglass
You can pick a tub for looks, but you live with it through cleaning days, kid baths, and the occasional dropped bottle. This table focuses on the differences that show up in real life.
| Bathtub material | Typical weight (60" alcove range) | Durability (daily wear) | Heat retention | Repairability | Typical price band (tub only) |
| Porcelain-enameled steel | ~200–350 lb | High surface hardness; can chip if hit; steel can dent if unsupported | Medium | Chips can be patched; surface refinishing possible | ~$300–$1,200 |
| Porcelain-enameled cast iron | ~300–500+ lb | Very high; dent-resistant; enamel can still chip from impact | High | Chips can be patched; refinishing possible | ~$900–$2,500+ |
| Acrylic bathtub (often reinforced) | ~60–120 lb | Medium; can scratch; may flex if not supported | Medium-low | Scratches can be sanded/polished; cracks can be repaired | ~$250–$1,500 |
| Fiberglass tubs | ~50–90 lb | Low-medium; more prone to dulling and wear | Low | Repair possible but often shows | ~$200–$800 |
If you are comparing acrylic and porcelain, this table is the big picture. The details come down to your home and your goals.
Performance deep-dive: durability, chips, dents, and lifespan
A porcelain enamel surface is hard. That’s great for resisting scuffs and many stains, but hardness can come with brittleness. So the “failure mode” is often impact. Drop a heavy shampoo bottle? Usually fine. Drop a tile, a hammer, or a cast-iron pan? That’s when chips happen.
Dents are mostly a concern with porcelain-enameled steel. Steel has strength, but it can still bend if there’s a hollow spot under the tub floor. If it dents, the enamel may crack around the dent. That’s why mortar bedding is not “extra”—it’s what helps a tub stay quiet, stable, and long-lasting.
So how long does a porcelain bathtub last? In many homes, 20+ years is realistic, and much longer is possible when the tub is installed flat, supported well, and cleaned gently. A tub can fail early if the drain seal leaks, if the tub rocks, or if a chip is ignored until rust spreads (on steel-core models).
Comfort and acoustics: insulation and bathing experience
Comfort is where people often change their mind after trying a porcelain tub for the first time. A good porcelain tub feels steady. The bottom doesn’t feel like it’s bowing under you. When you step in, it’s usually quieter than a hollow, unsupported tub because the mass absorbs vibration.
Water temperature matters too. Cast iron with enamel tends to hold heat the longest. Steel with enamel can still be comfortable, especially when installed with a mortar bed that reduces “drum” noise and helps the tub feel warmer.
If you like long baths or you’re trying to create a calmer guest bath, this “solid and quiet” feeling can be more important than any spec sheet.
Are porcelain tubs better than acrylic?
This is one of the most common questions, and the answer depends on what you need most.
A porcelain bathtub usually wins when you care about a hard, glossy surface, long wear, and easier cleanup without scratching. It’s a strong choice for high-traffic bathrooms where you want the finish to stay nice.
An acrylic tub often wins when weight is the main constraint. If you have tight stairs, a small crew, or you’re remodeling a second floor and want to reduce load and hassle, acrylic can be the practical choice. Acrylic also offers more design flexibility, including many shapes and sizes, because it’s easier to form.
So, “Is a porcelain tub better than an acrylic tub?” If you want a classic, long-lasting feel and you can handle the weight and careful installation, porcelain is often the better long-term pick. If you need lightweight, lower cost, and simpler handling, acrylic is hard to beat.

Types, Styles & Sizes (Alcove, Soaking, Freestanding)
When choosing a bathtub that’s right for your home, there are several factors to consider—porcelain vs other materials, ease of cleaning, potential for scratches, and whether your bathroom can support reinforced flooring. These choices not only affect the lifespan of your tub but also determine which style and size best suits families seeking durable, easy-to-maintain options.
Alcove porcelain bathtub (most common) + 60" standard sizing
The most common residential setup is a 3-wall alcove with an apron front. That’s the classic “tub-shower combo” space, and it’s where porcelain tubs show up most often.
The standard size many people search for is 60 inches long. In practice, you still need to measure carefully because width and depth can vary, and walls are not always square in older homes. A tub that is “about right” can become a headache if the drain doesn’t line up or the flange doesn’t sit flat against the studs.
Also pay attention to how the tub is supported at the walls. Many alcove tubs use a flange (a vertical lip) that tucks behind wall board. During a remodel, you may need a ledger board (a horizontal support) and sometimes stud shims so the flange sits correctly without bowing the wall.
Style options and who they fit
When people say type of bathtub, they often mean the installation style, not the material. With porcelain enamel, you’ll most often see alcove and drop-in options, with fewer true freestanding choices.
An alcove porcelain enamel tub is the standard for family bathrooms because it balances cost and durability. A drop-in tub can work in a custom deck or tiled surround, but it often adds labor and waterproofing detail.
You may also see skirted or apron-front versions, where the front panel is built in. That can look clean and modern while still being easy to maintain.
What about a porcelain freestanding tub? They exist, but they’re less common than acrylic freestanding tubs because porcelain enamel over metal is heavy. If you love the freestanding look, just know delivery and floor support become more important, and you’ll want to confirm the bathroom can handle the weight of the tub plus water plus a person.
Soaking depth, overflow design, and waterline considerations
Many buyers focus on the “depth” listed on a spec sheet, then feel disappointed after the first bath. That’s because there are two different measurements people call depth.
One measurement is from the bathroom floor to the overflow opening. That number is useful for installation and plumbing.
The other measurement is the interior soaking depth, which is the water level you can actually reach before the overflow starts draining. That’s the number that matters for comfort.
Overflow design also matters for leaks. The overflow is one more set of seals and screws behind the wall. A well-designed overflow system, installed carefully, helps reduce the chance of hidden water damage.
If soaking is a priority, read the interior depth carefully and picture where the waterline will hit on your body. If you’re tall, that one detail can make a “nice tub” feel like a missed chance.
Size-fit checklist + printable measuring worksheet
Before you buy, take five minutes and measure. It can save days of stress later.
Printable measuring worksheet (copy/paste into notes):
-
Rough opening length (stud-to-stud): ________
-
Rough opening width (stud-to-stud): ________
-
Floor level (check with a level): Pass / Fail
-
Drain location from back wall: ________
-
Drain location from side wall: ________
-
Doorway width and turning path for delivery: ________
-
Wall condition (soft spots, rot, mold): Yes / No
-
Stud spacing and straightness (bows/twists): Good / Needs shims
-
Access to plumbing (panel, ceiling below, open wall): ________
If any of these feel uncertain—like a door clearance that looks tight—pause and plan. A heavy tub is not something you want to “make fit” at the last minute.
Buying Checklist (What to Inspect Before You Purchase)
Before you make a purchase, it helps to weigh the key factors to consider—porcelain vs other materials, how easy the tub is to clean, and whether it’s vulnerable to scratches. For families, choosing a bathtub that’s durable, low-maintenance, and suited to everyday use ensures that your investment lasts, since tubs are much more than a one-time buy.
Quality signals: coating consistency, edge finishing, and warranty
When you’re standing under store lighting, everything can look perfect. At home, sunlight hits the tub and suddenly you notice dull spots or tiny flaws. That’s why inspection matters.
Look at the finish under bright light. You want a consistent shine, without pinholes (tiny dots), rough patches, or cloudy areas. Run your hand gently along edges and corners. Edges should feel smooth, not sharp or gritty.
Check the flange carefully. If the flange is bent or cracked, installation gets harder and leaks become more likely. Also look around drain and overflow openings. Those areas should be cleanly formed because seals depend on it.
Then read the warranty in plain language. Warranties vary, but you want to know what is covered (finish, structure) and what voids coverage (abrasive cleaners, improper install, or damage during handling).
Weight, floor support, and delivery logistics
Porcelain tubs are heavier than acrylic. A common range for enameled steel is often a few hundred pounds, and cast iron can be even more. Add water and a bather, and the load climbs fast.
Most homes can handle a standard alcove tub when framing is in good shape, but older homes and second-floor baths can have surprises. If you’ve seen sagging floors, cracked tile, or bouncy framing, it’s smart to talk with a qualified contractor who understands local code and structure. Sometimes the fix is simple, like reinforcing from below, but you want to know before the tub is in the room.
Delivery matters too. Ask yourself: Can the tub make the turn at the stair landing? Can it pass through the bathroom door? If you need to remove a door or trim, plan for that early so you’re not stuck with a heavy tub in the hallway.
Drain, overflow, and compatibility with existing plumbing
A tub can be “the right size” and still be wrong for your bathroom if the drain is in the wrong place. Many remodels reuse the existing drain location because moving plumbing can increase cost and complexity.
Before you buy, check whether your bathroom uses a left-hand or right-hand drain position. Also confirm access to the P-trap area. Sometimes a joist sits exactly where the drain needs to go, and that can turn into a real project.
When it comes time to seal threads, follow the manufacturer instructions and local code. Some threaded parts call for a specific sealant. The goal is a secure connection without forcing parts together.
What should I look for when buying a porcelain bathtub?
If you want a quick pass/fail check, focus on three things: the finish, the flange, and the openings. If the finish has chips, the flange is bent, or the drain/overflow areas look poorly formed, walk away. A tub is not the place to gamble, because once it’s installed, returns are difficult and repairs cost more.

Porcelain Tub Installation (DIY-Friendly, Done Right)
Installing a porcelain bathtub can be surprisingly DIY-friendly if you plan carefully, handle the heavy tub with care, and follow the right sequence—checking fit, supporting the base with reinforced flooring, and sealing drains properly ensures a long-lasting, easy-to-clean result without chips or scratches.
Tools + materials list (what actually matters)
You can install many alcove tubs with normal carpentry and plumbing tools, but a few items make a big difference. You’ll want premixed mortar (for bedding), a good level, a ledger board (often a straight 2x4), shims, and galvanized fasteners for the flange area. For plumbing, a tub drain wrench or large pliers can help, and silicone sealant is key for drain sealing in many setups because it stays flexible.
One note that surprises DIYers: many installers prefer silicone over plumber’s putty for certain drain connections because silicone holds up well with movement and temperature changes. Always match the sealant to the drain instructions and local code, but don’t assume putty is the default.
Step-by-step install sequence (reverse-pyramid essentials first)
This is the practical roadmap. If you do only a few things perfectly, do these: level support, mortar under the tub, and careful sealing.
- Prep and inspection: Shut off water if needed. Protect floors and nearby surfaces with cardboard. Unpack enough to inspect the tub, but keep protection on high-risk edges. If you see a crack or chip in the finish, do not install damaged tub—it rarely gets “better” once set.
- Dry-fit and mark: Place the tub in the alcove to confirm fit. Mark the flange height on studs so you know where support needs to land.
- Install the ledger/stringer: Secure a straight ledger board into studs at the correct height. This supports the tub’s edge and helps prevent movement.
- Stud prep and shimming: Many alcoves need minor adjustment so the flange sits flat. A common shim range is about 3/16"–1/4" in problem spots, but the goal is flush and straight, not a magic number.
- Plumbing dry-fit: Dry-fit the drain and overflow. Confirm the P-trap lines up and nothing conflicts with framing.
- Mortar bedding: Spread a bed of premixed mortar on the subfloor where the tub bottom will rest. This fills gaps and supports the base so it won’t creak or flex.
- Set the tub and level it: Lower the tub into place. Press it gently into the mortar. Check level front-to-back and side-to-side. Take your time here, because a tub that’s out of level can hold water and can stress seals.
- Fasten the flange correctly: Attach the flange to studs as the instructions allow. Avoid forcing fasteners in a way that chips enamel. The goal is secure support without stressing the finish.
- Wall waterproofing and closing up: Install wall waterproofing in a way that directs water into the tub. Many wall systems require the barrier to lap over the flange area correctly.
- Final sealing and cure: Use silicone where required, then allow it to cure. Rushing the cure time is a common reason for early leaks.
If you’re thinking, “Is a porcelain bathtub easy to install?” it can be DIY-friendly, but it is not the easiest material to handle because it’s heavy and the finish can chip if bumped. Many DIYers do fine with help lifting and careful prep.
Drain/overflow sealing best practices (leak prevention)
Drain leaks often come from overtightening or using the wrong sealant. The drain area is also where small movement shows up first, especially if the tub base is not supported well.
A common best practice is to use silicone under the drain flange/shoe where the instructions allow. Silicone stays slightly flexible, which helps when materials expand and contract. Tighten by hand first, then snug it (often about a quarter to one full turn beyond hand-tight, depending on the drain design). Too tight can squeeze out sealant, warp gaskets, or crack parts.
After sealing, let silicone cure fully before a full leak test. Many silicone products need around 24 hours, but check the tube. Then fill the tub and check for drips at the drain, overflow, and below (if you have access).
Installation diagram + “common mistakes” callouts
A properly supported bathtub relies on several structural elements working together. The tub is positioned against the wall studs, with the tub flange resting firmly against the wall to prevent movement and water intrusion. Beneath the flange, a ledger board—typically a 2×4—runs horizontally along the wall and carries part of the tub’s weight.
The main body of the tub sits below this support, while the bottom of the tub is fully backed by a mortar bed. This mortar layer spreads the load evenly, eliminates flexing, and prevents creaking or long-term stress on the tub shell. All of this support rests on the subfloor, which must be solid and level to maintain proper alignment.
The most common installation mistakes include skipping the mortar bed, setting the tub out of level, overtightening the drain connection, and damaging the enamel during handling. Avoiding these errors prevents most of the long-term problems that are often blamed on the tub itself rather than on improper installation.
Real-World Results & Case Studies (What Fails and What Lasts)
Even with careful installation, real-world results can vary—how a tub is handled, supported, and sealed often determines whether it lasts quietly for years or shows scratches, creaks, or leaks soon after.
Case study—mortar bed + silicone = fewer creaks/leaks over time
A common story goes like this: someone replaces a tub, installs it without mortar because the tub “seems solid,” and everything looks fine for a few weeks. Then a creak shows up when stepping in. Months later, there’s a faint water stain on the ceiling below.
Now compare that to the homeowner who beds the tub in mortar, takes extra time leveling, and uses silicone for the drain connection where allowed. Years later, the tub still feels quiet. No rocking. No mystery leaks.
That outcome isn’t luck. Mortar spreads the load so the tub base doesn’t flex under daily wear. Less flex means less stress at the drain and overflow. In a bathroom, that small detail can be the difference between a simple remodel and water damage repairs.
Case study—transport/handling damage discovered late
Another real-world failure is hidden damage. A small chip can be missed during delivery because the tub looks fine from a distance, or because packaging hides a corner.
Later, after the tub is installed, the chip becomes a rust point (again, mostly on steel-core tubs). The homeowner tries to scrub it away, but it keeps coming back. The reason is simple: once metal is exposed, moisture can reach it, and rust can spread under the enamel edge.
The practical lesson is boring but important: inspect the tub closely before it goes into the alcove. If you find a defect early, you can usually exchange it. If you find it after walls are closed, you’re looking at porcelain tub repair or refinishing costs.
Installer notes—fastener choices and flange support debates
If you ask ten installers how to secure a tub flange, you may hear ten variations. Some prefer minimal fasteners and strong ledger support. Others fasten more aggressively.
The safest approach is the one that matches the tub’s instructions and supports the tub without stressing the enamel. If you force a flange flat by cranking fasteners, you can create stress points. It’s often better to correct the studs with shims and keep the tub sitting naturally, supported by the ledger and mortar.
Do porcelain tubs crack easily?
A well-supported porcelain bathtub does not “crack easily” from normal use. Most cracks come from impact (dropping something heavy) or from the tub flexing because it was not supported well. If you set the tub in mortar and avoid heavy hits, cracking is not common.
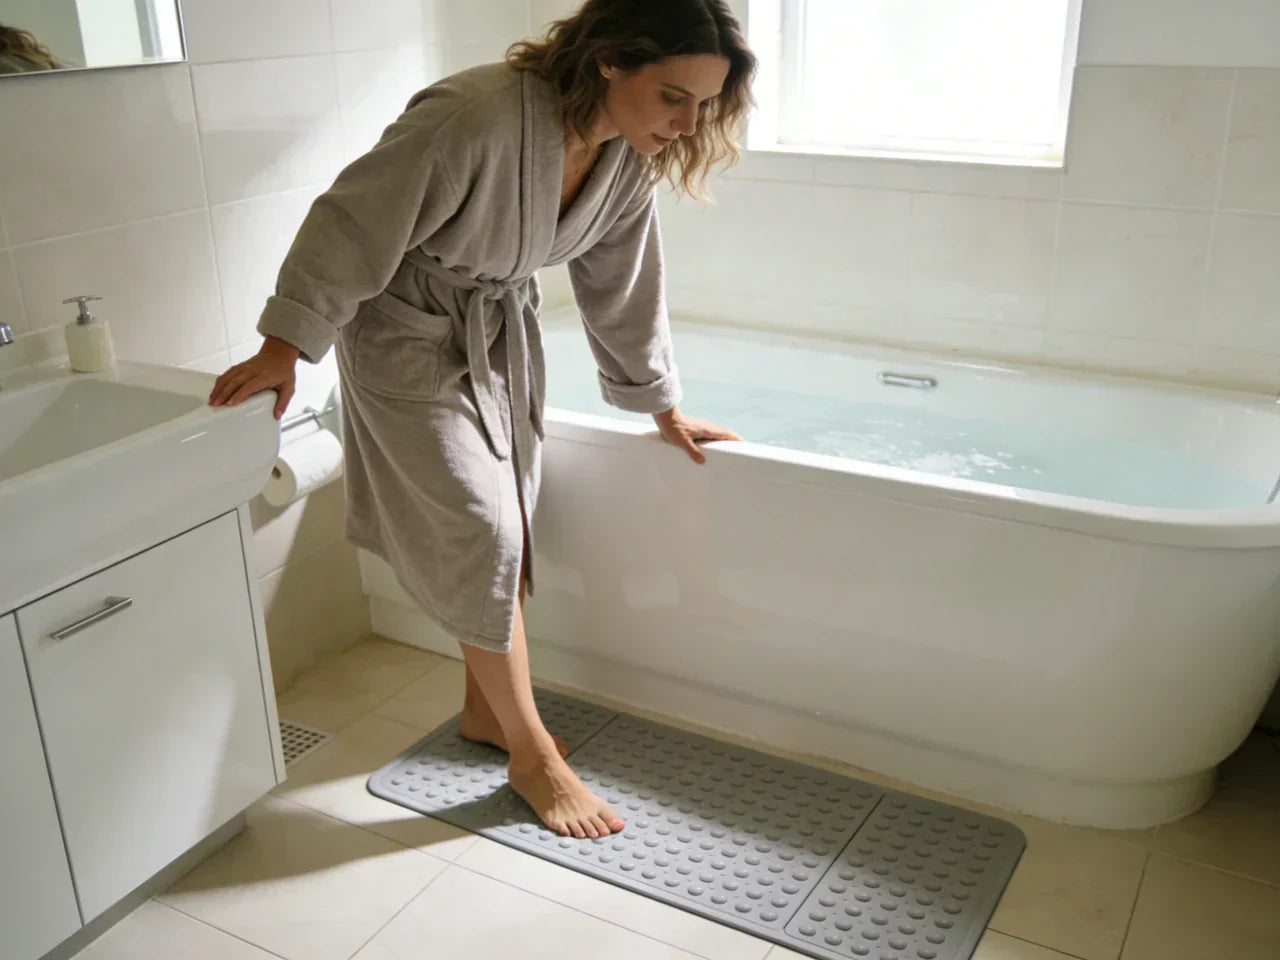
Cleaning, Maintenance, and Repair (Keep the Gloss for Decades)
Once your tub is properly installed and any chips are addressed, keeping that glossy finish for decades comes down to regular cleaning, gentle care, and knowing when DIY fixes or professional refinishing are worth it.
Weekly cleaning routine (non-abrasive) to prevent soap scum
Porcelain enamel stays nicest when you clean lightly but regularly. If you wait until soap scum becomes a thick film, you’ll feel like you need harsh products, and harsh products are what dull the shine.
A simple routine works: rinse the tub after use when you can, then once a week spray a gentle bathroom cleaner, let it sit briefly, and wipe with a soft sponge or cloth. Rinse well and dry if you want to avoid water spots.
Try not to use abrasive powders or rough pads. They can leave tiny scratches that trap grime, which makes the tub look dull faster. If you’ve been tempted to scrub harder and harder, it’s usually better to switch to a gentler cleaner and give it more time to work.
Stain removal playbook (by stain type)
If you’re searching “how to remove stains from a porcelain bathtub,” you’re not alone. The trick is to match the method to the stain, then start gentle.
For everyday soap scum, a non-abrasive bathroom cleaner and a soft sponge is often enough. For hard water marks, mild acidic cleaners can help because they break down mineral deposits, but you should use them carefully and rinse well.
For rust-colored stains, first ask: is this from water, or is it from a chip that exposed metal? If it’s water-related, rust removers made for bathroom surfaces may help, but test a small area and follow safety directions. If it’s from a chip, cleaning alone won’t fix the cause—you’ll want to seal the chip.
For dark stains in an old tub, you may need a few rounds of gentle cleaning rather than one aggressive scrub. If your goal is “how to clean an old stained porcelain bathtub,” patience helps. Let cleaners sit as directed, ventilate the room, and rinse thoroughly. If you mix chemicals or scrub with harsh abrasives, you can trade a stain for a dull patch.
Also, keep safety in mind. Good airflow and following label directions matters, especially with strong cleaners.
Chip/scratch options: DIY touch-up vs professional refinishing
If you have a small chip, a DIY touch-up kit may be enough. The goal is to seal the exposed area so water can’t get under the enamel. A touch-up will rarely be invisible up close, but it can stop the damage from spreading.
If the tub has many chips, widespread dullness, or you want a like-new look, professional refinishing (sometimes called reglazing) may make more sense. Refinishing coats the tub with a new surface layer. It can look great, but it requires strong ventilation, careful prep, and downtime while it cures.
So, how much does it cost to repair porcelain tub damage? It depends on what “repair” means. A small DIY touch-up might cost around $20–$50 for materials. A professional chip repair might land around $150–$400 depending on area and travel. Full refinishing often falls in the $400–$900 range in many markets, with higher prices in high-cost areas or for heavy prep. If the tub is badly damaged or leaking at the drain, replacement may be the smarter spend.
How do you clean a porcelain-enameled steel tub?
Treat it like a glossy surface, not like a concrete floor. Use non-abrasive cleaners, soft sponges, and plenty of rinse water. Avoid steel wool and gritty powders because they can scratch the enamel. If you need disinfecting, follow product directions and rinse well, especially if kids use the bath.
Can a porcelain bathtub be painted? What is the best paint for porcelain bathtubs?
Yes, a porcelain tub can be painted, but “paint” is a bit misleading. Most tub painting is really a special coating system made for bathroom surfaces.
If you’re searching how to paint a porcelain bathtub, the main steps are deep cleaning, sanding or etching (as directed by the kit), repairing chips, masking carefully, then applying thin, even coats with the right cure time. The hardest part is prep. If the surface still has soap film or silicone residue, the coating may peel.
The best paint for porcelain bathtubs is usually a two-part epoxy or a specialized tub-and-tile coating designed for wet areas. Some professional systems use advanced coatings that are tougher than many DIY kits, which is one reason pro results often last longer. Whichever route you choose, ventilation and safety gear matter because fumes can be strong.
Painting can be a reasonable short-term refresh, especially in a guest bath or a budget remodel. For a forever-home bathroom, refinishing or replacing may last longer and feel better day to day.

Cost, ROI & 2026 Budget Planning
With installation details, maintenance needs, and potential repairs in mind, it’s easier to see how upfront choices affect not just the lifespan of your tub, but also your long-term cost and return on investment.
Upfront cost ranges + hidden costs (delivery, plumbing, wall repair)
People often ask, “How much does a porcelain tub cost?” The tub itself can range widely based on core material, thickness, and features. Many homeowners find that porcelain-enameled steel models land in the mid hundreds to low thousands, while cast iron costs more.
But the tub price is only part of the budget. Hidden costs show up fast in remodels, especially if you open the wall and find water damage, outdated plumbing, or framing that needs help.
Here’s a practical budgeting view for a standard alcove replacement:
| Cost item | Typical range (USD, 2026 planning) |
| Porcelain-enameled steel tub (tub only) | $300–$1,200 |
| Porcelain-enameled cast iron tub (tub only) | $900–$2,500+ |
| Drain/overflow kit + small supplies | $50–$250 |
| Mortar, shims, fasteners, sealants | $25–$150 |
| Basic plumbing labor (if hired) | $300–$1,500+ |
| Wall repair / backer board / waterproofing | $200–$2,000+ |
| Delivery/haul-away (varies by area) | $50–$300+ |
If your bathroom is older, plan extra for surprises. The best budgeting move is to assume you’ll need at least some wall work, because the flange and waterproofing details are where leaks start.
Cost-per-year calculator (simple and useful)
A tub is a long-term purchase, so it helps to think in “cost per year,” not just sticker price. You can do this with a simple formula:
Annual cost = (Tub price + Install cost) ÷ Expected lifespan
Example (porcelain-enameled steel alcove):
-
Tub price: $700
-
Install and supplies: $1,300
-
Total: $2,000
-
Lifespan: 20 years
Estimated annual cost: $100/year
Now compare that to a cheaper tub that needs earlier replacement or refinishing. Even a “budget-friendly” tub can cost more over time if it dulls, scratches, or flexes enough to cause leaks.
ROI logic: longevity, resale perception, and reduced replacement cycles
ROI in a bathroom isn’t just about resale. It’s also about not having to redo work.
A well-installed porcelain tub can reduce replacement cycles because the finish holds up well and the structure feels solid. That matters in family homes, rentals, and guest bathrooms where cleaning and wear are constant.
Resale value is harder to measure, but buyers do notice when a tub looks clean, bright, and well cared for. A chipped, dull tub can make a bathroom feel older than it is. On the other hand, a glossy, solid tub suggests the room was maintained, even if the design is simple.
Are porcelain bathtubs worth the money?
They’re often worth it when you plan to stay in the home, when you want a surface that cleans up well, or when the bathroom gets heavy use. If you’re flipping a home fast, weight and install time may matter more than long-term durability, so you might choose a lighter material to simplify logistics. If you’re a renter or doing a short-term refresh, painting or refinishing may be enough.
For many “forever home” remodels, porcelain hits a sweet spot: long life, classic feel, and strong everyday performance—if you install it correctly.
Quick Decision Guide (Best Use Cases + Next Steps)
With all the costs, installation considerations, and real-world performance in mind, here’s a quick guide to help you decide which tub best fits your bathroom, lifestyle, and next steps.
Best for: high-traffic family baths, rental durability, classic alcove remodels
A porcelain bathtub is a strong pick when you want a tub that feels solid, looks bright, and handles daily wear. If you have kids, pets, or constant guest traffic, porcelain’s hard surface and easy cleaning can make your life simpler. It’s also a good fit if you want a classic look without worrying that the finish will scratch easily.
If your current tub is stained and never seems to get fully clean, porcelain can be a relief. You wipe, rinse, and you’re done—no constant “why is it still dingy?” moment.
Not ideal for: ultra-lightweight remodel constraints or tight stair deliveries
Porcelain is not the easiest choice when weight and handling are major problems. Tight stairwells, sharp turns, and small crews make heavy tubs harder and riskier to move. In those cases, an acrylic tub can be a safer and more practical plan.
Also, if your floor framing is questionable and you don’t want to open ceilings or reinforce from below, a lighter tub might reduce stress and cost.
One-page checklist—buy, inspect, install, maintain
If you want a quick summary you can screenshot, use this:
Buy
-
Confirm size, drain side, and overflow style.
-
Check weight and delivery path.
-
Read warranty terms.
Inspect
-
Look for chips, pinholes, dull patches, flange damage.
-
Check drain and overflow openings for clean edges.
Install
-
Use a ledger board and mortar bed.
-
Level carefully.
-
Seal drain/overflow correctly with silicone where allowed.
-
Leak test after cure time.
Maintain
-
Clean weekly with non-abrasive products.
-
Avoid gritty powders and rough pads.
-
Touch up chips early to prevent spreading damage.
Next steps: specification download + code/standards check
Before you order, download the tub’s specification sheet and installation instructions from the manufacturer. Then check your local plumbing and building rules, especially if you’re moving a drain or changing framing. If you’re unsure about structure or waterproofing, a short consult with a licensed pro can prevent expensive mistakes later.
FAQs
1. Is a porcelain bathtub good?
Porcelain bathtubs are generally an excellent choice if you want a tub that looks classic, feels solid, and is easy to keep clean. The enamel surface is smooth and glossy, which helps prevent soap scum and stains from sticking. They handle daily use well, especially in family bathrooms or high-traffic spaces. The main caveats are weight and fragility—steel or cast iron cores are heavy, and a hard impact can chip the enamel. But with proper installation, gentle cleaning, and quick attention to small chips, a porcelain tub can stay looking great for decades, making it a reliable long-term investment for your bathroom.
2. How much does a porcelain tub cost?
The cost of a porcelain bathtub varies a lot depending on the core material and size. Steel-core models typically land in the mid hundreds to low thousands, while cast-iron versions can run closer to two or three thousand dollars. That’s just the tub—installation, plumbing, delivery, and potential wall repairs add to the total. Even a “budget-friendly” porcelain tub can become costly if hidden issues appear during remodeling. The smart way to budget is to consider lifespan, maintenance, and potential repair costs. Over 20 years, a well-maintained porcelain tub often ends up being more cost-effective than cheaper alternatives that need earlier replacement.
3. How can I tell if my tub is porcelain or enamel?
Most tubs sold as “porcelain” are actually metal tubs coated with porcelain enamel. The easiest way to check is with a magnet—if it sticks, there’s likely a steel core. Cast iron tubs feel very heavy, while steel tubs are lighter but still solid. Look for chips: if the enamel is damaged, you might see a dark metal underneath. The enamel itself is the glassy finish, and the metal provides strength. Understanding this helps you know how to handle, clean, and repair the tub, since enamel is durable but can chip, while the core material affects weight, support, and heat retention.
4. Is a porcelain tub better than an acrylic tub?
It depends on your priorities. Porcelain tubs win for hardness, glossy finish, and long-term durability, making them ideal for busy bathrooms and family use. Acrylic tubs are lighter, easier to move, and more forgiving if your floor framing or delivery path is tricky. They also come in more shapes and sizes and can be reinforced with fiberglass for stability. Porcelain is better if you want a classic, long-lasting feel and don’t mind careful handling during installation. Acrylic is better for lightweight, flexible design and DIY-friendly projects, especially if you need to reduce labor and shipping challenges.
5. How long does a porcelain bathtub last?
A well-installed porcelain bathtub often lasts 20 years or more, with many lasting 30+ years when cared for properly. Longevity depends on supporting the tub correctly, avoiding impacts, and cleaning gently. Chips that expose the metal core should be repaired quickly to prevent rust and further damage. Even heavy daily use is usually no problem if the tub sits on a level surface with proper mortar bedding. Compared to acrylic or fiberglass tubs, porcelain generally keeps its glossy finish longer and resists staining better, which means less frequent refinishing and a more enduring bathroom centerpiece.
6. How much does it cost to repair a porcelain tub?
Repair costs vary depending on the damage. Small DIY touch-ups for chips usually run $20–$50 and can prevent rust from forming. Professional repairs are more thorough, averaging $150–$400 depending on size and location of the chip. Full refinishing, which gives the tub a like-new surface, often costs $400–$900. Repairing is worth it for preserving the tub’s life, especially for steel-core models where rust can spread. Quick action after damage minimizes costs. Remember, prevention—using proper support and avoiding hard impacts—can save hundreds in repairs over the years.
7. How to clean an old stained porcelain bathtub?
Cleaning an old porcelain tub is all about gentle, regular care. According to the CDC, using non-abrasive cleaners and wiping surfaces regularly can reduce buildup and maintain hygiene. Start with a non-abrasive bathroom cleaner and a soft sponge or cloth. Let the cleaner sit for a few minutes to loosen soap scum or mineral buildup, then rinse thoroughly. For stubborn hard water stains, use a mild acidic cleaner designed for mineral deposits, but avoid gritty scrubbers that can scratch the enamel. Repeat treatments may be necessary for deep stains. The key is patience and consistency—harsh scrubbing or abrasive products will dull the finish. A few minutes each week keeps your tub looking glossy and prevents buildup that could require refinishing later.
8. Can a porcelain bathtub be painted?
Yes, porcelain tubs can be painted or refinished, but it’s not like using ordinary paint. You need a coating system designed for bathroom surfaces, which usually involves deep cleaning, sanding or etching, and applying a specialized topcoat. Proper prep is critical—any soap residue, old silicone, or dirt can prevent adhesion. Multiple thin coats are applied, then allowed to cure fully. While it’s possible as a DIY project, professional systems last longer and are more durable against water, heat, and daily use. Painting can refresh an old tub, but it usually doesn’t match the longevity or feel of a well-maintained porcelain surface.
9. What is the best paint for porcelain bathtubs?
The most effective coatings for porcelain bathtubs are two-part epoxy systems or specialized tub-and-tile coatings made for wet areas. These products bond well to enamel, resist water, and withstand daily use. The surface prep matters just as much as the coating—deep cleaning, light sanding, and ensuring no moisture is trapped are key steps. Thin, even coats with proper curing time produce the most durable finish. While short-term refreshes are possible with DIY kits, professionally applied coatings generally hold up longer, maintaining a glossy, clean look that can last years, almost like a brand-new tub surface.
References


Leave a comment
This site is protected by hCaptcha and the hCaptcha Privacy Policy and Terms of Service apply.