



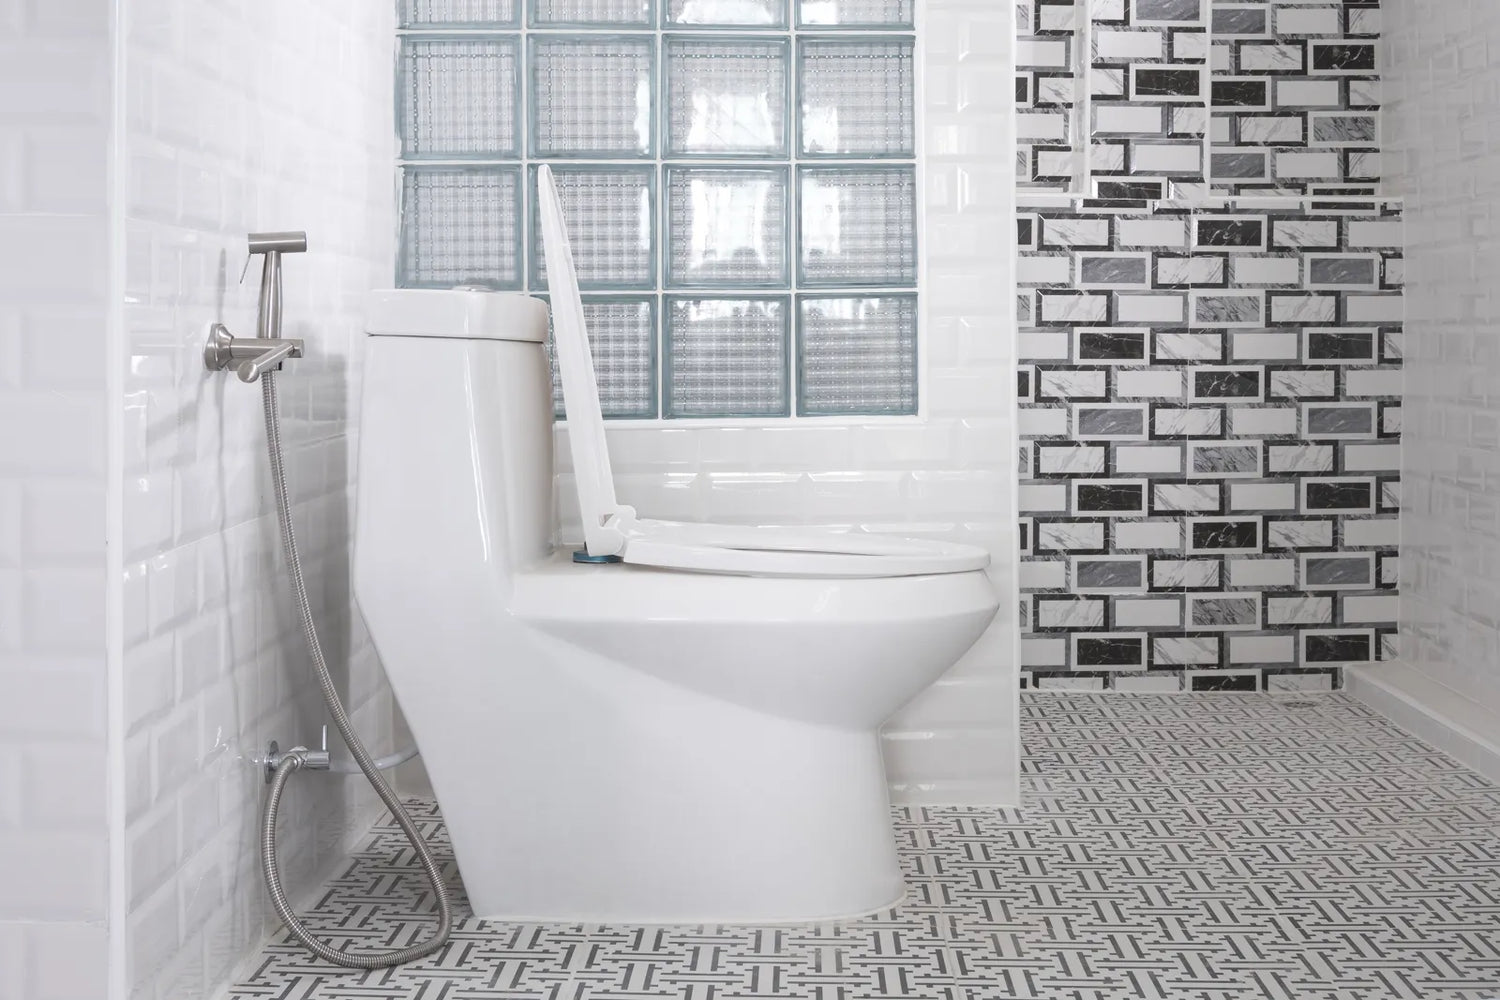
A one-piece toilet looks simple because the tank and bowl are molded as one unit. The problem is that the toilet is not simple once it has to fit an older drain, a tight powder room, a crooked wall, a low flange, or a shutoff valve in the wrong place.
The toilet also has to clear the wall, vanity, tub, door, and the user’s knees. Additionally, check supply valve access, cleaning tools, and future bidet hoses.
Typical one piece toilet dimensions fall around 27 to 30 inches deep, 18 to 20 inches wide, and 26 to 32 inches tall. Compact models may be shorter in projection, while comfort-height and elongated models often take up more usable space. The exact model dimensions matter more than the label.
This guide is about execution: whether the toilet will actually install and work in your bathroom.
Quick Answer
A one-piece toilet works if your rough-in matches the model. Make sure you have at least 15 inches from the toilet centerline to each side obstruction, and enough front clearance for knees, door swing, and cleaning access. It does not work well if your rough-in is short, the shutoff valve will be trapped behind a skirted base, the door hits the bowl, or the unit cannot be lowered straight onto the flange. If any measurement is borderline, choose a smaller projection or fix the plumbing first instead of hoping the toilet will “just fit.”
Decision Snapshot
Who this works for
A one-piece toilet is a good fit when the bathroom has a verified 12-inch rough-in, clear side space, enough front clearance, and a shutoff valve that remains reachable after installation. It also works best when two people can carry and set the unit without twisting it on the wax ring.
This is usually a clean replacement when:
- The existing toilet already sits centered and stable.
- The flange is level with, or close to, the finished floor.
- The shutoff valve is visible and accessible.
- The door clears the current toilet with extra room.
- The new toilet’s wall-to-front projection is equal to or shorter than the old one.
Who should avoid it
Avoid a one-piece toilet, or at least pause before buying, if your bathroom has a short rough-in, very tight side clearance, a narrow doorway, or a shutoff valve tucked close to the toilet base. A two-piece toilet may be simpler in those cases because it is lighter to set, easier to move through the house, and sometimes easier to work around during installation.
This becomes a problem when the bathroom is already tight and the new toilet adds even 1 or 2 inches of front projection. That small change can make a door hit the bowl or make the toilet feel too close to a vanity.
Most common failure constraints
The most common failures are not cosmetic. They are fit and access problems:
- Rough-in is not really 12 inches.
- Front clearance is code-minimum but uncomfortable.
- Side clearance is under 15 inches from centerline.
- Skirted base blocks the shutoff valve.
- Toilet rocks because the floor or flange is uneven.
- Heavy unit is twisted into place and damages the wax seal.
- Elongated bowl projects too far into a small room.
If your setup looks like one of those, the toilet may bolt down but still be the wrong choice.
One Piece Toilet Dimensions That Matter
Measure from finished wall
When learning how to measure one piece toilet dimensions before buying, start with the finished wall behind the toilet. Do not measure from trim, baseboard, or the old tank lid. The key rough-in measurement is from the finished wall to the center of the closet bolts.
If there are four bolts, use the rear set. If the bolts are hidden, measure to the center of the drain after removing the old toilet, or use the bolt caps as a close estimate before removal.
Then measure the existing toilet’s projection:
- Place the tape at the finished wall.
- Measure to the farthest front edge of the bowl or seat.
- Note how much space remains to the door, vanity, tub, or opposite wall.
That wall-to-front number is the one homeowners often miss.
Use projection, not bowl shape
“What is the size of a one piece toilet?” is not answered by saying round or elongated. The real size is a set of working dimensions:
- Rough-in: usually 10, 12, or 14 inches.
- Projection/depth: often about 27 to 30 inches.
- Width: commonly about 18 to 20 inches.
- Overall height: often about 26 to 32 inches.
- Seat height: standard or comfort height.
For tight spaces, projection is the critical dimension. For narrow bathrooms, centerline clearance and shoulder room are critical. For accessibility, seat height and front clearance matter more than tank height.
Verify width from centerline
Minimum side clearance is usually measured from the toilet centerline, not from the outer edge of the bowl. A common minimum is 15 inches from the centerline to each side wall, vanity, tub, or other fixture.
A narrow tank may look like it saves space, but the user still needs hip and shoulder room.
For narrow bathroom layouts, do not focus only on the toilet’s stated width. A toilet that is 18 inches wide can still feel cramped if one side is tight against a vanity.
Decision line: if you cannot get 15 inches from centerline to both sides, the toilet may install but will feel wrong and may not meet local requirements.
Confirm seat height reference
Comfort-height and standard-height toilet specs can be confusing because height may be listed in different ways. Some specifications show rim height without the seat. Others show height to the top of the seat.
Standard-height toilets are often around 14 to 16 inches to the rim. Comfort-height toilets usually place the seat around 17 to 19 inches above the finished floor. This range closely aligns with accessibility recommendations found in the ADA Standards for Accessible Design, which are widely referenced when selecting user-friendly toilet heights. The seat itself may add about ¾ to 1 inch, depending on the model.
Measure your current toilet from the floor to the top of the seat. Then compare that number with the new toilet’s listed seat height, not just bowl height.
Comfort height can help adults, taller users, and people with knee or hip issues. But in a tight bathroom, a higher seat can change knee angle and make front clearance feel tighter for shorter users.
Who Should Choose a One-Piece Toilet?
Use only with clear margins
A one-piece toilet is not automatically better for every home. It can be easier to clean because there is no tank-to-bowl seam, but that does not solve a tight layout. If the toilet barely fits on paper, the one-piece design can make the job harder because the whole unit is heavy and awkward.
A one-piece unit works best when you have clear margins. That means the rough-in is correct, the door swing is not closed, the shutoff valve remains accessible, and the floor is sound.
If you are replacing an older toilet, do not assume “standard” means safe. Older homes may have 10-inch or 14-inch rough-ins. Some bathrooms also have thick baseboards, added tile, shifted walls, or patched floors that change the real fit.
Works with verified rough-in
The rough-in is the distance from the finished wall behind the toilet to the center of the floor bolts or drain flange. Most modern toilets are made for a 12-inch rough-in. You will also find one piece toilet dimensions with 10-inch rough-in and one piece toilet dimensions with 14-inch rough-in, but the model choices are more limited.
Measure from the finished wall, not from the baseboard. If you measure from the baseboard, you may lose half an inch or more without realizing it. That half inch matters when the tank is close to the wall.
Decision line: if your rough-in is under about 11½ inches and you are looking at a 12-inch model, stop and verify the manufacturer’s clearance drawing before buying.

Avoid borderline doors and valve access
A one-piece toilet can become annoying when it blocks normal service access. The shutoff valve must still be reachable after the toilet is installed. If the valve is hidden behind a skirted base or squeezed between the toilet and wall, a small leak becomes a bigger problem because you cannot shut off the water quickly.
Door swing matters too. A door that opens over the toilet area can steal usable space. It may clear the old round-front toilet but hit the new elongated bowl.
This is where most people get it wrong: they measure the drain, then forget to measure the room after the toilet is in place.
Is a two-piece simpler here?
A two-piece toilet is not always smaller, but it is often easier to install in awkward rooms. The bowl can be set first, then the tank added later. That matters in a narrow bathroom where you cannot stand over the flange and lower a heavy one-piece straight down.
When comparing one piece toilet dimensions vs two piece toilet size, do not assume one-piece means compact. Compare the actual projection from wall to front edge, the tank width, the base width, and the height. Some two-piece toilets are shorter front-to-back than some one-piece toilets.
A simpler option may work better when:
- One person is doing the installation.
- The doorway or hall turn is narrow.
- The bathroom is too tight to lower the unit straight.
- The shutoff valve is close to the bowl.
- The floor needs shimming or flange repair.
What Trade-Offs Come With One-Piece Size?
Heavy units need straight placement
A one-piece toilet must be lowered straight onto the flange. If the installer twists it, drags it, or “walks” it into position, the wax ring can smear or deform. That can lead to a leak that does not show immediately.
A two-person set is usually safer. One person guides the bolts and the other controls the weight. In a tight room, this is harder than it sounds because the wall, vanity, tub, or door frame may block your body position.
This is usually where installation fails: the toilet technically fits, but there is no room to set it cleanly.

Skirted bases can block valves
Many one-piece toilets have smooth or skirted sides. That can look clean, but it may hide the connection area. The supply line and shutoff valve still need space.
Before buying, check the installation drawing for the open area behind or beside the base. Compare it with your valve location and confirm that the shutoff valve is reachable by hand according to the product manual or installer guidance. A valve that sits low and close to the toilet centerline may interfere with the skirt, and a valve too far forward may require special fittings.
If the valve must be moved, that can mean wall repair, plumbing work, paint, and sometimes tile patching. That is a much bigger job than a toilet swap.
Compact models trade comfort space
Compact one piece toilet dimensions for small bathrooms can help in powder rooms, half baths, and narrow layouts. A compact model may reduce wall-to-front projection by 1 to 3 inches compared with a full elongated toilet.
But compact does not always mean comfortable. The seat may feel shorter. The bowl may place the user closer to the wall or vanity. The tank may be narrow, but the base may still be wide enough to interfere with cleaning or valve access.
For small one piece toilet dimensions for powder rooms, projection is the first number to check. Width and height matter, but front clearance usually decides whether the bathroom feels usable.
Elongated bowls add front projection
The choice between elongated one piece toilet dimensions vs round front is mostly about projection. Elongated bowls often extend about 2 inches farther than round-front bowls, though compact elongated models can narrow that gap.
Do not buy by bowl shape alone. Use the model’s total depth or projection from the finished wall to the front of the bowl. A compact elongated toilet may fit better than an older round toilet, but a full-size elongated toilet may block the door in a small bathroom.
Decision line: if your current toilet barely clears the door, do not upgrade to elongated until you compare exact wall-to-front dimensions.
What Extra Work Can Retrofit Installation Create?
Valve relocation adds wall work
A toilet replacement can turn into a plumbing job if the shutoff valve is in the wrong place. This is common with skirted one-piece toilets because the base may cover areas that were open on the old toilet.
A normal exposed trapway toilet may leave plenty of space around the valve. A skirted one-piece may not. If the valve lands inside the skirt area, the toilet cannot sit flush or the valve cannot be turned.
Relocating the valve can require:
- Shutting off water to the bathroom or house.
- Opening the wall.
- Replacing old pipe or fittings.
- Patching drywall or tile.
- Installing a new supply line.
That added work can cost more than the toilet installation itself. Additionally, replacing an old toilet may reveal exposed old caulk lines, unpainted flooring, tile discoloration, or base-shape mismatch that could require minor cosmetic fixes to achieve a clean finish.

Low flanges need repair
The flange is the floor fitting that connects the toilet to the drain. Ideally, it should sit at the proper height relative to the finished floor and be firmly attached. If new flooring was added around an old flange, the flange may sit too low. If the flange is cracked, loose, or corroded, the toilet may not seal correctly.
A low flange may need an extender or a different seal. A damaged flange may need repair before the toilet is installed. Do not use the weight of the toilet to “solve” a bad flange. It will not.
This matters with one-piece toilets because resetting the unit is harder. If the seal fails, the whole heavy toilet must come back off.
Uneven floors require shimming
A toilet that rocks after setting is not acceptable. Rocking breaks the seal over time and can lead to leaks, sewer odor, or floor damage. Tightening the bolts harder is not the fix. Over-tightening can crack porcelain.
If the floor is uneven, the toilet should be shimmed before final tightening. Then the base can be caulked, often leaving a small gap at the back. This allows a future leak to appear and aligns with local practices.
If your old toilet rocks, fix the floor or flange problem before installing the new one.
Narrow doors need two-person handling
One-piece toilets are bulky. The issue is not only the bathroom size. It is also the path to the bathroom: stairs, turns, narrow halls, and doorways.
A toilet may fit the final space but still be difficult to move into position without chipping tile, scraping walls, or dropping it onto the flange at an angle. If the bathroom is narrow, plan for two people and clear the path before removing the old toilet.
This is not a minor detail. It is the difference between a clean install and a cracked tile or bad wax seal.
Will the Rough-In Match Your Drain?
What happens below 11½ inches?
A listed 12-inch rough-in does not always mean the toilet needs exactly 12 inches of empty space behind it. Many toilets leave a small gap between tank and wall when installed on a true 12-inch rough-in. But if your rough-in is short, that gap disappears.
At around 11½ inches, some 12-inch toilets may still fit, depending on the model’s tank shape and outlet design. Below that, the risk rises. The tank may touch the wall, the toilet may not sit over the bolts correctly, or the base may not cover the flange as intended.
If your rough-in is short, do not guess. Check the model’s spec sheet, compare the manufacturer’s clearance drawing, consider the rear tank gap, and evaluate the actual wall condition before buying. You may need to select a different rough-in model or consult a plumber for options.
12-inch rough-ins need tank gap
One piece toilet dimensions with 12-inch rough-in are the most common, but even a correct 12-inch rough-in should leave a little breathing room. A tank pressed hard against the wall can create stress if the wall is not flat. It can also make painting, cleaning, or lid removal harder.
A small gap behind the tank is normal. A large gap may mean you have a 14-inch rough-in with a 12-inch toilet. That may still function, but it can look odd and push the bowl farther into the room than expected.
10-inch models limit choices
A 10-inch rough-in is common in some older homes and small bathrooms. It is not a defect, but it limits your choices. If you need a one piece toilet dimension with 10-inch rough-in, shop by rough-in first, then by projection.
Do not buy a 12-inch model and assume it will fit a 10-inch rough-in. It usually will not. Moving the flange can involve floor work, drain work, and sometimes ceiling access below.
14-inch rough-ins can leave gaps
A 14-inch rough-in gives more space between the drain and wall. If you install a 12-inch rough-in toilet there, the toilet may sit with a noticeable gap behind the tank. It may work mechanically, but it may look unfinished and may place the bowl farther forward than desired.
A true 14-inch rough-in model can reduce that gap. However, choices are fewer. If appearance and front clearance matter, do not ignore the extra 2 inches.
For one piece toilet dimensions with 14-inch rough-in, check both the rear gap and total wall-to-front projection. You may solve the wall gap but still crowd the room.
HOROW One-Piece Toilets to Compare by Fit
After measuring your rough-in and available bathroom space, compare models against the requirements that matter for your installation. The examples below include 10-inch and 12-inch rough-in options as well as a comfort-height elongated option. You can also browse HOROW one-piece toilets before comparing individual product details.

HOROW T0338W-10
A one-piece toilet option for a 10-inch rough-in. Compare its exact dimensions and available bathroom clearance with your finished opening before ordering.
View T0338W-10
HOROW HWMT-76D
A dual-flush one-piece toilet option for a 12-inch rough-in. Confirm its exact wall-to-front dimensions and the space around your shutoff valve before installation.
View HWMT-76D
HOROW ST076W
A comfort-height, elongated one-piece toilet with a single-flush design. Compare its exact projection and available front clearance when planning a tighter bathroom layout.
View ST076WAlways confirm the exact rough-in, product dimensions, valve clearance, and installation requirements on the individual product page before ordering.
Will Clearances Work After Installation?
Is 21 inches enough?
A common minimum front clearance is 21 inches from the front of the toilet to the nearest wall, door, vanity, or fixture. This minimum is consistent with clearance requirements commonly referenced in ICC residential building codes, although many homeowners find 24 to 30 inches significantly more comfortable in daily use. That is a minimum, not a comfort target. In daily use, 24 inches feels more workable, and 30 inches or more feels much better for most adults.
This matters in small bathrooms. A 5-by-5-foot bathroom is not automatically too small for a toilet, but every inch must be planned. A 5-foot room can work if the door swing, vanity depth, and toilet projection are controlled. It becomes too small in practice when the door hits the toilet, the vanity blocks knees, or there is no standing room.
If your old toilet has 23 inches in front and the new one projects 2 inches farther, you are now near the minimum. That may pass a tape-measure check but feel cramped every day.
15-inch side clearance minimum
A common side clearance rule is 15 inches from the toilet centerline to each side obstruction. This gives a 30-inch clear zone. Some local codes or accessibility plans may require more.
Measure to the nearest fixed object:
- Wall
- Vanity
- Tub
- Shower glass
- Radiator
- Cabinet
- Door casing
Do not measure to the edge of the toilet. Measure from the centerline of the flange or bolts.
For one-piece toilets in narrow layouts, also think about shoulders. A person does not sit like a straight line over the flange. If the toilet is between a wall and a tall vanity, elbow and shoulder space may feel tighter than the floor plan shows.
Door swing can steal space
A door may clear the toilet when open but still make the bathroom awkward. If the door swings inward and passes close to the bowl, the person may need to step around it. If the door hits the toilet, the finish can chip or the door may not open fully.
Check the door with the old toilet still in place:
- Mark the current toilet front edge on the floor.
- Mark the new toilet’s projected front edge.
- Swing the door slowly.
- Check whether the door, handle, or towel hook enters that space.
If your setup looks like this, it won’t work: the new toilet projects into the door arc, and the door is the only entrance. Choose a shorter toilet or change the door swing before installing.

Narrow rooms need shoulder clearance
For one piece toilet dimensions that fit tight spaces, the published width does not tell the whole story. A narrow toilet tank does not fix a toilet squeezed too close to a wall. A compact toilet also does not fix a vanity that crowds the user’s knees.
Small bathrooms often fail in three ways:
- The toilet fits, but the user sits crooked.
- The door clears, but standing up is awkward.
- The valve is reachable only with a tool or by removing trim.
If the room is narrow, choose by centerline clearance first, then projection, then bowl shape.
Can Future Features Still Fit?
Will a bidet seat fit later?
If you may add a bidet seat later, check now. Many bidet seats need enough room behind the seat bolts and enough side room for hoses or controls. Some one-piece toilets have curved tanks or special seat shapes that limit compatibility.
Before buying, confirm:
- Seat bolt spacing
- Bowl shape
- Flat area behind the seat
- Clearance between tank and seat bolts
- Side access for hose connection
- Reachable shutoff valve
This is a common regret: the toilet fits the room, but the bidet seat does not fit the toilet.
GFCI outlet needed for smart seats
Electric bidet seats and smart seats need a properly placed GFCI-protected outlet. Do not plan to run an extension cord across the bathroom floor. That is unsafe and usually not acceptable.
If the bathroom is being remodeled, plan the outlet before the wall is closed. In a retrofit, adding an outlet may require electrical work, wall repair, and permitting depending on local rules.
A smart seat does not change the toilet rough-in, but it can change the real space needed behind and beside the toilet.
Hoses need side access
Even non-electric bidet seats need a water connection. The supply hose often connects near the shutoff valve and tank fill connection. If a skirted one-piece hides that area, the install can be frustrating or impossible without special fittings.
Leave enough access to:
- Turn the valve by hand.
- Replace a supply line.
- Tighten a connection.
- Check for leaks.
- Add a tee fitting for a bidet.
If you cannot see or reach the valve, future maintenance becomes slower and more expensive.
Comfort height may change knee space
Comfort height can be a good choice, but it changes the way a person sits. Taller users often like it. Shorter users may find their feet do not rest as well on the floor. In a tight bathroom, the higher seated position can also make the vanity or door feel closer to the knees.
Do not choose comfort height only because it sounds upgraded. Measure the toilet you have now, then decide whether you want the seat higher, lower, or the same.
What Fails Later With Tight Margins?
Rocking breaks wax seals
A toilet that rocks will usually get worse. Movement breaks the seal under the toilet. Once that seal is compromised, water can leak under the flooring without being obvious right away.
With one-piece toilets, resetting the toilet is more work because the whole unit must be lifted. That is why floor flatness and flange condition should be checked before final setting.
Hidden valves delay shutoff
A hidden valve is not just inconvenient. If the fill valve leaks, the supply line drips, or the bidet connection fails, you need to shut off water fast. If the valve is behind a skirt or too close to the wall, minutes matter.
Before the old toilet comes out, turn the valve by hand. If it is frozen, corroded, or leaking, replace it before installing the new toilet.
Tank contact causes stress
A tank that touches the wall may seem harmless, but it can cause problems if the wall is uneven or if the toilet shifts. Porcelain does not like point pressure. A small gap is safer than hard contact.
If the tank touches tile, wainscoting, or a bowed wall, do not force the toilet down and tighten the bolts. Recheck the rough-in and model drawing.
Old drains can flush poorly
A new toilet cannot always fix old plumbing. If the home has a history of clogs, slow drains, poor venting, or old waste lines with buildup, a high-efficiency toilet may not perform as expected. The toilet may flush correctly in a test but struggle with the actual drain path.
This is more about plumbing condition than one-piece dimensions, but it affects the buying decision. If the old toilet needed frequent plunging, inspect the drain before assuming a new toilet will solve it.
Fit and Requirement Summary
Use this block before buying, especially for replacements.
Space and clearance checks
- Rough-in: measure finished wall to bolt center.
- Side clearance: aim for at least 15 inches from centerline to each side.
- Front clearance: 21 inches is a minimum; 24 to 30 inches is more usable.
- Projection: compare wall-to-front dimension, not just bowl shape.
- Door swing: check the full door arc, including handle or hooks.
- Shoulder room: check tall vanities and walls beside the toilet.
Water and service checks
- Shutoff valve must stay visible and reachable.
- Supply line must connect without sharp bends.
- Skirted base must not cover the valve.
- Flange must be solid, level, and near proper height.
- Old valve should turn off fully before work starts.
Future feature checks
- Confirm bidet seat compatibility.
- Plan GFCI-protected power for electric seats.
- Leave room for hoses and tee fittings.
- Check seat height with the actual seat installed.
Handling checks
- Confirm the toilet can pass through doors and turns.
- Plan a two-person set if the room is tight.
- Lower the toilet straight onto the seal.
- Do not twist it into place.
Step-by-Step Pre-Install Validation
Step 1: Measure the rough-in
Measure from the finished wall to the center of the closet bolts. If you get close to 12 inches, you likely need a 12-inch rough-in toilet. If you get near 10 or 14 inches, shop for that rough-in instead of guessing.
Do not round up. An 11¼-inch rough-in is not the same as 12 inches.
Step 2: Measure current projection
Measure from the wall behind the toilet to the farthest front point of the current toilet seat or bowl. Then measure the remaining space in front.
If the new toilet projects farther, subtract the difference from your front clearance. This is the fastest way to catch a door or knee-space problem.
Step 3: Check side clearance
Find the toilet centerline. The closet bolts usually show it. Measure left and right to the nearest wall, vanity, tub, or fixture.
If either side is under 15 inches, the installation may not meet common clearance rules and will likely feel cramped.
Step 4: Check the valve
Look at the shutoff valve. Is it left, right, low, high, or directly behind the toilet? Can you turn it by hand? Will a skirted base cover it?
If the valve is questionable, handle that before ordering the toilet.
Step 5: Check the flange and floor
If the old toilet rocks, leaks, smells, or has stains around the base, plan for flange or floor work. When the toilet is removed, inspect the flange before setting the new one.
A damaged flange should not be hidden under a new toilet.
Step 6: Compare seat height
Measure floor to top of your current seat. Then compare the new model’s listed seat height. If the spec shows rim height only, add the seat thickness.
This prevents surprise height changes, especially for children, shorter adults, and older users.
Step 7: Plan cleaning and use
A one-piece toilet is easier to wipe around the tank-bowl area, but tight spaces still make cleaning hard. Make sure you can reach both sides, the rear, and the shutoff connection. A handheld bidet sprayer or compatible bidet seat needs valve access, hose clearance, and sometimes electrical power. Do not assume any one-piece toilet will support those additions after installation.
Before You Buy
Use this checklist to avoid the wrong toilet.
- Check bidet seat fit before installing.
- Add a GFCI-protected outlet if planning an electric seat.
- Make sure two people can carry and set the toilet.
FAQ
Are one-piece toilets a good idea?
Yes, one-piece toilets are a good idea when the bathroom has enough space, the rough-in matches, and the supply valve remains accessible. They are often easier to clean around the tank area, but they are heavier and less forgiving during installation. If the room is tight or the flange needs repair, a two-piece toilet may be easier to handle.
What are the disadvantages of one-piece toilets?
The main disadvantages are weight, handling difficulty, and access problems with some skirted designs. A one-piece toilet usually needs a straighter, more controlled set onto the flange, and it can be harder to reset if the seal fails. In small bathrooms, the projection and valve clearance matter more than the one-piece design itself.
Can a one-piece toilet fit in a 5x5 bathroom?
Yes, a one-piece toilet can fit in a 5x5 bathroom if the layout gives enough side clearance, front clearance, and door swing. The rough-in alone does not decide the fit. Use the toilet’s total projection and check whether the door, vanity, or tub steals usable space.
Can I add a bidet seat later?
Yes, you can add a bidet seat later if the toilet shape, seat bolt area, water connection, and side clearance allow it. Electric bidet seats also need a properly placed GFCI-protected outlet. Check compatibility before buying the toilet, especially with curved one-piece tanks or skirted bases.


Leave a comment
This site is protected by hCaptcha and the hCaptcha Privacy Policy and Terms of Service apply.