


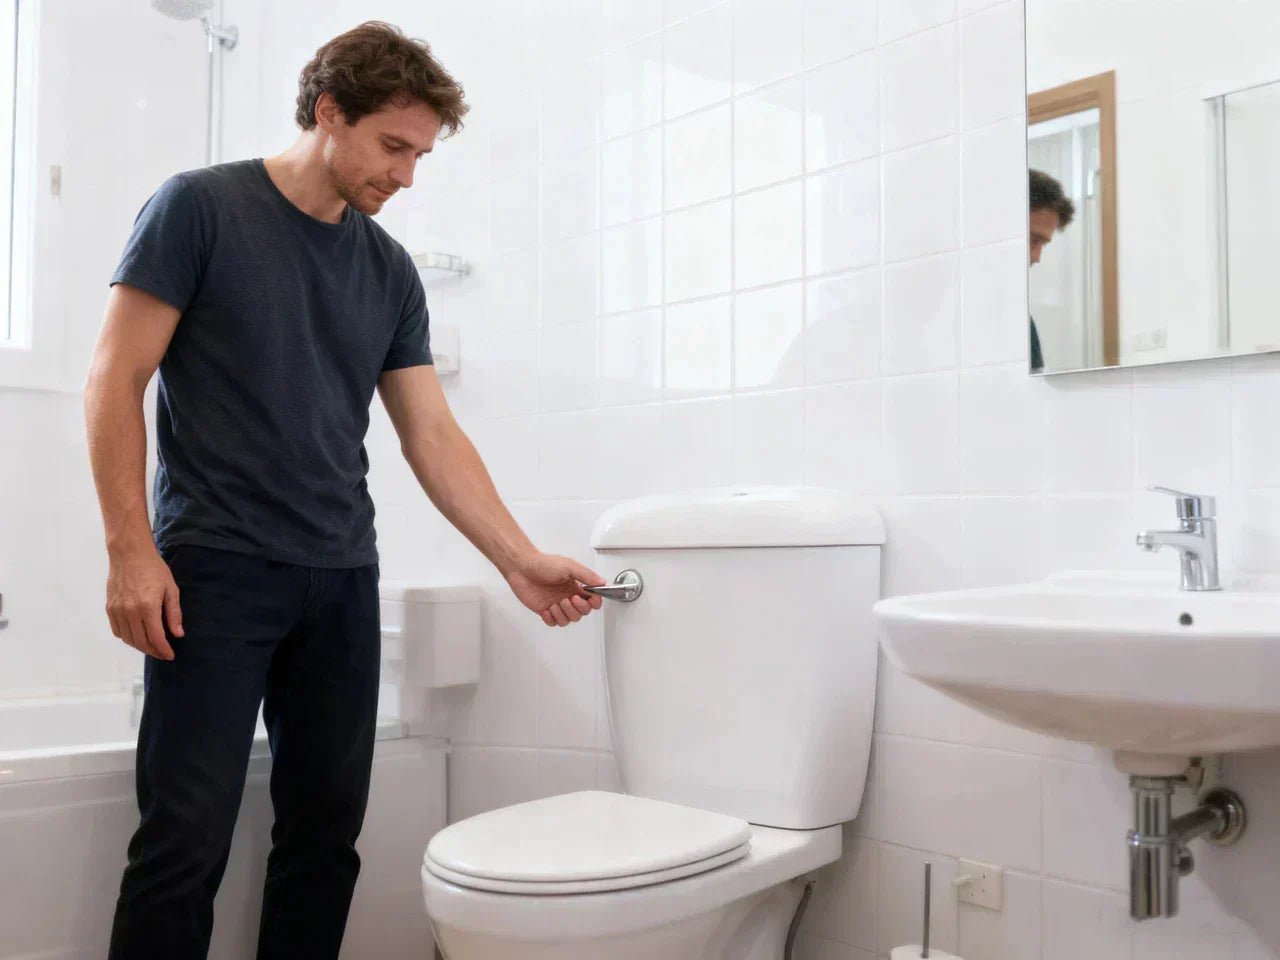
If your toilet handle is loose, stuck, or broken, it’s a sign you need to replace it soon before it causes flushing issues. In most homes, you can install toilet handle in 10–20 minutes with basic tools and no plumbing background. This guide gives you a simple step-by-step, then goes deeper into troubleshooting, universal fit and compatibility, finishes and durability, DIY vs. pro costs, safety, sustainability, and practical tips. You’ll learn how to set the chain correctly, avoid cracking the porcelain, and make sure every flush feels right. We’ll also answer common questions like: Do all flush handles for toilets fit all tanks? Can you replace just the handle? And how much would a plumber charge?
Think of this as your go-to manual to replace a broken toilet handle, fix a disconnected chain, or fine-tune a weak flush. No need to remove the toilet or do anything complicated. You’ll work from the top of the tank, and you’ll only touch a few parts: the handle (lever), the mounting nut and washer, the lift arm, and the flapper chain that lifts the flapper. Ready to get it done?
How to Install Toilet Handle (Step-by-Step)
You’ll start by taking off the toilet lid, loosening one nut inside the tank, and swapping in a new handle and arm. Then you’ll attach the chain with the right amount of slack and test the flush. The entire repair is clean and simple, and you won’t need to shut off the water.
Tools and parts checklist
-
Adjustable wrench or crescent wrench; pliers (optional); sponge or cloth
-
Penetrating oil for seized hardware (optional)
-
New toilet handle (also called trip lever or tank lever), mounting nut and washer
-
Lift arm with holes or slots, and a flapper chain clip
-
Optional: small towel to protect the outside handle finish while tightening
Tip: Most levers have a plastic or rubber washer or an o-ring that goes between the nut and the porcelain or between the handle trim and the tank. Make sure it’s in place when you reassemble.

Remove the old toilet handle: reverse-threaded nut basics
Before you install toilet handle, you’ll need to remove the old one first. Most handle mounting nuts are reverse-threaded (also called a left-hand thread). That means you turn the nut inside the tank clockwise to loosen and counterclockwise to tighten. This helps keep the nut from loosening during normal flushing.
-
Remove the tank lid and set it aside on a towel, safe from chips.
-
Note how the chain connects to the old lever arm. Many arms have multiple holes; take note of which hole the chain used.
-
Unclip the flapper chain from the arm. If it has a little “S” hook or clip, lift it off gently.
-
Find the handle’s mounting nut inside the toilet tank that holds the handle in place. It’s usually right behind the hole in the porcelain where the handle passes through.
-
Turn the nut clockwise to loosen. If the nut is stuck, apply a little penetrating oil and wait a few minutes. Use steady pressure. Do not pry against the porcelain.
-
Unscrew and remove the nut and washer. Hold the handle with your other hand so it doesn’t spin and scratch the tank.
-
Pull the old handle and lift arm out through the hole in the tank front or side. Clean the hole in the tank with a damp cloth to remove mineral buildup or grime.
Note: If your lever’s nut behaves the “normal” way (lefty-loosey, righty-tighty), don’t worry—some units are not reverse-threaded. But most are.
Install the new lever and align the lift arm
Now it’s time to actually install toilet handle — insert the new toilet handle through the hole and set the mounting nut and washer by hand. The key is to snug the nut enough to keep the handle from wobbling, but not so tight that you stress the porcelain.
-
Remove the nut and washer from the new handle, then insert the handle shaft through the hole from outside the tank. Keep the handle straight and level.
-
Inside the tank, slide on the washer (if included), then start the nut by hand. Most nuts tighten counterclockwise on these left-hand threads.
-
Hold the handle outside the tank in a neutral position (not pressed down). Using your fingers, tighten the nut until it stops turning easily.
-
Use a wrench to add a gentle quarter-turn. Do not overtighten. If resistance spikes, stop. The porcelain can crack with too much force.
-
Align the arm inside the tank so it swings up and down without touching the fill valve, float, or tank wall. If needed, bend an adjustable metal arm slightly so it clears other parts. Many universal arms are designed to be bent or set at an angle.
Reconnect chain, set slack, and test flush
How to attach toilet chain to handle? The chain sets how far the flapper lifts and how well it seals. Too short and the flapper may not close; too long and the flush can be weak.
-
Clip the flapper chain to the same hole on the new arm that the old one used, making sure the link on the chain is properly attached and the length looks right. If not, pick a nearby hole.
-
Aim for about 1/2 inch of slack. You want the chain to have slight play when the handle is at rest. The chain could be too tight if the flapper can’t seal, and too loose if the tank won’t drain.
-
Press the handle to flush the toilet and test the motion. Watch the flapper: it should open fully, then fall back into place and seal without you having to jiggle the handle.
-
If the flush feels weak, move the clip to a hole closer to the handle (shortens effective chain length). If the flapper won’t close, move the clip to a hole farther away (adds slack).
-
Make sure the refill tube points into the overflow tube and isn’t stuck under the lever arm.

Troubleshooting and Fine-Tuning the Flush Lever
If you’ve ever thought, “there’s a problem with my toilet handle,” don’t worry — most small hiccups after replacing a toilet handle come down to just a few things: nut tightness, arm alignment, or chain slack. The good news? These are easy, quick fixes you can do without calling a plumber.
Handle Feels Loose or Wobbly
If your handle wiggles when you press it, the mounting nut inside the tank probably needs tightening. Twist it hand-tight, then give it an extra quarter turn with pliers. Be gentle — over-tightening can crack the porcelain.
Tip: Many toilet handle nuts are reverse-threaded, which means you turn them counterclockwise to tighten and clockwise to loosen. If yours doesn’t work that way, it’s a standard thread.
If the nut is stuck due to rust or mineral buildup, spray a little penetrating oil, wait 5–10 minutes, and it should free right up.
Handle Sticks, Squeaks, or Feels Stiff
A sticky or squeaky handle usually means something is rubbing or misaligned inside the tank. Check that the rubber washer between the handle and the tank is properly seated and that the lever arm isn’t hitting the tank wall or fill valve.
If the movement still feels rough, apply a tiny drop of silicone-based lubricant (avoid petroleum products) to the pivot point of the lever. That little bit of lubrication can make it move smoothly again.
Flush Feels Weak or Incomplete
If the handle lifts normally but the flush feels weak, the chain inside is probably too long. The flapper isn’t lifting high enough to release a full rush of water.
Try one of these quick adjustments:
-
Move the clip one hole closer to the handle arm, or
-
Shorten the chain by one link.
Once adjusted, test the flush — you should get a strong, full flow without needing to hold the handle down.
Toilet Runs After Flushing
If the water keeps running after a flush, the chain is too short and the flapper isn’t sealing shut. You’ll need to add a bit of slack or move the clip to a hole farther from the handle.
While you’re at it, check the flapper itself. If it’s worn, warped, or covered in mineral scale, replace it — a new flapper costs only a few dollars and usually fixes constant running issues instantly.

“Ghost Flushing” or Random Refills
If you occasionally hear the tank refilling by itself, that’s called ghost flushing. It usually means a slow leak is letting water escape from the tank into the bowl.
Common causes:
-
A worn flapper seal that no longer sits tight.
-
The refill tube being pushed too far down the overflow pipe.
Make sure the refill tube sits just above the top of the overflow, not jammed deep inside it — that’ll stop water from siphoning and refilling unnecessarily.
Handle Presses but Nothing Happens
If pressing the handle does nothing, the chain probably came off or got tangled under the lever arm. Don’t worry — this is one of the easiest fixes there is.
-
Open the tank lid.
-
Reattach the chain clip to a hole on the lever arm.
-
Leave about ½ inch of slack so the flapper closes properly after each flush.
-
Make sure the chain hangs straight and doesn’t catch on anything.
After a few test flushes, everything should work smoothly again.
Universal Fit and Compatibility (Front, Side, Angle Mounts)
Do all toilet handles fit all toilets? No. Fit depends on mount position, arm shape, and the tank’s internal layout. But many “universal” levers fit most front-mount and side-mount tanks and can be bent or adjusted to clear parts. Here’s how to pick the handle you need without guesswork.
Start by checking the mounting position. Is the handle on the front, side, or at a corner (often called a neo-angle)? Front-mount levers work for most front locations, while side-mount levers have a different arm bend and pivot. Neo-angle tanks often need a special angle on the arm so it doesn’t hit the wall of the tank.
Measure arm length if you can, and note the angle or bends of your old lever. If you still have the old lever, compare it to the new one. Many universal arms are designed to be trimmed or bent slightly to match your old geometry. If the tank is small or crowded, choose a lever with a narrow arm, or one with multiple bend points. You want the arm to swing cleanly and lift the flapper straight up without rubbing the fill valve, float, or overflow tube.
Some toilet models prefer an OEM-style lever because the arm angle is unique. Others accept most universal levers with small adjustments. If your tank has a dual-flush button or a split-level mechanism, you need a model-specific part rather than a standard lever. That’s one of the few times you cannot swap a basic handle.
Materials, Finishes, and Durability
Picking a replacement toilet handle is as much about feel and look as it is about fit. Metal paddles usually feel solid and resist flex. Quality plastics won’t rust and are often lighter, which reduces wear at the pivot. The best choice depends on your bathroom’s conditions and how much you use the toilet.
In homes with hard water or near the coast, corrosion can show up around the handle’s trim and nut. If that’s your situation, lean toward corrosion-resistant materials, protective coatings, or composite arms. Look for stainless fasteners, UV-stable plastics, and sealed finishes.
Matching the finish to your other bathroom hardware gives a clean look. Chrome is classic and easy to clean. Brushed nickel hides fingerprints. Matte black is modern and needs gentle cleaning to avoid dull spots. Brass brings warmth; it needs soft cloth care to keep the shine.
Here’s a quick comparison to help you choose.
Materials comparison
-
Metal paddles and pivots: Firm feel and long life, but some alloys can corrode if water sits on them. Good choice if you want a sturdy feel and don’t mind light maintenance.
-
Engineered plastic paddles and arms: No rust, lighter on the pivot, and easy to clean. They can flex a bit under heavy force but are great for humid areas.
Finish care tips
-
Wipe splashes and dry around the handle base during routine cleaning.
-
Use mild soap and water; avoid harsh abrasives that can scratch the finish.
-
If you spot mineral buildup, a soft cloth and gentle cleaner will help. Rinse after.

What to Look For When You Buy A Toilet Handle (2025)
Shopping for a new toilet handle might seem like one of those quick, grab-and-go errands — but when you’re standing in the plumbing aisle, you’ll realize there are a lot of options. Some are metal, some plastic, some labeled “universal,” and others are made just for specific toilet models. To make sure you get a handle that works smoothly and lasts a long time, focus on the parts that really matter — the pivot, the arm, and the nut — plus a few comfort and convenience details.
Solid Pivot Design
The pivot is the small hinge where the handle turns — and it’s the heart of the whole mechanism. A good pivot should feel tight but smooth, without any wobble or squeak when you press it.
-
Metal pivots (like chrome-plated brass or stainless steel) feel sturdy and give a satisfying, solid action. They also look great in modern bathrooms.
-
Reinforced composite pivots are another great option because they don’t rust or corrode — a big plus in humid bathrooms.
A high-quality pivot helps your handle feel more responsive and prevents the annoying “loose handle” problem that cheap models develop over time.
Adjustable or Bendable Arm
Inside the tank, the arm connects your handle to the flapper chain — and that’s where fit really matters. Tanks vary a lot in shape, so look for an arm that’s adjustable, flexible, or bendable.
-
Multiple chain holes let you fine-tune how much lift the flapper gets.
-
Bendable or trimmable arms help you customize the fit so the lever clears the fill valve and doesn’t rub against the side of the tank.
Even a small adjustment can make a big difference in how well your toilet flushes. If you’re not sure of your tank’s layout, a “universal fit” lever with a flexible arm is usually a safe bet.
Clear, Quality Hardware
Don’t overlook the small stuff. A good handle kit should include:
-
A washer or o-ring for smooth, quiet movement.
-
A sturdy mounting nut with clean, easy-to-thread grooves.
These details make installation easier — and help prevent leaks, squeaks, or stuck handles later on. If you can, pick a kit where the nut is made of brass or corrosion-resistant plastic, not thin metal that can seize up over time.
Easy-to-Follow Instructions
Even though replacing a toilet handle is simple, not all kits explain it clearly. If you’re new to DIY repairs, choose a handle that comes with simple diagrams or an illustrated guide. Some even include QR codes linking to short install videos — which can be a lifesaver if you’re visual.
A few extra minutes saved during installation can mean a cleaner, tighter fit and fewer adjustments later.
Ergonomic and User-Friendly Design
The shape and feel of the handle itself matter more than you might think. A good design can make your daily bathroom routine a little easier — especially for kids, seniors, or anyone with arthritis or limited hand strength.
Look for:
-
Larger paddles that give better leverage.
-
Soft-touch or rubberized finishes for comfort and grip.
-
Stylish designs that match your bathroom hardware (matte black, brushed nickel, or chrome are popular in 2025).
It’s a small upgrade that can make a surprisingly big difference in everyday use.
Warranty and Return Policy
A toilet handle isn’t a big purchase, but it’s worth checking for a decent warranty or no-hassle return policy. That way, if the fit isn’t right or the handle doesn’t feel solid, you can easily exchange it.
Keep the packaging and model number — especially if you own a branded toilet, since those sometimes use unique handle styles. A few minutes of record-keeping now makes future replacements much smoother.
Quick Buying Recap
When you’re choosing the right toilet handle in 2025, think beyond just how it looks. The key is to balance sturdiness, adjustability, comfort, and clarity. A solid pivot, a well-designed arm, and good instructions will save you frustration, while a comfortable handle and clear warranty give you peace of mind.
Once you’ve got the right one, installing it should take just a few minutes — and you’ll notice the difference every time you flush.
Fixing the Toilet Handle: DIY vs. Pro
You can install toilet handle yourself in one short session. Most installs take under 20 minutes, and the tool list is tiny. The biggest risk is over-tightening the nut and stressing the porcelain. Work by hand first; then use a wrench for a small snug turn. If you feel a sharp jump in resistance, stop.
When should you call a plumber? If the nut is seized and you risk cracking the tank, if the porcelain already has a hairline crack, or if you’re dealing with a non-standard dual-flush or button system, a pro might be worth it. Also consider a pro if the lever interferes with a complex float/valve setup and you don’t want to bend or adjust an arm.
Typical cost and time
-
DIY time: 10–20 minutes
-
DIY cost: Basic lever price; tools likely already on hand
-
Pro visit: Often a service call minimum plus labor; may include the part
Cost comparison (estimates vary by region; check local rates)
-
DIY: You pay for the part and your time.
-
Pro: Many service calls range roughly from the low hundreds for a quick visit, depending on your area, plus the part. If the lever is specialty or the tank needs extra work, the total can be higher.
How much would a plumber charge to replace a toilet handle? In many areas, expect a service call fee plus a short labor charge. Because every region is different, it’s smart to call and ask for a quick estimate. Replacing a handle is fast work; the main variable is the house call itself.

| Installation Type | Time & Tools | Cost & Notes |
|---|---|---|
| DIY | 10–20 minutes with basic tools | Minimal cost; biggest risk is over-tightening the parts. |
| Professional (Pro) | Short visit for a standard lever installation | Cost varies by local service rates and travel fees. |
Safety, Maintenance, and Sustainability
Protecting the porcelain tank is your top safety goal. Hold the outside handle steady while you tighten the nut gently from the inside. Place a towel between a metal wrench and the handle trim so you don’t scratch the finish. After tightening, look inside the tank for stress lines near the hole. If you ever see a crack, stop and get advice before using the toilet.
Light maintenance keeps your toilet handle replacement working for years. Every few months, open the tank and check the chain. The clip should be secure, and there should be a little slack when the handle is at rest. Once a year, check the flapper. If it’s warped, sticky, or waterlogged, replace it. Over time, even a small warp can cause a leak or “ghost flush.” Also check that the arm inside the tank still swings freely and doesn’t rub against the fill valve or float.
Want to save water and stop hidden leaks? A proper flush-and-seal helps. If the chain is too tight, the flapper may not close all the way and water can seep into the bowl. You can test for a silent leak with a few drops of non-staining food dye in the tank. If color shows up in the bowl without flushing, you have a leak to fix. Choosing efficient parts and keeping the flapper sealing well supports water-saving goals encouraged by national programs. According to the EPA WaterSense program, even a small toilet leak can waste up to 200 gallons of water per day, and fixing these leaks is one of the easiest ways to reduce household water use.
Case Studies, Data, and Real-World Tips
A quick 7-minute install is common when the replacement handle matches the mount and the nut cooperates. You remove the lid, unclip the chain, loosen the nut, swap parts, and reattach the chain with slight slack. The longest part is usually adjusting the chain so the flapper opens fully and then seals.
A handy home “check method” after any toilet handle replacement is to run a small stress test. Do ten quick flushes and watch the flapper action and refill. Then do a few slow presses on the handle to see if a gentle press still opens the flapper enough. The goal is a reliable flush without having to hold the handle down, unless your flapper is the kind that needs a brief hold. If the tank runs after any flush, add a touch of slack to the chain. Based on the EPA’s Fix a Leak Week campaign, testing your toilet regularly for leaks or slow refills can prevent thousands of gallons of water waste per year — especially in older toilets or ones with worn flappers.
Want a deeper test? Try a 100-flush “break-in” over a week during normal use. Check for:
-
Pivot wear or squeak
-
Arm flex or rubbing
-
Mounting nut loosening
-
Finish spots from water sitting on the handle trim
Tighten the nut slightly if needed, wipe the handle dry after cleaning days, and you’re set.
Final Tips and Next Steps
You now know how to install toilet handle, adjust the chain, and avoid the most common errors. Take your time, start by hand, and use light wrench pressure. Check the flapper and chain every few months, and you’ll enjoy a clean, reliable flush for years. If your setup is unusual, if parts are seized, or if you spot any cracks, it’s fine to call a plumber. Otherwise, this is one of the easiest wins in home repair.
For ongoing care, pair your smooth lever action with a good flapper seal and a quick leak check once in a while. It saves water and keeps bills in check. And if you’re curious about upgrades, you can look for levers with larger paddles for easier use, or finishes that match your bathroom hardware.
FAQs
1. Do all toilet handles fit all toilets?
Not exactly. Toilet handles aren’t one-size-fits-all — the fit depends on where your handle mounts (front, side, or angled corner) and the shape of the lift arm inside the tank. Some handles have a straight arm, others are bent or curved to match different tank designs. That said, many “universal” replacement levers are designed to fit most toilets with just a little tweaking or bending. However, if you have a dual-flush system or a button-style flush (often found on top-mounted tanks), those usually require a model-specific handle or mechanism that matches your brand’s design.
2. Can you replace just the handle on a toilet?
Yes, absolutely. If your handle is broken or corroded, you can replace just that part without touching the rest of the flushing system. You’ll be swapping out the handle, the lift arm connected to the chain, and the mounting nut that secures it to the tank. It’s a simple job — no need to remove the toilet or replace the flush valve. In most cases, it’s a five-minute DIY fix using just a wrench or pliers.
3. How to fix a disconnected toilet handle?
If your toilet handle feels loose or does nothing when you press it, the chain inside the tank likely came off. Just remove the lid, and you’ll see the chain dangling free. Reattach it to one of the holes in the lever arm — aim for about ½ inch of slack so the flapper lifts easily but doesn’t stay open too long. Test a few times to make sure the handle moves smoothly and the chain isn’t snagging or pulling too tight.
4. How to fix the handle on the toilet if it’s loose?
A loose handle usually just means the inside nut has worked itself loose over time. To fix it, open the tank and gently tighten the nut that holds the handle in place. Here’s the trick — many toilet handle nuts are reverse-threaded, meaning you’ll tighten them by turning counterclockwise, not clockwise. Don’t crank it too tight though, or you might crack the porcelain tank. Just snug enough to keep the handle from wiggling.
5. What are common toilet handle problems?
Toilet handle issues are pretty common and usually easy to diagnose. You might notice a loose mounting nut that makes the handle wobble, a sticky pivot that makes it hard to press, or a chain that’s too tight or too loose, causing the flapper not to seal properly. Sometimes the lift arm rubs against the side of the tank, or the flapper itself is worn out, letting water keep running even after the flush. Regularly checking these small parts can save you from bigger leaks or wasted water later on.
References

Leave a comment
This site is protected by hCaptcha and the hCaptcha Privacy Policy and Terms of Service apply.