


A sink plunger is the quickest, safest first step for most kitchen and bathroom clogs. With a simple rubber cup and a tight seal over a flat drain, it uses suction and pressure to move water and air. This motion helps break up the clog and get water draining again—no harsh chemicals or costly service call needed. In this guide, you’ll learn exactly which plunger for sink drains to buy, how it works (Boyle’s law), the step-by-step technique that clears most clogs in under two minutes, and what to do if plunging doesn’t work. You’ll also see troubleshooting tips, safe alternatives like a drain snake or wet/dry vac, proper cleaning and storage, and data-backed success rates and cost savings.
What you’ll learn at a glance
-
How to pick the right cup-style plunger for flat drains.
-
The exact plunging sequence most pros use.
-
How to fix seal problems, handle double-bowl sinks, and block overflow vents.
-
When to switch to a drain snake or call a plumber.
Who this is for
DIY homeowners, renters, property managers, and anyone who wants a fast, safe fix for a clogged sink. It’s perfect for those who prefer to handle minor plumbing issues without calling a plumber, saving both time and money. Whether it’s a kitchen, bathroom, or utility sink, this guide will help you tackle the problem with confidence.
Key takeaways in 30 seconds
A basic cup plunger + a tight seal + short, strong plunging bursts (15–30 seconds) clear more than 90% of soft clogs in kitchen or bathroom sinks when used properly.
Quick Answer: Sink Plunger Essentials and Fast Fixes
When your kitchen sink or bathroom sink won’t drain, a cup (flat-bottom) plunger is the best first tool. It seals on flat surfaces like a sink, tub, or shower. It does not have a flange, which is the extra rubber collar seen on a toilet plunger. That flange is helpful inside a toilet drain, but it stops a good seal on flat sink drains.
Best tool in 30 seconds: cup vs. toilet plunger
For sinks, tubs, and showers, reach for a cup plunger. It’s the one with a smooth dome and a flat rim that sits flush around the drain. Avoid flanged toilet plungers for sinks. They are shaped for a toilet drain and usually won’t seal on a flat sink drain.
Snapshot stats and ROI
-
Success rate on soft clogs with correct technique: 90%+
-
Typical time-to-clear: 30–120 seconds
-
Cost difference: $5–$15 (plunger) vs. $150–$300 (service call)
Can I use a toilet plunger on a sink?
Short answer: No. A toilet plunger has a flange for a toilet drain. It won’t seal well on a flat sink or tub drain. Use a cup plunger for sinks.

Plunger type vs. drain type
| Plunger type | Works best on | Seals flat drains? | Use on toilets? |
| Cup (flat-bottom) | Sink, tub, shower | Yes | No |
| Flanged (toilet) | Toilet | No | Yes |
| Accordion/Bellows | Toilet (high pressure) | Poor on flat drains | Yes (with care) |
Before you plunge, set yourself up for a quick win:
-
Remove the stopper/strainer so the cup seats flat.
-
Add a few inches of water in the sink to help create suction.
-
Block the overflow hole (bathroom sink) or the second drain (double-bowl kitchen sink) so pressure doesn’t escape.
Sink Plunger Types and How to Choose
Picking the right plunger for sink drains is simple when you know what features matter. The cup plunger is the standard for flat drains. Look for a cup that’s wide enough to cover the drain opening with room to spare, and a handle that gives you a solid grip.
Cup plunger anatomy and sizing for flat drains
A cup plunger has a dome-shaped rubber cup with a flat rim. When you press it over the drain, that rim sits flush on the sink’s surface. Most cups measure 4–6 inches across. For kitchen or bathroom sinks, a 5–6 inch cup works well. A mini sink plunger (around 4 inches) can help in tight spaces, like small bathroom sink basins or shallow tubs.
Materials and ergonomics
Plunger cups are usually made from rubber or thermoplastic elastomer (TPE). Rubber tends to form a better seal on smooth, flat surfaces, while TPE may be a bit stiffer. Handles can be wood or plastic. A wooden handle is sturdy and easy to hold even when wet. A non-slip grip is a nice touch if your hands get soapy. Make sure the handle is straight and secure. A loose or bent handle reduces control and power.
What to avoid and when
A toilet plunger with a flange is made for toilets, not sinks. That extra collar is helpful for a toilet drain because it guides pressure down the trapway. On a flat sink drain, that flange folds or catches and breaks the seal. Accordion/bellows styles can create a lot of pressure, but they also need a good seal that’s hard to get on flat surfaces. Save those for toilet drain jobs.

Cup vs. flange vs. accordion: direct comparison
| Feature | Cup (sink) | Flanged (toilet) | Accordion/Bellows |
| Best match | Flat drains | Toilets | Toilets |
| Seal on flat surface | Strong | Weak | Weak |
| Mess factor | Low | Medium | Medium–High |
| Learning curve | Low | Low | Medium |
| Typical use | Sink, tub, shower | Toilet only | Toilet only |
How a Plunger Works: Suction, Pressure, and Boyle’s Law
To put it simply, a plunger moves water and air inside the pipe so pressure changes can loosen the clog. This is classic Boyle’s law in action: when the volume of a gas changes, the pressure changes too (in a closed space). Each push and pull nudges the clog until it breaks free or shifts enough for water to flow.
The seal is everything
A tight seal is the key. The flat rim of the cup must sit evenly around the drain. A thin layer of water under the cup helps make it airtight. Before you start, tilt the plunger to expel trapped air from the cup. Less air inside means more effective pressure changes with each stroke.
Boyle’s law in action
On the downstroke, you decrease the volume under the cup, so the pressure increases and pushes on the blockage. On the upstroke, the volume increases, so the pressure drops and pulls on the clog. These quick pressure swings help break up the clog and pull debris back and forth until it loosens and water drains.
Soft vs. hard clogs
Soft clogs respond best: food bits, soap scum, hair at the P-trap, or small grease mats. Hard clogs or deep clogs may not move, such as solid obstructions, foreign objects, or main line issues. If you hear gurgling in other fixtures when you plunge, the problem may be downstream in the plumbing system.
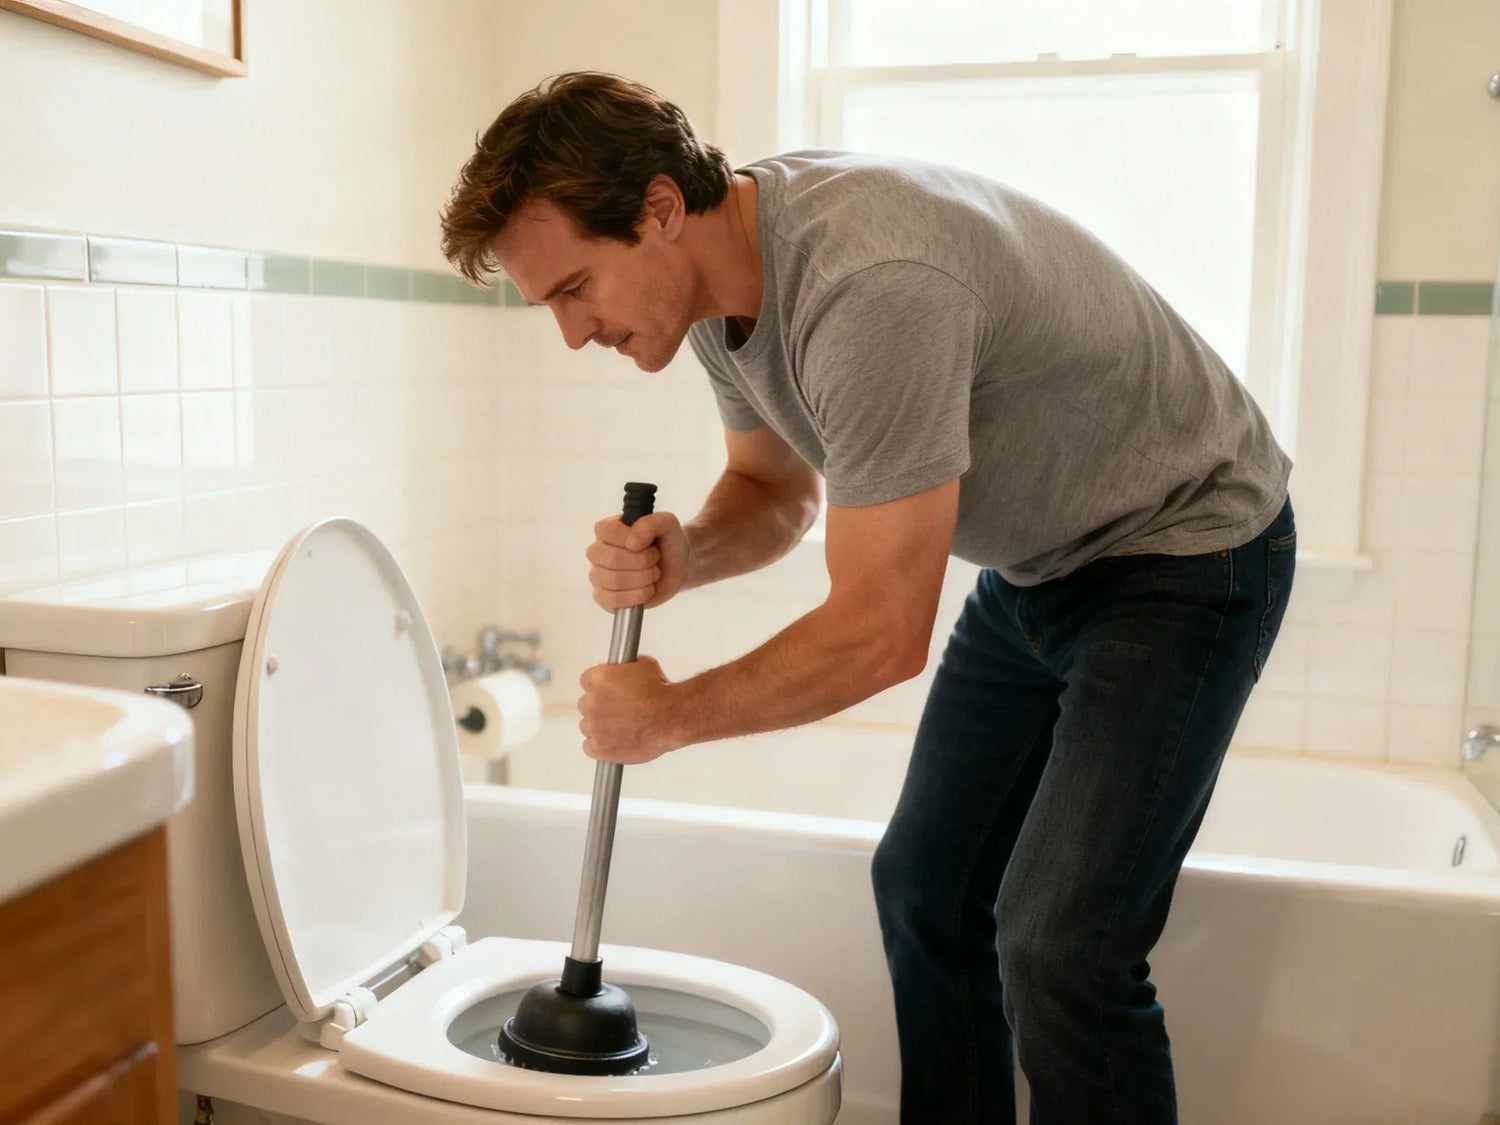
Step-by-Step: How to Use a Sink Plunger (Kitchen and Bathroom)
The right setup plus the right motion is what clears a clogged sink fast. If you’ve ever wondered how to “plunge a sink” the right way, use this short sequence.
Prep for success
-
Remove parts: Take out the stopper or strainer so the rubber cup can sit completely flat on the drain. This ensures a proper seal and prevents water from leaking around the edges during plunging.
-
Fill the sink: Add enough water to cover the cup by about an inch. The water helps create suction and transfers pressure directly to the clog. If the sink is very full, bail out a little, but make sure the cup remains submerged for effective plunging.
-
Block pressure leaks:
- Bathroom sink: Cover the overflow hole with a wet rag to prevent air from escaping and reduce loss of plunging power.
- Double-bowl kitchen sink: Seal the other drain with a wet rag or use a second plunger so pressure is focused on the clogged side.
-
Align the plunger: Place the cup squarely over the drain and tilt it slightly to release trapped air. Press down firmly to form a tight seal all around the drain. Keeping the handle straight and steady helps maximize pressure and control.
Technique that works
-
Start with control: With the cup sealed and submerged, press down and pull up in quick, short strokes for 15–30 seconds. Keep the handle straight and move at a steady rhythm. You should feel resistance.
-
Build power: After the first burst, pause for a few seconds. If the sink level drops a little, that’s a good sign. Repeat 2–4 more bursts of 15–30 seconds each. You’re creating a push-pull effect that helps break up the clog.
-
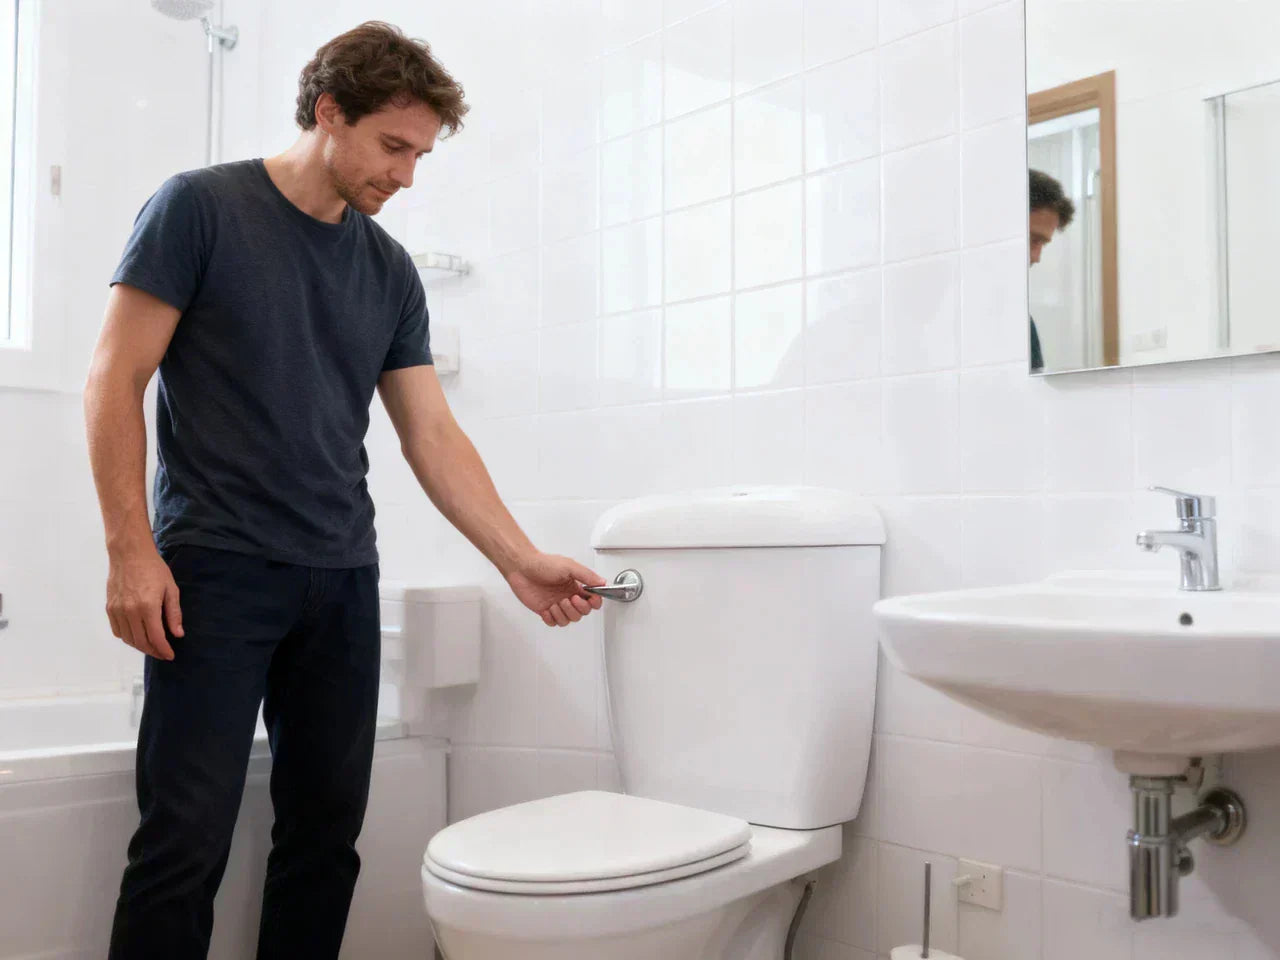
Test and flush: Lift the plunger. If the water drains freely, run warm water for 30–60 seconds. For grease clogs in a kitchen sink, you can also run hot water for a short flush to help wash away softened grease.
Most simple clogs clear in one to three cycles. If the clog is still holding, check your seal and setup, then try again.
Pro tips and safety
-
Improve the seal: A thin wipe of petroleum jelly around the cup rim helps stop air leaks on rough surfaces.
-
Avoid chemicals: Do not plunge a sink that has chemical drain cleaner in it. Plunging can cause splash-back, which can burn skin and eyes.
-
Protect the area: Cover nearby items and wear eye protection. Plunging can cause minor splashes, especially in shallow basins.
-
Garbage disposal note: For a kitchen drain with a disposal, turn off the power at the switch or breaker. Do not plunge with power on. If possible, plunge the opposite bowl in a double sink while sealing the disposal side.
Troubleshooting and Common Mistakes
If you’re asking, “Why won’t my sink plunger work?” the answer is usually simple: a poor seal, not enough water, the wrong plunger, or a clog that’s too deep or hard. Fixing setup issues often restores full power and clears the drain fast.
Fix the seal and setup
-
Add water: No water under the cup means no suction. Fill until the cup is fully covered, usually 1–2 inches. This helps transmit pressure directly to the clog and improves plunging efficiency.
-
Block the leaks: Cover the overflow hole or seal the second drain on a double-bowl sink. Preventing air escape ensures maximum pressure reaches the blockage for faster clearing.
-
Seat the cup: Press firmly so the rim sits flush all around the drain. Tilt slightly to remove trapped air and keep the handle straight for better control and less splashing.
-
Use the right plunger: A flat-bottom cup plunger is essential for sinks. Avoid flanged toilet plungers, which won’t seal properly, reducing plunging effectiveness.

Diagnose clog type and location
-
P-trap clog: Water drains slowly, then stops; plunging often helps. If clearing is partial, the P-trap may hold hair or debris.
-
Branch line clog: If other nearby fixtures are slow too (like the tub near a bathroom sink), the blockage might be farther down the branch pipe.
-
Main line issue: Gurgling in distant fixtures, sewage odor, or backup in multiple drains points to a larger problem. Stop plunging and call a pro.
Decision guide: next steps
-
If seal is bad → Re-seat the cup, add water, block overflow/second drain, try petroleum jelly on rim.
-
If soft clog suspected → Repeat 2–3 plunging cycles, then test with running water.
-
If clog won’t move → Try a drain snake (hair/food near the trap) or a wet/dry vacuum with a tight seal.
-
If multiple fixtures are affected → Consider a professional drain service; could be line issues.
Alternatives, Safety, and When to Call a Plumber
A plunger should be your first move because it’s fast, safe, and cheap. If it doesn’t work, there are a few solid second steps.
DIY methods and tools
-
Hot water flush: For grease in a kitchen drain, pour hot (not boiling) water in stages to soften and move the grease. Follow with gentle plunging. This method works best right after cooking, before the grease hardens and fully blocks the pipe. Avoid using boiling water on PVC pipes, as it can damage joints or seals.
-
Baking soda and vinegar: Add 1/2 cup baking soda, then 1/2 cup vinegar. Let the mixture fizz for 10–15 minutes. Rinse with hot water. This can help with odor and light buildup, but it won’t clear heavy blockages. It’s a natural, eco-friendly solution that keeps drains fresh between deeper cleanings. Regular use can help prevent slow drainage over time.
-
Enzyme cleaner: Good for maintenance and organic buildup over time. Not a quick fix for a stuck clog. These biological cleaners use natural enzymes or bacteria to digest waste in pipes, making them gentle yet effective for long-term upkeep. Use them overnight when water flow is minimal for best results.
-
Drain snake/zip tool: Great for hair or stringy debris near the P-trap. Insert, twist, and pull out debris. It’s an inexpensive, reusable tool that gives you direct control over what you’re removing. Ideal for bathroom sinks and tubs, where hair clogs are the main culprit.
-
Wet/dry vacuum: With a tight seal around the drain, a shop vac can pull out stubborn clog material. Empty and clean the vac thoroughly after use. It’s particularly useful when other methods fail, as the suction can dislodge deep or compacted clogs. Always cover nearby vents or openings to prevent splatter during use.
Is it better to use drain cleaner or a plunger?
Use a plunger first. It’s safer for you and your pipes. Chemical cleaners can splash and cause burns and fumes, and they can react with metals or other cleaners. If you already used chemicals, protect your skin and eyes, ventilate the area, and avoid plunging due to splash risk. Never mix different drain chemicals.
Red flags for professional help
-
Repeated plunging failures with a proper seal and technique.
-
Multiple fixtures draining slowly or backing up.
-
Gurgling or sewage odors from other drains while plunging.
-
Old, fragile, or galvanized lines that may not handle force well.
-
Standing water that returns after each temporary clear.
Cost check: DIY vs. pro
| Method | Typical cost | Typical time | Best for |
| Cup plunger | $5–$15 | 1–2 minutes | Soft clogs at or near the drain |
| Drain snake | $10–$40 | 5–20 minutes | Hair/food near P-trap |
| Wet/dry vacuum | Already owned or $50–$100 | 5–15 minutes | Stubborn clogs you can’t reach |
| Pro service | $150–$300+ | 30–90 minutes | Deep clogs, main line, repeated failures |
Real-World Results: Success Rates, Cost Savings, and Case Studies
Homes with standard sinks and common clogs—food scraps, soap, hair—see very high success with a cup plunger when the seal is right. Many homeowners report clears in under two minutes. Pros show the same in training demos: seal, short bursts, test, and repeat once or twice if needed.
Data highlights and expectations
-
Success rate on soft clogs when used properly: 90%+
-
Typical time-to-clear: 30–120 seconds
-
Cost savings per simple job: often $150–$300 vs. buying a $10 tool you keep
Simple case examples
-
Kitchen sink with grease and crumbs: A homeowner plugs the second bowl, fills the basin, tilts to purge air, and plunges for 25 seconds. Water drops quickly. A short hot water flush finishes the job.
-
Bathroom sink with hair: The user blocks the overflow with a wet rag, runs a 20-second plunging burst, then pulls a small hair wad into the cup. One more short burst, and the drain runs clear.
-
Failure due to wrong tool: A user tries a toilet plunger with a flange and cannot keep a seal. They switch to a flat cup and clear the clog in one cycle.
ROI and time saved
Keeping a kitchen plunger or mini sink plunger on hand pays for itself the first time you avoid a service call. The time to clear is short, the mess is minimal if you keep a tight seal, and you learn a skill you’ll use again.
Care, Cleaning, Storage, and Eco-Friendly Choices
Treat your plunger like any other household tool. Clean it, dry it, and store it so it’s ready next time. A clean plunger also avoids odors and germs.
Hygiene and disinfecting
After use, rinse the cup with clean water. To disinfect, you can use a fresh bleach solution on the rubber cup:
-
Mix 5 tablespoons (1/3 cup) of standard household bleach per gallon of water, or 4 teaspoons per quart.
-
Wipe or dip the cup, let it stay wet for the contact time on the label, then rinse and air-dry.
According to the CDC, household bleach solutions are effective at killing most germs when used properly (CDC, 2023). You can also use an EPA-registered disinfectant following label directions, which is recommended for safe sanitation.
Upgrade Your Bathroom Hygiene
Just as proper care and cleaning keep your sink plunger effective and hygienic, upgrading your bathroom with a smart toilet can further reduce maintenance and improve overall cleanliness. Modern smart toilets, like those from HOROW, feature self-cleaning bowls, automatic flushing, and odor control, helping you maintain a fresh and sanitary bathroom environment with minimal effort.

Storage and cross-contamination
After using a plunger, it’s important to let it dry completely to prevent mold or bacteria growth. Store the plunger upright in a drip tray or holder to catch any remaining water and keep your storage area clean. Make sure to keep sink and toilet tools separate to avoid cross-contamination—never use the same plunger for both types of drains. A ventilated area is ideal because air circulation helps the cup dry faster and extends its life. For extra hygiene, you can periodically wipe down the handle and cup with a mild disinfectant or soap before storing, especially if multiple people in the household use it.
Longevity and replacement
Regularly inspecting your plunger is key to ensuring it works effectively. Check the rubber cup for cracks, brittleness, or hardened areas, as these can reduce the seal and make plunging less effective. Examine the handle for splits, wobbling, or loose attachment to the cup. A loose or damaged handle can affect your control and pressure, making it harder to clear clogs. Replace the plunger if the rim is deformed or the handle is compromised, because a good seal depends on both the cup and handle being in top condition. Proper maintenance and timely replacement ensure that your plunging efforts remain efficient and safe.
Eco-minded buying
When choosing a plunger, consider durability and sustainability. Opt for tools that last longer, which reduces waste and avoids frequent replacements. Look for plungers with cups made from recycled or recyclable materials, and consider handles made from sturdy wood or durable plastic. Wooden handles can often be repaired or replaced if they wear down, extending the tool’s lifespan. Avoid products with excessive packaging to minimize environmental impact.
FAQs
1. What type of plunger is best for sinks?
The best choice for most kitchen or bathroom sinks is a cup-style sink plunger with a flat rim. These plungers are designed specifically for flat drains, unlike toilet plungers with flanges. The flat cup sits flush over the drain, creating a tight seal that allows you to generate enough suction and pressure to push through typical clogs like hair, soap scum, or food debris. When shopping, look for a cup that’s wide enough to fully cover your drain and a sturdy handle that gives you good control while plunging. Some models even have non-slip grips, which make drain cleaning easier, especially in shallow or tight sinks. A well-chosen cup plunger is an inexpensive tool that can handle most minor clogs in minutes, saving you from messy backups or unnecessary plumbing calls.
2. Does using a plunger on a sink work?
Absolutely—if you use it properly, a sink plunger is surprisingly effective. Most soft clogs, like hair, food particles, or grease, can be cleared in under two minutes with the right technique. You need to make sure there’s enough water in the basin to cover the cup, block any overflow or second drain, and form a solid seal before starting your plunging motion. By creating alternating pressure with quick bursts, you essentially move water and air to loosen the blockage. Can you use a plunger on a sink safely? Yes, it’s one of the fastest, chemical-free methods to restore drainage without damaging pipes. If plunging doesn’t work after a few attempts, it’s usually because the clog is deeper in the sewer line or tougher than a standard soft blockage.
3. What do plumbers use to unclog a kitchen sink?
Professional plumbers typically start with the same tools homeowners can use, like a cup plunger, but they also have more specialized equipment. For clogs near the P-trap, a drain cleaning snake or zip tool is often used to grab hair and food debris. If that fails, plumbers may turn to a power auger to reach deeper blockages, sometimes extending into branch lines or even the main sewer connection. They know the difference between stubborn clogs and recurring issues that indicate a larger problem. While a plunger handles most everyday clogs quickly, having a snake on hand can provide a more complete solution for more persistent or tricky blockages without calling for a full drain service.
4. What is the difference between a sink plunger and a toilet plunger?
The difference between toilet and sink plunger is mostly in the shape of the rubber cup. A sink plunger has a flat-bottom cup that sits flush on flat surfaces like sink or tub drains, creating a seal that allows suction and pressure to work effectively. Toilet plungers, on the other hand, have a flange designed to fit inside a toilet bowl’s curved drain. Using a flanged plunger on a sink usually won’t work well because it can’t form a complete seal, so the plunging motion loses effectiveness. Choosing the right type is key to preventing frustration and mess. Using the correct plunger ensures clogs are cleared efficiently, and it’s a simple way to maintain your drains while protecting your plumbing.
5. What is the quickest way to unblock a sink?
If you’re dealing with a slow or clogged sink, the fastest approach usually starts with a sink plunger. Make sure you have a flat-bottom cup that seals properly on the drain—this is key for creating the suction needed to move water and debris. Before you start, fill the basin with a couple of inches of water to improve the pressure effect. Tilt the plunger slightly to remove air pockets, then begin steady, controlled plunges. For a bathroom sink, block the overflow; for a double kitchen sink, seal the other bowl so pressure doesn’t escape. Most soft clogs clear in just one or two cycles. For tougher blockages, follow up with a hot water flush or a small drain snake to finish the job. By knowing how to plunge a sink effectively and maintaining regular drain cleaning, you can solve most clogs yourself and avoid messy backups or emergency plumbing calls.
6. How to use a sink plunger correctly?
Knowing how to use a plunger sink properly can save time and prevent frustration. Start by removing any stopper or strainer so the plunger cup can sit flat on the drain. Fill the sink with enough water to cover the cup, which helps create suction and push-pull pressure to loosen the clog. For bathroom sinks, block the overflow hole, and for double-bowl kitchen sinks, seal the other drain so pressure doesn’t escape. Tilt the plunger slightly to release trapped air, then press down to form a tight seal. Use short, firm bursts of 15–30 seconds, keeping the handle straight and steady, testing between cycles. Most soft clogs clear within a few rounds. For stubborn blockages, combine proper plunging with hot water or a drain snake to restore flow, maintain your drain cleaning, and prevent future backups.
References


Leave a comment
This site is protected by hCaptcha and the hCaptcha Privacy Policy and Terms of Service apply.