


A toilet flapper is the small, flexible seal at the bottom of your tank that lifts when you flush and drops to hold water in the tank between flushes. It’s simple, but it matters a lot. When it wears out or is the wrong size, it becomes the number-one reason for a running toilet and hidden leaks. That can quietly waste hundreds of gallons each day.
If your toilet flapper is old, warped, or not matched to the flush valve opening, your toilet can leak up to 200 gallons per day into the bowl. You might hear a “phantom flush,” see ripples, or watch the fill valve cycle on and off. The fix is fast and low-cost. In most homes, you can diagnose a leak, confirm whether you need a 2‑inch or 3‑inch flapper, and replace it in under 15 minutes with basic tools.
This guide gives you everything you need to pick the right flapper size, install it correctly, and stop leaks today. You’ll learn how toilet flappers work, why they fail, and how to fine-tune an adjustable flapper for 1.28–1.6 gallons per flush (GPF). You’ll also see how much water and money you’ll save—plus pro tips to make your new flapper last longer. Want quick answers? Start with the “Quick Fix” section, then come back for deeper help, visual cues, and troubleshooting.
Quick Fix First: Diagnose, Size, and Replace in Minutes
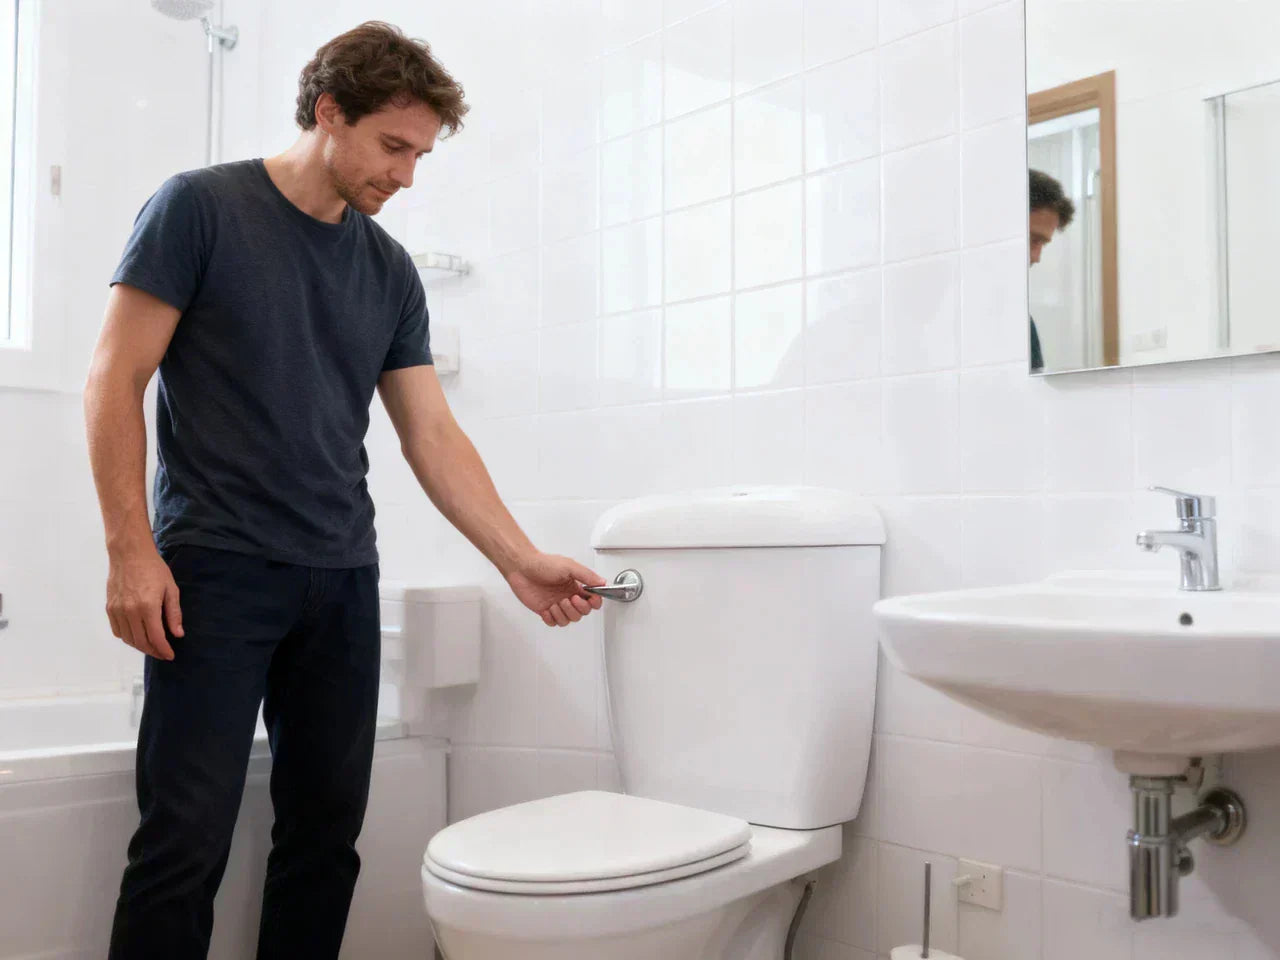
If your toilet is running or wasting water, a simple fix might be all you need. The toilet flapper is often the culprit, and diagnosing the problem can be quick and easy. Understanding the different toilet flapper types will help you choose the right replacement. Let’s dive into how to quickly identify the issue, select the correct flapper size, and get your toilet back to normal in no time.
30-second leak test and fast checks
Not sure if your toilet is leaking? Run this quick test:
-
Drop 5–10 drops of food coloring or a dye tablet into the tank. Do not flush. Wait 10–15 minutes. If colored water shows up in the bowl, water is seeping past the flapper seal. That means you likely need a toilet flapper replacement.
-
Listen for short bursts of water or a random refill. That “phantom flush” often means a leaky toilet flapper.
-
Open the tank lid. Gently press down on the flapper with a stick or spoon. If the sound of water stops, the flapper isn’t sealing.
-
Check the chain. If the chain is too tight, the flapper can’t close fully. If it’s too loose, it can tangle and keep the flapper from sealing. You want slight slack—about 1/4 to 1/2 inch—when the flapper is down.
-
Feel the flapper. If the rubber feels mushy, brittle, cracked, or warped, it won’t seal well.
If any of these point to the flapper, you’re on the right path.
Identify your flapper size (2-inch vs 3-inch)
Matching size is key. Most toilets use either a 2‑inch flapper or a 3‑inch flapper. Using the wrong size causes slow leaks that are easy to miss.
Here are two fast ways to confirm:
-
Visual estimate: If the opening at the bottom of the tank (the flush valve opening) is about the size of an orange or baseball, you need a 2‑inch flapper. If it’s closer to a grapefruit or softball, you need a 3‑inch flapper.
-
Ruler check: Turn off the water, flush to empty the tank, and measure the diameter of the circular opening where the flapper sits. About 2 inches means a 2‑inch flapper. About 3 inches means a 3‑inch flapper.
As a general rule, 2-inch flappers fit most toilets made in the late 20th century, while 3-inch flappers are common in newer, water-saving toilets built in the 2000s and later.
At-a-glance replacement steps and chain adjustment
This is the fastest safe way to replace a toilet flapper:
-
Turn off the water supply at the valve on the wall. Flush to drain the tank. Sponge out any remaining water from the bottom of the tank.
-
Unhook the chain from the flush handle lever. Unclip or slide the old flapper off the overflow tube pegs or ears. Remove it from the flush valve.
-
Clean the valve seat (the smooth ring where the flapper seals). Wipe off slime, minerals, or grit so the new seal sits flat.
-
Install the new flapper, making sure it fits the valve opening (2-inch or 3-inch) and sits flat. Hook the chain to the lever so there’s slight slack (about 1/4–1/2 inch) when the flapper is closed.
-
Turn the water back on. Let the tank fill. Test flush. Confirm the flapper closes smoothly and seals tightly. Run a quick dye test again if you want to be extra sure.
This simple swap fixes the most common running toilet problems.
Visual/interactive: 1-minute “Find Your Flapper” decision tree
Use this quick selector to get to the right flapper fast:
-
Step 1: Check your toilet’s gallons per flush (GPF). Look near the toilet bowl hinge or stamped inside the tank. If it shows 1.28–1.6 GPF, you likely need a 3‑inch or a 2‑inch adjustable flapper. If it shows 3.5 GPF or more (older toilets), you often need a non‑adjustable 2‑inch flapper.
-
Step 2: Measure the flush valve opening. About 2 inches? Pick a 2‑inch flapper. About 3 inches? Pick a 3‑inch flapper.
-
Step 3: Pick features. If your toilet is low-flow (1.28–1.6 GPF), choose an adjustable flapper so you can fine‑tune the flush time. If your water has chlorine or you use bleach, choose a chlorine‑resistant material.
-
Step 4: Install and test. Adjust chain slack and, if adjustable, set the timing ring or float so the flush is strong but not wasteful.
Note: If your toilet uses a canister or tower-style flush, you may need a seal, not a traditional toilet tank flapper.
Toilet Flapper Size and Fit: The 2-inch vs 3-inch Rule
When it comes to replacing your toilet flapper, size matters more than you might think. Using the wrong flapper size can lead to improper sealing, wasting water and causing leaks. Most toilets use either a 2-inch or 3-inch flapper, and getting the right fit is essential for a proper flush and leak-free performance. In this section, we’ll walk you through how to determine the correct flapper size for your toilet and why it’s crucial to match it to your toilet’s flush valve opening.
What size fits most toilets—and why it matters
Sizing isn’t guesswork. Using the right flapper size ensures a good seal, proper flush volume, and no leaks. A 2-inch flapper fits the majority of toilets built from the mid-1900s through the 1990s. Newer, water-saving designs often use a 3-inch flapper to move water faster through a larger opening, helping low-flow toilets clear the bowl with less water.
It matters because a flapper that’s too small will not cover the opening at the bottom of the tank completely. A flapper that’s too large can wrinkle or pinch, creating a poor seal. Either way, you get a slow leak and higher bills.
Measuring methods and fit pitfalls
The ruler method is the most accurate. With the tank drained, measure the inside diameter of the flush valve opening. Measure edge to edge across the circle. Confirm whether it’s closer to 2 inches or 3 inches. A quick visual check works, but measuring removes doubt.
Common fit pitfalls:
-
“Almost fits” leaks: A 2-inch universal flapper forced onto a 3-inch opening will leak. A 3-inch flapper on a 2-inch opening can hang up or never seal.
-
Worn valve seat: If the smooth ring where the flapper seals is chipped or crusty with mineral scale, you may get persistent seepage. Clean it gently and retest.
-
Chain tangle: Chain rubbing on the overflow tube can prevent a full close.
Matching size to GPF and flush performance
Low-flow toilets (1.28–1.6 GPF) often benefit from adjustable flappers. These have a small ring, dial, or float that controls how quickly the flapper drops. You can tune the flush length so it clears the bowl without wasting water. Older toilets that use 3.5 GPF or more usually need a non‑adjustable 2‑inch flapper that stays up long enough for a full-volume flush.

Size, flow, and seal area at a glance
| Flapper size | Typical GPF match | Typical toilet era | Approx. seal area | Notes |
|---|---|---|---|---|
| 2-inch | 1.6–3.5+ GPF | Common pre-2000 | ~3.14 in² | Fits most older and many standard toilets |
| 3-inch | 1.28–1.6 GPF | Common post-2000 | ~7.07 in² | Faster flow for water-saving toilets |
Numbers are approximate but useful. The 3-inch flapper has more than double the seal area, which is why it can move water quickly even at lower GPF.
How Flappers Work—and Why Toilets Start Running
Understanding how a toilet flapper works is key to diagnosing and fixing common toilet problems. The flapper is the heart of the flush mechanism, controlling the flow of water from the tank to the bowl. If it's not functioning properly, it can cause your toilet to run continuously, wasting water and increasing your utility bills. In this section, we'll explain the role of the flapper, how it operates during each flush, and why it may start to fail, leading to those annoying, never-ending flushes.
Mechanism explained: flush valve, seal, lift, and refill
When you press the toilet handle, the flush handle lever lifts a chain, which lifts the flapper. Water rushes from the tank through the flush valve into the bowl. As the water level drops, the flapper floats for a moment and then drops back down. It seals on the valve seat, and the fill valve refills the tank to the set level.
For a good flush and no leaks, three things must happen: the flapper must open fully when you lift, stay open long enough to deliver the needed water, and then close cleanly and seal tightly.
Top failure modes and causes
Why do toilet flappers fail?
-
Rubber degradation: Chlorine and harsh chemicals cause rubber to deteriorate. The flapper can get soft, swollen, or brittle and won’t seal.
-
Hard water scaling: Minerals build up on the valve seat and flapper, stopping a tight seal.
-
Chain issues: A chain that’s too tight keeps the flapper from closing. A chain that’s too long can get trapped under the flapper or wrap around the overflow tube.
-
Hinge wear: The ears or hinge points can crack or bend, so the flapper doesn’t drop in the same place each time.
-
Misalignment: If the flapper frame or arms don’t line up with the valve opening, it can rub or stick.
Symptom-to-cause map
-
Slow, silent leak into the bowl: Often a worn flapper seal, mineral buildup on the seat, or wrong size flapper.
-
Intermittent “phantom flush”: Usually a small leak past the flapper lowering the tank level enough to trigger a refill.
-
Short flush or weak flush: Chain too tight, flapper closes too fast, or an adjustable flapper set to close too soon.
-
Flapper won’t stay open: Water level set too low, chain too loose, or the flapper is the wrong type for your toilet’s GPF.
A simple dye test and a quick chain check will point you in the right direction.
Choosing the Right Flapper: Materials, Brands, and Features
Not all toilet flappers are created equal. The material, brand, and specific features of the flapper you choose can have a significant impact on the durability and efficiency of your toilet. In this section, we'll help you navigate the various options available, highlighting what to look for in terms of quality, brand reliability, and key features that match your toilet's needs.
Material science: rubber vs silicone and chlorine-resistant blends
Most toilet flappers are made of rubber, silicone, or a blend. Standard rubber seals well but can break down faster in chlorinated water or when exposed to in-tank tablets. Silicone and chlorine-resistant blends hold up longer to chemicals and heat. Some flappers include antimicrobial claims. These do not affect the seal itself but may reduce surface growth. If you use bleach or your water has a strong chlorine smell, a chlorine-resistant flapper is a smart pick.
Universal vs OEM styles
A universal toilet flapper is built to fit many valve styles, often with adjustable arms or different mounting options. These work well for most 2‑inch and 3‑inch openings. Some toilets need an exact shape, hinge, or frame style to align with the valve seat; in those cases, a model-specific flapper or a specific seal may be required. If your toilet uses a canister/tower system or a special mounting peg, check the style before you buy. When in doubt, measure and bring a photo of the inside of your tank to the store.
Cost, warranty, and expected lifespan (2–5 years)
A new toilet flapper is inexpensive and can last 2–5 years or more. The lifespan depends on water quality, chlorine levels, use of in-tank cleaning tablets, and how often the toilet is flushed. Houses with hard water or heavy chlorine may see faster wear. If you avoid harsh chemicals and keep the seat clean, you’ll get more life from your flapper.
Comparison table: fit types, adjustability, warranty, price range
| Feature | Basic 2-inch flapper | Adjustable 2-inch flapper | 3-inch flapper | Specialty seal (tower/canister) |
| Fit type | Standard 2″ valve | Standard 2″ valve | Standard 3″ valve | Model-specific |
| Best for | Older toilets (3.5+ GPF) | 1.6 GPF tuning | 1.28–1.6 GPF | Specific designs |
| Adjustability | No | Yes (timing ring/float) | Some models | No (design-specific) |
| Typical lifespan | 2–5 years | 2–5 years | 2–5 years | 3–7 years |
| Price range | Low | Low–moderate | Low–moderate | Moderate–higher |
Note: Lifespan varies with water quality, chemical exposure, and usage.

Step-by-Step Installation and Adjustment (Beginner-Friendly)
Installing and adjusting a toilet flapper might seem intimidating, but with the right guidance, it's a simple task that anyone can do. In this section, we’ll walk you through the process of how to install toilet flappers step by step, with clear instructions and tips to help you avoid common mistakes. Get your toilet working like new with just a few easy steps!
Tools, prep, and safety
You don’t need special tools to install a toilet flapper. Here’s what helps:
-
Small sponge or towel to dry the tank
-
A small brush or cloth to clean the valve seat
-
Gloves if you prefer
-
A bucket for any drips
Important: Do not use drop-in bleach tablets in the tank. These can damage rubber parts and cause early failure.
Replace the flapper: precise steps and pro tips
Follow these steps to replace a toilet tank flapper:
-
Turn off the water at the wall valve. Turn the handle clockwise until it stops.
-
Flush the toilet to drain as much water as possible. Hold the flush handle to let more water exit. Sponge out the rest.
-
Unhook the chain from the flush handle lever. Note which hole the chain was using.
-
Unhook the flapper arms from the side pegs or slide it up and off the overflow tube, depending on the style.
-
Clean the valve seat. Run your finger around the seat to feel for grit, slime, or mineral crust. Wipe it clean. If there is stubborn scale, gently rub with a nylon pad.
-
Fit the new flapper. Make sure it is the correct size (2″ or 3″) and sits flat over the flush valve opening without gaps or wrinkles.
-
Attach the chain. Start with the same lever hole you used before. Leave slight slack—about 1/4–1/2 inch—when the flapper is down. This slack ensures the flapper can close. If the chain is tight, the flapper may leak or never fully close.
-
Turn the water on and let the tank fill. Watch for drips or seeping around the flapper. If the flapper doesn’t sit squarely, adjust the arms or chain.
-
Test flush several times. Confirm the flapper opens fully, and that it drops and seals quickly after the bowl clears.
-
Run a dye test again if you want to confirm a perfect seal.
Pro tips:
-
If the chain keeps tangling on the overflow tube, shorten it one link at a time or move the hook to a different hole on the lever.
-
If your flapper seems to float and won’t close, check if the water level is set too high. Lower the tank level to the marked fill line.
-
If you see bubbles or hear hissing after closing, recheck the seat for grit or adjust the chain slack.

Dialing in adjustable flappers for low-flow toilets
If you have an adjustable flapper and a 1.28–1.6 GPF toilet, set the timing ring or float so the flush is strong enough to clear, but not too long. Start in the middle setting. Test a few flushes. If the flush seems weak or leaves tissue, open the setting one notch to make the flapper stay up slightly longer. If the flush seems too long or wastes water, close the setting one notch. Small changes make a big difference.
Troubleshooting a Running or Leaking Toilet (Decision Tree)
A running or leaking toilet can be frustrating, but with the right troubleshooting steps, you can identify and fix the problem quickly. In this section, we'll guide you through a decision tree to help you pinpoint whether the issue is with the flapper, fill valve, or something else entirely. By following a few simple checks, you'll be able to determine the problem and fix it in no time.
If the bowl refills itself, start here
Start with the dye test. If dye appears in the bowl without flushing, the leak is likely at the flapper seal. If no dye appears, but you still hear refills, check the fill valve and refill tube height. The refill tube should not be inserted down the overflow tube; it should clip above the top edge to avoid siphoning.
Fixes for common issues
-
Phantom flush (random refills): Replace a worn flapper and clean the seat. Confirm chain slack. Test again with dye.
-
Short cycling (shuts off, then turns on again): Check that the flapper seals and the tank level is set correctly. Make sure the refill tube is not below the top of the overflow.
-
Weak flush: Add a bit more slack to the chain, or adjust the adjustable flapper to stay open slightly longer. Check for clogs in rim jets.
-
Flapper closes too soon: Loosen the timing setting on an adjustable model or add a small float to the chain if recommended by the manufacturer of your kit style.
Why does my toilet run intermittently?
Most often, a small leak past the flapper slowly drops the tank level, and the fill valve turns on to top it up. A dye test confirms this. Chain tension or a misaligned flapper can also cause intermittent running.
How do I tell if my toilet flapper is bad?
Look for cracks, warping, or a rubber that feels soft and sticky. If dye seeps into the bowl, the flapper seal is failing. If pressing down on the flapper stops the sound of running water, it’s not sealing on its own and needs replacement.
Water Savings, ROI, and Environmental Impact
Replacing a worn-out toilet flapper may seem like a small fix, but the benefits extend far beyond just stopping leaks. By ensuring your toilet operates efficiently, you can save significant amounts of water, reduce your utility bills, and make a positive impact on the environment. In this section, we’ll explore how replacing your flapper can lead to real savings, calculate the return on investment (ROI), and highlight the environmental benefits of conserving water.
The cost of leaks: up to 200 gallons/day wasted
Small leaks add up fast. According to the U.S. Environmental Protection Agency (EPA), a leaking toilet can waste up to 200 gallons of water per day, significantly impacting household water costs (EPA, 2023). That extra water shows up on your bill and strains local water systems. Replacing a flapper costs little and saves water right away.
Aligning with water-saving toilets and EPA guidance
Federal standards limit most new toilets to 1.6 GPF, and high-efficiency toilets often use 1.28 GPF. Your flapper type and settings should match your toilet’s design so you get a clean flush with the least water. If you have a low-flow toilet, an adjustable flapper helps you tune flush time. A good seal keeps your toilet efficient day to day. Choosing a high-efficiency smart toilet can help avoid many issues while saving a significant amount of water. Smart toilets often come with advanced water flow control technologies, ensuring that water is used efficiently while providing a more comfortable experience.

Case studies and social proof
Homeowners and pros often share the same story: the toilet ran on and off at night, or the water bill jumped. A quick dye test and a new universal flapper fixed it. In many cases, the problem was chain tension or the wrong flapper size. A simple measure of the flush valve opening prevented repeat trips to the store.
Interactive calculator: leak cost and payback period
You can estimate savings with a simple formula:
-
Daily waste estimate: Up to 200 gallons per day for a steady leak.
-
Monthly waste: Daily waste × 30.
-
Cost: Monthly gallons × your water/sewer rate per gallon.
Most toilet flapper replacements pay for themselves in the first month if you had a steady leak.
Maintenance and Longevity in Real-World Conditions
To keep your toilet running smoothly and avoid frequent repairs, proper maintenance is essential. In this section, we’ll discuss practical tips for extending the life of your flapper, including regular inspections, cleaning, and how to avoid common issues that can shorten its durability. With a little care, you can ensure your toilet stays efficient and leak-free for years to come.
Extend life: cleaning, descaling, avoiding tank tablets
Want your new flapper to last? Keep chemicals out of the tank. Drop-in bleach tablets and harsh cleaners can swell or crack rubber parts. If you have hard water, gently wipe the valve seat and flapper now and then to reduce mineral buildup. Clean the chain path so it doesn’t snag or rub.
Inspection cadence and replacement intervals
Do a quick check every season or any time you hear a change in the toilet’s sound. A dye test takes minutes and can save you from a surprise bill. Expect to replace the flapper every 2–5 years, sooner if you run chlorinated tank tablets or have very hard water. Keep a spare toilet flapper or a toilet repair kit on hand if you manage multiple bathrooms.
How long should a toilet flapper last?
Most flappers last 2–5 years. Water quality matters. High chlorine, hot tank rooms, and in-tank tablets shorten life. A chlorine-resistant flapper in normal conditions can last much longer.
Practical Scenarios and Tips
-
Your guest bath runs once an hour: Do a quick dye test. If you see color in the bowl, swap the flapper and set proper chain slack. If not, check that the refill tube isn’t stuck down the overflow tube.
-
You replaced the flapper but still hear a hiss: Clean the valve seat. Even a thin line of scale can keep a perfect seal from forming. Also, recheck chain length and lever alignment.
-
You have very hard water: Plan to wipe the valve seat and flapper every few months. Consider a chlorine-resistant flapper to handle both minerals and treatment chemicals.
-
Your toilet has a weak flush after swapping the flapper: If it’s an adjustable flapper, open the setting one notch so it stays up longer. Confirm the water level is at the fill line.
Step-by-Step: Quick “Find Your Flapper” Selector
-
Locate your GPF (inside the tank or near the hinge). Is it 1.28–1.6? Go adjustable. Is it 3.5 or more? Go non-adjustable.
-
Measure the flush valve opening. 2 inches? Buy a 2‑inch flapper. 3 inches? Buy a 3‑inch flapper.
-
Check the mount. Standard pegs or tube ears? A universal flapper will likely fit. Tower/canister? Get the matching seal.
-
Consider your water. Heavy chlorine or in-tank tablets? Choose chlorine-resistant material.
-
Install, set chain slack to 1/4–1/2 inch, and test with a dye tab or food coloring.
Essential Specs and Numbers (Quick Reference)
-
Common sizes: 2-inch and 3-inch
-
Chain slack: About 1/4–1/2 inch when the flapper is closed
-
Low-flow tuning: Use adjustable flappers on 1.28–1.6 GPF toilets
-
Leak waste potential: Up to 200 gallons/day
-
Expected lifespan: 2–5 years (longer with clean water and no tank tablets)
Conclusion
Replacing a toilet flapper is a simple and effective way to fix running toilets, leaks, and poor flush performance. By choosing the right size and regularly maintaining your toilet, you can save water and reduce your utility bill. This quick fix ensures your toilet operates efficiently and contributes to water conservation. Don't wait for the issue to get worse—replace your flapper and keep your toilet in top condition!
FAQs
1. How do I know if my toilet flapper is bad?
If your toilet’s making strange noises or running continuously, your flapper might be to blame. The easiest way to check is by doing a dye test. Simply add a few drops of food coloring or a dye tablet into the tank and wait for about 10–15 minutes. If the color appears in the bowl without flushing, the flapper isn’t sealing properly, causing water to leak into the bowl. Another sign is a rubber flapper that feels mushy, cracked, or brittle, as these are no longer effective at creating a tight seal. Also, if the chain is too tight, it can prevent the flapper from fully closing. Pressing down on the flapper with a spoon or stick can help—if the water stops running, it's clear that the flapper isn't sealing on its own and needs to be replaced.
2. Can you just replace the flapper on a toilet?
Yes, you can easily replace the flapper on most toilets. It's a quick and affordable fix that typically requires no professional help. To start, turn off the water supply and flush the toilet to drain the tank. Once it's empty, remove the old flapper by unhooking it from the overflow tube and the chain. After that, simply install the new flapper, making sure it fits the size of the valve opening (either 2-inch or 3-inch). Adjust the chain slack (about 1/4 to 1/2 inch) to ensure it works properly. If you’re unfamiliar with the process, a toilet flapper replacement kit can make things easier by providing everything you need. If you have any doubts or complications, calling a plumber is a good idea to avoid any mistakes.
3. How do I know what flapper to buy for my toilet?
When choosing a new flapper, it’s important to get the right size and type for your toilet. Start by measuring the diameter of the flush valve opening at the bottom of your tank. Most toilets use either a 2-inch or 3-inch flapper, so knowing which one fits your toilet is crucial. You can also check your toilet’s gallons per flush (GPF) rating. For low-flow toilets (1.28–1.6 GPF), an adjustable flapper is a good option because it lets you fine-tune the flush. If your toilet has a unique design or mounting style, like a canister or tower flush system, you’ll need a specialized seal or flapper. Always make sure the flapper fits securely over the valve opening and doesn’t wrinkle or get pinched, as that can cause leaks.
4. What is the lifespan of a toilet flapper?
A toilet flapper typically lasts anywhere from 2 to 5 years, depending on a few factors. If your water has high mineral content or if you use in-tank cleaning tablets (like bleach), the flapper may wear out faster. Chlorine in the water can cause rubber flappers to degrade, so if you notice your flapper becoming brittle, soft, or swollen, it’s time for a replacement. To extend the lifespan of your flapper, it’s a good idea to avoid using harsh chemicals in the tank and regularly clean the valve seat to prevent mineral buildup. If you have a chlorine-resistant flapper made from materials like silicone or a blended rubber, you can expect it to last longer—especially if you have well water or use chlorine-treated water in your toilet.
5. How to choose the right toilet repair kit?
When buying a toilet repair kit, it’s important to select one that matches the size of your flapper—either 2-inch or 3-inch. Most kits will include the flapper, chain, and clips, but if your fill valve is also showing signs of wear or is making strange noises, it’s worth considering a kit that includes a new fill valve as well. For low-flow toilets (those using 1.28–1.6 GPF), an adjustable flapper kit is a smart choice. This allows you to adjust the flush timing, helping you save water without sacrificing performance. When choosing a kit, always check that it fits your toilet’s specific model and ensure that all components are compatible with your current system.
6. Are toilet flappers universal?
While many toilet flappers are marketed as universal, they’re not always one-size-fits-all. Most standard 2-inch and 3-inch flappers will fit most toilets, but some models may have special hinge designs, or a canister or tower-style flush system that requires a specific type of seal. It’s always best to measure the flush valve opening in your toilet tank to ensure you’re getting the right size. Some toilets, especially older models or those with unique flushing mechanisms, may need a specialized flapper or seal. If you’re unsure, it’s a good idea to bring a photo of your toilet’s inside tank components when shopping for a replacement, or check the manufacturer’s recommendations for your toilet model.
7. What size do toilet flappers come in?
Toilet flappers typically come in two standard sizes: 2-inch and 3-inch. The size you need depends on the diameter of the flush valve opening in your toilet tank. To measure, simply remove the old flapper and use a ruler to check the diameter of the valve opening. If it’s about 2 inches across, you’ll need a 2-inch flapper, which fits most toilets made before 2000. If the opening measures closer to 3 inches, you’ll need a 3-inch flapper, which is more common in modern, water-saving toilets built after 2000. Using the correct size is essential for proper sealing and ensuring a full flush, so take care to measure the valve opening before purchasing a new flapper.
8. Are there different types of toilet flappers?
Yes, there are several different types of toilet flappers, each designed to fit specific toilets and flushing systems. The most common types are standard 2-inch and 3-inch flappers, which are suitable for most traditional toilets. For low-flow toilets (1.28–1.6 GPF), adjustable flappers are often used because they allow you to control the timing of the flush for better water efficiency. There are also flexible and solid-frame flappers that fit various valve shapes, and some models are designed specifically for canister or tower-style toilets, which require a different sealing mechanism. When choosing a flapper, it’s important to consider your toilet’s flush system and select a model that matches both the size and style of your flush valve.
References


Leave a comment
This site is protected by hCaptcha and the hCaptcha Privacy Policy and Terms of Service apply.