


A single handle bathtub faucet simplifies bathing with one lever that controls both water flow and temperature through a mixing valve. If you’re choosing, upgrading, or installing a tub/shower combo, this guide gives you the fast answers you need—plus expert detail when you want it. We start with a clear, one-glance overview of benefits and use cases, then explain how the cartridge works, what to look for (valve type, rough-in, finishes), and how top systems compare by features. You’ll also get pro-level installation steps, maintenance fixes, retrofit and code tips, real-world data, and an easy decision tool—so you can choose and install with confidence.
Single Handle Bathtub Faucet: Quick Answer
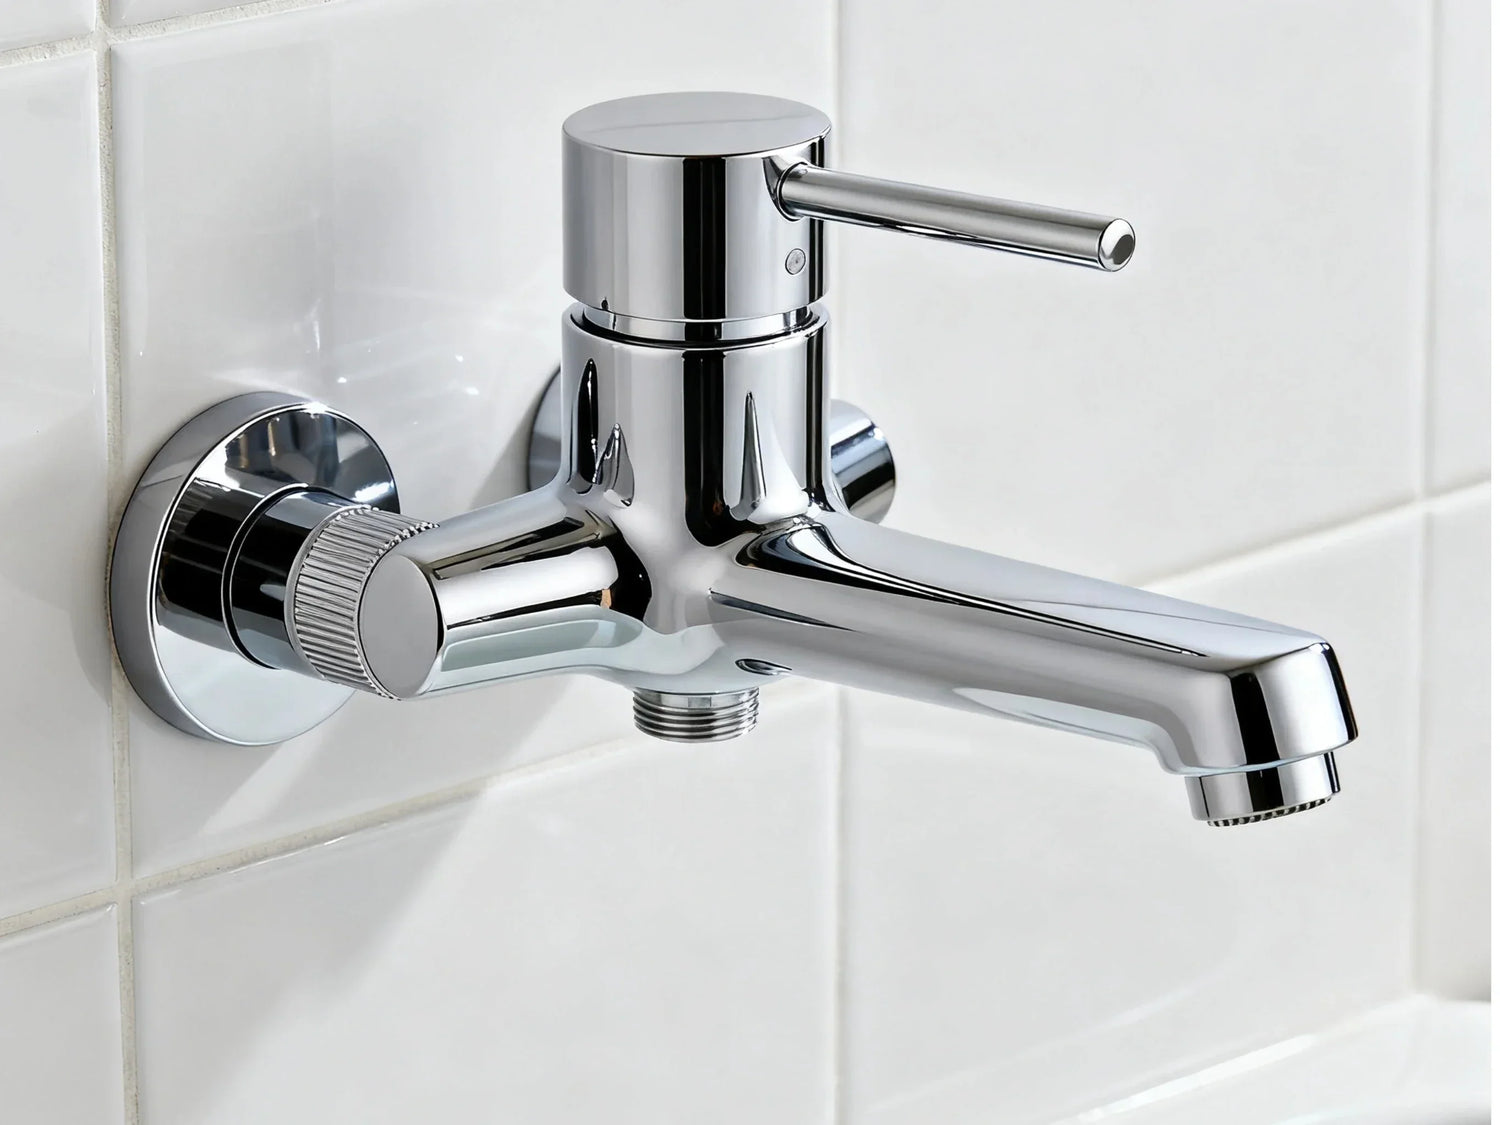
What it is and who it’s for
A single handle tub/shower faucet uses one lever to blend hot and cold inside a cartridge mixing valve. One hand adjusts both temperature and flow, so it’s simple to use and easy to clean. It’s a smart pick for tub/shower combos, small baths, and minimalist design styles. With a diverter, you can send water to the tub spout or up to a showerhead (and even a hand shower with a transfer valve).
What is a faucet with one handle called?
It’s usually called a single handle faucet or a single lever faucet. In kitchens, you’ll often hear kitchen single lever faucet or single lever faucet kitchen. The mechanics of single lever kitchen faucet are similar to a tub/shower setup: one handle, one valve, blended water
Top advantages vs two-handle setups
The key benefits show up every time you turn the water on:
- Convenience: You can set temperature with one hand. Many single handle bathtub faucet cartridges “remember” the last mix, so you can return to your usual comfort fast.
- Safety: Modern mixing valves provide pressure-balancing or thermostatic control to reduce scald risk.
- Space and looks: Fewer wall penetrations, a cleaner escutcheon plate, and less to scrub keep your bath looking tidy.
When a single lever isn’t the best fit
There are cases where two handles or other systems may suit better. If your bathroom has a strict historic style, separate hot and cold controls may match the look. In areas with very hard water, a single cartridge may need more frequent cleaning. And some specialty tubs—like wide-deck roman fillers or floor-mount fillers—often use different valve types built for high flow without a shower.

How a single-handle tub/shower valve works
Inside the cartridge: mixing valve mechanics
When you move the lever, you rotate and/or lift a cartridge inside the rough-in valve body. This aligns internal ports to change how much hot and cold water enter the mix, and how much total water flows out. Most homes use one of two safety types:
- Pressure-balancing cartridges: These keep temperature steadier when someone flushes a toilet or a tap opens elsewhere. If cold pressure drops, the valve reduces hot flow to resist sudden spikes. This is the common choice in many homes because it’s simple and reliable.
- Thermostatic cartridges: These use a temperature-sensing element to hold a set temperature more precisely. They often cost more but give tighter control and faster response to changes.
Both types typically include a limit stop ring. This adjustable ring caps the maximum hot side, helping prevent scalds. Set it during install and adjust as needed.
If you’ve wondered “how does a faucet work?”—this is the heart of it. A single lever faucet in the kitchen uses the same idea: a mixing valve blends hot and cold in a cartridge based on handle position.
Flow paths and diverters
The valve body has two outlets: one to the tub spout and one to the showerhead. The bottom port usually feeds the tub spout for a higher GPM flow rate, which fills the tub faster. The upper port feeds the shower arm. A diverter sends water where you want it:
- Tub spout diverter: Pull up the spout’s pin to route water to the shower.
- In-valve diverter: Built into the control or a separate transfer control.
- Transfer valve: Lets you add a hand shower or switch between multiple outlets.
Safety and standards
To protect users, modern codes require anti-scald valves in tub/shower controls. Look for compliance with:
- ASSE 1016 / ASME A112.1016 / CSA B125.16 (performance standards for bath/shower control valves)
- Typical max delivery temperature target: about 120°F, though local code may specify exact settings via IPC/UPC language
Setting your limit stop and testing the actual water temperature with a thermometer are simple ways to verify safe operation.
Selection criteria and specs that matter
Fit and rough-in basics
Choosing a faucet starts with what’s behind the wall. Your rough-in valve needs the right depth and connections.
- Rough-in depth: Each valve has a depth range. Use the manufacturer’s plaster guard as your guide, and confirm the final wall thickness (tile, stone, or fiberglass). A trim’s escutcheon must cover the opening and seal it.
- Connection type: You’ll see IPS/NPT threaded adapters, sweat/solder for copper, and PEX crimp/expansion options. Match to your house piping.
- Tub spout drop: Use copper or iron pipe to the spout, with short, straight runs. Avoid PEX on the spout drop. PEX can cause back-pressure and lead to a shower “dribble” when you only want the tub filling.
Performance and efficiency
For tub filling, higher flow to the spout saves time. For showering, check the showerhead rating and your water pressure.
- Tub spout: Prioritize a robust flow path with minimal restrictions. Shorter straight runs help.
- Showerhead: Consider WaterSense models for at least 20% water savings compared to standard 2.5 GPM heads, while keeping comfort.
- Pressure: Review minimum and optimal pressure ranges in the valve spec sheet. Many pressure-balance valves work down to moderate pressures but perform best at typical residential supply levels.

Finish, style, and durability
Trim finish is what you see and clean daily. PVD and brushed finishes resist corrosion and fingerprints. Spot-resistant coatings reduce water marks, which helps in hard-water homes. Style lines range from ultra-modern to classic. Good brands back valves and trims with long warranty terms; check details like lifetime limited coverage on finish and leaks.
Accessibility and compliance
For universal design, look for:
- Large, easy-grip levers and clear hot/cold markings
- Smooth resistance with tactile feedback so you can “feel” temperature changes
- Reliable temperature limit stops for child and elder safety
- Comfortable handle placement height and reachable diverter
Best systems and options compared
You’ll find three common “systems” on the market. The names differ by manufacturer, but their ideas are similar.
- System A: Widely used, pressure-balancing cartridge, known for consistent temperature and easy DIY support.
- System B: Modular universal rough-in that accepts multiple cartridge types. You can change trims later without opening the wall, or upgrade to a thermostatic cartridge if the valve body allows.
- System C: Smooth operation with options for thermostatic precision and premium trims. Often chosen for high-end design consistency and long trim lines.
Below is a feature comparison to help you match your needs.
Table: Feature comparison (for selection help)
| System type | Typical valve type | Trim flexibility | Install difficulty | Finish variety | Warranty |
| System A | Pressure-balance | Medium | DIY-friendly | Broad | Long |
| System B | Pressure-balance or thermostatic (upgrade path) | High | DIY/Pro | Broad | Long |
| System C | Thermostatic (often), with pressure-balance options | Medium to High | Pro-leaning | Very broad | Long |
Note: Actual prices and warranties vary. Choose based on desired control (steady pressure-balance vs precise thermostatic), trim style, and whether you want a future-proof rough-in.
Installation Guide and Pro Tips for New Single Handle Bathtub and Kitchen Faucets
If you’re handy and follow steps, installing a new single handle bathtub faucet or a single lever kitchen faucet is a straightforward project. That said, it’s plumbing—leaks are possible. If you’re not comfortable soldering or working behind finished walls, hire a licensed pro.
Pre-install Checklist
Gather tools and plan your work area. Shut off water, and test that water is truly off at the valve location. This applies to both bathtub and kitchen faucet installations.
Tools: Level, tape measure, pipe cutter, torch and solder (for copper) or PEX tools, wrenches, drill/driver, stud screws, thread tape, pipe thread sealant (where allowed), silicone sealant, thermometer, bucket/rags
Supplies: Rough-in valve, cartridge (if separate), trim kit, tub spout or kitchen spout, shower arm and head (for bath), elbows/fittings, copper or PEX (per plan), drop-ear elbow for shower arm
Safety: Eye protection, gloves, ventilation for solder, heat shield for adjacent framing
Pro tip: Check the “UP” marking on the valve. Brace the valve to the stud (bath) or secure the sink deck (kitchen) and confirm handle clearance for the finished wall or countertop.

Step-by-Step Rough-In to Trim
Follow the manufacturer’s instructions. The sequence below covers core steps for both bathtub and kitchen faucets.
Layout Heights (Bath):
- Showerhead: 72–78 inches from finished floor
- Valve handle center: 28–48 inches (common aim ~36–40 inches)
- Tub spout: 4–6 inches above tub rim
Rough-In (Bath & Kitchen):
- Mark stud or sink locations. Add blocking to secure the valve body or sink mounting hardware.
- Set the valve at the correct depth (use the plaster guard for bath or follow countertop clearance for kitchen). Confirm the handle won’t hit walls or backsplash when off or fully on.
- Run hot (left) and cold (right) supplies to the valve inlets. Kitchen setups follow the same left/right convention.
- For tubs, run the lower outlet straight down in copper or iron to the tub spout; keep it short and straight. Avoid PEX here.
- For kitchen faucets, connect supply lines to the new single lever faucet using the manufacturer’s fittings; ensure a smooth, leak-free path.
- Cap unused outlets and pressure-test if local code requires it.
Wall Close-Up and Trim (Bath & Kitchen):
- After testing, close the wall or secure the countertop.
- Install escutcheon with a continuous silicone bead to seal splashes. Leave a weep gap at the bottom if instructed.
- Install the handle with the lever pointing down in the OFF position.
- Add the shower arm and head (bath) or kitchen sprayer/side sprout as applicable, using thread tape on threads.
- Open water, flush lines (showerhead removed into a bucket for bath, or faucet open for kitchen), then reinstall components.
- Set the limit stop (bath) or check hot/cold mix (kitchen) with a thermometer; aim for a safe max temperature (~120°F or per local code).
Leak Prevention and First Test
Use thread tape and sealant on threaded joints where instructions call for it. Apply unbroken silicone behind escutcheon or deck plate, and ensure full coverage. Pressure-test before finishing wall or countertop. Cycle water between hot and cold and check for drips at every joint.
How Do I Identify My Bathtub or Kitchen Faucet?
Start at the handle and wall or deck plate. Look for cartridge type (pressure-balance, thermostatic, or single lever), screw location (front, top, or behind a cap), and the valve or body markings. Measure screw size and note trim shape. For kitchen faucets, check the spout type and aerator. Inside the wall or under the sink, manufacturer markings and connection style (threaded, solder, or PEX) confirm the new faucet model type

Maintenance, repairs, and troubleshooting
Cartridge replacement in 10–15 minutes
Most single handle issues come down to the cartridge and its seals. The fix is simple:
- Turn off water. Open the handle to relieve pressure.
- Remove the handle and escutcheon.
- Pull the retaining clip or nut, then pull the cartridge straight out. A puller tool helps if it’s stuck.
- Replace O-rings if provided, add silicone-based plumber’s grease to seals (not petroleum-based), and insert the new cartridge in the proper orientation.
- Reassemble and test for leaks.
Use original-equipment cartridges for the best fit and long life.
How to remove a one handle bathtub faucet?
“Faucet” often means the trim and handle. Pop the index cap (if present), remove the handle screw, slide the handle off, then remove the escutcheon screws. The spout can be unscrewed if threaded, or loosened if it’s a slip-fit with a set screw. Always shut off water first to service the valve.
Common issues and quick fixes
- Dripping spout: Usually a worn cartridge or debris on the sealing surfaces. Replace or clean the cartridge.
- Temperature drift: Adjust the limit stop. If your home has big pressure swings, consider a thermostatic upgrade (when your valve body allows it).
- Low flow: Remove mineral buildup from the showerhead, check filters and stops at the valve, and flush lines.
- Diverter issues: Replace a worn tub spout diverter or the in-valve diverter assembly.
Is it better to repair or replace a tub faucet?
If the valve is sound and parts are available, a cartridge swap is fast and affordable. Replace the whole valve if the body is leaking, parts are obsolete, or you want a new finish or safety type. When tile work is needed, compare the labor cost of a full replacement to repeated repairs.
Finish care and hard water management
Use mild, non-abrasive cleaners and a soft cloth. For mineral deposits, a quick vinegar soak helps. In very hard water, a whole-home softener or a point-of-use conditioner reduces scale and extends cartridge life.
Retrofitting
Converting two-handle to single handle: what to expect
Expect to open the wall. A single handle bathtub faucet uses a mixing valve where two-handle setups had separate hot and cold valves.
- Enlarge the opening to fit the new rough-in and brace it to studs.
- Plan for transition fittings between old copper/galvanized and new copper/PEX.
- Use a remodeling or “reno” plate if you need to cover a larger opening without retiling the whole wall.
- Update the diverter if you’re switching from an old spout style to an in-valve or transfer setup.
Working in tile, fiberglass, or drywall
If you can access the back of the tub wall (closet or other room), cut an access panel and work from there to avoid tile demo. If you must work from the front, protect finishes, drill carefully, and seal everything on reassembly.
Waterproofing steps matter. Use silicone behind the escutcheon, maintain your wall’s waterproofing layer, and use proper backer around the valve.
What faucets do plumbers prefer?
Pros favor valves with easy-to-source parts, clear documentation, and strong warranties. Many like universal rough-in bodies that accept multiple trims and cartridges, solid metal spout drops, and trims that seal well with a wide escutcheon.
Can I reuse my existing tub spout and shower arm?
Often yes. Standard threads are common, but confirm size and condition. For spouts, match the connection type (threaded vs slip-fit) and the spout length so the diverter works properly with your valve’s flow path.
FAQs
1. Can I replace a two-handle faucet with a single handle?
Yes, you can replace a two-handle setup with a single handle bathtub faucet. You’ll need access behind the wall to remove the old valves and install a new mixing valve. Using a remodeling plate helps cover a larger opening if the wall cutout is bigger. Ensure the single handle bathtub faucet you choose meets local anti-scald requirements. This upgrade not only simplifies control with one lever but also modernizes your bathroom and improves accessibility. Many homeowners prefer single handle bathtub faucets for easier use, cleaner aesthetics, and better water temperature management.
2. Do I need pressure-balancing or thermostatic?
For most homes, a pressure-balancing single handle bathtub faucet is ideal. It keeps temperature stable during sudden pressure changes, like a toilet flush, and is cost-effective. A thermostatic single handle bathtub faucet offers precise temperature control, which is useful for medical, safety, or multi-outlet setups. While pricier, thermostatic valves maintain consistent comfort and prevent scalding. Choosing between these depends on your home’s water system, safety needs, and whether you want precise temperature control or a simpler, reliable single handle bathtub faucet.
3. How long does a single-handle valve last?
The valve body of a single handle bathtub faucet can last for decades with proper care. The cartridge and O-rings are wear parts, and routine maintenance—such as cleaning and occasional cartridge replacement—extends their life. Expect 10–20+ years of reliable performance for a typical single handle bathtub faucet in residential use. Factors like water quality, frequency of use, and proper installation affect longevity. Keeping a spare cartridge on hand ensures that your single handle bathtub faucet continues to work smoothly without costly replacements or downtime.


Leave a comment
This site is protected by hCaptcha and the hCaptcha Privacy Policy and Terms of Service apply.