


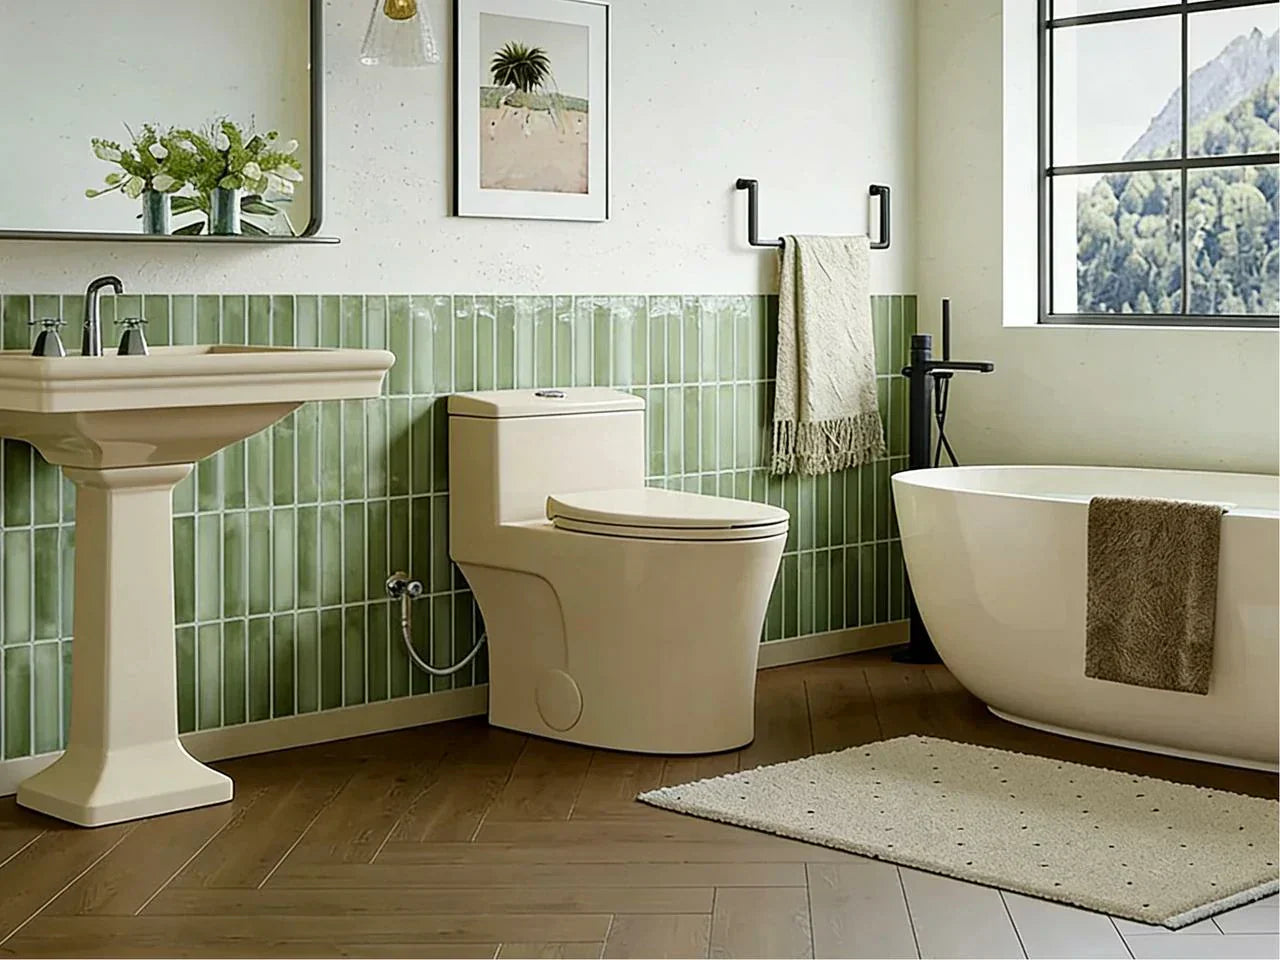
Most bathtub drain stopper types look simple from above: a cap, a knob, maybe a lever. Yet the part you see is only half the story. According to the CDC, proper hygiene and regular cleaning of bathroom fixtures help prevent bacterial buildup, making the choice and maintenance of a tub stopper more important.The mechanism under that cap decides whether your tub holds a full soak, whether hair is easy to pull out, and how often you’ll deal with wear and tear.
If you’ve ever stood in ankle-deep water during a shower and wondered, “Why won’t this stopper behave?” you’re not alone. The good news is that you can identify your bathtub drain stopper type in minutes, and once you know what you have, choosing the right bathtub drain stopper (or replacing an old one) becomes much easier.
This guide starts with fast answers: a quick visual ID path, a comparison table, and what’s most common in 2025 installs. Then we’ll walk through the most common types of tub stoppers, what breaks in real homes, how to remove and replace each style, and how to troubleshoot leaks, sticking, and slow drains.
Quick ID + Comparison (Fast Answers First)
Before diving into each bathtub drain stopper type, it helps to quickly identify what you have. This section gives you a fast, hands-on way to recognize your stopper and compare common types at a glance, so you can make smarter choices without guesswork.
60-second visual ID flowchart (by “what you touch”)
Use this simple decision tree based on what your hand or foot touches. (If you see an overflow plate—the cover on the tub wall under the faucet—pay close attention. It often means the stopper is controlled from there.)
Check the overflow plate lever
-
If you move a lever on the overflow plate to open or close the drain, you likely have a Trip-lever system (internal plunger/linkage).
-
If not, continue to the next step.
Check for a knob or cap in the drain opening
-
If there is no knob or cap, you may have a hidden/slot-style drain with overflow control or a missing stopper. Check the overflow plate and drain shoe.
-
If there is a knob or cap, continue.
Determine how you operate it
-
Press down / push to toggle → Toe-touch / push pop up drain (spring)
-
Pull up to open, push down to close → Push-and-pull stopper
-
Lift and twist to lock → Lift-and-turn stopper
-
Flip a small lever on the cap → Flip-it stopper
-
Chain attached to a plug → Chain-and-plug
-
Loose rubber/silicone cover laid over drain → Flat suction / tub plug cover
-
Rubber piece that compresses into drain → Accordion/bellows stopper
-
Oversized bell/bucket shape over the drain → Bucket/bell or twist-and-seal
Callout: If you have a lever on the overflow plate, your stopper may not be the cap you see in the drain. Many trip-lever systems have a “clean” drain opening, while the real plunger sits inside the drain pipes.
At-a-glance comparison table (seal, ease, durability, cost)
The table below helps you compare common bathtub drain stopper types by real-life use: sealing, cleaning hair, and how often parts fail.
| Mechanism (stopper type) | Best for | Common issues | Typical cost (2025 USD) | Typical lifespan* |
| Pop-up / plunger (often overflow-controlled) | Modern tubs, good sealing | Linkage wear, harder internal repair | $20–50 | 8–15 yrs |
| Push-and-pull | Daily-use tubs, easy access | Knob loosens, O-ring wear | $10–30 | 8–12 yrs |
| Lift-and-turn | Simple budget upgrades | Seal friction wear, set-screw loosens | $10–25 | 8–15 yrs |
| Trip-lever (overflow lever + linkage) | Built-in/older tubs | Corroded linkage, hair snagging | $20–60 | 7–12 yrs |
| Toe-touch / PresFlo-style | Hands-free feel, fast toggle | Spring wear, stuck closed from grit | $15–40 | 5–10 yrs |
| Flip-it | Simple operation, rentals | O-ring swelling, slipping seal | $15–35 | 3–8 yrs |
| Chain-and-plug | Clawfoot/vintage look | Rusty chain, hygiene concerns | $5–15 | 2–8 yrs |
| Flat suction / silicone cover | Travel/rentals, odd drains | Warping, loses suction | $5–15 | 2–5 yrs |
| Accordion / bellows | Varying drain openings | Rubber fatigue over time | $8–20 | 3–7 yrs |
| Bucket/bell / twist-and-seal | Large drains, freestanding tubs | Bulkier, pricier, limited fit | $15–45 | 5–10 yrs |
*Lifespan depends a lot on water hardness, cleaning habits, and how often you open or close the drain.
Market snapshot: what’s most common in 2025 installs
In most newer bathrooms, pop-up stoppers and push-style mechanisms lead because they feel clean to use and look minimal.
-
Pop-up / plunger styles: ~60–70% of modern installs
-
Push-and-pull: ~20–25%
-
Chain styles: <10% of new installs, but still common in older homes (especially pre-2000)
These aren’t perfect “lab stats.” They’re best understood as an industry pattern seen across installation guides and remodel norms.
What are the different types of bathtub stoppers?
When people ask about types of bathtub drain stoppers, they usually mean these core categories:
Pop-up/plunger, push-and-pull, lift-and-turn, trip-lever, toe-touch (push toggle), flip-it (cap lever), chain-and-plug, and flexible rubber options like flat suction covers and accordion/bellows styles. Specialty variants you may also see include oversized bucket/bell styles and twist-and-seal designs for larger openings.
Bathtub Drain Stopper Types (Most Common Mechanisms)
Understanding the different bathtub drain stopper types is key to keeping your tub functional and hassle-free. In this section, we break down the most common mechanisms, how they work, and what makes each type a good—or sometimes tricky—choice for everyday use.
Pop-up / plunger (often overflow-controlled)
A pop-up drain stopper (sometimes called a plunger style) seals well and looks neat, which is why it shows up so often in newer tubs. In many setups, you operate it with a control at the overflow plate. In others, it’s a spring-loaded cap you press.
If your tub fills fast and stays full for a long soak, this stopper type is often why. The seal is usually strong because the stopper seats evenly on a gasket.
Why people like it: it’s easy to control water flow without touching dirty water, and it can feel more hygienic in a busy family bathroom.
Where it gets annoying: when something goes wrong, the problem may be inside the drain, not right under the cap. Hair can wrap around parts you can’t see, and repairs can feel “mystery-meat” if you’ve never pulled a linkage before.
Why does my pop-up plug not stay down?
This is one of the most common questions, and it usually comes down to one of these causes:
-
The spring-loaded stopper is worn out, so it can’t latch in the closed position.
-
The stopper height is off, so it can’t fully seat and “click” down.
-
Soap scum or grit is blocking the latch, so the mechanism slips.
-
In overflow-controlled pop-up/plunger systems, the linkage is misadjusted, so the plunger never reaches the right position to seal the drain.
A quick test helps: press it down and watch if it pops back up right away (spring/latch issue) or if it stays down but still leaks (gasket/seat issue).

Push-and-pull (pull up/open, push down/close)
The push-and-pull stopper is one of the easiest to live with. You pull the knob up to open the drain, and push it down to close the drain. Because it’s straightforward, it’s a common choice when people are replacing an old stopper and want fewer surprises.
It’s also one of the easier designs for cleaning hair because you can often unscrew the cap and lift it out without dealing with hidden linkage.
One small downside shows up in daily use: if your hands are soapy, the knob can feel slippery. Another is that the knob can loosen over time, which makes the stopper wobble or sit crooked.
Lift-and-turn (twist knob to lock/unlock)
A lift-and-turn stopper works exactly as it sounds. You lift it slightly, twist to lock it in place, and twist back to release it. It’s a classic mechanism and stays popular because it’s simple and usually durable.
If you want a stopper that doesn’t rely on a spring, this is a nice middle ground. There’s less to “click and fail,” so you often get a long life when it’s installed correctly.
The tradeoff is seal wear. Over years of twisting, the gasket and contact surfaces can wear down. When that happens, you may find the tub slowly losing water even when you think you sealed it. That slow seep can also happen if the drain seat is scratched or pitted.
Toe-touch / PresFlo-style / flip-it (hands-free toggle options)
Hands-free operation is a bigger deal than it used to be. In 2025, more homeowners prefer not to touch the drain cap with wet hands after cleaning, bathing kids, or washing a pet. That’s where the toe-touch stopper and similar push-toggle designs fit in.
With a toe-touch, you press down with your toe to open or close the drain. Many are spring-based, and many are designed for easy swaps.
A flip-it stopper is slightly different: instead of pushing a spring, you flip a small lever on the cap to shift between open and closed. People often pick it when they want quick operation but don’t want a spring mechanism.
These styles can be great for accessibility if bending and gripping is hard. The main downside is that springs can wear faster in high-use tubs, especially with hard water scale that makes parts grind.
Overflow-Integrated vs Standalone Systems (Compatibility First)
Before you buy anything, it helps to understand a simple fact: some bathtub drains are tied to the overflow system, and others are not. That one detail decides whether a “simple cap” replacement will work—or whether you’ll be fighting hidden parts behind the tub wall.
Trip-lever (overflow plate lever + internal linkage)
A trip-lever stopper is easy to spot because you operate a lever on the overflow plate. When you move that lever, it pulls or pushes a linkage that moves a plunger inside the drain pipes.
People like trip-lever setups because there may be no big cap sitting directly over the drain opening, so the tub looks clean and hair is less visible at first glance.
The catch is maintenance. Hair and soap scum can collect on the linkage. In older tubs, corrosion can make the linkage stiff or flaky. If you’ve ever pulled an overflow plate and found a long, slimy assembly attached, you’ve met a trip-lever system.
How do I know which stopper I have?
If you want to identify your bathtub stopper types without tools, these cues get you there fast:
-
A lever on the overflow plate almost always means a trip-lever stopper or an overflow-controlled plunger system.
-
No lever, and the stopper is a cap you press to toggle? That’s likely a toe-touch stopper or other push-toggle push pop up drain style.
-
A chain connected to a loose plug points to a manual chain-and-plug setup.
-
If you can lift the stopper and twist it to lock, you likely have a lift-and-turn stopper.
-
If it pulls up and pushes down with no twisting, it’s usually a push-and-pull.
What are the different types of bathtub drains (not just stoppers)?
People often say “drain” when they mean “stopper,” but a bathtub drain system includes more parts:
-
The drain opening and drain flange (the metal ring you see)
-
The drain shoe (the elbow section under the tub)
-
The overflow drain and overflow plate
-
The drain pipe connection beyond the tub
Many tubs use a standard drain-and-overflow assembly where the stopper is either in the drain or controlled from the overflow. Freestanding and soaking tubs may use different drain kits, and some do not use a traditional overflow at all (design and code rules vary by location). That’s why choosing the right bathtub drain is partly about the stopper and partly about the tub’s built-in layout. If you’re looking for a tub that works seamlessly with a variety of drain and stopper types, check out Horow’s bathtub collection for options that combine style, functionality, and smooth drainage
Freestanding, soaking, and clawfoot tubs (manual plugs favored)
Freestanding and clawfoot tubs often look best with simple, manual stoppers because the plumbing is part of the style. A classic chain-and-plug or an oversized bell/bucket stopper can match that look while keeping the system simple. If you’re shopping for a stopper for a freestanding tub, don’t guess. A “universal” stopper may not seal if the drain lip is thin, chipped, or shaped differently than common drains. For a range of stylish and functional options, explore Horow’s freestanding tub collection.
If you’re shopping for a stopper for a freestanding tub, don’t guess. A “universal” stopper may not seal if the drain lip is thin, chipped, or shaped differently than common drains.
Before you buy, check these fit points:
-
Drain size: measure across the inside of the drain opening.
-
Drain depth: some stoppers need room to sit down into the drain.
-
Overflow presence: if the tub uses an overflow linkage, your options change.
-
Drain seat condition: pits and scratches can cause leaks even with a new gasket.
Plumbing rules can affect what’s allowed, especially where overflow protection is required. If you’re changing a drain setup (not just the cap), check local code guidance or ask a licensed plumber.

Manual & Flexible “Universal” Stopper Options (Travel + Odd Sizes)
Sometimes you don’t want to replace parts. You just want to prevent water from draining so the kids can take a bath, or so you can soak laundry in a tub that has a missing stopper. That’s where manual and flexible options shine.
Chain-and-plug (classic rubber/silicone plug)
The chain-and-plug is the simplest stopper type: a rubber or silicone plug that you place directly into the drain. It’s cheap, easy, and doesn’t care what mechanism your tub once had.
It can be a great fix in a guest bath that rarely gets used. In a daily-use tub, the chain can rust, and the plug can pick up grime quickly. If you go this route, cleaning it often matters more than the style.
Flat suction (rubber disc) and silicone universal covers
A flat suction stopper is basically a tub plug cover you press directly over the drain. If you travel or rent, this can be the fastest way to get a decent seal without tools.
It also makes hair cleanup simple because you lift the cover and wipe the underside. The downside is that suction can weaken as the material warps or as soap film builds up. If you notice the tub slowly losing water, clean the underside and the drain rim, then retest.
Accordion / bellows stoppers (compress-to-seal)
Accordion (bellows) stoppers compress into the drain opening. When you push them down, the sides press outward to seal against the drain walls. This is helpful when your drain size is slightly odd or when the drain lip is not friendly to flat suction.
If you’ve struggled with a cover that keeps slipping, an accordion style can feel like a relief because it seals by pressure inside the opening, not just by surface suction.
Bucket/bell or twist-and-seal (oversized drain solutions)
Bucket/bell styles sit over or into larger openings and create a wide seal. Twist-and-seal versions use a twisting action to expand or lock the seal.
These can work well in older tubs with larger openings, or in certain freestanding designs. The tradeoff is price and availability, and you need accurate measurements for a good fit.
How to Choose the Best Tub Stopper (Decision Framework)
Choosing the best bathtub drain stopper is less about what looks nice and more about how you use the tub. Are you a shower-only household? Do you take long soaks? Is hair shedding a daily battle?
Decision factors that matter most (ranked)
-
Seal reliability If you take soaking baths, the key point is a stopper that can truly seal the drain without slow leaks. Pop-up/plunger and well-fitted lift-and-turn designs often do well here. Flexible covers can work too, but only if your drain rim is smooth and clean.
-
Cleaning frequency If hair clogs are common, pick a design that lets you remove the stopper quickly and clean the drain without pulling hidden parts. Push-and-pull and lift-and-turn often win for simple access. Trip-lever systems can be fine, but they often collect hair on linkage where you don’t see it until drainage slows.
-
Household needs (kids, seniors, limited grip strength) If grip strength is limited, toe-touch and flip-toggle caps reduce twisting. If you’re helping kids bathe, easy one-hand operation can matter more than style.
Material and finish guide (durability + corrosion)
Materials affect how long a bathtub drain stopper lasts and how it looks after years of cleaning. Hard water and strong cleaners can dull finishes and weaken rubber.
Here’s a simple lifespan guide you can use when selecting a stopper:
-
Metal (brass/chrome/stainless): ~10–15 years
-
Plastic/PVC: ~5–8 years
-
Rubber: ~2–5 years with daily use
Stainless finishes tend to resist corrosion well, especially in humid bathrooms. Chrome can look great but may show pitting sooner if cleaners are harsh or water is very hard. Rubber and silicone seals are often the first parts to fail, which is why a stopper that includes replaceable gaskets can save money long-term.

Price ranges (2025 USD) by category
| Category | Typical price | What you usually get |
| Rubber/silicone covers and plugs | $5–15 | Basic stopper only |
| Standard metal/plastic cap stoppers | $10–30 | Stopper + O-ring/gasket (varies) |
| Integrated pop-up/lever assemblies | $20–50 | Stopper + linkage parts or trim pieces |
| Premium universal metal/silicone styles | $25–40 | Stopper + multiple gasket sizes |
Price doesn’t always mean better sealing. Fit and a clean drain seat often matter more.
What size is a standard tub drain stopper?
A “standard drain” is common, but not guaranteed. Many tub drains are around 1.5 to 2 inches in diameter, yet older tubs and specialty tubs can vary.
Use this quick fit checklist before buying:
-
Measure the drain opening across the inside edge (not the outside flange).
-
Check whether the stopper screws into a threaded post (common in some lift-and-turn and push-pull designs).
-
Check drain depth so the stopper can sit correctly.
-
If you have an overflow-controlled mechanism, confirm linkage clearance behind the overflow plate.
If you’re unsure, remove the stopper and measure the parts you can see. A two-minute measurement can save you a return trip.
Installation & Replacement (DIY-First, Minimal Tools)
Many stoppers are easy DIY swaps. The tricky part is knowing which ones are truly “no tools” and which ones hide a screw or set-screw.
No-tools swaps (toe-touch / flip-it / many universal stoppers)
These are often the least stressful replacements because they sit directly over the drain and don’t depend on overflow linkage.
Step-by-step:
-
Remove the old cap or cover. If it’s stuck, wiggle gently while pulling straight up.
-
Clean the drain seat and rim so soap scum doesn’t cause leaks.
-
Place the new stopper into the drain (or directly over the drain) as directed.
-
If the stopper includes gasket height options, test the seal and adjust so it sits flat.
-
Fill the tub a few inches and watch the waterline for 5 minutes to confirm it doesn’t seep.
When “universal” isn’t universal: If your drain lip is chipped, bent, or heavily pitted, even the right stopper may leak. In that case, you may need to address the drain flange or gasket, not just the cap.
Replacing push-and-pull and lift-and-turn stoppers
These stoppers usually attach to a post or use a small set-screw. Don’t rush here—cross-threading can create a bigger repair.
Tools (typical):
-
Screwdriver (often a small flathead or Phillips)
-
Pliers (optional)
-
Plumber’s grease (small amount for O-rings)
Common mistakes: overtightening, losing the O-ring, installing the gasket upside down, or forcing threads that don’t match your drain.
If you remove an old stopper and see damaged threads, stop and reassess. The issue may be the drain flange assembly, not the stopper itself.
Trip-lever service or conversion options
Trip-lever systems can work well, but they need occasional cleaning. If your tub drains slowly and you have a lever on the overflow plate, the clog may be on the linkage, not in the visible drain opening.
In many cases, you can service it by removing the overflow plate screws and pulling the linkage out carefully. That’s messy, but it’s often the fastest way to remove a long hair rope.
Some homeowners choose to convert from a trip-lever system to a simpler visible stopper. That can be possible, but it depends on your tub’s drain-and-overflow setup and local requirements.
Can I replace a trip-lever with a toe-touch?
Sometimes yes, sometimes no. The main issue is compatibility with the overflow drain and what’s happening inside the drain shoe.
Here’s what decides it:
-
Does your tub’s drain assembly accept a toe-touch style directly, or does it rely on the trip-lever plunger to seal?
-
Can you fully remove the old linkage and plunger so debris isn’t left inside?
-
Is anything corroded or stuck in a way that could crack old pipes if you force it?
When to call a plumber: if the linkage is stuck, the overflow screws are stripped, there’s visible corrosion at the drain shoe, or you suspect a leak around the drain flange (water stains below the tub, soft flooring, or recurring damp smells).

Maintenance + Troubleshooting (Prevent Leaks, Clogs, and Sticking)
A drain stopper is essential, but it also collects what you don’t want: hair, soap scum, and minerals. Small habits make a big difference here.
Symptom-to-fix troubleshooting table
| Symptom | Likely cause | Fix | Stopper types to consider next time |
| Won’t seal, tub slowly loses water | Hair on seat, worn gasket, scratched drain seat | Clean rim, replace gasket/O-ring, inspect drain lip | Lift-and-turn, push-and-pull with replaceable seals |
| Drains slowly during shower | Hair buildup under stopper or in linkage | Remove stopper, pull hair, flush with hot water | Designs with easy removal (push-pull, lift-and-turn) |
| Stuck closed | Spring jammed, grit in mechanism | Remove cap, clean, replace spring unit if needed | Non-spring designs if hard water is severe |
| Stuck open (won’t stay down) | Worn spring latch, misadjusted linkage | Adjust height, replace spring or linkage | Lift-and-turn or push-and-pull for fewer spring parts |
| Rattles or feels loose | Knob loosening, set-screw backing out | Tighten set-screw, add thread-safe snug fit | Any type, but check hardware quality |
| Overflow gurgle or odd sounds | Partial clog in overflow/drain path | Clean overflow channel and linkage, check venting if persistent | Not a stopper problem alone—inspect drain system |
Why won’t my bathtub stopper seal?
If your stopper won’t hold water, start with the simplest checks before buying parts.
First, look for hair or soap scum where the stopper meets the drain. Even a thin ring of buildup can keep the stopper from sitting flat enough to seal the drain. Next, check the gasket or O-ring. If it looks flattened, cracked, or slippery, it’s likely the leak source.
For trip-lever systems, misalignment is common. The plunger can sit slightly off, so water slips by. Adjusting linkage length (or replacing worn linkage) often fixes it.
A quick “waterline test” helps: fill the tub an inch or two, mark the waterline with a small piece of tape, then wait 10 minutes. If the water drops, you have a seep worth fixing.
Cleaning routines by mechanism (hair + soap scum)
How often should you clean? That depends on how many people use the tub and how much hair ends up in the drain. A family tub used daily usually needs attention more often than a guest bath.
For push-and-pull and lift-and-turn stoppers, a monthly quick clean is often enough: remove the stopper, wipe off hair and buildup, and rinse the drain opening. For trip-lever systems, plan to pull and clean the linkage a few times a year if drainage slows, because hair can cling to parts you can’t see.
Be gentle with finishes. Harsh abrasives can scratch chrome and coated metals, which can make future buildup stick faster.
Real-world failure patterns (what tends to break first)
In older installs, trip-lever linkage corrosion is a common failure. After many years, metal parts can pit and become rough, which snags hair and makes the lever feel stiff.
Spring mechanisms in toe-touch and some pop-up designs can wear faster with heavy use, especially where hard water leaves mineral grit inside moving parts. If you find yourself replacing a spring unit every few years, a non-spring stopper type may save you time.
2025 Trends & Data-Backed Insights (What’s Changing)
Bathrooms changed in small ways after the pandemic. People pay more attention to what they touch, how often they clean, and how fast they can rinse and reset a shared space.
Hygiene and hands-free preference shift
Interest in hands-free styles like toe-touch and push-toggle caps has grown in recent years, based on patterns seen in home improvement reviews and remodel discussions. The reason is simple: less hand contact with the drain cap, quicker open/close operation, and easier “one-step” use when bathing kids or rinsing a tub.
This doesn’t mean toe-touch is always “best.” It means more households now rank ease of use and reduced hand contact higher than they did before.
Finish and material trends
Two material trends stand out in 2025:
Stainless and corrosion-resistant metals are more popular, especially in humid climates and rentals where maintenance needs to stay low. At the same time, silicone seals are favored because they stay flexible and can be easier to wipe clean than older rubber blends.
If you manage a rental, these details matter. A stopper that’s easy to remove and clean can reduce how often a tenant reports “the tub won’t drain” when the real issue is hair trapped under the cap.
How to Remove Different Types of Tub Stoppers (Quick Guide)
Removal is where most people get stuck, so let’s make it simple. If you can’t remove it by hand, don’t force it. Many stoppers have a hidden set-screw.
Step-by-step removal by stopper type:
-
Toe-touch stopper: Press to the open position. Grip the cap and turn counterclockwise. If the cap comes off, you may see a threaded body you can unscrew.
-
Push-and-pull stopper: Pull it up to the open position. Look for a small screw on the side of the knob. Loosen it, then unscrew the knob or lift off the cap, depending on design.
-
Lift-and-turn stopper: Set it to open. Hold the base and twist the knob counterclockwise. Many have a set-screw under the knob; loosen it, then lift off and unscrew the body.
-
Flip-it stopper: Many lift straight out or unscrew. If it resists, check for a hidden screw under the flip lever area.
-
Trip-lever stopper (overflow-controlled): Remove the two screws from the overflow plate. Pull the plate outward slowly. The linkage will come with it. Have a towel ready and pull gently so you don’t bend parts.
If you’re unsure, take a photo before you disassemble anything. That one picture can save you a lot of guessing during reassembly.

Key Takeaways + Checklist (Wrap-Up)
You don’t need to be a plumber to make an informed decision about bathtub drain stopper types. You just need to match the mechanism to your tub and your daily habits.
Choose your stopper in 3 steps
-
Identify how you open or close the drain (cap push, twist, pull, or overflow lever).
-
Confirm compatibility (measure drain size, check overflow type, inspect drain seat).
-
Pick materials that fit your home (metal for long life, good seals for soaking, easy-clean designs for hair).
Quick buyer checklist
-
Drain opening diameter measured
-
Overflow plate present? Lever or no lever?
-
Prefer hand operation or toe-touch?
-
Finish match (chrome/stainless/other)
-
Gasket/O-ring included
-
Return policy (in case fit is off)
When to call a pro (time- and damage-savers)
Call a plumber when the trip-lever linkage is stuck and won’t pull out, when you suspect a leak around the drain shoe (water damage signs below the tub), when clogs keep returning after cleaning the stopper, or when pipes are old enough that forcing parts could crack them.
FAQs
1. How do I identify my tub drain stopper type?
Identifying your bathtub drain stopper doesn’t need any fancy tools—your hands are the best guide. Start by noticing how you interact with the drain. If there’s a lever on the overflow plate, you’re likely dealing with a trip-lever system, where a hidden linkage inside the drain opens and closes the stopper. If you push the cap down to toggle it, that’s usually a toe-touch or push-toggle style, often spring-loaded for easy one-step operation. Lift-and-twist action points to a lift-and-turn stopper, and a simple pull-up/push-down motion signals a push-and-pull design. Paying attention to these tactile cues not only helps you identify your current stopper but also makes replacement or maintenance much easier. A quick visual inspection and testing each motion gives you all the info you need without disassembling anything.
2. Why does my pop-up plug not stay down?
A pop-up drain plug is designed to seal the tub, but sometimes it just won’t stay down, and the reasons are usually simple. Most often, the spring latch is worn out, preventing it from holding in the closed position. Another common culprit is incorrect stopper height—if it’s set too high or low, it won’t seat properly on the gasket. Soap scum, hair, or mineral buildup can also block the latch, causing it to slip or pop up unexpectedly. In overflow-controlled systems, the hidden linkage might be misaligned, so the plunger never fully reaches the drain seat. Checking for debris, adjusting the stopper height, or replacing a worn spring or gasket usually solves the problem. With a little patience, you can get your tub holding water again without calling a plumber.
3. What are the different types of bathtub drains?
Many people use the word “drain” when they actually mean the stopper, but a bathtub drain system is more than just that. It includes the drain opening and flange you see, the drain shoe under the tub, the overflow drain, and the pipes connecting the assembly to your home plumbing. Some stoppers operate directly at the drain, like lift-and-turn, push-and-pull, and toe-touch types, while others, like trip-lever systems, are controlled from the overflow plate. Freestanding or soaking tubs sometimes use unique kits and may skip a traditional overflow entirely. Knowing the type of drain assembly helps you choose the right stopper and ensures a proper seal. It also makes maintenance easier, since you’ll understand which parts might collect hair or soap buildup and how they interact.
4. How to remove different types of tub stoppers?
Removing a bathtub stopper doesn’t have to be intimidating, but each type has its little quirks. Toe-touch stoppers usually unscrew while in the open position, revealing a threaded body that lifts out. Lift-and-turn and push-and-pull designs often hide a small set-screw on the side or bottom, so check carefully before attempting to pull them off. Trip-lever stoppers require removing the overflow plate screws and gently pulling out the linkage; a towel underneath helps catch any water or debris. Always move slowly and take note of how pieces fit together, maybe even snapping a photo before disassembly. With the right approach, cleaning, replacing, or servicing a stopper can be a straightforward DIY task, saving both time and money.
5. What’s the best bathtub drain stopper for hair cleanup?
If hair is your biggest drainage headache, go for a stopper that’s easy to remove and clean. Push-and-pull and lift-and-turn stoppers are great because you can unscrew or lift them out quickly, giving full access to the drain opening. Toe-touch or flip-it caps are handy too if you prefer a hands-free option, though they may require occasional spring or linkage maintenance. For temporary or rental situations, flat suction covers or removable silicone plugs allow you to wipe away hair in seconds without touching the drain. The key is minimizing hidden parts where hair can get trapped. Choosing a design that fits your tub and opens easily not only keeps the water flowing but also reduces the effort and frustration of daily maintenance.
References


Leave a comment
This site is protected by hCaptcha and the hCaptcha Privacy Policy and Terms of Service apply.