


If you’re new to plumbing, you might wonder what is a faucet and why there are so many different kinds of faucets. Understanding the parts of a bathroom faucet helps you fix issues faster and choose the right one for your home.
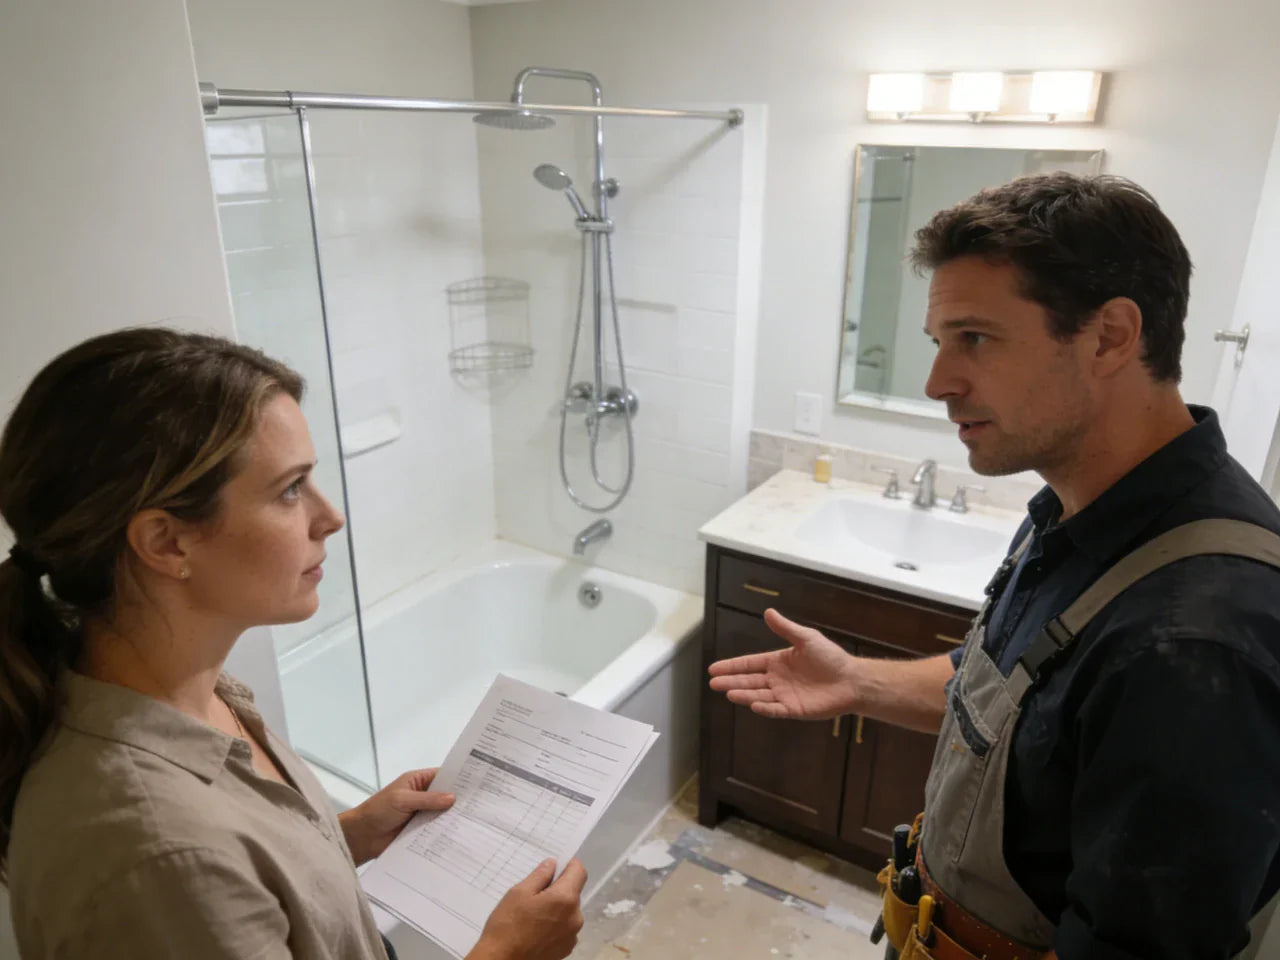
Bathroom faucets work hard every day, yet most of us only notice them when something goes wrong. A slow drip that keeps you up at night, a handle that wobbles, or a damp spot under the sink can all point to worn bathroom faucet parts, and knowing each one helps you fix it quickly. The good news is that many fixes are simple once you know which part does what. This guide gives you a clear parts map, a fast “symptom → part” diagnosis, and step-by-step repairs for the most common failures. You’ll also learn how faucet types change the layout, how to identify the right cartridge or valve, and what to upgrade in 2025—like low-flow aerators and long-lasting ceramic disc valve designs.
Bathroom faucet parts overview
Before we dive into each piece, it helps to take a step back and look at the faucet as a whole. Think of it like a tiny machine: every bathroom faucet part has a job, from letting water flow, to mixing hot and cold, to keeping everything sealed and steady. Understanding these core components makes repairs, upgrades, or even just buying a new faucet a lot less intimidating.
Exploded diagram: what each part does
If you could “explode” a faucet into its pieces on your counter, it would show every bathroom faucet part individually—each one guiding water, controlling it, sealing it, or holding everything tight. A clickable exploded diagram (with tooltips) is ideal here, but you can also use this mental map when you’re looking at your faucet from above and from under the sink.
Most bathroom faucets include the spout (where water exits), one or two handles (or a single lever), an aerator at the tip of the spout, and a cover plate (often called an escutcheon) that hides extra holes. Under the faucet, you’ll usually find mounting hardware that clamps the faucet to the sink or counter, plus hot and cold supply lines that connect to shutoff valves. Many sinks also have a matching drain assembly below the spout, which can leak even when the faucet itself is fine.
When homeowners ask, “What are the bathroom faucet parts?” this is the core set: spout, handles, aerator, escutcheon/cover plate, cartridge or valve, mounting hardware, supply lines, shutoff valves, and drain parts—plus the small seals like washers, gaskets, and O-rings that do a lot of the real work.
Core functions: flow, mixing, sealing, mounting
A faucet seems simple, but four functions are happening at once.
Flow control is handled by the valve or cartridge inside the faucet body. Some designs use washers and seats, while newer ones often use smooth ceramic discs.
Mixing is how hot and cold water blend to reach the temperature you want. A single-handle faucet mixes inside one valve. A two-handle faucet mixes in the spout or body as the streams meet.
Sealing is what stops leaks. This is where small parts matter most: washers, seats, O-rings, and gaskets. These parts wear out, dry out, or get scratched by grit.
Mounting is what keeps the faucet steady and watertight where it meets the sink. Loose mounting hardware can feel like a “bad faucet,” even when the valve is fine.
Most failure-prone parts
If you’re trying to fix a leak fast, start with the parts that fail most often.
The valve or cartridge is a top suspect because it handles friction and pressure every time you turn the water on. Many repair pros agree that a big share of drips trace back to valve seals, worn cartridges, or damaged seating surfaces.
Next comes the aerator, especially in hard-water areas. Scale (mineral buildup) and grit can clog the screen, causing low flow, sideways spray, or splashing.
Supply lines are also high-risk because they can leak quietly under the sink. A slow seep at a fitting can soak a cabinet floor long before you notice.
Faucet types change the parts layout
People use “types of faucet” to mean a few different things. Sometimes they mean how the faucet mounts (centerset vs widespread). Other times they mean how the valve works (compression vs ceramic disc). Both matter, because layout affects what parts you’ll see and what will fit.
Here’s a quick comparison of common bathroom faucet mount types and what changes.
| Faucet mount type | Typical hole spacing / holes | What usually changes in the parts layout |
| Centerset faucet | 3 holes on 4" centers (often on one base) | One combined base; fewer separate mounting points; compact under-sink footprint |
| Single-hole | 1 hole (cover plate may hide extra holes) | One mounting shank; usually one handle/lever; simpler install and fewer trim parts |
| Widespread faucet | 3 holes, usually 8" centers (but can vary) | Separate spout and handles; more under-sink connections; alignment matters more |
| Vessel faucet | Often single-hole, tall spout | Taller body; sometimes different mounting gasket; splash risk in shallow bowls |
| Wall-mounted | No deck holes | Valve may be in the wall; spout and handles mount to wall; repairs can be more involved |
When you’re shopping for bathroom faucet accessories or replacement parts, this mount style is your first “filter,” because it determines spacing, mounting hardware, and how the water lines route.

Identify your faucet type, brand, and part in minutes
Think of identifying your faucet like a quick detective hunt. With a few simple clues—tags, markings, photos, and measurements—you can figure out the type, brand, and exact part in just a few minutes, skipping the guesswork and extra trips to the store.
Where to find model info
It’s tempting to guess, order a part, and hope it fits. That’s how many people end up with a box of returns. Instead, treat it like a short investigation.
Look under the sink first. Some faucets have a tag on a supply line or a sticker on the underside of the body. Others have markings stamped into the metal near the mounting shank. If nothing is obvious, check the area under handle caps or decorative buttons—logos and part codes often hide there.
If you’re stuck, take a few clear photos before you remove parts. These photos become your “part finder” later when you compare shapes and measurements.
Photo checklist (fast and worth doing):
-
Take a top-down photo of the whole faucet and sink holes.
-
Take an under-sink photo showing mounting nuts and supply lines.
-
Remove the handle and take a close-up photo of the stem/cartridge top.
Those three shots solve most identification problems.
Measuring hole spacing & fit
Hole spacing is simple, but it’s often measured wrong. You want the center of one handle hole to the center of the other handle hole. If the faucet is already installed, measure from the center of the left handle to the center of the right handle. If handles are separate and you can’t find the centers easily, measure edge-to-edge and add the radius of the hole.
A common real-life issue is a widespread faucet installed on holes that aren’t truly aligned, especially on stone counters where drilling was slightly off. That can stress mounting shanks and gaskets, leading to movement and small leaks. If your handles feel “twisted” or don’t sit flat, spacing and alignment may be the real issue, not the valve.
A printable measurement diagram (top view with center-to-center arrows) can help if you’re measuring for a replacement faucet or converting styles.
How do I know what cartridge my faucet uses?
To identify a cartridge, focus on what you can observe, not what you hope it is.
Handle count is your first clue: one handle often means one mixing cartridge; two handles often means two separate valve cartridges or stems. Next, look at the cartridge top where the handle connects. The stem shape, the number of splines (tiny teeth), and the way it locks in place (clip, nut, or threads) help narrow it down.
Cartridge length and body shape matter too. Many manufacturers publish line drawings in PDF manuals that show exact dimensions. Matching your removed cartridge to a drawing is one of the most reliable methods—especially when different versions look similar at a glance.
Interactive “Part Finder” decision tree
If you want a fast way to narrow down parts, a decision tree works well. Imagine a simple tool where you choose:
-
mount type (centerset / single-hole / widespread / wall-mounted)
-
handle count (one / two / touchless)
-
symptom (drip, low flow, leak under sink, leak at handle)
-
any markings you found
-
photos (top view, under-sink, handle removed)
The output should be a short list of likely parts—often an aerator, a cartridge/valve kit, O-rings, supply lines, or mounting gaskets—plus a basic tool list. Even if you don’t have a real tool, you can follow this same logic manually and save a lot of time.
Valve & cartridge mechanisms
Inside every faucet is a small but clever system that controls water flow, temperature, and shutoff. How that system works—whether it’s a washer, a rotating ball, a sliding cartridge, or smooth ceramic discs—determines how reliable the faucet is, how easy it is to fix, and how long it will last.
Compression vs ball vs cartridge vs ceramic disc valve
Inside the faucet, the valve mechanism decides how water turns on, shuts off, and mixes.
A compression faucet uses a washer that presses down to stop water. It’s common in older two-handle faucets. It can work well, but washers wear and seats can pit, so drips happen more often over time.
A ball mechanism uses a rotating ball to control flow and mix, usually in a single-handle faucet. It often relies on small seals and springs that can wear. Many repairs are simple kits that refresh those wear parts.
A cartridge mechanism uses a sliding or rotating cartridge that seals with O-rings. It’s common in modern faucets because it’s fairly reliable and often easy to replace.
A ceramic disc valve uses two smooth ceramic discs that slide against each other. This design tends to last the longest and needs less routine maintenance, as long as debris doesn’t scratch the discs.
When people ask, “What are the three types of faucets?” they often mean the everyday user experience: single-handle, two-handle, and touchless. But from a repair point of view, the valve mechanism above is what tells you which parts fail and how you fix them.
Lifespan, cost, and repairability
Here are realistic benchmarks many homeowners see in the real world. Your water quality and how gently the faucet is used can push these numbers up or down.
| Mechanism type | Common lifespan range | Typical DIY part cost range | What usually fails |
| Compression | 5–10 years | $10–$20 | Washer, seat, stem wear |
| Ball | 8–12 years | $10–$30 | Seals and springs |
| Cartridge | 8–15 years | $20–$50 | Cartridge seals, body wear |
| Ceramic disc valve | 10–20 years | $20–$60 | Disc wear (less common), debris damage |
If you want a faucet you rarely think about, ceramic discs are often the “set it and forget it” choice. If you like the idea of inexpensive fixes, compression designs can be easy to service, but you may do it more often.
Hard water + material interactions
Hard water changes everything. Minerals can crust up aerator screens, clog small passages, and even make handles feel stiff. It also speeds up wear on seals because grit can act like sandpaper.
Material matters too. Solid brass bodies and valve housings tend to resist corrosion better than zinc alloys. In some water conditions, zinc alloys can corrode faster and develop pitting that damages seals. If you’ve ever replaced a cartridge and still had a drip, the real problem may be a rough or corroded sealing surface inside the body.
If your area has hard water, it’s worth cleaning the aerator more often and avoiding harsh cleaners that can damage finishes and seals.

What’s the difference between a cartridge and a valve?
People use these words in different ways, which causes confusion.
A valve is the full control assembly that manages water flow and mixing. A cartridge is often the replaceable “core” inside that valve. In many faucets, you can replace the cartridge without replacing the entire valve body. You replace the whole valve body when it’s damaged, corroded, cracked, or when internal surfaces are too worn for new seals to seat.
Troubleshooting: symptom → likely part → best fix
Sometimes you don’t need to see inside the faucet to make a smart guess. You just need to connect the symptom to the part that controls that function. If you’ve ever stood in the bathroom thinking, “Why is it doing that?” this section is for you.
| Symptom | Most likely part(s) | Best first fix | Typical time |
| Drip from spout when off | Cartridge/valve, washer/seat, O-rings | Replace cartridge or washer/seat | 20–60 min |
| Low flow / sideways spray | Aerator, debris in cartridge screen | Clean or replace aerator | 5–15 min |
| Leak at handle | O-rings, packing area, cartridge seals | Tighten, then replace O-rings, then cartridge | 15–60 min |
| Water under sink | Supply lines, fittings, shutoff valves, mounting gasket | Dry and trace; tighten or replace supply line | 10–45 min |
| Faucet base wobbles | Mounting hardware, gasket | Tighten mounting nuts; replace gasket if needed | 10–30 min |
Dripping spout (most common)
A dripping spout usually means water is slipping past a seal inside the valve. In a modern faucet, that often points to a worn cartridge or worn cartridge seals. In a compression faucet, it’s often a flattened washer or a damaged seat.
A quick clue is whether the drip changes when you move the handle slightly. If “almost off” reduces the drip, the shutoff surfaces are worn. Another clue is if only hot or only cold seems to trigger the drip more. On two-handle faucets, that can help you find which side is failing.
Low flow or spray going sideways
If the stream is weak or sprays in odd directions, don’t assume the whole faucet is failing. The aerator is a small part that does a big job, and it’s designed to be removed and cleaned.
Hard water can block the mesh screen. A small piece of debris can also lodge in the aerator after a plumbing repair or a water shutdown. In some faucets, debris can also collect on small screens inside the cartridge. If aerator cleaning doesn’t help, checking the cartridge screens is the next step.
Leaks under the sink (highest damage risk)
A leak under the sink can damage cabinets and flooring, so treat it as urgent even if it looks small. Supply lines can seep at fittings, braided hoses can fail near crimps, and shutoff valves can drip at the stem.
One simple trick is the paper towel test: dry everything, wrap a dry paper towel around one connection at a time, and wait. The first towel to show moisture tells you where to focus.
If you see corrosion, mineral crust, or greenish staining around a fitting, that area has likely been leaking for a while.

Why is my bathroom faucet leaking at the handle?
A handle leak often means a seal is failing where the stem or cartridge passes through the faucet body. Sometimes a packing nut has loosened, and a gentle tightening stops the leak. Other times the O-rings have dried out or cracked.
A good fix order is: tighten (carefully), then replace the O-rings, and if it still leaks, replace the cartridge. If water appears only when the faucet is on, that points strongly to a seal under pressure rather than a simple drip path.
DIY repairs (step-by-step) for the most replaced parts
Before you start, clear out the sink cabinet, put down a towel, and plug the sink drain so small screws can’t disappear. I learned that lesson the hard way after a tiny retaining clip bounced once and vanished like it had a plan.
Aerator clean/replace (5–15 minutes)
The aerator is the easiest win for low flow and messy spray.
-
Close the drain or cover it with a towel.
-
Try unscrewing the aerator by hand. If it’s stuck, use a strap wrench or wrap a cloth around it and use adjustable pliers gently.
-
Rinse the screen and remove visible grit.
-
Soak the aerator in white vinegar for 20–30 minutes if mineral scale is present.
-
Rinse well, then run water briefly with the aerator off to flush debris.
-
Reinstall the aerator and hand-tighten snugly.
If the threads are damaged or the finish is flaking, replace it. When replacing, match the thread type (male vs female) and size. This tiny detail is the difference between “perfect fit” and “leaks instantly.”
Cartridge replacement (single-handle and two-handle)
Cartridge replacement is the most common “real repair” because it stops drips at the source.
-
Shut off the hot and cold shutoff valves under the sink. Open the faucet to confirm water stops.
-
Remove the handle. This may involve a small set screw or a cap hiding a screw.
-
Take a photo of the cartridge orientation before you pull it out. This saves frustration later.
-
Remove the retaining clip or bonnet nut that holds the cartridge.
-
Pull the cartridge straight out. If it’s stuck, use a cartridge puller made for your style, or gently wiggle—don’t pry against fragile trim.
-
Clean the valve body opening with a soft cloth. Remove grit and scale.
-
Lightly coat new seals with plumber’s silicone grease if recommended for your cartridge type.
-
Install the new cartridge in the same orientation.
-
Reinstall the retaining clip/nut and the handle.
-
Turn water back on slowly and test for leaks and smooth handle movement.
If the handle is stiff after replacement, stop and re-check alignment. Forcing the handle can damage seals right away.
Fixing compression faucets (washers/seats)
Compression faucets are often simple to repair, which is why they’re still around.
-
Shut off water at the shutoff valves and open the faucet to drain pressure.
-
Remove the handle and trim to expose the stem.
-
Unscrew the stem assembly.
-
Replace the rubber washer at the bottom of the stem.
-
Inspect the valve seat inside the faucet body. If it’s rough or pitted, replace it if it’s removable, or clean it carefully.
-
Reassemble and test.
If you replace the washer and the drip returns quickly, the seat or stem may be too worn to seal well.

Can I replace faucet parts without turning off water?
It’s technically possible for a few outside parts, but it’s not worth the risk. You should shut off water at the under-sink shutoff valves first. If those valves are stuck or leaking, shut off the main water supply.
Even a small mistake under pressure can turn into a hard spray inside the cabinet. Supply lines can also shift during repairs, and that’s another reason to depressurize first.
Efficiency, flow rate, and 2025 design trends
Bathroom faucets today do more than just deliver water—they balance efficiency, comfort, and style. Flow rates, aerator types, materials, and even smart touchless features all play a role in how a faucet performs and how much water it uses. Understanding these trends helps you choose a faucet that looks good, lasts long, and saves water.
Low-flow rules & real savings
Many modern bathroom faucets are designed to use ≤ 2.2 GPM (gallons per minute), and many are lower than that while still feeling comfortable. The easiest upgrade is often an efficient aerator, because it shapes the stream and limits flow without making the faucet feel weak. According to EPA’s WaterSense program, installing low-flow aerators and efficient faucets can reduce household water use by up to 30% without sacrificing performance.
If you’re moving from an older, high-flow faucet, a low-flow setup can cut water use by roughly 30–50% in many homes. Your exact savings depend on habits and local water rates, but the water reduction is real.
A simple at-home flow check is the “time-to-fill test.” If you have a container with volume marks, time how long it takes to reach one gallon with the faucet fully on. Then divide 60 by the seconds it took. For example, 30 seconds to fill one gallon is about 2.0 GPM.
Aerator types: standard vs laminar vs waterfall look
Aerators aren’t all the same, and this is where comfort and splash control come in.
A standard aerator mixes air into the stream. That usually reduces splash and makes water feel soft.
A laminar stream is clearer and can be helpful in some sink shapes because it stays more “together” as it falls. In some bathrooms, it also helps reduce the misty splash that leaves spots on the counter.
Waterfall-style spouts are popular for looks, but they can splash more in shallow basins. If your sink is small or the drain is close to the front, a waterfall stream may turn handwashing into a cleanup job.
Materials & finishes that last
In 2025, matte finishes are popular, but they can show mineral spotting in hard-water areas if you let droplets dry. The best habit is simple: a quick wipe with a soft cloth after heavy use.
Under the finish, material matters more than most people think. Solid brass bodies generally hold up better against corrosion than cheaper alloys. If you’ve had repeated leaks and the faucet body shows roughness or pitting, replacing the faucet can be smarter than replacing parts of a faucet again and again.
Touchless/smart add-ons
Touchless bathroom faucets are more common now, especially in busy households and shared bathrooms. A touchless setup adds a sensor, a control box, and a solenoid valve under the sink. That means a few new failure points: power issues, sensor alignment, and solenoid wear.
If you’re considering a touchless add-on or a new touchless faucet, check under-sink access first. If the cabinet is cramped or packed with storage, servicing those parts can be annoying. Also think about power: batteries are simple, but you’ll replace them; plug-in power is convenient, but it needs a nearby outlet.
Compatibility & buying the right replacement parts
Replacing faucet parts isn’t just about picking something that looks right. Fit, function, and compatibility make all the difference between a quick fix and a frustrating leak. Knowing when to go with manufacturer parts, universal options, or matching by cartridge family helps you shop smarter and avoid costly mistakes.
OEM vs aftermarket (universal) — pros/cons
When you replace bathroom faucet parts, you usually choose between manufacturer parts and universal parts.
Manufacturer parts tend to fit perfectly and keep the faucet operating as designed. They can cost more, and sometimes they take longer to get.
Universal parts can be easier to find quickly and may cost less. They work best for simple items with standard sizing, like many aerators, supply lines, and some handle hardware. The risk is fit. A cartridge that is “almost right” can still leak, bind, or wear fast.
A practical rule is: use universal parts when the interface is standard and obvious, and use manufacturer parts when the part is the valve’s core sealing surface.
Compatibility matrix
| Part type | Universal usually OK? | Why |
| Aerator | Often yes | Many common thread sizes; easy to test and swap |
| Supply lines | Often yes | Standard connection sizes are common; choose quality hoses |
| Mounting hardware | Sometimes | Depends on faucet design and shank diameter |
| Handles/trim | Sometimes | Visual fit and spline/stem match must be exact |
| Cartridge / ceramic disc core | Often no | Many are proprietary; exact sealing surfaces matter |
Cross-reference chart: “series” cues without brand names
Even without naming makers, you can still use a reliable method: match by “family” features.
| What you observe | What it usually points to | What to do next |
| Retaining clip holds cartridge | Clip-retained cartridge family | Search by cartridge shape + clip style |
| Large bonnet nut on top | Nut-retained cartridge family | Measure cartridge diameter and length |
| Two-handle stems with rubber washer | Compression-style stems | Match washer size and seat type |
| Single lever with seal/spring kit | Ball-style family | Match ball and cam/seal kit visually |
If you can, bring the old cartridge or stem to a plumbing supply counter. Visual matching is often faster than guessing from photos online.
Are universal faucet cartridges any good?
Sometimes, but this is where caution helps. Universal cartridges can work when the original design uses standard sizes and sealing surfaces. They are less dependable when the faucet uses a specialized ceramic disc cartridge or a unique stem shape.
If your faucet is newer, or if it has a ceramic disc design, choosing the exact replacement cartridge is usually the safer path. A wrong cartridge can cause leaks that look like “bad installation” even when you did everything right.
Where to source parts
For critical parts like cartridges and valve cores, start with the faucet’s manufacturer parts channel or a plumbing supply house that can match parts accurately. For basic bathroom faucet accessories like aerators and supply lines, many reputable hardware sources are fine.
Before you buy, verify a few things that protect your health and your home. Look for lead-free compliance where required, and check whether the product meets common plumbing and material safety standards. If you’re replacing supply lines, don’t gamble on no-name hoses with vague packaging—under-sink failures can be expensive.

Maintenance plan + when to repair vs replace
Keeping a faucet in good shape is mostly about small, regular habits. A little maintenance goes a long way in preventing drips, low flow, and leaks. Knowing what to check, when to tighten or clean, and when a repair is enough versus a full replacement makes faucet care much less stressful.
Annual / quarterly checklist (prevents 80% of headaches)
A faucet doesn’t need much attention, but small habits prevent the most common problems.
| Frequency | What to do | Why it helps |
| Quarterly | Rinse/clean the aerator; check handle looseness | Prevents low flow, spray issues, and wobble |
| Twice a year | Look under the sink for moisture; feel around fittings | Catches slow leaks before damage spreads |
| Yearly | Exercise shutoff valves (turn off/on gently); inspect supply lines | Keeps valves from seizing and spots hose wear early |
If you live with hard water, aerator cleaning may be a monthly task. It sounds like a lot, but it’s often a five-minute job.
Repair-or-replace decision rules
Repairing makes sense when the issue is isolated: a drip from the spout, a clogged aerator, or a single leaking seal. Those are normal wear items, and replacing them is part of owning a home.
Replacing the faucet can be the better choice when the body is corroded, when cartridges fail repeatedly, or when the faucet is made from lower-grade materials that pit and tear up seals. Wall-mounted faucets also lean toward professional help because access can be limited, and mistakes can open walls.
As a rough benchmark, many common repairs land in the $50–$150 range for parts and labor. DIY can cut that down a lot, but only if you can identify the correct part the first time.
Real-world case snapshots
A neighbor once asked me to listen to a “mystery drip” that seemed to come and go. It turned out not to be mysterious at all. The faucet had a slow spout drip, but the bigger problem was under the sink: a supply line fitting had a tiny seep that only showed when the handle was moved. The fix wasn’t a new faucet. It was tightening the connection, then replacing an aging supply line that had a worn seal. The cabinet floor dried out, and the drip sound stopped because water was no longer traveling along the tube and dripping down later.
In another bathroom, a two-handle compression faucet dripped every night. A new washer helped for a week, then the drip returned. The real culprit was a damaged seat. Once the seat was replaced, the faucet stayed dry.
Widespread faucets bring their own lesson: if the holes are slightly off, handles can sit under tension. That tension can cause small leaks at gaskets and make handles feel rough. When that happens, alignment fixes can matter as much as replacing any internal part.
FAQs
1. What are the parts to a bathroom faucet?
Most bathroom faucets are made up of several key parts that work together to get water flowing smoothly. You’ve got the spout, where the water actually comes out, and the handle(s), which control the temperature and flow. Inside, there’s usually a cartridge or valve that regulates the water. On the end of the spout, there’s an aerator, which helps control water pressure and prevents splashing. Then there’s the mounting hardware that keeps everything fixed to the sink, plus supply lines that bring water in from your plumbing. Don’t forget shutoff valves, which let you turn off water for maintenance, and sealing parts like O-rings and gaskets that stop leaks. Basically, it’s a small team of parts all working together.
2. How do you identify the type of faucet?
Identifying a faucet is easier than it sounds once you know what to look for. First, check how it’s mounted: is it a single-hole, centerset, or widespread setup? Then notice how it operates—does it have a single handle, two separate handles, or is it touchless? If you really want to get technical, you can remove the handle and peek inside to see the valve style. Faucets might use a cartridge, compression stem, ball mechanism, or ceramic discs. Each type feels a little different when you turn the handle and has its own way of controlling water flow.
3. What are the three types of faucets?
In everyday bathrooms, you’ll mostly run into three types of faucets. First, the single-handle faucet, which mixes hot and cold water in one lever—super convenient if you like simple controls. Second, the two-handle faucet, which has separate controls for hot and cold, so you can fine-tune the temperature. Last, there’s the touchless faucet, which uses motion sensors—you just wave your hand and the water starts. These are especially handy for hygiene or if you have kids.
4. Why is my faucet spraying sideways?
If your faucet is spraying water all over instead of straight down, the culprit is usually the aerator. That little screen at the tip of the spout can get clogged with minerals, debris, or sediment over time. The fix is simple: unscrew the aerator, rinse off any gunk, and if it’s mineral buildup, soak it in vinegar for a while. Once it’s clean, screw it back on and your water should flow straight again. It’s a super easy maintenance step that solves a lot of annoying spray problems.
5. What is a spigot vs. faucet?
The difference mostly comes down to location and use. A faucet usually refers to an indoor sink fixture, like in your bathroom or kitchen, while a spigot typically means an outdoor water outlet, like the one you use to water the garden or wash your car. Functionally, they both control water flow, but spigots are built for outdoor conditions, and faucets are designed for indoor convenience and style.
Reference


Leave a comment
This site is protected by hCaptcha and the hCaptcha Privacy Policy and Terms of Service apply.