



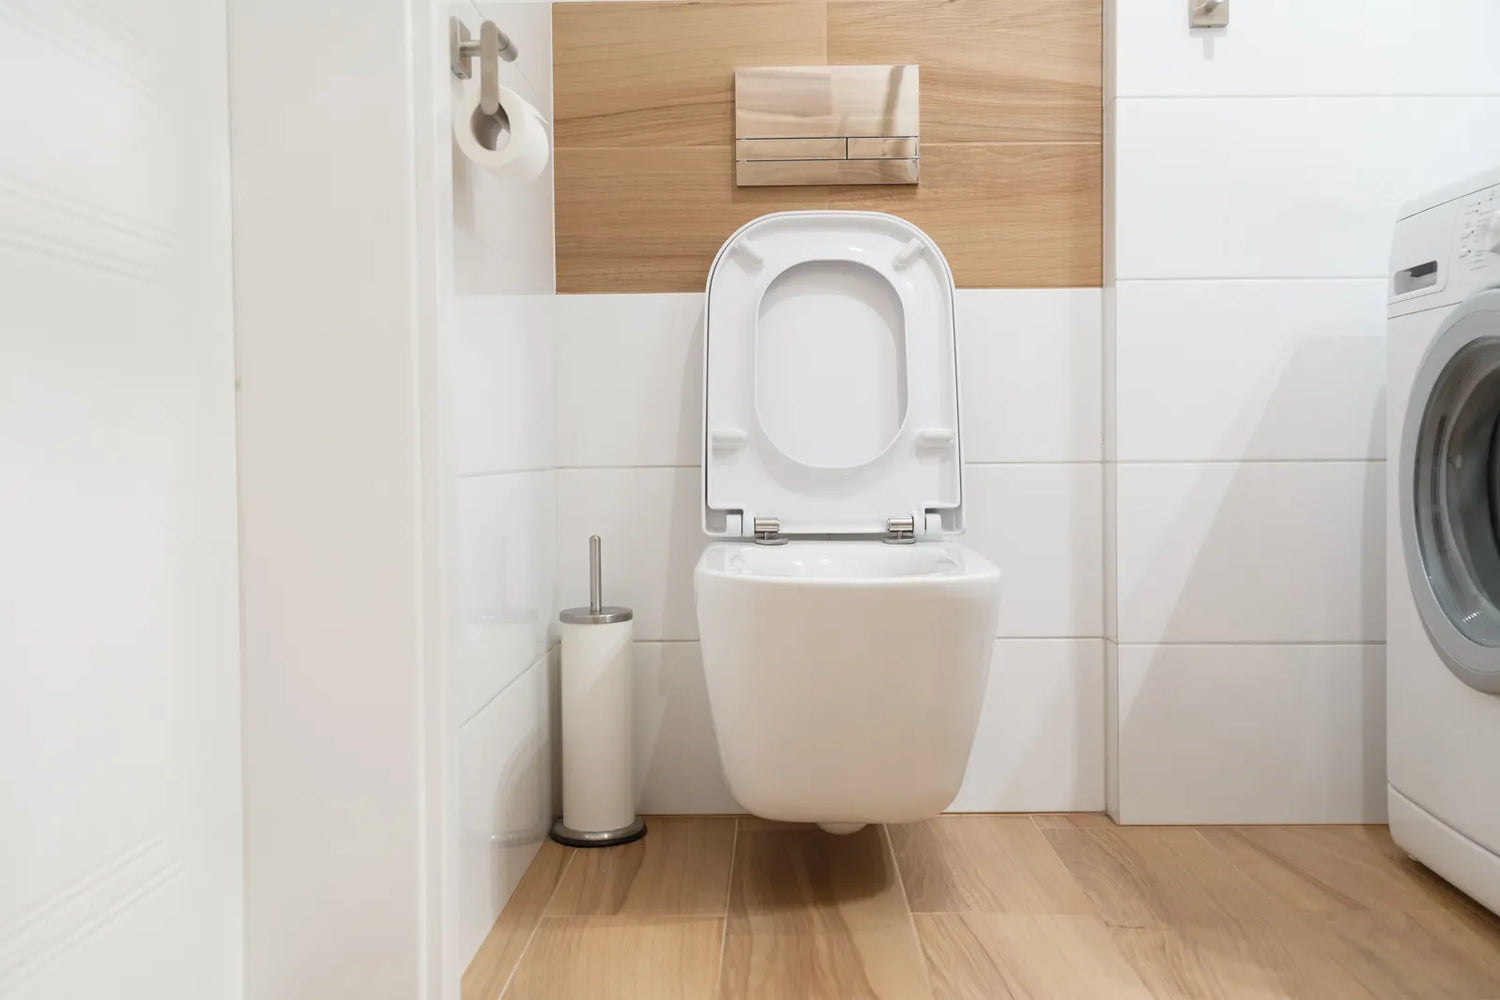
A wall-hung toilet works best when a proper wall-hung toilet installation is planned in advance, especially when you want to save space, and the wall is open, the drain can be moved into the wall, and there is enough depth for a carrier frame and in-wall tank. It usually does not work well as a simple swap in a finished bathroom, especially for DIYers following installation tips, on slab floors, thin 2x4 walls, or where the vent and waste stack cannot be moved without major demolition. If the framing, drain height, or access plan are wrong, the result is usually wobble, slow drainage, hidden leaks, or repair work that means opening the wall later.
Decision Snapshot: wall hung toilet plumbing requirements
The following sections break down the decision into practical installation scenarios so you can quickly see where a wall-hung toilet makes sense and where it becomes risky or costly. Each case focuses on real structural and plumbing constraints rather than design preference. This helps separate straightforward new-build applications from situations that typically require major reconstruction.
Best fit: new framing or full gut remodel
This setup makes the most sense when the bathroom is already stripped to studs or being built new. That is when the wall-hung toilet installation plumbing and framing requirements are easiest to meet and deliver a perfect fit result.
You can set the carrier frame correctly, place the drain at the right height, run the water supply where it belongs, and leave service access where it is needed.
In real jobs, this is the difference between a clean installation and a frustrating retrofit. When framing is open, the wall hung toilet becomes a planned system. When the room is finished, it becomes a demolition project.

Avoid: slab floors and finished baths
A lot of buyers picture this as a toilet swap. It is not. If the old toilet drains through the floor, the waste line usually has to be rerouted into the wall. On a slab, that can mean cutting concrete, changing the branch drain, and patching the floor after the old flange is abandoned.
In a finished bathroom, the damage is rarely limited to one wall. Tile, plaster, trim, and nearby flooring often get involved. This is where wall hung toilet installation cost with in wall tank system climbs fast. Based on Consumer Reports, retrofitting a wall-hung system in a finished bathroom often increases total project cost significantly due to hidden structural and plumbing modifications.
Reconsider: thin walls or fixed stacks
Thin walls are one of the biggest reasons people buy the wrong system. The minimum wall depth for wall hung toilet installation is often more than the existing wall can provide. A standard 2x4 wall usually does not give enough room for the carrier and tank once drywall or tile is added. Many installs need a rebuilt 2x6 wall or a false wall built in front of the old one.
If your stack or vent location is fixed and there is no easy way to shift the drain, this may stop the project before it starts.
Non-load-bearing walls need engineered support
A common misunderstanding is that the toilet hangs from “the wall.” It does not, at least not safely. It hangs from a steel carrier frame that transfers load into framing and floor anchors. So yes, do wall hung toilets need a carrier frame? In most residential installs, yes. It is usually not optional.
And yes, can you install a wall hung toilet on a non load bearing wall? You can, but only if that wall is rebuilt or reinforced to carry the frame and live load. A non-load-bearing partition with ordinary studs is not enough by itself.
Hard-spec screening checks (measure before buying)
Before selecting a model, confirm a few physical constraints that determine whether installation is even feasible in your bathroom layout. These measurements act as non-negotiable baseline checks rather than flexible guidelines.
-
Wall depth requirement: Most concealed tank systems require a minimum effective wall depth of about 6 inches or more, depending on the carrier frame design and plumbing configuration.
-
Waste line sizing: A typical installation relies on a 3-inch waste line, which is standard for modern toilet drainage systems and must be confirmed in the existing plumbing stack.
-
Older homes may require plumbing upgrades before installation.
-
Pipe routing and slope should also be checked during renovation planning.
-
-
Clearance requirements: Expect a baseline of 15 inches from toilet centerline to each side wall or fixture, along with at least 21 inches of front clearance (or more if local building codes require it).
-
Water supply line: A concealed system generally uses a 1/2-inch supply feed, but the exact connection point and routing depend on the specific carrier system design.
These checks should be completed before choosing a product, since deviations often require structural or plumbing redesign rather than simple adjustment.
Who Should and Shouldn’t Choose This
This section shifts from technical feasibility into practical decision-making. It breaks down who benefits most from a wall-hung toilet setup and who is likely to run into structural, cost, or retrofit limitations. The goal is to quickly map real bathroom conditions to installation reality before committing to the system.
Works when framing is still open
If you are in a full remodel, adding a bathroom, or moving walls anyway, this can work very well. The rough-in requirements for a wall hung toilet are easier to hit when there is no tile to save and no finished ceiling below to repair.
This is also the best time to think about future access. Hidden systems are fine when they are planned. They become expensive when they are improvised.
Poor fit for plaster, tile, or masonry walls
Old plaster walls, tiled wet walls, and masonry walls slow everything down. Even if the toilet can be installed, the work around it becomes the real cost.
Plaster tends to crack beyond the cut area. Tile repairs may not match. Masonry can mean furring out a new wall to carry the frame. That changes room dimensions and often affects trim, vanity depth, or door swing.
If your bathroom is fully finished and you are not already remodeling it, this is where a floor-mounted toilet usually remains the smarter choice.
Bad candidate if drain must cross joists
Moving plumbing for a wall hung toilet installation sounds simple until the drain route hits framing. A wall outlet toilet needs the waste line at a very specific wall location and height. If that branch line must cross floor joists to reach the stack, the job can become structurally and financially ugly.
Notching or drilling joists has limits. Large waste lines do not fit anywhere you want. In many retrofits, this is the moment a plumber says “possible, but not worth it.”
Buyer doubt: can a small bath handle this?
Sometimes yes, but not always in the way buyers expect. A wall-hung bowl can save visible floor space. But the in-wall tank system requirements for wall hung toilets often mean adding depth behind the wall. If you need a false wall, the room can end up smaller, not larger.
So in a small bath, ask one hard question: are you gaining usable space, or only changing what looks open?
What This Changes Behind the Wall
The real impact of a wall-hung toilet is not what you see in the bowl, but what has to be built, reinforced, and serviced behind the wall. Once you account for the carrier frame, structural support, and hidden access points, the installation becomes a coordinated system rather than a simple fixture swap. Understanding these behind-the-wall requirements is key to judging whether the layout can realistically support it.
Carrier frame is usually not optional
The carrier frame is the heart of the installation. It supports the bowl, holds the tank, sets the bolt locations, and fixes the drain and flush pipe positions. Without it, the wall and plumbing will not have the load path or alignment needed.
This is one place people get burned by product photos. The bowl looks simple. The hidden hardware is not.
A proper carrier is rated to hold several hundred pounds when installed correctly. The bowl itself is not the weak point. Bad anchoring is.
Structural requirement clarification
The carrier frame is the structural backbone of a wall-hung toilet system and must be treated as a required engineered component rather than an accessory.
Key structural expectations include:
-
Solid floor anchoring, where the carrier base is secured directly into the subfloor to handle vertical load transfer.
-
Stud reinforcement or blocking, installed according to manufacturer load specifications to prevent wall deflection under repeated use.
-
Common construction adaptations may include:
-
Reinforced 2x6 wall framing
-
Double stud reinforcement at mounting points
-
Added horizontal blocking layers for rigidity
-
Construction of a false wall or service chase
-
These elements are structural requirements defined by the carrier system, not optional upgrades or design preferences.
Standard 2x4 walls often need rebuilding
Wall hung toilet wall thickness requirements are one of the first field problems in retrofits. A nominal 2x4 wall does not equal a useful 4-inch cavity. Once you subtract stud depth, finishes, bends, clearances, and the body of the tank and frame, the space gets tight very fast.
The practical answer in many homes is one of these:
-
rebuild with deeper studs
-
fur the wall out
-
build a false wall in front of the old one
That is why the space needed behind the wall for a wall hung toilet matters more than the brochure suggests.
False wall depth can erase space savings
False wall requirements for a wall hung toilet are rarely discussed before purchase, but they are common in real remodels. If the original wall cannot hold the frame or cannot provide enough depth, a new wall gets built in front.
That solves the support problem, but it changes the room. It can push the toilet farther out, reduce knee room, and make a narrow bathroom feel tighter. It may also interfere with existing trim, windows, medicine cabinets, or vanity placement.
If your bathroom is already tight, measure the room after adding wall depth, not before.
Hidden shutoff and access must be planned
The clean look comes from hiding the tank and supply, but hidden systems still need service access. If the shutoff valve location and service opening are not planned, even a small repair becomes destructive.
This is where many installs age badly. A flush plate opening may give access to some components, but not all repairs. If there is no practical path to the fill valve, flush mechanism, or connections, wall repairs become part of maintenance.
Decision line: If your installer cannot explain how future repairs will be made without opening tile, stop there.
Service accessibility planning requirement
Service planning for concealed systems must be defined before wall closure, since post-installation access is limited.
Maintenance access typically falls into two categories:
-
Typically serviceable through the flush-plate opening:
-
Fill valve adjustments
-
Flush mechanism replacement
-
Minor internal tank servicing
-
Seal or gasket replacement (model-dependent)
-
-
Often requires opening the wall:
-
Major shutoff valve replacement (if not front-access designed)
-
Carrier frame repair or adjustment
-
Drain line modifications or relocation
-
Structural anchoring corrections
-
A defined service strategy should be confirmed during planning so that future maintenance does not require unnecessary demolition.
Will the Plumbing Layout Actually Fit?
Before committing to a wall-hung system, the real question is whether your existing plumbing layout can physically support the shift from floor outlet to in-wall discharge. Once drain routing, vent paths, and rough-in alignment are considered together, many “simple swaps” turn into full rework decisions rather than fixture replacements.
Floor drains must move into the wall
Wall hung toilet vs floor mounted toilet plumbing differences start with the waste outlet. A floor toilet drops into a flange in the floor. A wall-hung toilet discharges into the wall through the carrier connection.
That means the existing plumbing often has to be rerouted. In wood-framed floors, that may be manageable if the branch line is close and framing allows it. In slab homes, it can mean trenching and concrete work.
This is why many first-time buyers underestimate cost. The bowl is not what makes the project expensive. The drain relocation is.

Vent routing can block otherwise possible installs
A bathroom can look like a good candidate until vent routing is checked. The drain may be movable, but the vent path may not be. In older homes, especially two-story homes, stacks may run exactly where the carrier needs to go.
If moving the toilet means moving venting in a way that affects the roof path or nearby fixtures, the project gets more complex fast. This is a common hidden issue with moving plumbing for a wall hung toilet installation.
A lot of “maybe” jobs die here, not because the toilet is wrong, but because the drain-waste-vent layout is not flexible.
Rough-in height must match the carrier
The rough in requirements for a wall hung toilet are not forgiving. The carrier sets the bowl height, outlet location, and flush pipe alignment. If the drain is too high, too low, or too far off-center, the bowl may not seat correctly or may drain poorly.
This is where exact model coordination matters. Carriers and bowls are not guesswork items. The finished wall thickness, bowl projection, drain connection, and seat height all have to work together.
Mandatory carrier coordination requirement
Successful installation depends on precise coordination between the toilet carrier system and the rough-in plumbing layout. This is not an area where approximate alignment is acceptable.
To ensure compatibility, follow these steps:
-
Obtain the manufacturer’s carrier installation sheet and the bowl specification sheet before any framing or plumbing modifications.
-
Verify the outlet centerline height, ensuring the drain alignment matches the carrier’s required positioning exactly.
-
Check bolt spacing and mounting geometry, as mismatched spacing cannot be corrected after wall closure.
-
Confirm finished wall thickness assumptions, including tile backer, tile layer, and any additional wall build-out.
Any mismatch identified at this stage must be corrected in the rough plumbing or framing phase. Once the wall is closed, correction typically requires demolition rather than adjustment.
Buyer doubt: what if my rough-in is off?
If your rough-in is off by a little, sometimes the fix is simple during open-wall work. If it is off after the wall is closed, it becomes expensive. Minor pipe trimming is one thing. Wrong carrier elevation or wrong waste location is another.
This is where most people get it wrong: they assume “close enough” behind the wall is fine. It is not. Tight tolerances matter more when the plumbing is hidden.
Go / no-go tolerance rule for misalignment
When rough-in measurements do not align with carrier specifications, the solution is not to “make it fit” using flexible fittings or offsets.
Use this decision rule:
-
If alignment can be achieved within the carrier’s built-in adjustment range as specified in the installation manual, the installation can proceed normally.
-
If alignment cannot be achieved within that engineered range, the issue must be treated as a re-pipe, reframe, or repositioning requirement, not a minor installation adjustment.
Offset fittings or improvised solutions are not recommended, as they can compromise structural integrity, flushing performance, and long-term service access.
Wall Depth and Framing Limits
Once you move from product selection into real construction planning, wall depth and framing quickly become the limiting factor. The usable cavity behind the finished wall determines whether the carrier system can physically fit, how it must be supported, and whether the installation will require rebuilding or compromise.
Minimum cavity depth starts around 6 inches
As a practical rule, the minimum wall depth for wall hung toilet installation usually starts around 6 inches once you account for the carrier/tank body and finished surfaces. Some systems need more. Tile, backer board, or a thick finish can reduce usable cavity depth further.
That is why many installers say the wall hung toilet wall thickness requirements are closer to a built-up wall than a standard partition.
If you only have a finished 4 1/2- to 5-inch wall assembly, do not assume it will fit.

Thin finished walls create tank interference
Even when the frame technically fits between studs, the tank and plumbing may interfere with finish layers, bends, or fastening points. This is common in bathrooms with tile over cement board, old plaster, or out-of-plumb framing.
The result can be a wall that has to bulge, a frame that sits proud, or a flush plate area that does not align cleanly. Those are not cosmetic issues alone. They often signal a system being forced into a wall that is too shallow.
Stud spacing can conflict with the frame
Wall stud and framing requirements for wall mounted toilets are not just about strength. They are also about layout. Existing studs may land where the carrier needs to sit. Plumbing vents or supply lines may occupy the same cavity. Niche framing, electrical, or blocking from previous remodels can all interfere.
Sometimes this is easy to solve with reframing. Sometimes it means shifting the toilet location, which then affects centerline clearances, vanity spacing, and drain routing.
Reinforcement failure leads to wobble and sag
Structural support requirements for a wall hung toilet are unforgiving over time. A weak frame install may seem fine at first. Then months later the bowl starts to move, bolts loosen, grout cracks, or the wall face shows stress.
This does not usually happen because the bowl is defective. It happens because the frame was not anchored properly, the floor attachment was weak, the wall was underbuilt, or the finished wall compressed under load.
A wall-hung toilet should feel dead solid. Any movement is a warning.
Fit summary
Before buying, confirm these basics:
-
Wall cavity or new false wall deep enough for carrier and tank
-
Structural framing that can support the carrier load
-
Drain can be moved from floor to wall if needed
-
Vent route is code-compliant and physically possible
-
Water supply can be concealed in the wall
-
Access for shutoff and service is planned
-
Finished wall height requirements for wall hung toilet installation match the carrier and bowl you chose
-
Required side clearances and front clearances still work after any false wall is built
If one of those is unresolved, do not order the toilet yet.
How to validate before buying
Before choosing a model or committing to installation, it is essential to test whether the bathroom’s structure, plumbing, and code constraints actually support a wall-hung system. This validation step helps separate projects that are straightforward upgrades from those that will require major redesign, hidden rerouting, or unexpected permitting delays.
Measure the real wall
Do not measure only the room. Measure the wall assembly. Check stud depth, finish thickness, plumbing depth, and whether the wall is plumb. If it is a retrofit, open a small inspection area or use another reliable method to confirm what is inside.
This is the first check for space needed behind the wall for a wall hung toilet.
Locate the waste path
Find where the current toilet drain runs and where the main stack is. Then ask: can the branch line move into the new wall location without crossing major framing or requiring unreasonable offsets?
If the drain route depends on sharp offsets or long awkward reroutes, drainage performance and labor cost both suffer.
Confirm vent feasibility
Do not assume venting will “figure itself out.” Verify how the toilet will vent, where that vent ties in, and whether the route conflicts with framing or the carrier.
If venting is the weak point, this install may be technically possible but practically foolish.
Check floor and wall anchoring
The carrier must anchor to something solid. Confirm what the floor is made of, what is below it, and whether the wall can be rebuilt if needed. This matters even more on non-load-bearing walls.
Review finished dimensions
Look at the finished wall, not just rough framing. Tile, board, plaster patching, and trim all affect the final fit. Make sure the bowl projection, seat height, and flush plate location still work in the completed room.
Plan service access
Ask exactly how the fill valve, flush valve, shutoff, and connections will be serviced later. If the answer is vague, maintenance will be expensive.
Decision line: If no one has shown you the repair path, the installation is not fully designed.
Permit and inspection checkpoint
Before purchasing or beginning installation, confirm regulatory and inspection requirements in your jurisdiction.
Key checks include:
-
Whether a plumbing or building permit is required for altering waste lines or installing a concealed carrier system
-
Required inspection stages, especially whether inspection must occur before wall closure
-
Whether installation must be completed or signed off by a licensed plumber or contractor
Failing to confirm these requirements early can result in project delays, failed inspections, or mandatory demolition of completed wall finishes.
Retrofit cost and disruption reality
Once you move from feasibility into actual construction, the real difference between new builds and retrofits becomes cost and disruption rather than product choice. What looks like a simple upgrade on paper often turns into a coordinated plumbing and finish repair project once floors, walls, and access limitations are factored in.
First-floor retrofits differ from second-floor work
First-floor jobs are often judged by what is behind the wall and below the floor. Second-floor jobs add ceiling access concerns, stack alignment, and the risk of opening finished rooms below.
Neither is always easy, but they fail in different ways. First-floor installs can hit slab and foundation issues. Second-floor installs can hit joists, vent routing, and finished ceiling repair.
Slab homes may require concrete cutting
This is the classic budget breaker. If the existing toilet drains through a slab and the new wall outlet needs a different path, you may be into saw cutting, trenching, and patching. That is why slab-floor homeowners should be cautious.
This does NOT mean it can never be done. It means the project is no longer a fixture upgrade. It is a plumbing remodel.
Finished wall repair adds hidden cost
Even when the plumbing work is possible, restoring the room is where costs creep up. Drywall repair, tile matching, waterproofing, trim repainting, and floor patching all count. These are the costs people forget when comparing wall-hung to floor-mounted toilets.
Buyer doubt: when does retrofit stop making sense?
Usually when the wall must be rebuilt, the drain must be moved a long way, and the room is fully finished. At that point, a wall-hung toilet can still be done, but it is often a taste-driven choice rather than a practical one.
If you are not already opening the room, a standard floor-mounted toilet often wins on cost, repair simplicity, and risk.
What fails if requirements aren’t met?
When the installation requirements are not fully met, the issues rarely stay hidden in the short term—they tend to show up as structural movement, reduced flushing performance, or long-term water damage. Understanding these failure points helps clarify why wall-hung systems depend so heavily on precise framing, plumbing alignment, and proper installation discipline.
Weak framing causes movement at the bolts
When the wall or carrier support is inadequate, the bowl starts to move at the mounting points. That movement stresses seals, loosens hardware, and can crack finish materials. It may start as a slight flex and end with a full tear-out.
Offset waste fittings can slow drainage
Offsets are sometimes necessary, but too many or too much misalignment in the waste path can hurt flush performance. Solids do not like awkward routes. The more the line is forced to fit the wall rather than designed for flow, the more likely you are to get weak carry, slow clearing, or recurring service calls.
Closed walls hide leaks until damage spreads
This is one of the real ownership risks. A bad seal, loose connection, or supply problem may not show up immediately. By the time moisture appears outside the wall, framing, drywall, and finishes may already be affected.
That is why pressure testing and careful inspection before wall closure matter so much. Hidden leaks are not just leaks. They are delayed repairs.
DIY mistakes often appear after wall closure
The most expensive errors are the ones hidden by confidence. Slightly wrong bolt projection, poor alignment, weak anchoring, bad sealing, skipped access planning, or rough-in errors often do not show themselves until the wall is closed and the toilet is used for a while.
This is also why many plumbers dislike being called in after a homeowner has already framed, piped, and closed the wall around a bad setup.
Long-term access and ownership risks
Beyond the initial installation, the real difference with wall-hung toilets shows up over years of ownership, especially in how easily the system can be accessed, upgraded, and repaired. Once everything is sealed behind tile and drywall, even small maintenance needs can shift from simple fixes to invasive work that affects the surrounding wall structure.
No access panel turns repairs destructive
A wall-hung system can be serviceable, but only if service was considered from day one. If not, routine repairs can become wall-opening work. That is the part many buyers regret later.

Bidet and power upgrades may be blocked
What to consider before installing a wall hung toilet also includes future add-ons. If you may want an electronic bidet seat, warm water feature, or smart function later, think now about shutoff location, outlet placement, and cord routing.
The “clean wall” look often leaves no easy path for water or power upgrades later.
Maintenance costs run higher than floor models
Are wall-hung toilets hard to repair? Often, yes, compared with floor-mounted toilets. Not because they fail constantly, but because access is tighter, parts may be more model-specific, and repair labor is usually higher when anything behind the wall is involved.
That does not mean they are bad products. It means the ownership model is different. You are trading visible plumbing and simple access for hidden plumbing and tighter service conditions.
Buyer doubt: what fails first over time?
Usually the first problems are not catastrophic frame failures. More often it is flush mechanism wear, fill valve issues, slight movement from poor anchoring, or leaks at connections that were never quite right. On a good installation, these may be manageable. On a bad installation, they trigger wall work.
What plumbing is actually needed?
At minimum, a wall-hung toilet needs:
-
an in-wall carrier frame
-
an in-wall tank system
-
a concealed water supply to the tank
-
a waste connection routed into the wall
-
code-correct venting
-
secure anchoring into framing and floor
-
planned access for future service
That is why the answer to “Does a wall-hung toilet need a special tank?” is basically yes. It needs a tank and carrier system made for this type of installation. This is not a standard tank-on-bowl arrangement hidden in drywall.
And for people asking how much weight can a wall-hung toilet hold: a properly installed carrier system is generally designed to support several hundred pounds. The capacity comes from the carrier and anchoring, not from drywall or finish tile.
Before You Buy checklist
-
Is this bathroom already being gutted or framed new?
-
Is the existing toilet drain in the floor, and if so, how hard is it to move into the wall?
-
Is your home on a slab?
-
Do you have enough wall depth, or will you need a false wall?
-
Can the wall be rebuilt or reinforced if it is non-load-bearing?
-
Can the vent be routed correctly without major stack relocation?
-
Do the wall stud and framing requirements for wall mounted toilets work with your existing layout?
-
Have you checked the finished wall height requirements for wall hung toilet installation?
-
Is there a clear plan for shutoff access and future repairs?
-
Will any future bidet seat or power need be blocked by the design?
-
Have you priced wall repair, tile repair, and floor patching, not just the toilet and carrier?
-
If this is a retrofit, have you asked whether a floor-mounted toilet would solve the same problem with less risk?
FAQs
1. What plumbing is needed for a wall-hung toilet?
A wall-hung toilet needs specific wall hung toilet plumbing requirements, because most of the system is hidden inside the wall. You’ll need an in-wall carrier frame, a concealed tank, a properly sized drain line tied into the main waste stack, and a vent pipe for smooth flushing performance. The water supply line also runs inside the wall and connects directly to the tank system. Since everything is enclosed, correct alignment and proper rough-in planning are critical before closing the wall.
2. Can I install a wall-hung toilet in my house?
Yes, but it depends on whether your bathroom can support wall mounted toilet structural support. These systems require reinforced framing inside the wall to carry both the user load and the concealed carrier system. In many homes, this means opening the wall and adding extra blocking or steel framing during renovation. If your structure is already strong enough, installation is much simpler, but older or thinner walls may need modification first.
3. Does a wall-hung toilet need a special tank?
Yes, it uses a built-in system known as an in-wall tank system installation, which is completely hidden behind the wall. This tank is designed to fit inside a steel carrier frame and works with a flush plate instead of a traditional handle. It’s engineered to be compact but still strong enough to handle daily use and repeated flushing cycles. Without this specialized tank system, a wall-hung toilet simply wouldn’t function properly.
4. How much weight can a wall-hung toilet hold?
When properly installed, a wall-hung toilet can support a significant amount of weight thanks to its carrier frame and bathroom wall thickness for toilets considerations. Most systems are tested to hold several hundred pounds, often far more than typical household use requires. The strength comes from the reinforced steel frame anchored into the wall structure, not the ceramic bowl itself. Proper installation is what ensures long-term stability and safety.
5. Cost to move plumbing for a floating toilet?
The moving plumbing for wall hung toilet process can vary widely depending on your bathroom layout. If plumbing lines need to be relocated, the job often includes opening walls, adjusting drain positions, and modifying venting routes. Because of this, the total cost of wall hung toilet installation can range from moderate to high, especially in full remodels where structural changes are required. Simpler repositioning scenarios will naturally cost less.
6. Are wall-hung toilets hard to repair?
Not necessarily, but they are different from standard toilets. Most maintenance tasks can be done through the flush plate opening without damaging the wall, which is one of the key benefits of floating toilets in terms of serviceability. However, if the issue involves the concealed tank or carrier system, wall access might be needed. Choosing a high-quality system and correct installation significantly reduces long-term repair risks.
7. How does Horow ensure the safety of its floating toilets?
Horow focuses on engineering reliability by combining reinforced steel frames, pressure-tested components, and strict quality control standards. Their systems are designed to ensure Horow's wall-hung toilet durability and tech meet long-term stability needs under daily use conditions. Many models are tested for load capacity, leak prevention, and structural integrity before installation. This approach helps ensure the toilet remains secure, stable, and consistent over time.
References


Leave a comment
This site is protected by hCaptcha and the hCaptcha Privacy Policy and Terms of Service apply.