
Wall hung toilet height adjustment usually happens at the carrier frame, before the wall is closed. It is not normally an adjustment you can make later through the flush-plate opening. The useful target is the completed floor to the top of the installed seat—not a carrier mark, mounting bolt, or bare ceramic rim.
Setting that height also requires coordinating the bowl, waste connection, framing, and floor buildup. A carrier’s adjustment range cannot compensate for an unsuitable drain route or insufficient wall depth.
Where Does Wall Hung Toilet Height Adjustment Work?
Decision snapshot: Proceed, reconsider, or stop
- Proceed: The wall is open or will be rebuilt, the floor buildup is known, and the carrier, bowl, drain route, and finished room layout have been checked together.
- Reconsider: You only need a different sitting height, and a floor-mounted replacement could meet that need without reconstruction.
- Stop: Structural support, waste routing, final floor level, or component compatibility remains unresolved.
- Common trap: Treating an advertised adjustment range as a finished seat-height range—or assuming the height remains adjustable after tiling.
Open walls allow coordinated adjustment
With the wall open, the installer can position the carrier around the intended bowl height, waste connection, water supply, and finished enclosure.
Moving the frame changes the position of the bowl connections; it is not simply raising a seat above fixed plumbing. In an existing bathroom, inspection must also establish what is behind the wall and beneath the floor. Pipes, wiring, or structural members can limit an apparently straightforward installation.
A floor-mounted replacement may be enough
If the existing toilet works and sitting height is the only problem, compare suitable floor-mounted replacements first.
A concealed carrier can add demolition, framing, plumbing relocation, and finish restoration without addressing another household need. For a broader comparison of those trade-offs, see the pros and cons of wall-mounted toilets.
Which Height Compromises Could Make Daily Use Harder?
There is no single best wall mount toilet seat height for every household. A height that makes standing easier for one person may leave another person’s feet poorly supported.
Test sitting, standing, and transfers
Before selecting a carrier setting, test the proposed finished sitting height with a stable chair or a secure mock-up. Do not stack loose objects to create a test seat.

Each regular user should check:
- Comfortable foot contact with the floor.
- Controlled sitting down and standing up.
- Pressure from the seat edge behind the thighs.
- Reach to the flush control and toilet paper.
- Space for any transfer method, mobility aid, or assistance.
A chair is only an approximation. Seat shape, bowl position, and nearby walls can change the result. Include those relationships in the layout check, and use the intended seat’s installed rise when calculating the final target.
When users have substantially different needs, one compromise height may not work well. Resolve that conflict before enclosing the carrier rather than assuming everyone will adapt.
Higher is not automatically better for seniors
The best toilet height for an older adult depends on mobility, balance, foot support, and transfer method—not age alone.
Where transfers, grab bars, or mobility aids matter, involve an occupational therapist or another suitable professional. Have the designer or installer check applicable local accessibility requirements separately. A product described as “comfort height” or “accessible” does not establish that the completed bathroom meets a particular person’s needs or local rules.
A step stool should not become the unplanned solution to a permanently installed bowl that is too high. It also occupies space used for standing and movement.
What Reconstruction Could the Chosen Height Require?
Can height change after the wall is tiled?
For a conventional concealed carrier, changing bowl height after tiling generally requires access to the frame and may require changes to the flush and waste connections.
The repair can extend beyond removing tiles. Wallboard, waterproofing where present, framing, and adjoining finishes may need restoration. A flush-plate opening should not be treated as a height-adjustment hatch.
Some systems are expressly designed for post-installation adjustment. That capability must be documented for the exact system; the word “adjustable” alone does not establish it.
A retrofit can involve both wall and floor work
Replacing a floor-outlet toilet with a wall-hung installation may require opening the floor, rerouting the waste line, installing structural support, and building an enclosure. The enclosure also consumes room depth before the bowl projects into the bathroom.
These are feasibility questions, not finishing details. Resolve the drain route and proposed finished-wall position before committing to the conversion.
Separate the work in the quote
Setting an exposed carrier and changing the height of a finished installation are different jobs. Ask for an itemized scope covering:
- Demolition and disposal.
- Carrier installation and structural work.
- Waste and water-supply changes.
- Electrical work, if needed.
- Enclosure construction and substrate.
- Waterproofing and finish restoration, where applicable.
- Testing, final bowl installation, and commissioning.
For a retrofit, agree on an approval process for concealed obstructions, unsuitable framing, or damaged materials found during demolition. Also identify who supplies replacement finishes: unavailable matching tile can turn a local repair into a larger restoration.
How Do You Establish the Finished Sitting Height?
Separate the floor, carrier, rim, and seat references
A carrier reference mark, bowl mounting point, ceramic rim, and seat top are different measurement points. The selected system’s drawing must identify what each published dimension measures.
Use these relationships:
Finished sitting height = finished rim height + installed seat rise above the rim
When measuring the rim from the structural floor:
Finished rim height = structural-floor-to-rim measurement − floor buildup
If the bowl stays in the same absolute position, adding flooring reduces its height above the completed floor.
Measure the sitting surface with the lid open. Closed-lid height is irrelevant, and a seat’s overall product height may not equal its installed rise above the ceramic rim. Do not add seat rise to a dimension that already measures to the seat top.
Establish a finished-floor datum
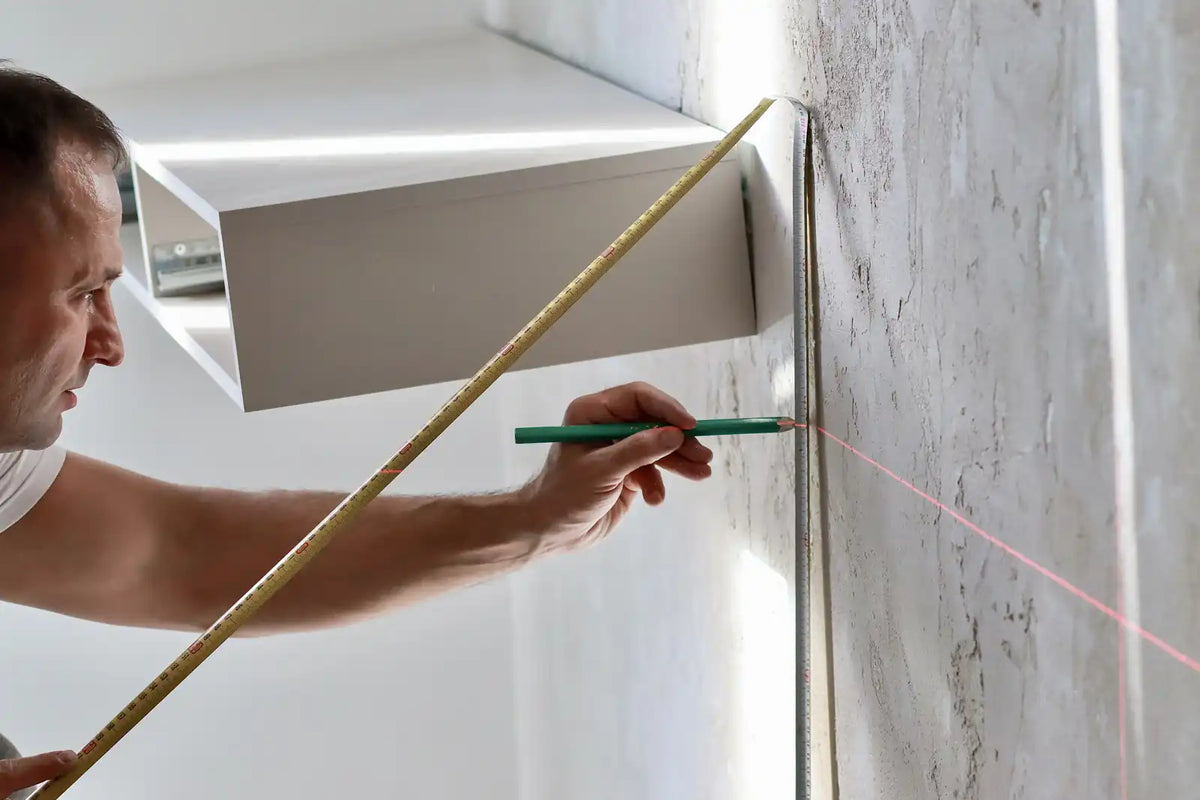
A datum is a fixed measurement reference. Mark the planned finished-floor level where the carrier will be set, and record the floor assembly behind that level.
Include leveling work, underlayment, waterproofing where applicable, setting materials, and the floor finish. The plumber, flooring installer, and enclosure builder must work from the same reference.
This mark—not an allowance for tile estimated by eye—anchors the height calculation.
Adjust, level, secure, and verify the carrier
The exact wall hung toilet carrier adjustment procedure depends on the selected system. A typical installation sequence is:
- Approve the seat-height target. Start with the users’ tested finished sitting height and the intended bowl and seat.
- Translate that target into the carrier setting. Use the official drawings to relate the finished-floor datum to the rim, mounting points, and carrier reference. Include installed seat rise.
- Position the carrier. Where the design uses adjustable feet or frame supports, adjust them according to the carrier instructions. Coordinate the frame with the planned finished-wall plane and connection positions.
- Check level and alignment. Verify frame level, plumb, mounting-point position, and flush and waste alignment. Changing frame height may require repositioning the connections.
- Secure the selected setting and carrier. Follow the system’s specified sequence for locking adjustment and anchoring to the approved structure. Recheck the measurements after securing it.
- Verify the resulting bowl and seat height. Use the documented bowl geometry and any manufacturer-permitted trial fit to confirm the target before finishes prevent correction.
This sequence explains the coordination required; it does not replace the exact carrier’s fastening, anchoring, or connection instructions.
Leave room for installation tolerances
A target near an adjustment limit needs closer checking. A published limit may refer to a different floor datum or assume a particular bowl.
Record:
- What the advertised range measures.
- Whether adjustment is continuous or uses defined positions.
- How the selected bowl converts the setting into rim height.
- The installed seat rise.
- The remaining allowance for floor buildup and installation tolerances.
A target that works only if every unconfirmed measurement lands perfectly is not ready for purchase or wall closure.
Will the Carrier, Bowl, and Bathroom Fit Together?
Treat the carrier, bowl, seat, enclosure, and connections as one assembly. A matching appearance—or the shared description “wall-hung”—does not establish compatibility.
For a HOROW installation, identify the exact products and use their official installation documentation alongside the carrier instructions. The HOROW wall-hung toilet collection can help identify candidates, but a collection listing does not replace installation drawings.
Dimension and compatibility reference
Use this table to compare candidate assemblies before ordering. Keep a candidate’s status pending verification until the exact carrier, bowl, seat, and required connection parts are identified and their relevant dimensions are documented.
| Item | Required record or comparison | What it establishes |
|---|---|---|
| Exact assembly | Carrier, bowl, and seat model identifiers; required adapters and connection parts | Which components the dimensional check covers |
| Carrier height reference | Named reference point and whether its datum is structural floor or finished floor | What the published setting actually measures |
| Adjustment limits | Documented range, adjustment method, and applicable bowl assumptions | Whether the intended setting is available |
| Bowl geometry | Mounting-point-to-rim relationship and connection positions | Finished rim height and connection alignment |
| Installed seat rise | Rise above the ceramic rim for the intended seat | Finished sitting height |
| Floor assembly | Structural-floor level and complete buildup to finished floor | Correct floor reference |
| Bowl connections | Mounting arrangement, flush inlet, waste outlet, and specified connection parts | Carrier-to-bowl compatibility |
| Structure and enclosure | Anchoring arrangement, wall depth, framing spacing, substrate, and permitted finish buildup | Whether the assembly fits and can be supported |
| Waste and water | Existing locations, proposed routes, connection requirements, and shutoff access | Whether plumbing can serve the assembly |
| Finished room | Enclosure face, bowl projection, doors, adjacent fixtures, and user space | Whether the completed layout remains usable |
| Service and electronic-seat provisions | Component removal paths, seat fit, water connection, and any electrical requirements | Whether the intended features can be installed and maintained |
There is no universal carrier range or finished seat-height target to substitute for this assembly-specific check.
HOROW Wall-Hung Toilets to Compare
These two models illustrate different feature choices. For either one, confirm the exact carrier, connections, and finished seat height before closing the wall.
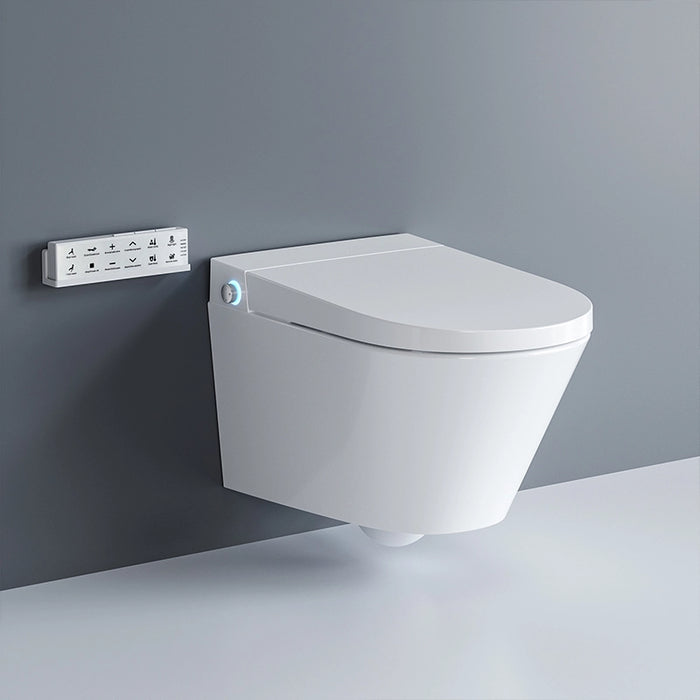
HOROW G10 Wall-Hung Smart Bidet Toilet
A wall-hung model with adjustable bidet settings, a heated seat, and an automatic opening and closing lid.
Installation check: The standalone G10 does not include the in-wall carrier frame or concealed tank. Confirm compatible components and the finished seat-height calculation.
View G10 Details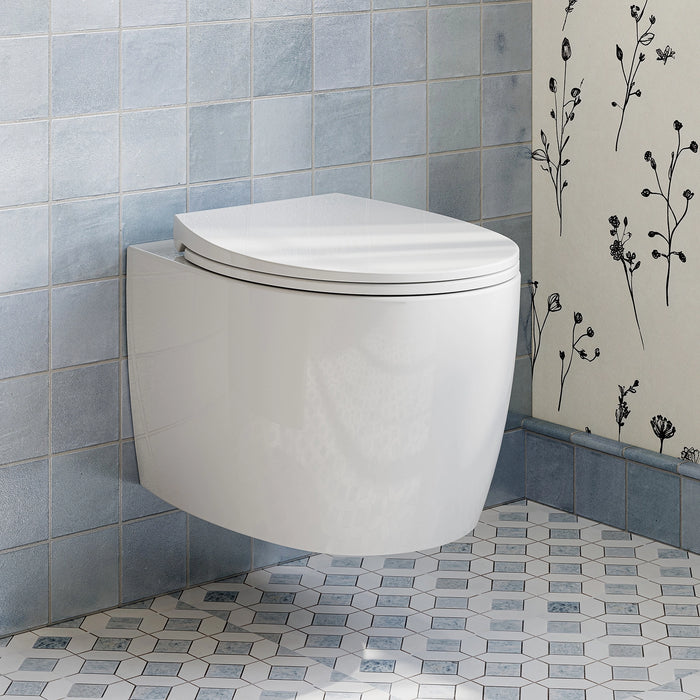
HOROW TG04W Wall-Hung Dual-Flush Toilet
A wall-hung model with a rimless bowl and quick-release seat for easier access during cleaning.
Installation check: Verify the compatible in-wall tank and carrier, bowl connections, and installed seat rise before setting the final height.
View TG04W DetailsThe carrier needs suitable structure
The bowl’s support comes from the carrier and its specified anchoring system—not drywall alone.
The installer needs to assess the actual framing or masonry, floor construction, anchor locations, and required blocking. Wall depth, framing spacing, substrate, and finish thickness must suit the selected assembly. A detail copied from a different carrier can leave the frame unsupported or the bowl connections unable to reach correctly.
Will the existing floor drain align?
Not necessarily. A floor-outlet toilet and a wall-hung bowl do not connect in the same place.
The plumber must establish whether the existing waste line can be routed to the carrier outlet within the available construction space, with suitable connections, drainage, and venting under applicable requirements. An adapter alone may not solve the conversion.
Any proposed structural cutting needs appropriate assessment; the drain route should not be improvised by cutting framing to make space.
Measure from the new finished wall
Mark the finished face of the proposed enclosure on the floor, including the wallboard and tile. From that line, mark the bowl’s actual projection and footprint.
Then check:
- Door swing and access to the vanity.
- Standing space and any transfer area.
- Seat-opening and hinge clearance.
- Reach to controls.
- Access beneath the bowl for cleaning.
Have required clearances checked against applicable local rules. Comfortable use may need more space than a minimum permits.

Plan electronic-seat connections early
An electronic or bidet seat can change both fit and service needs. Check bowl compatibility, hinge clearance, installed seat rise, water connections, and shutoff access.
Have a qualified electrician determine the supply, receptacle location, grounding, and protection required by the exact product and applicable local rules. Resolve those provisions before wall closure rather than planning around an extension cord.
What Must Be Confirmed Before Closing the Wall?
Treat wall closure as a formal hold point between rough-in and finishing.
- Verify the floor reference and height. Confirm the finished-floor datum, assumed floor assembly, carrier setting, calculated rim height, and intended seat height. Obtain the household’s approval of the setting.
- Check structure and position. Verify anchoring, frame alignment, mounting points, and the intended finished-wall plane.
- Confirm connection details. Check waste and flush alignment, required pipe engagement, and accessible shutoff. Connection pipes cut to suit the bowl must follow the exact product procedure.
- Complete required tests. Have the installer perform manufacturer-required and locally required checks while concealed work remains accessible. Repeat relevant checks after final bowl installation; a rough-in test does not verify connections made later.
- Record the concealed work. Photograph the carrier, anchors, pipe routes, connections, shutoff, and service opening. Include a visible measurement reference where useful, and retain the approved height setting with the manuals.
Photographs support later diagnosis. They do not replace inspection or testing.
Which Failures Could Require Reopening the Wall?
Bowl movement needs diagnosis, not more caulk
A moving bowl can indicate a mounting problem, unsuitable wall support, incorrect connection fit, or an issue with the carrier or anchors.
Cracked caulk may be a symptom rather than the cause. Sealant cannot secure loose anchors or correct an unsupported gap behind the bowl.
Have the installer assess movement promptly. Repeatedly tightening fasteners without the product procedure can damage the ceramic.
Flush-opening access has limits
A service opening may provide access to specified tank components without exposing the carrier anchors, waste joint, or every concealed supply connection.
Before finishing, identify which components can be replaced through the opening and how they come out. Access requires a removal path—not merely enough room to touch a valve.
A shelf, cabinet, or fixed worktop can obstruct that path even when the flush plate remains visible. Preserve the service space required for component removal.
Leaks and height corrections have different repair routes
Depending on the failed connection, repair may be possible through the service opening, after removing the bowl, or only by opening the wall.
Height correction is a separate issue: access to a replaceable valve does not establish access to the frame adjustment. Plan for those limitations before finishes are installed.
Before You Buy
Proceed when these purchasing decisions are resolved:
- Users have accepted a proposed finished sitting height.
- The exact assembly can achieve it with the planned floor and wall buildup.
- Structure, plumbing routes, and finished room fit are workable.
- The quote includes the required reconstruction and finish restoration.
- Pre-closure approval, testing, and documentation are included in the installation plan.
An unresolved height, structural, or plumbing question is a reason to pause—not something the carrier’s adjustment range will fix.
Common Installation Questions
What height should a wall-hung toilet be off the floor?
Choose the finished seat height through user testing, then check that the complete assembly can achieve it. Use the finished-floor method above rather than treating a carrier mark or bare-rim dimension as the sitting height.
Is there a standard gap beneath the bowl?
There is no single gap for every wall-hung bowl. Clearance depends on the underside shape and installed height. Check the actual bowl profile and whether your cleaning tools can reach beneath it.
Can I reuse my existing toilet seat?
Only if its shape, hinge spacing, fixing access, and wall clearance suit the selected bowl. Include its installed rise in the sitting-height calculation.
Does the installer need the bowl before framing?
The installer needs the exact bowl and carrier documentation before framing is finalized. Having the actual bowl and seat available can help resolve fit questions. Any trial fit should follow the installation instructions and occur before finishes make correction difficult.
Can I raise the floor instead of lowering the bowl?
Raising the floor reduces the seat’s height relative to that floor, but it also affects doorways, shower transitions, the vanity, waterproofing, and other fixtures. Have the whole room assessed before using floor buildup to compensate for an incorrectly set carrier.
How does height adjustment work with HOROW wall-hung toilets?
For a HOROW G10 or TG03W installation, the final seat height depends on the chosen compatible carrier system, bowl geometry, finished-floor level, and installed seat. Check the product and carrier installation drawings together and approve the finished seat-height target before the wall is closed. Do not assume the installed bowl can be raised or lowered through the flush-plate opening.


Leave a comment
This site is protected by hCaptcha and the hCaptcha Privacy Policy and Terms of Service apply.