


Tub shower door upgrades solve real, everyday problems—leaks, mildew, and cramped space—while adding modern style and value. If your shower curtain clings, your floor gets wet, or cleaning feels endless, a tub shower door can be a simple fix with long-term benefits. This guide gives clear, quick answers so you can choose the right door type, measure correctly, understand costs, and decide whether to DIY or hire a pro. We focus on tempered glass safety, frameless and sliding trends, and practical upkeep. You’ll get real-world comparisons, cost benchmarks, and selection criteria you can trust. Start with the quick comparisons, then move into measuring, costs, installation, care, brand tiers, and design ideas. By the end, you’ll know exactly what to buy and how to get it installed without surprises.
Tub Shower Door Types & Quick Comparisons
Before choosing a model, it helps to understand how each tub shower door style functions and what makes them better suited for different bathroom layouts.
Sliding/bypass vs hinged/pivot vs bi-fold vs fixed splash panel
If you have a standard alcove tub, you can almost always put a shower door on a tub. The right opening style depends on space, users, and cleaning preferences.
-
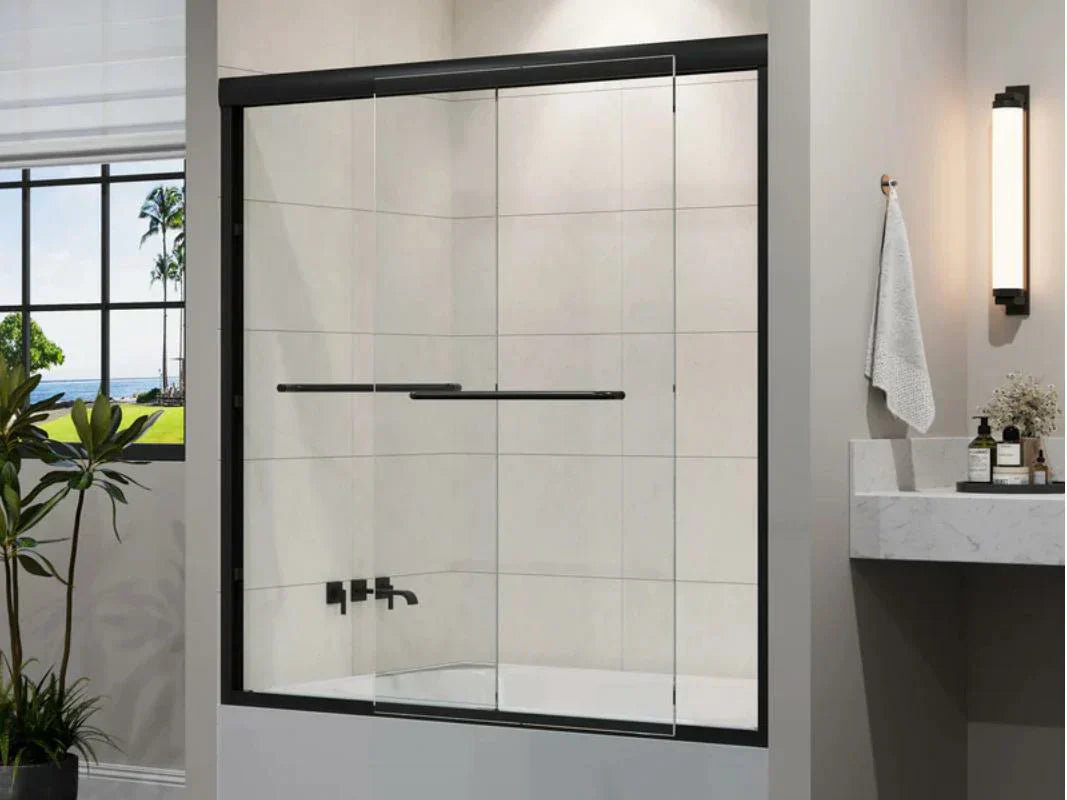
Sliding/bypass: These are the classic “two-panel” bathtub sliding doors. Panels overlap and slide on a top rail, often with a low-profile or standard bottom track. They shine in small bathrooms because there’s no door swing. They’re smooth to use, and modern rollers make them quiet. If your toilet or vanity sits close to the tub, a slider avoids clearance issues. Maintenance is easy if you choose quality rollers and a track that’s simple to wipe.
-
Hinged/pivot: These trackless shower doors for tubs swing open on a hinge or pivot (top/bottom pin). The big win is wide, clear access, which helps with bathing kids or cleaning the tub. They give a premium, frameless look and are often “easier to clean” because there’s no bottom track to collect soap scum. They do need swing room. In tight bathrooms, check that the door won’t hit a toilet or towel bar.
-
Bi-fold: A bi-fold door folds inward on itself and can save space in very narrow rooms. It’s useful in tight alcoves where a pivot won’t clear and a slider feels cramped. There are more moving parts, so buy decent hardware to keep the folding action smooth over time. Cost sits in the middle for most models.
-
Fixed/half panel splash guard: A single glass panel that covers the shower end of the bathtub. It’s minimalist, modern, and super low-maintenance. A stabilizing bar can add rigidity. It only offers partial coverage, so it requires mindful showering and a well-aimed spray. It works best for hand showers, guest baths, or users who prefer an open feel.
Framed, semi-frameless, frameless—look, maintenance, leak protection
-
Framed: Metal frames surround the glass on all sides. Framed doors are budget-friendly and offer solid support. More seals and edges help with leak protection, which is great for active family baths. The trade-off is more crevices to clean and a more traditional look.
-
Semi-frameless: These reduce visible metal along edges and keep a clean sightline. With fewer crevices, they are easier to clean than fully framed doors. They sit at a moderate price point and often strike the best balance between cost, look, and day-to-day care.
-
Frameless: Minimal hardware, thicker tempered glass (often 3/8" or 1/2"), and a sleek, light-filled style. A frameless tub shower door resists mold and grime because there is less metal to trap moisture. It’s the premium choice, often custom-cut for an exact fit. When installed well, they seal effectively and look high-end.
Why glass beats curtains: containment, heat retention, hygiene, resale
Glass shower doors for tubs keep water where it belongs. Better containment means less floor damage, fewer slip hazards, and lower risk of mold at the floor and wall edges. Doors also hold warmth and steam, which makes showers more comfortable and can reduce drafts. Tempered safety glass is strong, shatter-resistant by design, and often comes with optional hydrophobic “easy-clean” coatings that resist water spots and soap build-up. And yes, buyers notice. Swapping shower curtains for glass doors raises perceived value and refreshes your bathroom with a modern, open feel.

Side-by-side comparison table
| Type (LSI) | Pros | Cons | Typical Price (materials) | Best For | Maintenance |
| Sliding/Bypass (bypass door, sliding doors) | No swing clearance; smooth entry; family-friendly | Track can trap grime if neglected | $200–$700 | Small baths; tight alcoves | Clean rollers and track; replace bottom sweeps |
| Hinged/Pivot (trackless) | Widest access; premium frameless look; no bottom track | Needs swing clearance; careful sealing | $400–$1,200+ | Luxury feel; easy tub cleaning | Wipe hinge area; check seals |
| Bi-fold | Space-saving; opens wide in tight rooms | More moving parts; mid-budget | $300–$900 | Very narrow layouts | Lubricate pivots; check folds |
| Fixed/Half Panel (glass enclosure) | Minimalist; fastest install; low upkeep | Partial coverage; splash control needed | $200–$800 | Guest baths; modern style | Light wipe-down; no track cleanup |
| Framed | Budget-friendly; strong support | More metal to clean; traditional look | $200–$500 | Value upgrades; rentals | Extra attention to crevices |
| Semi-frameless | Cleaner lines; moderate cost | Still some framing | $300–$800 | Most homes; balanced pick | Low to moderate care |
| Frameless | Thick glass (3/8–1/2"); sleek | Higher cost; heavier | $700–$1,500+ | High-end remodels; resale | Minimal crevice cleaning |
Quick Recommendations by Space & Users
Once you know your space, who will use the shower, and how much you plan to spend, these targeted recommendations make it easy to narrow your options.
Small bathrooms/apartments—minimum clearances and best picks
When space is tight, sliders shine. A quality sliding/bypass door with a narrow track and smooth rollers keeps your pathway clear. If your alcove is extra narrow, consider a bi-fold to open wider without needing extra swing space. A fixed splash panel can also work in a compact bath when paired with a hand shower and a smart spray angle. Look for a low-profile bottom track to reduce stubbing and make cleaning simple. If you go with a fixed panel, add a stabilizing bar for rigidity on thinner walls.
Families & high-use baths—durability, safety, easy-clean wins
For busy baths, a full-height bypass with sturdy top rollers and thick tempered glass is a strong pick. Choose child-friendly handles and anti-slam soft-close hardware when possible. Add a hydrophobic coating to cut down on spots. Seals matter here: solid vertical jambs and a true level fit prevent leaks during splashy showers. When kids bathe in the tub, a slider lets you reach in from either side—convenient for shampoos and toy clean-up.
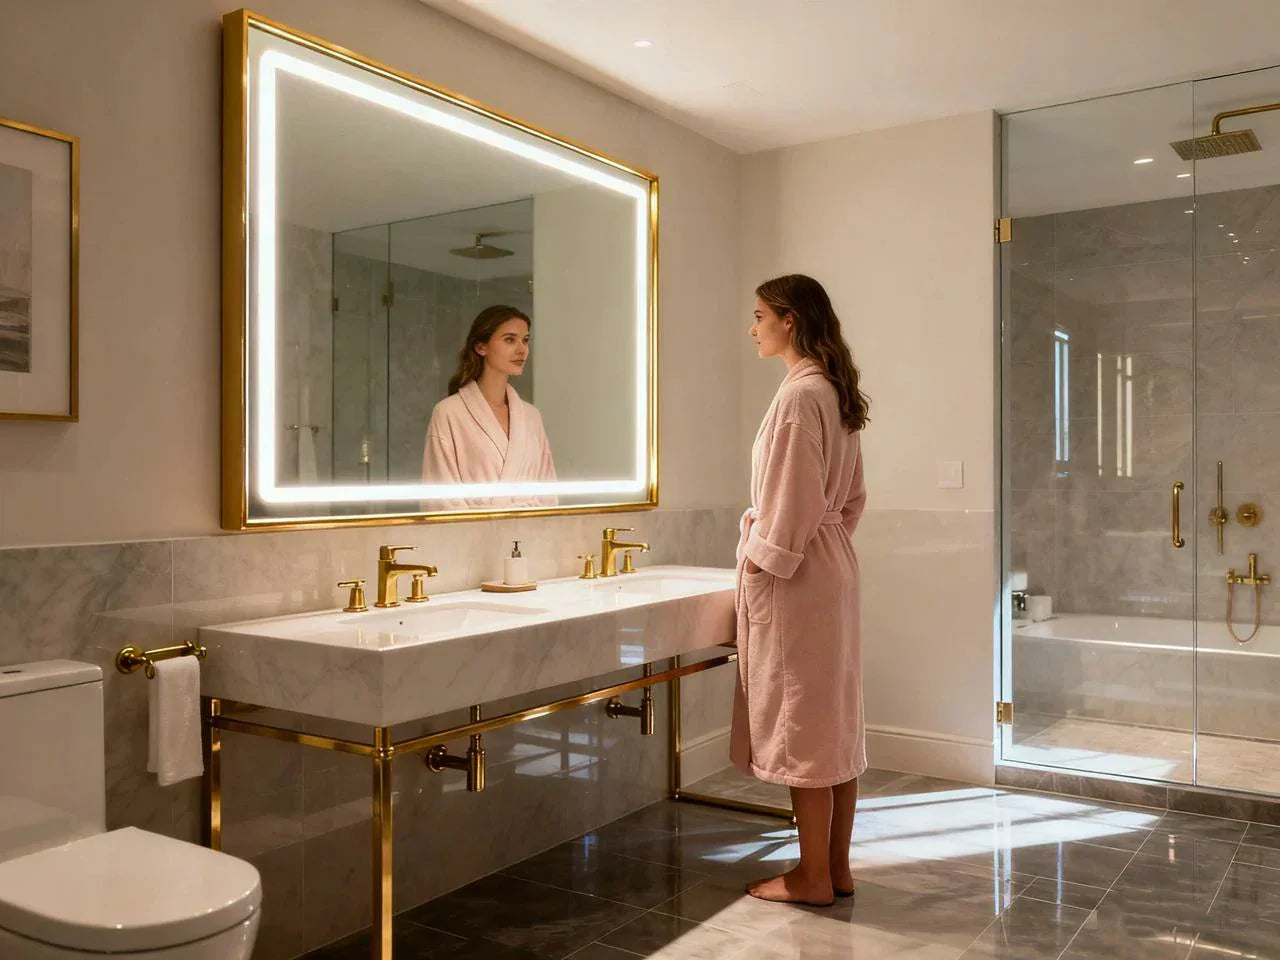
Luxury remodels—frameless, low-iron glass, premium hardware finishes
A frameless hinged or pivot door is the luxury standard. Go with 3/8"–1/2" tempered glass for a sturdy feel. For crystal clarity, choose low-iron glass that reduces the green tint at the edge. Matte black, brushed nickel, and warm brass hardware pair well with today’s tile. If your walls are out-of-plumb (not perfectly vertical), a custom cut and pro install deliver a tight, leak-resistant fit. Minimalist clips and slender hinges keep the look light and modern.
Measuring & Fitment: How to Measure for a Bathtub Shower Door
Correct measurement is the heart of a clean install. Even a great door will leak if the walls aren’t plumb or the track tilts.
Step-by-step measuring checklist
-
Measure the opening width at the top, middle, and bottom. Write down all three.
-
Use the largest width for ordering, unless the maker says otherwise.
-
Check both walls for plumb with a 24" level. Note any out-of-plumb difference.
-
Check the tub ledge for level from end to end.
-
Measure the height from the top of the tub ledge to your desired door height (most tub doors are 56"–60" tall).
-
Confirm faucet, spout, and showerhead locations to avoid handle or swing conflicts.
-
Mark the proposed drill points with painter’s tape. Verify there’s enough material behind thin surrounds for fasteners.
-
Take clear photos of the alcove and notes on out-of-square conditions. These help if you hire a pro.
Tub/wall compatibility: fiberglass/acrylic vs cast iron; tile vs surround
Thin fiberglass or acrylic surrounds may flex. Add backing or use proper anchors if studs aren’t right behind mounting points. Use a stud finder and, if needed, toggle anchors rated for the load the door imposes. For tile walls, use the correct drill bit and go slow to avoid cracking. On cast iron or thick porcelain-coated tubs, drill the wall—not the tub. The tub’s top ledge must be wide and flat enough for the bottom track if your door needs one; if not, consider a trackless pivot.
Clearance & swing rules: pivot arcs, towel bars, toilets, code-aware spacing
-
Leave at least 30" of clear approach space in front of the shower if you plan a swinging door.
-
A hinged door should not swing into a toilet or hit a vanity. Adjust swing direction or choose a slider if needed.
-
Keep the towel bar on the dry side or choose a door with an integrated towel handle on the outside only.
-
Ensure the spray path aims toward the tub and away from seams. This reduces splash and leaks.
-
In an accessibility-focused bath, aim for wide, clear entry and easy handle reach (see ADA guidelines in references below).

Costs & Budget Planning
Understanding the typical price ranges and what drives costs will help you plan your budget confidently and avoid surprises during installation.
Typical price ranges (materials only; install separate)
-
Framed or semi-frameless sliding tub doors: about $200–$500
-
Frameless or custom tub doors: about $500–$1,200+
-
Professional installation: add roughly $200–$600 (depends on wall type, drilling, custom cuts, and adjustments)
So how much does a bathtub shower door cost, all-in? For most homes, expect $500–$1,600 total for a standard slider with pro install, and $1,000–$2,400 for a frameless hinged door installed.
What drives cost: glass thickness, coatings, finish, custom cuts
Thicker glass costs more. Common options are 5/16", 3/8", and 1/2". Frameless builds need thicker glass for stability. Low-iron clarity and hydrophobic coatings add to the price but cut cleaning time and prevent the “green edge” look. Hardware finish matters too. Matte black, chrome, brushed nickel, and brass can vary in price. If your walls are out-of-square, custom notches, miters, or extra-panel adjustments increase labor and material costs.
Sample budgets: economy, mid-range, premium
| Budget Level | Line Items | Estimated Materials | Estimated Labor | Typical Total |
| Economy | Framed slider, standard tempered glass, DIY install | $200–$350 | $0 | $200–$350 |
| Mid-range | Semi-frameless slider, hydrophobic coating, pro install | $400–$700 | $250–$450 | $650–$1,150 |
| Premium | Frameless pivot, low-iron 3/8", custom fit, pro install | $900–$1,500+ | $350–$600 | $1,250–$2,400+ |
Materials vs labor—typical split
| Door Type | Materials Share | Labor Share |
| Framed/Semi-Frameless Slider | 65–80% | 20–35% |
| Frameless Hinged/Pivot | 70–85% | 15–30% |
| Fixed/Half Panel | 75–90% | 10–25% |
If you’re comparing quotes, ask for itemized materials and labor. That makes it easier to see the value of thicker glass or coatings.
Installation: DIY vs Pro, Tools, and Safety Codes
After selecting a door style, the next step is deciding whether you’ll install it yourself or hire a professional—plus what tools and safety standards you need to know.
DIY readiness by door type; tools and skills checklist
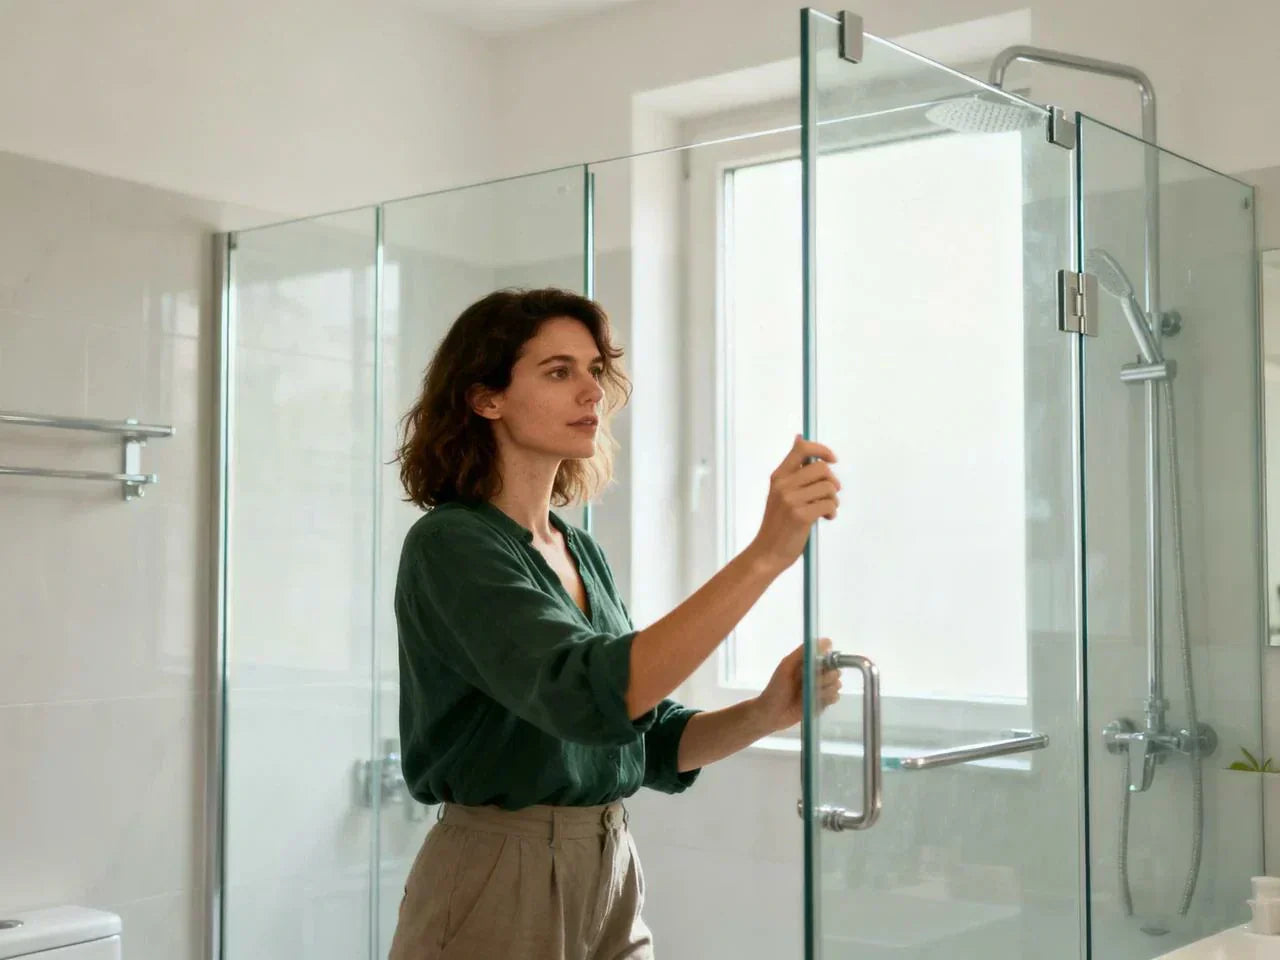
DIY is doable for many sliders and fixed panels. Hinged frameless doors are heavier and less forgiving during install.
Tools:
-
Tape measure, level, and pencil
-
Drill with bits for tile/fiberglass
-
Masking or painter’s tape, and a stud finder
-
Quality silicone sealant and caulk gun
-
Safety glasses, gloves, and hearing protection

Skills:
-
Reading a level and shimming for out-of-plumb walls
-
Drilling tile or surround material without cracking
-
Applying silicone neatly and sealing all seams
-
Handling tempered glass safely with help (never install heavy glass alone)
Safety & standards to know
Tempered safety glass in doors for bathtub applications is guided by standards such as ANSI Z97.1 and CPSC 16 CFR 1201 for impact safety. Many frameless doors use glass that also aligns with ASTM standards for heat-treated glass. For layout and clearance, consult building code context (IRC/IBC) and, if designing for accessibility, ADA guidance for approach clearances and hardware reach. See references below to read the official sources.
When to hire a pro
-
Heavy glass or large frameless pivots where fine alignment is critical
-
Out-of-plumb or out-of-square openings beyond standard adjustability
-
Tight, tiled alcoves where drilling mistakes are costly
-
Any setup that needs custom cuts or notched glass
-
When you want warranty protection tied to professional installation
-
A good installer will template, check plumb, level, and make fine adjustments so your door seals well and glides smoothly from day one.
Maintenance & Cleaning for Longevity
To keep your door looking clear and working smoothly for years, a simple routine of cleaning and inspection is essential.
Daily/weekly care: squeegee routines, hydrophobic coating upkeep
A 15-second squeegee after each shower is the single best habit to stop scum and water spots. Keep seals and sweeps dry by cracking the door after use, and run the fan to reduce humidity. Hydrophobic coatings help water bead and roll off—extend their life by using gentle cleaners and avoiding abrasive pads.
Simple weekly routine:
-
Quick squeegee of glass
-
Wipe the bottom track (if you have one)
-
Dry the door edge and handle area
-
Vent the bath for 20–30 minutes after use
Deep clean & hardware care
Every month, clean with a non-abrasive spray or a mix of vinegar and water if your glass doesn’t have a special coating. Rinse and dry. For sliders, check rollers and the track. A soft brush removes grit; a tiny bit of silicone-safe lubricant on moving parts can keep things quiet. Inspect vinyl sweeps and seals; swap them when they harden or crack.
Troubleshooting common issues
-
Leaks: Look for gaps at the wall jambs, uneven tracks, or worn sweeps. Re-level the track if needed. Add silicone to inside seams only where the maker allows (some advise sealing inside and outside; others specify outside only—follow the manual).
-
Sticking rollers: Clean the track, check for bent rails, and ensure set screws are tight. Replace rollers if flat spots or cracks appear.
-
Corrosion: In coastal or high-humidity areas, choose stainless or brass hardware. Wipe down metal parts as part of your weekly routine.
-
Loose handles: Re-tighten through-bolts and add a drop of thread locker if they back out often.
-
Replace vs repair: If repairs exceed 40–50% of the door’s cost or the glass is damaged, replacement is safer and more cost-effective.

Maintenance checklist and calendar
-
After every shower: Squeegee and vent fan on
-
Weekly: Wipe glass, track, and seals
-
Monthly: Deep clean; inspect rollers, hinges, and sweeps
-
Yearly: Replace worn sweeps; renew any failing silicone joints; check fasteners
-
Hard water tip: If you have stubborn spots, use a cleaner approved for tempered glass and your hardware finish. Avoid harsh acids or abrasive powders that can scratch.
Top Tub Shower Door Brands & How to Choose
You asked for the best—but the “best” depends on your bathroom, your users, and your budget. Instead of naming names, here’s how to pick with confidence and compare brand tiers fairly.
Selection criteria for quality and reliability
-
Warranty length and clarity: Multi-year coverage on glass and hardware is a good sign.
-
Glass options: Look for tempered safety glass; upgrades include low-iron clarity and thicker panels (3/8"–1/2").
-
Hardware grade: Stainless or brass hardware resists corrosion; quality rollers with ball bearings glide longer.
-
Parts availability: Check if sweeps, rollers, and handles are easy to order.
-
Certifications: References to ANSI Z97.1 or CPSC 16 CFR 1201 show safety awareness.
-
Service and support: Read recent customer feedback about instructions and response time.
What different makers often specialize in
-
Sliding/bypass specialists: Smooth, quiet rollers; soft-close options; low-profile tracks.
-
Frameless custom fabricators: Site measurement, out-of-plumb adjustments, pristine edge polish.
-
Accessibility-focused lines: Wide openings, easy-grip handles, barrier-free entry on walk-in tubs.
Pros/cons from consumer feedback
Common praise:
-
Clear instructions and labeled hardware bags make DIY faster.
-
Quality rollers stay true, so panels don’t drift open.
-
Hydrophobic coatings reduce weekly cleaning time.
Common gripes:
-
Cheap tracks collect grime and flex.
-
Thin glass rattles in budget frames.
-
Replacement parts can be slow to arrive for niche models.
Design Trends & Aesthetics: Style, Privacy, and Layout
With the practical details covered, you can focus on style—exploring current design trends, privacy options, and layout choices that enhance your bathroom.
Finish trends and minimal hardware aesthetics
Matte black remains strong with white tile and light stone. Brushed nickel suits almost any interior. Warm brass pairs well with earthy tile and wood accents. Minimal hardware, concealed fasteners, and clean vertical lines let the glass read as the star. If you dislike a bottom track, consider a trackless pivot with a slim threshold and tidy sweeps.

Glass choices for privacy and clarity
Clear tempered glass keeps the room bright. Low-iron glass removes the green tint at the edge for true color. For privacy, frosted, etched, or fluted textures blur shapes while letting in light. Rain and reeded patterns hide water spots well. Remember that textured glass can be a touch harder to squeegee; choose coatings if you live with hard water.
Small-bath layout hacks
In a compact bath, every inch counts. A bi-fold or fixed splash guard can free up space. A slider with an integrated towel bar saves wall room. Keep niches and hooks on the dry side so towels don’t get splashed. Use clear glass to make the bathroom feel bigger.
What homeowners say: case studies and pitfalls
Homeowners who switch from shower curtains to glass doors often report a drier floor, fewer odors, and fewer mold issues around the tub apron. On the flip side, doors without a coating show more water spots in areas with hard water. Easy wins people share include hanging a squeegee from the door handle, adding a small bead of silicone at the “problem corner” where a splash sometimes sneaks out, and using a non-slip bath mat just outside the door to reduce slips.
FAQs
1. Can you put a shower door on a tub?
Yes, you can install a shower door on most standard alcove tubs as long as the ledge is flat and wide enough to support the hardware. A properly chosen tub shower door can reduce leaks, improve heat retention, and make cleaning easier compared with a regular curtain setup. The key is measuring width, plumb, and level carefully. Whether your bathroom walls are tile, fiberglass, or acrylic, the right anchors and seals make installation safe and reliable. Even small baths can fit a slider, bi-fold, or fixed panel.
2. How much does a bathtub shower door cost?
A typical bathtub shower door ranges from $200–$500 for framed or semi-frameless sliders, while frameless hinged or pivot styles often run $700–$1,500+. Professional installation usually adds $200–$600 depending on wall type and complexity. Overall, most homeowners spend $500–$1,600 total. Prices rise with thicker tempered glass, hydrophobic coatings, and premium finishes. Compared with a regular curtain system, the investment pays off through durability, reduced water damage, and a more modern look.
3. What are the options for glass doors for bathtubs?
Your main choices include sliding/bypass doors, hinged/pivot doors, bi-fold designs, and minimalist fixed splash panels. Each works differently depending on space, cleaning preferences, and user access. Sliding models are great for tight bathrooms; pivots offer wide entry; bi-folds suit narrow alcoves; and fixed panels look modern with minimal hardware. You can choose framed, semi-frameless, or frameless glass, each offering different aesthetics and maintenance levels. Any of these can function as a tub shower door when measured and installed correctly.
4. What to use instead of a shower door?
If you prefer not to install a door, a high-quality fabric or vinyl curtain with a weighted hem is the most common alternative. Pair it with a curved or regular straight rod to improve elbow room. Another option is a fixed half glass panel that offers openness while limiting splash, though it's not a full enclosure. Curtains are budget-friendly and easy to replace, but they don’t contain water as effectively as a tub shower door, especially in high-use family bathrooms.
5. How long does it take to install a bathtub shower door?
A standard sliding bathtub shower door typically takes a skilled DIYer 2–4 hours and a professional 1.5–3 hours. Frameless hinged doors require more precision and usually take 3–6 hours due to alignment and sealing checks. Time varies based on drilling through tile, correcting out-of-plumb walls, and applying silicone. Prep work—measuring, marking, and confirming hardware layout—is essential for a smooth install. Compared with regular curtain setups, doors need more care up front but offer long-term benefits in performance.
References

Leave a comment
This site is protected by hCaptcha and the hCaptcha Privacy Policy and Terms of Service apply.