


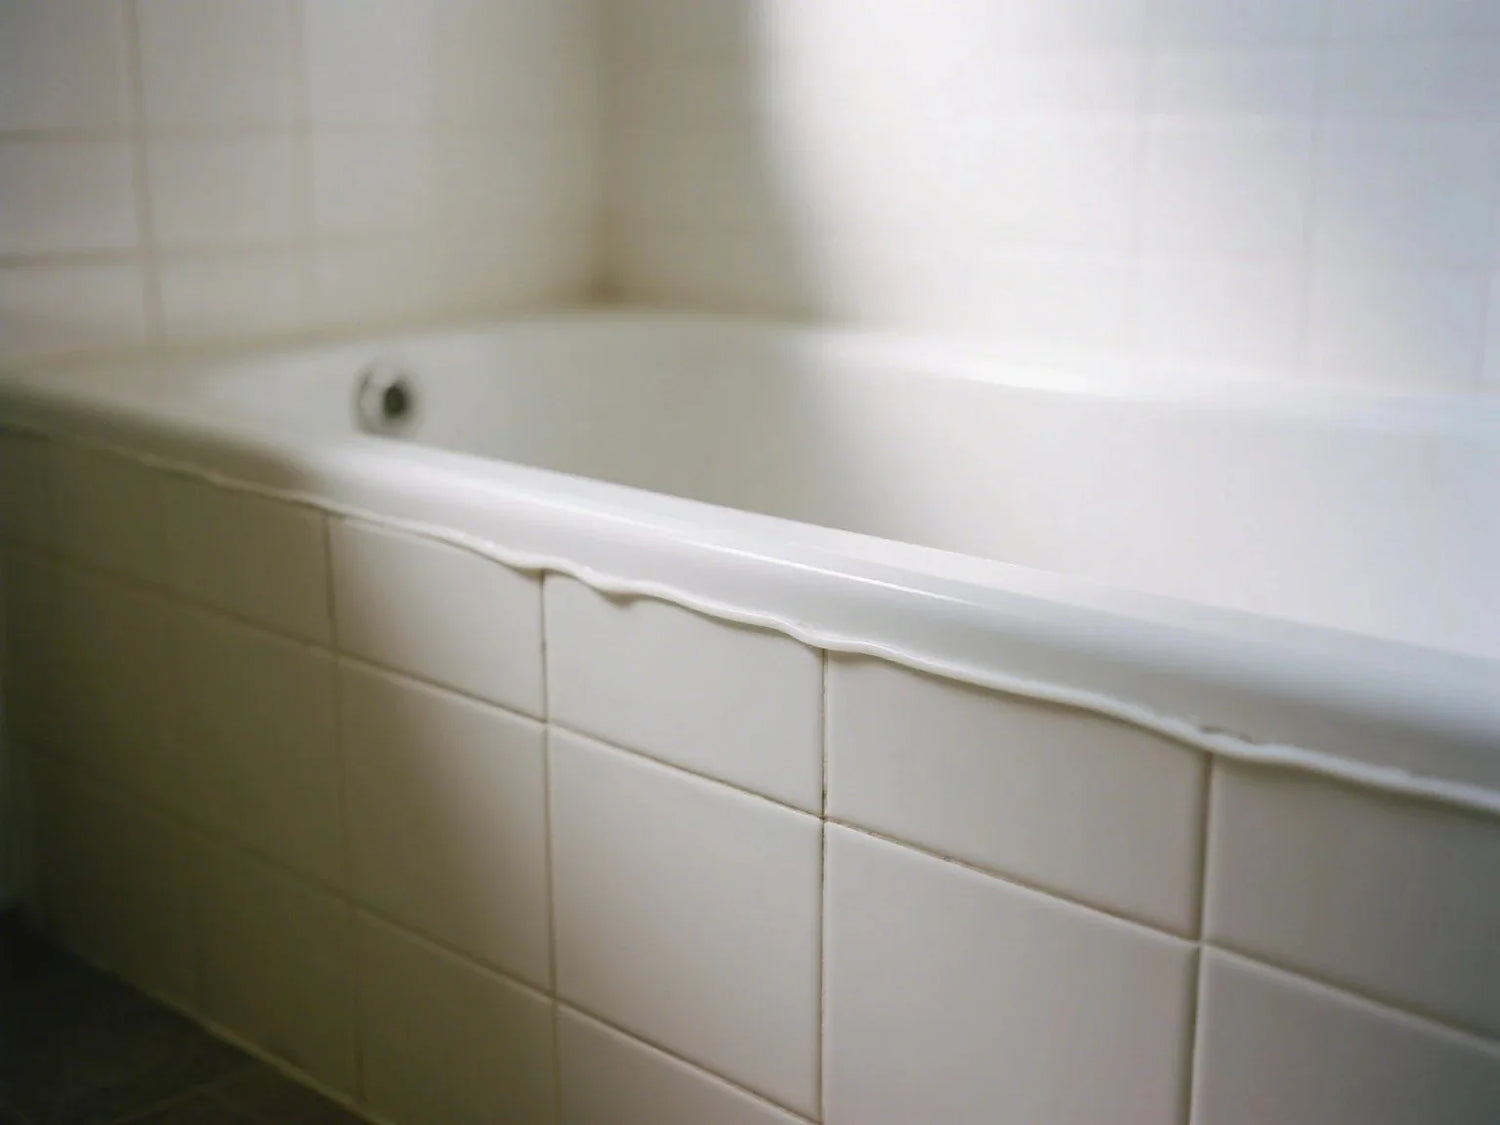
A fresh, clean line of tub caulk is more than just a finishing touch; it's your bathroom's most important defense. It stands between water and your walls, preventing leaks, stopping mold and mildew, and protecting your home from expensive damage. Whether you’re a seasoned DIY pro or tackling your first home improvement project, understanding how to choose and apply the right sealant is essential.
This guide provides everything you need to know. We will walk you through selecting the right caulk, preparing your surfaces, and applying a perfect bead of caulk that will last for years. Let's get your bathroom sealed, safe, and looking its best.
Tub Caulk: What It Is and Why It Matters
At its core, caulk is a flexible material used to seal gaps and joints. Around a bathtub, its job is critical. The seam where your tub meets the tub surround or tile is a prime spot for water to seep in. Without a proper seal, water can get behind walls, leading to wood rot, drywall damage, and unseen mold and mildew growth.
Purpose of Caulk
The main job of tub caulk is to create a waterproof, airtight seal. It stops water from getting into gaps, which helps prevent structural damage and the growth of unhealthy mold. A clean caulk line also gives your bathroom a professional, finished look.
Types of Tub Caulk
Not all caulk is created equal. Choosing the correct type of caulk for a wet environment like a shower or bath is the most important step.
- 100% Silicone: This is the top choice for any high-moisture area. Bath silicone is completely waterproof, highly flexible, and contains additives that make the sealant is resistant to mold and mildew. Its flexibility allows it to move with the slight shifts of the tub without cracking. And it is widely recognized as the best caulk for shower and tub areas due to its long-lasting protection and flexibility.
- Acrylic Latex: This type of caulk is water-based, making it easy to apply and clean up with just soap and water. Acrylic latex caulk is also paintable. Its main drawback is that it’s not very water-resistant and can break down in damp conditions, making it a poor choice for sealing a tub where it meets the wall. It’s better for dry areas like baseboards or window trim.
- Siliconized Acrylic Latex (Hybrid): This is a middle-ground option. It’s an acrylic caulk with added silicone to improve its water resistance and flexibility. It's easier to work with than pure silicone but doesn't offer the same level of long-term protection in a constantly wet environment. It’s a good choice for kitchen backsplashes but probably not the best for direct water contact in a shower.
Visual Comparison Chart
This table breaks down the key differences to help you decide.
| Caulk Type | Pros | Cons | Best Use |
|---|---|---|---|
| 100% Silicone | Extremely durable, waterproof, flexible, excellent mold and mildew resistance. | Cannot be painted, requires mineral spirits for cleanup. | Tubs, showers, sinks, and any area with direct water contact. |
| Acrylic Latex | Paintable, very easy to apply, simple soap-and-water cleanup. | Not waterproof, can crack or degrade in wet areas. | Trim, baseboards, and dry areas away from the tub. |
| Siliconized Acrylic (Hybrid) | More flexible and water-resistant than pure acrylic, easier to use than pure silicone. | Less durable and mold-resistant than 100% silicone. | Kitchen backsplashes, areas with low to moderate moisture. |
How to Choose the Right Caulk for Your Tub
With the different types in mind, how do you pick the right caulk for your specific caulking project? The answer almost always comes down to location and moisture exposure.

Match Caulk to Situation
For Tubs and Showers: Always choose 100% silicone or an advanced silicone formula. This type of bathtub sealant is specifically designed for constant exposure to moisture and provides a long-lasting waterproof barrier. When it comes to caulk vs silicone for a bathtub sealant, silicone is the clear winner.
For Older Tubs: If you have an older, heavy cast-iron tub, you still need silicone, but pay close attention to flexibility. These tubs can settle, and a flexible sealant will prevent cracking.
For Painting Needs: If you need to paint the caulk, do not use it directly next to the tub. Use acrylic or a hybrid caulk for the trim around the bathroom and use clear or colored silicone for the tub itself.
Visual Decision Aid
Imagine a simple flowchart. Does the area get wet daily? If yes, use silicone. If no, you can consider other options. Do you need to paint the caulk line? If yes, and the area is dry, use acrylic latex. If it gets a little damp, use a siliconized acrylic. For the seal around the tub itself, the path always leads to 100% silicone.
Specialty and Eco Options
According to the U.S. Environmental Protection Agency (EPA), VOCs are emitted as gases from certain solids or liquids—including many home improvement products like caulks, paints, and adhesives—and can contribute to short- and long-term health issues. Look for low-VOC (Volatile Organic Compound) formulas if you or your family members are sensitive to chemical smells. These products release fewer fumes into the air, making your home improvement project healthier.
Prepping for Caulking a Tub: Tools & Setup
A great caulking job is all about preparation. Skipping this step is the number one reason why new caulk fails. Taking the time and patience naturally to prep the area will ensure your sealant can make a strong bond.
Essential Tools
Having the right tools makes all the difference. Before you start, gather these items:
- Caulk gun
- Painter’s tape
- Utility knife or a dedicated caulk removal tool
- Scraper or putty knife
- Cleaning supplies: a stiff brush, rubbing alcohol or bleach solution, and clean cloths or a paper towel
- Caulk smoothing tool (or your finger and a cup of water)
- Vacuum or shop vac
Surface Preparation: This is the most crucial phase.
- Remove the old caulk completely. Use a utility knife to slice through the top and bottom edges of the old caulk or sealant. Then, use a removal tool or pliers to pull it out in long strips.

- Scrape away any leftover caulk. A plastic scraper can prevent scratching acrylic or fiberglass tubs.
- Vacuum up all the debris. This prevents small pieces from getting trapped under the new caulk.
- Clean the joint thoroughly. Use a brush with rubbing alcohol to kill any lingering mold and mildew. Wipe down the area until it is perfectly clean and dry. Any soap scum, dust, or moisture will prevent the new silicone from being able to adhere properly.
Troubleshooting Prep Pitfalls
Is the old caulk hard and brittle? You can buy a caulk softener spray to help loosen its grip. If you find minor grout or tile damage underneath, repair it before you calk a tub. The new caulk needs a solid, stable surface to bond to.
How to Caulk a Tub: Step-by-Step Guide
Once your surface is clean, dry, and ready, you can start caulking a bathtub. Work slowly and methodically for a result that will look perfect.
Step 1: Fill the Tub with Water (Pro Tip!)
This is a trick the experts use. If you have a heavy fiberglass or acrylic tub, fill it with water before you begin. The weight of the water pulls the tub down, widening the gap slightly. By caulking a tub in this state, the caulk bead will be in a neutral position. When you drain the water, the caulk will compress instead of stretch when you later fill the tub for a bath, which prevents it from pulling away from the tile.
Step 2 : Tape Off the Edges
Apply two strips of painter’s tape, one on the wall and one on the tub, to create a channel for your caulk line. This is the secret to getting a perfectly straight, clean bead. The space between the tape should be the exact width you want your caulk bead to be (usually 1/8 to 1/4 inch).
Step 3: Cut the Caulk Tube Tip
Use a utility knife to cut the tip of the caulk tube at a 45-degree angle. The size of the opening should match the width of the gap you are filling. A small hole gives you more control. Start small; you can always make it bigger. Puncture the inner seal of the caulk tube with a long nail or the tool on your caulk gun.
Step 4: Apply a Steady, Consistent Bead
Load the tube at a 45-degree angle into the caulk gun. Start in a corner and push the caulk forward, applying steady pressure on the trigger. Move at a consistent speed to lay a smooth, even bead of caulk. Work in a small section at a time, from one corner to the next, without stopping.
Step 5: Tool the Bead
Immediately after applying the bead of sealant, smooth it out. You can use a caulk smoothing tool or a wet finger. Press gently and drag it along the caulk line to create a concave, professional finish. This pushes the sealant into the gap and removes any excess caulk. Wipe the excess off your finger or tool with a paper towel between swipes.
Step 6: Remove the Tape
While the caulk is still wet, carefully remove the painter’s tape. Pull it away from the fresh caulk at a 45-degree angle for the sharpest line possible. If you wait for the caulk to skin over, you might pull up the edge of your new bead.
Step 7: Let it Cure
Patience is key. Let the caulk to dry completely. Most silicone sealant products require at least 24 hours to cure before they can be exposed to water. Check the instructions on your caulk tube for the specific time.

Common Mistakes and Easy Fixes
- Applying caulk over old caulk: This is a recipe for failure. The new sealant won't bond properly and will peel quickly. Always remove old caulk.
- Using the wrong caulk type: Using latex or silicone in the wrong place is a common error. Latex caulk in a wet shower will fail.
- Skipping the cure time: Getting the new caulk wet too soon will ruin the seal and can lead to a sticky mess.
Maintain Your Caulked Bathtub
Once you’ve successfully completed your caulking a tub project, a little maintenance will keep it looking great for years.
- Routine Inspection: Once a year, take a close look at the caulk line around your tub. Look for any signs of cracking, shrinking, or peeling.
- Mold Prevention: To prevent mold and mildew, ensure your bathroom is well-ventilated. Use an exhaust fan during and after showers. Wiping down the tub and caulk after use also helps keep it dry.
- When to Replace: Act at the first sign of failure. A small gap can let a surprising amount of water through. Don't wait to remove the old caulk and apply a fresh bead. Timely replacement is the best way to avoid costly water damage repairs down the road.

Product Reviews: Best Tub Caulk Picks
Here are the features to look for when choosing the best tub caulk for your needs.
| Category | Winner (Features to Look For) | Key Features |
| All-around Silicone | 100% Silicone Sealant | Waterproof, permanent flexibility, 10+ year mold-free product protection. |
| Modern Color Finish | Colored 100% Silicone Sealant | All the benefits of silicone but available in colors like black, bronze, or tan to match modern tile and fixtures. |
| Budget-Friendly | Siliconized Acrylic Latex Sealant | Paintable, easy cleanup. Best for low-moisture areas around the bathroom but not for the tub itself. |
| Eco-Friendly | Low-VOC Silicone Formulas | Labeled as "Low-VOC" or "Green" for better indoor air quality with less odor during application and curing. |
The consensus from both experts and DIY communities is clear: for a project like caulking a bathtub, 100% silicone is the most reliable choice for its superior waterproofing and longevity.
Real-World User Stories & Pro Tips
- DIY Wins: A home renovator shared their story about tackling their first bathroom remodel. They said, "I was nervous to calk a tub, but using painter’s tape was a lifesaver. My caulk line looks like a professional did it. I followed the steps: remove old caulk, clean the surface, tape it off, and smooth the bead. It turned out great!"
- “Learn from My Mistake”: Many DIY beginners share a common regret: not preparing the surface well enough. One user wrote, "I was in a hurry and didn't get all the old caulk or sealant off. The new silicone started peeling in six months. I had to do it all over again. Take your time with the prep work; it's worth it."
Conclusion & Quick Reference
Properly caulking bathroom tub is one of the most effective ways to protect your home and keep your bathroom looking fresh. It is a project that any homeowner can master with the right knowledge and a little patience.
To ensure success, always remember these key tips to help you succeed:
- Use 100% silicone for tubs and showers. Its waterproof and flexible nature is essential for these high-moisture areas.
- Preparation is everything. You must remove the old caulk completely and work on a clean, dry surface for the new caulk to adhere correctly.
- Allow proper cure time. Give your new bead of sealant at least 24 hours to dry before exposing it to water.
By following these guidelines, you can caulk your bathtub the right way and enjoy a leak-free, beautiful finish that lasts for years.
FAQs about Tub Caulk
1. Is silicone better than caulking?
This question can be confusing because silicone is a type of caulk. The phrasing caulk vs silicone often compares silicone caulk to acrylic latex caulk. For a bathtub or shower, silicone caulk is far better because it is 100% waterproof and mold-resistant. Caulk and silicone sealant are terms often used interchangeably, but for a tub, you want a product that is specifically a silicone sealant.
2. How often should I recaulk my tub?
Most quality silicone bathtub caulk lasts between 5 and 10 years, but how long it actually lasts depends on how humid the bathroom is, how well it's ventilated, how often the tub is used, and the craftsmanship of the first application. Regardless of how the product is advertised, checking the caulk once a year is a must. Look for cracking, narrowing, peeling or discoloration in the seams, especially around the corners of the tub and around the fixed parts. Even small cracks where water seeps in can harbor dirt, grow mold and leave unsightly water stains. If the mold stains on the caulk won't wash off, or if it's soft to the touch and crumbles when you touch it, don't hesitate to shovel out the old one and re-glue it. Doing this maintenance can firmly plug water seepage, but also make the bathtub and surrounding materials last for many more years, saving a lot of money on repair and replacement.
3. Do you have to fill a tub with water before caulking?
Yes, this is highly recommended - especially for acrylic and fiberglass tubs, which are lightweight and prone to minor movement when filled with water. Filling the tub with water before caulking simulates the actual conditions that the sealant will encounter during application. The added weight will slightly widen the joint between the tub and the wall, allowing the caulk to stabilize in a neutral position. Once the water drains, the caulk will compress rather than stretch, reducing the risk of future cracking or separation. Although cast iron or steel tubs are much heavier and don't bend as easily, many professionals still follow this step as a precaution. In short, filling the tub adds an extra layer of reliability to your caulking job and helps ensure long-term adhesion and durability of the sealant.
4. How long do you wait to take a shower after caulking a tub?
After caulking the tub, be sure to allow the sealant to fully cure before exposing it to moisture. For most 100% silicone bathtub caulks, the cure time is at least 24 hours, but the actual time varies depending on factors such as room temperature, humidity, and the specific product formulation. Some premium or fast-curing silicone sealants claim to be waterproof in as little as 3 to 6 hours - but even in this case, it's safest to wait the full recommended time to ensure maximum adhesion and durability. Rushing this step is one of the most common reasons for caulking failures, which can lead to premature flaking of caulk, mold growth, or water leaks. Be sure to check the manufacturer's instructions on the caulk tube and allow extra time if in doubt.
5. How many tubes of caulk to do a bathtub?
For a standard-sized bathtub, one tube of caulk is typically more than enough. One 10.1 oz caulk tube contains enough sealant to caulk around several tubs. This amount will usually cover the entire edge of the tub where it meets the walls and floor, with some left over. However, how much you actually use depends on the situation, as the width of the seam, how you glue it, and whether you want to seal other seams and fixtures along the way will all affect the amount you use. If you do not have much experience in gluing, it is best to have an extra tube. In the event that you make a mistake, need to make a repair, or if the glue is too thick, or if the edge of the bathtub is uneven, the extra caulk will come in handy. When you're not sure how much to use, look directly at the instructions on the caulk tube; most of the labeled coverage lengths are based on a 1/4-inch gluing thickness.
References
U.S. Environmental Protection Agency (EPA). Volatile Organic Compounds' Impact on Indoor Air Quality. https://www.epa.gov/indoor-air-quality-iaq/volatile-organic-compounds-impact-indoor-air-quality


Leave a comment
This site is protected by hCaptcha and the hCaptcha Privacy Policy and Terms of Service apply.