


A toilet that’s slow to fill wastes time, water, and patience. The good news: most fixes are simple and take just a few minutes. In many homes, the cause is debris or mineral buildup inside the fill valve, a partially closed shutoff valve, or an aging fill valve that’s past its prime. If your toilet tank is not filling like it used to, you can often restore normal speed today with a quick cleaning. If cleaning doesn’t work, a straightforward replacement usually does.
Here’s the plan. You’ll get the fast answer first, then a clear path to diagnose, fix, and prevent a slow-filling toilet. We’ll explain what “normal” looks like, how to time your refill, and which tests isolate the problem. We’ll also help you decide when it’s worth calling a plumber. Expect plain language, easy steps, and simple checks you can do with the tank lid off and a towel nearby.
Before we begin, one key benchmark: a healthy toilet tank should refill in about one minute after a flush. If your toilet is filling slowly and it takes much longer, something is restricting water flow. Let’s find it and fix it.
Toilet slow to fill: quick diagnosis and first fixes
Is your toilet slow to fill after a flush? This common issue is often easy to fix, and in this section, we’ll walk you through a simple diagnosis and a few quick fixes to get your toilet tank refilling at the right speed again. Whether it’s a partially closed valve or debris in the fill valve, you’ll learn how to fix a slow filling toilet tank in no time. Let’s get started!
60-second checklist: open shutoff fully, time refill, flush the fill valve
When a toilet tank is slow to fill, start with this quick win. These steps solve most cases without tools.
-
Make sure the shutoff valve (the small valve at the wall or floor) is fully open. Turn it counterclockwise until it stops. Partially closed valves are a common reason your toilet is slow to fill.
-
Lift the tank lid and flush. Start a timer as soon as the flapper drops and the fill starts. Stop the timer when the water stops and the float settles. Target: about one minute.
-
If it’s slow, try a simple fill valve flush to clear debris. You’ll use a cup and two minutes. Details below.
If you saw an instant improvement after opening the shutoff, you’re done. If not, keep going.
Time your refill: target ≈ 1 minute; longer indicates a fault
Timing your refill sets a baseline and proves your fix. Most modern toilets should refill in about one minute. Older toilets or low-pressure systems might take a little longer, but multi-minute refills are a red flag. Run the timer before and after each step, and write down the times. This helps you see what worked and decide if you need a new part.
Cup-and-flush method to clear debris from the fill valve (no tools)
Debris and mineral flakes often get stuck in the fill valve, reducing flow. The “cup-and-flush” purge often restores full speed in under five minutes. You won’t even remove the entire valve—just the top cap.
Step-by-step (read once, then do):
-
Turn the water supply off at the shutoff valve. Flush to drain the tank. Hold the handle down to empty most water. Place a towel to catch drips.
-
Remove the small refill tube where it connects to the fill valve and rest it above the tank.
-
Open the fill valve cap. Most caps twist off with a quarter turn while you gently lift the float arm or float cup. Keep track of the small rubber seal under the cap.
-
Hold a plastic cup upside down over the exposed valve opening to act as a splash shield.
-
Turn the water supply on briefly—1 to 2 seconds—to flush debris out of the valve. Turn it off. Repeat once more if needed. You may see sand-like grit or mineral flakes.
-
Inspect the small rubber seal in the cap. Rinse it clean. If it’s torn, hardened, or misshapen, plan to replace the fill valve.
-
Reassemble the cap and reconnect the refill tube. Turn the water on. Let the tank fill and time it again.
If your toilet was slow to fill because of grit, you’ll often hear a stronger rush and see your refill time drop back toward one minute.
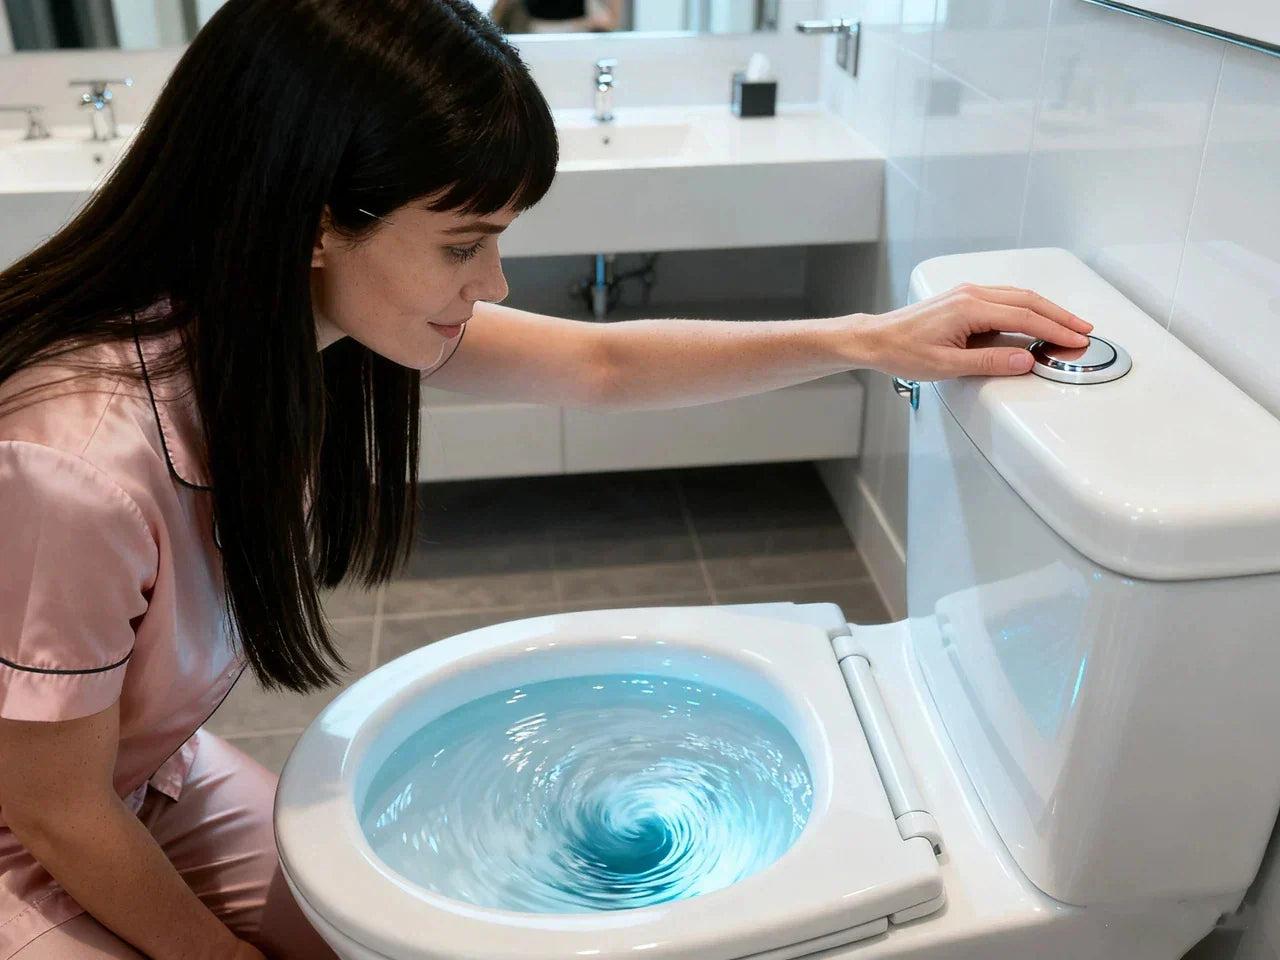
But if you’re looking for an upgrade that not only solves common issues but also enhances your bathroom experience, consider switching to a smart toilet. Smart toilets, equipped with 1000g Map technology, offer precise control over water flow and pressure, ensuring optimal performance with every use.

Visual: 3-step mini flowchart (text version)
Start → Is the shutoff valve fully open?
-
No: Open it fully. Flush and time the refill.
-
Yes: Flush the fill valve with the cup method above. Time the refill. Still slow? Inspect the float and refill tube, then move to the full troubleshooting steps below.
Quick reference: symptoms → causes → DIY fixes (at-a-glance)
Here’s a fast map from symptom to likely cause and fix. Use it to choose your next step when your toilet slow to fill problem won’t go away.
| Symptom | Likely cause | Fix | Skill level | When to call a pro |
|---|---|---|---|---|
| Tank takes 2+ minutes to fill | Debris/mineral buildup in fill valve | Cup-and-flush cleaning; replace worn cap seal | Easy | If no improvement after cleaning and replacement |
| Tank barely fills, flow weak | Partially closed or stuck shutoff valve; kinked supply line | Open/replace shutoff; straighten/replace supply line | Easy–Medium | If shutoff is corroded or leaks |
| Fill stops early, waterline low | Misadjusted float; waterlogged float ball | Adjust float; replace float or update to modern valve | Easy | If float won’t hold setting or keeps sticking |
| Bowl water level stays low after refill | Refill tube not aimed into overflow; siphon tube clipped wrong | Aim refill tube into overflow; secure above waterline | Easy | If bowl level swings wildly or you hear gurgling |
| Noisy, erratic, surging fill | Worn fill valve seals; debris under diaphragm | Clean or replace fill valve | Easy | If surging continues after cleaning |
| Tank never fills, almost no flow | Blocked supply; shutoff stuck; municipal supply issue | Bucket-flow test; replace valve; call utility for outage | Medium | If house-wide pressure is very low |
| Sewer smells, drains gurgle, weird refill behavior | Vent stack blockage (rare for slow fill) | Inspect vent openings, remove visible debris | Medium–Pro | If roof access is unsafe or blockage is deep |
Stats and thresholds that help:
-
Normal tank refill time: about 1 minute after a flush.
-
Fill valve typical lifespan: about 7 years in many homes, shorter in very hard water.
Want it on your phone while you work? Copy this table into your notes app for a mobile-friendly view.
How a toilet refills and what “normal” looks like
If you understand the sequence, it’s easier to find what’s slowing you down. After you flush, the flapper drops and seals the tank. The fill valve opens to let water in. A float (a round ball on a metal arm or a sliding float cup) rises with the water level and signals the valve to shut when the tank reaches the set waterline. A small refill tube aims water into the overflow tube to top off the bowl. The shutoff valve at the wall and the supply line bring water into the tank.
Normal signs you can trust:
-
Sound: A smooth, steady hiss or gentle rush that fades out as the float rises. No loud squeal, sputter, or chattering.
-
Waterline: Stops at the marked waterline on the tank, usually about 1/2 to 1 inch below the top of the overflow tube. If your toilet tank is filling too low, adjust the float.
-
Refill speed: About one minute from start to finish. If your toilet takes too long to fill, you likely have a restriction or misadjustment.
-
Anti-siphon action: The valve should prevent backflow. Modern fill valves include this on purpose. It’s important for health and often required by code.
Why buildup slows filling: Water carries small particles. Hard water leaves mineral scale. These collect in the tiny opening inside the fill valve, around the valve seal, or in the supply line. The narrower the path, the slower the water flow, according to the U.S. Geological Survey, which discusses how hard water can affect plumbing systems (USGS, 2021). A quick purge often restores full flow, but very old valves may not seal or modulate well after years of deposits and wear.
PAA: How long should a toilet tank take to fill after a flush?
About one minute is a good target. If it consistently takes much longer, look for a partially closed water supply valve, debris inside the fill valve, or signs of low water pressure in the house.
Step-by-step troubleshooting checklist (from easiest to advanced)
Follow these steps in order. Stop when your slow-filling toilet returns to normal.
Shutoff valve and supply line: fully open, remove kinks, bucket-flow test
Start at the source. Is the shutoff valve fully open? Turn it counterclockwise until it stops (hand tight). Make sure the braided supply line isn’t kinked. If you suspect poor supply, do a quick bucket test:
-
Turn off the shutoff valve. Place a small bucket or large cup under the line connection at the toilet. Disconnect the supply line from the tank, not the wall.
-
Open the shutoff valve briefly to see flow into the container. You should get a strong, steady stream. Close the valve.
-
Weak bucket flow suggests a bad shutoff valve or upstream pressure problem. Strong bucket flow points to a restriction inside the tank’s fill valve.
Reattach the line, open the valve, and move on.
Fill valve inspection and flush: cap, seal, and simple cleaning
Remove the tank lid. Look at the fill valve. If it’s an older style with a large float ball and metal arm, check for stiffness or corrosion. If it’s a modern vertical valve with a float cup, look for smooth sliding.
Do the “cup-and-flush” cleaning you saw earlier. While you have it open, examine the small rubber seal under the cap. If it’s cracked, flattened, or hardened, cleaning may help today but replacement will soon be needed. Reassemble, restore water, and time your refill.
Float and refill tube: waterlogged float ball, sticky float cup, proper tube placement
If the water level stops early or the toilet tank is not filling to the line, look at the float:
-
Float ball: If it’s waterlogged (heavy, sits low in the water), it will shut the valve too early. Replace the float ball or upgrade to a modern adjustable fill valve.
-
Float cup: If it sticks on the shaft, clean the shaft and ensure nothing rubs against it. It should slide freely.
Check the refill tube. It must aim into the overflow tube to refill the bowl. If it’s out of place or clipped below the tank waterline, the bowl won’t fill right and can back-siphon. Aim it into the overflow and secure it above the waterline. A short refill tube fix can solve the common “toilet bowl not filling” complaint after a flush.
Water pressure and flow: quick gauge test at a hose bib, compare to tank fill behavior
If every test points to weak supply, check house water pressure. A simple garden-hose gauge at an outdoor spigot can show static pressure. Many homes run around 40–80 psi. If pressure is low house-wide, your toilet isn’t the only thing affected. If pressure is fine at the house but the toilet still fills slowly and the bucket test at the toilet was weak, the shutoff valve may be failing internally and restricting flow.
DIY fixes that solve most cases (illustrated how-tos)
These are the repairs that fix a toilet slow to fill in most homes. Work carefully and turn off the water before opening anything. Keep towels handy.
Clean the fill valve: isolate water, remove cap, flush debris, reassemble, retest
Use this when your time to refill is slow and you suspect grit or scale. You already saw the quick version. Here’s the full, step-by-step sequence:
-
Turn off the water at the shutoff valve. Flush and hold the handle to drain most of the tank.
-
Disconnect the small refill tube from the fill valve top and set it aside.
-
Release the fill valve cap. Gently lift the float arm/cup as you rotate the cap a quarter turn. Set the cap and small seal aside.
-
Place a cup upside down over the valve opening to block splashes.
-
Brief flush: Open the shutoff valve for 1–2 seconds to purge debris. Close it. Repeat if water looked cloudy or you saw grit.
-
Rinse the cap and rubber seal. If the seal is damaged, plan on a replacement valve.
-
Reinstall the seal and cap. Reconnect the refill tube and aim it into the overflow tube.
-
Open the shutoff valve. Let the tank fill. Time the refill and check the waterline.
If your toilet tank slow to fill problem was caused by debris, it should be back near one minute now.
Replace the fill valve: when cleaning fails or valve is older than about 7 years
If cleaning didn’t help or your valve is old, install a new fill valve. Choose an adjustable, anti-siphon model that fits your tank height. Most modern valves fit standard toilets and include instructions. Expect about 20–40 minutes.
Basic install overview:
-
Turn off the water and flush to empty the tank.
-
Sponge out remaining water at the bottom of the tank.
-
Disconnect the supply line from the fill valve shank beneath the tank.
-
Remove the old fill valve nut from under the tank and lift the valve out.
-
Set the new valve height so the top sits above the overflow tube per the instructions.
-
Drop it in, hand-tighten the mounting nut from below, and reconnect the supply line.
-
Reattach the refill tube, aiming into the overflow.
-
Turn the water on and check for leaks. Adjust the water level to the tank’s waterline.
Tip: Do not overtighten plastic nuts. Hand tight plus a small tweak is enough to seal without cracking parts.

Repair/replace shutoff valve and supply line: stuck, corroded, or restricted parts
If the shutoff won’t open fully, leaks, or barely allows flow, it can make a toilet slow to fill even with a new valve. Replacing a shutoff valve usually requires shutting water off to the house and using basic plumbing tools. If you’re not comfortable, call a plumber. Replace any old, rigid supply tube with a braided, stainless-steel flex line sized to your toilet and valve. This reduces kinks and improves flow.
Update old float ball assemblies: convert to a modern, adjustable fill valve
Older float ball systems can stick, bounce, or shut off early. Upgrading to a modern vertical valve with an adjustable float cup improves reliability and refill speed. After installing, set the waterline and test the timing. This upgrade also brings built-in anti-siphon features common in newer valves.
Less common causes and how to test them
Most slow fills come from debris, a misadjusted float, or a failing valve. But in some homes, the issue lies elsewhere. Here’s how to rule out the rarer cases.
Clogged plumbing vent: symptoms, safe check, when to hire a pro
The vent stack keeps air pressure equal in your drain system. While vent problems usually show up as slow draining and gurgling, they can sometimes create odd refill behavior if the bowl doesn’t refill properly due to siphoning. Signs include gurgling drains and sewer smells. If you suspect a vent blockage, a visual check from the ground (binoculars) may show leaves or a nest at the top. Do not walk on a steep or slick roof. Call a pro if you need a closer look or cleaning. Call a professional plumber if you suspect a serious vent blockage or need a roof-level inspection. A proper diagnosis, combined with a high-pressure toilet, ensures your system runs cleanly and efficiently.

Municipal water issues and sediment surges: call utility, add basic filtration if needed
After street work or a main break, sediment can surge into home lines and bog down valves. If your slow fill started right after muddy or rusty water events, clean the fill valve again. You can install a small sediment screen or a whole-house filter if this is common in your area. For widespread low pressure, contact your water utility.
Hidden leaks/restrictions: dye test, listen for running water, inspect braided lines
If the toilet tank won’t fill and you also hear water running at odd times, run a quick dye test: add food coloring to the tank, wait 10 minutes without flushing, and check the bowl. Color in the bowl means a leaking flapper, which doesn’t slow filling but can mask timing because the tank never quite “finishes.” Also check the braided supply line for kinks behind the toilet. Replace lines older than 10 years.
PAA: Can a clogged vent stack make a toilet fill slowly?
Usually no. A vent issue affects draining, not the fresh water supply. But it can alter bowl refill behavior. Treat vent checks as a last step after you’ve ruled out supply, shutoff, and fill valve issues.
Replacement guide: choosing and installing the right fill valve
When cleaning fails or the valve is old, replacement is a smart, low-cost fix.
Selection criteria that matter:
-
Anti-siphon compliance: Choose a valve designed to prevent backflow. This protects your home’s water from contamination.
-
Adjustable height and water level: Lets you set the valve to your tank and mark the proper waterline.
-
Quiet fill: Many valves include flow control for a quieter refill.
-
Compatibility: Standard 7/8-inch shank fits most toilets. Check your tank’s height and clearance.
Installation overview (20–40 minutes):
-
Shut off, drain, remove the old valve, set the new valve height, install, reconnect the supply line, aim the refill tube, and test. See the earlier step-by-step for more detail.
Cost snapshot:
-
DIY parts: about $10–$40 depending on features.
-
If you hire a plumber, labor varies by region. The visit is usually short, especially if the shutoff valve works and the tank bolts are in good shape.
PAA: Should I replace or clean the fill valve for a slow-filling toilet?
Try cleaning first. If cleaning doesn’t restore speed, the valve is older than about seven years, or seals look worn, replace it. Replacement is inexpensive and often quieter and more reliable.
Prevention and maintenance (stop slow fills from returning)
Hard water and tiny particles are always moving through your toilet water supply. A simple routine keeps the toilet tank filling properly.
Hard water mitigation:
-
Do a quick valve flush every 6–12 months. It takes two minutes and helps prevent grit from building up.
-
In very hard water areas, a vinegar soak on removable parts can help dissolve scale. Keep vinegar away from rubber seals that are not rated for it.
-
Consider a basic sediment filter for the house if you often see sand-like grit.
Seasonal maintenance:
-
Do the one-minute timing test twice a year. Write the time on a sticky note inside the tank lid.
-
Exercise the shut-off valve—close and reopen it once or twice a year to keep it from seizing.
-
Inspect the refill tube clip and float movement. Small adjustments now save headaches later.
Best practices:
-
Do not overtighten the supply line connection. It can crack plastic parts.
-
Keep the refill tube aimed into the overflow tube, and keep its end above the waterline.
-
Replace braided supply lines every 10 years or if you see rust or bulges.
PAA: How do I keep my toilet tank from filling slowly over time?
Flush the valve once or twice a year, keep the shutoff fully open, and replace the fill valve when it gets noisy, erratic, or older than about seven years—especially in hard water.
Red flags to call a pro
If cleaning and replacement don’t improve your slow-filling toilet tank, the shutoff is stuck or leaks, the tank or bowl is cracked, you see constant moisture around fittings, or roof/vent work is required, bring in a licensed plumber. Also call for house-wide low pressure that doesn’t match your neighbors—your water supplier or main line may be involved.

What a pro will do
A plumber will test water pressure, check shutoff and supply line restrictions, replace aging parts, and verify venting if symptoms suggest it. Most repairs, including a new fill valve, take under an hour unless shutoffs or tank bolts are corroded.
Tools
-
Quick timing log: write today’s refill time, then note after each fix.
-
Parts checklist: new fill valve, braided supply line, sponge, towel, adjustable wrench, small bucket, and a plastic cup for safe purging.
Interactive decision tree (text version you can follow now)
Start here:
- Does the tank take more than 1 minute to refill?
- No → Done. Monitor seasonally.
- Yes → Is the shutoff fully open?
- No → Open it. Flush and time again. If still slow, continue.
- Yes → Cup-and-flush the fill valve. Time refill.
- Back to ~1 minute? → Success. Add a reminder to flush the valve in six months.
- Still slow? → Adjust float and confirm refill tube placement.
- Fixed? → Success.
- Still slow? → Replace the fill valve.
- Fixed? → Success.
- Still slow? → Check shutoff and supply line (bucket test).
- Weak bucket flow → Replace shutoff/supply line or call a plumber.
- Strong bucket flow → Look for rare causes (vent, municipal, hidden restrictions) and consider a pro visit.
Real-world example to make this simple
A renter notices their toilet is filling slowly and takes over two minutes. They open the shutoff all the way, but it doesn’t help. They try the cup-and-flush method and see tiny white flakes shoot out. After reassembly, the tank fills in about 55 seconds. Two months later, it slows again. This time, the seal under the cap looks warped. They replace the fill valve, set the waterline, and get a steady 50–60 second refill every time. The total cost is under a takeout dinner, and they keep a note inside the tank lid with the date and time.
Conclusion
In conclusion, addressing a toilet slow to fill is often a straightforward task that can be fixed with a few simple steps. Whether it’s cleaning the fill valve, adjusting the float, or ensuring the shutoff valve is fully open, many issues can be resolved without the need for a plumber. By taking proactive steps, like regularly maintaining your toilet and performing minor toilet repair tasks, you can avoid slow refill times and keep your toilet running smoothly. If you’ve followed the troubleshooting steps and your toilet is still slow to fill, it may be time to fix a slow-filling toilet by replacing worn-out parts like the fill valve. Keeping your toilet in top shape not only ensures better performance but also saves you from future headaches.
FAQs
1. Why is the toilet taking so long to fill?
If your toilet is taking forever to fill, it's likely due to something blocking the water flow. A common issue is mineral deposits or debris building up inside the fill valve, restricting water flow. Another potential cause could be a partially closed shutoff valve or an old, worn-out valve that’s not working as efficiently as it should. If your toilet is slow to fill, start by checking that the shutoff valve is fully open—turn it counterclockwise to ensure it's not partially closed. Then, time how long it takes to fill the tank. If the refill is still slow, use the “cup-and-flush” method to flush out any debris from the fill valve. Simply remove the refill tube, turn the water on briefly for a second, and see if this clears the buildup. If you notice no improvement, it’s a sign the valve may need replacing to restore normal flow and fix your toilet slow to fill issue.
2. How to unclog a toilet fill valve?
Unclogging a fill valve is simple and can usually be done without tools. First, turn off the water supply to the toilet and flush to drain the tank. Hold the flush lever down to empty out most of the water, then place a towel underneath to catch any drips. Next, remove the fill valve cap—this is usually just a twist-off piece. Hold a plastic cup upside down over the valve to prevent water splashing, then briefly turn the water back on for about 1-2 seconds to flush out any debris. You should see sand-like particles or grit. Once the water runs clear, rinse the cap and any rubber seals, reassemble the valve, and turn the water back on. If the flow is still weak, the valve might need to be replaced.
3. Is a slow flush always a clog?
Not necessarily. A slow flush can sometimes be caused by a clog, but there are other factors at play as well. Often, it’s related to the water level in the tank, which could be too low to provide enough pressure for a strong flush. Another reason might be a misadjusted float or a worn-out flapper that doesn’t stay open long enough, preventing the full volume of water from flushing at once. If both the fill and flush are weak, start by diagnosing the refill side first—check the fill valve, then adjust the float if needed. Afterward, inspect the flapper and rim holes to ensure they’re not clogged. This way, you can pinpoint whether it’s a clog or another issue causing the slow flush.
4. Why is the water not filling up in my toilet bowl?
If your toilet bowl isn't filling up properly after a flush, it could be an issue with the refill tube. This small tube helps direct water from the tank into the overflow tube, topping off the bowl. If the refill tube isn’t positioned correctly—either it’s too low or not aimed into the overflow tube—the bowl won’t fill properly. Sometimes, the tube may also be clipped or kinked in a way that prevents the water from reaching the overflow tube. To fix it, check that the refill tube is aimed directly into the overflow tube and positioned above the waterline in the tank. If it’s misaligned, adjust it so that the water flows freely into the bowl.
5. How to properly adjust a toilet fill valve?
Adjusting the toilet fill valve is crucial for maintaining the correct water level in your toilet tank and preventing common issues like overflows or insufficient flushing. If your toilet uses a float cup system, you’ll usually find a small screw or clip that allows you to raise or lower the float, which in turn adjusts the water level. For toilets with a float ball system, the ball is typically attached to a metal arm, and you can gently bend this arm to control the float's height and, consequently, the water level.
To set the correct water level, the waterline should sit about an inch below the top of the overflow tube. This ensures that your tank fills to the right level, avoiding the risk of overflow or running dry. Regular toilet fill valve adjustments are simple tasks you can do yourself to keep your toilet working efficiently, preventing costly plumbing issues down the road.
References


Leave a comment
This site is protected by hCaptcha and the hCaptcha Privacy Policy and Terms of Service apply.