


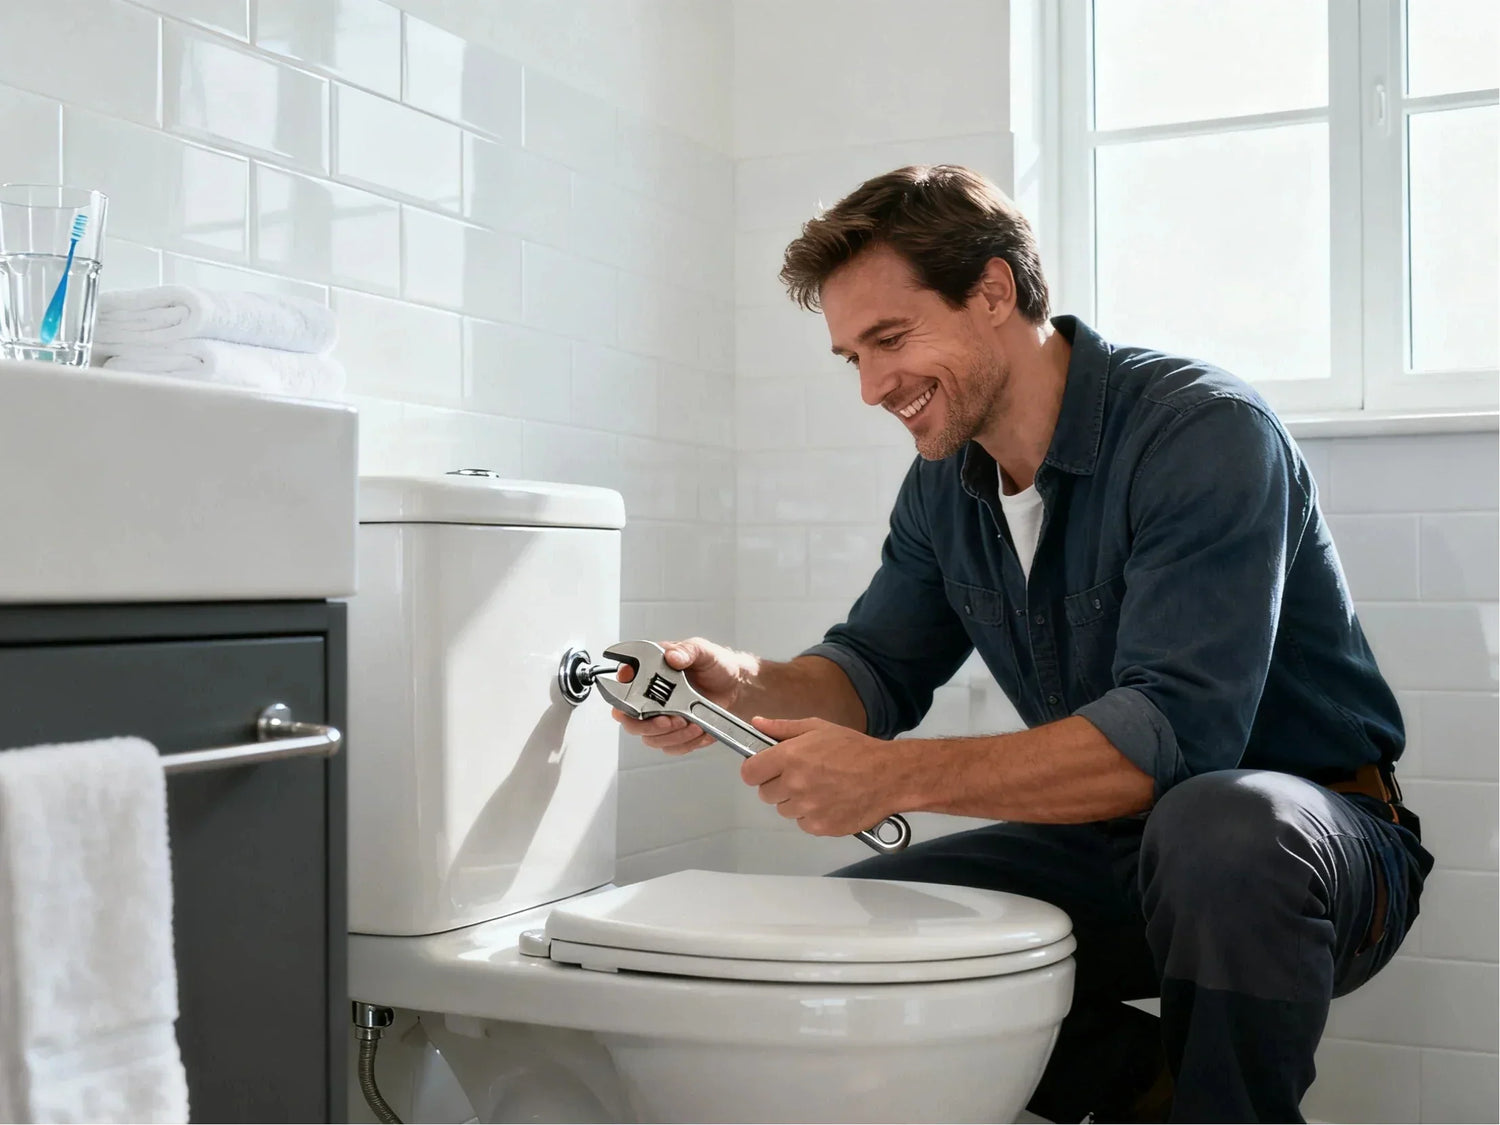
A sticky lever. A weak flush. A dated metal finish that doesn’t match anything else. A simple fix can solve all three in minutes. A modern, universal toilet handle replacement kit costs less than a family lunch, fits most tanks, and installs with basic tools you already own. This guide gives you fast answers up front, a quick fit-and-finish selector, and a ranked comparison of the top universal styles so you can buy with confidence. Then we walk you through step-by-step installation, testing, and fine-tuning. You’ll also learn how to stop silent leaks, pick finishes that match your space, and choose corrosion-resistant parts if you have hard water. At the end, you’ll find a printable checklist and links to authoritative resources to make this a smooth, 10-minute DIY plumbing repair.
Along the way, we’ll tackle the questions people ask most: Do all toilet handles fit all toilets? Can you replace just the handle on a toilet? How do you know what handle you need? How much should a plumber charge? And will a new handle fix a weak flush? Let’s make your toilet flush like new.
Toilet Handle Replacement Kit: Quick Selector
Choosing the right toilet handle replacement kit starts with knowing your toilet lever type and tank setup. Not all levers fit every toilet — designs vary by flush direction, mounting position, and material. This quick selector helps you match your current setup to the correct replacement, so you can restore smooth flushing without trial and error.
One-minute fit + finish selector (interactive widget)
Not sure which toilet flush handle will fit? Use this simple selector. If you’re reading a printout, follow the prompts as a checklist.
-
Inputs to choose:
-
Tank mount: front, side, or angled corner
-
Handle side: left-hand or right-hand flush
-
Finish preference: chrome, brushed nickel, matte black, white, or bronze
-
Tank thickness: standard or thick-front
-
Chain connection: direct to flapper chain or lift wire
-
-
Outputs to expect:
-
Compatible universal toilet flush lever options (front, side, or multi-mount)
-
Arm geometry notes: straight arm vs flexible/spring-loaded vs pre-bent
-
Install tips: reverse-thread nut reminder, chain slack target, and which hole on the lever arm to start with
-
How to use it well: snap a quick photo of your current handle and inside-the-tank lever before you start. It takes 10 seconds now and can save you guesswork later.
Fast fit cheatsheet (front-mount vs side-mount vs angled tank lever)
Look at the tank face. Is the handle centered on the front, off to one side, or on the left/right side of the tank? That’s your mount type. The toilet lever inside the tank follows the button, so your arm must clear the tank wall, fill valve, and flapper. Universal kits solve this with adjustable arms, multiple chain holes, and sometimes a flexible or spring-loaded arm that “finds” the right angle.
-
Front mount: Most common. The handle sits on the front face of the tank. A straight or slightly bent arm works well.
-
Side mount: Often on round tanks or compact toilets. An angled or adjustable arm helps reach the flapper smoothly.
-
Angled corner: Found on some compact or designer tanks. You’ll want a lever with extra adjustability, offset bends, or a flexible/spring return arm.
Quick checks that matter:
-
Arm length: Your new arm should reach the flapper without hitting the fill valve.
-
Bend profile: The arm should lift the flapper straight up without rubbing.
-
Flange/escutcheon shape: Make sure the round plate that sits outside the tank covers the hole and looks right with your style.
Budget and material guide (what $9–$25 buys)
A toilet handle replacement kit is one of the best-value bathroom fixes you can make.
-
$9–$15: Durable plastic or basic metal-look finishes, standard adjustable arms, simple hardware. Great for quick repairs.
-
$16–$25: Corrosion-resistant finishes (chrome or brushed nickel), flexible or spring-loaded arms, 6–8 chain holes for fine-tuning, decorative escutcheons, and smoother action. Good for style upgrades and tough fits.
If you have hard water, materials matter. A stainless or corrosion-resistant arm and hardware will outlast plain steel. If you need a fresh look, brushed nickel, chrome finish, or matte black upgrades are common and help tie in faucets and door hardware.
Are all toilet handles universal?
Most modern “universal” toilet flush handles fit well over 90% of bowls and tanks because they include adjustable arms, multiple mounting positions, and flexible geometry. But there are exceptions. Some dual-flush systems use buttons or proprietary linkages that need a model-specific part. A few specialty or very old tanks use unusual angles or arm lengths. If your toilet uses a push-button on top of the tank or an integrated two-button flush, a standard lever kit won’t fit. Otherwise, a universal kit is likely to work with minor adjustments in arm hole choice or arm angle.

Top 5 Kits (2025) — Comparison and Best Uses
Below is a simple, at-a-glance comparison of the most useful universal styles on the market. To keep it brand-agnostic, we’ve named them by their standout features. All are widely available at home centers and online.
Side-by-side features table
| Model nickname (generic) | Mount type supported | Arm adjustability | Finishes offered | Install difficulty | Typical price |
|---|---|---|---|---|---|
| Adjustable 8-Hole Universal | Front, side, angled | Rigid arm with 8 chain holes | Chrome, brushed nickel, white, black | Easy | $12–$18 |
| Flexible-Arm Universal | Front, side | Flexible/spring-loaded arm | Chrome, brushed nickel, black | Easiest | $16–$22 |
| Heavy-Duty Metal Lever | Front | Rigid metal arm, 4–6 holes | Chrome, brushed nickel | Moderate | $18–$25 |
| Compact Tank Angled Lever | Side, angled | Short offset arm, 6 holes | Chrome, white, matte black | Easy | $12–$20 |
| Decorative Escutcheon Upgrade | Front | Rigid arm, 6–8 holes | Matte black, brushed nickel, bronze | Easy–Moderate | $18–$25 |
How to read this:
-
If you want the simplest path for a first repair, the flexible/spring-loaded option is forgiving and lines up fast.
-
If you want a long-lasting feel with a premium look, choose a heavy-duty metal lever with a corrosion-resistant finish.
-
For compact bathrooms or angled tanks, pick the compact/angled style to avoid bumping into the fill valve.
Best for first-time DIYers
If this is your first DIY plumbing repair, the flexible/spring-return style offers the smoothest setup. That arm flexes to find the flapper without scraping the tank or hitting the fill valve. You’ll also see “reverse-thread” reminders on better kits, which helps you avoid cracking the porcelain. Look for clear hardware bags and a simple nut with big flats you can tighten by hand.
Best for design upgrades
If your goal is a quick style refresh, lean toward finishes that match your faucet and cabinet pulls. Matte black can make a bold, modern statement. Brushed nickel blends well with stainless-look bath hardware and hides fingerprints. Chrome stays classic and is easy to wipe clean. Decorative escutcheon plates (the trim around the handle) give a clean, finished look and can help cover old wear marks.
Data snapshot: sales, price, lifespan
-
Most kits sell in the $9–$25 range.
-
Big-box retailers report steady weekly unit sales in the thousands across the country, which tracks with how often this repair comes up.
-
Lifespan depends on materials and water conditions. In standard homes, a good lever can last many years. In hard-water areas, plan for periodic cleaning or a corrosion-resistant upgrade to extend life.
What drives lifespan? Corrosion, mineral buildup, and the quality of the pivot point. Flexible arms and corrosion-resistant parts tend to hold their smooth action longer.
How to Choose the Right Flush Handle (Fit, Finish, Function)
Selecting the right flush handle isn’t just about looks — it’s about getting the perfect fit, durable finish, and reliable function. The right toilet lever should match your tank’s mounting style, resist corrosion, and move smoothly with every press. Here’s how to evaluate size, material, and compatibility before picking your next toilet handle replacement kit.
Identify your mount and arm geometry in 60 seconds
Stand in front of the toilet. Is the handle on the front face, left side, or right side? That’s your mount. Now remove the tank lid and look inside. Note where the lever’s arm points and how far it travels to lift the flapper. Take a quick photo. Also note which hole the flapper chain connects to and how many links of slack there are. Finally, check the tank thickness at the mounting hole; thicker tank faces may need a longer bushing or extra-tight escutcheon to sit flush.
If your current arm is bent at a sharp angle, you can usually match the function by picking an adjustable arm with multiple chain holes and testing which hole provides the best lift.
Universal vs model-specific: myths, limits, workarounds
“Universal” is accurate for most lever-style toilets. The limits are:
-
Dual-flush and push-button systems use a different mechanism.
-
Some proprietary designs use unique arm shapes that need model-specific parts.
Workarounds that help:
-
Choose a lever with more chain holes to change the lift point.
-
Use a flexible or spring-loaded arm if your tank is tight inside or the old arm had an unusual bend.
-
Rotate the arm slightly during install to change the arc and avoid internal parts.
Materials and finishes for hard-water homes
Hard water leaves mineral scale that can make a lever feel sticky. If you see white crust or green-blue buildup, choose a corrosion-resistant arm (stainless or treated metal) and a finish that wipes clean easily. Plan on a quick quarterly wipe-down inside the tank. If your water is very hard, consider keeping a small brush and mild vinegar solution for mineral cleanup. Less friction means a better flapper lift and longer handle life.

Will a new handle fix a weak flush?
Often, yes—if the problem is chain length or sluggish lever action. A new toilet flush handle replacement lifts the flapper more cleanly, which helps the tank water move fast into the bowl. But if the flapper is warped or the fill valve is failing, you may need to swap those too. A quick test: after installing the new handle, set 1–2 links of slack in the chain and make sure the flapper lifts fully and drops back to seal. If the flush is still weak, inspect the flapper and fill valve next.
Step-by-Step Installation Guide
This repair works for most lever-style toilets. If you have a dual-flush button or top-mounted button, follow your toilet’s model-specific instructions.
Tools and prep checklist
-
Adjustable wrench or pliers
-
Small towel or sponge
-
Bucket or small cup
-
Mild cleaner for mineral buildup
-
Camera or phone to take a quick “before” photo
-
Your new toilet handle replacement kit
Prep steps:
-
Turn off the water at the shut-off valve beside the toilet.
-
Remove the tank lid and set it on a soft towel to prevent scratches.
-
Flush to lower the water level. Use a cup or sponge to bail a bit more water if you want extra working room.
-
Take a photo of the current chain connection and the lever position.
Remove the old handle like a pro
-
Find the mounting nut on the inside of the tank where the lever goes through the porcelain.
-
Most lever nuts are reverse-thread. That means you loosen by turning the nut clockwise. Say it out loud if it helps: reverse-thread, loosen clockwise.
-
Support the handle from the outside with your other hand so you don’t torque the porcelain.
-
Once loose, remove the nut and any washers. Slide the old lever out.
-
Clean mineral buildup around the hole and check for chips. A smooth, clean surface helps the new escutcheon sit tight.
Install and adjust for a perfect flush
-
From the outside, insert the new handle and escutcheon through the tank hole. Hold it in a natural resting position.
-
From the inside, slide on the washer and reverse-thread nut. Hand-tighten only. Porcelain can crack if over-tightened. If you need a tool, use the lightest pressure—snug is enough.
-
Set the arm angle. If you have a flexible or spring-loaded arm, let it settle in a natural arc.
-
Hook the flapper chain to a hole in the lever arm so the flapper lifts straight up. Start in the middle hole.
-
Adjust slack. Aim for slight slack—about 1–2 chain links—so the flapper can fully seal after a flush.
Test, fine-tune, and safety checks
-
Turn the water back on and let the tank fill. Test flush a few times.
-
Watch the flapper. It should lift fully, then drop and seal without catching.
-
If the handle sticks down, loosen the nut a hair or move the chain one hole closer to the handle. If you get a running toilet, you likely need a touch more chain slack or a smoother flapper motion.
-
Inspect for drips around the handle shaft and nut. If you see water, tighten the nut a quarter-turn at a time.
If the handle action is stiff after all that, clean the pivot and check for mineral buildup. A smooth pivot and proper chain slack solve most problems.
Troubleshooting, Maintenance, and Smart Upgrades
Even the best toilet handle replacement kit needs occasional care to keep your toilet lever working smoothly. This section covers quick troubleshooting tips, simple maintenance habits, and smart upgrade ideas — from corrosion-resistant materials to water-saving mechanisms — that extend your handle’s life and improve overall toilet performance.
Fix sticky handle, jiggle-to-stop, and weak flush
-
Sticky handle: Clean mineral deposits on the pivot and arm. Make sure the nut is snug but not binding the lever. If metal parts are corroded, replace the lever with a corrosion-resistant option.
-
Jiggle-to-stop: That’s almost always chain or flapper related. Add a link of slack, or move the chain to a different hole so the flapper can fully seal.
-
Weak flush: The lever might not be lifting high enough. Shift to a hole farther from the handle for more lift. Also check that the arm doesn’t hit the fill valve.
Chain, flapper, and alignment checklist
-
If the water keeps running, does lifting the handle stop it?
-
Yes: Chain too tight. Add 1–2 links of slack.
-
No: Does the flapper look warped or not sealing? Replace the flapper.
-
-
If the flush is weak, does the flapper lift fully?
-
No: Move the chain to a hole farther from the handle to increase lift.
-
Yes: Check for obstructions around the arm and fill valve.
-
-
If the handle sticks down, is the nut too tight?
-
Yes: Loosen slightly and re-test.
-
No: Clean pivot, check for mineral buildup, and confirm the arm is not rubbing the tank wall.
-
Maintenance for longevity
-
Every few months, peek inside the tank. Wipe away mineral buildup on the lever arm and around the pivot.
-
Keep chain slack at about 1–2 links; revisit if the toilet starts running or the flush feels weak.
-
If you see rust or green-white crust on the arm, consider upgrading to a stainless or treated metal arm.
Upgrade paths: stronger levers, dual-flush kits
If you want an even crisper action, choose a lever with a spring-loaded or flexible arm and multiple chain holes for fine-tuning. If your goal is lower water use, consider a dual-flush conversion kit—but note that these use a different mechanism. Make sure the system matches your tank and follow the included instructions.

Cost, Value, and ROI for Homeowners
When it comes to bathroom repairs, the toilet handle replacement kit offers one of the best returns for minimal effort. A quality toilet lever costs only a few dollars but can prevent costly water waste and improve daily convenience. In this section, we’ll learn how this small upgrade can make a noticeable difference in both performance and savings.
What you get at $9–$15 vs $16–$25
-
$9–$15: A basic, durable toilet bowl handle and lever that will fix sticky or wobbly action. Good for quick repairs and rentals.
-
$16–$25: Better finishes, adjustable or flexible arms, smoother return action, and decorative trim. Ideal when you want a longer-lasting part or a polished look.
DIY vs plumber: time and cost comparison
-
DIY: Expect 10–20 minutes with a wrench and towel. Parts: $9–$25.
-
Plumber: A simple handle swap may be billed as a minimum service call. In many areas, that ranges from about $90 to $200 including parts, depending on distance and schedule. For a standard lever-style toilet, most homeowners can reasonably handle this task themselves and save the visit for more complex issues.
Lifespan drivers and warranties
Material choice and water quality drive lifespan. In soft-water homes, a basic lever can last many years. In hard water, mineral deposits shorten the life of bare metal parts. Look for corrosion-resistant hardware to extend service. Keep your receipt and packaging; many kits include a simple warranty.
How long does a toilet handle last?
With periodic cleaning and correct chain slack, a quality toilet flush lever can last many years. If the pivot point wears down or the arm corrodes, you’ll feel wobble or drag, and it’s time to replace it.
Style, Ergonomics, and Accessibility
Beyond function, a toilet handle replacement kit can transform the look and feel of your bathroom. Choosing the right toilet lever isn’t just about mechanics — it’s also about matching finishes, improving grip comfort, and ensuring accessibility for all users. This section explores how thoughtful design choices can enhance style, ergonomics, and usability without a major renovation.
Match finishes to your bathroom hardware
The fastest way to make the handle look “on purpose” is to match nearby finishes. Chrome looks bright and classic. Brushed nickel pairs well with stainless faucets and resists fingerprints. Matte black reads modern and works with light tile or wood tones. Bronze warms up traditional spaces. If your faucet has a distinct shape, consider a handle with a similar silhouette or a matching escutcheon style.
Ergonomic grips and ADA-friendly options
A larger lever with a comfortable grip reduces the force needed to flush and helps kids and older adults. For accessibility, look for handles that operate with one hand and don’t require tight grasping or wrist twisting. Left- or right-hand options matter too—choose the one that matches your tank and your household’s needs.
Small details, big impact
That round plate around the handle (the escutcheon) hides the hole and frames the finish. A slightly larger escutcheon can hide old marks from previous hardware. A smooth, simple lever in the right finish can make a small bathroom feel put together in minutes.
Case vignette: 10-minute style refresh
A small guest bath had shiny chrome everywhere except a tired, yellowed plastic handle. Swapping to a brushed nickel lever with a matching escutcheon brought the whole space together. The homeowner took one photo of the chain before removal, loosened the reverse-thread nut, and hand-tightened the new one. The final step was setting one link of slack in the chain. Cost: $18. Time: 10 minutes. Impact: outsized.
Water Efficiency and Leak Prevention
A properly installed toilet handle replacement kit does more than improve flush action — it plays a key role in water efficiency and preventing silent leaks. Even small issues like a sticky lever or improper chain slack can waste hundreds of gallons. In this section, we’ll show how the right toilet lever setup keeps water use low, stops running toilets, and protects your home from unnecessary waste.
Do handles affect water use?
The handle itself doesn’t change how much water your tank holds, but it does affect how cleanly the flapper lifts and drops. A smooth lift and proper chain slack help the flapper seal quickly, which prevents running toilets and wasted water. Pair your handle upgrade with a quality flapper and a well-adjusted fill valve for the best water-saving results.
Stop silent leaks and running toilets
A running toilet can waste hundreds of gallons per day. According to the U.S. Environmental Protection Agency (EPA), a single running toilet may leak more than 200 gallons of water daily, adding up to thousands of gallons per year if unnoticed. A quick dye test can help: add a few drops of food coloring to the tank. If color appears in the bowl without flushing, you have a leak. Often, correcting chain slack or replacing a warped flapper stops it. After a handle swap, always confirm the flapper seals cleanly and the fill valve stops at the right level.
Traditional lever handles work well when properly installed and adjusted, but smart toilets often include precision-controlled flushing, dual flush options, and leak prevention technology. For homeowners looking for hands-free operation or enhanced water efficiency, a smart toilet can be a worthwhile upgrade over manual handle fixes.

Hard water strategies
Hard water leaves deposits that can make levers bind. Use a corrosion-resistant arm, wipe away mineral buildup, and avoid harsh chemicals that can attack soft metals and rubber parts. Gentle cleaning keeps moving parts smooth and lowers the chance of a running toilet.
Can a bad handle cause a running toilet?
Yes. If the lever sticks or the chain is too tight, the flapper can’t seal. The tank keeps feeding water into the bowl. Fix the slack and the pivot, and the problem usually stops right away.
Real-World Insights: User Feedback and Trends
Homeowners and renters who share their repairs online tend to say the same things. Universal kits with clear instructions are easy even for a first timer. Most problems come from overtightening the nut on porcelain, forgetting that the nut is reverse-thread, or setting the chain too tight. People also like having finish choices—chrome, brushed nickel, black—so the handle doesn’t look like an afterthought.
On the market side, universal fit and better adjustability keep growing. Flexible and spring-return arms reduce frustration. Decorative finishes are now common, even in budget kits. And thanks to steady demand, most home centers keep multiple styles in stock.
Common pitfalls to avoid:
-
Cross-threading the nut. Start by hand, then snug gently.
-
Overtightening on porcelain. Tight is good; cranked is cracked.
-
Ignoring reverse thread. Loosen clockwise, tighten counterclockwise on most lever nuts.
-
Skipping chain slack. One or two extra links prevent running toilets.
Key Takeaways and Next Steps
Quick buying recap
Choose a universal toilet handle replacement kit with the right mount type, a corrosion-resistant arm, and a finish that matches your space. If you’re new to this, a flexible or spring-loaded arm makes alignment easy.
10-minute install recap
Remember the reverse-thread nut. Hand-tighten to protect the porcelain. Set the chain with slight slack—about 1–2 links. Test several times to confirm a full lift and a clean flapper seal.
Keep it efficient and stylish
Pair your new toilet flush handle with a reliable flapper and a well-adjusted fill valve. Wipe away mineral buildup every few months. Matching finishes across the room gives you a quick style gain for very little cost.
FAQs
1. Do all toilet handles fit all toilets?
Not all toilet handles fit every model, though most modern universal levers cover the vast majority of toilets. Exceptions include push-button flush systems, dual-flush setups, or older tanks with unusual lever angles or arm lengths. Universal kits typically come with adjustable arms, multiple chain holes, and flexible geometry to accommodate a variety of tanks and flapper types. Before replacing, it helps to take a photo of the current handle and note the tank mount—front, side, or angled—and whether the handle is on the left or right. This preparation ensures you choose the correct kit and can fine-tune the arm and chain for a smooth, full flush. With these adjustments, even first-time DIYers can achieve proper lever action, preventing weak flushes and stopping minor running issues. Proper alignment also avoids scraping the tank or hitting internal components, making installation efficient and reliable.
2. Can you replace just the handle on a toilet?
Yes, you can often replace just the handle without touching the rest of the tank or internal parts. Handle-and-arm kits are designed as standalone replacements, making them a quick, simple fix for worn, sticky, or corroded levers. Most universal kits include multiple chain holes, adjustable arms, and decorative escutcheon plates to cover the mounting hole, so installation is clean and easy with basic tools like a wrench or pliers. Before starting, note the mount type—front, side, or angled—and the handle orientation, and consider snapping a quick photo to reference during installation. If you live in a hard-water area, choose corrosion-resistant metals or durable plastics to extend lifespan. This simple swap restores smooth lever action, improves flushing performance, and prevents water waste, making it one of the most cost-effective and beginner-friendly DIY plumbing fixes you can do.
3. How do I know what toilet handle I need?
Selecting the right toilet handle starts with identifying the tank mount type—front, side, or angled—and noting whether the handle is on the left or right side. Then, check how the lever arm moves to lift the flapper. Most universal levers have multiple chain holes and adjustable arms, allowing you to fine-tune the lift for smooth flushing. Take a quick photo of your current handle setup and note the distance the arm travels, the position of the chain, and the tank thickness. Consider the material and finish too: corrosion-resistant metals, stainless steel, or durable plastics perform better in hard-water areas and last longer. Matching the finish to existing bathroom hardware also helps maintain a clean, coordinated look. With these considerations, you can confidently select a handle that fits, functions properly, and ensures efficient flushing without trial and error.
4. How much does a plumber charge to change a toilet handle?
Plumber costs for a basic toilet handle replacement typically range from $90 to $200, depending on your location and whether the service call includes parts. By comparison, a DIY approach using a universal toilet handle replacement kit costs only $9–$25 and takes about 10–20 minutes with simple tools like a wrench, pliers, or towel for protection. Doing it yourself allows you to immediately restore proper flush action, prevent running toilets, and improve water efficiency. Even first-time DIYers can achieve a smooth, functional lever by following the kit instructions, adjusting the arm and chain as needed, and ensuring proper alignment. Swapping the handle yourself also reduces water waste, avoids labor fees, and allows for material and finish upgrades, such as corrosion-resistant metals or matching finishes. Overall, it’s a quick, low-cost way to maintain your toilet and avoid common minor issues.
5. How to fix a broken handle on a toilet?
Fixing a broken toilet handle is usually quick and straightforward. First, turn off the water at the shut-off valve and remove the tank lid to prevent accidents. Most problems involve a loose pivot, bent lever arm, or worn-out chain connection. Start by inspecting the handle: if the lever is bent, replace it with a new arm from a universal toilet handle replacement kit. Check the chain that connects the handle to the flapper—ensure it has about 1–2 links of slack so the flapper can fully seal. If the pivot or mounting nut is corroded, swap it for a corrosion-resistant replacement and hand-tighten to avoid cracking the porcelain. For handles that stick or rub the tank, flexible or spring-loaded arms often solve the alignment problem. After installation, test the flush several times to confirm smooth motion and a full lift of the flapper. A small adjustment here usually restores reliable flushing in minutes.
6. What are common toilet handle problems?
Common toilet handle problems include a sticky pivot, chain that’s too tight, lever rubbing against the tank, or corroded metal parts. These issues often develop over time due to mineral buildup from hard water, loose pivot points, or wear on metal components. Most problems are easy to fix during a handle replacement: cleaning mineral deposits, adjusting chain slack, or switching to a corrosion-resistant arm can restore smooth operation. Flexible or spring-loaded arms in universal kits also prevent rubbing and reduce stress on the lever. Checking the lever’s travel and alignment ensures the flapper lifts fully without interference. Routine maintenance, like wiping mineral deposits and keeping the chain at proper slack, helps prevent recurring issues. Fixing these common problems improves flush efficiency, stops silent leaks, and extends the life of your toilet handle, making a simple replacement or adjustment a highly effective DIY solution.
7. Do toilet handles wear out?
Yes, toilet handles do wear out over time. The pivot point may loosen, the lever arm can bend, and minerals from hard water can corrode metal parts, making flushing difficult or inconsistent. When a handle shows signs of wobble, stiffness, or uneven lift, it’s time for replacement. A universal toilet handle replacement kit can restore smooth motion and proper flapper lift without changing the rest of the tank. Choosing durable materials, such as stainless steel or treated metal, prolongs lifespan, especially in hard-water homes. Regular maintenance, including wiping mineral deposits and adjusting chain slack, also helps handles last longer. Replacing worn handles not only improves flush performance but also prevents water waste, protects internal components, and refreshes the bathroom’s appearance with a clean, matching finish. Even simple swaps can make a noticeable difference in both function and style.
References

Leave a comment
This site is protected by hCaptcha and the hCaptcha Privacy Policy and Terms of Service apply.