


A tankless bidet toilet can work very well, but only when the bathroom is already close to what the unit needs. This directly affects the overall bathroom experience, especially in terms of comfort, usability, and long-term satisfaction. According to the U.S. Environmental Protection Agency (EPA) WaterSense program, water-efficient bathroom fixtures are designed to maintain performance while improving water use efficiency, which directly impacts daily bathroom comfort and usability. This is where buyers get tripped up. They assume “tankless” means easier, smaller, and cleaner to install than a standard toilet. In practice, it often means the opposite: more dependence on pressure, power, exact rough-in fit, and usable space behind and around the bowl.
If your bathroom is being remodeled, has a nearby GFCI outlet, stable water pressure, and a normal 12-inch rough-in, tankless bidet toilet installation is usually straightforward. If you are trying to drop one into an older bathroom with no outlet, weak pressure, a questionable flange, or a tight powder room layout, this can turn into a much more expensive job than expected.
Here’s where people usually run into trouble: they buy the toilet first, then find out the outlet is too far, the shutoff valve is too old, the flange is not level, or the rear housing hits the supply line or wall trim. By then, returns are harder, and the “simple replacement” has become electrical work, plumbing correction, and trim modifications.
Decision Snapshot: Fit or Skip?
Before deciding whether to move forward, it helps to step back and look at your bathroom as a whole rather than just the toilet itself. A tankless setup depends heavily on existing plumbing, electrical access, and space conditions, so the “fit or skip” decision is really about readiness, not difficulty. The sections below break down when installation tends to go smoothly—and when it’s likely to cause frustration.

Best fit in remodeled, code-ready bathrooms
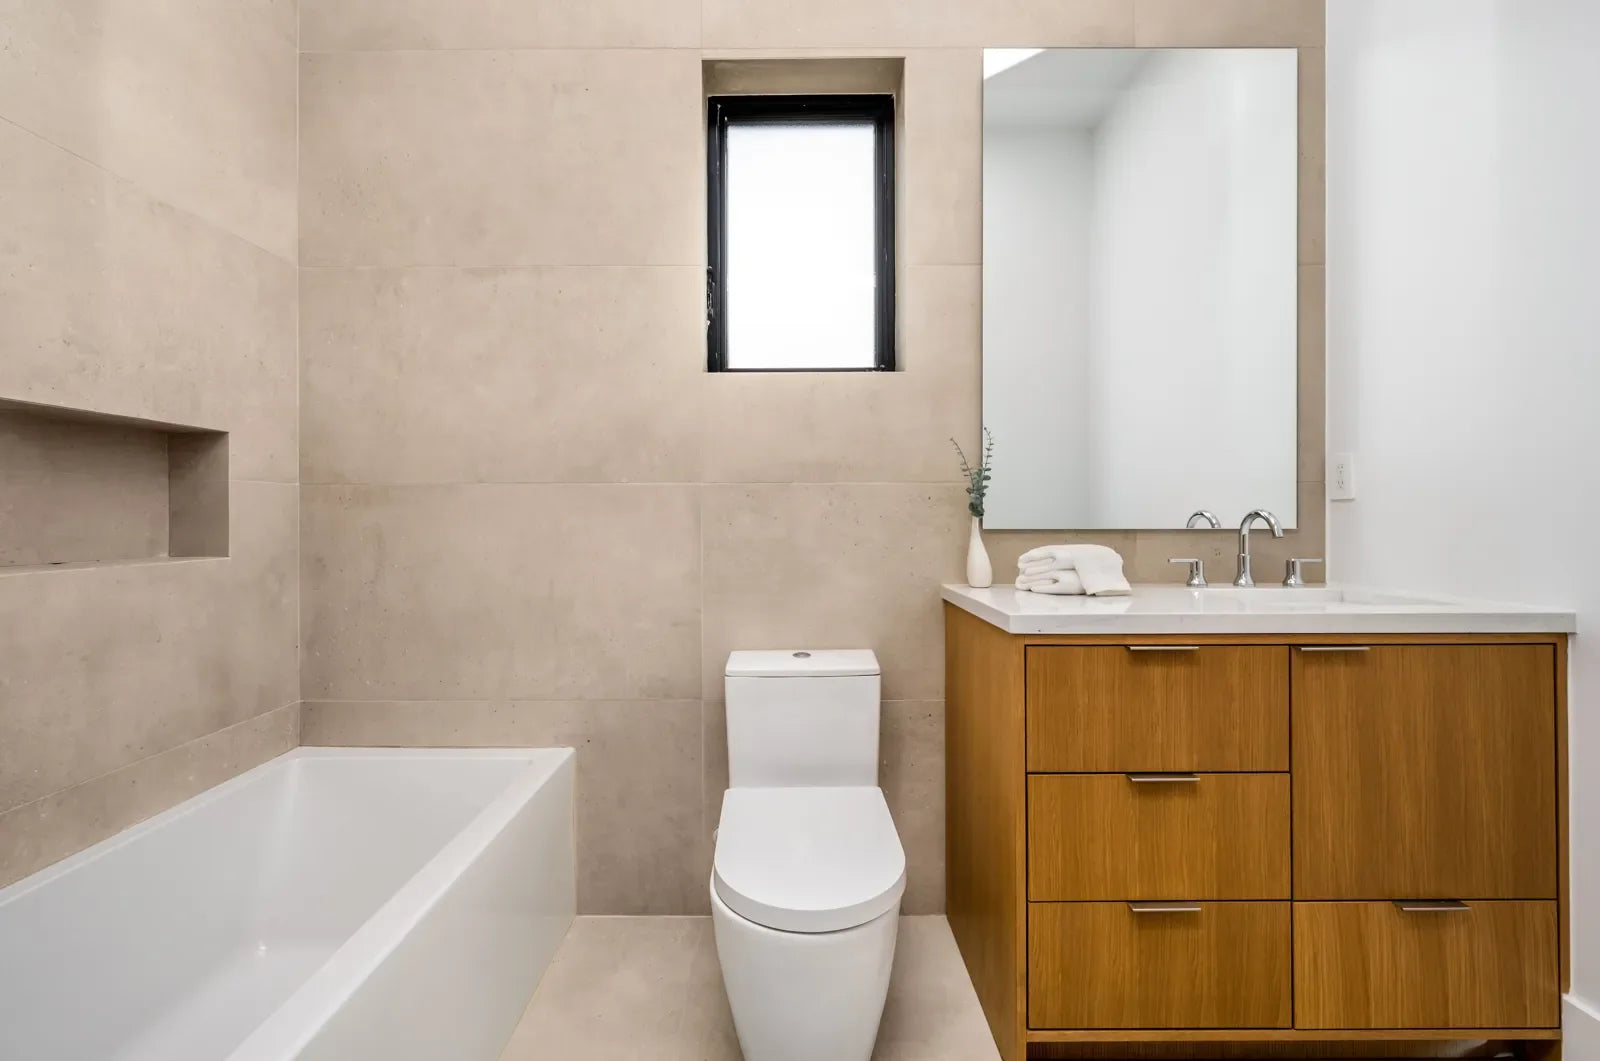
This works best when the bathroom already has the basics in place or is open for renovation. That means a 12-inch rough-in, a properly placed GFCI outlet, decent pressure, a healthy shutoff valve, and enough room around the larger rear section of the toilet. In that setup, installing a smart toilet in a bathroom remodel is much easier than forcing one into an old finished space.
Avoid in tight, underpowered retrofit bathrooms
Skip or rethink it if the bathroom is small, the toilet area is shallow, the home has weak well pressure, or there is no nearby outlet. A lot of retrofit problems come from trying to replace a standard toilet with a tankless unit without checking electrical outlet requirements, water pressure requirements, and true clearance first.
Regret triggers: low pressure, no outlet, bad rough-in
The most common regret triggers are simple:
-
water pressure too low for reliable flush performance
-
no outlet within reach without unsafe cord routing
-
rough-in that is not what the product expects
-
old flange or offset bolts that do not match the mounting hardware
-
too little room behind or beside the bowl for service and cleaning
The key point is this: tankless bidet toilet installation is not hard because the toilet is complex. It becomes hard because the bathroom often is not ready for it.
Who This Works For — And Not For
Choosing the right user profile for a tankless setup is less about preference and more about matching real-world conditions. Installation success, comfort, and long-term satisfaction all depend on how well the bathroom’s layout, utilities, and structure align with the unit’s requirements. The following breakdown helps clarify who will get a smooth experience—and who may run into limitations.
Good candidate: 12-inch rough-in, nearby GFCI
If your bathroom has a standard 12-inch rough-in, solid floor, level flange, 1/2-inch water supply, and a GFCI outlet within about 3 to 4 feet, you are in the good-candidate category. This is the type of room where tankless bidet toilet plumbing requirements and electrical needs are already close to being met.
These installs usually go smoothly because the toilet is not being asked to compensate for bad conditions. Water arrives with enough flow, the flush system is not starved, and the cord reaches the outlet without crossing an unsafe area.
Poor candidate: small powder room layouts
Small powder rooms are where many buyers get surprised. A tankless unit may look sleek in photos, but many have a larger rear housing than a basic toilet. In a room with only 28 to 30 inches from the back wall area to a door swing, vanity edge, or opposite wall, the bowl can feel cramped. Knees hit obstacles. The seat position can shift farther forward than expected. Cleaning access gets worse, not better.
This is one reason people ask how much space is needed for tankless bidet toilet installation. It is not just code clearance. It is usable body space once the unit’s shape is in place.
Older homes with weak plumbing limits
Older homes often have one or more hidden limits:
-
lower real-world pressure than the gauge suggests
-
mineral buildup in old stop valves or supply lines
-
undersized supply piping
-
worn shutoff valves that do not open fully
-
uneven floors and flanges
These homes can still accept a smart toilet, but they need a closer check. Weak flush complaints often turn out to be old valve or line restrictions, not a bad toilet.
Frequent outages reduce core value
If power goes out often where you live, think hard before buying. Many users focus on seat heating and wash features, but forget that some tankless smart toilets lose much of their value during outages. Some retain limited manual flush ability, some do not function normally, and comfort features stop. If outages are common, a simpler toilet plus a non-electric bidet seat can be the more practical spec.
What Extra Work and Cost Appears?
Understanding potential extra work upfront helps prevent budget surprises and mid-install delays. While the fixture itself may seem straightforward, real-world installations often involve adjustments to electrical, plumbing, or structural elements. The sections below outline where additional cost and effort typically appear—and why they matter.
New outlet often changes the budget
The electrical side is one of the biggest missed costs. Smart toilet installation electrical outlet requirements are not optional. If the bathroom has no nearby GFCI outlet, adding one may mean opening drywall, fishing wire, adding protection at the receptacle or breaker, and in some homes running a new circuit.
That can take a product from a basic fixture swap to a small electrical project. In finished tile bathrooms, it gets more expensive fast.
A rough budget reality:
| Extra work | Typical impact |
| Add nearby GFCI outlet | Moderate to high |
| New dedicated or less-loaded circuit | Moderate to high |
| Replace shutoff valve and supply line | Low to moderate |
| Flange repair or reset | Moderate |
| Floor leveling around flange area | Moderate |
| Wall opening for wiring or plumbing relocation | High |
The key point is not the exact number. It is that a toilet advertised as a simple replacement often is not one in a real retrofit.
Valve or supply upgrades are commonly missed
Smart toilet installation water supply line requirements matter more than buyers think. If the toilet is fed by an old, partly clogged angle stop or a narrow line that restricts flow, performance suffers. The homeowner often blames the unit when the issue is really upstream.
Replacing the shutoff valve and using the right supply connection parts is cheap compared with tearing the unit back out later to chase weak flushing or seepage.
Flange correction can stop a simple swap
Tankless bidet toilet installation with a standard toilet flange is possible in many bathrooms, but not guaranteed. This is where people get stuck mid-install. The flange may be too high, too low, not level, or not centered enough for the bracket. Some mounting systems are less forgiving than a plain wax-ring toilet swap.
If the flange bolts are offset or the bracket pattern conflicts with the existing flange hardware, installation can stop until the flange is corrected or adapted.
DIY saves little when rough-ins are wrong
DIY smart toilet installation vs professional installation is not really about whether you can tighten bolts and connect a hose. It is about what happens when the rough-in, flange, outlet, or valve is wrong. A homeowner can save money on a clean install. But once the bathroom needs diagnosis, correction, or code decisions, DIY savings shrink fast.
That is why many failed installs are not caused by poor effort. They are caused by buying before confirming fit.
Will tankless bidet toilet installation fit?
Fit is not just about whether the toilet can physically be installed—it is about whether the space supports safe use, daily comfort, and future maintenance. Many installations pass basic code but still feel cramped or become difficult to service over time. The breakdown below separates minimum requirements from practical usability so you can evaluate the space more accurately.

-
Code Clearance (Minimum Legal Requirements)
These are building code-based minimum distances required for installation approval.
-
Minimum side clearance from centerline: typically 15 inches
-
Minimum front clearance: typically 21 inches
-
Compliance ensures:
-
Basic usability
-
Inspection approval
-
-
Usable Body Clearance (Comfort & Daily Use)
This reflects real human movement and comfort, beyond code minimums.
-
Recommended side clearance: 18–20 inches
-
Recommended front clearance: 24–30 inches
-
Additional considerations:
-
Knee space when seated
-
Ease of standing and turning
-
Accessibility for different users
-
-
Service Access Clearance (Maintenance & Repair)
This ensures the unit can be serviced without removal or damage.
-
Space for:
-
Power cord routing
-
Water hose connection
-
Access to shutoff valve
-
-
Recommended:
-
At least 2–4 inches behind the unit
-
Accessible electrical outlet (not blocked)
-
Quick Fit Evaluation
-
Meets all three categories → installation-ready
-
Meets code only → usable but may feel cramped
-
Fails service access → redesign needed before install
Rough-In, Flange, and Drain Limits
Rough-in dimensions, flange condition, and drain performance form the hidden foundation of a successful installation. Even when the toilet itself is compatible, small deviations in these underlying elements can stop the process or create long-term issues. The following checks help determine whether your bathroom is truly ready—or if correction is needed before moving forward.

10-inch vs 12-inch rough-in risks
The tankless bidet toilet installation rough-in size guide matters more here than with many standard toilets. Many integrated smart toilets are built around a narrow rough-in range, often centered on 12 inches. Some support 10-inch rough-ins with special adapters, while others do not.
If you are asking about 10-inch vs 12-inch rough-in for smart toilet installation, do not guess. Measure from the finished wall to the center of the flange bolts. Do not measure from baseboard. Do not measure to the tank of your old toilet.
A true 10-inch rough-in is where many buyers get burned. The product may physically enter the room but still fail to align cleanly.
Standard flange compatibility is not guaranteed
Can you do tankless bidet toilet installation with a standard toilet flange? Often yes, but the word “standard” hides many problems. Standard flanges vary in height, condition, and alignment. A smart toilet mounting bracket may be less tolerant of a damaged or tilted flange than a basic toilet with a wax ring.
If the flange sits too low below the finished floor, the seal may be unreliable. If it sits too high, the toilet can rock or fail to sit down correctly.
Offset bolts can block bracket alignment
This is a real installation stopper. Some existing flange bolt positions do not line up cleanly with the bracket system included with the toilet. If bolts are off-center or the flange slots are damaged, you may not get secure attachment.
At that point, what looked like a normal install turns into flange repair, new hardware, or bracket modification decisions. That is not where you want to be with a heavy fixture sitting in the room.
Uneven drain seals cause leaks and odors
How to prevent leaks during smart toilet installation starts with the drain connection. Uneven flange height, unlevel flooring, or a poor seal setup can create small leaks or sewer odor that appears days later, not right away. A no-wax seal system may work well on a clean, level flange, but it is less forgiving when the floor is uneven or the drain opening is not sitting right.
If the unit rocks even slightly, fix that before final connection. Tiny movement becomes a long-term leak problem.
Flange Readiness: Simple Pass/Fail Checks for Homeowners
These checks determine whether installation is straightforward or requires professional correction.
-
Flange Stability (Rocking Test)
-
Press down around the flange perimeter
Results:
-
Solid, no movement → PASS
-
Slight movement → may need spacer or tightening
-
Noticeable rocking → STOP and call plumber
-
Flange Height Relative to Finished Floor
-
Ideal: flange sits slightly above floor level (~3–6 mm / 1/8–1/4 inch)
Evaluation:
-
Flush to slightly above floor → PASS
-
Slightly below floor → manageable with wax ring/extender
-
Deeply recessed (>10 mm / ~3/8 inch) → STOP and correct flange height
-
Alignment and Condition
Check for:
-
Cracks in flange ring
-
Rusted or broken mounting slots
-
Misalignment with drain pipe
Decision:
-
Minor wear → manageable adjustment
-
Structural damage → professional repair required
Drain/Waste-Line Adequacy Check
This step helps distinguish whether problems come from the toilet system or the drain path itself.
-
Signs of Drain Path Problems
-
Recurring slow draining toilet caused by issues in the drain outlet or pipe restriction
-
Frequent clog history
-
Gurgling sounds after flushing
-
Water backing up in nearby fixtures
-
Odors indicating venting issues
-
Older Drain Material Considerations
-
Cast iron (possible internal buildup)
-
Clay pipes (root intrusion risk)
-
Early PVC (possible slope or venting issues)
-
Flush Strength vs. Drain Path – Key Difference
-
Flush strength issue:
-
Weak or incomplete bowl clearing
-
Caused by water pressure or toilet design
-
-
Drain path issue:
-
Strong flush but slow removal
-
Caused by pipe restriction or venting
-
-
Pass/Fail Guideline
-
Fast, consistent drainage → suitable
-
Occasional slow drain → monitor
-
Repeated clogs / backups → fix drainage before installing tankless system
Water Supply Requirements Before Buying
Water performance is one of the most decisive factors for a tankless setup, yet it is often underestimated during the buying stage. Unlike traditional systems, there is no stored reserve to compensate for weak supply, so real-world pressure and flow directly affect every use. The section below helps you evaluate whether your water conditions are truly sufficient before committing.
Pressure below 30 PSI causes weak flushing
Water pressure requirements for tankless bidet toilet installation are critical because there is no gravity tank storing flush water. The system depends on incoming supply conditions. If the home pressure is below about 30 PSI, expect trouble. Under that, weak flushes and incomplete bowl clearing become common.
In some homes, pressure at a hose bib reads fine but dynamic pressure at the bathroom under use is much lower. That is why a simple pressure reading is not always enough.
30 to 50 PSI is borderline
A home in the 30 to 50 PSI range may work, but this is the area where restrictions matter most. If the shutoff valve is half blocked, the line is undersized, or filters are dirty, performance drops fast. Many “bad flush” complaints come from this borderline zone.
If you are in this range, check the full path:
-
house pressure
-
bathroom branch line size
-
stop valve condition
-
supply hose type and size
-
mineral buildup in fittings
How to Test Static vs. Dynamic Water Pressure (Homeowner Method)
Understanding real-world water performance is not just about the number on a spec sheet—it depends on how pressure behaves at rest (static) and during use (dynamic).
Step-by-step test procedure:
-
Prepare a pressure gauge
-
Use a standard hose-thread water pressure gauge (widely available).
-
Connection points:
-
Washing machine tap (most accurate and accessible)
-
Outdoor hose bib
-
Toilet supply valve (requires adapter, optional)
-
-
-
Measure Static Pressure (system at rest)
-
Ensure all fixtures are OFF (no taps, washing machine, showers).
-
Connect the gauge and fully open the valve.
-
Record the reading → this is your static PSI.
-
-
Measure Dynamic Pressure (real-use condition)
-
Keep the gauge connected and visible.
-
Turn on:
-
A sink faucet and
-
A shower (or flush another toilet)
-
-
Observe the pressure drop → this is your dynamic PSI.
-
-
Interpret the results
-
Example:
-
Static: 60 PSI
-
Dynamic: 38 PSI → acceptable but moderate drop
-
-
If dynamic drops below ~30 PSI, performance issues may occur in tankless bidet toilets.
-
What “dynamic pressure” means in practice:
-
It reflects available pressure under simultaneous demand
-
This is what your toilet actually experiences during operation
-
Tankless systems rely heavily on stable dynamic pressure, not just static values
Quick pass/fail guideline:
-
Static ≥ 40 PSI AND Dynamic ≥ 30 PSI → suitable
-
Static OK but Dynamic < 30 PSI → risk of weak wash / slow refill
-
Large drop (>20 PSI difference) → possible pipe restriction or undersized supply
Supply lines under half-inch restrict flow
Tankless bidet toilet plumbing requirements usually assume adequate flow through the supply path. If the toilet is being fed through a restrictive setup, especially one effectively smaller than 1/2 inch in key sections, the unit may not perform as designed.
This is why smart toilet installation water supply line requirements should be reviewed before purchase, not after poor flush performance starts. The issue may not be pressure alone. It can be flow starvation caused by old parts.
Do you need a booster pump?
Do you need a booster pump for a tankless bidet toilet? Only if the home truly cannot provide enough pressure and flow after simpler fixes are ruled out. A booster pump should not be the first answer.
Check these first:
-
actual incoming pressure
-
pressure under fixture use
-
old shutoff valve condition
-
clogged supply lines or filters
-
undersized branch piping
If all that checks out and pressure still falls short, then a booster pump may help. But this adds cost, noise, maintenance, and another failure point. If you are already heading toward a pump just to make one toilet work, it is fair to ask whether this is the right fixture for the home.
Electrical Requirements and Safety Limits
Electrical setup is not just a checklist item—it directly affects safety, reliability, and day-to-day usability. Many installation issues come from treating power as an afterthought rather than a core requirement. The details below clarify what a safe, functional setup looks like and where common risks appear.

Outlet distance beyond four feet is risky
Where to put outlet for smart toilet? Close enough that the factory cord reaches without extension cords, strain, or crossing a walking path. In practice, once the outlet is more than about 4 feet away, you start seeing bad workarounds: cords stretched behind the bowl, routed along baseboards, or exposed near damp areas.
That creates both code and usability problems. You should be able to plug in the unit with a relaxed cord path that stays out of the wet zone.
Shared 15A circuits may overload
Many smart toilets can draw 1500 watts or more when heating functions are active. If the bathroom is on a shared 15-amp circuit with hair tools, heaters, or other loads, nuisance tripping becomes more likely.
Smart toilet installation electrical outlet requirements are not just about having a plug nearby. The circuit has to support the load. In older homes, this is where the breaker panel review matters.
Wet-zone cord routing creates code problems
How to hide cords on a smart toilet install? The answer should not be “run it where it is least visible.” It has to be safe first. Cords should not cross open floor area, lie where mopping water reaches them, or snake behind plumbing in a way that pinches insulation.
If the right outlet location does not exist, the fix is usually to add or move the outlet, not to improvise cord routing.
What if the bathroom has no outlet?
If the bathroom has no outlet, budget for electrical work before buying. In a remodel, this is usually manageable. In a finished bathroom with tile, plaster, or limited access, it can be the job that breaks the plan.
This is also why how to install a smart toilet in a bathroom remodel is a different question from retrofitting one later. Remodel timing makes outlet placement, wall opening, and finish repair much easier.
How to Verify GFCI Protection and Circuit Load Safety
Before installation, confirm both shock protection and circuit capacity to avoid safety risks and nuisance breaker trips.
-
How to Confirm GFCI Protection
Method A: Check the outlet directly
-
Look for “TEST” and “RESET” buttons on the receptacle
-
Press “TEST”:
-
Power should cut immediately
-
-
Press “RESET” to restore
Method B: Upstream protection check
-
If the outlet has no buttons:
-
Check your electrical panel for a GFCI breaker
-
Or test nearby bathroom outlets (they may share protection)
-
Pass/Fail:
-
Outlet trips when tested → GFCI protected
-
No trip response → protection missing → upgrade required
-
How to Check if a 15A Circuit Is Overloaded
Most homes use 15A circuits, which can be shared with lighting or other outlets.
Step-by-step sanity check:
-
Identify the circuit
-
Turn off the suspected breaker
-
Confirm what devices lose power
-
-
Check what’s already on the circuit
-
Common shared loads:
-
Hair dryer (1200–1800W)
-
Heater
-
Washing machine
-
Lighting
-
-
-
Compare load demand
-
Typical tankless smart toilet: 800–1400W
-
A 15A circuit max safe continuous load ≈ 1440W (80% rule)
-
-
Nuisance Trip Risk – Warning Signs
Watch for these indicators:
-
Breaker trips when:
-
Bidet heater activates
-
Another appliance runs simultaneously
-
-
Lights dim when toilet is in use
-
Outlet feels warm after operation
-
Intermittent power resets during wash/dry cycles
Risk evaluation:
-
Dedicated circuit → safest
-
Shared circuit but stable → acceptable
-
Frequent trips / overload signs → requires electrician intervention
What Fails After Tankless Bidet Toilet Installation?
Installation success is only part of the story—how the system behaves after daily use is where most issues appear. Small setup imperfections or overlooked conditions often show up later as leaks, performance drops, or usability frustrations. The sections below highlight the most common post-installation failures and what typically causes them.
Leaks start at taped or mismatched fittings
Common tankless bidet toilet installation problems often begin at the water connections. Mismatched adapters, poorly seated washers, over-tightened plastic fittings, or taped connections where tape was not appropriate can seep slowly. The install looks fine on day one, then a drip appears under pressure or after thermal cycling.
How to connect water to bidet toilet correctly depends on the fitting style provided by the manufacturer. Follow that exactly. If the supplied connection method expects a washer seal, extra tape can make things worse, not better.
Weak flushes signal pressure or valve issues
If flushing is weak after install, do not assume the toilet is defective. First look at the easy suspects:
-
shutoff valve not fully open
-
old stop valve not actually flowing fully
-
kinked or pinched supply line
-
clogged filter screen
-
low dynamic pressure
-
branch line restriction
This is one of the major tankless vs tank toilet installation differences. A tank toilet can mask some supply weakness because it stores water in advance. A tankless unit depends on what the home gives it in real time.
Heating loss during outages changes usability
When power fails, the smart functions change or stop. Heated seat, warm water, dryer, and automatic functions may be unavailable. In some setups, flush performance also changes. In outage-prone homes, this becomes a daily-life issue, not a technical footnote.
Common tankless installation problems over time
Over time, the usual complaints are not dramatic failures. They are repeat annoyances:
-
slight water seep at a fitting
-
odor from a poor drain seal
-
weak flush after mineral buildup worsens
-
breaker trips when other bathroom loads run
-
impossible-to-clean dust or grime behind the unit
-
no access to service the valve without pulling the toilet
That is why what to check before installing a tankless bidet toilet matters so much. Most long-term regrets are visible before purchase if you know where to look.
Before You Buy
Use this checklist before ordering:
-
Measure the rough-in from the finished wall to bolt center. Confirm the toilet supports that exact rough-in.
-
Confirm a GFCI outlet is within reach without extension cords or strained cord routing.
-
Check house and bathroom water pressure under use, not just static pressure at one fixture.
-
Inspect the shutoff valve, supply line, and line size. Replace old or restricted parts before blaming the toilet.
-
Verify the flange is level, solid, and correctly set relative to the finished floor.
-
Measure real front, side, and rear clearance, including door swing and vanity interference.
-
Check whether you can still reach the shutoff valve and clean behind the unit after installation.
FAQs
1. Can I install a tankless toilet myself?
Yes, you can handle it on your own if you’re comfortable with basic plumbing and electrical work. A diy smart toilet installation is doable when you’re replacing a similar unit and all connections are already in place. However, if wiring, outlet placement, or pipe adjustments are involved, it quickly becomes more complex than a standard swap. For many homeowners, it’s less about whether you can do it and more about how much time and troubleshooting you’re willing to take on.
2. Do tankless toilets need a pump?
Most models don’t require a pump because they rely on household supply pressure. As long as your home meets the typical water pressure for tankless toilet, the flushing system should work as intended. In situations where pressure is low—like older buildings or high-floor units—a booster pump might be needed to maintain consistent performance.
3. Where to put outlet for smart toilet?
The outlet should be positioned behind or slightly to the side of the toilet, usually about 30–40 cm above the floor. Planning for smart toilet electrical outlet needs early helps avoid exposed cords and messy retrofits. Ideally, use a GFCI-protected outlet with a waterproof cover to keep things safe in a humid bathroom environment.
4. How to connect water to bidet toilet?
Water is typically connected using a T-valve attached to the shut-off valve. From there, a hose runs directly to the toilet’s inlet. During tankless bidet toilet installation, make sure all fittings are sealed properly and compatible in size. After setup, always test for leaks before regular use to avoid hidden issues later.
5. What plumbing do I need for a tankless toilet?
You’ll need a reliable supply line with sufficient flow and stable drainage. The tankless toilet plumbing requirements are generally higher than traditional systems, especially in terms of pipe diameter and pressure consistency. Some setups may also require upgrading the supply line to support peak flushing demand.
6. How to ensure enough water pressure for a bidet?
Start by checking your current pressure level and flow rate. If performance feels weak, consider upgrading valves, cleaning old pipes, or installing a booster system. Meeting the right water pressure for tankless toilet ensures that both flushing and bidet functions operate smoothly without interruption.
7. Can I replace a standard toilet with tankless?
Yes, but it’s not always a direct replacement. When comparing tankless vs tank toilet installation, the main differences come down to pressure demands, electrical access, and sometimes pipe sizing. You may need minor upgrades to make everything compatible, especially in older homes.
8. Best tools for smart toilet installation?
You’ll need essentials like an adjustable wrench, screwdriver, level, drill, and sealing tape. If you’re installing Horow smart toilet or a similar model, having the right tools ready makes the process much smoother and helps avoid alignment or leakage issues during setup.
9. How to hide cords on a smart toilet install?
Clean cable management starts with planning. If possible, run wiring inside the wall and position the outlet discreetly. For existing setups, use cable covers or protective boxes to conceal wires. This is especially important for designs like a rear discharge smart toilet, where visible cords can disrupt the overall look if not managed properly.
Reference


Leave a comment
This site is protected by hCaptcha and the hCaptcha Privacy Policy and Terms of Service apply.