Knowing how to plunge toilet the right way can save your bathroom, your time, and your money. A blocked toilet can turn into an emergency fast: the toilet bowl fills to the rim, bad smells rise, and one more flush might mean dirty water on the floor. The good news is that most toilet clogs can be cleared at home in just a few minutes with a plunger, as long as you use the right type, make a tight seal, and use the right motion.
In this guide, you’ll get a quick 5‑step method to unclog a toilet in under five minutes, followed by deeper tips on tools, proper technique, DIY helpers like soap and hot water, what to do if plunging fails, and simple habits that keep clogs from coming back.
What this guide covers (structure + expectations)
Here is how this guide is set up so you can jump to what you need:
-
Fast “under 5 minutes” step‑by‑step for plunging the toilet
-
Tools and setup: choosing the best plunger, protecting your floor, and setting the water level
-
How to properly plunge a toilet using water pressure, not wild arm swings
-
Boost methods: dish soap, hot water, and when to use a toilet auger
-
What to do when the toilet won’t unclog with a plunger
-
Prevention tips so clogged toilets become rare in your home
-
Short FAQs that answer the most common questions in plain language
In many homes, a simple soft clog from too much paper will clear in 2–5 minutes of correct plunging. Hard clogs, deeper drain issues, or tree roots in outside pipes can take longer and may need an auger or a professional drain service. This guide helps you tell the difference so you know when it’s time to call a plumber.
Quick-step guide: unclog a toilet in under 5 minutes
You just want the mess gone—fast. When the water is rising and time matters, you don’t need long explanations, you need clear action. This quick-step guide shows how to plunge a clogged toilet the right way in under five minutes, using simple tools and proven technique.
1‑minute checklist: what you need before you plunge
Before you plunge a toilet, grab these basics so you are not running around with a full bowl:
-
Flange toilet plunger (the one with the narrow extended flange at the bottom, not the flat sink type)
-
Rubber gloves to keep your hands clean
-
A bucket or large cup to move water if needed
-
Old towels or newspaper around the toilet to catch splashes
If you have them, these extras can make things easier:
-
Dish soap
-
Hot water (from the tap, not boiling) in a bucket
-
A toilet auger (sometimes called a closet auger) as a backup if plunging does not work
Emergency overflow control before plunging
If the water in the toilet bowl is already very high, your first job is to stop an overflow. You have three quick options:
-
Turn the shutoff valve behind or beside the toilet clockwise to stop water from the tank.
-
Take off the lid of the tank and lift the float (the plastic ball or cup that rises with the water) so the flapper does not let more water in.
-
In some toilets, you can press the flapper down by hand (with gloves) to stop water flowing from the tank into the bowl.
Once the water has stopped, check the water level in the bowl. For good plunging, the plunger cup must be fully under water. If the bowl is too full, bail out water with a cup into a bucket until it is about halfway up the bowl. If the level is low, add water from a bucket until it covers the rubber cup of the plunger when you insert it.
This water control step prevents a messy flood and lets you use water pressure to dislodge the clog instead of just moving air.
Condensed step-by-step: how to plunge toilet correctly
Here is the best way to plunge a toilet in a short, clear sequence:
-
Insert the plunger into the bowl at an angle so the cup fills with water, not air.
-
Position the flange into the hole at the bottom of the bowl and press down to make a tight seal around the toilet drain.
-
Start with a gentle push to squeeze the air out of the cup, then begin short, firm pumps up and down while keeping the seal.
-
Keep the handle moving back and forth (up and down) in a steady rhythm for about 10–20 thrusts.
-
After that set, pull the plunger away and watch the water. If it drains quickly, the clog may be gone.
-
Do a small test flush. If water rises but then drains, repeat one or two rounds of plunging to fully clear the clog.
-
If water does not drain at all after a few rounds, stop and move to backup methods like hot water, soap, or an auger.
This sequence also answers a common question: Do you flush while plunging? The answer is no. You do not flush during the plunging motion. You plunge first, then do a short test flush only after you see signs that the water is starting to move down.
When to stop and reassess (time and symptom checks)
Many people ask, “How long should plunging take?” For a normal paper clog, expect 2–5 minutes of work in several rounds. The key is to watch for signs that the blockage is changing.
Signs the clog is starting to clear include soft gurgling sounds, the water level dropping a bit between attempts, or a slow spin of water after your test flush. If you see these, keep going with controlled plunging.
On the other hand, there are red flags. These tell you that plunging the toilet may not be the right fix:
-
Water rises close to the rim every time you flush, with no improvement
-
Water in nearby fixtures, like a tub or sink, starts to rise or drain slowly
-
The bowl water never drops between attempts, even after you wait a few minutes
If you see these warning signs after several correct plunging rounds, it is time to call a professional or switch to a toilet auger, because the blockage might be deeper in the pipe or even in the sewer line.
How toilet clogs happen (and why plunging usually works)
Knowing what causes the problem makes it easier to fix it and avoid it next time.
Common causes of a blocked toilet
Most clogged toilets come from one of two things: soft buildup that belongs in the toilet, or hard objects that never should have gone down the drain.
Soft clogs usually come from:
-
Heavy use of toilet paper in a single flush
-
A build‑up of paper over time in older or low‑flow toilets
-
Slow buildup from grease, body wipes, or tissues that do not break down well
Hard clogs often involve:
-
“Flushable” wipes (which usually are not safe for plumbing)
-
Feminine products, cotton pads, or paper towels
-
Small toys, caps, or other items children drop into the bowl
-
Dental floss or string that tangles and traps paper
Habits that raise your risk include using the toilet as a trash can, flushing wipes after each use, or trying to force big loads down in one flush. These are the cases where you often hear, “Why won’t my toilet unclog with a plunger?” because a foreign object is jammed in the trap or line.
How a toilet trap and drain work (simple anatomy)
You do not need to be a plumbing and heating expert to understand the basics. Inside the base of your toilet there is a curved section of pipe called the trap. It looks like a sideways “S”. This trap always holds some water. That water blocks sewer gas from coming back into your bathroom.
When you flush, water from the tank rushes into the bowl, fills the trap, and starts a siphon. Once that siphon starts, it pulls water and waste through the trap and into the sewer or septic tank line.
Most clogs form right in that S‑curve. The opening is narrow and bends sharply, so paper or objects can stick. The good thing is that this makes the trap the ideal spot for a plunger to work, because the plunger can send strong pulses of water into that bend and break the clog apart.
If you could see a simple side‑view diagram, you would see the plunger on top, the trap as a loop under the bowl, and the clog sitting in that curve. The goal of plunging is to use water pressure to move or shred that clump.
Soft vs. hard clogs: knowing what you’re dealing with
Understanding the type of clog helps you choose the best way to plunge toilet clogs or when to stop.
Soft clogs are made of toilet paper and waste. They often form after a big flush or build slowly in a toilet that does not flush very strong. When you plunge, you feel steady resistance that gives a bit with each pump, and you may hear water sloshing and gurgling. These clogs are very responsive to plunging and to helpers like dish soap and hot water that help break them down.
Hard clogs come from objects like toys, plastic, wipes, or sanitary products. When you start plunging, you may feel a hard stop with little give. The plunger may bounce back, or there may be almost no movement in water level between attempts. These often need a toilet auger to hook or push the item through, instead of just more forceful thrusts.
You can also watch how the problem started. A sudden total block right after a child was in the bathroom often means an object. A gradual slowdown over days points more to paper buildup.
When a clog is unlikely to be fixed by a plunger
There are some signs that even the best plunger and technique will not solve the issue:
-
Multiple fixtures (toilets, sinks, tubs) are slow or backing up at the same time
-
The toilet fills and never drains lower, even after a few rounds of plunging and a 10–15 minute rest
-
You hear gurgling in other drains when the toilet is used
These signs can mean a main line blockage, a serious sewer problem, or tree roots in outside pipes. In these cases, self‑help with a plunger or even a normal snake may not reach far enough, and forcing harder can risk damage. The safe move is to call a professional who has camera tools and heavy‑duty equipment made for main lines.
Tools and setup to unclog a toilet safely
The right tools and a little preparation make the job faster, cleaner, and safer. More importantly, they help you effectively use a plunger the way it’s meant to work—by creating strong water pressure instead of chaos. With the proper setup, you reduce mess, improve your chances of clearing the clog on the first try, and avoid unnecessary damage to the toilet or surrounding area.
Choosing the right toilet plunger (flange vs. cup vs. beehive)
A plunger is not just a plunger. Different shapes work better in different places.
Here is a simple comparison so you can see which tool is best for which job:
| Plunger type |
Best use case |
Key features |
Main drawback |
| Flange plunger |
Toilets |
Has a narrow flange that fits into the toilet outlet and makes a strong tight seal |
Less suited for flat sink or tub drains |
| Flat cup plunger |
Sinks, tubs, flat drains |
Simple cup shape fits flat surfaces |
Does not seal well in curved toilet bowl |
| Beehive/accordion |
Toilets (stronger pressure) |
Curved or ribbed shape, can create high suction and pressure |
Can be harder to control; may splash more if used too hard |
For how to plunge a toilet with a plunger, a flange plunger is usually the best choice. It is shaped to fit into the hole at the bottom of the toilet bowl, making it easier to force water back and forth through the trap. Flat cup plungers are suited for sinks and tubs because they seal better on flat surfaces.
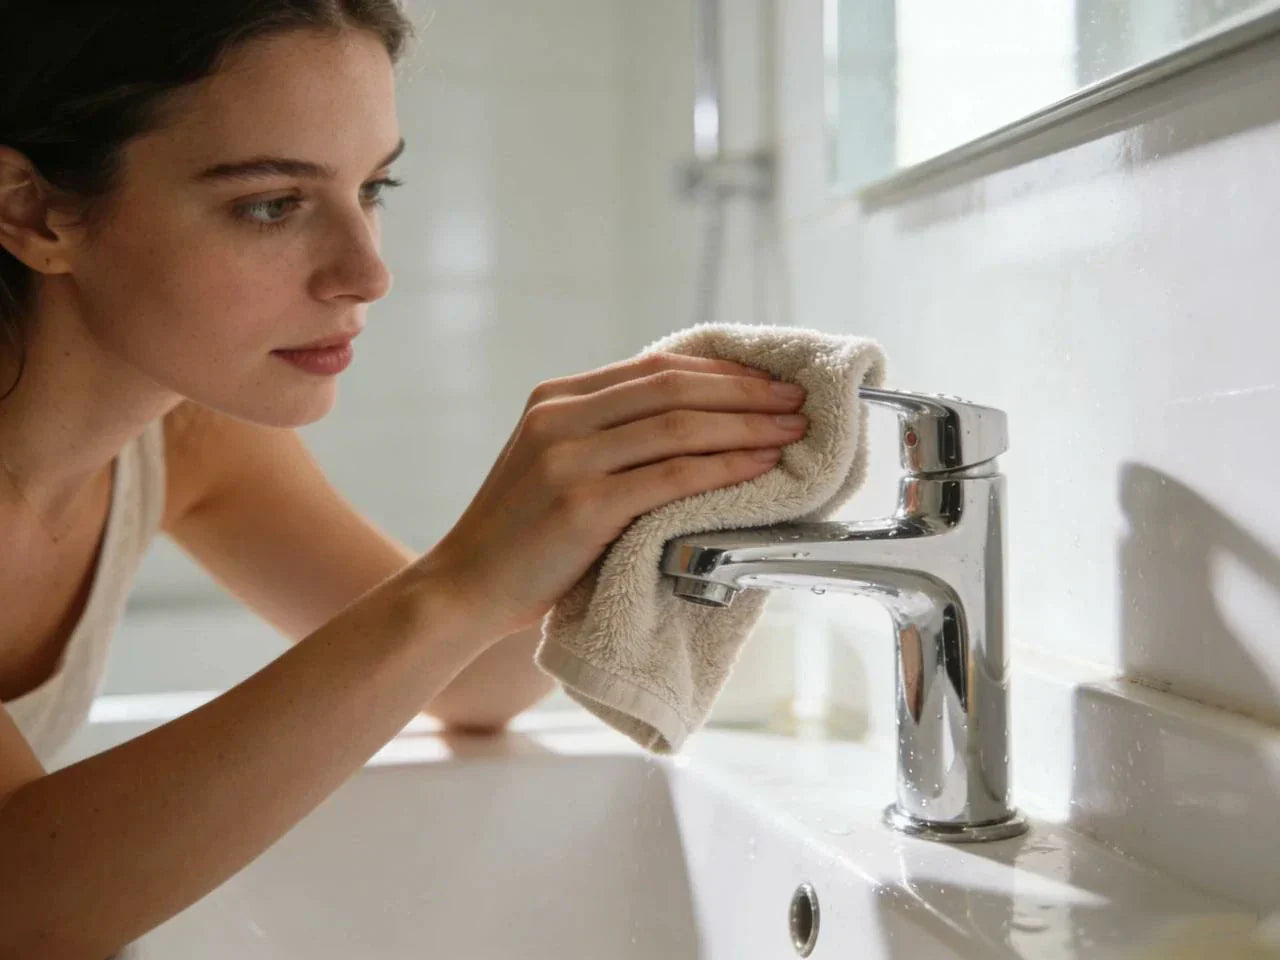
Safety gear and bathroom prep to avoid contamination
Before you use a toilet plunger, take a minute to set up. Put on rubber gloves to protect your hands from germs. Based on guidance from the Centers for Disease Control and Prevention (
CDC), wearing gloves and eye protection while handling contaminated water reduces the risk of infection. If you have eye protection, it can help in case of splashes, especially with a very full bowl. Wear clothes you do not mind getting dirty.
Lay an old towel or some newspaper around the toilet base. This protects your floor from small spills and makes cleanup easier. Turn on the bathroom fan or open a window if smells are strong. After you clear clogs, wash your hands well with soap and water and clean any nearby surfaces with a disinfectant.
Controlling water level in the bowl before you plunge
The best way to plunge toilet clogs is to let water, not air, do most of the work. For that, the water level needs to be right.
If the bowl is almost empty, insert the plunger and see if the plunger cup is covered. If not, remove it and pour in water from a bucket until it is. A cup full of water can transfer your pump motion into pressure in the trap.
If the bowl is too full, use a cup, small container, or the plunger itself to move water into a bucket until the level is below the rim. This reduces the risk of overflow when you start plunging and gives space for the water to move up and down with each stroke.
Backup tools: toilet auger, drain snake, and what they’re for
Sometimes a plunger is not enough. Here is how common backup tools compare:
| Tool |
Typical reach |
Best for |
Notes |
| Toilet auger |
3–6 feet |
Objects or hard clogs in toilet trap and nearby line |
Has a curved tube to protect porcelain in the bowl |
| Drain snake |
15–50 feet (varies) |
Deeper clogs in larger pipe runs and main lines |
Straight cable, better from cleanout or removed toilet |
A toilet auger has a tube shaped to follow the toilet’s trap and a coiled cable you extend by turning a handle. It is made to use a toilet safely without scratching the porcelain.
A general drain snake can reach deeper into the line but is harder to use from the bowl without damage. It is more often used from a cleanout opening by a pro.
Proper plunging technique to clear a clogged toilet
This section answers two big questions: “What is the best way to plunge a toilet?” and “How do I know if I’m plunging correctly?”
Positioning the flange and creating a watertight seal
Start by setting your feet in a stable stance on each side of the toilet. With your gloves on, lower the flange plunger into the bowl at a slight angle so water fills the cup. You do not want a pocket of air trapped inside, because air compresses easily and does not transfer force well.
Next, guide the flange into the drain opening at the bottom of the bowl. Press the cup firmly so the rim of the cup contacts the porcelain all the way around. Wiggle it a bit until you feel that tight seal.
You know the seal is good when you can move the handle up and down slightly and the plunger tugs against the hole instead of sliding around. Keeping this seal the whole time is one of the key signs that you are plunging correctly. If the plunger keeps slipping off or you hear air sucking in around the sides each stroke, pause and reset the position.
Correct push–pull motion: force, rhythm, and duration
Many people think they must use huge, wild arm swings. That often just makes a messy splash and sends air through the line. The real trick is to use water pressure, not just muscle.
Once your seal is set, start with a gentle push straight down to force any remaining air out of the cup and into the water. After that, begin a series of firm but controlled strokes, pushing down and then pulling up, always keeping the plunger cup sealed on the drain. The water inside the cup and in the trap moves back and forth with each motion, which helps to dislodge the clog.
People often ask, “Is it better to plunge slowly or quickly?” The answer is: start slow, then move to a moderate speed. You do not want lazy, slow moves that barely move water. You also do not want wild, super fast thrusts that break the seal. A steady rhythm, like one pump per second, is usually ideal.
Do about 10–20 controlled thrusts in one round. Then break the seal by pulling the plunger straight up and watch what the water does. If needed, start plunging again for another round. It may take a few cycles, especially with a stubborn clog made of lots of paper.
How long should I plunge a toilet before stopping?
Most simple clogs clear in 2–5 minutes, or about 3–4 rounds of plunging with short breaks. Between rounds, wait a couple of minutes and see if water slowly drains. That slow drop shows that some of the clog has broken apart and moved down the line, which makes the next round more effective.
If you have tried correct positioning, several cycles of 10–20 thrusts, a rest in between, and maybe soap and hot water, and you see no change at all, it is time to switch to a toilet auger or call a plumber. At that point, more force is less likely to help and more likely to cause problems.
Common plunging mistakes that make clogs worse
Many “plunger fails” come from the same simple errors. Knowing what not to do when unclogging a toilet is just as important as knowing what to do.
Common mistakes include using a flat sink plunger instead of a flange plunger, plunging with the cup mostly full of air, and breaking the seal in the middle of a stroke. These waste your effort and can spray dirty water out of the bowl.
Another mistake is plunging very hard on a bowl that is close to overflowing. The strong strokes shove more water up, which can send it over the rim and onto your floor. There is also a small risk with very extreme force that you could shift the toilet, stress the wax ring at the base, or in rare cases damage pipes in old or weak plumbing.
To fix these issues: choose the right plunger, set your tight seal, keep the cup under water, adjust your stance so you can push straight up and down, and control the water level before making strong strokes. If you feel a hard, unmoving resistance that does not change at all with repeated controlled plunging, stop before you hurt the toilet.
This addresses another common question: “Can plunging damage pipes?” Normal, steady plunging with a proper tool on a stable toilet almost never harms pipes. Damage risk comes from very extreme, violent force, using metal tools incorrectly, or forcing a snake without care. If you keep your motion firm but reasonable and stop when nothing is changing, you are in the safe zone.
Boosting results: soap, hot water, and other DIY helpers
Sometimes the classic plunger alone struggles, especially with heavy paper clogs. In those cases, a few simple helpers can make a big difference.
Using dish soap and hot water safely in the toilet bowl
For soft clogs, one of the easiest tricks is dish soap and hot water. Squirt a generous amount of dish soap into the bowl—about 1/4 cup is plenty. Let it sit for 5–10 minutes so it can coat the trap.
While it sits, fill a bucket with hot tap water. Do not use boiling water from a kettle, because pouring boiling water into cold porcelain can cause cracks. Water that is hot from the tap, but safe to touch briefly, is hot enough.
Hold the bucket at about waist height and pour the hot water into the bowl in a steady stream. The soap works as a lubricant, and the heat helps soften toilet paper and organic material. Let this mix rest another 10–15 minutes if you can. Then try the plunger again as described above.
This method is gentle on your septic tank and pipes and often helps clear clogs that were too sticky for plunging alone.
Adjusting methods for heavy toilet paper vs. foreign objects
If you know the clog is from a lot of toilet paper—maybe someone admitted it, or you see wet paper near the surface—the best combo is soap + hot water + standard plunging. Expect the clog to become softer and feel more “springy” as you pump. The resistance should slowly ease with each round.
If you suspect a toy, plastic cap, or clump of wipes, you should be more careful. Strong plunging can sometimes move the item deeper, turning a toilet‑level problem into a pipe‑level problem. In those cases, try gentler plunges at first. If there is no change, switch to a toilet auger to try to hook or break the item. Do not add harsh chemicals in hopes they will “melt” non‑flushable objects—they rarely do and can create extra hazards.
The way the plunger “feels” gives feedback. A soft clog feels resistant but alive, almost like a spring. A hard object often feels like you are hitting a wall. Pay attention to that signal.
Eco-friendly and chemical-free ways to unclog a toilet
Many people reach for chemical drain cleaners meant for sinks. These products can be harsh, may damage the inside parts of a toilet or rubber seals, and often do little against solid objects or wipes. They can also create dangerous fumes in a small bathroom.
For toilets, it is safer to stick to mechanical methods—a plunger, toilet auger, and water—plus mild helpers like soap or enzyme‑based cleaners that are labeled as safe for septic systems. Always follow the label on any product and keep chemicals away from children and pets.
Your local wastewater or sewer authority often has “what not to flush” lists that also warn against using strong chemicals in drains, both to protect pipes and the environment.
DIY decision guide for a clogged toilet
Here is a simple way to think through your steps when the toilet backs up:
Ask yourself: Is the toilet close to overflowing? If yes, stop the water using the valve or lifting the float, then adjust the water level.
Next: Does this seem like soft waste and paper, or could it be an object? For paper, use soap, hot water, and standard plunging. For a likely object, try gentle plunging once or twice, then move to a toilet auger to fish it out.
If after several correct attempts the bowl still will not drain, or if other fixtures are backing up too, it is time to call a plumber. Pushing harder at that point rarely helps and raises your risk of damage.
What to do when plunging doesn’t work
Even with the best technique, some clogs just will not move with a plunger. Here is what to do next.
How to use a toilet auger without damaging the bowl
A toilet auger is the next step up from a plunger. It has a curved tube that rests in the bowl and a coiled metal cable that slides through the trap when you extend it with a handle.
To use it, put on gloves and place the curved end of the auger into the bowl so the tip points into the drain opening. Rest the plastic or rubber guard on the porcelain to avoid scratches.
Hold the handle steady and turn the crank to feed the cable through the tube. You will feel light resistance as the head moves through the trap, and then a stronger stop when you hit the clog. Keep gentle pressure and slowly turn the handle to push into or twist through the blockage. If you feel the cable catch something, you may be able to pull it back out into the bowl.
Once you think you have broken or hooked the clog, slowly pull the cable back while cranking the opposite way. Remove any material that comes out, then try a flush. If water flows well, you can clean the auger and you are done.
The key with an auger is to move slowly and avoid forcing the cable so hard that it jams or bends. This protects both the auger and your toilet.
When to try a drain snake vs. calling a plumber
A drain snake is like a longer auger without the special toilet guard. It is more suited to straight pipes and cleanout openings than to the delicate curves of a toilet trap. If you already tried a plunger and a toilet auger from the bowl, and there is still no change, the problem is likely beyond the toilet.
Signs of a deeper issue include several toilets or drains in the home backing up at once, slow drainage in lower‑level fixtures, or gurgling in a bathtub when you flush. These are strong signals of a main sewer line problem.
In these cases, using a long snake from the wrong spot can be hard and risky. It is usually better to call a professional who can find the right access point and use heavier tools safely.
What if the toilet is still clogged after plunging?
If you are wondering, “Why won’t my toilet unclog with a plunger?”, work through this short checklist:
-
Did you use a flange plunger made for toilets, not a flat sink plunger?
-
Was the plunger cup fully under water, with most strokes pushing water, not air?
-
Did you make a tight seal and use 10–20 steady thrusts per round, for several rounds?
-
Did you try the soap and hot water trick and give it time to work?
-
Did you try a toilet auger to reach a hard or deeper clog?
If the answer to all of these is yes and the toilet is still blocked, repeating the same steps is unlikely to help. Keep notes on what you tried and any symptoms in other drains. This information is helpful for a plumber or your building’s maintenance staff.
Cost, time, and damage risks of forcing a bad clog
A good plunger and a basic toilet auger are usually low‑cost tools that you can use many times. A quick visit from a plumbing and heating service to clear the clog with pro gear often costs much more than these tools combined, but for deeper or repeated problems it may still be worth it.
Forcing a bad clog with very hard plunging or pushing metal tools in the wrong way can lead to cracked porcelain, damaged wax rings that cause leaks at the base, or extra stress on old pipes. Floor damage from overflows can also be costly, especially if water seeps into lower levels or walls.
So while DIY can save money, there is a point where it is smarter to stop and call a professional drain service—especially if you see repeated clogs in the same toilet, slow drains across the home, or signs of a main line issue.
Smart Toilets Worth Comparing if You Frequently Deal With Toilet Clogs
Learning how to plunge a toilet can solve most minor blockages, but recurring toilet clogs may also be related to flushing performance, toilet design, or aging fixtures. If you're evaluating a long-term upgrade, these HOROW smart toilets may be worth comparing. Check rough-in requirements, seat height, electrical access, and available features before purchasing.

HOROW T38
This model may be worth comparing if you need a smart toilet designed for standard 12-inch rough-in installations with automated comfort features.
- 12-inch rough-in compatibility
- Integrated bidet system
- Auto flush function
- Heated seat
- Mood light feature
View Product

HOROW T05
It is suitable for users who want a smart toilet with a built-in water tank, automatic flushing, and integrated bidet functionality.
- Built-in water tank
- Auto flush
- Heated seat
- Warm water washing
- Warm air dryer
View Product

HOROW T33
This model may be worth comparing if you need an ADA-compliant smart toilet with integrated bidet functionality and advanced hygiene features.
- ADA-compliant seating height
- Built-in bidet system
- UVC water sterilization
- Plasma sterilization
- Warm air dryer
View Product
Prevention: keeping your toilet from clogging again
Once your clogged toilet is clear, a few simple habits can keep it that way.
What NOT to flush down a toilet (and why wipes are a major culprit)
Toilets and sewer systems are built to handle only human waste and toilet paper. Many things that look harmless do not break down the same way and can cause buildup in your pipes and septic tank.
Items you should never flush include:
-
Any type of wipes, even those labeled “flushable”
-
Paper towels, napkins, or facial tissues
-
Feminine products and cotton pads
-
Dental floss, string, or hair
-
Grease, oils, or fat from cooking
-
Plastic, toys, or any other solid objects
Toilet paper is made to fall apart quickly in water. Wipes and many other products stay strong and can snag in the trap or farther along the toilet drain, starting a blockage that catches more material over time. Many city sewer and environmental agencies warn that wipes are linked to costly clogs and pump failures.
Family and guest rules to protect your plumbing
If you live with children, guests, or tenants, a clear set of “toilet rules” helps people use a toilet the right way. Some families put a small sign near the toilet that says something like “Only pee, poop, and toilet paper go in here.” Place a small trash bin near the toilet for wipes, pads, and other items so people are not tempted to flush them.
For homes with curious kids, you can use simple lid locks or keep the bathroom door closed to stop toys from landing in the bowl. Taking a minute to explain why flushing toys or wipes is a problem can save you from late‑night clogs.
Landlords can add these guidelines to move‑in information, which can cut down on plumbing calls and protect both the building and tenants’ things.
Maintenance tips for older toilets and low-flow models
Older toilets or early low‑flow models sometimes have weaker flushes, which can lead to frequent soft clogs. If you often see slow, swirling flushes or water that almost but not quite clears, your toilet might be close to clogging even when it is not fully blocked yet.
In those cases, you can sometimes use a gentle round of plunging on a “sluggish” toilet before a full clog forms. Check inside the tank from time to time to make sure the water level is set correctly and that there is no heavy mineral buildup on the flush holes under the rim.
If your toilet is very old or constantly having issues, you may want to consider upgrading to a newer, high‑efficiency model that is labeled by water‑saving programs. These are made to flush with less water but still move waste well when used correctly.
Simple habits that reduce future plumbing emergencies
A few small habits go a long way:
Try not to pack the bowl with paper and then flush once. For heavy loads, flush once in the middle and once at the end. Avoid “flush and cram” behavior where you try to send a lot down in one go.
In older homes or homes with many bathrooms, a yearly check from a plumbing professional can spot early signs of buildup or root growth in outside lines. This may seem like extra work, but it often prevents sudden emergencies.
If a toilet starts to act “off”—occasional slow flushes, gurgling, or smells—treat it early instead of waiting for a complete clog. Early attention usually means a quick plunger session, not a weekend without a working bathroom.
Considering a Smart Toilet to Reduce Future Clogs
In some homes, especially those with frequent soft clogs or older plumbing, prevention isn’t only about habits—it’s also about the toilet itself. Modern smart toilets are designed with improved flush systems, smoother trapways, and optimized water flow that reduce the chance of buildup.
When choosing a
smart toilet to prevent future clogs, look for models with a powerful siphon or pressure-assisted flush, a fully glazed trapway, and intelligent water control that delivers strong flushing without using excessive water. These features help move waste efficiently through the trap, making toilet clogs less likely over time.
Expert answers to common questions about how to plunge toilet
Plunging a toilet sounds simple, but small mistakes can make a clog worse or cause messy splashes. In this section, experts answer the most common questions about how to plunge toilet correctly.
Is it better to push or pull when plunging a toilet?
Both the push and pull strokes matter. When you push, you send pressure forward against the blockage. When you pull, you help draw water and part of the clog back toward the bowl. Many experts say the most helpful work happens when you pull up while keeping a tight seal, because it can tug the clog loose from where it is stuck. The key is to move water back and forth through the clog with both motions.
Can you plunge a toilet too hard and cause damage?
Yes, very extreme force can cause problems. Very hard plunging on a nearly full bowl can send contaminated water onto the floor and may stress the wax ring that seals the base of the toilet to the floor. In rare cases, violent motion or metal tools used the wrong way can crack porcelain or stress old pipes. Normal, controlled plunging with a proper flange plunger is safe, so focus on a steady rhythm instead of raw force.
Are chemical drain cleaners safe or effective for toilets?
Most strong chemical drain cleaners are not made for toilets. They are often meant for straight sink or tub drains, and they can harm toilet parts, damage rubber seals, or create fumes in your bathroom. They also rarely fix solid objects like toys or a wad of wipes. Safer choices are mechanical tools (plunger, toilet auger) and mild helpers like dish soap or enzyme cleaners made for plumbing systems. For health and safety, always handle chemicals with care, read labels, and keep them away from children.
References and trusted sources for DIY plumbing advice
For added peace of mind, you can look at information from:
-
Government or city water and sewer departments that list what to flush and how to care for pipes
-
National health agencies that explain safe cleaning and hand‑washing after handling wastewater
-
Environmental programs that explain how toilets and septic systems work and what can damage them
These sources help you check that your methods protect both your home and your local environment.
Conclusion
Knowing how to plunge toilet effectively can save you time, money, and stress. Most clogs are simple, caused by excess toilet paper or minor buildup, and can be cleared with the right plunger, proper water level, and controlled push-pull motion. By observing the water behavior, using gentle helpers like dish soap and hot water, and knowing when to stop or switch to a toilet auger, you can tackle most toilet blockages at home. Following these steps not only clears clogs efficiently but also helps prevent future plumbing issues, keeping your bathroom clean and functional without unnecessary calls to a plumber. Mastering how to plunge toilet ensures you are prepared for emergencies and confident in maintaining your home.
FAQs
1. What is the best way to plunge a toilet?
The key to clearing a clogged toilet effectively is having the right tool and using it properly. A flange plunger is your best bet because it fits snugly into the toilet drain and forms a tight seal. Make sure the cup is completely submerged in water before you start, as water, not air, is what really moves the clog. Begin with a gentle push to expel air, then use firm, steady push-and-pull strokes—about 10 to 20 per round. You don’t need to swing wildly; a controlled rhythm is more effective and reduces the risk of splashes or mess. Watch the water level carefully: if it starts to move down, you’re on the right track. Sometimes it takes a couple of rounds to fully dislodge the blockage, but this method usually works for common toilet paper or soft waste clogs.
2. How do I know if I'm plunging correctly?
Knowing whether you’re plunging correctly comes down to paying attention to feedback from both the plunger and the water. First, you should feel firm resistance that gives slightly as you pump, which indicates the plunger is pushing against the clog. The cup should stay sealed against the drain throughout your strokes; if air is escaping, you’re losing pressure and need to reposition. You’ll also notice that the water in the bowl starts to move or even drop slightly after a few rounds. Some gurgling sounds are normal—they’re a sign the clog is loosening and water is moving through the trap. If you don’t see any change in water level after several rounds, reassess your setup: maybe the water isn’t high enough, the plunger isn’t fully sealed, or the clog is too solid for plunging alone.
3. Why won't my toilet unclog with a plunger?
There are a few common reasons a toilet won’t unclog, even if you’re doing everything right. One of the most frequent issues is using the wrong type of plunger—flat sink plungers don’t create a proper seal in a toilet’s curved drain. Another problem is not having enough water in the bowl to transmit pressure effectively; without water, your strokes mostly just move air. A poor seal is also a culprit, letting pressure escape instead of pushing the clog. Sometimes the issue is the clog itself: “flushable” wipes, toys, or other foreign objects won’t budge with a plunger and usually require a toilet auger or professional help. If repeated correct plunging fails, it’s best to stop and assess the situation rather than risk overflow or damage.
4. Do you flush while plunging?
No, you shouldn’t flush while plunging. The purpose of plunging is to use water pressure to push the clog through the trap, and flushing during this process can make things worse. Flushing adds more water to the bowl, which can cause an overflow and spread dirty water onto your bathroom floor. The right approach is to plunge first and only do a short test flush after you see the water start to move down the drain. This helps you confirm whether the clog has cleared without creating a mess. Think of the plunger as your main tool to unclog a toilet—the flush is just a test afterward, not part of the unclogging process.
5. Is it better to plunge slowly or quickly?
Controlled, steady plunging is more effective than plunging too fast or too slow. Starting slowly helps you maintain a proper seal around the drain, which is critical for moving water through the trap rather than just air. Once you have the seal, a moderate, rhythmic push-and-pull motion works best—typically about one stroke per second. Too slow and you barely move water; too fast and you risk breaking the seal or splashing dirty water. The key is to focus on consistent water movement with both push and pull strokes. Over time, you’ll get a feel for the rhythm that efficiently unclogs a toilet without making a mess.
6. What not to do when unclogging a toilet?
There are a few common mistakes that make plunging less effective or even messy. First, don’t use a flat sink plunger; it won’t seal properly in a toilet’s curved drain. Second, avoid plunging with the cup mostly full of air instead of water—water is what actually moves the clog. Never plunge violently on a full bowl, as this can cause water to overflow and damage the wax ring at the base. Also, don’t ignore stubborn clogs. If repeated controlled plunging doesn’t work, stop and consider an auger or professional help. Following these guidelines keeps the process cleaner, safer, and more likely to clear the clog efficiently.
7. How long should plunging take?
Most soft clogs—like toilet paper or regular waste—clear in about 2–5 minutes of correct plunging, typically done in several short rounds. After each round of 10–20 strokes, pause and watch the water level. If it drops, you’re making progress. If it doesn’t, reassess your setup: check the water level, seal, and plunger type. Continuing too long without results usually doesn’t help and can create a mess or stress the toilet. For tough clogs, you might combine plunging with hot water, dish soap, or a toilet auger. Knowing when to stop is just as important as knowing how to plunge, to avoid making a minor clog into a major cleanup.
8. Can plunging damage pipes?
Normal, controlled plunging is generally safe and rarely causes damage. The risk comes mainly from extreme force, careless use of metal tools, or ignoring signs of a deeper blockage. For example, plunging very hard on a full bowl can stress the wax ring or, in rare cases, crack old porcelain. The safest method is to use a proper flange plunger, maintain a firm but controlled rhythm, and stop if the water isn’t moving. By keeping the plunger cup fully under water and focusing on steady strokes, you can unclog a toilet effectively while protecting both the porcelain and the plumbing system.
References


Leave a comment
This site is protected by hCaptcha and the hCaptcha Privacy Policy and Terms of Service apply.