


To keep a clean bathroom faucet and make your bathroom look brighter and newer every day, you need a simple routine that stops hard water stains, limescale, germs, dull finishes, and reduced water flow before they build up. The problem in many homes is clear: water spots, crusty white buildup, and handles that never quite gleam, no matter how hard you scrub. The good news is that a quick daily and weekly routine, plus smart choices in cleaners and faucet design, can fix this.
In this guide you’ll learn specific cleaning and step-by-step methods to remove limescale, how to clean a chrome, brushed nickel, brass, or stainless steel faucet safely, how to handle hard water, what germs live on bathroom taps, and how to pick easy‑clean bathroom fixtures. About 60% of U.S. homes have hard water, and untreated buildup can cut flow by 30–50% in 6 months. A simple daily dry‑wipe can prevent about 95% of water spots and extend faucet life by 2–5 years.
Quick Answer: Daily & Weekly Clean Bathroom Faucet Routine
When people ask, “What is the best way to clean bathroom faucets?” the real answer is: do a tiny bit every day, plus a light clean each week. That keeps big jobs from ever forming.
60‑Second Daily Bathroom Faucet Cleaning Checklist
A daily routine for a clean bathroom faucet is short and gentle. You do not need strong chemicals or lots of tools.
-
Rinse the tap, faucet handles, and base with clean water after the last use of the day.
-
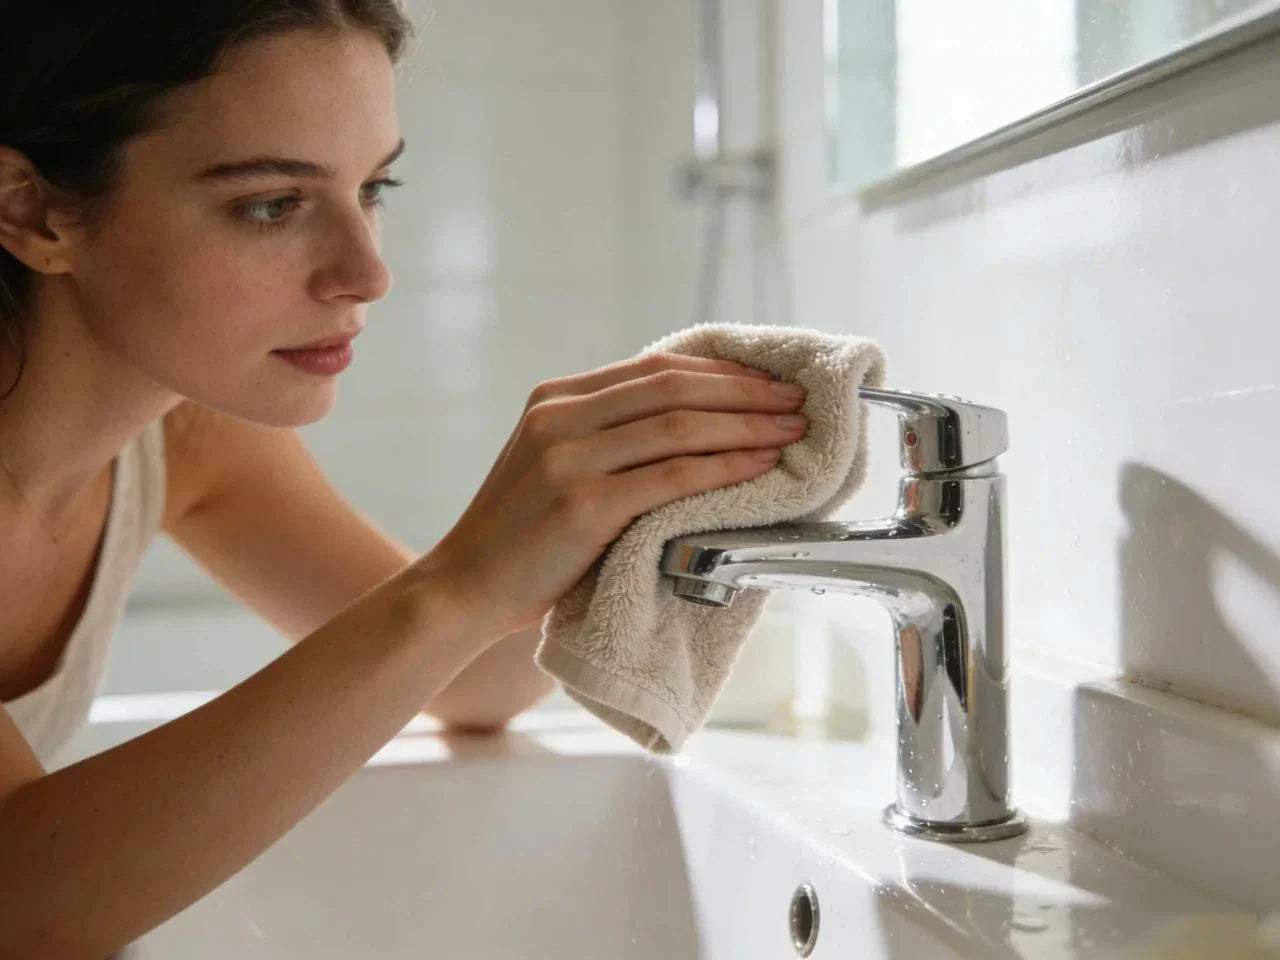
Always use a soft cloth or microfiber towel to wipe down the faucet until fully dry, avoiding scratches and water spots.
-
Pay extra attention to the base of the faucet, the area behind the spout, and the tiny gaps around handles where water pools.
About 80% of mineral deposit and soap scum starts when water drops sit and evaporate. A quick dry wipe can remove any surface minerals and film before they harden into stains or mineral buildup. This simple step also helps prevent water spots and keeps your bathroom sink looking fresh with almost no effort.
Weekly Mild Soap Clean: Simple 5‑Minute Method
Once a week, add a light soap clean. This clears oils, grime, and any film that the daily dry wipe misses.
Weekly 5‑minute routine:
-
Use a mixture of warm water and a few drops of mild dish soap or pH‑neutral dish soap in a small bowl.
-
Dip a soft cloth in the soapy water solution, wring it out, and gently wipe the faucet, base, and handles.
-
Use an old toothbrush to gently scrub hard-to-reach areas around the faucet base, joints, and behind the spout.
-
Rinse away the soap with clean water and a soft cloth.
-
Rinse and dry with a clean, dry cloth to prevent new water spots.
Avoid harsh chemicals, harsh scrubbing pads, powdered cleaners, or strong chemicals. These cause about 90% of finish damage on bathroom taps and can quickly turn shiny chrome or nickel dull and scratched.
Bi‑Weekly Deep Clean Schedule by Water Hardness
How often you need to deep clean with vinegar or citric acid depends on how hard your water is. Many people never test their water, then wonder why every bathroom fixture is covered in scale.
You can use simple test strips or check your local water report from your utility or from national maps to see whether your home has soft, hard, or very hard water.
| Water Hardness (grains/gal) | Deep Clean Frequency | Expected Buildup if Ignored |
| Soft / Moderate (< 7) | Every 2–4 weeks | Light film, small spots around 1–2 months |
| Hard (7–14) | Every 2 weeks | Visible white crust in 1–2 months |
| Very Hard (> 14 or > 200 ppm) | Weekly descaling | Heavy limescale in a few weeks; flow loss |
In hard and very hard water areas, a vinegar solution deep clean is not “extra.” It is basic care to keep your clean bathroom faucets and fixtures working well. U.S. water hardness maps and local reports from utilities or agencies like USGS show that many regions fall in the hard or very hard range.
How Often Should You Clean Bathroom Faucets?
-
Daily: Quick rinse and dry wipe.
-
Weekly: Mild soap and water clean on all visible surfaces.
-
Every 1–4 weeks: Vinegar and water or citric‑acid descaling, based on water hardness.
-
Every 1–3 months: Remove and deep clean the aerator to clear sediment and restore flow.

Step‑by‑Step Guide: How to Clean Bathroom Faucet
Hard water leaves white, chalky or green‑brown crust on spouts, around the base, and inside aerators. If you have a discolored chrome faucet or a tub spout with rough white edges and low flow, this section is for you.
Vinegar & Citric Acid Method: Safely Dissolve Limescale
A vinegar solution is one of the safest, most effective ways to remove mineral deposits from most metal faucets.
For most finishes, you can mix equal parts white vinegar and water (50/50). For heavy buildup on durable finishes like plain stainless steel, you can sometimes use a stronger mix, but always test on a small spot first.
Vinegar wrap method:
-
Mix equal parts vinegar and water in a small bowl or cup.
-
Soak a soft cloth in the water and vinegar mix.
-
Wrap the wet cloth tightly around the faucet spout and the area with scale (for example, the tip or the base). Use a rubber band to hold it in place.
-
Allow it to sit for 10–60 minutes, depending on how thick the limescale is.
-
Remove the cloth and use a toothbrush to gently scrub away softened deposits.
-
Rinse with clean warm water and dry with a soft cloth to prevent new water spots.
Household white vinegar has a pH of about 2.4. At that level, it can dissolve calcium carbonate (the main part of limescale) in about 10–60 minutes, which matches many lab and home tests. Citric acid, made from citrus fruits and often sold as a powder, works in a similar way and is another good natural cleaning option.
This gentle method works well if you are wondering “How long do you soak a faucet in vinegar to clean it?” For light film, 10–15 minutes is enough. For stubborn crust, up to 1 hour is common. Avoid leaving strong acid mixes on sensitive finishes, like unlacquered brass or some matte coatings, for long periods.
Deep‑Cleaning the Faucet Aerator to Restore Flow
If your bathroom sink is running weak or spraying sideways, the aerator is often the problem. Mineral buildup and tiny particles can clog the screen and reduce flow by 30–50% in just a few months.
Here is how to remove sediment from a bathroom faucet safely.
-
Look at the tip of the spout. Most bathroom taps have a small threaded ring at the end; this holds the aerator.
-
Try to unscrew the ring by hand. If it is stuck, use pliers wrapped in a cloth so you do not damage the finish.
-
Note the order of the parts as you remove them: screen, mixer disk, small O‑ring, and housing. Take a quick photo if needed.
-
Place the parts in a small bowl filled with white vinegar and water (50/50). Let them soak for 10–20 minutes.
-
Use a toothbrush to gently scrub the screen and plastic parts, removing loosened grit and scale.
-
Rinse each piece fully with clean water to remove any vinegar and leftover dirt.
-
Reassemble the aerator in the same order and screw it back onto the faucet.
Many homes see a clear jump in flow after this thorough cleaning. Clean aerators can improve flow and stream shape by 20–40%, which also means less time with the tap running. According to the EPA WaterSense program, replacing or maintaining faucet aerators can significantly reduce household water use, since standard efficient bathroom faucets operate at about 1.5 gallons per minute while still delivering strong performance. Over time, this can save thousands of gallons of water per household per year.

Common aerator problems and fixes:
| Symptom | Likely Cause | Simple Fix |
| Weak, thin stream | Mineral deposits, sediment | Soak and clean aerator; repeat every 1–3 months |
| Spray shooting sideways or split stream | Clogged or damaged screen | Clean; replace screen if damaged |
| Gurgling or uneven flow | Partial blockage, trapped grit | Remove aerator, flush tap, then clean and reinstall |
| No change after cleaning aerator | Valve or cartridge problem; supply issue | Check shut‑off valves, supply lines, and internal parts |
If you still have low flow after cleaning, there may be stubborn mineral deposits in the cartridge or supply lines, or a partly closed shut‑off valve. At that point a plumber visit can save a lot of guessing.
What Is the Safest Way to Remove Limescale from a Faucet?
-
Start with a diluted vinegar solution or citric acid and a soft cloth or soft brush.
-
Avoid steel wool, wire brushes, and abrasive powders. These can scratch chrome, nickel, and brass finishes.
-
Never use strong acids on coated or specialty finishes unless the manufacturer says it is safe.
-
Always test any cleaner on a hidden area first and follow the faucet maker’s cleaning tips if you have them.
Troubleshooting Stubborn Mineral Buildup & Low Water Pressure
Sometimes one cup of vinegar and a quick scrub is not enough. Here are a few real‑world situations and what to do.
If you see heavy crust around the spout or base, use a thicker vinegar wrap. Soak the cloth, wrap it tightly, and allow it to sit for up to 1 hour. Check every 15 minutes and gently lift off loosened chunks with a brush. Rinse, dry, and repeat on another day if needed rather than forcing it in one go.
If you still have low flow even after a clean aerator, check your shut‑off valves under the sink. Make sure they are fully open. You can also briefly remove the aerator and run water to flush loose dirt and grime from the line (keep a cup over the end to control the spray). If that does not help, there may be scale in the faucet cartridge or even in the house pipes.
If the finish shows deep pits, green‑black corrosion, or peeling layers, cleaning will not fix the surface. In those cases, it is better to replace damaged parts or the full faucet, especially if leaks or drips are starting.
One common story from hard‑water areas goes like this: a home with very hard water had lost about 50% of its bathroom faucet flow. By starting a weekly vinegar aerator soak, a light bi‑weekly descale, and daily wipe downs, they restored flow from around 1.2 GPM to about 2.5 GPM in a few weeks and kept the clean bathroom look with only about 15 minutes of work per session.
Materials & Finishes: Cleaning Chrome, Brass, Stainless & Matte Safely
Different finishes need different care. If you clean them all the same way, you can damage the finish even while trying to keep your faucet clean.
Identify Your Bathroom Faucet Material & Finish
Take a close look at your faucet in good light. Is it very shiny and mirror‑like? Soft and brushed? Dark and matte?
Here is a quick way to tell common finishes apart:
-
Chrome: Very shiny, mirror reflection, cool silver tone. Shows fingerprints and water spots easily.
-
Stainless steel: Softer silver, often brushed with fine lines. Hides small marks better than chrome.
-
Brushed nickel: Warm gray with visible brush lines. Less shiny than chrome, good at hiding spots.
-
Brass: Warm yellow‑gold tone. Unlacquered brass may darken or discolor with age.
-
Matte or black finishes: Flat, low‑shine surface. Can show white mineral spots if not dried.
You can also check any paperwork from your faucet or search the model online if you still have the box.
Best Cleaners by Finish (What to Use & Avoid)
Use this table as a quick guide before you apply any cleaner or a mixture to your faucet.
| Material / Finish | Recommended Cleaner | Avoid Using | Notes |
| Chrome / Polished brass | Mild dish soap and water; diluted white vinegar and water | Strong acids, bleach, abrasive pads, powders | Short vinegar soaks are fine if you rinse and dry well |
| Stainless steel | Soap and water, mild natural cleaning sprays | Bleach, chloride‑based cleaners | Wipe with the grain to reduce fine scratches |
| Brushed nickel | Mild soap and water; damp cloth; very light vinegar only if allowed | Strong acids, abrasive powders, scrub pads | Dry after each clean to protect the soft finish |
| Matte / Black finishes | Dry soft cloth to prevent water spots; mild soap and water if needed | Vinegar and strong chemicals unless maker approves | Blot, do not rub hard; watch for dull spots |
| Unlacquered brass | Mild soap and water; gentle polishing cloth | Long vinegar soaks, harsh chemicals | Some patina is normal and part of the look |
Strong chemicals can even void faucet warranties, so it pays to stay gentle.
Can Vinegar Damage Chrome or Matte Black Faucets?
For many people, the big question is whether a vinegar solution will hurt their finish.
-
On chrome, diluted white vinegar and water is usually safe for short periods. Do not leave it on for hours, and always rinse and dry right after.
-
On matte black and other specialty coatings, long contact with acids can dull or spot the surface. Use vinegar only if the manufacturer allows it, and keep times very short.
-
When in doubt, start with mild soap and water, and use a test patch in a hidden area before treating the whole faucet.
Preventing Scratches, Spots & Finish Damage
The easiest way to keep your faucet shiny is using cleaning to avoid the things that wear it down.
Choose very soft microfiber cloths without stiff edges or plastic tags. Many people are surprised to learn that rough cloths cause tiny scratches, and about one in five users who report “mystery scratches” later find their cloth was the problem.
Always dry the faucet after cleaning. Even if you use only plain water to clean, leaving it to air dry can still leave water spots and mineral rings. That is why it helps to wipe down the faucet with a dry cloth every time you clean the bathroom.
Avoid using abrasive powders and green scrub pads. These might feel good for a tub or bathtub, but on a faucet they scrape off thin protective finishes. Most long‑term finish damage on bathroom fixtures comes from using the wrong tools, not from the water itself.

Hygiene, Bacteria & Health: What Lives on Your Faucet?
A faucet does not just hold water spots; it can also hold germs. Think about how often you turn it on with dirty hands.
Germ Hotspots: Handles, Aerators & Hidden Crevices
Studies of tap hygiene show that aerators, handles, and seams are common spots for bacteria. One month with no cleaning is often enough for coliform bacteria to appear on aerators in many bathrooms.
Handles and the area around the faucet collect soap scum, skin oils, and bits of dirt. Over time, this mix can form a slimy biofilm where microbes are harder to remove. Aerators are also damp and dark inside, which is a perfect spot for some germs to grow if you never clean them.
If you could see a “bacteria map” on your tap, the brightest areas would be the handles, underside of the spout, and the tiny gaps around the base.
How Cleaning Extends Faucet Lifespan & Protects Your Investment
Good hygiene helps your health, but it also helps your faucet last longer. Regular cleaning can add 2–5 extra years of life to your fixture compared with a similar faucet that is rarely cleaned.
When you keep mineral deposits and grime off your faucet:
-
You slow down corrosion that forms under thick crusts of scale.
-
You protect rubber seals and cartridges from grit that can make them leak.
-
You reduce how often you have to swap out parts or buy a new faucet.
Many neglected faucets start to fail in just 3–5 years, while similar well‑maintained models can work for 10 years or more.
Safe Disinfection Habits Without Damaging Finishes
You might wonder how to disinfect your faucet without harming the surface.
For daily use, soap and water are enough to remove most germs from smooth surfaces. During illness or when you want extra disinfection, you can use disinfecting wipes or sprays that are safe for your finish. Always check the label. After the contact time listed, wipe off any extra chemical with a damp cloth and then dry the faucet.
Never mix chemicals such as bleach and ammonia, as this can release dangerous gases. Health agencies give clear advice on safe cleaning and disinfection, including using regular household cleaners and disinfectants correctly in homes.
Are Bathroom Faucets Dirtier Than Toilet Seats?
It might surprise you, but in many tests bathroom faucets can carry as many, or more, bacteria than toilet seats. The reason is simple: they are high‑touch, often moist, and many people forget to clean them as often as the toilet bowl.
The key point is that regular wiping with soap and water, plus disinfection when needed, cuts the number of germs on faucets by a large amount. Cleaning your faucets should be seen as just as important as cleaning toilets and sinks if you want a truly clean bathroom.
Tools, Products & Natural Cleaners for Bathroom Faucets
You do not need a huge cabinet of sprays to clean your bathroom well. A small, smart kit works better.
Essential Cleaning Kit for Any Bathroom Faucet
Here is a simple kit that covers almost every need, along with rough costs:
-
A set of lint‑free microfiber cloths in a few colors (for example, one for the bathroom sink, one for the tub and shower faucets).
-
One old toothbrush or a small detailing brush for crevices.
-
Plain white vinegar or citric acid powder for descaling.
-
Mild, pH‑neutral dish soap or a gentle all‑purpose cleaner.
-
Baking soda for making a light baking soda paste on durable finishes when you need a tiny bit of scrub power.
With just these items you can keep most bathroom taps, shower valves, and even tub faucet spouts in top shape.
Natural vs. Commercial Cleaners: What Actually Works?
People often ask if they really need special scale removers, or if natural cleaning products like vinegar are enough.
In many home tests, vinegar and citric acid remove most limescale on their own. A mixture of lemon juice and water or vinegar can also help with lighter film, though plain vinegar is usually stronger. Some consumer trials show vinegar removing around 80–85% of stains, while some general bathroom sprays remove far less scale unless they are made just for limescale.
Baking soda mixed with a bit of water to form a baking soda paste is a mild abrasive you can use on tough spots on sturdy finishes like stainless steel. Spread a thin layer, let it sit for a few minutes to break down grime, then gently scrub with a cloth or toothbrush and rinse away fully. Avoid using this on soft or shiny finishes that scratch easily.
Stronger commercial limescale removers have their place, but on many bathroom faucets they are overkill and can harm finishes if left too long. If you use them, apply the cleaner to a cloth (not straight on the faucet), avoid overspray on counters like marble, and rinse well.
A simple way to see what works for you is to start with water to clean, then add mild dish soap, then step up to vinegar and water, and only go beyond that if the buildup does not respond.
When to Avoid Strong Acids & Abrasive Powders
There are times when vinegar or acid‑based products are not a good idea.
Avoid strong acids and harsh powders on:
-
Unlacquered brass, gold, bronze, and some designer matte finishes. These can discolor or dull very quickly.
-
Stone counters such as marble or some natural stones. Acid drips can etch the surface and leave dull spots.
If you need more power on a sensitive surface, try longer contact with weak cleaners rather than a short blast of strong chemicals. For example, apply a mild soap mix, allow it to sit for a few minutes, then scrub gently with a soft brush.
Always do a small patch test in a hidden area to see if a new cleaner affects the finish before using it everywhere.
Visual Comparison: Before/After Clean Bathroom Faucet
Even without photos, imagine this: your faucet starts dull, with visible residue, chalky crust, and a weak, uneven spray. After a week of daily drying, a vinegar wrap, aerator clean, and a gentle wipe down the faucet with soap and water, the surface reflects light again, the stream is smooth, and the handles feel clean instead of sticky.
That difference is what a steady routine brings, and it keeps your bathroom faucets and fixtures looking new without harsh effort.

Designing & Buying a Low‑Maintenance, Easy‑Clean Bathroom Faucet
If you are changing a faucet soon, you can pick models that stay clean longer and need less work.
Features That Keep Faucets Looking Clean Longer
Some faucet designs are much easier to keep clean than others. When you shop, look for:
-
Touchless or sensor‑based faucets that reduce fingerprints and germ transfer.
-
Single‑handle designs instead of two separate knobs, which means fewer seams and joints to trap grime.
-
Simple, smooth shapes with minimal grooves, ridges, and decorative carving.
-
Spot‑resistant or fingerprint‑resistant finishes such as some brushed nickels and some stainless steels.
-
Certified low‑flow bathroom taps (often around 1.2–1.5 GPM) that still give a full stream but reduce water use.
Certifications like water‑efficiency labels or lead‑free safety standards can signal that a faucet is designed with performance and health in mind.
Best Bathroom Faucet Brands for Easy Cleaning
There are many reputable makers with a good track record for easy‑clean designs, smooth finishes, and long warranties. Since brand names are not the focus here, use these general checks instead:
-
Look for models advertised as “spot‑resist,” “easy‑clean,” or with simple aerator access.
-
Check that the aerator is easy to unscrew without special tools.
-
Read product descriptions for mentions of special coatings that resist fingerprints and water spots.
-
Review the warranty: longer coverage often means better materials and finishes.
A helpful habit is to browse user photos and comments to see how faucets hold up after a year or two in real bathrooms, especially in hard water areas.
What Is the Easiest Bathroom Faucet Finish to Keep Clean?
If you want the lowest daily effort:
-
Brushed nickel and some stainless steel finishes are among the best at hiding fingerprints and water spots. They do well with simple soap and water and quick dry wipes.
-
Chrome is very shiny and shows every spot, but it is also easy to wipe clean if you keep up a daily routine. For many people asking “How to clean a chrome faucet?” the answer is: daily dry wipe, weekly soap clean, monthly vinegar wrap.
-
Matte black can hide fingerprints but often shows white mineral spots and may be more finicky with cleaners. Keep it dry and be gentle.
Budget vs. Premium: How Price Affects Durability & Maintenance
Price is not everything, but it does affect how long a faucet stays nice‑looking and how much care it needs.
-
Budget faucets (under about $150–$200): Often have basic finishes and fewer special coatings. They work fine but may show wear, scratches, and spots sooner if you live with hard water.
-
Mid‑range faucets ($200–$500): Tend to use better valves, stronger finishes, and easier‑clean designs. Many have built‑in aerators that are simple to remove and clean.
-
Premium faucets ($500+): Often add touchless controls, advanced coatings, and strong warranties. They can be worth it in busy bathrooms or in homes with very hard water, because they handle frequent cleaning better.
Think of the trade‑off as “upfront cost vs. effort over time.” A stronger finish often means less time spent scrubbing and less risk of long‑term discolor and wear.
Real‑World Results: Case Studies, Mistakes & Expert Tips
Theory is useful, but real bathrooms tell the story best.
Hard Water Home Makeover: From Clogged to Clean
Imagine a home where the tap water measures around 250 ppm for hardness, which counts as very hard. Every bathroom faucet had a thick ring of scale around the base, and the flow from the bathroom sink was half of what it used to be.
They started this simple routine:
-
Daily: quick rinse and dry.
-
Weekly: vinegar wrap on spouts and weekly aerator soak in equal parts vinegar and water.
-
Every two weeks: full descale of spouts and handles with a toothbrush and vinegar mix, followed by soap and water and a dry wipe.
Within a month, the faucets changed from dull and crusty to clean and almost new‑looking. Flow went from about 1.2 GPM to roughly 2.5 GPM. The owner spent only about 15 minutes per session but stayed consistent.
Common Cleaning Mistakes That Ruin Faucets
Many damaged faucets did not fail from age, but from the way they were cleaned. Some common mistakes include:
-
Using steel wool, rough scouring pads, or abrasive powders “just this once” to remove a stain.
-
Letting strong chemicals sit on the finish for long periods without rinsing.
-
Only cleaning what you can see and ignoring aerators and hard‑to‑reach areas where sediment and scale build up.
-
Spraying cleaners directly on the faucet so they drip onto natural stone counters or into seams. Applying to the cloth first gives more control.
If you catch yourself tempted to “go hard” on a spot, remember that it is safer to repeat a gentle method than to fix a scratched or stripped finish.

Pro Tips from Plumbers & Manufacturers
Plumbers and faucet makers share a few simple habits that work across most homes:
-
For aerators with soft rubber nozzles (common on some shower faucets), rubbing them with your fingers under running water can break off light scale without tools.
-
Many professionals use the vinegar wrap method for severe buildup. They keep the vinegar on the problem area only, to avoid hitting nearby surfaces.
-
When an aerator is very tight, place a towel around it before using pliers. This gives grip and protects the finish. If it still will not move, they sometimes apply a bit of warm air from a hair dryer to loosen mineral bonds before trying again.
Watching short how‑to videos from trusted plumbing sources can help you see these small tricks in action.
Visual & Interactive Tools: Checklists and Calculators
To make your routine easy to follow, you can print a small checklist for your bathroom:
-
Daily: rinse and dry faucet and handles.
-
Weekly: soap clean and quick aerator check.
-
Monthly (or as needed): vinegar descale, full aerator soak, quick inspection for leaks.
Some online tools let you enter your tap flow rate before and after cleaning to see water savings. Even without a calculator, if cleaning your aerator makes the stream stronger and more direct, you are likely using time and water more efficiently each day.
Summary: Simple Routine for a Forever‑Clean Bathroom Faucet
By now you have seen that a clean bathroom faucet is not about hard scrubbing or strong chemicals. It is about gentle steps, done often.
3‑Step Maintenance Plan to Keep Faucets Spotless
You can remember this simple plan:
-
Daily: Rinse and wipe dry with a soft cloth to prevent water spots and fresh mineral film.
-
Weekly: Wash with mild dish soap and warm water, gently scrub crevices with a toothbrush, then rinse and dry.
-
Monthly (or based on water hardness): Use equal parts white vinegar and water or citric‑acid mix to descale spouts and clean the aerator.
This same pattern works whether you are thinking about how to clean tub faucet spouts, how to keep a discolored chrome faucet shiny, or how to clean brushed nickel fixture in bathroom spaces.
At‑a‑Glance Schedule by Water Hardness & Household Use
Here is a quick schedule you can adjust based on water hardness and how busy your bathroom is.
| Water Hardness & Use | Daily Task | Weekly Task | Bi‑Weekly / Monthly Task |
| Soft water, 1–2 people | Rinse and dry | Soap clean | Descale and aerator clean every 4 weeks |
| Soft water, 3–5 people | Rinse and dry | Soap clean | Descale and aerator clean every 3 weeks |
| Hard water, 1–2 people | Rinse and dry | Soap clean | Descale every 2 weeks; aerator clean every 1–2 months |
| Very hard water, 3–5+ people | Rinse and dry | Soap clean + light vinegar touch‑ups | Full descale weekly; aerator clean every 1–2 weeks |
You can adjust these times if you see spots forming faster or slower in your own bathroom.
When to Call a Pro or Replace Your Bathroom Faucet
Some issues are not worth fighting on your own.
Consider calling a plumber or planning a replacement when:
-
You see persistent leaks, corrosion, or a severely pitted finish that does not improve with cleaning.
-
You have repeated clogs and low flow even after cleaning aerators and checking shut‑off valves.
-
You want a touchless or low‑maintenance upgrade to cut down on both germs and cleaning time.
A new, easy‑clean faucet combined with the routine you have learned here can keep your bathroom looking neat and fresh with far less work.
FAQs
1. Why spray WD‑40 in your faucet?
Some people spray lubricants like WD‑40 on stuck faucet parts, such as tight handles or a frozen aerator ring, to help loosen them. It is not a cleaner and should not be sprayed into the water path. If you use any lubricant, keep it on the outside parts only, wipe off extra, and avoid contact with rubber seals and drinking water.
2. How do you make chrome shiny again?
To restore shine on chrome, wash with soap and water, rinse, and dry. Then use a vinegar and water wrap on any scale for 10–20 minutes, scrub gently with a soft toothbrush, and rinse and dry. A final buff with a clean, dry microfiber cloth makes the faucet sparkle.
3. Can you use Dawn dish soap on chrome?
Yes. A small amount of mild dish soap (such as blue dish soap many people use in kitchens) mixed with warm water is safe for most chrome faucets. Apply with a soft cloth, then rinse and dry. Do not leave soapy residue to dry on the surface.
4. Can I use Windex on a chrome faucet?
Glass cleaners can remove fingerprints and spots from chrome, but some contain ammonia or other chemicals that may not be ideal for all finishes. If you use a glass cleaner, spray it on a cloth, not directly on the faucet, wipe gently, then rinse with water and dry. For regular cleaning, plain soap and water is usually better.
5. How to clean brushed nickel bathroom fixtures?
For brushed nickel bathroom taps, skip harsh chemicals. Use warm water and a few drops of mild dish soap on a soft cloth, wipe the surface, then rinse and dry. For light scale, use a very diluted water and vinegar mix on a cloth for a short time, only if the maker says it is safe. Always dry fully to protect the soft finish.
References


Leave a comment
This site is protected by hCaptcha and the hCaptcha Privacy Policy and Terms of Service apply.