


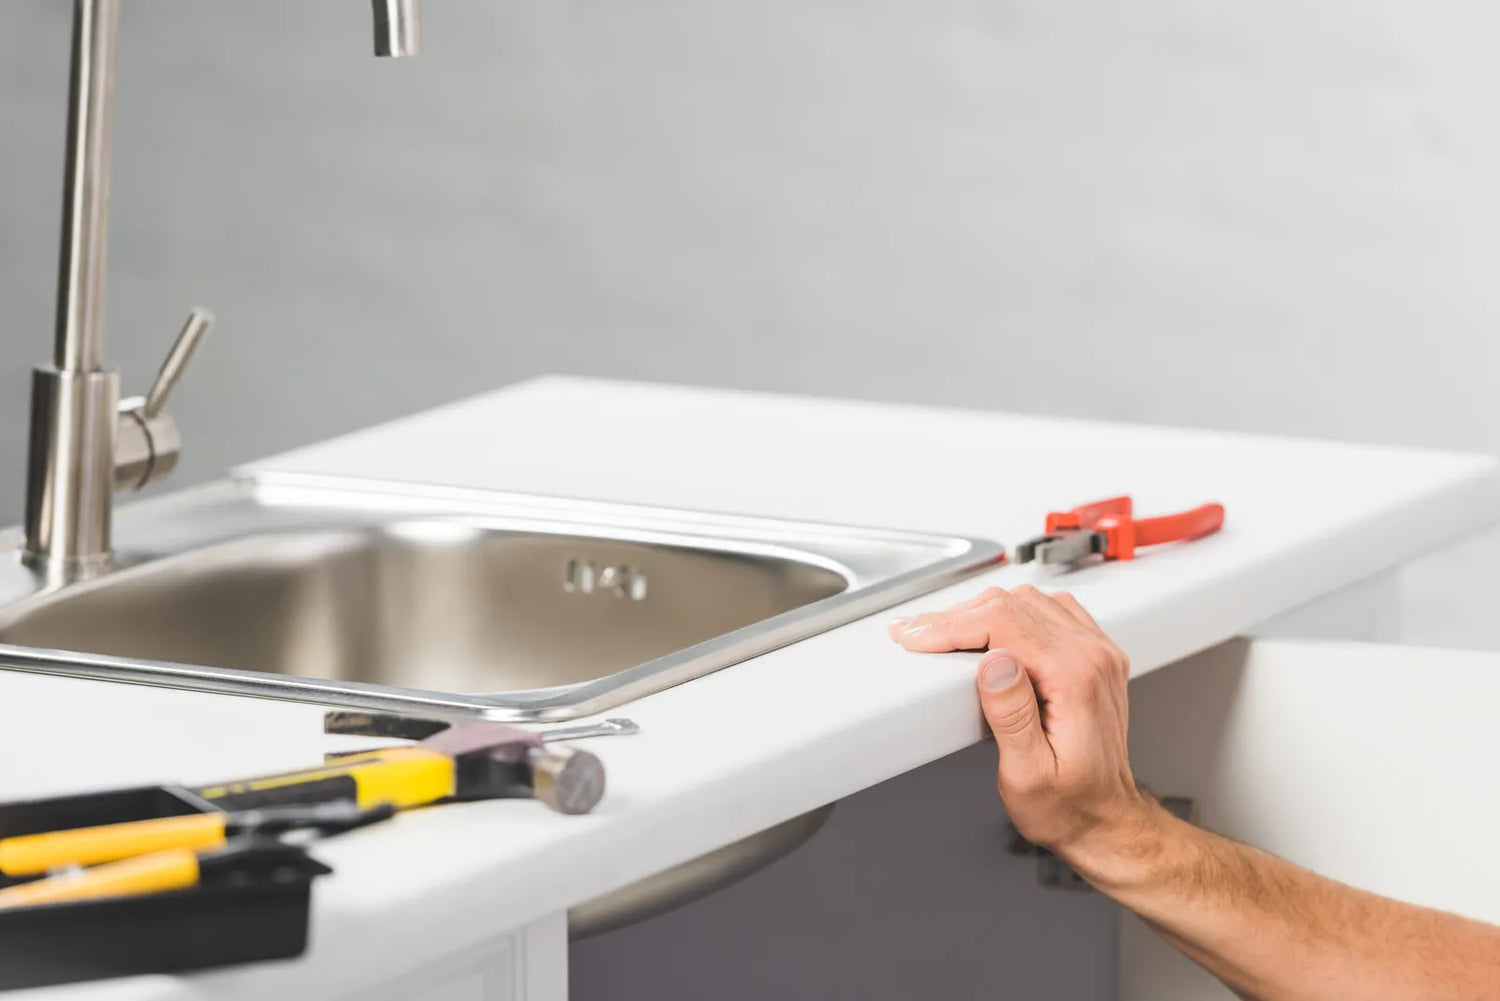
Replacing a kitchen sink sounds simple until the new one arrives and is just slightly wrong. That is the point where small mistakes get expensive.
A sink can fail in three different ways:
-
It does not physically fit the cabinet or cutout
-
It fits on paper but forces plumbing, countertop, or faucet changes
-
It installs, but daily use is annoying because depth, bowl shape, or drain location were not checked
This is why mastering sink measurement tips for how to measure for a kitchen sink is not just length and width. If you want to know how to measure for a replacement kitchen sink, you need to start with the limits of the space, not the sink listing.
Quick Answer
This works if you measure the cabinet interior, countertop cutout, mounting style, and plumbing clearances before buying. It does not work if you buy by the old sink’s outside size alone, assume all 33-inch or 30-inch cabinets take the same sink, or switch from drop-in to undermount or farmhouse without checking support, cutout shape, and faucet space.
Decision Snapshot
Before diving into specific fit scenarios, it helps to quickly outline the conditions that make sink selection straightforward, risky, or entirely premature.
Works best with known cutout and cabinet limits
This goes smoothly when you already know:
-
the exact countertop opening size
-
the inside width of the base cabinet
-
whether the sink is drop-in, undermount, or farmhouse
-
where the drain, faucet holes, backsplash, and plumbing sit now
Understanding the types of kitchen sinks helps ensure a smoother swap, especially when replacing a drop-in with another drop-in, as there is usually some margin to work with.
Avoid guesswork when sink type is changing
This is where people get into trouble. A switch from:
-
drop-in to undermount
-
undermount to drop-in
-
standard sink to farmhouse apron front
-
shallow bowl to deep bowl
-
centered drain to rear drain
can trigger extra work even when the listed dimensions seem close.
Reconsider if plumbing or clearances are tight
This becomes a problem when:
-
shutoff valves already sit high in the cabinet
-
garbage disposal barely clears the bottom shelf area
-
a tip-out tray is installed on the front rail
-
the faucet is close to a backsplash or window trim
-
the countertop opening has odd corner radiuses
If your setup already feels cramped under the sink, a deeper or differently shaped bowl can make service and storage worse.
Wrong fit signs before you buy
Do not order yet if any of these are true:
-
you only know the old sink’s outside size
-
you do not know the cabinet inside width gable-to-gable
-
you cannot tell whether the old sink opening is square-cornered or rounded
-
you have not measured faucet-to-backsplash clearance
-
you are assuming the new rim will cover the old cutout
Decision line: If you do not know the cutout size and cabinet interior size, you do not yet know what sink will fit.
What must be measured first?
The right order matters. Most sink measurement mistakes happen because people measure the sink first instead of the space.
Existing cutout before sink dimensions
If you are replacing an existing sink, the countertop opening is usually the first hard limit.
Tolerance & pass/fail rules
-
Take width and depth measurements at three points along each direction, and use the smallest dimensionas your controlling cutout size.
-
If the opening varies by more than 1/8 inch or is noticeably out-of-square, flag the condition as high-risk and plan for a template or mock-up.
-
Require a physical template or full-size mock-up if the counter is uneven, the opening is irregular, or switching mounting styles (drop-in to undermount or vice versa).
-
For drop-in sinks, verify rim dimensions fully cover the old cutout with consistent overlap on all sides; gaps or insufficient coverage are an immediate fail.
-
For undermount sinks, confirm reveal specifications and countertop thickness early; rely on a manufacturer template to avoid reveal, seating, or clearance failures.
Also measure:
-
the corner radius of the cutout
-
distance from cutout to backsplash
-
distance from cutout to front counter edge
If you are asking how to measure kitchen sink size for an existing cutout, this is the answer: measure the opening itself, not just the sink that came out of it.
Cabinet interior before advertised sink width
Sink listings often show overall sink width first. That is useful, but it is not the real limit. The real limit is the cabinet interior.
Measure the inside of the sink base cabinet from gable to gable. That means the interior wall on the left to the interior wall on the right, not the outside cabinet dimension.
Then check:
-
front rail thickness
-
back wall clearance
-
any braces or corner blocks
-
whether plumbing enters through the side wall
-
whether disposal, filtration, or hot-water accessories use cabinet space
A “33-inch sink” does not fit every 33-inch cabinet. The cabinet’s actual inside width decides that.
Counter thickness before undermount replacement
If you are learning how to measure a kitchen sink for undermount replacement, countertop thickness matters more than many guides admit.
Measure:
-
countertop thickness at the sink opening
-
distance from countertop underside to top of doors or drawer fronts
-
existing support method under the sink
Why it matters:
-
clips and support rails need room
-
thicker sink rims and deeper bowls reduce under-sink space
-
reveal style changes how much of the bowl opening is exposed
-
some undermount swaps need a new template even if width looks close
If this is missed, you can end up with poor support, weak adhesive bonding, or a reveal that looks wrong and traps water.
Faucet and backsplash space before bowl depth
Many people measure the depth by recording bowl depth but forget what sits behind it.
Measure:
-
center of faucet holes to backsplash
-
faucet height and reach
-
distance from sink rear deck to wall
-
window trim or sill interference if applicable
A deeper sink shifts working height lower but must still provide enough space to wash dishes comfortably. That sounds minor until a tall faucet handle hits the backsplash or the faucet stream lands too close to the front wall of the basin and splashes.
Decision line: If faucet and backsplash space are already tight, do not assume a deeper or thicker sink will still work.

Will the sink fit the cabinet?
Before diving into specific measurements and fit checks, it’s critical to evaluate all interior clearances, potential obstructions, and size constraints that will determine whether your chosen sink can install safely and function properly within the existing cabinet space.
Gable-to-gable width sets the real limit
This is the most important cabinet measurement.
Open the doors and use a measuring tape to record the clear inside width from left cabinet wall to right cabinet wall. Ignore the nominal cabinet size for now. Write down the exact number to the nearest 1/8 inch.
Decision procedure: Cabinet fit validation
-
Measure the gable-to-gable interior width of the cabinet to the nearest 1/8 inch.
-
Locate the minimum cabinet size rating on the manufacturer’s sink spec sheet.
-
Compare the measured interior width directly to the listed minimum cabinet size.
-
Confirm the sink’s overall width, mounting clips, and side accessories will not bind against cabinet walls.
Tight-fit retrofitIf the cabinet interior width is at or near the sink’s stated minimum cabinet size, verify additional clearances:
-
Sufficient space for undermount mounting clips without modification
-
Adequate clearance for workstation rails, side ledges, or accessory trays
-
No interference with internal braces, corner blocks, or side-entry plumbing
If a sink is too wide for the cabinet:
-
Mounting hardware may not fit
-
Clips can hit the cabinet walls
-
The sink can bind during install
-
Side-mounted accessories or rails become unusable
Front rail and back wall reduce usable depth
Front-to-back fit matters too. Base cabinets do not offer the full outside depth as usable sink depth.
You lose space to:
-
the front rail behind the false drawer
-
cabinet frame material
-
back wall irregularities
-
plumbing stubs and shutoffs
This is where many workstation and deep-bowl sinks fail. The outside dimensions might fit, but the sink body and rails interfere once lowered in.
Tip-out trays block deeper front bowls
Tip-out trays and false-front hardware often occupy the same zone as a sink’s front wall.
This becomes a problem when:
-
the bowl is very deep at the front
-
the sink has a thick apron or ledge system
-
a replacement sink has a more vertical front wall than the old one
On paper, width and cutout may be fine for a larger sink, but in practice, the tray hardware hits the sink body and must be removed or modified.
Surrounding counter ledges/overhang interference
Measure any underside buildup, lip overhang, or adjacent structural ledges around the cutout that could block proper seating of the sink rim or mounting system. This check is critical for sinks with thick rims, workstation ledges, or undermount installations, where hidden counter features can prevent the sink from sitting flush or create uneven pressure points. Ensure full contact along the entire perimeter and no obstructions within the mounting zone.
What size fits a 30-inch cabinet?
For people asking what size kitchen sink fits a 30 inch cabinet, the short answer is: usually a sink with an overall width clearly below the cabinet’s nominal width, but the exact fit depends on the actual interior width, sink wall thickness, and mounting method.
In many homes, a 30-inch sink base works well with compact sinks around the mid-to-upper 20-inch range comfortably. Some sinks listed for 30-inch cabinets are designed tightly and leave little tolerance. That can work in new construction, but in retrofits it often becomes frustrating.
If your cabinet is 30 inches nominal and:
-
the interior width is reduced by thick side panels
-
the sink is composite or cast material with thick walls
-
the installation uses undermount clips
-
the sink has workstation rails
You need more margin, not less.
What size fits a 33-inch cabinet?
For what size kitchen sink fits a 33 inch cabinet, many homeowners expect a 33-inch sink. Sometimes that works, often it does not.
A 33-inch cabinet usually takes a sink somewhat smaller than the cabinet’s nominal width, especially for easier retrofit installation. Some tight-fit models are made for 33-inch cabinets, but they leave less room for error.
This is where people get misled by “minimum cabinet size” listings. Minimum means the sink may fit under ideal conditions. It does not mean it will fit easily in an older cabinet with framing buildup, slight out-of-square conditions, or bulky plumbing.

Will the sink fit the cutout?
Even with accurate overall dimensions, several critical details determine whether your sink will sit flush, seal properly, and install without extra countertop modifications.
Rim coverage must exceed the old opening
If you are replacing a drop-in sink, the new rim must fully cover the existing countertop opening. This is basic, but many failures happen here.
If the old cutout is larger than the new sink’s covered area:
-
the sink falls partly into the opening
-
gaps show around the rim
-
sealant cannot do its job
-
the countertop may need enlargement or replacement
For how to measure a drop-in kitchen sink correctly, do not try to match the cutout exactly to the sink body. A drop-in sink needs overlap.
A practical rule is to confirm that the rim gives solid coverage on all sides. In many retrofit situations, a cutout that is roughly 1/4 to 1/2 inch smaller than the supported rim area per side is manageable, but always verify against the sink’s actual cutout template and rim dimensions.
Corner radius mismatch forces countertop changes
This is where most people get it wrong.
The old sink opening may have rounded corners. The new sink may have tighter corners or a different corner shape. Even if the length and width match, the sink may not seat correctly.
Measure the corner radius carefully. You can use a radius gauge, make a cardboard template, or compare with printed radius guides.
If the new sink corner radius is tighter than the old cutout:
-
The sink may rock or leave gaps
-
Undermount reveal may look uneven
-
Countertop cutting or grinding may be required
That extra work is especially risky with stone counters.
Uneven counters shrink usable tolerance
Older countertops often have slight bowing, seam variation, or chipped edges hidden by the old sink.
That means your real tolerance may be less than it looks.
Measure the opening in several spots and check level across the opening. If one side dips or the opening varies more than about 1/8 inch, assume a tighter install.
This aligns with measurement best practices published by ASTM International, which recommends verifying dimensions at multiple points to account for material warping and installation tolerances. This is one reason many installers advise rounding measurements to the nearest eighth and checking twice.
How much smaller should the cutout be?
For drop-in sinks, the countertop opening must be smaller than the sink’s outer rim so the lip of the sink can rest securely on the counter without leaving too much counter space exposed.
For undermount sinks, the cutout is not “smaller than the sink” in the same way. Instead, the visible opening depends on the bowl opening and the chosen reveal:
-
positive reveal: a little of the sink rim shows
-
zero reveal: counter edge aligns with bowl edge
-
negative reveal: counter overhangs the sink slightly
The exact amount varies by installer and material. In retrofit work, do not assume a new undermount bowl will match the old reveal exactly.
Decision line: If your countertop opening and corner shape are unknown, you are guessing, not measuring.
How mounting type changes measurement
Each mounting style comes with its own unique measurement rules and clearance requirements.
Drop-in needs rim overlap, not exact matching
A drop-in is more forgiving in retrofit work because the rim hides minor cutout imperfections. That is why many replacements succeed without stone cutting.
When measuring a drop-in replacement, focus on:
-
outer sink size
-
cutout size
-
rim width
-
faucet hole layout
-
front-to-back deck space
If the old cutout is ugly, a wider-rim drop-in can sometimes save the job.
Undermount uses inner opening and reveal
For undermount vs drop-in sink measurement differences, this is the big one: undermount measurement is driven by the bowl opening, reveal style, and countertop underside support.
You need to measure:
-
inside opening of the countertop
-
actual bowl opening dimensions
-
reveal preference
-
counter thickness
-
support hardware space
An undermount that “almost matches” can still fail because:
-
clips do not line up
-
the reveal exposes rough stone edges
-
the bowl edge sits too close to the cabinet frame
-
faucet holes or soap dispenser holes land badly
Farmhouse needs apron and door clearance
If you are learning how to measure a farmhouse apron front kitchen sink, do not start with width alone.
You need to measure:
-
cabinet inside width
-
cabinet face frame opening
-
apron height
-
apron projection
-
distance to doors, false drawer front, and toe-kick area
-
required support structure
Farmhouse sinks often need cabinet modification. The apron section changes the front of the cabinet, and the sink usually needs a support frame inside.
This becomes a problem when:
-
the apron height cuts into drawer space
-
the sink front blocks door swing
-
the cabinet rail must be cut
-
the sink weight exceeds what the old setup supported
Can a drop-in replace an undermount?
Sometimes, yes. Often, it is the easier rescue option when an undermount replacement does not match the old opening.
A drop-in can replace an undermount if:
-
the new rim fully covers the existing cutout
-
there is enough counter surface around the opening
-
faucet placement still works
-
cabinet and bowl depth still fit below
It does not work well when:
-
the cutout is too large for the drop-in rim
-
the rear deck crowds the backsplash
-
the new sink shifts the faucet too far forward
-
the counter material around the opening is damaged

What fails during retrofit installs?
Most retrofit failures boil down to missing one critical clearance or dimension.
Fit summary
Before buying, confirm these minimums in your own kitchen:
-
Cabinet width: inside gable-to-gable measurement, not label size
-
Cutout size: measured in multiple spots, smallest number used
-
Cutout corners: radius and shape must match sink spec or be coverable
-
Counter thickness: needed for undermount support and reveal
-
Rear clearance: enough room for faucet, backsplash, and handles
-
Under-sink height: enough for drain, trap, disposal, and shutoff access
-
Front clearance: no conflict with false-front trays or apron projection
If one of these is unknown, delay the order.
Drain location can block storage or disposal
A rear-set drain can improve usable bowl floor and free some cabinet space. But if your wall drain stub, trap arm, or disposal setup is fixed in a certain spot, the new sink’s drain location may force plumbing changes.
Check:
-
sink drain location front-to-back
-
whether it is centered or offset
-
disposal body height if used
-
trap alignment with wall outlet
If the new drain sits farther back or lower than the old one, the trap may not line up cleanly.
Deep bowls crowd traps and shutoff access
Standard kitchen sink depths vary, but many common replacements land around 8 to 10 inches deep. Deeper bowls can feel useful, but they also push the drain lower into the cabinet.
That creates problems when:
-
The trap almost touches the cabinet floor
-
Shutoff valves are hard to reach
-
Disposal units hang too low
-
Cleaning the trap later requires disassembly in a cramped space
This is one place where size works but maintenance gets worse.
Wall faucet and deck faucet need different space
If the faucet comes from the wall, the sink’s rear edge and bowl position matter differently than with a deck-mounted faucet.
Check whether:
-
the faucet stream will land near the bowl center
-
the faucet can reach over the sink wall thickness
-
handles clear backsplashes and trim
-
a deck-mounted replacement sink still has room for faucet holes
A sink that is deeper front-to-back can move the working area forward and change splash behavior.
Is re-plumbing likely with this sink?
Re-plumbing is likely if:
-
the new drain location shifts by more than a small amount
-
the new bowl is noticeably deeper
-
you are adding a disposal where none existed
-
you are switching single bowl to double bowl
-
the sink outlet no longer aligns with the wall drain elevation
It may still be worth doing. But it should be part of the buying decision, not a surprise after delivery.
Where size works but daily use fails
Even when a sink passes all physical fit checks, several common design choices can still lead to frustrating daily performance and reduced functionality.
Shallow bowls splash more than expected
A sink can fit perfectly and still be disappointing.
Shallow bowls often create more splash, especially with:
-
high-arc faucets
-
strong water pressure
-
flat-bottom bowls
-
users wash larger pots and pans
If your current sink already splashes, going shallower usually makes it worse.
Thick sink walls reduce usable basin space
This catches people moving from thin stainless to thicker composite, fireclay-style, or heavy cast materials.
The outside dimensions may match the old sink closely, but the inside basin gets smaller because the walls are thicker.
So when checking common kitchen sink sizes and how to measure them, do not stop at outside dimensions. Measure or confirm:
-
interior bowl width
-
interior bowl front-to-back
-
interior bowl depth
This matters even more in smaller cabinets.
Small second bowls often become wasted space
For how to measure single bowl vs double bowl kitchen sinks, the issue is not only fit. It is function.
Double bowls divide usable width and often create a smaller bowl that limits practical use when washing dishes. In a cabinet that is already on the smaller side, one bowl often ends up too small for sheet pans, stock pots, or rinsing large items.
This becomes annoying when the second bowl is too shallow or narrow to do real work. On paper, a double bowl can look efficient. In daily use, a cramped second bowl often becomes a place where clutter sits.
Will a deeper sink hurt under-sink storage?
Yes, often.
A deeper sink lowers the drain and trap. That reduces space for:
-
pull-out bins
-
cleaning caddies
-
water filters
-
disposal clearance
-
normal storage
If under-sink storage is already tight, deeper is not automatically better.
Decision line: If your cabinet is compact and already crowded, prioritize drain and trap clearance before buying a deeper bowl.
Long-term problems after installation
Even a correctly sized sink can lead to persistent, long-term issues if installation clearances, support, and edge details are not planned upfront.
Poor support causes movement and seal failure
This is a common callback issue.
Undermount sinks need proper support. Farmhouse sinks need even more. If the sink is held poorly, movement starts small:
-
slight flexing under load
-
caulk line opening
-
water seepage at edges
-
staining or swelling in adjacent materials
That is not really a sink-size problem at first glance, but it often begins with a sink that was forced into a marginal opening or mounted without enough support room.
Wrong depth complicates trap cleaning later
A very deep bowl can make trap service awkward. If there is little room between the disposal or drain assembly and cabinet floor, simple maintenance gets harder.
This matters in real homes because sinks are not just installed once. They need service.
Water pooling starts with thickness misreads
Counter thickness and reveal choices affect how water behaves at the edge of an undermount. If the sink sits too low, too far back, or with a poor reveal, crumbs and water catch on the transition.
That means more wiping, more residue, and a messier sink edge long term.
Mistakes to avoid before final ordering
These are the measurement mistakes that cost the most:
-
measuring only the old sink’s outside dimensions
-
assuming standard kitchen sink dimensions for replacement are enough
-
not checking inside cabinet width
-
not measuring cutout corners
-
ignoring counter thickness on undermounts
-
forgetting faucet and backsplash clearance
-
buying a deeper bowl without checking trap height
-
assuming a listed minimum cabinet size means easy fit
-
not checking whether thick sink walls reduce bowl space
-
skipping a cardboard or paper template test
A template test is simple and worth doing. Place a full-size outline in the opening area and check rim coverage, faucet room, front edge clearance, and bowl placement before ordering.
Step-by-step validation
Use this quick process before you buy:
-
Measure the cabinet
Record:
-
inside width gable-to-gable
-
usable front-to-back interior depth
-
inside height to cabinet floor and to any obstructions
-
Measure the opening
Record:
-
cutout width in three spots
-
cutout front-to-back in three spots
-
smallest dimensions
-
corner radius
-
front and rear counter margins
-
Confirm mounting type
Decide whether you are keeping:
-
drop-in
-
undermount
-
farmhouse
If changing types, assume more work unless proven otherwise.
-
Measure plumbing zone
Complete the following record-and-compare checklist:
-
Wall drain centerline height
-
Exact trap arm location and orientation
-
Disposal body height and vertical clearance
-
Horizontal and vertical clearance for drain components
Re-plumb triggers
-
Drain centerline height differs significantly from the new sink’s drain location
-
Trap arm no longer aligns with the sink outlet
-
Deeper bowl lowers the drain beyond usable trap geometry
-
Disposal placement conflicts with existing plumbing or cabinet floor
Also verify the electrical and outlet conditions:
-
GFCI outlet location and physical access
-
Disposal cord length and service loop availability
-
Interference from deeper bowls, sink wings, or accessories with outlet or wiring path
-
Check faucet space
Record:
-
faucet hole spacing
-
distance to backsplash
-
handle clearance
-
window or trim conflicts
-
Compare inside bowl space
Do not buy by outside size alone. Compare:
-
usable bowl width
-
usable bowl front-to-back
-
bowl depth
-
drain location
-
Test the footprint
Use cardboard or paper to mock up:
-
rim coverage
-
apron projection of farmhouse
-
faucet landing zone
-
bowl position
If your setup looks tight during mock-up, it will feel tighter during install.

Before You Buy
Use this checklist to avoid the usual mistakes:
-
I measured the cabinet interior width, not just the cabinet label size.
-
I measured the countertop cutout in multiple places.
-
I checked the corner radius of the cutout.
-
I confirmed whether I need a drop-in, undermount, or farmhouse sink.
-
I checked counter thickness for an undermount replacement.
-
I verified the new sink’s rim covers the old opening.
-
I measured backsplash and faucet clearance.
-
I checked the drain location on the new sink against existing plumbing.
-
I checked whether a deeper bowl lowers the trap too much.
-
I compared inside bowl size, not just outside dimensions.
-
I checked for tip-out tray, disposal, filter, and shutoff interference.
-
I used a template or mock-up before ordering.
If you cannot check at least most of these, wait. The sink is not the expensive part of a bad installation. The extra labor, plumbing changes, countertop work, and delays are.
FAQs
1. Is sink size measured by the opening?
Not exactly. While mastering how to measure for a kitchen sink, the countertop opening is only one key factor, alongside outer rim dimensions, bowl depth, wall thickness, and mounting type. A sink that matches the opening can still fail due to poor rim coverage or cabinet interference, so full spatial checks are essential. Focusing only on the cutout ignores real-world fit issues and can lead to installation delays or poor performance. Taking multiple measurements and checking for uneven surfaces ensures you avoid common fitting pitfalls.
2. Can I replace a sink without changing cabinets?
Usually yes, as long as the new sink fits your cabinet interior and provides proper cutout coverage. The process becomes more involved when upgrading to farmhouse styles, which requires measuring apron front sinks for apron height, projection, and door clearance. You must also verify space for mounting hardware, plumbing, and tip-out trays to prevent installation conflicts. Even with common sizing, retrofits demand extra attention to out-of-square openings and cabinet irregularities. With careful planning, most sink swaps can be completed without altering cabinet structure.
3. How do I know what size sink to buy?
Begin by recording your cabinet interior width and countertop cutout measurements, then compare these values to the manufacturer’s spec sheet for finding the right replacement sink size. Never rely solely on nominal sink width, as labeled sizes do not guarantee a proper fit. Be sure to check corner radius, counter thickness, and drain alignment to avoid unexpected fitting issues. Understanding how your space limits overall dimensions helps narrow down compatible options efficiently. Taking these steps ensures you select a model that fits both physically and functionally.
4. What is the standard depth for kitchen sinks?
Most standard kitchen sink dimensions fall between 8 and 10 inches deep, but this generic range does not guarantee suitability for every cabinet. Deeper bowls reduce under-sink storage and can cause interference with traps or garbage disposals. You must evaluate vertical clearance and plumbing layout before choosing a depth that works for your space. Shallow sinks may fit more easily but can lead to splashing during regular use. Always prioritize actual clearances over industry-standard numbers when making your choice.
5. How to measure for an undermount sink?
Start by measuring the countertop opening, cabinet interior, and counter thickness, keeping in mind the differences when measuring undermount vs drop-in sink installations. Check corner radius to ensure the sink sits flush without gaps or uneven edges. Plan to use a manufacturer template to set proper reveal and avoid seating or sealing problems. Verify drain and trap alignment to prevent the need for last-minute plumbing changes. Accurate readings at this stage prevent costly adjustments during installation.
6. How to measure for a farmhouse sink upgrade?
When completing how to measure sink depth and width, take width and depth measurements at three separate points and use the smallest value as your working dimension. Account for countertop overhangs, cabinet braces, and mounting hardware that can reduce usable space. For drop-in models, confirm rim overlap, while undermount styles require attention to counter thickness and reveal settings. Using precise measuring tools helps maintain consistency and avoid miscalculations. These steps ensure your dimensions reflect real usable space rather than just theoretical sizing.
7. Common mistakes in sink measurement?
A frequent error is relying only on the old sink’s outer dimensions instead of measuring the actual cabinet and cutout space. Many people also skip checking faucet clearance, trap height, and corner radius, leading to avoidable fit failures. Using proper best tools for accurate sink measurements helps eliminate guesswork and inconsistent readings. Assuming nominal cabinet sizes guarantee fit ignores real-world irregularities and obstructions. Skipping template testing often results in poor rim coverage or awkward installation positioning.
References


Leave a comment
This site is protected by hCaptcha and the hCaptcha Privacy Policy and Terms of Service apply.