


Caulking kitchen sink edges is a simple DIY that prevents leaks, mold, and countertop damage. Based on guidelines from the U.S. Department of Energy (DOE), proper caulking helps seal gaps and prevent water damage, which supports using durable silicone around wet areas like sinks. This guide shows you exactly which sealant to use, how to prep and apply it for crisp lines, and how to fix common issues—so your sink stays clean, dry, and protected.
Quick answer: the fastest way to seal your sink
Let's learn how to caulk kitchen sink. If you just need the short version, here it is. For most kitchens, the right choice is a 100% silicone kitchen and bath sealant that resists mold and mildew. Apply a single, smooth bead around the rim where the sink meets the countertop, then tool it and let it cure. The result is a neat, watertight seal.
- What to use: 100% silicone kitchen/bath caulk (mold/mildew-resistant).
- Where to apply: Continuous bead around the visible perimeter where the sink meets the countertop.
- Key steps: Remove old caulk → clean with water + rubbing alcohol → dry completely → tape both sides → cut nozzle at a 45-degree angle → apply 1/4–3/8 inch bead → smooth → remove tape while wet → cure 24 hours.
- Time to complete: About 45–90 minutes of work, plus 24 hours to cure.
- Top mistakes to avoid: Caulking over damp/dirty surfaces, skipping tape, leaving old caulk behind.
Want more detail and pro tricks? Keep reading for the step-by-step.
Tools and materials checklist (at a glance)
- Tools: Caulk gun, utility knife or scraper, caulk remover (optional), caulking tool or plastic spoon, clean rags, painter’s tape, small bucket or spray bottle.
- Materials: 100% silicone caulk (kitchen/bath grade), rubbing alcohol, mild dish soap and water, mineral spirits (for cleanup only if your caulk label allows).
- Optional: Nitrile gloves, paper towels, vacuum with crevice tool.
Caulking kitchen sink: step-by-step that wins
The goal is a watertight, flexible seal that looks clean and lasts for years. Take your time on prep. That’s the trick most people miss.
Remove old caulk completely
When caulking kitchen sink, removing every trace of old sealant ensures the new silicone adheres properly. Start by cutting along both edges of the old bead with a sharp utility knife. Run the blade where the rim of the sink meets the countertop, then use a scraper to lift out every bit of old material. If the caulk is stubborn, a gel-style caulk remover can help soften it. Vacuum or wipe all debris so nothing remains in the joint.
Why this matters: new caulk won’t stick to old caulk, soap scum, or oils. Incomplete removal is the number one cause of failure. If you can still see shiny residue or feel rubbery strips, keep going until it’s gone.
Safety tip: Work slowly and keep the blade flat to avoid scratching stainless steel, porcelain, or stone.
Clean and dry the joint
Wash the area with mild dish soap and warm water. Rinse, then wipe the seam and surrounding surfaces with a towel soaked in rubbing alcohol. Alcohol removes oils, polish, and cleaner residue. Let the area dry completely. If moisture is trapped under the rim, leave a fan running for 30–60 minutes. Caulk won’t stick to damp surfaces, so patience here pays off.
Mask for perfect lines
Apply painter’s tape along the sink rim and along the countertop edge, leaving a narrow channel where you want the bead. The gap you leave should match your target bead width—often about 1/4 inch. Tape makes a crisp caulk line and speeds cleanup. Even pros tape for sinks and backsplashes because it saves time.
Tip: Press the tape down firmly so caulk can’t bleed under the edges.
Cut the nozzle and load the tube
Load the caulk tube in the caulk gun. Cut the nozzle at a 45-degree angle. A small cut near the tip is best for a thin seam; for most kitchen sinks, a 1/4–3/8 inch opening suits a 90-degree joint between rim and counter. Puncture the inner seal if your tube has one. Keep a damp cloth close by.
Why 45 degrees? The angled cut helps the bead lay into the joint as you move, which improves adhesion and appearance.
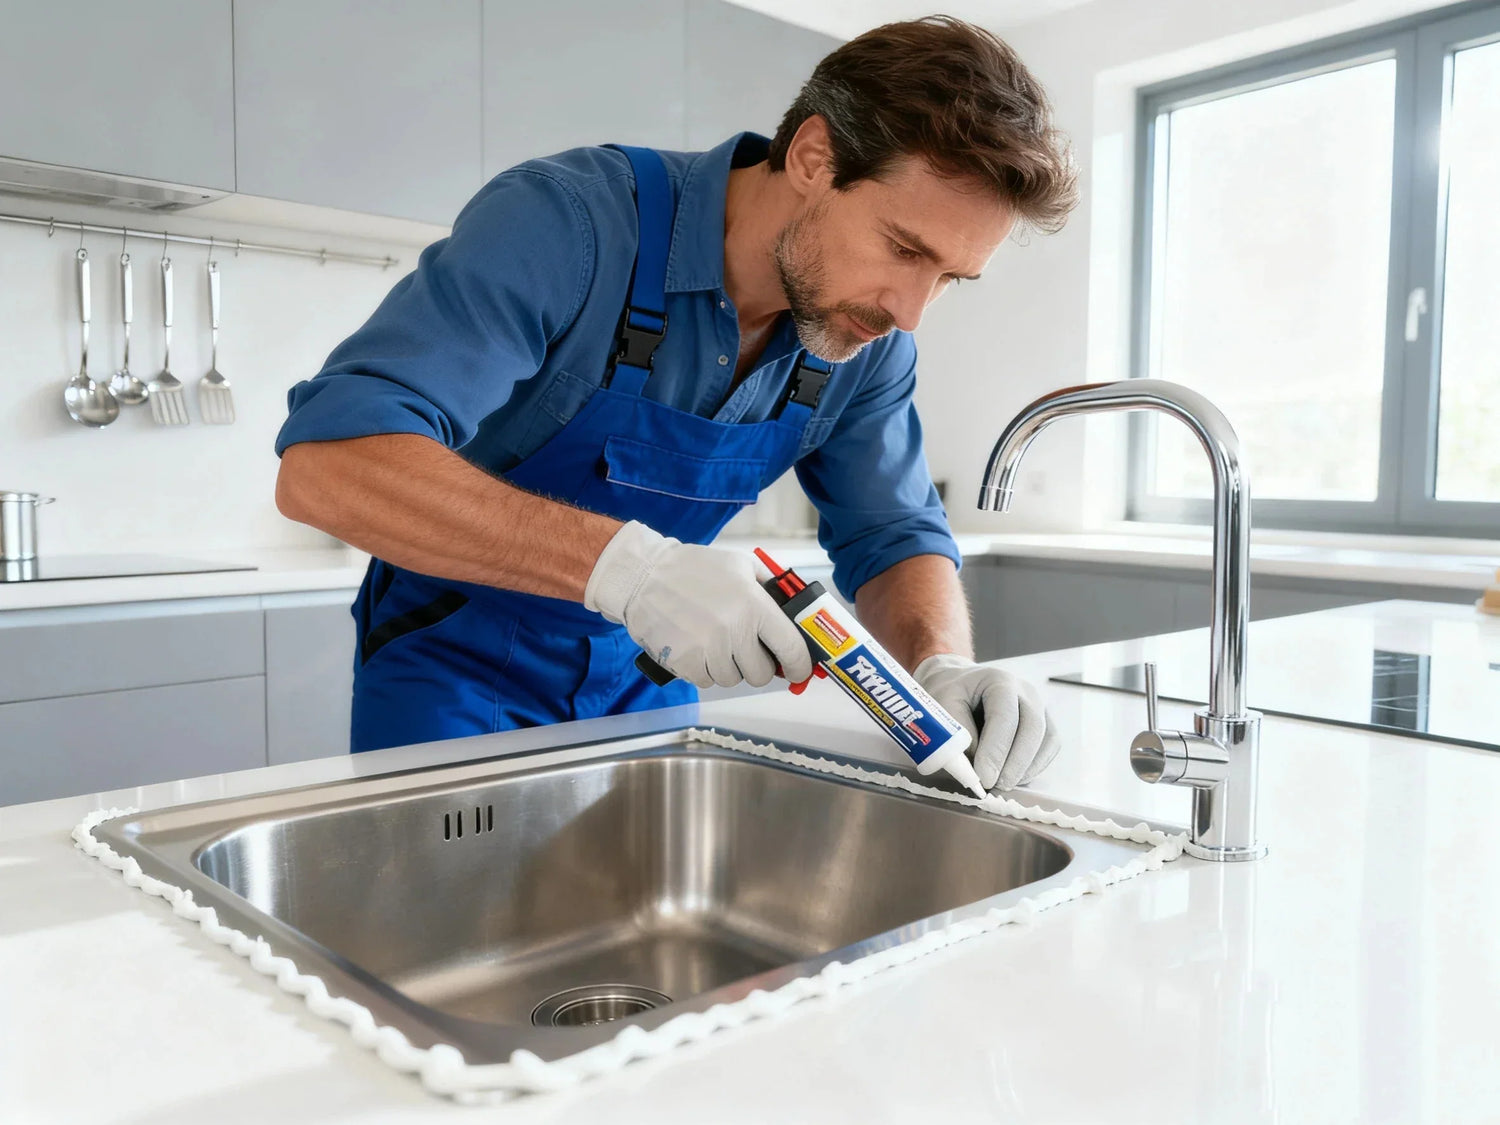
Apply the silicone bead
Hold the gun at about 45 degrees to the seam. Squeeze the trigger with a consistent amount of pressure and pull the gun toward you in one steady pass. Pulling, not pushing, feeds the bead into the gap and tends to produce fewer voids. Aim for a continuous, even bead that fills the joint fully without big bulges. If you miss a spot, you can add a small touch right away.
If your gap is inconsistent or wider than 3/8 inch in places, apply a light first pass to fill low areas, tool it, then lay a second pass. Two thin layers are easier to control than one oversized bead.
Tool and finish
This is where the bead turns from “okay” to “flawless.” Immediately after applying, smooth the caulk with a caulk finishing tool or a fingertip dipped in water with a little dish soap. Move in the same direction you applied, with light, even pressure. Your goal is to press the caulk into full contact with both the sink and the countertop while forming a neat surface.
As soon as it looks smooth, remove the tape while the caulk is still wet. Pull it back on itself at a sharp angle to avoid lifting the bead. Wipe away any excess caulk with a damp cloth. If your silicone allows mineral spirits for cleanup (check the label), you can use a tiny amount on a rag for smears on metal. Don’t flood the joint.
Cure
Let the new caulk cure per the label. Many kitchen and bathroom silicones are water-ready in 24 hours at room temperature and average humidity. Cooler rooms, high humidity, or very thick beads may take longer. Avoid water, cleaners, and scrubbing until the sealant is fully cured. If in doubt, wait an extra day.
Ventilation note: Silicone has a vinegar-like or solvent-like odor while curing. Open a window or run a fan.
Tips: Using a high-quality sink makes a noticeable difference when caulking kitchen sinks. A premium sink provides a smooth, even surface, making it much easier to apply the silicone neatly and achieve a precise application.
Choose the right sealant (silicone wins in wet areas)
For effective caulking kitchen sink, it’s crucial to choose the right product, like 100% silicone labeled for kitchen and bath use. The type of caulk matters more than you might think. Kitchens are constantly exposed to water: dishes splash, sponges sit on the rim, and moisture can linger in seams. That’s why selecting the correct silicone is key—it stays flexible, bonds well to metal, porcelain, composite, and stone, and resists mold and mildew. It also stands up better to cleaning products than latex.
Before you start, gather all the materials you’ll need, including painter’s tape, a caulk gun, and a smoothing tool. Using the right tools ensures a precise application, giving your caulked kitchen sink clean, neat lines and a long-lasting watertight seal. Avoid standard latex-only caulks around the sink; they are easier to paint and clean, but don’t hold up under constant moisture. Hybrids and siliconized acrylics can be tempting because they tool easily, but they still fall short in wet areas. Stick with 100% silicone, and you’ll end up recaulk less often, ensuring a durable and professional finish.
How to read labels:
- Look for “Kitchen & Bath,” “Mold/Mildew-Resistant,” and “100% Silicone.”
- Match materials listed on the label to your sink and countertop (stainless steel, porcelain, composite, quartz, granite, laminate).
- If you have natural stone like marble or limestone, use a neutral-cure silicone that is safe for stone. Acetic-cure silicones can sometimes affect certain stones and sealers. The label will say if it’s stone-safe.
- Check the expiration date. Old caulk may not cure correctly.
Where does plumber’s putty fit? Plumber’s putty seals the drain flange inside the sink, not the rim where the sink meets the countertop. For sealing around the sink, silicone is better. Some drains also use silicone instead of putty; follow the drain manufacturer’s instructions.
Material-specific tips and scenarios
Different sinks and countertops respond a little differently. The steps are the same, but these small adjustments help.
- Stainless steel sink + laminate/quartz/granite: Clean very well with water and rubbing alcohol. Stainless shows smears, so wipe lightly after tooling. On porous stone, confirm your silicone is stone-safe. A 1/4–3/8 inch bead works well for most drop-in stainless sinks.
- Composite or porcelain sinks: These materials are less flexible than stainless. Because of that, make sure the joint is clean, dry, and fully filled. Composite can have tiny texture; press the bead firmly during tooling to ensure contact.
- Undermount vs. drop-in: For both styles, you seal the visible perimeter at the countertop. Undermount sinks are also supported with clips and adhesive under the counter. Your bead protects the edge from water and crumbs. Keep it continuous all the way around.
- Heavily used kitchens and rentals: Choose a mold-resistant silicone. A slightly fuller bead (up to 3/8 inch) can add durability if your gap allows it. Remind tenants or family to avoid soaking the bead before it cures.
Bathroom note: The same process works on a bathroom sink countertop. Use kitchen and bathroom silicone, prep the surface, tape, apply, tool, and cure. The only difference is usually a smaller joint and gentler wear.

Pro techniques for crisp, durable lines
Everyone asks, what’s the trick to caulking? There isn’t one magic move. It’s a few simple habits that add up to a pro result.
- Tape both sides. Even experienced DIYers use painter’s tape around the sink because it speeds cleanup and delivers straight lines. It is faster to tape than to fix smears later.
- Pull the gun, don’t push. Pulling feeds the bead into the joint and reduces air pockets.
- Keep a steady pace. Squeeze the trigger smoothly. If caulk piles up, move slightly faster. If the bead thins, slow down or apply a touch-up.
- Tool within a minute. Silicone starts to skin over fast. Smooth the bead right away for a clean finish.
- For uneven or wide gaps, do two light passes. Tool after the first pass, then apply a second pass to build the profile. This controls sag and keeps edges sharp.
- Warm the tube slightly if it’s cold. Room-temperature silicone flows better. Don’t heat it on a radiator; a warm room is enough.
- Practice on cardboard. Two minutes of practice can save you from messy lines on the countertop.
Troubleshooting and quick fixes
Even careful work can go sideways. Here’s how to fix common issues.
- Messy or wavy bead: If the caulk is still wet, re-tape slightly tighter to the joint, retool gently, and pull the tape. If it has skinned but not cured, carefully scrape off the bad section and reapply. Once fully cured, cut out the problem area with a utility knife and recaulk just that section.
- Poor adhesion or peeling: This almost always means there was residue, moisture, or old caulk left behind. Cut out the loose area, clean with water and rubbing alcohol, dry completely, and reapply silicone. If surfaces are glossy or oily, spend more time with alcohol and a clean rag.
- Caulk won’t cure: Check the tube’s date. Expired silicone can stay tacky. Also check humidity and temperature. Very thick beads can take more than 24 hours. If a bead is gummy after two days in normal conditions and it’s a new tube, remove and reapply.
- Persistent leaks under the rim: Look for gaps where the bead didn’t make full contact. Also check corners and behind faucets where access is tight. Clean and dry those spots and add a small, continuous touch-up bead, then tool it to bond both sides.
- Mold or discoloration: Surface mold can grow on soap film and grime. Clean the seam with mild soap and water and dry after use. If staining remains inside the silicone or the bead is cracking, cut it out and recaulk. Improving airflow and fixing slow drips helps prevent mold growth.
- Silicone smears on countertop: Wipe fresh smears right away. A damp cloth handles most. If safe per your caulk label and countertop material, a small amount of mineral spirits on a rag can help on metal or some non-porous surfaces. Test in an out-of-the-way spot first.
Maintenance and inspection schedule
A good caulk job can last 5–10 years, but kitchens vary. Water, cleaners, and daily wear speed things up. Do a quick visual check every 6–12 months. Look for cracking, gaps, peeling, or mold that doesn’t clean off. If you see any of these, plan a quick refresh before water gets under the rim.
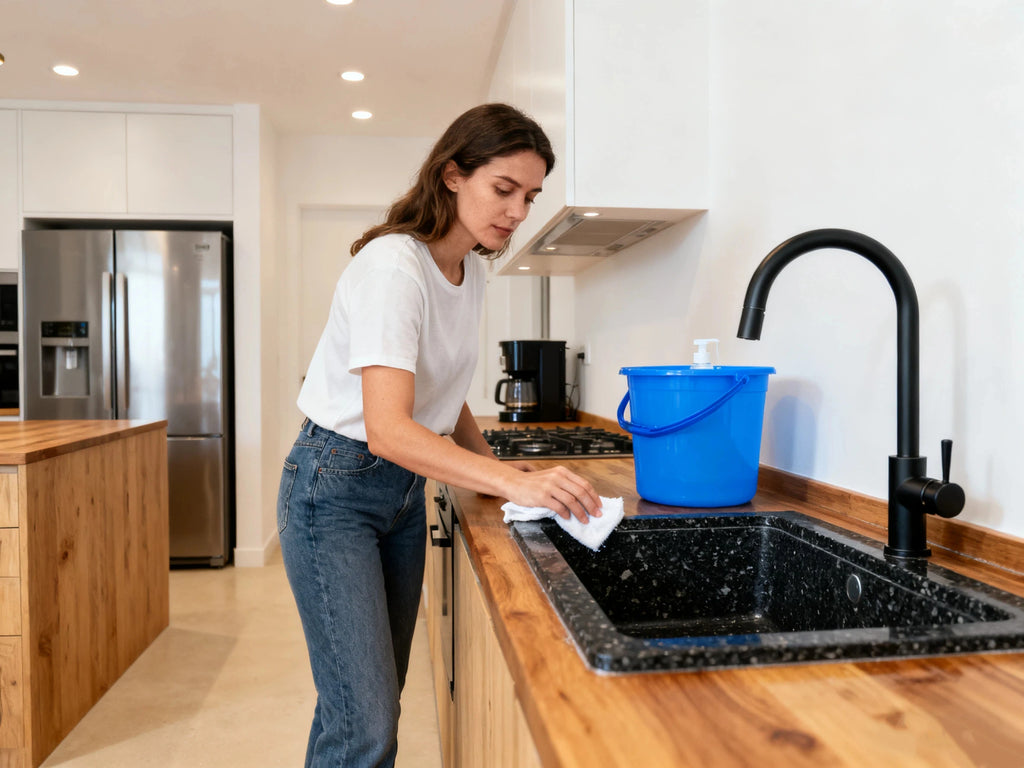
Keep the seam clean with mild soap and water. Avoid harsh abrasives or stiff brushes right on the bead. Wipe standing water after heavy use. Good airflow helps too. These small habits prevent mold growth and extend the life of the seal.
Choosing a high-quality sink helps significantly—its smooth, durable surface makes silicone adhere better and resist peeling or cracking, which means you’ll need to recaulk less often. During your regular maintenance and inspection schedule, look for any gaps, cracks, or mold, and wipe the seam clean with mild soap and water. With a top-quality kitchen or bathroom sink, your careful caulking kitchen sinks or bathroom sinks will hold up longer, providing a watertight, professional finish and reducing the hassle of repeated touch-ups over time.
If you notice water under the sink cabinet without a plumbing leak, inspect the rim immediately. A fresh bead is cheaper than fixing swollen countertops.

Dos and don’ts
- Do remove any old caulk completely. New caulk needs clean surfaces.
- Do clean the area with water and rubbing alcohol, and allow the area to dry fully.
- Do use a 100% silicone kitchen and bath sealant for a waterproof seal.
- Do tape both sides, smooth the caulk, and remove the tape while the caulk is still wet.
- Do let the caulk dry and cure at least 24 hours before water contact.
- Don’t caulk over damp or dirty joints.
- Don’t use non-kitchen/bath or latex-only caulk around a sink.
- Don’t cut the nozzle too large; start small and adjust if needed.
- Don’t skip tooling; it is key to adhesion and appearance.
- Don’t rush curing or expose to water too soon.
Cost, time, and how much caulk you need
A sink recaulking project is budget-friendly and fast for most DIYers. Here are realistic ranges.
| Item | Typical range |
| Materials cost | $10–$20 for a tube of kitchen/bath silicone |
| Tools/tape (if you don’t have them) | $10–$20 |
| Work time | 45–90 minutes (plus 24 hours cure) |
| Coverage from one 10 oz tube | Enough for one standard kitchen sink perimeter with a 1/4–3/8 inch bead |
Tip: If you have a double sink or very wide joint, keep a second tube on hand so you don’t run out mid-bead.
Should you caulk around the kitchen sink?
Yes. Sealing around the sink keeps water from creeping under the rim and into the countertop. Without caulk, water can cause swelling, stains, and mold growth. Even if you don’t see leaks right away, slow seepage can cause damage over time. A neat silicone bead blocks water and keeps cleanup easy.
How to recaulk a kitchen sink
Learn how to reseal kitchen sink properly: the process is similar to caulking a new sink, with extra care on removing old caulk. Cut out every bit of old sealant, clean with water and rubbing alcohol, dry completely, tape both sides, apply a 1/4–3/8 inch silicone bead, smooth, remove tape while wet, and let it cure 24 hours. If you struggle to remove old material, use a caulk remover gel and give it time to work.
Is plumber’s putty or silicone better for kitchen sinks?
They do different jobs. Plumber’s putty is for sealing certain drains and fittings inside the sink bowl. Silicone is for sealing the rim where the sink meets the countertop. For the rim, choose kitchen and bath silicone. For the drain, follow the drain manufacturer’s instructions—some prefer silicone there too, especially with stone tops.
How to seal a kitchen sink to a countertop
Learn how to seal kitchen sink to countertop using 100% silicone:
- Remove old caulk.
- Clean with soap and water, wipe with rubbing alcohol, and dry.
- Tape both sides of the joint.
- Cut the nozzle at a 45-degree angle, load the caulk gun, and apply a continuous bead.
- Smooth the caulk, remove the tape while wet, and let it cure.
That creates a watertight seal that resists mold and daily wear.
When to call a pro
Most homeowners can handle caulking kitchen sinks in an hour or so. Consider calling a pro if the sink is loose, the countertop is swollen or damaged, or the undermount brackets are failing. Caulk alone won’t correct structural issues. Also ask for help if you have specialty surfaces you’re unsure about, like soft natural stone.
Extra tips for special situations
- Tight spaces behind faucets: Turn the nozzle so the tip points into the corner. A short piece of tape on the faucet base can protect the finish. Use a small amount of caulk and a damp fingertip for control.
- Hairline gaps: You still need a bead with body. Very thin smears don’t last. If the gap is tiny, angle the cut at the very tip to lay a narrow but solid bead, then tool it flat.
- Big gaps or missing support: If the gap is larger than 3/8 inch, consider a two-pass method or consult a pro. In extreme cases, a foam backer rod can support the bead, but this is rare at sink rims.
- Natural stone counters: Choose a neutral-cure, stone-safe silicone per the label. Avoid harsh solvents on stone. Clean with mild soap and water, then alcohol if the stone sealer allows it.
- Cold or humid rooms: Allow extra curing time. If possible, raise the room temperature a bit and run a fan to improve airflow.
Cleaning and safety notes
- Ventilate the area while applying silicone. Open a window or run a fan.
- Wear disposable gloves if you prefer to avoid skin contact.
- Keep rags and tools handy so you can clean as you go. A clean rag dampened with soapy water is great for quick wipe-downs along the tape line.
- Dispose of used blades safely. Dull blades slip and scratch; sharp blades cut the caulk, not your countertop.

FAQs
1. How long before I can use the sink after caulking?
After you’ve caulked your kitchen sink, patience really pays off. Most silicone sealants need about 24 hours to fully cure, but that can vary depending on the brand, room temperature, and humidity. Cooler or more humid kitchens might require a little extra time—sometimes up to 48 hours—before the sealant reaches full strength. During this curing period, try to keep the sink dry and avoid placing wet sponges or dishes on the seams. Even light splashes can interfere with adhesion and create weak spots that may lead to leaks later. If you’re unsure, check the label on your silicone tube; it usually specifies the recommended curing time. A good rule of thumb is to treat the first day as hands-off. Giving your newly caulked kitchen sink this time ensures a watertight, long-lasting seal, helps prevent mold, and keeps your countertops safe from water damage.
2. Can I caulk over old caulk?
It’s generally not a good idea to caulk over old caulk. Silicone needs a clean, dry surface to stick properly, and any leftover residue, soap scum, or oils can prevent a strong bond. If you just add new caulk on top, it might look fine at first, but over time it can peel, crack, or let water seep underneath, leading to leaks and potential mold growth. The best approach is to carefully remove the old bead using a utility knife, scraper, or caulk remover gel if needed, then clean the area with soap and water, wipe it with rubbing alcohol, and let it dry completely. Once the surface is prepped, you can apply a fresh bead of silicone, which will adhere properly and last much longer. Taking the time to remove the old caulk ensures a neat, watertight seal and avoids headaches down the road.
3. How do I get straight lines when I caulk a sink?
Getting perfectly straight caulk lines around a sink can feel tricky, but a few simple tricks make it much easier. First, use painter’s tape on both sides of the seam where the sink meets the countertop—this creates a clean boundary and helps prevent smears. When applying the silicone, try to keep a steady hand and a consistent pressure on the caulk gun, moving in one smooth pass rather than stopping and starting. Right after laying the bead, smooth it with a caulking tool or your fingertip dipped in soapy water to press it evenly into the joint. Then, while the caulk is still wet, carefully pull off the tape at a sharp angle—this leaves a crisp, professional-looking line. Taking your time during prep and tooling makes a huge difference, so don’t rush. With a little patience, your caulking kitchen sink will look neat, uniform, and leak-free for years.
4. What if the caulk won’t stick?
If your caulk isn’t sticking, the most common culprit is a dirty or damp surface. Silicone sealant needs a completely clean and dry area to bond properly, so any leftover soap, grease, or moisture can cause it to peel or fail. Start by thoroughly cleaning the joint with warm water and mild dish soap, then wipe it down with rubbing alcohol to remove any oils or residue. Make sure the area is completely dry before trying again—sometimes letting it air-dry for 30–60 minutes is best. Once the surface is prepped, apply a high-quality 100% silicone sealant, keeping a steady hand for a smooth bead. If the caulk still doesn’t adhere, check that your silicone hasn’t expired, and ensure the room temperature isn’t too cold or humid. Following these steps carefully will help your caulking kitchen sink stick properly and form a long-lasting, watertight seal.
5. Does this method work for bathroom sinks too?
Absolutely! The process for caulking a bathroom sink is very similar to what you’d do in a kitchen. The key is to use a silicone sealant labeled for both kitchen and bathroom use, as it’s designed to handle water exposure and resist mold and mildew. Start by removing any old caulk, clean the area thoroughly, and make sure it’s completely dry. Apply painter’s tape if you want crisp lines, then lay a smooth bead of silicone and tool it right away for an even finish. Let it cure fully—usually 24 hours, but check the product label for exact times. Taking these steps ensures a watertight seal that protects your countertop and sink edges. Even though bathroom sinks see less heavy use than kitchen sinks, following the same careful method prevents leaks, mold growth, and keeps the sink looking clean and professional.


Leave a comment
This site is protected by hCaptcha and the hCaptcha Privacy Policy and Terms of Service apply.