


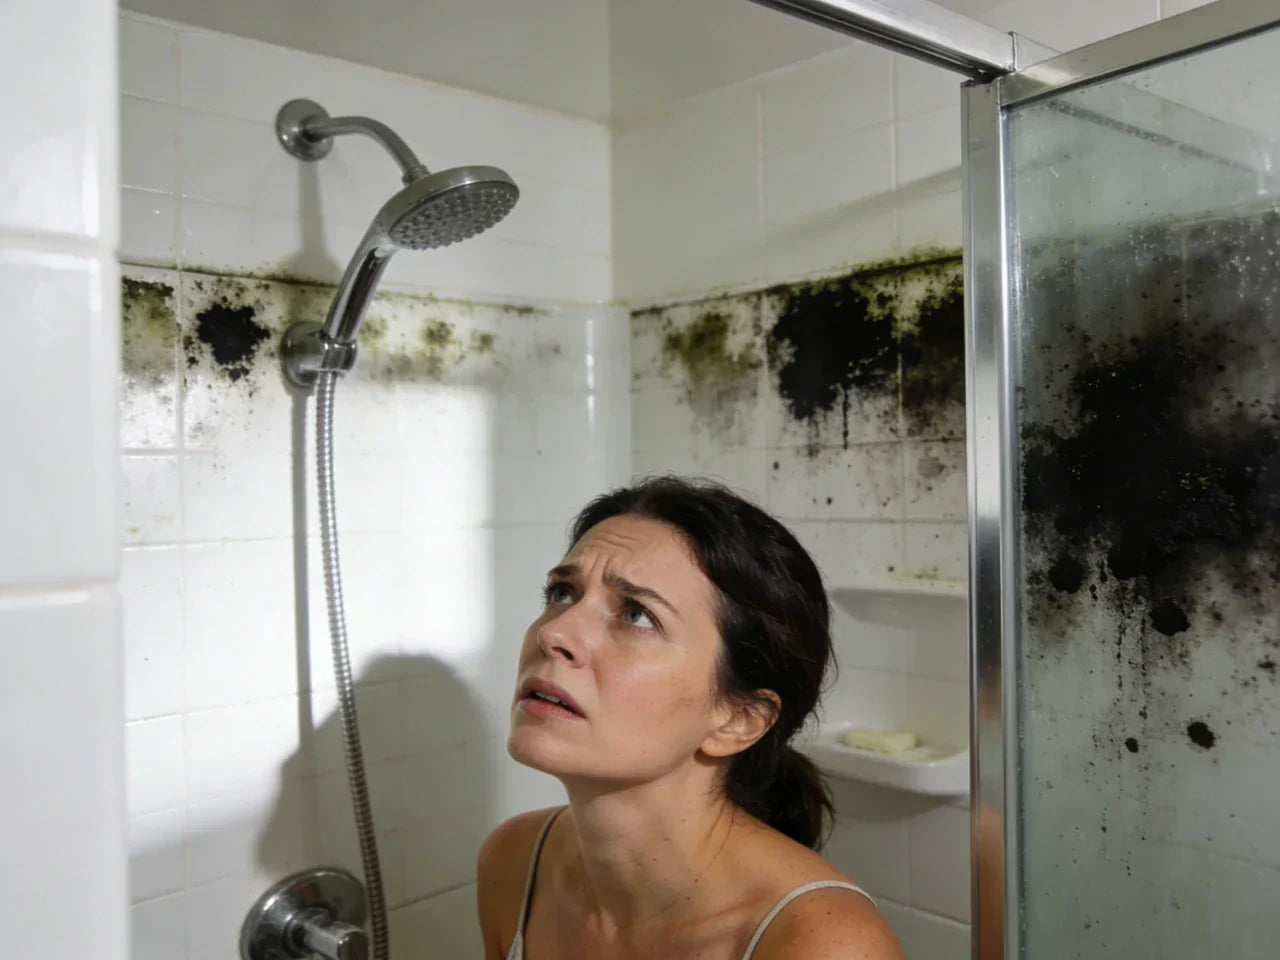
Black mold in your shower base is more than a small housekeeping issue. Those dark bathroom black spots can point to hidden water damage, raise the risk of asthma flare‑ups, and even lower your home’s value if they spread. The good news is that in many cases you can get rid of black mold in the shower safely yourself, as long as you act early and know when it’s time to call a professional.
This guide walks you through what to do the moment you see black mold in shower areas, how to tell if it’s “just mildew” or something deeper, how to clean tub mold, how to clean it from tile, grout, caulk, and how to prevent mold from coming back. You’ll also see when mold in the shower is harmful, what health agencies say, and how humidity and ventilation play a big role.
Quick Answer: What to Do About Black Mold in Shower Base
When you first spot black mold in your shower or black mold in bathtub corners, it’s easy to feel stressed. Take a breath. Your first ten minutes should focus on safety and on deciding if this is a DIY job or a job for a professional mold remediation company.
Immediate Safety Steps (First 10 Minutes)
If you walk into the bathroom and see a thick, slimy patch of mold in the shower base or along the walls, your instinct might be to grab a scrub brush and attack it. Hold off for a moment. You want to avoid spreading mold spores into the air.
In the first few minutes, focus on three things: limit use, improve ventilation, and avoid dry scraping. If the affected area is larger than about 10 square feet (for example, a patch bigger than a standard bath towel), if the mold is spreading onto the bathroom walls or ceiling, or if anyone in the home has asthma, chronic lung disease, or a weak immune system, treat the bathroom as off‑limits until you have a plan.
Open a window if you can and switch on the exhaust fan if it vents outside. This helps pull mold and mildew odors and airborne spores out. At the same time, do not dry‑brush, sand, or scrape the black spots, because that can send a cloud of spores through the house. Wiping with a damp cloth is safer than brushing a dry surface, but full cleaning should wait until you have the right gear and cleaner ready.
Can You Still Use the Shower If You See Mold?
Many people wonder, “Can I still shower if I see a little black mold in the shower?” The answer depends on size, location, and damage.
If you see a few small black spots on silicone caulk or along the drain on an acrylic or fiberglass base, and there is no musty smell, no soft or crumbling grout, and no signs of leaks around the tub or shower, you can usually keep using the shower for a short time while you plan cleaning. Try to keep your bathroom extra dry in the meantime: run the fan longer, squeegee the walls and base, and leave the door slightly open to let moisture escape.
On the other hand, if the black areas look thick, slimy, or fuzzy, if mold extends onto painted bathroom walls or the ceiling, or if you see swollen baseboards or peeling paint near the tub, stop using the shower. These are signs that mold growth may go deeper than the surface. At that point you should plan for more serious mold removal, and likely talk with a professional.
DIY vs. Pro: Fast Decision Checklist
A simple way to decide between DIY and pro help is to think about area, material, and health.
Do‑it‑yourself work is usually fine when the mold patch is under about 10 square feet (roughly a square a little over 3 feet by 3 feet), when it sits on hard, non‑porous surfaces like ceramic tile, acrylic, or fiberglass, and when no one in the home has strong allergies, asthma, or other health problems that mold can trigger. In this range, you can often get rid of mold in shower bases with basic protective gear, common cleaners, and good drying.
Call a professional mold company when mold keeps coming back even after you scrub it, when you suspect a leak behind the wall, under the shower pan, or around the tub, or when you see damage like soft subfloor, loose tiles, or sagging drywall. Also call if the black mold spreads outside the shower walls or bathtub area and into nearby rooms, or if anyone in the home feels worse at home and better when away.
Many people find it helpful to imagine a simple flowchart: you see black mold in shower base, then you ask yourself about the size, health risks, and moisture signs. If it’s small and surface‑level, you follow the DIY steps in this guide. If it’s large, recurring, or linked to leaks, you skip straight to a professional assessment. This approach follows guidance from public health agencies that suggest a 10‑square‑foot limit for typical DIY jobs.
Is Black Mold in Shower Base Dangerous?
A common question is, “Is black mold in the shower harmful?” The short answer is yes, it can be, especially for certain people and when there is a lot of it or it stays for a long time.
Any indoor mold is considered a problem because mold releases tiny spores into the air. You can breathe these in, and they can irritate your nose, eyes, throat, and lungs. In a tight space like a bathroom, bathroom mold can build up in the air each time the room gets steamy.
Common Symptoms and Who Is Most at Health Risks
If you spend time in a bathroom with mold growth on bathroom surfaces, you might notice sneezing, a runny or stuffy nose, itchy or watery eyes, coughing, or wheezing. People with asthma may find that mold in the shower brings on flare‑ups more often, especially if the shower is used daily and not dried well.
Children, older adults, pregnant people, and anyone with asthma, allergies, or an immune system problem are at higher risk. Public health data suggests that about half of asthma cases get worse with mold exposure. So, if a child’s asthma seems to flare when they shower or brush their teeth, and you have mould in shower corners or on bathroom tiles, that is a clear warning sign to act.
Skin irritation can also occur when you touch moldy caulk, grout, or a shower curtain. Some people develop rashes or itching where their skin meets moldy surfaces, such as the edge of a tub where they rest their arm.
What Health Agencies Say About Bathroom Mold Exposure
Health agencies like the CDC and EPA are very clear about indoor mold: any visible mold inside a home should be removed, and the moisture problem feeding it should be fixed. There is no “safe” amount of mold growth on indoor bathroom surfaces.
You might have heard of “toxic black mold” or Stachybotrys chartarum. This is one type of mold that is dark and can produce certain toxins. In reality, many types of mold can look black, green‑black, or dark brown in a shower or bathtub. Without lab testing, it is very hard to tell which exact mold species you have. Health agencies usually say that for a normal home, you do not need to test for the exact kind before you get rid of black mold. Any visible mold should be cleaned up and the wet area dried.
The EPA also stresses a simple rule: dry wet materials within 24–48 hours. If your shower base or grout stays damp day after day, mold has the perfect place to grow, no matter what species it is.
When Should You Worry About Mold in Your Shower?
You should worry — and act soon — when black mould in shower areas is spreading, smells strong, or comes back fast after cleaning. Black patches that reach beyond the shower base to painted bathroom walls or ceiling suggest that moisture is moving through drywall, which is a food source for mold. A musty smell that never fully goes away, even after you clean, is another red flag, because it may mean there is mold behind the shower wall or under the base where you cannot see it.
Water stains on the ceiling below the bathroom or warped flooring outside the bathroom door also signal that your problem is bigger than mold stains on tile and grout. In that case, you’re not just dealing with how to clean mold, but also with leaks and possible structural damage.
Data Snapshot: Prevalence, Asthma Links, and Costs
To see how common mold problems are, and why quick action matters, here is a short data snapshot from recent research and industry reports:
| Statistic | Number / Range | Source type |
|---|---|---|
| Homes worldwide with some mold problem | ~70% | Industry report, 2023 |
| U.S. buildings with unhealthy mold levels | 45+ million | Industry estimate, 2023 |
| U.S. homes with noticeable mold | ~1 in 5 | Testing company report, 2025 |
| Asthma cases worsened by mold exposure | Roughly 50% | Public health data |
| Typical mold remediation job (small bathroom) | About $500–$1,500 | Cost surveys, 2025 |
| Moderate bathroom + wall repair | About $2,000–$6,000 | Cost surveys, 2025 |
| Worst‑case whole‑bath and structural repairs | Up to about $30,000 | Cost surveys, 2025 |
These numbers show why getting rid of mold early, when it is small and surface‑level, can save you a lot of money and protect health at the same time.
How to Identify Black Mold in a Shower or Bathtub
If you are asking how to get rid of mold in a bathroom, the first step is knowing what you are looking at. Not every dark mark is mold.
Black Mold vs. Mildew vs. Hard Water Stains
On shower tiles, you often see three common problems: mold, mildew, and hard water or soap scum. They look and feel a bit different.
Black mold in the shower tends to appear as dark green‑black or almost tar‑colored patches. The edges can look irregular, and the surface may look slimy or slightly raised. In corners, around drains, and along old caulk, the spots may grow together into larger patches that look wet or fuzzy.
Mildew is also a type of mold but is usually lighter and easier to wipe. It often shows up as gray or white film on tile and grout or light specks on a shower curtain. When you rub it with a cloth and mild cleaner, it usually comes off quickly without deep scrubbing.
Hard water stains and soap scum are different again. They may look chalky white or yellowish, or even orange‑brown, often in streaks where water runs down the wall or in circles where water pools. They feel rough or gritty, not slimy or fuzzy, and they do not have the musty smell that bathroom mold often has.
Knowing these differences helps you choose the best way to clean mold and avoid harsh chemicals when they are not needed.
Typical Locations in Shower Bases and Surrounding Areas
Mold in your shower often starts in hidden or often‑wet spots. Common locations include the ring around the drain cover, the small groove where the shower base meets the wall, grout lines in the floor and corners, and under shower mats, bottles, or a folded shower curtain that stays wet.
If the shower base does not slope well toward the drain, small puddles can sit there for hours. That standing water, mixed with soap and body oils, feeds mold growth. Leaking supply lines or valves behind the wall can also keep the back side of tiles damp even if the tile and grout look mostly dry.
When you see a few black spots in these areas, that is your early warning. Waiting turns a small cleaning job into a bigger repair.
DIY Testing Options and When Lab Testing Makes Sense
Many homeowners ask if they need a mold test kit when they see mold in the shower. For a small, clear patch of black mold in the shower, the answer is usually no. You already know you have mold because you can see it. The more urgent question is how to get rid of mold in bathroom surfaces and how to stop moisture.
DIY test kits can collect dust or spores on plates or tape that you send to a lab. These may tell you some of the species present, but they rarely change the basic steps: clean, dry, and fix leaks. Simple moisture meters and even small infrared cameras can be much more useful because they help show if there is damp material behind tile or under the tub or shower pan.
Professional or lab testing makes more sense when people in the home have ongoing health symptoms with no clear cause, when you suspect hidden mold in large areas behind walls or below floors, or when there is a serious water event, such as a long, slow leak or a flood, that affected many rooms.

Step-by-Step: How to get rid of Black Mold in Your Shower Base Safely
Once you understand what you are facing and it fits the DIY range, you can move on to the best way to clean mould in shower surfaces. Safety and method matter here, both for your health and for results.
Protective Gear, Ventilation, and What NOT to Mix
Even for small jobs, basic protective gear helps you avoid breathing or touching mold and harsh cleaners. At a minimum, wear non‑porous gloves, such as rubber or nitrile, and eye protection. An N95 or similar mask is a good idea, especially if you will be scrubbing moldy grout or caulk.
Good ventilation is key. Run the exhaust fan and open a window if you can. Keep the bathroom door mostly closed to limit the spread of spores to other rooms, but leave a small gap at the bottom so fresh air can flow.
Chemical safety is just as important. Never mix bleach and vinegar, or bleach with ammonia‑based cleaners. These mixes can create dangerous gases. If you use a bleach solution on day one and want to try white vinegar on day two, rinse the area very well and let it dry between products.
Method 1 – Bleach or Fungicidal Cleaner for Non‑Porous Surfaces
Many people reach for bleach when they want to kill mold on smooth, non‑porous surfaces like glazed tile, acrylic, or fiberglass. Used correctly, it can be an effective mold remover on the surface.
A common mix is about one part regular household bleach to three parts water, though you should always follow the label on your product. Pour this into a labeled spray bottle. Spray the affected area of the shower base, drain, or tile. Let it sit for about 10–15 minutes so it has time to work on the mold stains and spores on the surface.
After the wait, scrub with a stiff brush or a scrubbing pad that is safe for your surface. Focus on grout lines, corners, and around the caulk bead where black mold in the shower often clings. Rinse with plenty of clean water. Then dry the area thoroughly with a towel or squeegee so mold does not have a fresh start.
Bleach can lighten stains quickly, which feels satisfying, but it may not reach deep into porous grout or old, cracked caulk. It can also irritate skin, eyes, and lungs, and sometimes discolor certain materials. This is why some people prefer natural options.
Method 2 – Natural and Eco‑Friendly Mold Removal Methods
If you want a milder approach, vinegar is a natural cleaner that can help get rid of mold on many bathroom surfaces. Regular undiluted white vinegar can be poured into a spray bottle and sprayed directly onto moldy tile, grout, or a bathtub edge. Let it sit for at least an hour to soak in. Then scrub and rinse with warm water. Vinegar’s mild acid can break down many mold species on surfaces and help prevent quick regrowth.
Another common option is hydrogen peroxide at 3%. You can spray it on moldy grout or caulk, let it foam and sit for about 10 minutes, scrub, and rinse. It can reach slightly deeper into porous areas than vinegar.
Baking soda is useful for scrubbing. You can make a paste with water, spread it on spots, let it sit, then scrub. It is gentle on surfaces and helps remove smells. Some people also like to mix a few drops of tea tree oil with water as an anti‑mold spray, though it has a strong scent and should be kept away from pets and small children.
These natural methods are safer for daily or weekly cleaning and for homes with kids or pets. They may take more than one round to fully remove deep mold stains, but they are a good answer if you ask, “How do I get rid of black mold in my bathtub?” without harsh chemicals.
Here is a simple comparison of common cleaners for shower mold:
| Cleaner | Works Best On | Main Pros | Main Limits |
| Bleach solution | Non‑porous tile, acrylic, fiberglass | Fast stain removal, strong surface kill | Fumes, can irritate, may not reach deep |
| White vinegar | Tile, grout, tubs, curtains | Natural, low fumes, good for maintenance | Slower, may need repeats |
| Hydrogen peroxide | Grout, caulk surface, tubs | Foams into pores, helps lift stains | Can lighten colors with long contact |
| Baking soda paste | Any scrub‑safe surface | Gentle scrub, odor control | Needs pairing with liquid cleaner |
Method 3 – Deep Cleaning with HEPA Vacuuming and Drying Tools
For mold in the shower after a leak or overflow, cleaning is not just about scrubbing. The area has to be dried quickly and deeply. After using one of the cleaning solutions above and rinsing, a HEPA vacuum can help remove dried mold particles from surfaces, especially around floor edges and vents. HEPA filters are built to catch very small particles, including mold spores, instead of blowing them back into the room.
If your bathroom has been very damp, a dehumidifier can lower humidity below 50%. This is a level where mold has a hard time growing. In larger or more serious cases, professionals may use strong desiccant dehumidifiers, thermal drying (special heaters), and large HEPA air scrubbers. Homeowners do not usually need these for minor shower mold, but it helps to know what exists if you ever have a flood or major leak.
Special Problem Areas: Grout, Caulk, and Shower Pan Materials
Some parts of a shower are harder to clean than others. Grout, silicone caulk, and different shower base materials each need slightly different care.
Mold in Grout Lines and Shower Tiles
Grout is porous, which means it soaks up water. Soap, shampoo, and body oils also cling to it, which feeds mold growth. That is why grout lines often show dark streaks before the rest of the tiles.
To remove mold from grout, pre‑treat the lines with vinegar or a commercial fungicidal cleaner. Let it sit for at least 10–15 minutes. Then scrub with a grout brush or an old toothbrush, working along each line. Rinse well and dry with a towel. Once the grout is fully dry — this may take a day with good ventilation — consider sealing it with a grout sealer. A sealed grout line is more resistant to mold because it does not absorb as much water.
Moldy Silicone or Caulking: Clean or Recaulk?
Black lines inside silicone caulk are a very common complaint. Light surface discoloration can sometimes be bleached or scrubbed away using the methods above. However, when you see black deep inside the caulk bead, or the caulk is cracked, peeling, or separated from the tile or tub, cleaning is not enough.
At that point, the best way to get rid of mold in caulk is to cut out the old bead with a sharp utility knife or caulk removal tool, scrape away any remaining bits, and clean the joint with a mold remover or vinegar. Then you must let it dry fully. This may mean leaving the shower unused for a day or two. Once dry, use mold-resistant products. This fresh seal helps keep water from slipping behind the joint and feeding hidden mold.
Acrylic, Fiberglass, and Tile Shower Bases: Surface‑Specific Tips
Different shower pan materials handle cleaners in different ways. Acrylic and fiberglass are smooth but can scratch. When cleaning black mold in shower base areas made of these materials, avoid harsh abrasives or stiff wire brushes. Use non‑abrasive pads and cleaners labeled as safe for acrylic or fiberglass.
Tiled shower bases have grout lines and sometimes small cracks where water can seep down to the waterproofing layer or subfloor. In these showers, regular inspection is part of good mold control. Watch for missing grout, loose tile, or a base that feels bouncy. These signs suggest water under the tile, which can lead to mold from showers in hidden areas.
Cast iron or enameled steel bases are harder but can chip. Avoid heavy abrasives or sharp tools that can break the enamel. Chips can rust and hold moisture, which again helps mold.
Here is a brief comparison:
| Shower base material | Cleaning focus | Key “Do” | Key “Don’t” |
| Acrylic / fiberglass | Surface mold, scratches | Use soft pads, mild cleaners | Don’t use harsh abrasives or metal tools |
| Tiled base | Grout, cracks, waterproofing membrane | Seal grout, fix cracks quickly | Don’t ignore loose tiles or bouncy spots |
| Cast iron / enamel | Chips, rust spots | Use gentle cleaners, rinse well | Don’t chip or sand enamel surface |
Hidden Mold Behind Shower Walls and Under the Base
One of the biggest worries is hidden mold. So how can you tell if there is mold behind the shower wall?
There are a few signs. A strong, musty smell that stays even after you scrub all visible surfaces is one. Loose tiles or grout that crumbles when you touch it can mean that the wall behind is soft or damp. A shower base that feels spongy under your feet, or a floor outside the bathroom that warps or darkens, are also signals.
Water stains on the ceiling of the room below the bathroom, or staining on the wall next to the shower, also point to leaks. In these cases, the black spots you see on the surface may be just the tip of the problem. This is a clear time to bring in a professional mold inspector or remediation company for moisture testing and a plan.

When to Call a Mold Remediation Professional
DIY cleaning is fine for many small jobs, but there are times when you should not handle black mold in your shower alone.
Signs Your Black Shower Mold Is More Than a Surface Issue
If you see mold outside the shower area — on drywall, ceilings, or adjacent closets — you are likely dealing with a larger moisture issue. If you keep getting rid of mold in shower areas and it returns within days or weeks, there is a good chance water is still getting into walls, floors, or gaps.
Health is another reason to call a pro. If anyone in the home has severe allergies, asthma, chronic lung disease, or a weak immune system, it is safer to have professionals set up containment and use HEPA filtration while they remove mold. If family members feel better when they are away from home and worse when they come back, that is another signal to look deeper than surface cleaning.
How Big Is Too Big for DIY Mold Removal?
Public health guidance often uses area as a simple rule. If visible mold is under about 10 square feet and is on non‑porous surfaces like tile, tubs, or acrylic, careful DIY cleanup is usually fine if you follow safety steps. Once the affected area is larger than that, or if mold is growing on porous materials like drywall, insulation, wood framing, or subfloor, professional help is recommended.
Imagine a space about as big as a standard bath mat. If your mold patch is smaller than that and doesn’t go into the walls, you are likely within DIY range. If mold covers much of the wall above the tub or a large section of ceiling, the job is probably too big and too deep for home tools.
What Professionals Actually Do: Testing, Containment, and Drying
A professional mold remediation company will usually start with an inspection and moisture mapping. They may use meters and infrared cameras to find wet areas behind tile or under the shower pan. Then they set up containment with plastic sheeting and run negative‑air machines or HEPA air scrubbers so mold spores do not spread through your home while they work.
They remove materials that cannot be cleaned, such as moldy drywall or soaked insulation. They clean remaining surfaces with fungicidal agents, HEPA vacuuming, and often mold removal methods like damp wiping. Then they dry the structure with dehumidifiers and fans until materials reach safe moisture levels. Finally, they may suggest repairs such as new waterproofing, new tile, or new vent fans to prevent black mold from returning.
Cost Ranges, Insurance Issues, and Real‑World Examples
Costs vary widely. A small bathroom job involving only a bit of drywall and tile can cost around $500–$1,500. If the work includes removing and rebuilding a tiled shower with mold growth behind the walls, costs can rise into the $2,000–$6,000 range. Serious cases with structural damage to subfloor or framing, or full bathroom rebuilds, may reach tens of thousands of dollars.
For example, one family in a humid coastal area discovered black mold in shower grout. Once tiles were opened, mold covered parts of the backing board and framing. The remediation and repair cost about $4,500, but it also fixed a slow leak that had been there for years. In another case, a gym with multiple showers spent around $12,000 on mold cleanup, drying, and new ventilation to protect members and avoid legal issues.
Insurance can help, but only in some cases. Sudden events, like a pipe that bursts and floods a bathroom, may be covered if you act fast. Long‑term neglect, such as years of ignoring mold in the shower, is often not covered. Reading your policy and talking with your insurance company early is wise if you suspect a larger problem.
Preventing Bathroom Mold: Humidity, Ventilation & Cleaning Habits
Once you have cleaned or remediated black mold in shower areas, the most important job is keeping it away. Mold comes back when moisture comes back, so prevention is all about humidity, airflow, and regular cleaning.
Target Humidity Levels and How to Measure Them
Mold loves moist air. Keeping indoor humidity between about 30% and 50% makes it much harder for mold can grow on bathroom surfaces. In many homes, simple digital hygrometers (small humidity meters) are enough. Place one in the bathroom or in the hall just outside and check it through the day, especially after showers.
If your bathroom regularly sits above 50–60% humidity, even hours after a shower, you may need a portable dehumidifier nearby, a stronger exhaust fan, or both. Some smart sensors can track humidity and send alerts when it gets too high, which helps you spot patterns, such as mornings when everyone showers in a row.
Better Airflow in Bathrooms: Exhaust Fans, Windows, and Doors
Good airflow is one of the easiest tools to prevent mold. Run the bathroom exhaust fan during your shower and for at least 20 minutes after you finish. This helps remove humid air before it can condense on shower tiles and grout.
If your bathroom has a window and privacy allows it, open it slightly during and after showers. After every shower, pull the shower curtain closed (so it can dry across its full surface) or leave a shower door partly open to let air move across shower walls and the base. If towels or clothes hang in the bathroom, spread them out so they dry quickly instead of staying damp.
It also helps to keep the fan clean. Dust‑clogged fan covers move less air. A simple monthly wipe with a damp cloth, after turning off power, can improve performance.
Weekly and Monthly Cleaning Routines That Prevent Mold
Many people only think about how to get rid of mold in bathroom spaces once they see black spots. A steady cleaning plan stops those spots from appearing in the first place.
Right after each shower, a quick wipe with a squeegee or towel on shower walls and the base removes most water and soap film. Focus on corners, grout lines, and around the drain. Move bottles and soap dishes once in a while so water does not stay trapped under them.
Once a week, clean the shower base, grout, and caulk with a mild bathroom cleaner or a vinegar solution (for example, one part vinegar with three parts water). This is enough to control light mold and mildew growth before it becomes shower mold. Inspect grout and caulk as you clean. Catching a small crack early can save you from leaks and deep mold later.
Monthly or quarterly, clean the fan grill, check humidity readings, and look for any new black spots on bathroom tiles or ceiling. Reseal grout every year or as recommended for your tile. This simple routine is a powerful way to keep mold under control.
Tech & Tools: Dehumidifiers, Smart Sensors, and HEPA Air Purifiers
Modern tools make prevention easier. A small dehumidifier near a bathroom without a window can keep humidity in check if your fan is weak. Smart humidity and leak sensors placed under sinks, near the tub, or close to the shower wall can warn you about leaks or high moisture before you see damage.
HEPA air purifiers in nearby bedrooms or hallways can help capture killing mold spores that leave the bathroom, especially in small homes where air moves freely between rooms. Some people also like to use Wi‑Fi dehumidifiers that let them set a target humidity and run the unit only when needed.
You can think of your bathroom as part of a small system: fan, dehumidifier, and cleaning routine all work together to keep the bathroom well-ventilated, clean, and dry. Whether you live in a very humid climate or you are building a new bathroom, planning for strong ventilation and easy‑to‑clean surfaces pays off for years.

Short FAQs
1. Is black mold in the shower harmful?
Not every dark spot is the dangerous “toxic black mold,” but any mold in the shower can still irritate your nose, throat, or lungs—especially if you have allergies, asthma, or a weaker immune system. Children and older adults are more sensitive, too. So even if you don’t know the exact mold type, treat it as something that shouldn’t stay there. Don’t paint over mold or ignore it, because it will keep spreading in grout, caulk, and behind tiles. The safest approach is simple: clean it promptly and fix the moisture problem that caused it.
2. How do you get rid of black mold in the shower?
Wear gloves, ventilate the bathroom, and use a cleaner like diluted bleach, white vinegar, or hydrogen peroxide. Spray the area, let it sit for 10–15 minutes, scrub the grout or caulk, rinse, and dry completely. If mold keeps returning or the caulk stays dark, the mold may be deep inside the silicone, which means you’ll likely need to remove and replace it. Recurring mold usually points to a leak or long-term moisture, so a professional may be needed.
3. How can I tell if mold is behind the shower wall?
Hidden mold leaves signs even if you can’t see it. A persistent musty smell after cleaning, loose or hollow-sounding tiles, soft or bulging walls, or a shower base that feels “bouncy” can all indicate moisture behind the surface. Water stains on the ceiling or walls outside the bathroom are another red flag. If mold keeps appearing in the same spot, it often means water is leaking behind the wall and creating the perfect environment for mold growth.
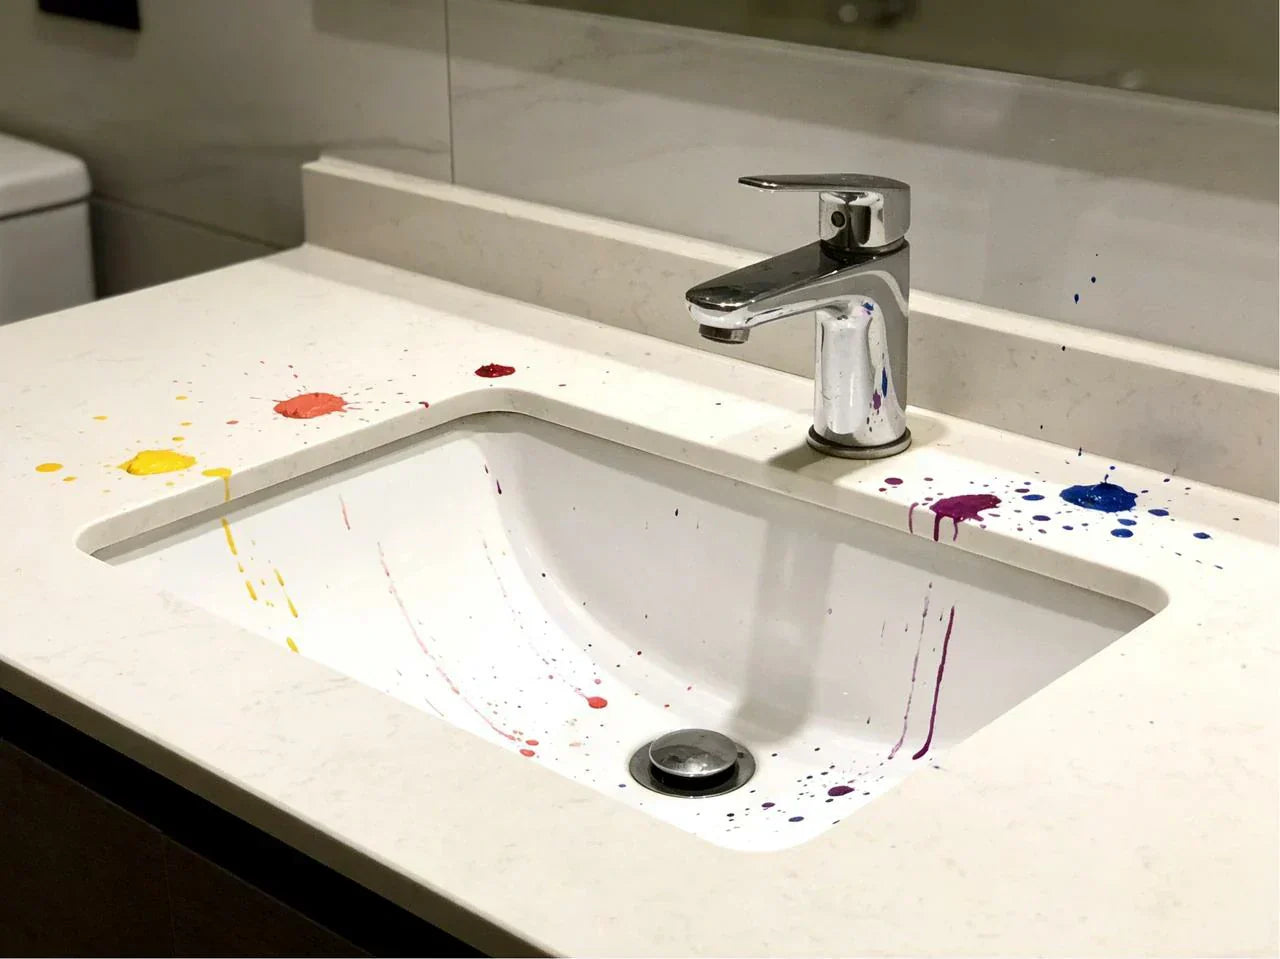
4. Why are there black spots in my bathroom?
Black spots usually appear where moisture lingers—grout lines, silicone edges, ceiling corners, and areas with poor airflow. Steam from showers, high humidity, and infrequent cleaning give mold exactly what it needs to grow. Sometimes black spots are just soap scum or mineral deposits, but mold is the most common cause. Better ventilation, wiping surfaces dry, and regular cleaning will greatly reduce these spots.
5. Is bleach or vinegar better for removing mold in the shower?
Both work, but differently. Bleach is fast and effective on tile and tub surfaces but has strong fumes and isn’t ideal for caulk. Vinegar is safer and great for regular cleaning, though tougher stains may need repeat applications. Hydrogen peroxide is a strong, odor-free middle option. Many people use vinegar or peroxide for routine cleaning and save bleach for stubborn mold. Never mix bleach with vinegar or ammonia.
6. How do I get rid of mold in my bathtub?
Use bleach, vinegar, or hydrogen peroxide depending on your tub material. Spray, let it sit, scrub, rinse well, and dry thoroughly. Mold on silicone often won’t come off completely because it grows inside the sealant—so replacing the caulk is usually the long-term solution. Keeping the tub dry and improving ventilation helps prevent mold from coming back.
References


Leave a comment
This site is protected by hCaptcha and the hCaptcha Privacy Policy and Terms of Service apply.