


If your tub looks dull, stained, or chipped, you may be wondering if you really need a new bathtub—or if you can reglaze tubs and get that clean, glossy look again without tearing up your bathroom. This guide starts with the fast, decision-making answers: how much to reglaze a tub in 2026, how long it takes, and whether the results are worth it. Then it walks you through the real process pros use, what changes for porcelain, fiberglass, and cast iron, how DIY kits compare, what causes peeling or yellowing, and how to care for a reglazed surface so it can last for years.
Reglaze tubs: 2026 costs & value
Reglazing a bathtub can give an older tub a like-new appearance without the full expense of replacement. Refinishing costs vary widely depending on materials, repair needs, and whether you hire a professional or attempt a DIY approach. The following sections break down typical 2026 prices, options, and factors that influence the final cost.
How much does it cost to reglaze a tub?
Most homeowners want the number first. In 2026, the national average to reglaze a bathtub is about $480, and many standard tubs fall in the $350–$600 range. Your real price depends on what your tub is made of, how much repair it needs, whether it’s a tub-shower combo, and how hard it is to protect and ventilate the space.
Here’s a practical cost snapshot you can use when planning.
| Tub type / material | Typical 2026 price range | Why it changes |
| Standard porcelain/enamel | $350–$600 | Most common; prep is straightforward if the enamel is sound |
| Fiberglass / acrylic | $350–$1,000 | Surface can flex; failures happen if prep and bonding aren’t right |
| Clawfoot / freestanding | $400–$1,400 | More surface area (often inside + outside) and more masking |
| Tub-shower combo (tub + walls) | $800–$1,200 | Much more area to prep and spray |
| Cast iron / older porcelain | $350–$650 (often $500–$1,200 for antique-style work) | Extra time for rust repair and careful prep |
DIY is cheaper up front. A bathtub reglaze kit often costs $40–$150, but the finish and lifespan are much less predictable, especially in a busy family bathroom.
Reglazing vs. replacement vs. liners
If you’ve ever priced out a full replacement, you already know the “hidden” costs: demolition, hauling, plumbing changes, tile work, drywall repair, and time without a working bath or shower. That’s why people choose reglazing—it’s usually the biggest visual upgrade per dollar.
A simple comparison helps clarify the tradeoffs.
| Option | Typical total cost | Downtime | Durability (typical) | Main risk |
| Bathtub reglazing | $350–$1,200 | 2–3 days (cure) | ~10–15 years (pro care) | Peeling if prep is poor or tub has prior coatings failing |
| Replacement | $2,000–$5,000+ | 1–3+ weeks | 15–30+ years | Remodel surprises; highest disruption |
| Liner | $1,300–$4,000 | 1–2 days | ~7–15 years | Fit issues, trapped moisture, edge caulk failures |
Many households see savings up to about 75% vs. replacement, especially when the tub is structurally fine and the problem is cosmetic.
What drives price up or down
When you get quotes, you’ll notice they can differ a lot. That’s not always a red flag. It often means contractors are pricing real differences in prep time and risk.
Price tends to go up when the tub has chips that need repair, when there’s rust around the drain, when old caulk has to be removed and replaced, or when the surface already has a failing coating. A tub-shower combo also costs more because the surface area is much larger, and pros must mask more of the bathroom with tape and drop cloth to protect floors, walls, fixtures, and hardware.
Location matters too. In many metro areas, you may pay 15–25% more because labor and insurance costs are higher and schedules fill faster.
If you like a simple mental calculator, start with your tub type from the table above, then add cost for extra repair work. In real life, the “extra” is often the difference between a job that looks good for two years and one that last at least 10.

Time, downtime, and disruption
The spraying part is fast, which surprises people. A typical professional job is around 4 hours of active work, but you still need cure time before you use the tub.
Most homeowners should plan on 48–72 hours before normal use, because fume control and curing matter as much as the coating itself. If your bathroom has poor ventilation, you may want to plan a night or two elsewhere, or at least keep kids and pets away from the area.
A simple timeline looks like this:
| Day | What happens | What you do |
| Day 1 | Prep + spray + initial set | Stay out of the bathroom; keep ventilation running |
| Day 2 | Cure | Avoid touching the surface; no water use |
| Day 3 | Ready for use (often) | Follow the contractor’s “safe to use” timing |
Humidity and temperature can stretch this. If your home is cool and damp, a coating may need longer to cure. That’s normal, and rushing it is one of the easiest ways to damage a fresh finish.
What is bathtub reglazing?
Bathtub reglazing restores worn or outdated tubs by applying a specialized coating that looks fresh and stands up to water and cleaning. Understanding the terminology, common issues, and material compatibility helps you know what this process can—and cannot—fix.
Definitions & terminology (LSI + clarity)
People say reglaze, refinish, resurface, and restore like they mean different things. In most homes, they point to the same core service: the old tub is cleaned and prepped, minor damage is filled, and a new coating system is sprayed to create a fresh, glossy finish.
A key point is that bathtub reglazing is not the same as “painting your tub” with leftover wall paint. Pros use coatings made for wet areas—often an epoxy base with a tougher topcoat. The exact system varies, but the goal is the same: proper bonding and a smooth finish that stands up to water, soap, and cleaning.
What problems reglazing fixes best
Reglazing shines when the tub is ugly but still solid. It’s a great option for dull, etched enamel; stubborn stains that never seem to come out; light scratches; worn areas around the drain; and small chips that make the tub look older than it is.
If you’ve got an old bathtub that “looks dirty even after you scrub it,” that’s often a worn finish, not a cleaning problem. Reglazing gives you that clean, bright surface again because the new coating becomes the new outer layer.
When reglazing is the wrong solution
Not every tub should be coated. If the tub moves under your feet, that movement can crack coatings over time. If there’s rust-through, severe bubbling, or large cracks (especially in fiberglass), the tub may be failing underneath.
Also, if the tub has been coated before and that coating is peeling, the new finish is only as good as the layer under it. Some pros can strip old coatings; others won’t warranty over them. Either way, prior coatings increase risk and cost.
Surface/material compatibility
Reglazing can work on most tubs, but prep changes by material.
| Material | Common issue | Prep focus |
| Porcelain/enamel | Etching, stains, chips | Careful sanding/etching + chip fill for a smooth profile |
| Cast iron | Rust near drain, worn enamel | Rust removal and sealing + strong bonding steps |
| Fiberglass tub | Flexing, cracks, dull gelcoat | Crack stabilization + adhesion-promoting prep |
| Acrylic | Scratches, dullness | Controlled sanding to avoid gouges + compatible primers |
If you’re not sure what you have, look underneath or inside an access panel. Cast iron is very heavy and often magnetic. Fiberglass and acrylic feel lighter and can flex slightly.

Is your tub a good candidate?
Not every tub is ready for reglazing. A quick pre-check helps you spot structural issues, rust, or prior coatings that could affect results—and ensures you choose the safest and most cost-effective approach.
Pre-checklist: “reglaze tubs or replace tubs?”
Before you book anything, do a quick inspection with good lighting. Ask yourself a few simple questions. Is there a crack that looks deep, wide, or spreading? Is there soft or crumbling rust near the drain or overflow? Does the floor under the tub feel unstable? Have you already used a DIY kit in the past?
Small chips and light cracks can often be repaired. Large cracks—especially on the bottom where people stand—can mean the tub is not stable enough for a coating to hold. Rust right around the drain is common, but if the metal is pitted or thin, a coating may hide it for a while without solving the real problem.
Common repairs included (and what costs extra)
Many pro jobs include basic chip filling and smoothing. They also usually remove and replace the bead of caulk at the tub line, because old caulk can hide mildew and can break the seal at the edges.
Costs can rise when there are deep chips that need shaping, heavy rust that requires extra steps, or a tub-shower combo where walls are included. Optional add-ons may include a non-slip area on the tub floor or a color change. Some people also ask about coating a sink or vanity top at the same time, which can be convenient if the space is already masked and ventilated.
Environmental/health considerations
Reglazing products can release strong odors and chemicals while they’re applied and curing. That’s why ventilation is not “nice to have.” It’s a safety step. According to the U.S. Environmental Protection Agency (EPA), many coatings and refinishing products emit volatile organic compounds (VOCs), which can significantly degrade indoor air quality, especially in enclosed or poorly ventilated bathrooms.
If you’re hiring a pro, ask how they handle fumes. Do they use an exhaust fan vented outside? Do they seal the room with protective plastic? Will you need to leave the home for a set period? These are normal questions, and a good refinisher will answer clearly without brushing you off.
If you’re thinking about DIY, be honest about your space. A small bathroom with no window is a tough place to use coatings safely. A respirator, gloves, and room containment are not optional if you want to reduce exposure according to the Occupational Safety and Health Administration (OSHA).
Before/after expectations
A well-done reglaze should look smooth and evenly glossy, without rough patches, dry spray texture, or visible sanding marks. It should also feel consistent when you run your hand across it after it cures.
That said, it isn’t factory porcelain. You may see subtle edge lines near the drain and overflow where masking and hardware meet the coating. If you’re expecting a perfect “fresh from the showroom” look, talk about expectations before work starts. Clear expectations prevent disappointment later.
Professional bathtub reglazing process
Professional reglazing is more than just spraying a new coat. Success depends on careful preparation, proper bonding, and precise application, with attention to materials, curing, and quality checks. Knowing the steps helps you understand what sets a durable finish apart from a short-lived one.
Step-by-step: what a pro actually does (process map)
People often ask, how do you glaze a tub if you’re not replacing it? The short answer is: prep, bond, spray, cure. The long answer is where quality lives.
Below is the common pro process. Steps can vary, but skipping any of these is where problems begin.
-
Inspect and protect the bathroom. The refinisher masks walls, floors, fixtures, and hardware with tape and plastic, using a drop cloth where needed. This is also when they plan ventilation to control overspray and fume movement.
-
Remove hardware and old caulk. Drain covers, overflow plates, and old caulk are removed so the coating can bond cleanly and water can’t creep under edges later.
-
Deep clean and degrease. Soap scum, body oils, and residue from cleaners can block adhesion. Pros use strong cleaners and rinse thoroughly so the surface is truly clean.
-
Etch or sand for adhesion. The goal is a surface profile the coating can grip. This is where sandpaper choice and technique matter. Over-sanding can gouge, under-sanding can lead to peeling.
-
Repair chips, small cracks, and imperfections. A filler is used, then sanded smooth so you don’t see a “pimple” under the final coat. This stage also addresses light rust after it’s removed.
-
Prime/bond and spray the coating system. A bonding layer may be used, then multiple spray passes build the final finish. A pro sprays evenly to avoid runs and thin edges.
-
Cure and quality check. The tub is left to cure, then inspected. Some pros take photos for documentation and to support warranty coverage.
If you’re hiring someone, it’s fair to ask them to walk you through these steps. If they can’t explain their prep, that’s a concern.
Coating system choices (epoxy vs. acrylic/urethane)
Homeowners often hear “epoxy” and think it’s one single product. In real life, coatings are systems. Many refinishing systems use an epoxy base for bonding, then a tougher top layer designed to resist wear and stains.
Why does this matter to you? Because the top layer is what you clean, touch, and stand on. If the topcoat is too soft, it can scratch and stain. If bonding steps are weak, the finish can peel even if the tub looked perfect on day one.
Fiberglass and acrylic tubs often need extra attention because they can flex. A coating that bonds well to a rigid cast iron tub may struggle on a flexible surface if the prep and primers are not compatible.
Cure times & “when can I use it?” guidance
A fresh coating can feel dry and still be easy to damage. That’s why “dry to touch” is not the same as “safe to use.”
Here’s a simple guide many refinishers follow, with timing affected by temperature and humidity:
| Stage | What it means | Typical timing |
| Dry to touch | Surface is no longer tacky | Hours after spraying |
| Safe to light contact | Minor contact won’t mark it | Often 24–48 hours |
| Safe to bathe/shower | Water and normal use are okay | Often 48–72 hours |
| More fully cured | Harder, more chemical resistant | Several days to a few weeks |
Ask your provider for their specific cure instructions and stick to them. If they say “wait 72 hours,” don’t cut it to 48 because you’re impatient. That impatience shows up later as dull spots, stains, or marks that never quite go away.
Quality controls that predict longevity
The best predictor of how long the finish will last is not the color or the shine on day one. It’s prep quality and thickness control.
A careful refinisher aims for even coverage, avoids thin edges around the drain, and checks that the surface is uniformly smooth before spraying. They also give you written aftercare instructions, because harsh cleaners and suction-cup mats can ruin a good job quickly.
If there’s a warranty, ask what you must do to keep it valid. Some warranties are strict about cleaners, bathmats, and even leaving shampoo bottles on the ledge.

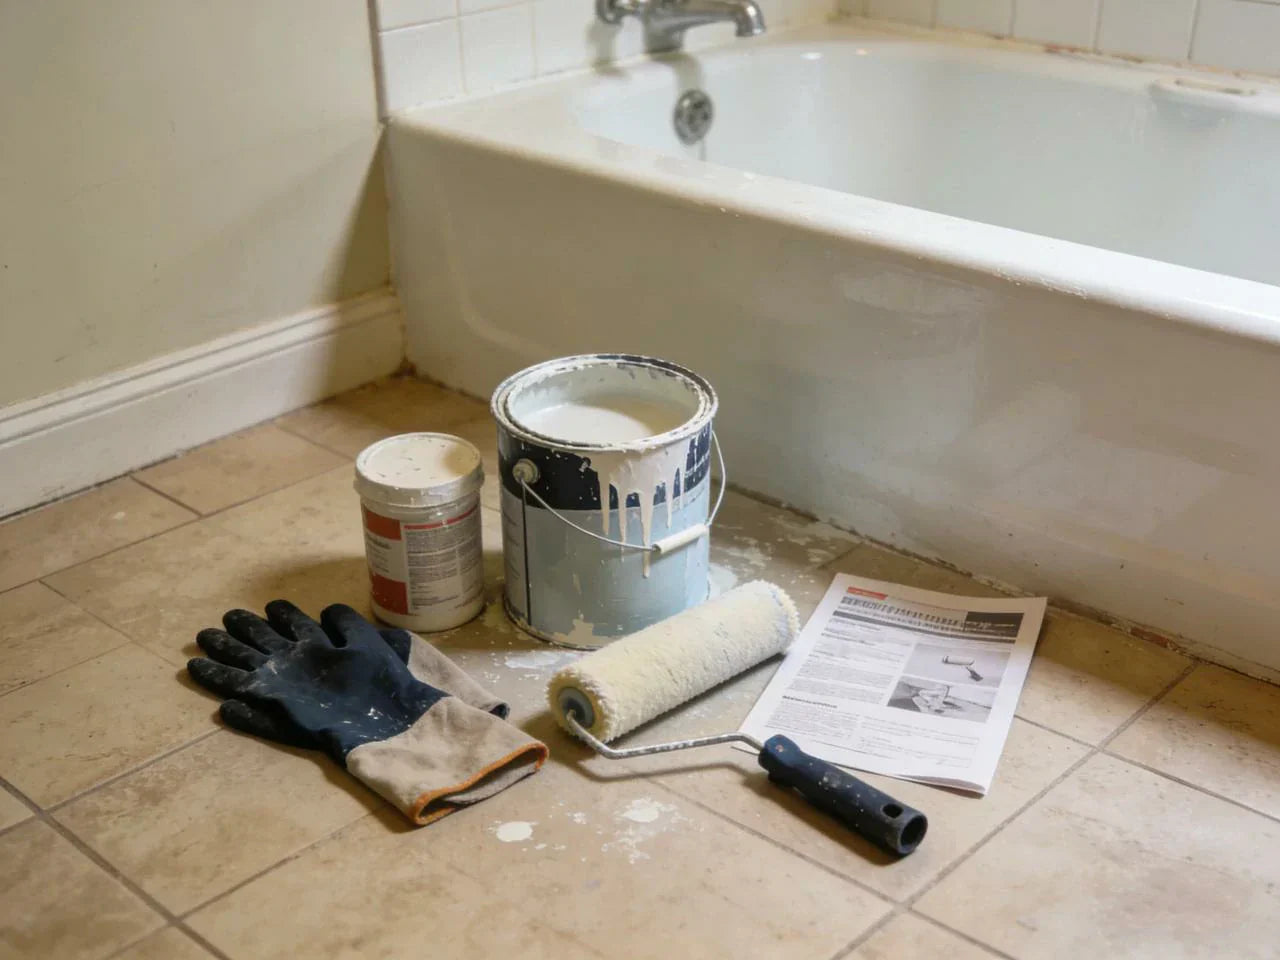
DIY kits vs. hiring a pro to reglaze tubs
Deciding between a DIY kit and a professional reglaze comes down to usage, budget, and expectations. Understanding the differences in prep, durability, and finish quality helps you choose the approach that fits your tub and lifestyle.
Can you reglaze a fiberglass tub yourself?
Yes, you can reglaze your bathtub with a kit, including a fiberglass tub, and many people do. A bathtub reglaze kit can be tempting when your budget is tight or you need a quick fix before guests arrive. But the real question is not “can you,” it’s “what happens after?”
DIY kits often come with a small roller or brush system. That makes it hard to get a smooth, sprayed finish, especially on curved areas. The bigger challenge is prep. In a normal home bathroom, it’s difficult to sand evenly, control dust, and manage strong odors safely without professional ventilation.
If the tub is in a low-use guest bath, DIY can be a reasonable short-term choice. If it’s your main shower and it gets daily use, DIY failure is much more common.
Durability comparison
This is where the numbers matter. A typical DIY coating may last 2–5 years, and many fail sooner when prep is rushed or the bathroom stays humid. A professional reglaze often lasts 10–15 years with normal care.
Think about what “true cost” means. If a $100 kit fails in a year and you redo it (and then pay a pro to strip it later), you can spend more than you would have on one good pro job. Also, once a tub has multiple coatings, adhesion becomes harder. Each layer adds risk.
Failure modes you can prevent
Most complaints about reglazing your bathtub fall into a few patterns, and the good news is that many are preventable.
Peeling is usually an adhesion problem. It can happen if the tub wasn’t deglossed enough, if soap residue or silicone caulk was left behind, if humidity was high during application, or if the tub had an older coating underneath that was already failing. It also happens when the tub is used too soon, before cure is complete.
Chipping often comes from impact. Dropping a heavy shower head, a metal drain snake, or a tool can chip even a good finish. Chips also show up around the drain and overflow if the coating is thin at those edges.
Yellowing is a common worry in hard-water areas. Mineral deposits can stain the surface over time, especially if water sits in the tub or if harsh cleaners are used. Some products, like strong bleach soaks or gritty powders, can also change the look of a finish. If your water leaves white crust on faucets, plan on gentler, more regular cleaning and drying.
Decision framework: who should DIY vs. who should hire
So, is reglazing a bathtub worth it if you’re not sure which route to take?
DIY makes sense when the stakes are low: a guest bath, a short-term rental, or a situation where you can accept a less perfect finish. It also helps if you have strong ventilation, patience for long prep work, and comfort using protective gear.
Hiring a pro makes sense when the bath is used daily, when you want it to last at least 10 years, or when the tub is special—like a heavy cast iron tub or an antique shape you want to preserve. It also makes sense when there’s rust repair, previous coatings, or a tub-shower combo where overspray control is harder.
If you’re selling a home soon, professional refinishing is often a great way to make the bathroom look clean and updated without the cost and disruption of replacement.

How long does reglazing bathtub last? Longevity, warranties & failure risks
The lifespan of a reglazed tub depends on preparation, materials, and everyday use. Understanding typical durability, warranty coverage, and common risk factors helps set realistic expectations and avoid premature failures.
How long does bathtub reglazing last?
When done well and cared for, a professional tub finish often lasts 10–15 years. That’s the realistic range many homeowners see in normal use. Outliers exist: some tubs have lasted 20+ years, usually when prep was excellent, coatings were applied under controlled conditions, and the tub was cleaned gently.
On the other hand, poor prep can lead to early failure in months, not years. That’s why “how long does bathtub refinishing last” is really two questions: how good was the prep, and how will the tub be treated afterward?
Warranty terms to compare
Warranties vary, but many pros offer 5–10 years. Read the exclusions carefully. Some warranties don’t cover damage from suction-cup mats, bath oils, certain cleaners, or chips from impacts. That may sound strict, but it’s also honest: those things can damage coatings.
Red flags include a provider who can’t explain what coating system they use, won’t give written cure instructions, or dismisses ventilation concerns. Another red flag is a warranty that sounds great but has no clear process for service calls.
Risk factors that shorten lifespan
If you want your tub to look good for a long time, watch for the big risk multipliers.
Prior coatings are near the top. A tub that has been coated before can still be refinished, but the job often needs stripping or aggressive prep, and peeling risk is higher if old layers remain.
Large cracks (around 1/4 inch or more), chronic moisture trapped under caulk, and standing water are also major issues. Hard-water scaling can shorten the “like new” look by staining the finish. Abrasive cleaning tools—like steel wool, scouring pads, or gritty powders—can dull the surface and create tiny scratches that hold stains.
“Is reglazing a bathtub worth it?”
For many homes, yes. Reglazing is worth it when the tub is solid, the damage is mostly cosmetic, and you want a cleaner look fast without a full remodel. It’s also worth it when you’re preserving a heavy cast iron tub you don’t want to remove.
It’s not worth it when the tub is structurally failing, rust is severe, or you’re already planning a remodel that will move plumbing or change the tub size. In those cases, the money is better put toward replacement.
Aftercare & maintenance
Proper aftercare is key to keeping a reglazed tub looking fresh and lasting longer. Knowing what to do in the first week, along with routine cleaning and preventive steps, helps protect the finish from chips, stains, and premature wear.
First 7 days: do’s and don’ts
The first week sets the tone for how well the finish hardens. Even if the tub is “safe to use,” treat it gently at first.
Avoid harsh cleaners, gritty powders, and long bleach soaks. Skip suction-cup mats and anything rubber that sticks tightly to the surface, because it can trap moisture and pull on the finish. Try not to do extra-hot soaking baths during the earliest period if your contractor warns against it.
Also keep the space ventilated when you can. If you still smell strong odor, give it more time and airflow.
Weekly/monthly cleaning routine
A reglazed tub does best with simple cleaning. Warm water, mild soap, and a soft sponge or cloth go a long way. If you clean more often with gentle products, you won’t need aggressive scrubbing later.
Avoid abrasive pads, scouring powders, and repeated bleach use. Those products can rough up the finish, making it easier for soap scum and minerals to grab on. If you’re used to “scrub until it squeaks,” this is a mindset shift. A coated tub is more like a car’s clear coat: treat it gently and it stays glossy.
Preventing chips, stains, and yellowing
To prevent chips, be careful with heavy items. Don’t rest tools on the tub edge when you work on plumbing. If you bathe kids, watch for metal toys or anything that can scrape.
To prevent stains, rinse away dye-heavy products and avoid leaving bottles sitting in puddles. If your water is hard, drying the tub with a towel after use can make a big difference. It sounds fussy, but it takes 15 seconds and can keep mineral rings away.
If you need a descaler for hard-water buildup, confirm that it’s safe for refinished surfaces. Some acidic products can dull coatings if used too strongly or too often.
Maintenance checklist
A quick monthly look can catch issues early. Check the caulk line for gaps, because water under caulk can cause lifting at edges. Look around the drain for rust staining or worn spots, and fix drips promptly so water doesn’t sit in the same place every day.
If you spot a chip, address it early. Small chips can sometimes be touched up before water gets under the coating and spreads the damage.

Case studies: wins, fails, and what caused each outcome
Real life is messy, so it helps to see patterns.
One common “win” story is a standard porcelain tub in a busy family bathroom. The tub is stained and dull, with a couple of small chips near the front edge. A pro removes old caulk, sands thoroughly, fills chips, sprays evenly, and gives clear cure instructions. The total cost lands near the national average, and the tub stays glossy for around a decade with gentle cleaning. The key reason it works is simple: the tub was solid, and prep was not rushed.
A second pattern is the fiberglass tub that looks fine for a year, then starts to peel near the drain. In many of these cases, the tub had slight flex, water sat near the drain after showers, and the coating at that edge was thin. Sometimes the tub had an older coating that wasn’t fully removed. This is where hiring someone who understands bonding on fiberglass—and who is willing to do the unglamorous prep—matters a lot.
A third example is a clawfoot tub where the owner wants the outside refinished too. These jobs can look stunning when done well, especially in older homes. But they cost more because the exterior needs the same careful prep, and masking is harder. When they fail early, it’s often because of impacts (moving the tub, bumping it with tools) or because cleaners were too harsh on the outside finish.
Reviews & social proof integration
When you’re choosing a refinisher, photos and reviews help, but look for the details that hint at quality. Do reviewers mention the bathroom being protected well? Do they talk about clear cure instructions? Do they mention the tub still looking good after months or years?
Also pay attention to how problems are handled. Even good jobs can have issues like dust nibs or a small drip. A reliable pro comes back, fixes it, and doesn’t argue about what they promised.
FAQs
1. Is reglazing a bathtub worth it?
Reglazing a bathtub can definitely be worth it if your tub is still solid and the issues are mostly cosmetic, like dullness, small chips, or stubborn stains. It’s a fast and cost-effective way to make your tub look almost brand new without going through a full replacement, which can be expensive and disruptive. For everyday bathrooms, especially if you want a quick visual upgrade before selling or just refreshing the space, reglazing gives a glossy, clean finish that can transform the look of the bathroom in just a few days. However, if your tub has serious cracks, rust-through, or unstable structure, the money is often better spent on a replacement.
2. How much does it cost to reglaze your tub?
The cost of reglazing depends on the tub material, size, and any extra repairs needed. In 2026, a standard professional job usually runs around $350–$600, while fiberglass or acrylic tubs can cost $350–$1,000 due to extra prep work. Clawfoot tubs or tub-shower combos are even higher because of more surface area and masking. DIY kits are much cheaper, around $40–$150, but the finish is less predictable and may not last as long, so the “true cost” could end up being more if you have to redo it or hire a pro later.
3. How long does a bathtub reglaze last?
A professionally refinished tub typically lasts about 10–15 years with normal use and proper care, though some can last 20+ years when prep and application are excellent. DIY coatings generally last only 2–5 years and are much more likely to fail if preparation, sanding, or ventilation wasn’t ideal. Longevity really depends on how well the surface was prepped, how evenly the coating was applied, and how carefully you treat the tub afterward.
4. Can you reglaze your bathtub?
Yes, most tubs can be reglazed, including porcelain, enamel, cast iron, fiberglass, and acrylic, but suitability depends on condition. A tub is a good candidate if it’s structurally sound, has minor chips or dullness, and doesn’t move underfoot. Large cracks, rust-through, or peeling old coatings make reglazing less effective, and some situations may require professional stripping of old layers to ensure proper adhesion and a long-lasting finish.
5. Can a bathtub be refinished more than once?
A bathtub can be refinished multiple times, but each additional layer increases the risk of peeling or chipping because coatings stick best to a properly prepped bare surface. Professionals often need to strip old layers before applying a new finish. Multiple layers also make it harder to get a smooth, even coat, so while refinishing more than once is possible, it’s better to invest in a high-quality job the first time to minimize future problems.
6. Why is my bathtub peeling after Reglazing?
Peeling usually happens because the coating didn’t properly adhere to the surface. Common reasons include inadequate cleaning or sanding, leftover soap residue or silicone, high humidity during application, using the tub too soon before the coating fully cured, or existing layers underneath that weren’t removed. Peeling can often be prevented with careful prep, correct curing time, and professional techniques, and if it does happen, a pro may need to strip the old coating and start fresh for a durable finish.
7. How many times can a bathtub be refinished?
Most bathtubs can be refinished once or maybe twice, but it really depends on the tub’s material, condition, and how well previous coatings were applied. After a professional reglaze, a tub usually lasts 10–15 years, and if you want to refinish it a second time, a pro often needs to strip or carefully prep the old coating to make sure the new layer sticks properly. Doing it more than twice isn’t usually recommended because each extra layer makes it harder for the finish to adhere evenly, increasing the risk of peeling, chipping, or uneven spots. So while multiple refinishes are technically possible, for the best long-term results it’s smarter to focus on a high-quality job the first time and maintain it gently afterward.
References


Leave a comment
This site is protected by hCaptcha and the hCaptcha Privacy Policy and Terms of Service apply.