


A bathtub drain system does more than “let water out”—it prevents leaks at the flange, controls overflow, and decides how reliably your tub seals when you want a deep soak. This guide explains the parts, stopper types, sizing, installation, and troubleshooting so you can choose the right setup and avoid repeat clogs, slow drainage, and surprise water damage.
Quick Answer (What to buy and what it includes)
A bath tub drain system is the full tub drain and overflow setup, not just the shiny ring you see at the bottom of the tub. If you’re shopping, you’re usually looking for a complete waste-and-overflow kit (sometimes called a bathtub drain assembly).
Here’s what a typical system includes:
-
Core parts: drain flange, drain shoe (drain elbow), stopper mechanism, overflow assembly (overflow plate + gasket + overflow tube), waste tee, and the P-trap connection to the home plumbing system
-
Typical sizing: most tubs use a 1.5-inch tub drain opening; the connecting bathtub drain pipe is commonly 1.5–2 inches depending on tub volume and local code
-
Most common stopper styles: lift-and-turn, push-pull (pop-up), and trip-lever
-
Good “default” choice for many homes: a quality waste-and-overflow kit paired with a lift-and-turn or push-pull stopper, because it’s simple to service and tends to be DIY-friendly
If your goal is “buy once, install once,” focus on correct sizing, the right material (PVC vs ABS tub drain compatibility matters), and careful gasket placement.
Bathtub Drain System Parts (What each part does—and what fails)
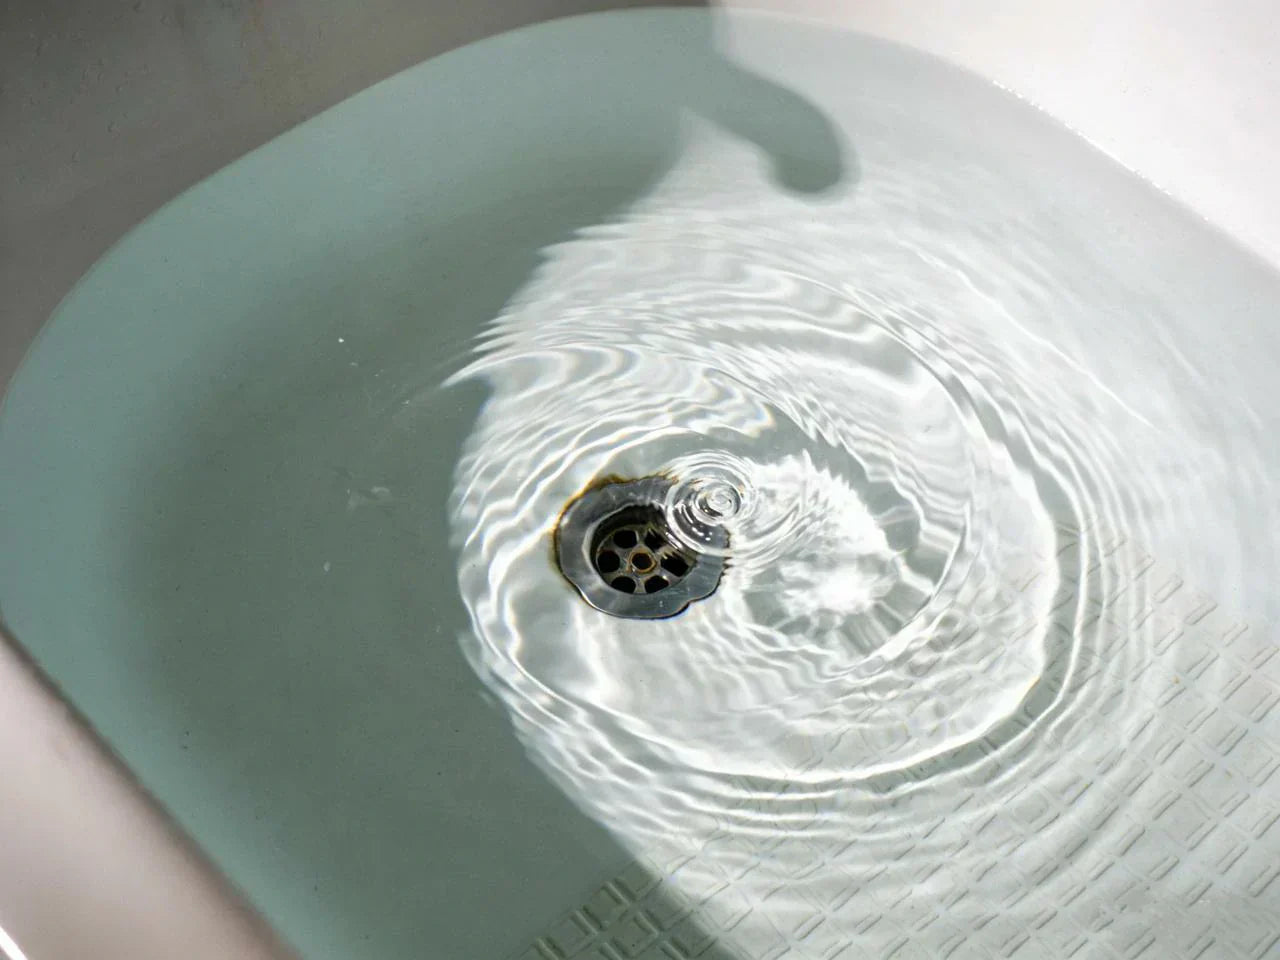
When people say “my bathtub doesn’t drain” or “there’s water under the tub,” they often blame the tub itself. In real life, the trouble is usually in a few small areas of the drain system: the seals, the slip connections, or the stopper where hair and soap scum collect.
So, what does a tub drain look like as a system? From above, you usually see a round drain cover or stopper at the bottom, plus an overflow plate on the tub wall below the faucet. Under the tub, there’s a short network of pipes that ties those two openings together and routes water into the P-trap.
Drain flange (the visible ring at the bottom)
The bathtub drain flange is the trim ring you see inside the drain hole. It threads into the drain shoe under the tub and seals against the tub surface. A failed flange seal is one of the most common causes of a slow leak that shows up as staining on the ceiling below.
Most installs seal the flange with plumber’s putty (more on that later). If the old putty dries out, cracks, or was applied to a dirty surface, water can slip through.
Drain shoe (drain elbow under the tub)
The drain shoe is the elbow-shaped part directly under the tub. It’s the “socket” the flange threads into. It also points toward the waste tee where the overflow ties in.
If the shoe gasket is pinched, crooked, or overtightened, you can get leaks only when the tub is full (because the water level sits above the drain opening and pushes water outward).
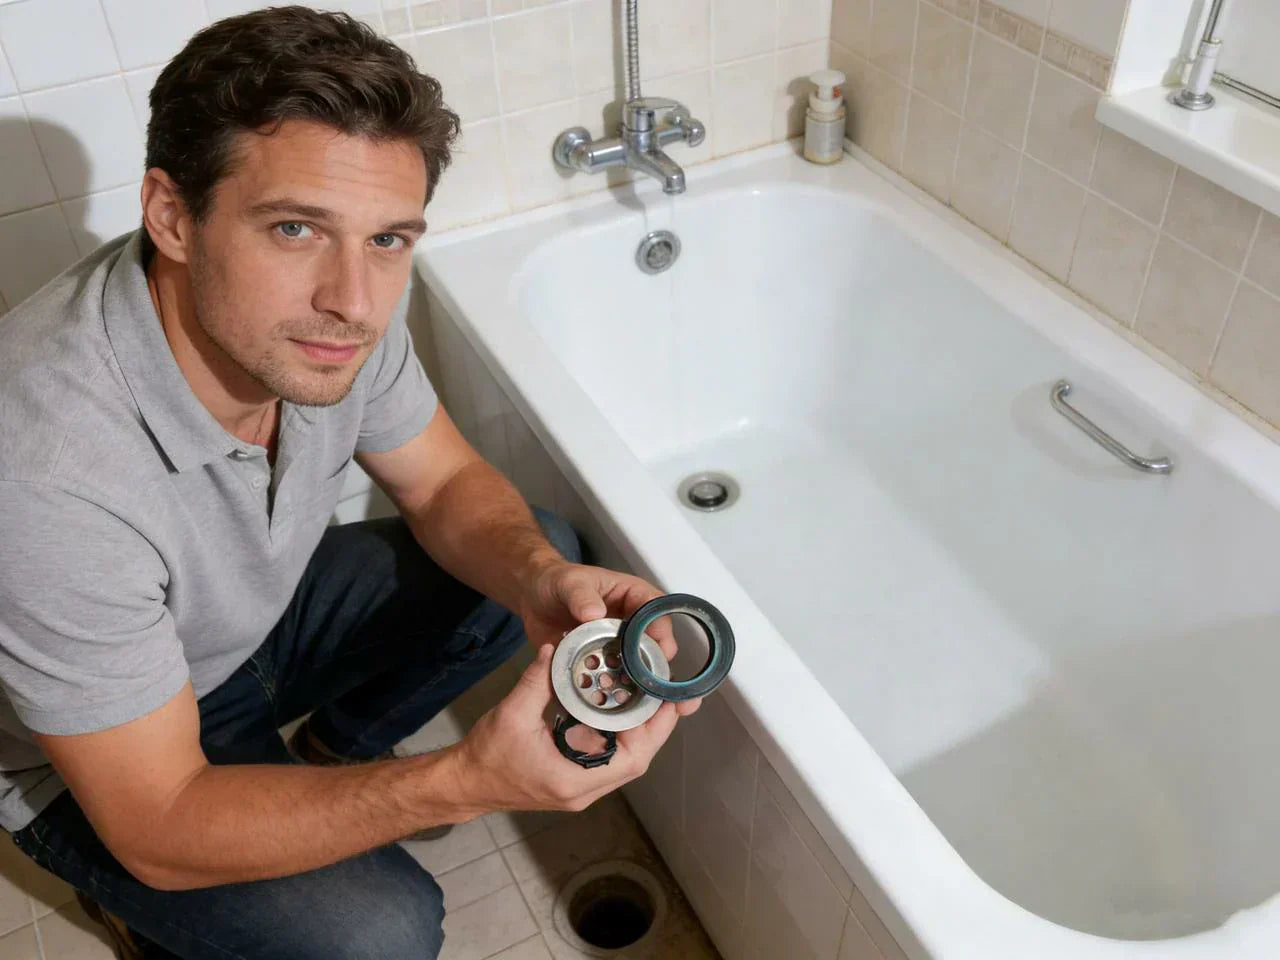
Stopper mechanism (how you open and close the drain)
This is the part you touch every day. It’s also where hair builds up, which is why many “clogged bathtub drain” problems start at the stopper instead of deep in the pipe.
Different bathtub drain stopper types use different hardware: a simple center screw, a spring, a rocker toggle, or a linkage plunger hidden in the overflow tube.
Overflow assembly (the safety backup)
The overflow is the opening on the tub wall that prevents water from overflowing onto the floor when the water level rises too high. Behind the overflow plate is a gasket and a short tube that runs down to the waste tee.
Overflow leaks are common after a sloppy replacement because the overflow gasket must sit the right way. If it’s flipped or off-center, water can run behind the tub wall.
Waste tee and tailpiece (where drain and overflow meet)
This is where the drain from the tub bottom and the overflow drain combine. Many kits use slip nuts and washers here. Slip nuts can loosen over time, especially if the tub flexes a little when someone stands in it.
P-trap connection (the odor blocker)
The P-trap is the curved section of pipe that holds a small amount of water to block sewer gas. A bad tub drain connection at the trap can leak, and a trap that loses its water seal (or has venting problems) can lead to odors.
Material compatibility (PVC vs ABS tub drain)
Under many tubs, you’ll see either white PVC pipe or black ABS pipe. They use different cements and sometimes different fittings. Mixing materials without the proper transition method is a common DIY mistake that turns into a leak later.

Bathtub Drain System Types (8 Options)
Most homeowners shop by “drain style,” but what they really mean is stopper style. These are the main options you’ll see in 2025, along with the real-life tradeoffs.
Stopper comparison table (reliability, look, maintenance)
| Type | How it works | Pros | Cons | Best for | Notes (maintenance) |
| Lift-and-Turn | Lift slightly and twist to open/close | Simple, steady seal, easy DIY removal | Small screw/cap can catch hair | Most standard tubs | Remove and clean quarterly; check center screw |
| Push-Pull (Pop-Up) | Push down to close, pull up to open | Fast to use, clean look | Can trap debris under cap | Busy family bathrooms | Clean underside often to prevent slow drainage |
| Toe-Touch | Press with foot to toggle | Hands-free, good for mobility | Springs/caps wear with heavy use | Kids’ baths, accessibility | Replace worn seals/springs as needed |
| Trip-Lever (Overflow lever + plunger/linkage) | Lever moves internal linkage and plunger | Classic style, keeps stopper out of sight | Linkage can rust or misalign | Older tubs and replacements | Pull linkage to clean hair; adjust if it won’t seal |
| Cable-Operated | Overflow knob turns a cable to move stopper | Smooth look, no dangling linkage | Cable can bind if neglected | Modern/luxury look | Keep mechanism clean; replace cable if stiff |
| Flip-It (Drop-in O-rings) | Drop-in stopper uses O-rings; flip toggle | Tool-free, quick upgrade | Fit isn’t universal; O-rings wear | Renters or fast refresh | Expect O-ring replacement over time |
| Fixed Grid / Slotted | No moving parts; open grid cover | Minimal, fewer moving failures | Doesn’t fully seal for soaking | Shower-only tubs or “drain-first” use | Add a separate test plug when you want a soak |
| Pop-Up/Plunger variants (deep seal designs) | Internal plunger makes a stronger seal | Strong seal for deeper tubs | Some designs clog more easily | Deep-soak tubs | Plan on regular cleaning to prevent buildup |
If you’ve ever wondered how does a tub drain work with a trip lever, the idea is simple: the lever doesn’t block the drain opening at the bottom. It lifts and lowers a plunger inside the overflow tube or drain line, changing the way water flows. That hidden plunger is also why trip-lever drains can be tricky when a tub won’t drain—they can snag hair in places you can’t see.
Sizing & Compatibility (avoid costly mismatches)
A drain kit can look “universal” online and still not fit your tub. Before you buy, take five minutes to confirm size and layout. It saves you from returning parts mid-project with a half-disassembled bathtub.
Drain opening size and pipe diameter
Most tubs use a drain opening around 1.5 inches. That doesn’t mean every part you buy will say “1.5 inches” in the same way. Some listings focus on the drain shoe size, some on the tub opening, and some on the pipe size.
Under the tub, the bathtub drain pipe that ties into the P-trap is often 1.5 inches, but some setups transition to 2 inches depending on the home and local plumbing rules. If you’re not sure what you have, measure the outside diameter of the pipe or check markings on the pipe itself.
Tub type: alcove vs freestanding
A standard alcove tub usually works with a common waste-and-overflow kit because the drain and overflow are in expected locations.
A freestanding tub drain rough-in is different. The drain location can be centered, offset, or tied to a special floor drain fitting. Some freestanding tubs also have tighter space under the tub skirt, which makes certain drain bodies harder to tighten.
Access matters more than people expect
If you have an access panel behind the tub or a ceiling you can open from below, replacement is much simpler. Without access, small leaks become big problems because you may not see them until there’s discoloration, swelling trim, or moldy smells.
Material matching: metal, PVC, or ABS
Metal assemblies (often brass under a chrome finish) tend to last longer and tolerate cleaning better. PVC and ABS kits are common and cost less, but they rely heavily on correct assembly and correct solvent cement where cement is required.
If you’re dealing with PVC vs ABS tub drain parts, don’t guess. PVC is typically white; ABS is typically black. Each uses its own cement, and local rules can affect what’s allowed.

Materials & Finishes (durability vs budget)
You don’t have to pick the most expensive kit to get a reliable drain system, but you do want the parts that matter to be stable: the flange threads, the shoe, and the connections that get moved during cleaning.
What tends to last longest
In many homes, metal waste-and-overflow parts last longer than plastic, especially when they’re cleaned often or when people use stronger bathroom cleaners. Metal threads also tend to feel smoother during assembly, which helps prevent cross-threading.
What wears out first (even in good systems)
The wear items are usually small: O-rings, springs, and rubber seals. If you choose a stopper style that uses O-rings (like some drop-in designs), expect that rubber to harden over time. In real bathrooms, those small seals often need attention within 2–5 years, depending on use and cleaning habits.
A quick “real life” example
In one home I worked on, the tub drained slowly for months. The homeowner tried drain cleaners again and again. The real issue wasn’t deep in the pipe—it was thick grime packed under a pop-up cap. Once the stopper was cleaned and a simple hair strainer was added, the tub began to drain normally. Sometimes the fix is less dramatic than you expect, and that’s good news.
Installation Overview (most important steps first)
If you’re replacing a drain system, the goal is simple: clean surfaces, correct gasket placement, and even tightening. Most leaks come from rushing those basics.
The standard install sequence (works for most kits)
-
Prep the tub surface and openings. Scrape away old putty, old silicone, and grime around the drain hole and overflow hole. A clean surface helps the new seal hold.
-
Remove the old parts (if replacing). If you’re wondering how to get a drain out of a bathtub, start by removing the stopper, then use a drain wrench (or drain removal tool) to unthread the drain flange. Hold the drain shoe steady from below if needed so you don’t twist and stress the piping below.
-
Seal the new drain flange. Apply plumber’s putty under the flange (common for many tubs). Thread the flange into the drain shoe and tighten until snug and evenly seated.
-
Set the drain shoe gasket correctly. Under the tub, install the rubber gasket between the tub and the drain shoe where the kit calls for it. Make sure it lies flat and centered.
-
Install the overflow gasket and overflow plate. The overflow gasket shape matters. Many are thicker on one side to match the curve of the tub. Tighten the overflow plate screws evenly so the gasket compresses uniformly.
-
Connect the waste tee and piping. Join the drain shoe and overflow tube into the waste tee, then connect toward the P-trap. Tighten slip nuts evenly. Don’t force a nut that feels cross-threaded—back it off and start again.
-
Install and adjust the stopper mechanism. Each type of drain stopper adjusts a little differently. Trip-lever linkage may need length adjustment so it seals when closed but doesn’t snag when open.
-
Leak test before you close everything. Fill the tub to a few inches below the overflow and watch for leaks under the tub. Then run water into the overflow opening (or fill higher and let it overflow normally) and check again.
Tools you’ll usually need
A drain wrench (or drain key), screwdrivers, adjustable pliers or a wrench, and a putty knife are the common basics. A flashlight helps more than you’d think.
Putty or silicone for the flange?
People ask this a lot because they don’t want to do the job twice. Many tubs and drain flanges seal well with plumber’s putty. Some surfaces and some manufacturer instructions call for silicone instead, especially when putty can stain certain materials. The safest path is to follow the tub and drain instructions when you have them. When you don’t, putty is common on standard installations, but silicone can be a better choice for surfaces where putty doesn’t behave well.

Freestanding Tub Notes (special case section)
Freestanding tubs look simple, but the drain planning is less forgiving. With an alcove tub, small alignment errors can be hidden behind a wall. With freestanding, the drain often comes up through the floor and has to land in a tight target.
If you’re doing a freestanding tub drain rough-in, plan around access first. Can you reach the connections after the tub is set? Do you have a removable panel, or will you be working through a small gap under the tub?
Freestanding installs often need a precise drain location and sometimes a larger opening in the subfloor so you can set and tighten the connections without stressing the pipe. A smart habit during rough-in is using a test plug or cap to confirm the line holds water and to keep construction debris out. That one step can prevent a “why won’t my bathtub drain?” moment on day one, caused by dust and scraps in the line.
If you’re on a slab foundation, have an offset drain, or have no way to access the connection later, that’s often the point where hiring a pro is worth it. Not because the parts are mysterious, but because a hidden leak under a freestanding tub can be expensive to find and fix.
Costs (kits vs pro install)
Costs vary mostly based on access and how much piping you’re replacing. A simple stopper swap is not the same job as a full waste-and-overflow replacement.
Typical cost ranges (realistic planning numbers)
| Scenario | What’s being replaced | Typical cost range (parts) | Typical cost range (installed) |
| Stopper-only refresh | Stopper and small trim parts | $10–$40 | $75–$200 |
| Drain flange/shoe reseal | Flange seal + gasket work | $10–$30 | $150–$300 |
| Full waste-and-overflow kit | Flange, shoe, overflow, tee, piping to trap | $20–$100 | $150–$400 |
| Freestanding tub drain work | Drain alignment + floor connection + testing | $50–$200+ | $300–$800+ |
So, how much does tub drain replacement cost? For many standard tubs with decent access, homeowners often land in the “full kit” range. Freestanding work climbs fast if access is tight or if floor work is needed.
Troubleshooting & Repairs (high-intent fixes)
This is the section people read while standing in a bathroom with wet towels on the floor. If that’s you, start here: find out if you have a clog problem, a seal problem, or a loose connection problem. The fix depends on which one it is.
When the tub won’t drain: what to do first
How to get bathtub to drain? If your bathtub doesn’t drain, the quickest progress usually comes from checking the stopper area before you attack the pipe.
If you have a lift-and-turn, push-pull, or toe-touch stopper, remove it and look inside the drain opening. Hair often forms a thick rope just below the stopper. Pull it out with a plastic drain tool or a bent wire hook.
If you have a trip-lever drain, remove the overflow plate screws and pull out the linkage and plunger carefully. You may be surprised how much hair is wrapped around it. Clean it, rinse it, and reinstall.
People also ask, what is the quickest way to get a tub to drain? In many homes, it’s simply removing the stopper and clearing the hair plug right at the top. That’s faster and safer than pouring harsh chemicals, and it doesn’t risk damaging older piping.
If you want a gentle next step, a hot water flush followed by baking soda and vinegar can help loosen soap buildup, though it won’t magically dissolve a big hair clog. Use it as a cleanup step after you remove the blockage, not as the only solution.
If the tub drains slowly but isn’t fully clogged
Slow drainage often points to buildup rather than a single plug. Once you remove and clean the stopper, use a hair catcher on top of the drain cover going forward. That small habit keeps the water flow steady and reduces the chance you’ll be taking things apart again soon.
Where leaks usually come from (and how to fix them)
Leaks tend to show up in three places: the flange seal, the overflow gasket, or the slip nuts near the P-trap.
Leak at the drain flange (water around the drain, or dripping below): This often means the putty or seal under the flange failed. The fix is to remove the flange, clean off old putty, apply new sealant, and reinstall. If you’re seeing water only when the tub is full, this is a top suspect because the water level sits above the drain opening and pushes outward.
Leak at the overflow plate (leaks when water reaches overflow): This is usually a gasket issue. The overflow gasket may be upside down, off-center, or not compressed evenly. Remove the overflow plate, reposition the gasket so it matches the tub’s curve, and tighten the screws evenly.
Leak at a pipe under the bathtub (drip at slip nut or trap): This is the big one people worry about: how to fix leaking pipe under bathtub without tearing out walls. Start by drying everything. Then run water and watch with a flashlight. If the drip forms at a slip nut, gently snug the nut and recheck. If it still leaks, the washer may be cracked or mis-seated. Disassemble, inspect the washer, replace if needed, and reassemble straight.
If the leak is on a glued joint (common with PVC/ABS), it’s not a “tighten it” problem. That usually needs a cut-and-repair with proper fittings. If you can’t access it well, it’s a good time to call a plumber, because a stressed repair can fail later and cause hidden water damage.
A simple symptom-to-fix guide
| Symptom | Most likely cause | Fast check | Common fix |
| Leaks only when tub is full | Drain flange seal or shoe gasket | Fill tub and watch drain area | Remove flange, reseal, reset gasket |
| Leaks only when overflow runs | Overflow gasket misaligned | Run water into overflow | Reposition gasket, tighten evenly |
| Slow drain | Hair at stopper | Remove stopper and inspect | Pull hair, clean stopper, add strainer |
| Trip lever won’t seal | Linkage/plunger misadjusted | Move lever and feel resistance | Adjust linkage length, clean plunger |
| Sewer odor | Trap seal/venting or buildup | Smell near drain after non-use | Run water, clean buildup; get venting checked |
Maintenance Schedule (prevent clogs and early wear)
Most drain problems are “repeat problems.” That’s why a simple routine matters, especially in homes with long hair, kids’ bath time, or frequent baths.
| Frequency | What to do | Why it helps |
| Monthly (high-use homes) | Rinse and wipe the drain cover; use a hair catcher | Keeps grime from turning into slow drainage |
| Quarterly | Remove stopper and clear hair/soap buildup | Prevents clogs and helps the stopper seal better |
| Every few years | Inspect and replace worn O-rings/springs if your stopper uses them | Stops drips and keeps the drain opening working smoothly |
| After any install/repair | Fill tub and run overflow to leak test | Catches leaks before they become water damage |
A small reminder: avoid mixing strong cleaners, and ventilate the bathroom when using any cleaning product. Also, if you ever have a leak that wets drywall or flooring, drying quickly matters. Moisture left behind can lead to mold growth, which can pose health risks such as allergies or respiratory irritation, according to the CDC.

Buying Guide (match the right system to how you use the tub)
Standing in the aisle (or scrolling online), it’s easy to focus on finish and forget the daily experience. Ask yourself: do you soak often, or is this tub mostly used like a shower? Do you want simple cleaning, or are you okay with a little extra maintenance for a sleeker look?
If you soak often, choose a stopper that seals reliably and is easy to remove for cleaning. Lift-and-turn and push-pull styles are popular for that reason. If bending is hard, toe-touch can be more comfortable, but it may need a little more upkeep over time.
If you have an older tub with a trip lever, you can often keep that style and simply replace worn linkage parts. People also ask, can I replace a trip-lever with a different stopper type? Sometimes yes, but it depends on the drain body and overflow setup. Many trip-lever systems rely on the overflow opening for the mechanism, so switching to a different type may require a different waste-and-overflow assembly. When in doubt, replacing like-for-like is usually smoother than trying to “convert” without changing the parts behind the wall.
If your tub is freestanding, prioritize compatibility and access. The best-looking drain is not the best choice if you can’t reach it to tighten a gasket or service a clog.
Key Takeaways (wrap-up)
A bathtub drain system is a complete setup—flange, stopper, overflow, waste tee, and the pipes that tie into the P-trap. Most problems come from two places: debris buildup around the stopper and small seal failures at gaskets and slip nuts. If you confirm sizing (usually a 1.5-inch drain opening with 1.5–2-inch piping), match materials correctly, and do a real leak test, you’ll avoid the most common headaches.
FAQs
1. How do I get the bathtub drain out?
First things first, remove the stopper—whether it’s a lift-and-turn, push-pull, or trip lever type—so you can access the drain opening. Then grab a drain wrench or a specialized drain removal tool to unthread the drain flange. Sometimes these drains get stubborn from years of buildup or corrosion. If it’s not turning easily, don’t force it by twisting the pipes underneath; instead, apply slow, steady pressure, maybe use some penetrating oil, and wiggle it gently until it starts to loosen. Taking your time here saves you from breaking the plumbing below.
2. How to drain a bathtub that won’t drain?
If your tub is holding water, the first step is to check and clean the stopper, because a surprising number of clogs hide right under it. For trip lever stoppers, remove the linkage from the overflow plate and clear out hair or gunk from the plunger mechanism. If that doesn’t do it, a plunger or a hand auger can often reach clogs further down the drain. Hot water and baking soda or vinegar can sometimes help break up minor buildup, but avoid harsh chemicals if you have older pipes—they can do more harm than good.
3. How to fix a leaking pipe under the bathtub?
Start by drying the area completely and then running a small amount of water to see exactly where the leak is coming from. If it’s a slip nut joint, you can usually reseat or replace the washer and then snug the nut evenly—no over-tightening. For glued PVC or ABS joints, it usually requires cutting out the damaged section and doing a proper cut-and-repair with new glue and pipe. Don’t forget to check other nearby joints too; leaks sometimes travel along the pipe and appear somewhere unexpected.
4. What are the different types of bathtub drains?
Bathtub drains actually come in a few different flavors, and the type you have can make a big difference when it comes to maintenance or upgrades. The most common ones are lift-and-turn drains, push-and-pull drains, toe-touch drains, and trip lever drains. Lift-and-turn drains are the ones you twist to open or close, while push-and-pull drains work by pushing or pulling a knob. Toe-touch drains let you open or close the drain just by stepping on it—super handy if your hands are wet or soapy. Trip lever drains are usually found in older tubs and involve a lever on the overflow plate that lifts a stopper. Each type has its pros and cons, so knowing which one you have is key if you’re thinking about cleaning, fixing, or replacing it.
5. What does a bathtub drain system look like?
A bathtub drain system might seem simple at first glance, but it’s actually a mini plumbing network. Essentially, it starts with the drain opening in the tub, which connects to a stopper mechanism (whatever type it may be) that controls water flow. From there, water travels down a tailpiece into the P-trap, a curved pipe that prevents sewer gases from coming up into your bathroom. After the P-trap, the water flows into the main waste line that leads out of your house. Overflow drains also connect to the same system, giving you a safety path in case you accidentally overfill the tub. So, while it looks like just a hole at the bottom of the tub, there’s a lot going on under there to make sure water drains efficiently and safely.
6. How much does tub drain replacement cost?
The cost of replacing a bathtub drain can vary quite a bit depending on what type of drain you choose and whether you’re doing it yourself or hiring a pro. For a basic DIY replacement, the drain itself might cost anywhere from $10 to $50, depending on the style and material. If you hire a plumber, labor could add another $75 to $200, bringing the total to around $85–$250 on average. Things can get pricier if your drain is old, corroded, or hard to reach, or if you decide to upgrade to a fancy toe-touch or trip lever system. It’s usually a small investment compared to the hassle of dealing with a slow or leaking drain over time.
7. What is the quickest way to get a tub to drain?
If your bathtub is draining slowly, there are a few quick tricks that usually do the job. The simplest method is to use a plunger—just make sure you block the overflow with a wet cloth first to get better suction. Another fast option is to remove the stopper and clear any visible hair or debris by hand or with a wire hook. For a slightly more high-tech approach, a drain snake can reach deeper clogs that are out of reach. And, if you’re in a hurry, a mixture of baking soda and vinegar followed by hot water often helps dissolve soap scum and minor buildup. Just remember, these are temporary fixes if the clog is stubborn or recurring, in which case a professional might be your fastest long-term solution.
References

Leave a comment
This site is protected by hCaptcha and the hCaptcha Privacy Policy and Terms of Service apply.