



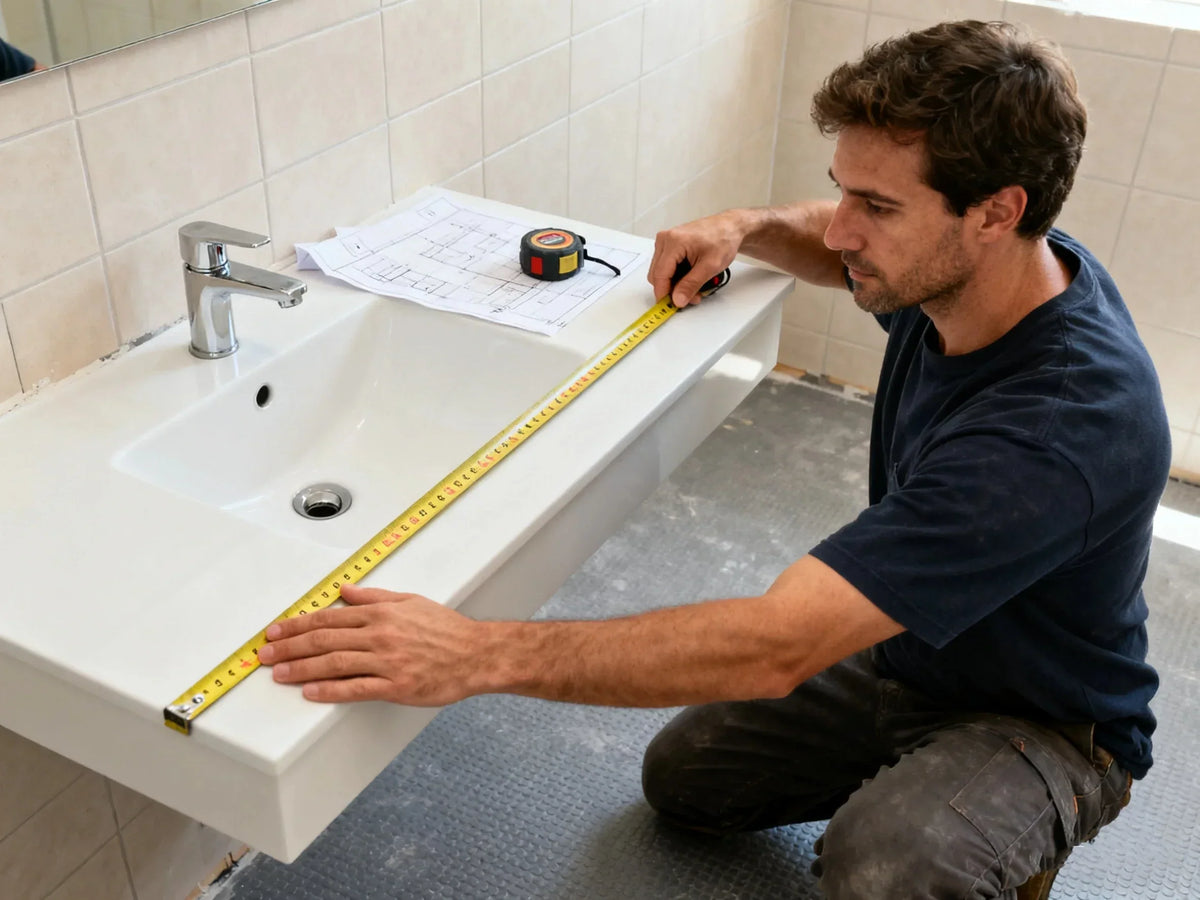
Bathroom sink sizes are the starting point for a successful remodel. In 2025, the standard bathroom sink size falls between 16–24 inches wide, 12–22 inches front-to-back, and 5–8 inches deep. The right fit depends on your room layout and vanity width, often based on the sink you select, including its width, depth, and style. This guide gives you quick answers up front, then moves into sizes by type, how to measure, space planning rules, ADA compliance, budget ranges, and real-world examples. You’ll see data-backed ranges, practical pro tips, and clear steps so you can choose the right new sink size with confidence—especially in small bathrooms and powder rooms where compact and wall-mounted options shine.
Standard bathroom sink dimensions at a glance (2025)
Choosing the right bathroom sink size is key to both functionality and style. While the “standard” range covers most homes, understanding how different widths, depths, and basin heights fit your space can make a big difference—especially in small bathrooms or powder rooms. The table below breaks down the typical dimensions by sink type, helping you quickly match your needs with the right design.
Quick answer: 16–24" W, 12–22" D (front-to-back), 5–8" basin depth
For many bathroom, the average bathroom sink size will land in this band: around 20 inches wide for many standard vanities, though smaller or larger sizes are available depending on the space:
- Small/powder rooms: 15–24" wide, 12–20" front-to-back, 4.5–6.5" basin depth
- Typical households: 18–24" wide, 16–22" front-to-back, 5–8" basin depth
- Bathroom trends note: In small baths, compact and wall-mounted sinks dominate because they free up floor space and improve circulation
A common first question is, what are the standard bathroom sink dimensions or standard sink size? In simple terms, standard sizes are usually 16 to 24 inches wide, 12 to 22 inches long, and 5 to 8 inches deep. That “standard” range expands or shrinks based on the type of sink and the vanity it sits in.

Visual: master size table by sink type and shape
Here is a quick overview of sizes by type of sink. For example, vanity sinks typically range 18 to 24 inches wide, while wall-mounted or smaller units may be 19 to 24 inches wide, and 24 inches wide and 16 inches deep works for some integrated or console models.
| Sink Type | Width / Diameter | Front-to-Back Length | Basin Depth | Typical Notes |
|---|---|---|---|---|
| Top/Drop-in | 16–24" | 12–20" | 5–8" | Most common; simple install and replace. |
| Undermount | 17–25" | 12–22" | 5.5–8" | Great with stone/solid-surface vanities; clean look; needs a cutout. |
| Vessel (Round) | 14–20" diameter | — | 4–7" | Sits on top of the counter; faucet height/flow matters for splash control. |
| Wall-Mount (Floating) | 11–24" | 10–18" | 5–8" | Best for very small bathrooms; leaves floor open for a bigger feel. |
| Pedestal | 19–24" | 16–22" | 6–8" | Classic look; good in guest baths where storage is secondary. |
| Console/Integrated | 24–36" | 16–24" | 5–7" | Slim, modern lines; counter and basin as one piece; fewer grout lines. |
| Corner (Triangular) | 12–19" each leg | 12–18" | 4.5–6.5" | Solves door swing conflicts and tight floor plans. |
| Trough/Double | 36–48" overall length | 16–22" | 5–8" | Shared-bath planning; two faucets; user zones need careful spacing. |
Size bands and when to choose them (small, standard, large)
When you filter by size and shape, the decision often becomes easier:
- Small sink(≤18–20" wide): Best for powder rooms, urban apartments, and tight floor plans. Wall-mount and corner sinks lead here.
- Standard sink (20–24" wide): Fits most hall/family baths. An undermount bathroom sink or drop-in sink in this band balances bowl capacity and counter space.
- Large sink (≥24" wide or double): Suited for master/shared vanities. Think a double sink vanity at 60–72 inches, or a trough at 36–48 inches with two faucets.
In short, the typical sink width for everyday use is 18 to 24 inches, but smaller choices make sense when floor space is tight or the room is under 35 sq ft.
Finish the “Standard bathroom sink dimensions at a glance (2025)” review, then browse HOROW bathroom sinks and faucets for current product options.
Common Types of bathroom sink sizes: data-backed ranges
Bathroom sinks come in a variety of shapes and mounting styles, each with its own size ranges and installation considerations. Understanding the typical dimensions for drop-in, undermount, vessel, wall-mounted, and double-sink options makes it easier to choose the right fit for your vanity, room layout, and daily use. Below, we break down the data-backed sizes and key planning tips for each type.
Drop-in and undermount sinks: standard dimensions and cutout sizes
If you want the most common path, drop-in sinks and undermount sinks are the go-to.
- Drop-in: 16–24" W x 12–20" D x 5–8" basin depth. The rim sits on top of the countertop. You’ll need a cutout template and a compatible vanity top.
- Undermount: 17–25" W x 12–22" D x 5.5–8" depth. The sink mounts under the counter for a clean edge. This style is popular with solid-surface or stone tops.
When planning cutouts, decide if you want a reveal (a small visible ledge of the sink rim under the counter), a zero reveal (edge flush with the cutout), or a negative reveal (counter slightly overhangs the bowl). Each affects cleaning, splash, and the look around the sink.
A quick rule: the cutout size will be slightly smaller than the external sink size for drop-ins, and slightly larger than the internal bowl for undermounts. Always use the manufacturer’s template to avoid guesswork.
Vessel and integrated/console: diameter/width, rim height, splash control
Vessel sinks sit on top of the counter. Round bowls are common, with 14–20 inches in diameter and 4–7 inches in basin depth. Because the rim is higher than the counter, the faucet height and reach matter. Taller spouts can cause splash if the water hits near the sink drain at a steep angle. To control splash:
- Choose a deeper bowl (toward 6–7 inches), or one with a soft slope.
- Use a faucet with a 1.0–1.2 GPM aerator and aim the stream toward the side slope, not directly on the drain. Based on the U.S. Environmental Protection Agency (EPA) WaterSense program, bathroom faucets with 1.0–1.2 GPM flow rate help reduce water usage while controlling splash。
Integrated/console sinks combine countertop and basin in one piece and typically run 24–36 inches wide and 16–24 inches front-to-back with a 5–7 inch basin depth. These are trending for slim profiles and easy cleaning. Less grout and fewer seams mean fewer maintenance points.
Wall-mounted, floating, and corner sinks: compact solutions and clearances
For tiny rooms and powder baths, wall-mounted sinks and corner sinks are often the easiest win. Wall-mount models range 11–24 inches wide and 10–18 inches front-to-back. Their floating look keeps the floor visible, which makes a small bathroom feel larger.
Corner sinks tuck into the room’s angle and help clear doors, drawers, and knees. They are a smart fix when front-to-back depth is limited, like near inward-swinging doors.
Plan for:
- Blocking in the wall if you’re mounting a sink (solid backing to hold screws and brackets).
- Correct rough-in heights for the drain and supply lines.
- Optional trap covers for a clean look and pipe protection.

Trough and double sink bathroom dimensions: shared-bath planning
If your bathroom serves two users often, a trough sink or a double-sink vanity saves time and avoids crowding.
- Trough sinks: 36–48 inches long is typical. You’ll still follow standard depths (16–22 inches) and keep 5–8 inches of basin depth. Plan two faucets and a drain layout that prevents cross-splash.
- Double sinks: A 60–72 inch vanity is common. Aim for 30 inches center-to-center spacing between faucets for comfort. 24 inches is a workable minimum in tight rooms but feels snug.
How to measure your vanity and room for the right fit
Measuring your vanity and bathroom space correctly is the first step to choosing a sink that fits perfectly. With the right tools and a few simple steps, you can ensure proper width, depth, and faucet reach—avoiding common mistakes and making installation smoother. Below is a step-by-step guide to get accurate measurements for your next bathroom upgrade.
Tools and steps: width, front to back depth, basin depth, bathroom faucet reach
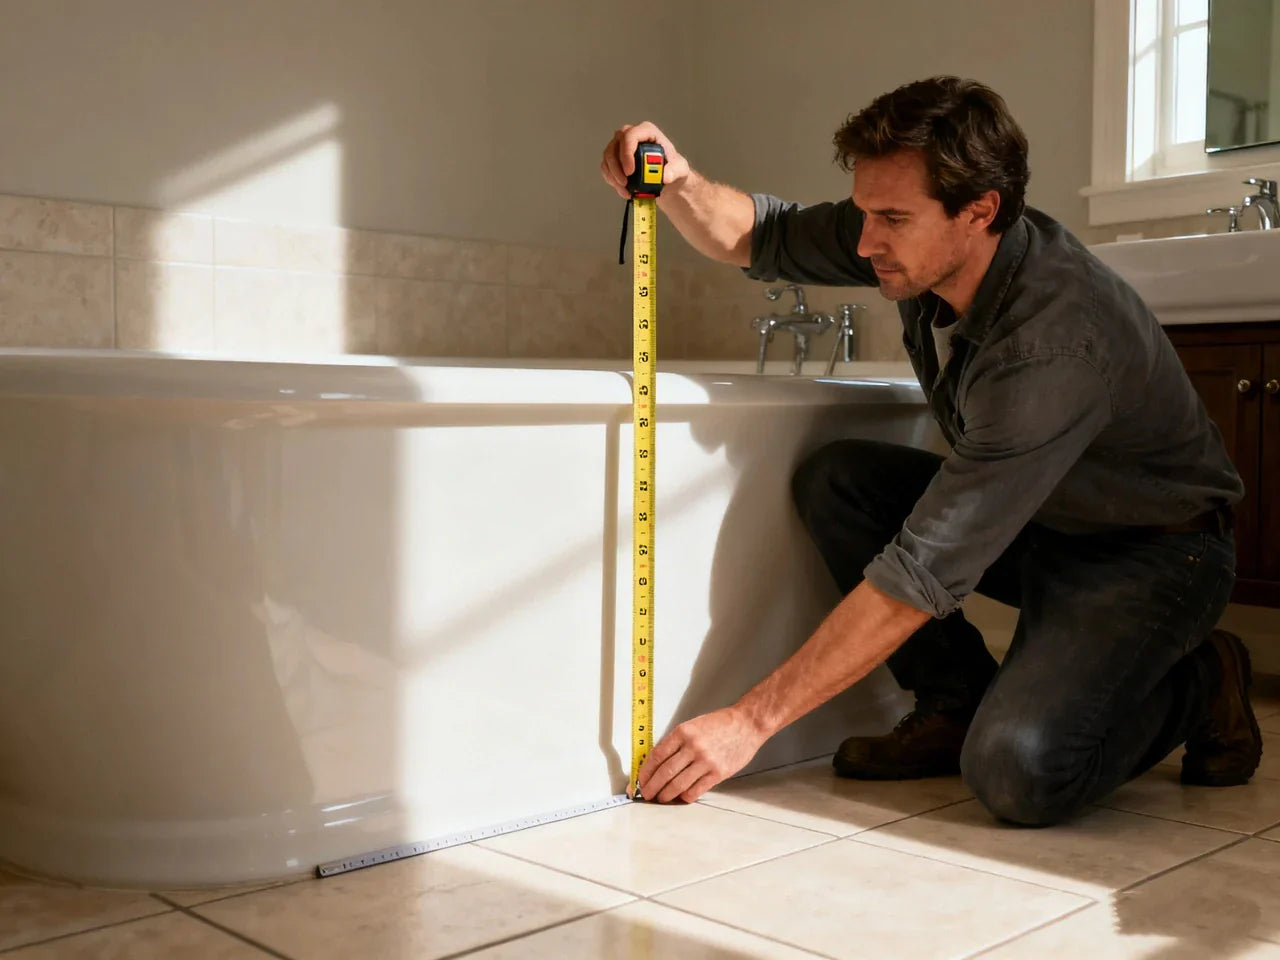
You asked, how do you measure a bathroom sink length? Measuring is easy when you follow a simple path.
Tools:
- Tape measure, straightedge, pencil, and level
- Painter’s tape (to mark sizes on the counter or wall)
- A smartphone or notepad for quick photos and notes
Steps:
- Measure the vanity width end-to-end. Note any walls, trim, or pipes that reduce usable space.
- Measure front-to-back depth of the vanity or counter. Standard bathroom vanities are often 18–21 inches deep. Write down the max depth your room allows without hitting a door swing or walkway.
- Check front clearance in the aisle. Aim for 21–30 inches from the front of the vanity to the next object or wall.
- Mark the sink outline with painter’s tape in a size you’re considering (for example, 20" x 16"). Stand and mimic handwashing to feel the space. Does the faucet reach land in the middle third of the bowl?
- If replacing a sink, measure the existing cutout and the bowl depth. Check the distance from the sink centerline to the wall so the new drain aligns.
- Confirm your mirror centerline and lighting. You want the faucet and mirror centered over the bowl, with sconces at a comfortable face height.

Countertop cutout, rough-in plumbing, and drain alignment
Three measurements reduce surprises:
- From wall to sink centerline: ensures the drain and P-trap will align.
- P-trap clearance: leave room under the sink for the trap, shutoffs, and your hands.
- Supply spacing: typical hot/cold supply stubs are 4–8 inches apart on center, and 21–24 inches above the floor for vanities (varies by setup).
Height math for vessels vs undermounts:
- If your ideal counter height is 34–36 inches, and your vessel is 6 inches high, set the counter around 30–32 inches so the rim height ends near 34–36 inches.
- For undermounts, focus on bowl depth: deeper bowls can raise your elbows; many families enjoy 6–7 inches deep for daily use.
Vanity and Faucet Compatibility
Match the sink to the vanity interior, countertop, cutout, mounting method, faucet hole pattern, faucet reach, backsplash, drain, drawers, and supply lines. Use the exact sink and faucet drawings rather than category averages.
For an undermount or vessel installation, also confirm the support, finished edge, seal, and mounting method specified for the selected components.
Common measuring mistakes (and fixes)
It’s easy to overlook small things that cause big headaches:
- Ignoring drawer clearance, door swing, or towel bar intrusion. Fix: lay painter’s tape to show the sink edge, then open every door and drawer.
- Forgetting faucet spout reach. Fix: for a typical bowl, a 5–6 inch spout reach works well so water lands in the middle third of the basin.
- Not checking mirror and sconce alignment. Fix: center the mirror over the bowl and confirm the faucet clears the mirror’s lower edge.
- Skipping the cutout template. Fix: use the manufacturer’s template before cutting tops.
Bathroom Sink Measurement Matrix
Record the sink, countertop, vanity, faucet, and plumbing measurements separately. A sink can fit the countertop opening yet still conflict with drawers, supply lines, a backsplash, or faucet reach.
| Measurement | Confirm | Why it matters |
|---|---|---|
| Overall sink | Width, front-to-back depth, height, and rim profile | Establishes the space the complete sink occupies |
| Basin | Interior width, depth, and drain position | Affects usable space, splash behavior, and plumbing alignment |
| Countertop cutout | Exact shape, dimensions, corner profile, and reveal for the model | Prevents reliance on a generic opening size |
| Vanity interior | Clear width and depth plus rails, drawers, shelves, and plumbing | Confirms that hidden components do not block the basin or drain |
| Faucet area | Hole pattern, reach, handle movement, and backsplash clearance | Confirms that the faucet can be mounted and directs water into the basin |
| Plumbing centerline | Drain and supply positions relative to the cabinet and sink | Identifies alignment conflicts before the countertop is cut |
Use the current sink drawing and cutout template for the final decision. Category ranges help with early planning but do not establish model fit.

Checklist (condensed):
- Vanity width and depth recorded
- Front clearance measured
- Sink centerline marked
- Faucet reach and height set
- Cutout template verified
- Drain and supplies aligned
- Mirror and lighting centered
Space planning and layout rules that affect sink size
Proper space planning ensures your bathroom sink is both comfortable and functional. By considering front, side, and aisle clearances, as well as the layout for small, standard, or double vanities, you can prevent crowding, improve ergonomics, and make the most of your available space. Below, we break down the key rules and practical strategies for every bathroom size.
Clearance and ergonomics: front, side, and aisle space
Comfort and safety drive bathroom sink dimensions that actually work day to day:
- Front clearance: 21–30 inches is a good target. 30 inches feels roomy. Some areas require at least 21 inches by code.
- Side clearance: Keep 4–6 inches from a side wall to the sink edge. Try to keep the centerline of the sink 15–18 inches off a side wall for elbow room.
- Aisle width: Aim for 30–36 inches for a shared walkway. Narrower aisles feel tight.
These rules help you choose the right size and type of sink without painful bumps or splash on nearby walls.
Small bathroom strategies: powder rooms under 35 sq ft
In rooms under 35 sq ft, the key is to reduce depth and free up floor for a compact room sink setup:
- Pick a 16–18 inch wall-mount or a corner sink to open the aisle.
- If you want a cabinet, a 24-inch compact vanity with an 18–20 inch wide undermount can work.
- A floating sink or floating vanity shows more floor, so the room feels bigger.
Standard and master baths: double-sink spacing and accessories
For hall and family baths, a 20–24 inch wide sink in a 24–30 inch vanity is a smooth fit. In master baths, double sink setups need careful spacing:
- A 60–72 inch vanity is the sweet spot for double undermounts.
- Use 30 inches center-to-center between faucets for two users at once. 24 inches is the tight minimum if space is tough.
- Pair mirrors to the sink centerline or use one large mirror with sconces set 36–40 inches off the floor at eye level (general rule; adjust for your height).
Visual: layout diagrams and ADA-friendly clearances
Plan templates can save hours. Keep a small, standard, and double-vanity layout on hand that call out:
- Front clearance (21–30")
- Side clearance (4–6"+)
- Sink centerline (15–18" off side walls)
- Mirror alignment, sconce height
- ADA forward approach and knee/toe space (more below)
Materials, shapes, and basin depth: performance and style
Choosing the right sink for your bathroom isn’t just about size—it’s also about materials, shape, and basin depth. These factors influence durability, weight, splash control, and overall style, helping you pick a sink that looks great and performs well in your space.
Material choices: ceramic/porcelain, glass/acrylic, stone/solid-surface, metal/wood
Choosing the right sink material depends on durability and style. There are several types of bathroom sinks, including drop-in, undermount, vessel, wall-mounted, and vanity sinks, so selecting the kind of sink that fits your layout is essential.
- Ceramic/porcelain: Most common. Sizes are broad, from small wall-mounts to 24-inch bowls. Easy to clean, affordable.
- Glass/acrylic: Often used for vessel sinks and small baths. They come in 14–20 inch diameters with slim walls. They visually lighten the space but may show water spots faster.
- Stone/solid-surface: Great for undermount and integrated designs. Heavier; check your cabinet and wall for support. Sizes vary, but many undermounts fall in the 17–25 inch width range.
- Metal/wood specialty: Statement sinks in powder rooms. Keep finish protection and maintenance in mind. Pair with a faucet that matches the use and cleaning routine.
Weight matters for wall-mounted sinks and console units. Use proper anchors and wall backing to carry the load.

Shape and geometry: round, oval, rectangular, square
Shape changes how the sink lives with the countertop and how it drains:
- Round and oval sinks : Efficient for vessel sinks at 14 to 20 inches in diameter. Rounded forms reduce splash at the corners.
- Rectangular sinks and square sinks: Great for counter space because they tuck into corners and align with edges. A rectangular bowl at 16 to 22 inches front-to-back often offers the best counter to basin balance.
- Drain placement: Center drains are most common; rear drains free space in the cabinet and can improve flow into the trap. A gentle slope reduces standing water and speeds drain time.
Depth and slope: splash risk and faucet flow rate matching
For splash control, bowl depth and slope do the heavy lifting:
- For small baths, 5–6 inches deep is a safe choice to reduce splash, especially with shorter faucets.
- For family use, 6–8 inches gives more capacity for face washing and cleanup.
- Pair taller faucets and vessels with a 1.0–1.2 GPM aerator and aim the stream at the slope, not the drain.
Visual: material-size comparison chart
| Material/Style | Typical Sizes Available | Weight/Support Needs | Splash Risk (Low/Med/High) | Cleaning Effort (Low/Med/High) |
| Ceramic/Porcelain | Very wide range (small to large) | Low–Medium | Low–Med | Low |
| Glass Vessel | 14–20" diameter, 4–6" depth | Low | Med–High (depends on GPM) | Med–High (spots show) |
| Solid-Surface/Stone | Undermounts, integrated 24–36"+ | Medium–High | Low–Med | Low–Med |
| Metal (e.g., stainless) | Various, often specialty shapes | Medium | Med | Med |
| Wood/Composite | Specialty, sealed finishes | Medium | Med | Med–High (finish care) |
Accessibility and code essentials (ADA-compliant sink dimensions)
Designing an accessible bathroom goes beyond style—sink height, knee space, and clearances are critical for usability and code compliance. Following ADA guidelines ensures your sink works for everyone, whether seated or standing, while keeping controls, mirrors, and surrounding space within easy reach.
ADA sink height, rim, and knee/toe clearances
If you’re aiming for ADA compliance or just universal design, here are the key measures from the ADA Standards (summarized):
- Rim or counter height: 34 inches max above the finished floor.
- Knee clearance: 27 inches high minimum at the front.
- Knee/toe depth: Forward approach clear space depth 17–25 inches. Knee space must be at least 8 inches deep at 27 inches high; toe space must be at least 9 inches high.
- Clear floor space: 30 x 48 inches minimum to allow forward approach.
- Exposed pipes: Insulate or guard to prevent contact.
These numbers help guide mounting heights and cabinet choices.
Approach and controls: universal design details
Make the sink easy to use for everyone:
- Allow forward approach for wheelchair users. Keep the area under the bowl open or design a removable panel.
- Use lever, touch, or motion controls for the faucet.
- Keep soap and towels within typical reach ranges (15–48 inches above the floor when unobstructed).
- Mount the mirror low enough to be usable from a seated height.

Mounting heights by sink type: vessel vs undermount vs wall-mount
Adjust the counter or bracket so the rim lands where you want:
- Vessel sinks: If the bowl is 6 inches tall, set the counter at 30–32 inches so the rim ends near 34–36 inches (or 34 inches max if you’re targeting ADA).
- Undermount/drop-in: Counter at 34–36 inches is typical for most adults; for ADA, keep the rim at 34 inches max.
- Wall-mount: Set bracket height to place the rim at 34 inches max if ADA is required. Always confirm bracket-to-rim dimensions in the spec sheet.
Costs by size and material: budgeting your sink upgrade
Understanding costs by size and material helps you plan a bathroom sink upgrade without surprises. From small ceramic drop-ins to large stone troughs, prices vary widely, and installation factors—like countertops, plumbing, and wall supports—can shift your budget significantly. This section breaks down typical ranges so you can choose the right sink for your style and wallet.
Price bands by size and material
Here’s a simple cost breakdown to help you plan. Prices vary by region and brand, but these ranges are common for a single sink (not including faucet or vanity):
| Size/Material/Type | Typical Price Range (USD) | Notes |
| Small ceramic drop-in | $50–$200 | Affordable and easy to replace. |
| Standard undermount (ceramic) | $80–$350 | Needs a countertop cutout; popular with stone tops. |
| Glass or acrylic vessel | $100–$500 | Style-forward; watch splash and water spots. |
| Wall-mount (ceramic) | $120–$600 | Add cost for blocking and bracket install. |
| Pedestal | $150–$400 | Classic look; no cabinet storage. |
| Console/integrated | $300–$1,000+ | Counter + basin in one; slim and modern. |
| Stone or solid-surface basin | $250–$1,000+ | Higher weight; premium look and feel. |
| Trough (single piece) | $300–$1,200+ | Two faucets; plan drain layout and spacing. |
Vanity widths matter too. A 24–30 inch vanity typically costs $200–$1,000+ depending on material, finish, and whether it includes a vanity top.
Installation factors that move the budget
- Countertop fabrication (sink cutout, polishing): $200–$600
- Faucet + drain kit + P-trap: $100–$400 for midrange quality
- Plumber or installer labor: $150–$450 for a simple swap; more for relocation
- Wall blocking for wall-mounts: $100–$250 if walls are already open
- Plumbing relocation or permits: varies by city; relocating supply and drain lines is the main cost driver
Value and ROI: when to splurge or save
- Rentals or urban apartments: Pick compact, durable sinks that reduce splash and are easy to clean. Save on exotic materials and spend on a quality faucet and shutoff valves.
- Master bath ROI: Integrated sinks and solid counters with reliable valves boost everyday comfort and resale impression. Choose sizes that fit your routines, not just trends.
Visual: cost breakdown chart + simple estimator tool
Simple estimator:
- Powder room (≤35 sq ft): $350–$1,200 for sink, faucet, and basic labor.
- Family bath single: $600–$1,800 with new undermount, faucet, and cutout.
- Double vanity or trough: $1,200–$3,500+ with two faucets and coordination.
To estimate fast:
- Start with sink type cost above.
- Add faucet + drain: $100–$400.
- Add labor/cutout: $200–$800.
- Add blocking if wall-mounted: $100–$250.
Real-world case studies and pro recommendations
Seeing how real homeowners solve space and style challenges makes planning easier. From tiny powder rooms to family baths and master suites, these case studies show which sink sizes, shapes, and layouts actually work—and highlight pro tips that keep installation smooth and daily use hassle-free.
Micro-bath (≤35 sq ft): 17–18" wall-mount or corner basin
A couple updated a 32 sq ft powder room in an older home. The old vanity stuck out 22 inches and blocked the door swing. They switched to a 17-inch wall-mount that was 12 inches front-to-back. The result? More front clearance, full door swing, and less splash on the opposite wall. They also used a 1.0 GPM faucet and aimed the stream toward the slope. The room felt bigger because the floor stayed visible.
Pro notes:
- Choose compact or corner sinks when depth hurts traffic flow.
- Check the trap cover and bracket rating.
- Use semi-gloss paint near the splash zone for easy cleaning.
Family bath (35–55 sq ft): 20–24" undermount in 24–30" vanity
A family of four needed storage and easy cleanup. They picked a 21-inch undermount in a 30-inch vanity. The 6.5-inch basin depth cut splash, and they gained two working drawers below because the rear drain kept the trap out of the middle. Morning routines got smoother because there was more counter on both sides for toothbrushes and soap.
Pro notes:
- A 20–24 inch bowl in a 24–30 inch vanity is a sweet spot for counter space and bowl capacity.
- Pair with a 5–6 inch spout reach for good aim into the bowl’s center.
Master/shared bath: 36–48" trough or double basins
Two busy professionals shared a 72-inch vanity. They debated two separate undermounts vs. one 42-inch trough. They chose the trough with two faucets spaced 30 inches center-to-center. It cut clutter and made cleaning faster, with one drain and fewer edges. Their mirrors were aligned with each faucet for easy sight lines.
Pro notes:
- Troughs save cleaning time but plan faucet spacing and user zones.
- For a 36-inch vanity, a single bowl 16–20 inches wide usually fits best with comfortable counter space left and right.

Pro tips: installer and designer checklists
- Block walls for wall-mount sinks; confirm bracket hole spacing and height before tile goes up.
- Always dry-fit the sink and faucet before final holes or cuts.
- Do a splash test with water at the planned faucet height to adjust the aim and aerator.
- Use templates for cutouts; never trace the sink body.
- Leave maintenance access to shutoff valves and trap.
Putting it all together: a simple path to te right sink
When choosing the right sink size, start with your room layout. Picking the right sink ensures comfort and efficiency. Use templates to find a sink that fits the available space perfectly. If it’s a family bath, choose 20–24 inches wide and 6–8 inches deep to reduce mess. For a 36 inches vanity, pick 16–20 inches wide to keep useful counter space. When in doubt, tape out the size you want and try a five-minute “mock routine.” Wash your hands. Pretend to brush your teeth. Where does water land? Is the faucet too tall or too short? Small checks like these can prevent daily frustration.
A last tip: your faucet and sink are a team. Flow rate, aerator style, and spout reach need to match the basin depth and slope. In many homes, a faucet with a 1.0–1.2 GPM aerator and a 5–6 inch reach is a solid pairing with a standard undermount or drop-in bowl.
If you want a quick printout, use the downloadable PDF cheat sheet: it includes the master size table, ADA highlights, a measuring checklist, and a simple budget worksheet you can bring to the store or share with your installer.
FAQs
1. What is the standard bathroom sink size?
Most standard bathroom sinks fall in the range of 16–24 inches wide, 12–22 inches front-to-back, and 5–8 inches deep. Of course, the “right” size really depends on the type of sink you choose, the width of your vanity, and how much room you have to work with. Smaller powder rooms might lean toward the lower end of these dimensions, while a family bathroom could comfortably handle a larger bowl. Think of it this way—if you just need a compact sink for quick handwashing, the smaller end works fine. But if you’re using the sink daily for washing up, brushing teeth, or even a little face washing routine, you’ll probably appreciate the extra space of a wider, deeper sink.
2. How deep should a bathroom sink be to prevent splashing?
Splashing is mostly about the bowl depth and faucet type. For small bathrooms or powder rooms, a 5–6 inch deep sink usually keeps the mess contained. In a family bathroom where the sink sees a lot of daily use, going a little deeper—around 6–8 inches—gives more space for washing hands or face without water flying out. Pairing a deeper bowl with a faucet that has a 1.0–1.2 GPM flow rate usually helps control splashing even further. So, if you’ve ever had that annoying spray hitting your shirt every time you turn on the tap, chances are your sink is too shallow or your faucet is too powerful. Adjusting both together really makes daily use a lot less messy.
3. What size sink fits a 36-inch vanity?
A good rule of thumb is a 16–20 inch wide sink for a 36-inch vanity. That way, you still have around 8–10 inches of counter space on either side for everyday essentials like soap, cups, or toothbrushes. It keeps the sink centered and balanced without crowding the countertop. Think about it: too small a sink looks a bit lost in the middle, while too big eats up all your counter space. Sticking to the 16–20 inch range usually strikes the perfect balance between function and style.
4. Are vessel sinks practical for small bathrooms?
Yes, they can be, if you pick the right size. For a small bathroom, aim for a 14–16 inch diameter vessel with a 5–6 inch deep bowl. Keep the overall rim height around 34–36 inches so it’s comfortable to use without feeling too tall. Using a low-flow aerator on the faucet helps minimize splash, which is especially important in tight spaces. Vessel sinks can actually make a small bathroom feel more stylish and modern without taking up extra room—just be sure to size it right so it feels sleek, not oversized.
5. How much space is needed for a bathroom sink?
Clearance is key for comfort. Plan for 21–30 inches of front clearance so you don’t feel cramped. Keep at least 4–6 inches from a side wall, and ideally place the sink centerline 15–18 inches from any wall. This ensures there’s enough elbow room and that the sink feels open rather than squeezed in. A good way to think about it: if you can stand in front of the sink and move your arms freely without bumping into walls or counters, you’ve got the right clearance. It’s one of those details that might not seem important on paper but makes a big difference in everyday comfort.



Leave a comment
This site is protected by hCaptcha and the hCaptcha Privacy Policy and Terms of Service apply.