


A foggy bathroom mirror is one of those small daily annoyances that adds up. You shower, step out, and the mirror is useless right when you want to shave, do skincare, or check your hair. An anti fog LED bathroom mirror fixes that problem and can replace (or improve) your vanity lighting—but only if you choose the right type and plan the install.
What I see homeowners get wrong most often isn’t the mirror style. It’s the assumptions:
-
“Anti-fog means the whole mirror stays clear.” (Often false.)
-
“LED mirrors are always bright enough for makeup.” (Not always.)
-
“This will install like a normal wall mirror.” (Sometimes… sometimes not.)
This guide is built to help you make a confident first decision: Is this mirror type right for your bathroom, and which version will actually work in daily life?
Decision Snapshot: Should you buy one or skip it?
Navigating the world of bathroom upgrades starts with a simple choice: do you actually need an anti-fog LED bathroom mirror? This quick decision guide helps you answer “buy” or “skip” based on your real daily routine, not just marketing hype. A persistently steamy bathroom not only fogs mirrors but can promote mold growth, which the EPA and CDC note can affect indoor air quality and potentially trigger allergies or respiratory issues. An anti-fog mirror, coupled with proper ventilation, directly tackles this moisture problem.
Buy For: Steamy Bathrooms & Frequent Hot Showers
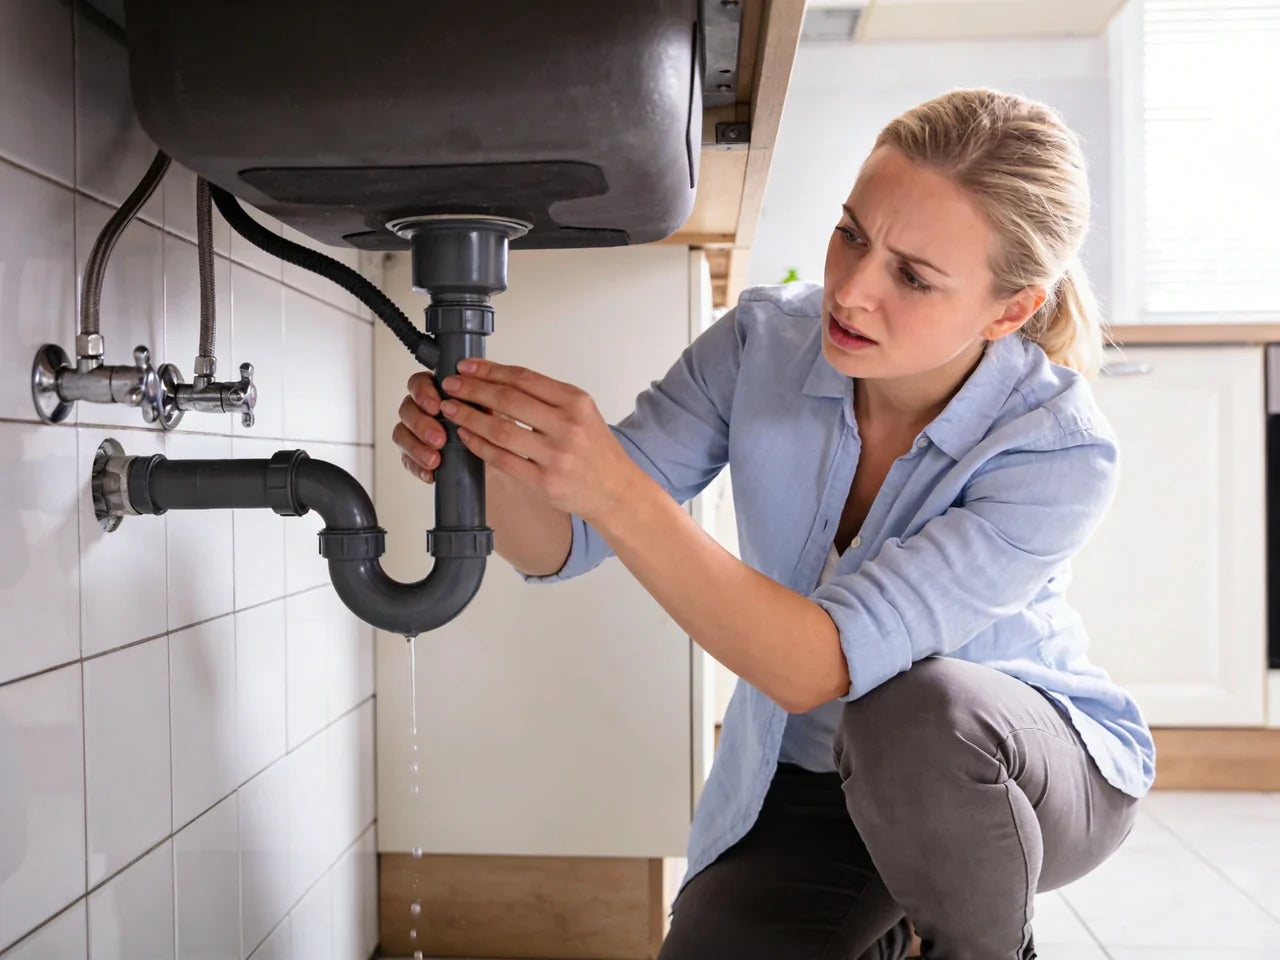
If you have a steamy bathroom, weak exhaust fan, teenagers taking long showers, or you share one bath on a morning schedule, the anti-fog feature is a real quality-of-life upgrade. You get a clear reflection without wiping the glass (which usually leaves streaks and can damage coatings over time).
Skip If: Rare Fog or Tight Budget is the Priority
If your mirror only fogs a few times a month, you can solve most of the problem with a better fan, leaving the door cracked, or simply waiting a minute. A basic mirror is still the best value if budget is the top priority.
Best-fit buyers: makeup/shaving users who want built-in LED light + dimmable settings
If you do anything detail-heavy at the vanity—makeup, shaving, contact lenses, skincare—dimmable LED light with adjustable color temperature is the real win. Anti-fog is the bonus that makes the mirror usable right after a hot shower.
Red-flag situations: no nearby power, strict rental rules, or you can’t change wiring/switches
Most LED bathroom mirrors need power at the wall (hardwired or plug-in). If you’re renting and can’t add an outlet or open drywall—or if your vanity wall is tile/concrete with no access—installation can turn into a project fast.
Rule of thumb: If you can power it cleanly and you routinely fight fog + bad lighting, an anti-fog LED bathroom mirror is usually worth it. If powering it is messy, start by fixing ventilation and lighting first.
Choosing an anti fog LED bathroom mirror: the trade-offs that matter most
Selecting the right bathroom mirror isn’t about finding a perfect product—it’s about understanding the essential compromises. We’ll dive into the core choices that define your daily experience: anti-fog technology, lighting layout, and light quality.

Heated Pad vs. Anti-Fog Coating: Reliability Compared
There are two common “anti-fog technology” approaches:
Heated bathroom mirror (defogger pad behind the mirror)
This is the most common in LED mirrors. A thin heating pad sits behind the mirror and warms part of the glass so condensation won’t form there.
What it’s like in real use
-
It usually clears a section of the mirror, not always the entire surface.
-
It often works best if you turn it on before you shower (more on timing later).
-
If you forget and turn it on after the mirror is already fogged, it can still clear—but it takes longer.
What can go wrong over time
-
Adhesive can loosen (pad lift), creating uneven heat or dead zones.
When it’s the right choice
-
You want consistent fog-free performance in a steamy bathroom.
-
You don’t mind that the anti-fog zone might be centered rather than edge-to-edge.
Anti-fog coating (hydrophilic coating on the mirror surface)
Some mirrors use a coating that helps moisture spread into a thin, clear layer instead of forming droplets.
What it’s like in real use
-
It can reduce fogging but may not fully prevent it during very hot showers.
-
It can be more sensitive to cleaners and abrasion.
What can go wrong over time
-
Coatings can wear off or become patchy, especially if you scrub hard or use harsh cleaners.
When it’s the right choice
-
Your bathroom only gets mildly steamy.
-
You want a simpler mirror (possibly with fewer electronics).
My practical take: If you’re buying an anti fog LED bathroom mirror mainly for fog control, a heated mirror defogger pad is usually the safer bet. Just assume it covers a “working zone,” not the whole mirror, unless the specs clearly say full coverage.
Lighting Types: Backlit vs. Front Light vs. Hybrid for Face Illumination
The lighting layout changes how you look in the mirror—especially for makeup and shaving.

Backlit mirror (LED backlight / backlit LED)
LED strips sit behind the mirror and throw light onto the wall, creating a halo.
Pros
-
Soft, modern look
-
Reduces harsh glare
-
Nice ambient light for night use
Cons
-
Often not strong enough alone for detailed grooming
-
Can cast shadows on the face because the light is not aimed forward
Backlit mirrors are great if your bathroom already has good overhead lighting and you mainly want a clean look plus gentle light.
Front light mirror (front lit)
LEDs face outward through a diffuser in the mirror itself.
Pros
-
Better task lighting for shaving/makeup
-
Put light closer to your face
Cons
-
Can create glare if the diffuser is cheap or the LEDs are too exposed
-
Can still create shadows if the light is only on the top edge
Front light works well when you need the mirror to be your main vanity light source.
Hybrid (front light + backlight)
This is the most forgiving setup in real homes.
Pros
-
Backlight adds soft fill; front light provides task lighting
-
More even lighting with fewer “raccoon-eye” shadows
-
Looks good and functions well
Cons
-
Costs more
-
Slightly more wiring/controls to think about
If you wear makeup or shave often: lean hybrid or strong front light. If you want atmosphere and you already have good lighting: backlit mirror is fine.
Brightness and color temperature (3000K–6000K) + CRI (≥90–95): how to avoid “off” makeup/shaving results
This is where a lot of returns happen: people install the mirror and realize the light makes them look “gray,” “green,” or washed out—or it’s dimmer than expected. For tasks like makeup, a high Color Rendering Index (CRI) is crucial. As resources from Energy.gov and the National Institute of Standards and Technology (NIST)explain, CRI measures how accurately a light source reveals the true colors of objects compared to natural light, which is why a CRI of 90+ is recommended for grooming.
Brightness: “bright enough” depends on your bathroom, not the product page
A lighted bathroom mirror can be plenty bright in a small bathroom with light walls. The same mirror can feel weak in a larger bath with dark paint or dark tile.
What matters:
-
How much other light you have (ceiling lights, vanity sconces, natural light)
-
Wall color and surfaces (dark surfaces eat light)
-
Mirror size (bigger mirrors can spread light over a larger area, sometimes feeling less intense)
Practical advice: If the mirror will be your main task light, choose a model known for strong front lighting or hybrid lighting, and plan on dimmable control so you can dial it back.
Color temperature: choose based on your routines
Many LED bathroom mirrors let you switch color temperature, often across a range like 3000K to 6000K.
-
3000K (warm white): cozy, flattering, can look more “yellow”
-
4000K (neutral): a balanced everyday choice for most bathrooms
-
5000K–6000K (cool daylight): crisp and bright; can feel clinical but shows detail
If you do makeup, neutral-to-daylight settings help you avoid surprises when you step into daylight. If you mostly want a relaxing look at night, warm settings feel better.
CRI: the spec that affects “real” skin tone
CRI (Color Rendering Index) measures how accurately light shows colors.
-
CRI 80: common, okay for general lighting
-
CRI 90: good for grooming
-
CRI 95+: excellent (best chance of makeup looking right)
If grooming accuracy matters, look for CRI 90 minimum, and ideally CRI 95. If the listing doesn’t state CRI, that’s a gamble.
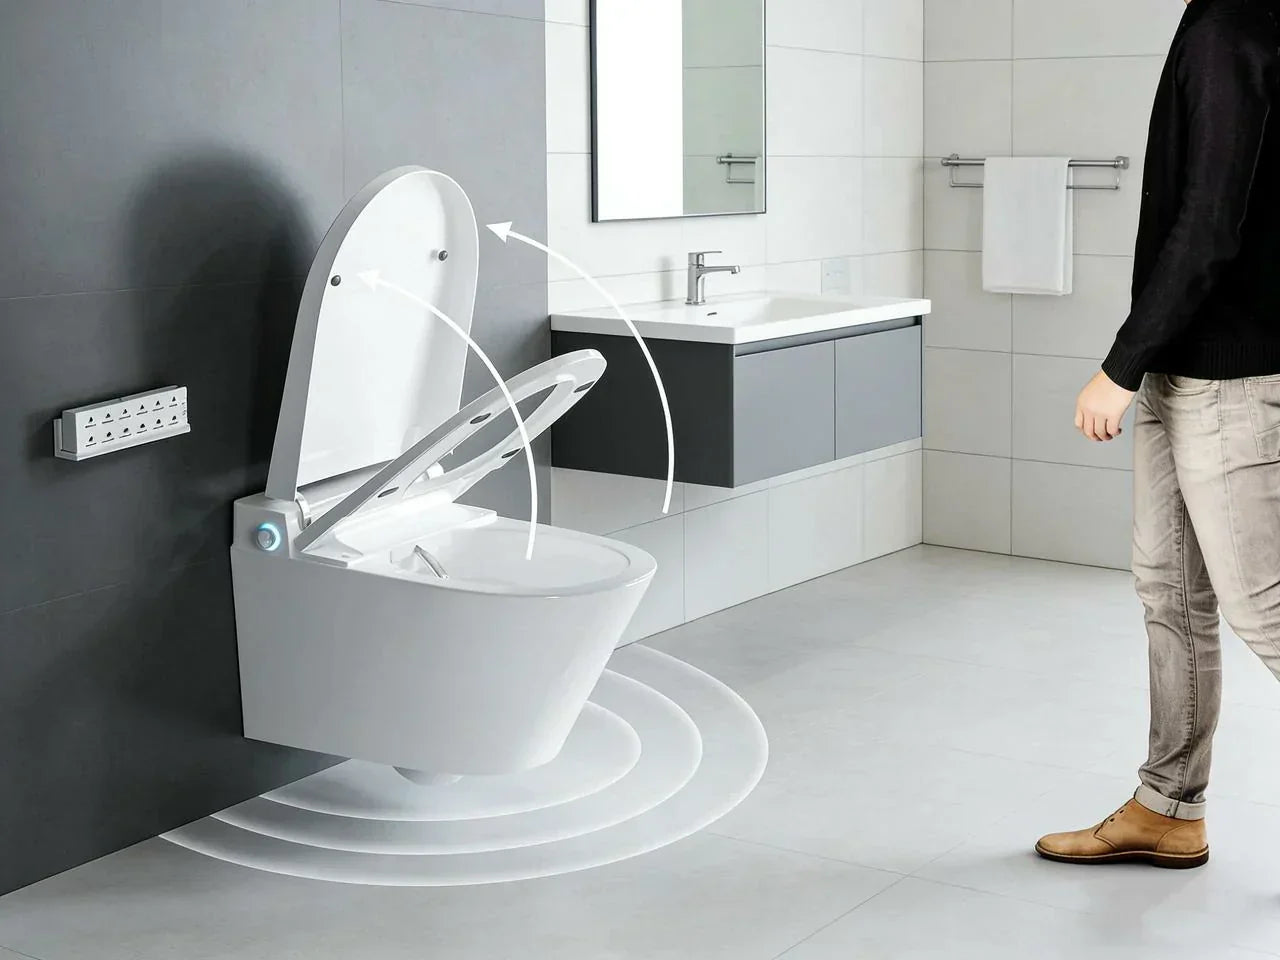
Smart mirror with defogger vs simple touch control: what you actually gain (and what breaks)
A “smart mirror with defogger” can mean a lot of different things. Some mirrors are simply touch-controlled. Others add Bluetooth audio, a clock, or other extras.
Here’s what matters for most homeowners:
The useful “smart” features
-
Separate controls for LED light and anti-fog feature (saves energy)
-
Dimming + color temperature control
-
Memory function (returns to your last brightness and light color)
-
Auto shutoff timer for the defogger (common in many models)
The features that are nice but not essential
-
Clock/date display (helpful if your phone isn’t in the bathroom)
-
Bluetooth speaker (works, but steam and fan noise can make it underwhelming)
What tends to be finicky long-term
-
Touch controls that are too sensitive or not sensitive enough
-
Added electronics that don’t like humidity
-
Wireless features that become a troubleshooting task later
My take: If you want fewer headaches, prioritize great light + a reliable defogger + certifications over extra gadgets. A simple touch control mirror can be “smart enough.”
What will it really cost (mirror + install + electricity)?
The purchase price is just the tip of the iceberg. A true budget must account for installation complexity, potential electrician costs, and long-term energy use—helping you avoid unexpected expenses.

Typical price bands by size/features (frameless, tempered glass, RGB, smart)
Prices vary by finish and features, but these ranges are common:
-
Basic LED mirror with anti-fog (frameless, touch control): mid-range
-
Hybrid front light + backlight + defogger: higher
-
Smart features (clock/Bluetooth), RGB lighting: higher, sometimes not worth the premium unless you’ll use it
Also pay attention to build:
-
Tempered glass is a meaningful upgrade in a bathroom.
-
“Shatter-proof” is often marketing language, but tempered glass is a real safety feature.
Hardwire vs plug-in: electrician cost vs renter-friendly setup
Plug-in
-
Easiest install if there’s an outlet in the right place (sometimes inside a vanity cabinet)
-
More renter-friendly
-
The challenge is hiding the cord cleanly
Hardwire
-
Cleanest look (no visible cord)
-
Can be tied to a wall switch, depending on design and wiring plan
-
Usually the better choice for a bathroom remodel
Can I hardwire an LED mirror to a wall switch?
Often yes, but it depends on the mirror’s wiring design and how you want it to behave:
-
Some homeowners want the mirror to turn on with the bathroom switch.
-
Others want constant power so the mirror’s touch control + memory function always work.
A common compromise is: wall switch controls power to the mirror, but you leave the mirror set to your preferred brightness so it comes on “ready.” Just know that cutting power can reset some mirrors or disable memory on certain models.
If you’re unsure, plan for an electrician. Bathrooms are damp environments, and code rules around GFCI protection and box placement matter.
Do heated bathroom mirrors use a lot of electricity if the defogger runs often?
Usually, no—if you use it like most people do.
A defogger is basically a small heater. Many are in the rough neighborhood of tens of watts (size matters). The LED lighting also draws power, but LEDs are efficient.
What changes your cost is behavior:
-
If you run the defogger for 10–20 minutes after showers, the cost is small.
-
If the defogger stays on for hours every day, it adds up (and it can shorten component life).
That’s why auto shutoff and separate defogger control matter.
Visual: Cost range table (mirror price, install range, estimated energy use)
Below is a simple budgeting table you can use early in planning. These are typical ranges, not quotes.
| What you’re paying for | Typical range | What drives it |
| Anti fog LED bathroom mirror (basic, frameless) | $150–$350 | size, CRI, dimmable controls, glass quality |
| Mirror (hybrid front light + backlit + anti-fog) | $250–$600 | stronger lighting, better diffusion, more electronics |
| Mirror with extra “smart” features (clock/RGB/audio) | $300–$800 | features + larger sizes |
| Install (plug-in, simple mount) | $0–$150 | DIY vs handyman, wall type, anchors/studs |
| Install (hardwire to existing box) | $150–$400 | access to wiring, wall material, local labor |
| Install (new box/switch/run wire) | $300–$900+ | opening walls, tile work, long wire runs |
| Energy use (typical) | a few kWh/month | how long LEDs + defogger run |
Sizing & Placement: Ensuring Perfect Fit and Lighting on Your Vanity
“Looks right” and “fits right” are two different things. The wrong size can ruin your bathroom vanity’s balance, and poor placement can weaken your LED light effect. Accurate measuring is the first step to avoiding returns.
Sizing rules that prevent returns (why 24"x36" is a common “safe” choice)
A simple sizing rule that works in most bathrooms:
-
Choose a mirror width close to the vanity width, but not wider.
-
Many people land around 24" x 36" because it fits a wide range of standard vanities and gives a comfortable viewing area.
General guidance:
-
For a single-sink vanity, mirror width is often 2–4 inches narrower than vanity.
-
For a double vanity, you can use one large mirror or two smaller vanity mirrors—just plan lighting accordingly.
Why this matters more with LED mirrors: The lighting is built in. If the mirror is too small, the light coverage on your face can feel uneven. If it’s too large, it can look crowded and make mounting harder.
Will this work in a small bathroom or over a narrow vanity?
Yes, but watch two things:
-
Brightness in a tight space: Very bright front lighting can feel harsh when you’re close to the mirror. Dimmable is important.
-
Door swings and storage: If you have a medicine cabinet door, a nearby sconce, or a door that swings near the mirror wall, measure clearance.
In small bathrooms, a backlit mirror can look great because it adds a soft glow without feeling like a spotlight.
Mounting height and clearance: faucet reach, backsplash, and cleaning space
Common “didn’t think of that” issues:
-
The mirror sits so low that faucet splashes hit it constantly.
-
The mirror sits so tight to a backsplash that cleaning the bottom edge is annoying.
-
The mirror is so high that shorter users can’t see well (especially kids).
A practical starting point:
-
Leave a small gap above the backsplash (if you have one).
-
Center the mirror for the main users’ eye level.
-
Make sure the mirror doesn’t interfere with faucet handles or tall faucet spouts visually.
Visual: Simple Sizing & Placement Guidelines
Use this as your quick planning checklist:
For Width (Top View)
-
Measure Your Vanity: Determine its width (e.g., 36 inches).
-
Calculate Mirror Width: The mirror should typically be 2 to 4 inches narrower than the vanity.
-
Practical Example: For a 36-inch vanity, the ideal mirror width is between 32 to 34 inches. Center it on the wall.
For Height & Layout (Front View)
Plan from top to bottom:
-
Leave Top Clearance: Allow for some wall space (at least a few inches) between the top of the mirror and the ceiling. This ensures visual balance and room for light fixtures.
-
Find the Center: The mirror's center line should align with the primary user's eye level (typically 57-62 inches from the floor). This is the most critical step.
-
Mind the Gap: Maintain a gap of 4 to 8 inches between the bottom of the mirror and the top of the backsplash. This prevents water splashes and makes cleaning easier.
-
Clear the Faucet: Visually ensure the mirror's position won't clash with or be blocked by a tall faucet spout.
Vertical vs. Horizontal Choice
-
Vertical (Portrait) Mirrors: Best for narrow vanities or rooms with low ceilings; they create a feeling of added height.
-
Horizontal (Landscape) Mirrors: Can make a small wall feel wider; double-check that they won't cover electrical outlets or switches on the sides.
Installation Guide: Wiring, Mounting, and Bathroom-Safe Setup
Installing a wall-mounted LED mirror is more complex than hanging a picture. Wall type, power location, and electrical codes for damp zones—these often-underestimated factors determine whether it’s a DIY job or requires a pro.
Wall-mounted hardware: studs/anchors, level brackets, and preventing shifting
Most mirrors use a mounting bracket. The mirror hangs on it and locks (or screws) in place.
What matters:
-
Hit studs when you can.
-
If you can’t, use anchors rated for the mirror’s weight and your wall type (drywall vs plaster vs tile).
-
Make sure the bracket is perfectly level. A tiny error looks big once the LED lines are glowing.
Preventing shifting: If the mirror design allows, use the lower stabilizing screws or pads. Bathrooms get vibration (doors slamming, drawers closing), and a heavy wall mirror can drift over time if it’s only “hung.”
Hardwiring basics: switch integration, junction box placement, and hiding wires behind the mirror
If you hardwire, plan these details before you buy:
-
Where does the wire enter the mirror? Many mirrors have a defined entry point. If your junction box is in the wrong spot, you may see a gap or need a workaround.
-
Do you want the mirror on a switch or always powered? Always-powered is nice for memory function, but you need a plan for turning it off (touch control).
-
Can you hide the wiring behind the mirror? Some mirrors sit close to the wall, so wire bulk matters.
If you’re remodeling, ask your electrician to place the box where the mirror design expects it. That one decision can make the final result look clean instead of “almost.”
What happens if your bathroom lacks nearby power or you can’t open the wall?
This is a common deal-breaker.
Options (each has trade-offs):
-
Choose a plug-in mirror and route the cord to an outlet (sometimes through a vanity cabinet). Clean look is harder but possible.
-
Add a new outlet (can be simple or not, depending on access).
-
Choose a non-lit mirror and improve vanity lighting with sconces instead.
If you have strict rental rules: a plug-in mirror is usually the only realistic path, and even then you may need permission to mount it.
Visual: Installation checklist (tools, time estimate, and “call an electrician if…”)
DIY-friendly tools (typical):
-
Tape measure
-
Level
-
Drill + bits
-
Stud finder
-
Anchors rated for weight
-
Silicone or bumpers (if included/needed)
-
Helper (many mirrors are awkward solo)
Time estimate (typical):
-
Replace existing mirror with similar footprint: 1–2 hours
-
New mirror position + bracket install: 2–4 hours
-
Hardwire work: plan for an electrician visit
Call an electrician if…
-
You need a new circuit, new box, or new switch
-
You see damaged wiring or an old, crowded electrical box
-
The mirror will be installed in a location that gets frequent splashes
-
You’re unsure about GFCI protection or bathroom electrical requirements
Daily Performance: Real-World Anti-Fog and Lighting Tests
Product specs are measured in ideal labs, but your bathroom is the real test. How do the anti-fogand lighting features actually perform during your daily hot shower and busy morning routine? Let’s talk real-world results.
Defog timing in steamy conditions: why you often need to pre-activate (3–5 minutes)
Here’s what many homeowners don’t realize: anti-fog is not always instant.
In a steamy bathroom, the mirror glass cools and moisture condenses fast. The defogger pad needs time to warm the glass.
In real use, many people get best results when they:
-
turn on the defogger before stepping into the shower, or
-
turn it on at the start of the shower and let it “catch up.”
If you turn it on only after the shower, you may still wait a few minutes. It’s not “broken”—it’s just physics.
Separate controls for light vs anti-fog feature: avoiding wasted heat and power
This is a decision-critical feature.
A mirror with lights + defogger should let you control them separately because:
-
You might want light without heat (most of the day).
-
You might want defogger without bright light (rare, but some people do).
If the defogger turns on every time the light turns on, people tend to stop using the anti-fog feature—or they waste energy and wear out the heating pad sooner.
Look for: separate touch buttons, or a clearly described control scheme.
Touch control and dimmable settings: will it behave with wet hands and splashes?
Touch control is convenient, but bathrooms are wet spaces.
What I’ve seen work well:
-
Touch buttons that respond to a quick tap (not a long press every time)
-
Dimming that is smooth (often called stepless dimmable) so you can set it precisely
-
Controls placed where you won’t hit them by accident while wiping the mirror
What can be annoying:
-
Controls too close to the edge where you naturally grab the mirror to clean around it
-
Overly sensitive touch areas that change settings when you wipe condensation or cleaner nearby
If you’re picky, choose a mirror with memory function so you aren’t re-adjusting brightness and color temperature every morning.
Multi-user habits: memory function benefits (and when it becomes a nuisance)
Memory function is great when:
-
You want the mirror to return to your favorite brightness
-
You have one main user and consistent routines
It can be annoying when:
-
one person likes 6000K bright white and the other likes warm dim light
-
kids tap buttons and leave it on a strange setting
In multi-user bathrooms, the best setup is often:
-
wall switch controls power
-
mirror is set to a “family default” brightness and color
-
Touch control is still available when someone wants to adjust
Long-Term Care, Cleaning, and Durability Factors
Long-term satisfaction comes from clear expectations. Will the anti-fog fail? What about cleaning? Understanding maintenance and potential risks ensures you buy with confidence and enjoy it for years.
What happens if the anti-fog stops working after 1–2 years (pad lift, uneven heat, coating wear)?
This is the long-term risk you should plan for. LEDs often last a long time, but the defogger is a heat component with adhesive and wiring.
Common failure patterns:
-
The defogger works, but only in part of the mirror (uneven heating)
-
The defogger stops heating at all (control or wiring issue)
-
The anti-fog coating becomes less effective (if coating-based)
What to do before you buy:
-
Check warranty terms specifically for defogger and electronics.
-
Avoid mirrors with vague warranty language.
Simple expectation-setting: Buy for the lighting and daily convenience, but choose a model you won’t hate if the defogger becomes less perfect years later.
Cleaning and care: protecting the mirror surface, LED strip diffusion, and touch sensors
Good habits that keep things looking new:
-
Use a soft microfiber cloth.
-
Avoid abrasive pads.
-
Avoid spraying cleaner directly into seams or around touch controls (spray the cloth instead).
-
Don’t scrub the same spot aggressively—especially on coated mirrors.
Also, pay attention to the diffuser (the frosted area that spreads LED light). Cheap diffusers can yellow or haze faster; gentle cleaning helps.
Safety and durability signals: tempered glass, shatter-proof claims, IP rating, UL/ETL certifications
In bathrooms, safety matters because water + electricity share the same room.
What to look for:
-
Tempered glass (a real safety upgrade)
-
A meaningful IP rating (often something like IP44) for damp resistance
-
Independent safety certifications (commonly UL or ETL marks)
If a seller can’t tell you anything about electrical safety testing, that’s not a detail to ignore.
Warranty and lifespan expectations: LEDs (50,000+ hrs) vs defogger parts that fail first
LEDs can last a long time on paper. In real bathrooms, the weak points tend to be:
-
touch control boards
-
power supply/driver
-
defogger pad adhesion and wiring
So when you compare mirrors, don’t just compare “LED lifespan.” Compare:
-
warranty length
-
what’s covered (electronics, defogger, driver)
-
how replacement parts/service are handled
Final Choice: How to Select the Best Anti-Fog Mirror for Your Bathroom
With all factors considered, it’s time to make the final choice for your unique bathroom. Whether tackling steam, improving light, handling a bathroom remodel, or renting, here’s your clear action plan.
If your main problem is fog after hot showers
Choose a heated bathroom mirror (defogger pad), with:
-
separate defogger control
-
auto shutoff timer (or you’ll forget it on)
-
a clear statement of defogger coverage area
If your main problem is bad grooming light
Choose a front light or hybrid LED mirror with:
-
dimmable control
-
adjustable color temperature (at least warm/neutral/cool)
-
CRI 90+ (CRI 95 if makeup accuracy matters)
If you’re doing a bathroom remodel
Hardwire is usually worth it for the clean look. Plan:
-
junction box placement behind the mirror
-
switch behavior (constant power vs switched power)
-
mirror size based on the vanity and wall layout (outlets/sconces)
If you’re a renter or avoiding wall work
Look for:
-
plug-in option
-
a plan to hide the cord
-
lighter weight if you can’t hit studs easily (but still mount safely)
Before You Buy checklist (5–8 items)
Before you click “buy,” run through this concise final checklist. It captures the guide’s key points to ensure you haven’t missed a critical decision.
-
Measure vanity width and wall space (including outlets, sconces, and door swings).
-
Choose lighting layout: backlit vs front light vs hybrid based on grooming needs.
-
Confirm separate controls for light and the anti-fog feature.
-
Check light quality: CRI 90+ (ideally 95) and color temperature options you’ll actually use.
-
Decide install type: hardwire vs plug-in, and confirm you have a realistic power plan.
-
Verify safety signals: tempered glass, IP rating for damp areas, and UL/ETL-type certification.
-
Understand defogger behavior: it may need 3–5 minutes and may not cover the entire mirror.
-
Read warranty coverage for defogger + electronics, not just “LED lifespan.”
FAQs
1. How Do Anti-Fog Mirrors Work?
Most anti-fog LED bathroom mirrors use a heated pad behind the glass to prevent condensation. After a hot shower, warm, moist air hits the cooler mirror surface and turns to droplets (fog). The defogger gently heats the glass so moisture stays invisible, ensuring a clear reflection. Some models use an anti-fog coating instead, but a heated mirror pad is more reliable for steamy bathrooms. Note: heating often covers the central “viewing zone,” not necessarily the entire mirror.
2. Does the Defogger Auto-Off?
Many do. Look for models listing an “auto shut-off timer” (commonly 60 minutes) to save energy. If not stated, assume manual control via touch buttons. Auto-off is a smart, energy-saving feature worth checking for in the specs.
3. Does the Heated Pad Cover the Whole Mirror?
Frequently, no. Many heated bathroom mirrors are designed to keep the central area clear—perfect for shaving or makeup—while the very edges may still fog in extreme steam. Check product details for “full-surface heating” if complete coverage is important. For most users, the central clear zone is sufficient.
4. Can I Hardwire a Wall Switch?
Yes. Hardwiring is ideal for a clean, built-in look and allows switch control. Important: If the wall switch cuts all power, it may reset the mirror’s memory function (your saved light brightness and color temperature settings). For constant memory, the mirror needs uninterrupted power; you’d then use its touch control to turn lights on/off. Discuss your preferred setup with an electrician during installation planning.
5. Are LED Mirrors Bright Enough for Makeup?
They can be, but specs matter. For accurate makeup application, prioritize:
-
High CRI (90+): Ensures true-to-life color rendering.
-
Front or Hybrid Lighting: Backlit mirrors alone often cast shadows; front light or hybrid (front+back) provides direct, even face illumination.
-
Adjustable Color Temperature: Daylight settings (~4000K-5000K) best mimic natural light for makeup.
A basic backlit LED mirror may not provide sufficient, shadow-free task lighting for detailed grooming.
References

Leave a comment
This site is protected by hCaptcha and the hCaptcha Privacy Policy and Terms of Service apply.