



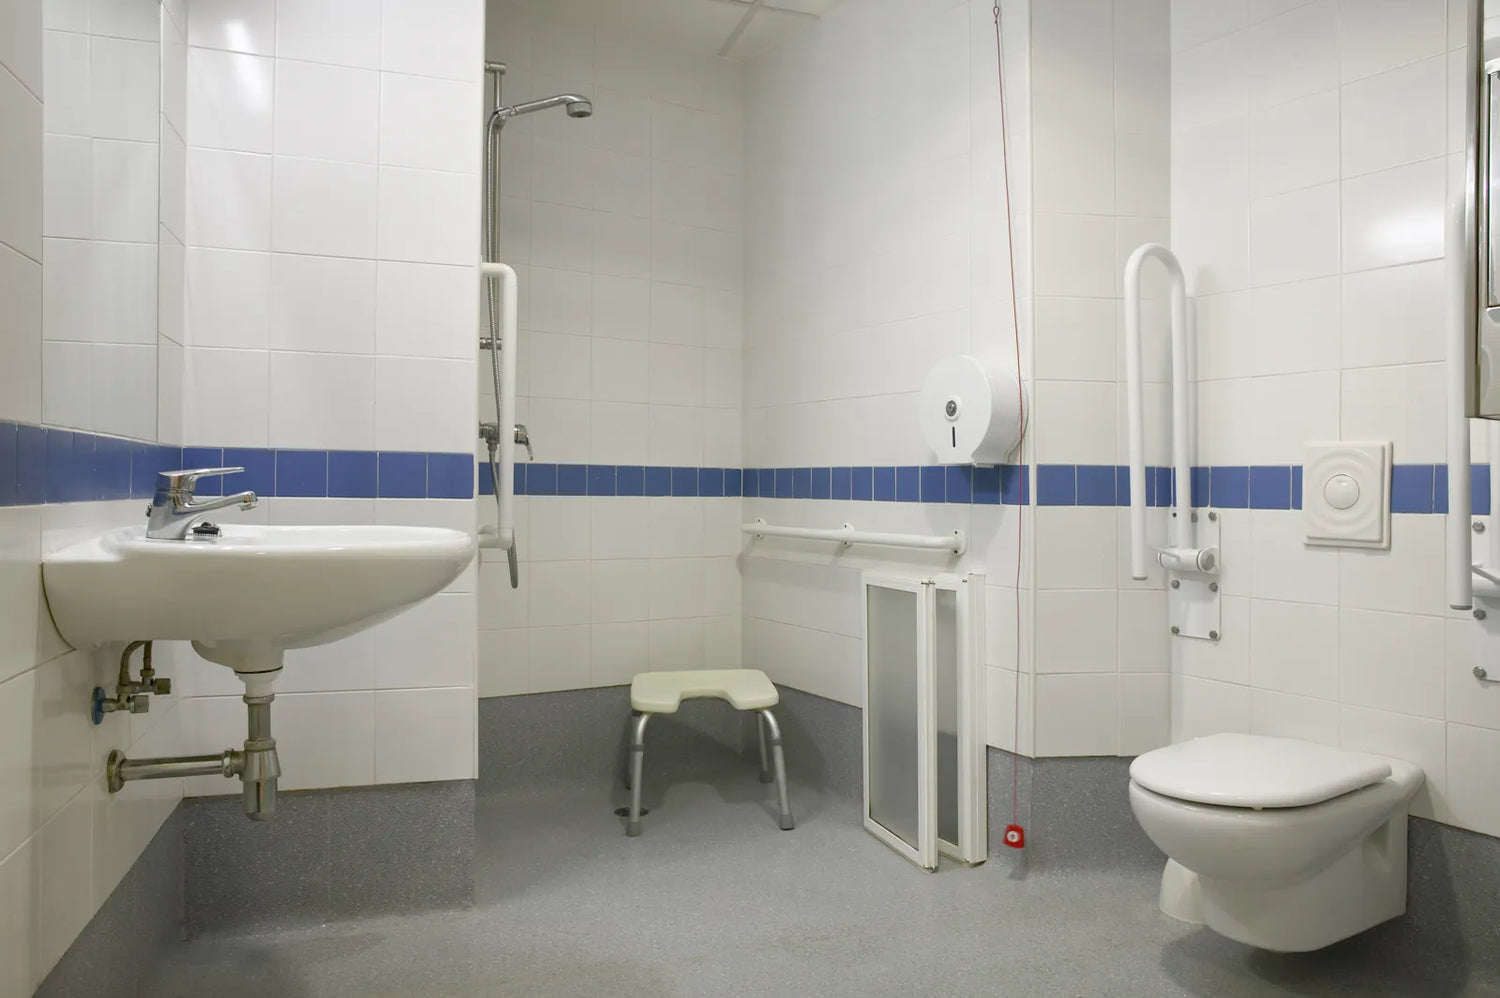
Yes, ADA compliance under the Americans with Disabilities Act can work in a home if you understand how ADA requirements for multi-user bathrooms and requirements set under 2010 ADA translate into real layouts, especially when ensuring spaces accessible for users who are accessible to people with disabilities, and you have enough floor area, can control door swing conflicts, and are willing to move plumbing or walls when needed. They usually do not work cleanly in many tight 5x8 bathrooms unless you accept major layout changes, reduced storage, or partial accessibility instead of strict ADA-style clearances. For most homes, the right question is not “Can I copy a commercial ADA bathroom?” but “Which accessibility requirements actually fit my room and daily use?”
Bathrooms in public restrooms get called “ADA” all the time when they only have a comfort-height toilet and one grab bar, but a true ADA restroom must follow specific requirements set under 2010 ada, where requirements include proper clearance, turning space, and reach ranges instead of just fixture upgrades.
That is not the same thing as meeting actual ADA compliant bathroom requirements for commercial facilities or following the design dimensions often used as a residential target.
In a house, this matters because people often buy fixtures first, then find out the room does not have the turning space, the sink blocks knee clearance, or the door arc eats the only usable transfer area.
If you are planning for aging in place, wheelchair use, caregiver help, or resale to a buyer who needs accessibility in an ambulatory accessible or fully accessible to people with disabilities context, the standards are useful, especially when designing spaces accessible that must support long-term independence.
If you only need a safer bathroom for mild balance issues, full compliance can be more space-hungry and expensive than the home actually needs.
Decision Snapshot: ADA compliant bathroom requirements
A quick decision check helps separate layouts that are realistically achievable from those that only work on paper. Before choosing fixtures or committing to measurements, it is worth identifying whether your space, plumbing flexibility, and accessibility goals align with a full compliance-driven remodel or a more practical adaptation.A quick decision check helps separate layouts that are realistically achievable from those that only work on paper. Before choosing fixtures or committing to measurements, it is worth identifying whether your space, plumbing flexibility, and accessibility goals align with a full compliance-driven remodel or a more practical adaptation.
Best for full-access remodels
This works best when you are already doing a full gut remodel, especially if the bathroom serves a person who uses a wheelchair or needs side transfer space at the toilet. It also works better when the room is single-user, not shared by several people with competing storage and layout needs.
Avoid in tight 5x8 bathrooms
This is where most people get it wrong. A standard 5x8 bathroom can often be made more accessible, but it often struggles to fit a true ADA compliant bathroom layout for small spaces once you account for door swing, toilet side clearance, sink approach, and wheelchair turning space. On paper it can look close. In real use, it feels jammed.

Reconsider with fixed plumbing walls
If your toilet drain, vent stack, or structural wall location cannot move, your options shrink fast. Toilet rough-in relocation is one of the biggest cost drivers in these projects. If the toilet is trapped between a tub and vanity, the layout may fail before fixture selection even starts.
Overkill for mild mobility limits
If the user only needs help standing, wants a taller toilet, or needs one or two grab bars, full ADA-style layout may be unnecessary. In many homes, a smart safety remodel works better than chasing every commercial dimension.
Who Should Use These Standards
Accessibility standards are most effective when matched to the actual user, especially people with mobility limitations, not applied as a one-size-fits-all checklist. The right approach depends on whether the need is permanent or temporary, individual or shared, and whether the bathroom must support independence, caregiving, or both.
Aging-in-place with wheelchair transfer needs
If the plan is long-term use with a wheelchair, walker transition, or caregiver assist, these requirements matter. This is where ADA bathroom requirements for elderly aging in place remodels can be worth the extra work. The key issue is not just fixture height. It is transfer space, reach range, and maneuvering room.
Temporary injury needs less clearance
For a knee surgery recovery or short-term mobility issue, you may not need full turning radius, full side transfer clearance, or a wall-hung sink with open knee space. A temporary need often calls for fewer permanent compromises.
Single-user homes fit easier
A single-user bathroom is simpler because you can prioritize one method of use. Multi-user spaces create conflicts between accessibility and normal storage, grooming space, and traffic flow.
Multi-user layouts raise complexity
Single-user vs multi-user ADA bathroom requirements are not just a code topic. In practice, multi-user rooms are harder because people keep adding things that ruin compliance: trash cans, shelves, overdeep vanities, swinging hampers, and decorative legs under sinks. The room may start compliant and become unusable later.
What Trade-Offs This Creates
Every accessibility upgrade improves one aspect of use, but it can also create compromises elsewhere in the room. Understanding those trade-offs early helps you balance compliance, comfort, and everyday practicality instead of discovering limitations after the remodel is complete.
Clearances can shrink storage
Clearances can shrink storage, especially when maintaining minimum width requirements for an accessible stall while preserving usability around one sink and circulation zones. The first thing that disappears is vanity storage. To achieve ADA sink height and knee clearance requirements, you usually need open space below the sink. That means no standard base cabinet in the usual form. Even accessible vanities often hold much less.

Door swings often become conflicts
Many layouts fail not because the toilet or sink is too big, but because the door swing cuts through the required clear floor area. This becomes a problem when the room is technically large enough but the open door blocks toilet transfer or wheelchair turning.
Taller toilets can hinder some users
People search ADA toilet height and clearance requirements expecting a taller toilet to always be better. Not always. ADA seat height is generally about 17 to 19 inches to the top of the seat, and accessories such as dispensers or controls should be mounted no higher than required reach ranges to remain usable. That helps many adults and seniors, but shorter users and some people with limited leg control can find it harder, not easier, to stabilize.
Full compliance may exceed home needs
A strict ADA-style layout can make sense in a public or commercial setting because the room must serve many unknown users. In a house, you may know exactly who will use it and how. That changes what is worth paying for.
What Retrofit Work Gets Expensive
Retrofit costs rise fastest when accessibility goals require structural or plumbing changes rather than simple fixture swaps. The most expensive surprises usually come from hidden conditions inside walls, floors, and drain lines that only become obvious once demolition begins.

Toilet rough-in relocation drives cost
If the toilet needs to move sideways to get the right centerline from the wall, that usually means opening the floor, shifting the flange, and sometimes reworking joists or drain path. In slab homes, this can get expensive quickly.
A lot of homeowners miss one detail: toilet centerline is measured from the finished wall, not from open studs. Add tile, backer, or wall panels later and your layout can end up off.
Grab bars need wall blocking
Grab bar placement requirements around ADA toilets sound simple until the walls are open and you realize that grab bar must be installed with proper structural blocking behind finished walls and you discover that grab bar must have proper backing where the bars need to go. Retrofitting bars into finished walls is possible, but proper blocking during remodel is cleaner and stronger. Existing plumbing, wiring, and vent lines often sit exactly where the blocking should be.
Sink drains can block knee space
A common failure in ADA vanity requirements for wheelchair accessible bathrooms is that the sink bowl and drain trap hang too low or too far back. The vanity may claim to be accessible, but once the countertop and trap are installed, knee clearance is gone. Pipe insulation is required for protection, but insulation alone does not fix bad drain placement.
Small-room turns trigger full rework
The biggest spatial issue is often ADA bathroom turning space requirements for wheelchairs. If you cannot get the turning circle or T-turn to work, you are no longer tweaking details. You are rethinking the entire room: door type, vanity depth, fixture locations, and maybe whether this bathroom should be the accessible one at all.
Will ADA compliant bathroom requirements fit?
Space planning determines whether accessibility standards can function in practice, not just on a drawing. Before focusing on fixture specs, it is essential to test whether the room can preserve usable clearance once doors, walls, and finished surfaces are fully in place.
Will this work in small bathrooms?
Sometimes, but not by default. A small bathroom can be made safer and easier to use without meeting full ADA-style clearances. A true fit depends on three things:
-
whether the door swing can be removed from the usable floor area
-
whether the toilet has side transfer clearance
-
Clearance affects accessibility compliance in compact bathrooms.
-
Proper layout planning improves long-term usability and safety.
-
-
whether the sink approach and turning space still work after fixtures are installed
A 5x8 room usually runs into trouble because every inch matters. Trim, thick tile, toilet projection, and vanity overhang all eat into the plan. This is where many “close enough” layouts fail.
Toilet clearances fail beside tubs
A toilet next to a tub is one of the most common residential problems. The toilet may meet height requirements, but the side approach and front of the toilet clearance is blocked by the tub deck or side wall. This affects ADA bathroom requirements for clear floor space around toilet and sink more than most buyers expect.
If your toilet is wedged between a tub and vanity, full compliance is unlikely without moving at least one of them.
Turning space disappears at door arcs
A bathroom can look open enough until the door opens. Then the wheelchair turning space gets clipped. Pocket doors help, but they are not a magic fix. The wall has to be free enough to hold the pocket frame, and the clear space still has to exist when the door is closed and in use.
Trim and baseboards steal inches
This sounds minor until it is not. Finished wall dimensions, tile buildup, baseboard thickness, and casing returns can affect whether you hit minimum clearances. The tighter the room, the more these small deductions matter.
Fit summary
Here is the practical baseline most homeowners should check before buying fixtures:
| Item | Typical target to verify | Where jobs fail |
| Door clear opening | 32 in minimum | Thick trim, hinge type, narrow slab |
| Toilet seat height | 17–19 in to seat top | Finished floor raises seat too much |
| Toilet centerline | 16–18 in from side wall | Measured from studs, not finish |
| Sink rim/counter height | 34 in max | Countertop buildup pushes it over |
| Knee clearance | 27 in high minimum below sink | Trap, apron, drawer, drain line block it |
| Clear floor at sink | 30 x 48 in | Door arc or vanity corners cut in |
| Turning space | 60 in circle or T-space | Door swing, tub edge, deep vanity |
This is not the full code book. It is the basic fit screen that tells you whether the room is even a candidate.
Specification note: Door clear opening refers to the actual unobstructed passage width when the door is open to 90 degrees, not the nominal slab size. A 32 in clear opening is the standard baseline, but 36 in may be required when the opening depth exceeds 24 in, as deeper entries reduce maneuvering efficiency for wheelchair users.
Which Measurements Commonly Fail
Measurement errors rarely come from major design flaws—they usually come from small assumptions made too early in the process. The most common failures happen when finished materials, installation tolerances, and real-world use are not accounted for in the original plan.
Toilet centerline misses finished wall
This is one of the most frequent layout misses. Someone marks the toilet off framing, then tile and wall board go on and the centerline shifts out of range. In small spaces, even a small miss can make the grab bar layout and side transfer area feel wrong.
Seat height changes after flooring
People buy an ADA-height toilet, then add thick tile or a heated floor build-up. Now the seat lands higher than expected. For some users that is still okay. For others, the foot position and transfer angle become awkward.
This matters when homeowners search “How high is an ADA compliant toilet?” because the real answer is not just the fixture spec. It is the installed seat height after finish floor is done.
Sink height ignores countertop thickness
A vanity box may seem low enough, but the finished top pushes it above the limit. The same problem shows up with vessel sinks, which often look good but work badly for accessibility.
Paper dispenser blocks reach space
ADA bathroom requirements for toilet paper dispenser placement get ignored all the time. The dispenser gets mounted where it looks normal, not where it can be reached without twisting or leaning too far. Then the grab bar conflicts with the roll holder, so one of them gets shifted into a worse position.
Why designing exactly to minimum dimensions often causes compliance issues
Meeting the minimum requirement on paper does not always guarantee real-world compliance. Construction tolerances, tile thickness, trim profiles, hardware projections, and installation shifts can all reduce usable space after the build is complete.
A bathroom designed exactly to the minimum 32 in door clear opening, for example, may lose critical clearance once hinges, stops, or finish materials are installed. The same risk applies to toilet centerline placement, where even small framing deviations can reduce transfer space, and to sink height, where countertop buildup can push the finished surface above the allowed range.
For this reason, designers and contractors should avoid planning to the exact minimum whenever possible. Building in extra margin helps protect accessibility performance and reduces the chance of costly corrections during inspection or after occupancy. In practice, a few additional inches of clearance often make the difference between technical compliance and actual usability.
What Breaks During Installation
Even when a layout looks correct on paper, installation realities often reshape what is actually possible. Hidden mechanical systems, structural conditions, and site imperfections can quickly force adjustments that affect spacing, fixture placement, and overall accessibility performance.
Existing vents limit fixture moves
On paper, moving a toilet or sink a few inches seems easy. In the field, venting can stop that plan fast. The vent path may be tied to a wall you did not want to open, or the slope on the drain may not work in the available joist bay.
Sloped floors distort clearances
Older homes often have out-of-level floors. That changes real installed heights and can affect how clearances feel in use. A toilet may technically fit, but the user feels off-balance because one side transfer is uphill and the floor falls away at the doorway.
Outlets and ducts block grab bars
This is usually where installation fails. Electric boxes, duct chases, med-gas in some care settings, and plumbing lines often sit right where the rear or side grab bar should go. If the wall is not opened early, you do not learn this until late.
Pocket doors still need clear space
Pocket doors solve swing conflict, but they do not fix bad fixture spacing. They also need a wall cavity free of plumbing, vents, and wiring where the pocket runs. Many remodels discover too late that the ideal pocket door wall is full.
What Causes Long-Term Regret
Long-term satisfaction depends less on whether a bathroom meets technical standards and more on how it performs under daily use over time. Many issues only become obvious after installation, when structural limits, usage habits, and caregiver needs start to expose design weaknesses.
Wall-hung fixtures can loosen over time
Wall-hung sinks and toilets can be excellent when installed properly, but they depend on solid support and good framing. In older homes with weak walls or rushed blocking, small movement over time creates a “soft” feel that users hate. Even if still safe, it feels wrong.
Near-minimum layouts feel cramped daily
A bathroom that barely meets minimum dimensions often performs poorly in real life. There is a difference between “passes a tape measure” and “works every day.” If the user has a wider chair, a caregiver, or a habit of side loading from one direction only, near-minimum layouts become frustrating fast.
Caregiver access fails first
This is one of the least discussed problems. A layout may let the user enter and transfer, but there is no room for a helper to stand where needed. If aging in place is the goal, caregiver space matters early, not after the first fall or decline in mobility.
Partial upgrades create bottlenecks
A comfort-height toilet and grab bar do not fix a bathroom where the door is too narrow or the sink blocks approach. This is why many projects advertised as “ADA” are really mixed upgrades with one or two accessible parts and several noncompliant bottlenecks.
What to check before planning
When people ask what to consider before planning an ADA compliant bathroom, they usually focus on fixture dimensions. The better order is:
First, check whether this bathroom is the right room to convert. Sometimes the hall bath is too tight, and the better answer is converting a larger primary bath or powder room addition.
Second, decide if you need true wheelchair function, walker-friendly use, or just safer aging in place. Those are different design targets.
Third, identify what cannot move: main drain stack, load-bearing walls, windows at grab bar height, and door location.
Fourth, measure from finished surfaces or calculate your finish buildup accurately.
Fifth, decide whether this is meant to mimic commercial ADA exactly, or whether you want a home bathroom that is more accessible without claiming strict compliance.
This is the point many people ask, “Do residential homes need ADA bathrooms?” In most private homes, no, not in the same legal sense as a public accommodation. But the dimensions are still useful as design standards when accessibility is the goal.
Step-by-step home fit check
A proper accessibility fit check is less about drawings and more about verifying real space under real conditions. Before committing to fixtures or construction, each critical clearance and movement path should be tested in sequence to confirm the bathroom will still function after installation and finishing layers are added.
1. Measure the door correctly
Measure the actual clear opening, not just the door slab. A 32-inch slab does not always give a 32-inch clear opening. Hinges, trim, and stop details reduce usable width.
If your setup looks like this, it won’t work: the only wheelchair path requires squeezing through less than 32 inches clear.
2. Map fixture projections
Measure how far the toilet, sink, and tub or shower project into the room. Use real product specs, not generic assumptions. Some accessible toilets project farther than standard models.
3. Mark toilet transfer area
Tape the toilet centerline and side clearance on the floor. Include the grab bar wall, the open side of the toilet, and any nearby vanity edge. This shows quickly whether transfer space is real or theoretical.

4. Test sink knee space
Do not stop at vanity width. Check underside height, depth to the rear wall, trap location, and whether the drain pipe can stay out of knee space after installation.
5. Check turning movement
Tape a 60-inch circle or T-shape on the floor. Then swing the door, stand where the vanity will be, and see what disappears. This simple mock-up catches more bad plans than many drawings do.
6. Confirm wall structure
Before ordering bars or wall-hung fixtures, confirm stud layout, blocking plan, and whether plumbing or electrical is in the way.
7. Verify floor and finish changes
If you are adding tile, underlayment, radiant heat, or wall panels, re-check every height and clearance after those layers are included.
8. Plan accessory placement
Mirror height, faucet reach, flush control side, and toilet paper location all affect real use. This is especially important in ADA requirements for accessible bathroom stalls, where accessory placement often breaks an otherwise workable layout.
Small bathrooms: where full compliance usually fails
For ADA compliant bathroom layout for small spaces, the biggest pain points are predictable:
The toilet needs lateral clearance, but the tub is fixed.
The sink can be made shallow, but then storage drops sharply.
The door can become a pocket door, but the wall needed for the pocket may already contain plumbing.
The room can almost fit turning space, but the vanity corner clips it.
The remodel can technically pass a drawing, but once towel bars, base trim, and real bodies are in the room, it feels unusable.
In many homes, the better answer is not strict full ADA-style compliance in the tiny bath. It is a strategic remodel that improves access where it matters most: curbless shower, stronger bars, better lighting, wider door, and an easier toilet transfer.
Residential versus commercial reality
A lot of searchers mix up ADA bathroom requirements for residential homes with ADA compliant bathroom requirements for commercial buildings. They are not interchangeable in legal use. Commercial ADA rules apply to public accommodations and covered facilities. Private homes usually are not forced into that same standard unless tied to specific housing programs, local rules, or special project types.
Still, homeowners use ADA dimensions because they are practical benchmarks. That is fine, as long as you understand two things:
First, “ADA-inspired” is not the same as truly compliant.
Second, a home can be safer and more usable without meeting every commercial condition.
That matters if you are thinking about resale value. Accessibility features can help resale for some buyers, but a heavily specialized layout can also narrow appeal if it makes storage, style, or shared use worse. The best resale move is usually broad usability, not extreme specialization unless the home is clearly intended for accessible living.
How to make a home bathroom more ADA accessible
If strict full compliance will not fit, this is usually the better path. How to make a home bathroom more ADA accessible without forcing a bad layout:
Widen the entry door if possible.
Use a taller toilet only if the primary user benefits from it.
Add blocking for future grab bars even if you are not installing all bars now.
Choose a sink setup that protects knee space and keeps controls easy to reach.
Reduce vanity depth where turning or approach is tight.
Use a curbless or low-threshold shower when space allows.
Keep accessories out of transfer zones.
Improve lighting and slip resistance.
This is often a better answer than buying “ADA” fixtures and assuming the room is now accessible.
Common mistakes that make bathrooms non compliant
The most common mistakes that make a bathroom non compliant with ADA or ADA-style targets are not dramatic. They are small misses that stack up:
-
measuring from studs instead of finished surfaces
-
buying a tall vanity and trying to call it accessible
-
forgetting the door arc
-
placing grab bars where studs happen to be, not where they are needed
-
mounting the toilet paper holder in the wrong reach zone
-
assuming any comfort-height toilet is automatically right
-
losing knee clearance to plumbing
-
ignoring caregiver space
-
using the smallest possible clearances everywhere
That last one creates a room that may satisfy paper dimensions yet still annoy the user every single day.
When a simpler plan is better
Full ADA-style specs are not always the right answer. If the user walks independently, does not need wheelchair turning, and mainly wants safer transfer and less fall risk, a simpler plan is often better and cheaper.
That may mean:
-
a correctly chosen taller toilet
-
properly placed grab bars
-
a shower seat
-
non-slip flooring
-
better lighting
-
a wider doorway if possible
This is especially true in older homes where structure and plumbing make a full accessible re-layout disproportionate to the actual need.
Before You Buy
Use this checklist before ordering anything:
-
Measure the bathroom from finished surfaces, or account for all finish buildup.
-
Confirm the actual door clear opening, not just the slab width.
-
Tape out toilet side clearance and sink approach on the floor.
-
Check whether a 60-inch turning space or T-turn really fits with the door open and closed.
-
Verify toilet centerline from the finished side wall.
-
Confirm installed toilet seat height after new flooring.
-
Check sink height with countertop included, not cabinet alone.
-
Make sure knee space is clear of traps, drawers, and apron panels.
-
Plan grab bar blocking before walls are closed.
-
Locate vents, wiring, and ducts before choosing bar positions or pocket doors.
-
Decide whether you need full wheelchair access or a safer aging-in-place remodel.
-
If the room is a tight 5x8, assume compromises will be needed until proven otherwise.
FAQs
1. What makes a bathroom ADA compliant?
A space becomes truly accessible when every element works together to support safe, independent use. The foundation starts with ADA compliant bathroom requirements, which cover maneuvering room, doorway width, fixture reach ranges, and support features. Beyond measurements, the goal is to create an environment that feels intuitive and comfortable for people with different mobility needs. A well-planned bathroom should balance usability with style, making accessibility part of everyday living rather than a visible compromise.
2. How high is an ADA compliant toilet?
The standard for ADA toilet height and clearance generally places the seat between 17 and 19 inches from the finished floor, creating a more natural sitting and standing position. Proper surrounding space is equally important, ensuring there is enough room for transfers and mobility aids. These dimensions are designed to reduce strain, improve comfort, and make daily use easier for individuals who need additional support without sacrificing convenience.
3. Do residential homes need ADA bathrooms?
Private residences are not usually required to follow commercial bathroom accessibility codes, since those regulations mainly apply to public and business facilities. However, many homeowners choose to adopt accessibility principles because they improve long-term functionality. Adding thoughtful features can make a property more adaptable for aging family members, guests, or future needs, even when compliance is not legally mandatory.
4. Best ADA toilets for seniors 2026?
The best choices for seniors in 2026 focus on comfort, hygiene, and ease of movement. A strong option should fit within a residential ADA bathroom layout, while also offering reliable flushing, supportive seat height, and simple maintenance. Seniors often benefit from models that reduce bending and standing effort, creating a safer and more practical daily experience that supports independence at home.
5. Are Horow toilets WaterSense and ADA certified?
Many buyers look for trusted brands that meet efficiency and accessibility expectations, and Horow ADA certified products often stand out in that conversation. Select models are built to align with modern standards for comfort-height seating and water-saving performance. Since certifications vary by product line, reviewing each model’s technical specifications is essential before purchase to confirm compliance with project requirements.
6. How to convert a bathroom to ADA standard?
Converting an existing bathroom starts with identifying barriers and replacing them with user-friendly solutions. Installing ADA compliant sinks and vanities can improve reach and usability, while updating fixture positions creates a more functional flow. Accessibility upgrades may also include wider entries, supportive hardware, and better flooring choices, all of which contribute to a safer and more adaptable environment.
7. Why choose ADA fixtures for resale value?
Accessibility upgrades can strengthen market appeal because buyers increasingly value homes that support long-term living. Improving home safety with certified fixtures adds practical benefits while signaling thoughtful design. These updates often attract a broader audience, from families planning ahead to individuals seeking comfort-focused spaces, which can positively influence resale potential in competitive housing markets.
8. How to choose an ADA-compliant toilet that still looks modern?
A modern accessible fixture should combine performance with clean visual appeal. Many homeowners now explore handicap accessible bathroom ideas that integrate sleek silhouettes, concealed plumbing, and minimalist finishes. The best designs prove that accessibility can blend seamlessly into contemporary interiors, offering both compliance and a polished aesthetic without creating a clinical atmosphere.
9. Why is Horow a top choice for accessible bathroom projects?
Horow continues to gain attention because it delivers accessible solutions in compact, design-forward formats. Features such as efficient engineering and user-focused details pair well with essentials like grab bar placement for toilets, helping create spaces that feel supportive and refined. This balance of practicality and style makes the brand appealing for projects that prioritize comfort, efficiency, and visual consistency.
References




Leave a comment
This site is protected by hCaptcha and the hCaptcha Privacy Policy and Terms of Service apply.