


Welcome to our manual for how to install a pedestal sink with water supply lines! Whether you're a seasoned DIY enthusiast or just starting out in the world of home improvement projects, we’ve got you covered with step-by-step instructions—from turning off the water supply to replacing outdated fixtures and prepping your space for a smooth pedestal sink installation.
One of the most important parts of installing a pedestal sink is making sure it's securely attached to the wall using a proper mounting brace. This provides essential stability, as pedestal sinks can be quite heavy. Having an extra pair of hands during this stage can make a big difference. We’ll guide you through the process of marking hole placements accurately, choosing the right tools, and connecting the plumbing system—supply lines, drain pipe, and more—so you know exactly how to install a pedestal sink with confidence.
Once everything is properly aligned and installed, your new pedestal sink will be ready to use. Ready to begin your DIY upgrade? Let’s get started and learn how to install a pedestal sink step by step!

Tools and Materials Needed for Installing a Pedestal Sink
Installing a pedestal sink is a great DIY project that can enhance the look of your bathroom. Here's a comprehensive list of tools and materials you'll need for a successful installation:
Tools Needed
Adjustable Wrench – For tightening and loosening nuts on plumbing connections.
Basin Wrench – Helps reach hard-to-access faucet nuts under the sink.
Pipe Wrench – For extra torque on stubborn plumbing fittings (optional).
Drill and Drill Bits – To make holes for wall anchors and mounting hardware.
Level – Ensures the sink and pedestal are perfectly straight.
Tape Measure – For accurate placement and spacing.
Bucket – To catch any water from disconnected pipes.
Screwdrivers (Phillips and Flathead) – For faucet and bracket installation.
Putty Knife – For removing old caulk or sealant.
Hole Saw (if needed) – For cutting through drywall or tile for new plumbing lines.
Materials Needed
Pedestal Sink (Basin + Pedestal Base) – Be sure it fits your space and existing plumbing.
Faucet and Drain Assembly – May be sold separately from the sink.
Plumber's Putty – Seals faucet and drain to prevent leaks.
Silicone Caulk – Seals the sink base and helps prevent water damage.
P-Trap Assembly – Connects the sink drain to the wall.
Shut-off Valves – If your existing valves are old or corroded.
Water Supply Lines – Flexible hoses to attach the faucet to the shut-off valves.
Mounting Hardware – Brackets, bolts, and anchors (usually included with sink).
Wall Anchors or Toggle Bolts – For securely mounting to drywall or tile.
Wood Blocking (if needed) – For added support behind drywall if mounting to wall studs isn't possible.
Optional but Helpful
Stud Finder – To locate wall studs for secure mounting.
Caulking Gun – For easy and even application of silicone.
Hacksaw or Tubing Cutter – To trim supply or drain pipes as needed.
Protective Gloves and Goggles – For safety during demolition and drilling.
Step 1: Prep the Area
If you want to install a pedestal sink without any problems, you'll need a workspace first! Find a clean, safe place that's just the right size so you can adjust pipes, install fittings, and put the pedestal in place. A good setup from the start helps make the entire pedestal sink installation process much smoother. Whether you're a DIY beginner or just learning how to install a pedestal sink, having an organized area is the key to getting started right.
Turn off the water valve first
Don't forget to turn off the water before you start. Find the hot and cold water valves under the sink, screw clockwise to the end on the line. Then turn on the faucet, drain the water—the pressure in the pipe will be less, so when removing the pipe you're not afraid of water splashing out.
Next, take a bucket or basin to connect under the P-type water storage elbow. Using an adjustable wrench or pipe wrench, carefully take apart the water supply pipe and remove the P-type elbow, remembering to prepare to catch some water.
This step is super important whether you are installing a pedestal sink or removing an old one. Pipes removed safely mean your bathroom and yourself can stay clear of leaks and flooding. In fact, anyone learning how to remove a pedestal sink should always begin with this step to avoid mess and damage.
Say goodbye to the old sink
Whether you're replacing or removing a sink, you have to start by removing the mounting parts. In the case of a pedestal sink, the countertop has to be removed and the screws holding the base in place have to be unscrewed. For a pedestal sink, look for fixing bolts on the wall and floor.
Carefully lift the sink and remove the sink from the base (if there is one). With some post basins, there are hidden screws in the wall or bracket that have to be unscrewed ahead of time. This step is essential for anyone figuring out how to remove a pedestal sink before starting fresh.
After removing the old basin, use a putty knife to scrape all the caulk, sealant, and adhesive from the wall. This way the new basin will fit securely. And don't forget to check the walls—any cracks, holes, mold, or anything else has to be fixed.
To install a pedestal sink properly, the wall has to be clean and flat, because the stability of the sink depends on it and the wall. A smooth surface makes mounting a pedestal sink much easier and ensures long-term durability. Whether you're a first-timer or brushing up on how to install a pedestal sink, remember that thorough prep is what sets up your success.

Step 2: Careful Planning and Measuring
With the site prepared and the old sink removed, the next crucial step in installing a pedestal sink is proper planning and measuring. Taking your time here will pay off later—the pedestal basin will sit neatly, the pipes will line up correctly, and your bathroom will look cleaner and more polished.
Start by doing a dry fit. Place the sink and pedestal where you want them in the bathroom. Don’t rush—make sure the size fits your space and leaves room for cleaning or adjustments. Position the base so that it aligns perfectly with the wall behind the sink.
Next, use a pencil to mark the anchor holes on the wall for the mounting brace and on the floor for the pedestal base. These marks will guide your drilling, so accuracy is key.
Measure the clearance for the pipes. The water supply and drain lines need to fit behind the sink and within the pedestal column. If you're replacing a previous sink, you might be able to use the existing plumbing, but you may still need to reposition pipes slightly so everything fits inside the pedestal without sticking out.
Before drilling or fastening anything, place a level on the top of the pedestal and basin. Ensuring the sink is level both horizontally and vertically is critical. If not, you could face drainage issues or stress on the mounting brace.
Good planning and careful measurements are the foundation for a smooth pedestal sink installation. Whether you're a beginner or simply swapping out an old sink, this step ensures the rest of the project flows smoothly.
Step 3: Install Support (if needed)
Next, when installing the pedestal sink, take a look at the wall behind the sink to see if it's sturdy enough to support the sink. Unlike a sink that sits firmly on the floor, a pedestal basin relies on the base and the wall to hold it up. So the wall has to be hard enough to hold the weight of the basin.
If the wall behind the sink is plasterboard or stucco, and the faucet bolts are not installed in the right place, then you need to add some wood between the bolts to give the basin mounting bolts or brackets to find a secure “landing”.
There are only a few steps to installing wood blocks:
- First, take a faucet bolt detector and find all the bolts in the wall.
- Then, at the height where the sink will be installed, in the center of the plasterboard, gently cut a small opening.
- Next, get a sturdy piece of 2x6 or 2x8 wood, stick it flat between the uprights, and give it a firm hold with screws or nails.
- Lastly, patch the sheetrock, trimming the piece to make it as flat as the surrounding area.
Although this step seems to be a bit troublesome, but it is very important - without this solid support, the column basin installed, over time, may be loose, unstable. The sink is supported by the legs of the pedestal, but the wall is instrumental in keeping it aligned and stable!
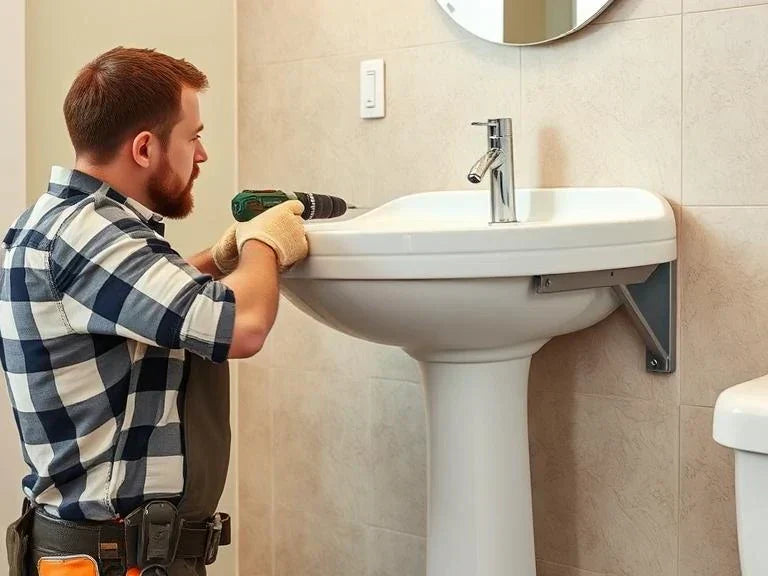
Step 4: Mount the Sink
With the supports secure the sink and the dimensions correct, let's get technical - mounting the sink on the wall!
First, take a drill and drill a few pilot holes into the wall in the previously marked areas. Whichever type of wall you have (drywall, stucco, or tile), you'll need to use whichever anchoring system you want. For drywall or hollow walls, expansion bolts or heavy-duty wall anchors will have to be used and installed securely. If it's a solid wall, or there's a wall block or keel, standard mounting bolts will probably do the trick.
Then the mounting brackets or bolts are nailed to the wall with the fittings that come with them. You have to make sure all the parts are tightened, aligned, and level. If the brackets are loose, if the anchors are crooked, the sink won't be able to stand up later.
Now it's the sink's turn. Place the pedestal on the floor and align it with the drain and water pipes. Once the base is in place, carefully place the sink on it. This way, the two pieces fit together and the classic columned basin model comes out - elegant to look at, space-saving and especially practical.
Once the sink is in place, tighten the mounting bolts or screws to secure it to the wall. You have to be careful with this step, don't push too hard. Ceramic, porcelain sinks, the strength to make too much will be easy to crack. Just screw until the sink is stable, will not shake on the line.
This step is done, the column basin is almost installed, to the back of the receiver channel also lay a good foundation.
Step 5: Hook Up Plumbing
Now that the sink is securely installed, let's “connect” the pipes to make this step really complete!
First, while the sink is still easy to manipulate, quickly put the faucet and drain components. Plumbing is not yet fully connected, this is the easiest time to install, the place is also spacious.
Then, connect the water supply hose to the faucet. Remember to use a flexible water supply hose, so that it is easy to install, but also to reduce the pressure on the pipe. Don't forget to wrap a few turns of plumber's tape (the Teflon tape) around the joint, as leakage prevention is key!
Next, reconnect the P-trap to the drain fitting in the wall. You have to carefully align the sink drain tailpipe by hand tightening the sliding nut and then reinforcing it with an adjustable wrench. You have to make sure it's flat and tight.
Once all the connections are secure, do a final double check to see if there are any leaks. This is the best time to check dry, so as not to flood later!
Step 6: Finish and Seal
With all the plumbing in place and the sink securely in place, the final step in the big project of installing a pedestal sink is just one step away! At this time, we have to make everything look beautiful, but also to prevent moisture and mold, to do everything.
Grab the silicone caulk and squeeze a layer of it along the bottom of the pedestal sink and the floor, as well as the back of the sink and the wall. This step isn't just for looks, it's waterproofing! This way, water won't seep in from the back of the sink, leading to mold growth and wall damage.
Once you've filled in the seams, don't rush the sink. Follow the manufacturer's instructions and wait for the silicone caulk to dry completely (usually 24 hours) before using it. In this way, our pedestal sink is truly both beautiful and practical!
Step 7:Final Check
Don't forget to open the shut-off valve to see if the water is coming in smoothly. Keep your eyes peeled for leaks in the pipe connections, drains, and P-type elbows. If so, tighten the fittings a little more.
The last step is to make sure that the sink is standing firmly, level and solid. Gently shake the sink with your hand and see if the base or wall bracket wobbles. If it does, then you need to look at the expansion bolts or brackets again and re-fasten them.
Okay, congratulations! The pedestal sink installation is complete! Whether it's your first time or you're getting a new one, follow this guide and you'll be able to get every step right!

Cost to Install a Pedestal Sink
Intended to install the column basin, that have to disk first to spend how much money, where the head can learn a lot, several factors can affect the total price. First of all, the column basin itself, the price depends on what it is, what brand, what material to do. Ordinary, about 100 dollars can be done, but if the high-end goods, designers out, it will be 2000 dollars up.
In addition to the money for the sink, other expenses have to be taken care of, too, and they go up. For example:
- Hiring a professional plumber or installer, that labor cost can't be beat.
- Plumbing has to be changed, especially if you want to replace a pedestal sink with a pedestal sink, and the supply and drain pipes have to be redone.
- In some places, you have to apply for a license before installation, another sum.
- If the existing faucets and fittings don't match the new sink, then you'll have to buy new ones.
- The old sink has to be removed and disposed of, another expense.
Putting all of this together, the average home would cost about $530 to put in a full stand-up sink. However, that number also depends on where you live, what type of sink you have, and how complicated the plumbing work is, and it varies a lot.
DIY vs. Hiring a Professional for Pedestal Sink Installation
Some people think that installing a pedestal sink is a pretty fulfilling DIY job, but let's be honest, it's not easy. Unlike a regular sink, a pedestal sink has to be calibrated correctly and fitted securely - after all, the sink has to be supported by the wall and base. This is especially true if you're switching between different types of sinks.
If you don't have much plumbing or renovation experience, it's best to get a professional plumber or installer to help you. They have professional guys and gals who are experts at installing pedestal sinks, adjusting pipes, waterproofing, and conforming to code, all of which are no big deal. Typically, a local installer will cost around $400, but it depends on where you live and how difficult the job is.
Of course, if you're handy and confident and want to install it yourself, you can save a fortune on labor. But be prepared to put in a little more time and effort, especially when it comes to removing the old sink, adjusting the plumbing, and installing the new pedestal sink.
Why Choose a Pedestal Sink?
When updating or planning your bathroom layout or design plans a pedestal sink can be an option that combines style and usability seamlessly.Whether you have limited space to work with or desire to infuse a bit of sophistication into your bathroom decor pedestal sinks offer a range of advantages that set them apart as a choice, for your space.
Space-Saving Design
Pedestal sinks offer a space saving advantage in smaller bathrooms or powder rooms by keeping the area open and airy with their sleek and minimalist design that minimizes clutter and maximizes mobility within the space—a perfect fit for apartments or bathrooms, with limited square footage where space is precious.
Elegant and Timeless Aesthetic
Pedestal sinks are an option for your bathroom decor because they offer a classy and sophisticated look that can suit different styles, and they hold the sink in place effectively when you set the pedestal correctly. Whether you're going for a classic feel or something more modern and sleek in your design scheme When you include a pedestal sink, in your bathroom setup it seamlessly fits in with the overall aesthetic of the space and serves as a stylish focal piece that enhances the ambiance without overshadowin This item is excellent because it exudes an appeal that will ensure its fashionability for years to come despite evolving trends. Particularly if it is securely mounted on robust wall supports.
Easy Maintenance and Access to Plumbing
Pedestal sinks are really simple to take care of because of their design that minimizes hidden spots for dust or dirt to collect in easily cleanable surfaces making cleaning a breeze and hassle free.They have surfaces that make wiping down effortless and keep the sink looking neat with very little effort required.On top of that it is convenient to access the plumbing, under the sink making it easier to conduct maintenance or repairs as necessary.
Ideal for Small or Minimalist Bathrooms
Pedestal sinks can be an option for bathrooms or for those who appreciate stylish design aesthetics, especially when they already have the right plumbing in place. Their small size helps make the most of space and creates a feel, in the room especially in bathrooms that prioritize simplicity and design coherence where pedestal sinks seamlessly complement the overall aesthetic appeal. Enhance the appearance by making sure the top of the pedestal aligns perfectly with the anchor holes on the wall. Pedestal sinks bring a blend of functionality and sophistication to your bathroom by keeping a look without the need, for large pieces of furniture or fixtures that could overpower the rooms aesthetic appeal and highlight the basin atop the pedestal base when positioned correctly.
Pedestal sinks provide a balance of style and practicality while optimizing space usage effectively in various ways, especially when replacing an existing pedestal sink. Whether you aim to maximize space in a bathroom or achieve a classic look with minimal upkeep requirements in mind; these sinks are a versatile option that can effortlessly complement different bathroom designs—resulting in a worthwhile addition, to any remodeling endeavor.

FAQ
1. Are pedestal sinks easy to install?
To be honest, installing a pedestal sink is a lot more complicated than installing a regular undermount or wall-mounted sink. The basin and the base have to fit together seamlessly, which requires us to measure and calibrate, and make sure that every part fits together perfectly, and not to be sloppy at all.
Here, the biggest headache is how to hide the pipes in the tub. Column basin, it is both the pipe “mountain”, but also the pipe “cover”, so we have to water supply pipe, drain pipe are arranged clearly, so that they can hide and seek in a small space. This is a job that requires a lot of tinkering with the pipes, which can be a real headache if you don't have some experience.
Furthermore, fixing the basin firmly to the wall is also a technical task. Whether the sink is stable or not, it all depends on whether the anchor or block on the wall is strong or not, and if it is a little crooked, it will be inconvenient to use and look awkward.
Of course, if you are a master of plumbing, love DIY, then installing a pedestal sink may not be difficult for you. But for newbies, it can be a real challenge. So if you're not too familiar with plumbing or bathroom renovations, finding a professional to ask is definitely a time-saving and hassle-free option, and you can avoid those big headache-inducing mistakes.
2. Does a pedestal sink need to be attached to the wall?
Yes, when installing a pedestal sink, the sink has to be securely fastened to the wall so that it is stable and safe to use. Most pedestals are hung on the wall, supported by mounting brackets or metal shelves, so that the basin stays there securely, no matter how you use it.
You may be thinking, isn't the pedestal just to hold up the basin? Actually, it's just a little help, mainly to hide the plumbing and make the underside of the sink look neater. The pedestal does share a little bit of the weight, but it's not all about it.
Since the basin is mainly held up by the shelf on the wall, you have to prepare it well before installing it. Make sure the shelves are securely nailed to the studs, and if the wall isn't strong enough, such as drywall or a hollow wall, then you'll need to add some wood blocks to reinforce it. Otherwise, the sink may wobble or even fall over time.
So, when installing a pedestal sink, fixing it to the wall is a big deal. The base will make the sink look better and help hold up the plumbing a bit, but don't expect it to carry the whole thing by itself.
3. Is plumbing different for pedestal sinks?
Yes, a bit. While the basic plumbing is similar, pedestal sinks often require pipes to be repositioned since they’re more exposed. If you're replacing a similar sink (like another pedestal or wall-mounted type), your existing plumbing may work fine. But switching from a vanity sink might need adjustments, especially in pipe placement and appearance. For clean looks, you may also need upgraded fixtures.
4. How to secure a pedestal sink to the floor?
First of all, you have to put the base in the place you want to install, and then mark the location of the mounting holes on the floor. Next, depending on what kind of flooring you have, drill a few pilot holes, and if the flooring isn't strong enough, use anchor bolts so that it's secure. Then ah, carefully tighten the base, but do not be too hard, or the material should be cracked. When you're done, take a look at the base to see if it's stable and not wobbly.
Another tip, to make the base tighter to the floor and waterproof, squeeze some silicone caulk where they touch. Although the sink is mainly supported by the wall bracket, but the base is also fixed to the floor, the sink will be more stable, and will not sway from side to side.
5. What tools and materials do I need to install a pedestal sink against the wall?
You'll need a pedestal sink, faucet, and plumbing supplies to connect to the existing plumbing, including the drain and water supply. Also, standard hand tools are a must to place the sink securely and ensure you use hanger bolts in the wall for added stability. You'll also need a drill, mounting hardware, and plumber's tape.
6. How do I remove an old pedestal sink ?
First, turn off the water supply and ensure that the supply lines and drain pipe are disconnected before you position the sink. Then, disconnect the plumbing and unscrew the mounting bolts. Carefully remove the previous sink and pedestal to make way for your new installation.
7. Can I install a pedestal bathroom sink by myself, or do I need help to put the pedestal in place?
While possible, it's better to have help when you install a pedestal sink to ensure everything is aligned and marked on the wall. The sink is heavy, and installation needs precision, particularly when you secure the bottom of the pedestal with toggle bolts.


Leave a comment
This site is protected by hCaptcha and the hCaptcha Privacy Policy and Terms of Service apply.