


A broken toilet handle can really upset your day. No one likes a toilet that doesn't flush right, causing trouble. This guide on how to fix a toilet handle will teach you how to solve this problem. You'll learn how to find the issue and fix it easily with our toilet handle repair guide.
Our DIY toilet handle fix provides step-by-step instructions for both minor adjustments and complete handle replacements. Are you prepared to begin your toilet flush handle repair? Let's begin!
Common Toilet Handle Problems
Toilet handle problems can be a real headache—even just going to the bathroom becomes a hassle. The following are some common issues. Have you experienced any of them?
Loose toilet handle
The handle shakes, or you press down and nothing happens? Most likely, the mounting nut inside the tank is loose, or the parts attached to the handle are worn out. In this case, use a wrench to tighten the nut or replace the handle, and the problem is solved.
Toilet Handle Does Not Flush
Pressing the handle but the toilet doesn’t respond? This could be caused by a problem with the lever, chain, or flapper inside the tank. If the chain is broken or too loose, it won’t lift the stopper properly. You can fix this by adjusting or reconnecting the chain—no need to remove the toilet.
Toilet handle is stuck or can't be pushed
The handle, hard, press can not be pressed, may be inside the rust, or by the scale, debris to the block, the chain may also be too tight. At this time, you have to clear the dirt inside, adjust the chain tension, so that the handle can move smoothly.
Toilet handle does not pop back
If the handle doesn't return after flushing, it's usually because the spring is broken, or the hard water scale is causing too much friction inside. Replace the handle with a new one, or lubricate the pivot, and the handle will be as flexible as ever.
Broken tank chain
This is a common problem. If the chain falls off the flush lever or flapper, the toilet won't flush. At this time, you reload the chain, adjust the length, so that the chain is not tight or loose, the problem is solved.
Knowing these common problems, you will be able to quickly determine whether you need a simple adjustment or a new one, which will save you time and water, and less hassle.

Tools and Materials You’ll Need
The process of toilet handle repair appears challenging at first but becomes achievable through proper tool selection and part acquisition. This section provides essential information for performing a successful repair on the flush valve.
Basic Equipment for the Job
The correct tools are essential for both tightening loose handles and replacing them. You'll need:
Adjustable Wrench: Great for tightening and loosening nuts and bolts.
Pliers: Useful for gripping and turning parts.
Screwdriver: Needed for removing screws in some setups.
Lubricant: Helps moving parts work smoothly.
When a Replacement Handle Is Necessary
At times, fixing the handle isn't enough. Regular use can wear it down, making replacement necessary. Look out for these signs:
- Cracks or visible damage to the handle.
- Corrosion or rust on metal parts.
- The machine continues to stick or jam even after performing routine maintenance tasks.
Choose replacement parts that match your toilet model when making purchases. A well-made replacement handle reduces maintenance costs by minimizing the need for repeated repairs. Replace a broken toilet handle is necessary.
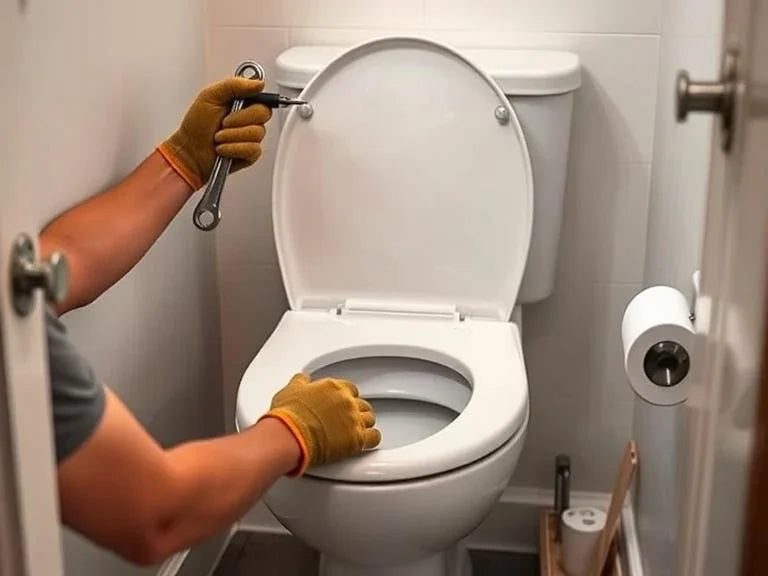
Step-by-Step Instructions: How to Quick Fix a Toilet Handle
Learning to fix a toilet handle will save you money and hassle. Follow these easy steps to fix common problems like a loose handle or adjustment issues. Start with the basics before tackling more complex repairs.
Step 1: Open the Tank and Inspect the Mechanism
First, carefully remove the tank lid and set it aside. Then, look inside the toilet tank for signs of wear or disconnections in the lift chain. Check the handle, chain, and flapper closely.
Step 2: Tighten the Nut
A loose handle usually requires only a tighter handle nut or a check on the flush valve. Use a wrench to tighten it clockwise until it is snug but not too tight. This should fix the handle's functionality.
Step 3: Adjust or Attach the Chain
Check the chain that links the handle to the toilet flapper. If it's too loose or too tight, it can prevent flushing. Adjust the chain length so that it has just the right amount of slack for the flapper to close completely.
Step 4: Replace the Handle if Needed
If adjusting and tightening don't work, it might be time for a new handle. Buy a compatible one from a trusted hardware store and follow the installation guide. This step often fixes persistent issues.

When Should You Replace the Handle?
When should you replace your toilet handle? It is a very important thing to know and it will help you to avoid a lot of trouble and prevent your toilet from breaking down further. Here are some signs that it is time to change the handle:
The Handle Is Cracked or Corroded:
The metal toilet handles crack and rust as time goes by. This makes the handle less sturdy and may break one day. Cracked and rusted handles look old, and may suddenly break, making it inconvenient for you to use the toilet.
It No Longer Activates the Flush:
The handle is pushed but the toilet does not respond. The handle may be broken, or the chain in the tank may not be able to connect. At this point, it is useless to repair the handle, replace it with a new one to solve the problem, to ensure that the toilet can be flushed, but also to save water.
It’s Too Stiff or Too Loose to Use:
The handle is either too hard or too loose: if the handle can not be pressed, or once pressed on the shake, that is the mechanical part of the wear and tear, or the position is not right. A hard handle may be stuck by scale or rust, making it difficult to flush. If the handle is loose, it may not be able to pull the chain, so the toilet won’t flush. In both cases, you’ll need a new handle.
So, see these signs, hurry to change a new toilet handle it, so that the toilet can be used, but also to avoid suddenly broken add blockage. Change a handle, simple and affordable, do-it-yourself can be done, do not have to find a professional!
How to Replace Toilet Handle: Step-by-Step
The process of toilet handle replacement proves to be extremely straightforward since you can accomplish it by yourself. I will explain each step of this process in detail.
Step 1: Prepare your tools
For the task you need a replacement toilet handle that corresponds to your toilet type together with an adjustable wrench or pliers and a towel for cleaning the water.
Step 2: Turn Off the Water Supply
The second step requires turning off the water supply although this step remains optional yet performing it provides the best results.
Locate the valve situated beneath the toilet base and turn it clockwise to block water flow. After that flush the toilet to empty the tank water.
Step 3: Open the tank lid
The tank lid requires careful removal while keeping it intact during this process.
Step 4: Unlock the chain
The chain that connects to the flush lever inside the tank requires gentle manipulation to release it.
Step 5: Remove the old handle
Use a wrench to loosen the nut that holds the handle in place. The toilet handle threads run in the opposite direction thus requiring clockwise turning to loosen the nut. After removing the handle and its components you can proceed.
Step 6: Install the new handle
The new handle must go through the tank hole while the nut secures it in place by twisting counterclockwise. Avoid using excessive force because tank damage could occur.
Step 7: Connect the chain
Adjust the chain length so the flap remains open with a slight looseness when the chain is attached to the new handle's flushing lever arm.
Step 8: Try the new handle
The tank lid needs to be placed on while you should turn on the water supply if it was previously disabled. Perform multiple flushes to verify that the new handle functions properly and produces a clean flush.
The process of replacing a toilet handle turns out to be straightforward. The do-it-yourself approach allows you to both save money and enjoy the convenience of it.
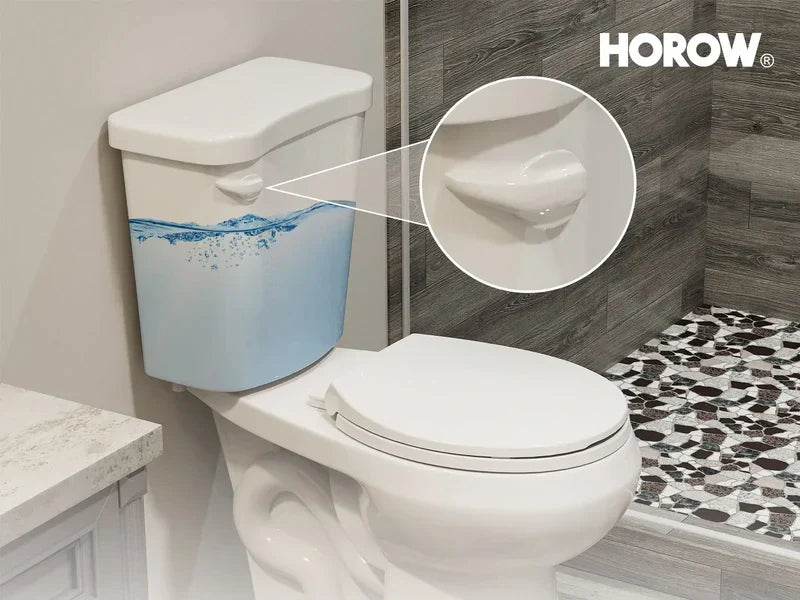
Tired of constantly fixing a broken toilet handle? Instead of patching up the same old problems, why not eliminate the hassle altogether? With a HOROW Toilet, you can enjoy hands-free flushing technology that removes the need for a traditional handle — and with it, the risk of future repairs.
The HOROW Toilet upgrade brings you the most advanced smart bathroom technology available. HOROW toilets provide contemporary designs and state-of-the-art features and superior hygiene and convenience that surpass traditional toilet models.

Final Thoughts: Should You Repair or Replace?
The decision to repair a toilet handle requires evaluating both advantages and disadvantages. The cost-effective nature of repair makes it seem like a smart choice for toilet handle solutions. The problem can be resolved through basic repair methods.
A new toilet handle becomes necessary when your old toilet handle continues to break and cannot effectively flush the toilet. The cost of repeated repairs becomes too high. The purchase of a new handle will both reduce your expenses and enhance your toilet's operational efficiency.
Your current situation with the toilet tank determines which option you should select. The knowledge of expenses and advantages enables you to make an informed decision. Your objective should be to maintain proper plumbing operation regardless of whether you select repair or replacement.
FAQ
1. How to fix a broken toilet handle?
Fixing a broken toilet handle is a simple and inexpensive DIY task. Start by purchasing a replacement toilet flush handle that matches your toilet model. Open the tank, unhook the chain from the old handle, and use a wrench to unscrew and remove it. Install the new handle, reconnect the chain, and adjust the length so the flapper lifts properly when you flush. It’s a quick fix that can save you a call to the plumber!
2. Why is there no tension on my toilet handle?
The toilet handle has no tension and is a real headache! It moves when you press it, but it's floppy and has no force. This is most likely a problem with the lift chain in the tank, either loose or broken.
This chain acts as a bridge between the toilet handle and the baffle. The flapper is the rubber ring at the bottom of the tank that must be opened when flushing for water to flow into the toilet. If the chain is loose and you press the handle, the flapper won't open and the toilet won't flush. To make matters worse, the chain sometimes comes off the flush lever and it's even more of a problem.
Don't worry, this problem is easy to fix! First, gently remove the toilet lid and take a look at the chain. If it's broken, you can hang it back on the flush lever; if it's loose, you can adjust the length so that it's slightly looser so that the flap seals tightly but isn't too loose and the toilet handle can still be lifted. With just this simple adjustment, the toilet can be flushed properly without the need to replace parts, isn't it very convenient?
3. What to do when toilet handle stays down?
Toilet handle after flushing stuck in the lower back, this can be a real headache! Don't worry, it's a common problem that can be solved with a few tricks.
1. Grease the handle mechanism
Sometimes the sleeve or shaft next to the handle can get stuck due to rust, limescale or wear and tear. That's when you put some pipe lube around the shaft to allow the handle to move smoothly.
2. Take a look at the chain and stopper
The chain can also keep the handle from going back if it's too tight or tangled. At this point, you open the toilet lid and take the chain off the baffle. If the handle can move, that is the chain is too tight, you adjust the length, let it loose a little, flush smoothly.
3. Check if the handle arm is broken
The metal or plastic arm in the tank can also get stuck if it's bent, warped or rusted. At this point, you may have to get a new handle:
- Start by removing the toilet lid.
- Unscrew the nut that holds the handle in place.
- Install the new handle and attach the chain.
See if the toilet lid is in the way Sometimes, the toilet lid itself presses down on the handle, preventing it from moving. You have to make sure that the toilet lid is placed properly and not in the way of the handle. Just a few steps and the toilet handle will be back to normal!
4. Are toilet handles easy to replace?
The DIY handle repair process remains straightforward to the point where it can be considered simple like baking a cake. The replacement of a broken loose handle requires only a few minutes. The repair requires only a wrench together with a handle that matches the existing one. The repair process begins with lifting the toilet lid followed by tightening the nut on the old handle before installing the new handle and connecting the chain in the tank. The process is quick and budget-friendly and simple enough for beginners to perform without needing professional plumbing assistance.
5. Can you fix a toilet handle?
A faulty toilet handle requires only a replacement of the handle itself instead of the entire toilet. The three common toilet problems which include loose handles and stuck handles and broken tank chains are simple to repair. The solution to most problems involves twisting the mounting nut or connecting the chain or cleaning rust and limescale buildup to complete the repair. A new handle replacement becomes necessary only when the existing handle shows signs of cracking or rusting but fixing a toilet handle remains a simple and budget-friendly DIY task.
6. What basic equipment do I need to fix a toilet handle?
You'll need an adjustable wrench, pliers, and possibly a screwdriver. It is also helpful to have the right parts such as a new handle or chain.
7. When should I replace the toilet handle rather than repair it?
If you're in one of these situations, you'll need a new toilet handle, so don't even think about fixing it:
If the handle is cracked, rusted or broken, don't fix it - the physical damage can't be repaired properly, and it can make flushing worse.
If the handle doesn't flush when you push it down, the parts inside, like the lever or mounting nut, may be too worn or broken, and need to be replaced.
Also, if the handle is tightened and cleaned, but still loose or hard, it may be worn out or have accumulated a bunch of minerals, which is not a good idea to do this simple repair.
After flushing the handle can not return to the original position? Then 80% is the spring is broken, or the shaft there is worn out, this time also need to replace a new one.
With a new handle, you can flush smoothly and avoid wasting water or the embarrassment of not being able to flush cleanly.
8. What should I do if my toilet handle is stuck?
First, check the internal mechanism for obstructions or sticking parts. Check that all nuts are tight and that the chain is properly attached. If it still doesn’t work, consider replacing the handle.

Leave a comment
This site is protected by hCaptcha and the hCaptcha Privacy Policy and Terms of Service apply.