


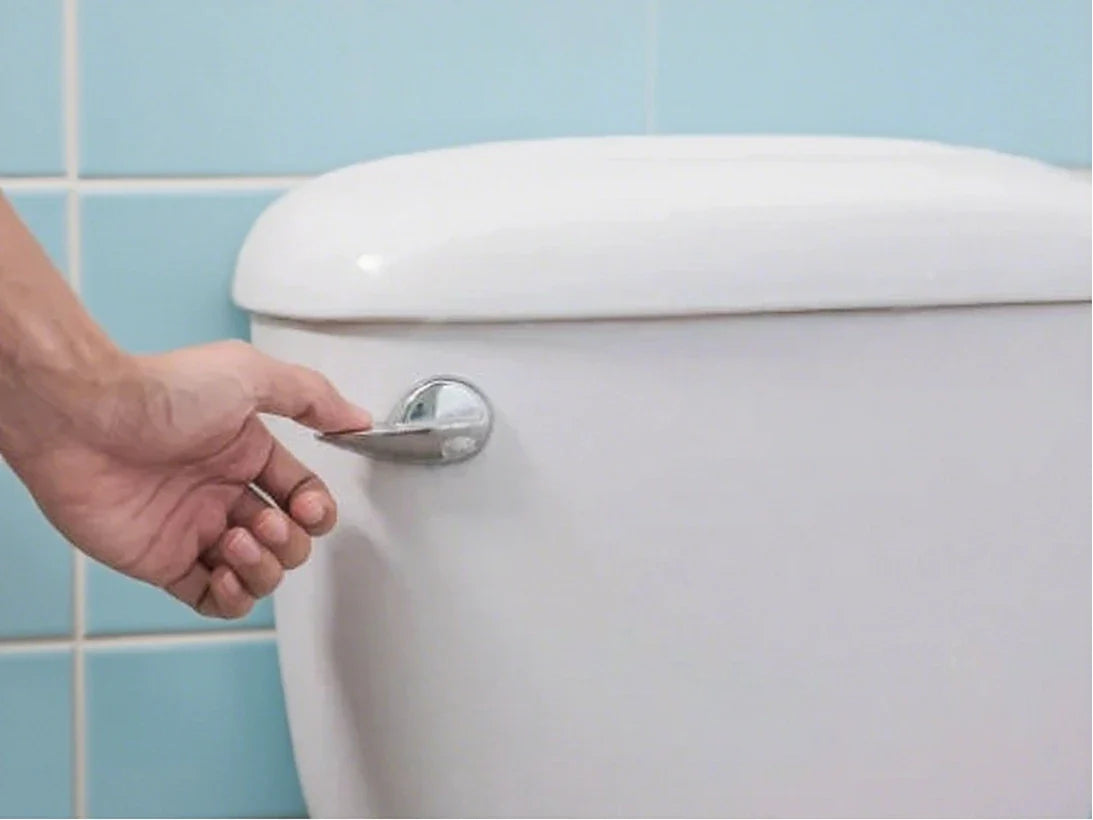
When people talk about bathrooms a lot of times they debate between using handles for toilets. This is a common concern for those who want an easy and dependable bathroom setup experience.Lots of folks find comfort and a feeling of ease, with handles that newer automated systems might not always offer.If you're thinking about changing handle on toilet it's key to know the characteristics that separate each type from one another.
Nowadays with the advancement in technology there are options available, for flush handles. Each having its advantages and disadvantages to consider carefully! Lets dive into the advantages and disadvantages of both manual and automatic flush systems to help you decide which one suits your bathroom best. Step-by-Step Guide: How to Change a Toilet Handle
Changing handle on toilet yourself is a do it yourself project that can save you money in the long run if your current handle is broken or worn out. No need to worry at all about it!. It's completely achievable for anyone to try their hand at changing a toilet handle on their own!. Allow me to guide you through the process step by step.
Step-by-Step Guide: How to Change a Toilet Handle
Skill level: Beginner
Time needed: Less than an hour
Tools you'll need:
- New toilet handle
- Adjustable wrench
- Screwdriver
- Rubber gloves
- Towel or cloth (to keep surfaces safe)
Step 1: Understanding Your Toilet Handle Setup
Before purchasing a replacement handle, check
Handle position: Determine if the handle is mounted on the front, side or at an angle to the toilet tank.
Handle Orientation: Most toilets have handles on the left side, but some have handles on the right side. Check your toilet.
Note that some handles are universal, while others can only be used in certain positions or orientations.
Step 2: Remove the toilet tank lid (hold it gently)
Now that you're ready, it's time to open the tank - but take your time. The toilet tank lid is heavier and more fragile than it looks.
Use both hands to lift the lid upwards. The lid is porcelain and can chip or crack if it accidentally slips or hits a hard object (a headache no one wants).
After removing the lid, instead of placing it directly on the floor or countertop, gently place it on a towel, bath mat or folded cloth to cushion it. This prevents the cover from getting scratched and protects the surface underneath.
Tip: If the workspace is tight or there are pets/children around, move the lid to a safe place so it doesn't accidentally fall over.
Take a moment to look inside the tank. Don't worry if it looks a little strange - you're about to become an expert.
Step 3: Unlock the chain inside the tank (this part is easier than it looks)
Now that you have opened the tank, let's take a closer look inside. You will see a thin metal rod attached to a handle on the inside of the tank, this is the lift arm. It moves when the handle is pressed.
Attached to the end of the lift arm is a small chain which is connected to a soft rubber flapper at the bottom of the tank. This rubber part is the flapper valve, and when you flush, it lifts up to allow water to flow into the tank.
You will need to do this:
Gently release the chain from the lift arm. The chain is usually attached through a small hole in the arm, and you simply slide it out or unclip it with your fingers.
Be gentle in your movements! These parts aren't super fragile, but they work best when touched lightly.
IMPORTANT: Take the time to memorize which hole the chain attaches to, this will affect how much the valve flap lifts when you flush. If you're not sure you can remember, take a quick picture with your cell phone. Trust us, it will come in handy later.
At this point, you've officially disconnected the flush. It's a small but crucial step - you're one step closer to installing shiny new handles!
Step 4: Remove the old handle
It's time to say goodbye to the old toilet handle! Now that the chain is undone, you can remove the handle itself.
First, look inside the tank. Find the nut that holds the handle in place - it's located on the inside wall of the tank, right where the handle shaft passes through from the outside.
Here's the trick:
Most toilet handle nuts are counter-threaded, which means they tighten in the opposite direction you'd expect. As a result, you actually need to turn the nut clockwise, rather than to the left like most things to loosen it.
You can usually loosen the nut by hand. However, if it feels a little stuck or slipping, you can use an adjustable wrench to increase your grip. Be careful not to apply too much force, as the inside of the tank is usually porcelain and may crack if you apply too much force.
Once you have loosened and removed the nut, simply slide the lift arm and handle out of the hole in the tank wall. It should come out easily, no pulling or tugging required.
That's it! The old handle is officially out. The project is half over, and the fun part (installing the new handle) is next.
Step 5: Install the new handle (almost there!) .
It's time to bring in the shiny new handle! Let's get it installed and get the toilet flushing smoothly again.
First, pick up the new handle and remove the pre-installed nut and rubber washer. You'll need to remove them temporarily in order to slide the handle into the hole in the tank.
Next, insert the rod (i.e., the metal arm attached to the handle) into the hole from the outside of the tank inward. Carefully align it so that it is flush with the wall of the tank.
Once through, go inside the tank and slide the rubber washer onto the rod, followed by the nut.
Now comes the important part:
Gently tighten the nut by hand, turning it counterclockwise, remembering that toilet handle nuts are usually counter-threaded! Until it's tight but not strained.
Still feel a little loose?
Use an adjustable wrench to tighten it a little more - a quarter turn or so will do. But don't over-tighten! Porcelain is strong but fragile. Over-tightening may cause cracks, and no one wants that kind of accident.
At this point, gently test push the handle. It should move freely without feeling too stiff or loose. If it wobbles, check the nut again - just adjust it gently as needed.
That's it! The new handle is installed and a fully functional flush is just a few steps away.
Step 6: Reconnect the chain and test (fine-tune the timing!)
Alright, now that your shiny new handle is in place, it’s time to connect the inside mechanism — specifically, the chain that links your handle to the flapper (the rubber valve at the bottom of the tank that controls the flush).
Hooking Up the Chain
Take a look at the new lift arm (the metal rod attached to your new handle). You’ll see a series of little holes in it — just like the old one had.
Now, hook the chain into the same hole it was connected to before. If you took a photo earlier, now’s the perfect time to reference it!
If you didn’t snap a pic, don’t worry — just pick a middle hole to start. You can easily adjust it later if needed.
Give It a Test Flush
Gently press the new handle and watch how the flapper moves.
Does it lift up smoothly and then drop back down once you release the handle? That’s the goal!
If things don’t look or feel quite right, don’t panic. Chain adjustments are totally normal and often needed.
Adjusting the Chain Length
If the chain is too long, it’ll feel slack. The handle may move, but the flapper won’t lift high enough — meaning your toilet might do a “lazy flush” or not flush at all.
If the chain is too short, it can hold the flapper open after you flush. That’ll make your toilet run endlessly as water keeps refilling the tank.
The sweet spot? The chain should have just a tiny bit of slack when the flapper is closed — not so tight that it pulls the flapper up, and not so loose that it hangs uselessly.
Try adjusting one link at a time until you get that “just right” flush action. You might have to test it a couple of times, and that’s perfectly okay — it’s all part of the process!
Once everything feels good, you’re basically done. Just one last step to go…
Step 7: Replace the Tank Lid and Check for Issues
Now that the new handle is working perfectly, it’s time to put the tank lid back on. This is the last step, but before you finish, take a moment to inspect the inside of your toilet tank for any potential issues.
First, carefully place the lid back onto the tank. Make sure it sits securely in place, aligning any tabs or grooves properly. Be gentle, as you don’t want to crack the porcelain or damage the lid.
While you’re putting the lid back on, it’s also a good opportunity to quickly check the other components inside the tank to make sure everything is in good condition. Here are a few things to look out for:
- The Flapper: This rubber valve is responsible for controlling the flow of water into the toilet bowl when you flush. Check for any cracks, warping, or debris that might prevent it from sealing properly. If the flapper doesn’t seal well, it can cause the toilet to run continuously or waste water.
- The Fill Valve: Make sure the fill valve (which controls the water level in the tank) is working correctly. If you hear any unusual sounds or if the tank is filling slowly, there could be a problem with the valve.
- Mounting Bolts: Give the mounting bolts that secure the tank to the toilet bowl a quick check. If they are loose, it could lead to leaks or instability, so make sure they are tightened securely.
- Leaks: Finally, after replacing the lid and checking the components, flush the toilet a few times and carefully inspect around the base of the tank, the fill valve, and the flapper for any signs of leaks. If you notice any water dripping or pooling, you may need to replace a part or tighten a connection.
Once you’ve checked everything, you’re all set! Replacing a toilet handle is one of the easiest DIY plumbing projects you can do, and it only takes about an hour to complete. Plus, it’s an easy way to refresh your bathroom without the hassle of a big renovation.
Congratulations! Now that you’ve successfully replaced the handle, you’re ready to tackle even more simple DIY projects around the house, like swapping out toilet seals, changing gaskets, or updating toilet seat parts.
By following these steps, we've successfully replaced our toilet handle. Changing handle on toilet yourself means you can fix your bathroom without a plumber.
Understanding Toilet Handle Issues: Causes & Symptoms
In order to ensure our bathrooms operate efficiently and effectively is crucial to be aware of the toilet handle malfunctions that may arise from various common factors.
Aging parts
As time goes by, the parts of a toilet handle can wear out. Changing handle on toilet is often a simple fix when this happens. This can lead to the need for a repair. If you've seen a drop in performance, it might be because of aging parts.
Loose connections
Issues with handles often stem from connections, which can include screws and nuts becoming undone and affecting the overall function of the handle itself; therefore it's advisable to initially inspect these connections when changing handle on toilet or troubleshooting any problems that may arise.
Improper installation
Some problems come from how the handle was installed. A handle not installed right can cause tricky issues. If your handle feels wobbly, it might not have been installed correctly.
Frequent use
Bathrooms with heavy foot traffic tend to experience wear and tear requiring repairs or replacements sooner than less used ones do Regular inspections, for signs of wear can help ensure everything stays in good working condition.

Why Changing Handle on Toilet?
Make sure to keep an eye on your toilet handle so everything in your bathroom keeps running smoothly, and be ready for changing handle on toilet if something starts acting up.
Toilet handle loose
A loose toilet handle can start as a small problem but grow bigger. If it's loose, flushing might not work well, needing you to try several times. So, it's smart to change the handle when you first notice it's loose.
Toilet handle broke
If your handle breaks, it won't work with the flush mechanism. Changing handle on toilet becomes necessary to get your toilet working again. This means you'll need a new handle to get your toilet working again. A broken handle can lead to wasted water or no flushing, causing hygiene issues.
Toilet handle snapped
A snapped toilet handle can really mess up your day. It might break from too much use or old parts wearing out. Replacing the handle is easy and cheap, getting your bathroom back to normal quickly.
Two Types of Toilet Handle
The selection of toilet handles presents two alternatives which include manual flush handles and automatic flush systems. Each has its own benefits. The two options are reliable and practical, but they cater to different preferences and needs.
Manual Flush Handle: Classic, Simple, and Reliable
Many households prefer toilet flush handles for their functionality and aesthetic appeal as they provide a satisfying user experience and evoke nostalgic memories with their traditional design.
Easy to use and low maintenance
Manual flush handles are easy to use and don't need much care. Changing handle on toilet is also straightforward with this type of system. They are simple, making repairs easy. This means fewer parts can break, keeping your toilet in good shape.
Perfect for those who love the classic feel
If you like a traditional bathroom, a manual flush handle is perfect. It adds a classic touch to your bathroom. It's both useful and beautiful, lasting for years.
Requires occasional maintenance
Even though manual flush handles are reliable, they sometimes need a little care. Changing handle on toilet might be one of those simple fixes. You might need to tighten screws or replace old parts. These small steps keep your toilet working well. It shows how easy it is to take care of a low maintenance toilet handle.
Automatic Flush: Smart, Hygienic, and Effortless
Automatic flush toilets are leading the way in bathroom tech. Changing handle on toilet isn’t usually a concern with these systems, since many don’t use traditional levers. They offer a cleaner and easier experience. These smart systems are great for both public and private areas.
Touch-free for better hygiene
Automatic flushing toilets operate without the need for a handle to function properly This feature helps prevent the spread of germs and bacteria making it an ideal choice for locations such, as airports restaurants and hospitals.
Smart sensors for water efficiency
These toilets have smart toilet handles with sensors. They use just the right amount of water for each flush. This saves water and cuts down on bills over time.
Higher upfront cost, but worry-free in the long run
Yes, automatic flush toilets cost more at first. But the long-term savings are huge. They need less upkeep and are super convenient. They're a smart choice for any bathroom.
HOROW Toilets: Handle or Handle-Free — Solutions for Every Bathroom
Toilet models from HOROW cater, to a variety of styles. Whether traditional or modern settings suit your preference.The timeless handle designs exude elegance and functionality seamlessly.Those who prefer a hands on approach will appreciate the user interface of these models that also evoke a sense of nostalgia.
For those who prefer the classic handle design
HOROWs traditional handle models are a choice for those who appreciate the aesthetics of both vintage and modern toilets.They boast an appearance and efficient functionality with durable construction, for longevity and minimal maintenance requirements.
HOROW Comfort Height Elongated One-Piece Toilet ST076W

If you're thinking about changing handle on toilet, the HOROW ST076W is a great way to upgrade more than just the lever. With its left-hand trip lever, sleek design, and solid performance, this one-piece toilet is super easy to install and comfortable to use.
Perfect for Handle Replacements
Got an old or broken toilet handle? The ST076W is perfect for changing handle on toilet. Its simple design makes swapping out the handle quick and easy, so you can update your bathroom without any hassle.
Modern One-Piece Design
This toilet’s got a smooth, one-piece design with an elongated bowl, so it looks great and feels comfortable. It blends in with any bathroom style, whether modern or classic, and there are no awkward gaps where grime can hide.
Effortless to Clean
The fully skirted trapway and glazed surface make cleaning a breeze, as there are fewer corners for dirt to collect. Less scrubbing, more shining!
Efficient and Powerful Flush
With a 1.28 GPF single flush that meets EPA WaterSense standards, this toilet saves water without sacrificing power. The siphon flushing system and 800g MaP score make sure you get a strong, reliable clean every time.
Comfortable, Quiet Seating
The soft-close PP seat with a stainless steel hinge is easy to remove for cleaning or tightening. Plus, no more loud slams—just smooth, quiet comfort.
Elongated Two-Piece ADA Toilet HWTT-E03S

Looking to replace your toilet handle? The HOROW E03S is designed for easy handle swaps while offering ADA-compliant comfort, modern style, and efficient performance in a two-piece design.
Easy Handle Replacement & ADA Comfort
With a side-mounted flush lever, the E03S allows for quick, straightforward handle replacement. Changing handle on toilet is made simple, and its 17.5-inch ADA height ensures easy sitting and standing, making it a comfortable choice for everyone.
Efficient Flush & Powerful Performance
The 1.28 GPF single flush system and 2-inch glazed trapway deliver clog-free flushing, while the 360° jet siphon offers powerful performance with every use, saving water without sacrificing effectiveness.
Durable, Soft-Close Seat
The quiet-close seat with durable hinges prevents slamming and adds comfort, while the elongated bowl provides ample sitting space.
Complete Installation Kit Included
Comes with everything you need: tank, bowl, flush lever, soft-close seat, installation kit, and wax ring—ideal for a hassle-free upgrade.
For those looking for a modern, hands-free experience
Experience enhanced comfort and hygiene with the handle free toilets by HOROW featuring state of the art sensors that ensure a seamless flushing experience with a simple wave of your hand – ideal, for individuals who prioritize cleanliness and modern design trends.
HOROW Smart Toilet with Bidet T37
The HOROW T37 represents an ideal opportunity to upgrade your toilet with smarter and more hygienic features. The T37 stands out from standard toilets those need changing handle on toilet because it includes automatic flushing technology and integrated bidet functionality and dual flush operation and 10-inch rough-in compatibility which provides a complete solution for comfort and hygiene and space efficiency.
No Changing Handle on Toilet, Upgrading Is Simple and Seamless
Whether you're replacing an old toilet with a worn handle or refreshing your bathroom with a modern touch, the HOROW T37 makes the transition easy. Its thoughtful design caters to smaller bathrooms with 10-inch rough-in requirements, making it a smart and flexible choice.
A Bidet Included for Daily Hygiene
The integrated bidet offers an invigorating cleanse with customizable water pressure and temperature settings—eliminating the need, for additional attachments as everything is conveniently built in and good to go.
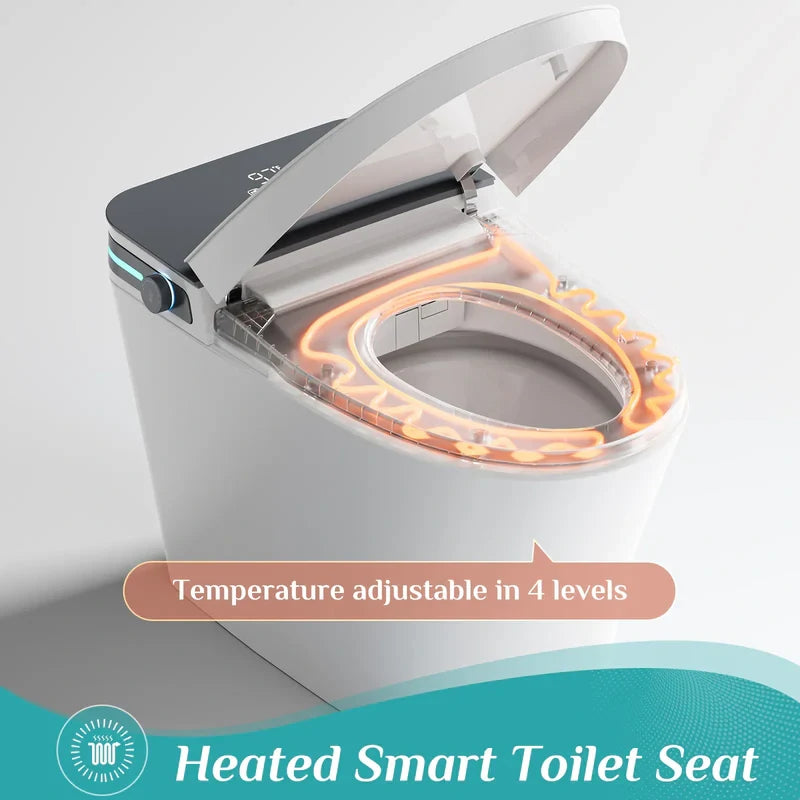
One Stop Solution, for Comfort Enhancements
The T37 prioritizes comfort with its closing seat and warm heated seating option perfect for chilly days – all designed for a cozy and relaxed sitting experience due, to its ergonomic shape that enhances natural comfort.
Efficient Dual Flush System to Conserve Water.
The flush feature allows you to choose between a full or partial flush based on your requirements.This feature makes it simple to conserve water without compromising the efficiency of the toilet.Flush according to your needs, for performance and water savings.
HOROW Bidet Combo Toilet with Mood Light T38
Enhance your bathroom with the HOROW T38. An contemporary bidet toilet combination specifically created for 12 inch rough ins! With its blend of premium functionalities and tasteful aesthetics it provides an sanitary experience.

Mood Lighting & Smart Comfort
The T38 comes with a customizable 4 color mood light to set an ambiance and offers an adjustable heated seat as well as personalized water temperature and pressure options, for your comfort needs.The self cleaning nozzle guarantees cleanliness after each use and the seats 0. 20 Second warming technology delivers coziness and warmth.
Advanced Hands-Free Flush System
Equipped with four flushing modes, the T38 guarantees powerful performance every time. The pre-wet feature prepares the bowl for a cleaner flush, and the emergency flush ensures functionality even during power outages. You can choose from automatic, knob, foot-kick button, or remote control options for maximum convenience, making it a great upgrade if you're changing handle on toilet or just looking to enhance your bathroom.
Reliable Performance with Built-In Water Tank
The T38’s built-in water tank ensures consistent, powerful flushes, even in homes with low water pressure. This reliable design guarantees optimal performance in any environment, making it a great choice if you're changing handle on toilet or looking for an upgrade.
Heating the Air. Using UV Light, for Sterilization
To enhance comfort levels further with the T38 model is the inclusion of an air drying function post use and an automated UV sterilization system, for toilet cleaning purposes. Ensuring a more sanitary and hygienic user experience overall.
Simple to maintain Layout
The design, with a skirted bottom makes it easier to clean those tough to reach spots in your bathroom and keeps it looking neat all the time.
FAQ
1. What are the signs that our toilet handle needs maintenance or replacement?
Look out for signs like a loose handle or one that doesn't return to its place. If the toilet won't flush right, it's time to check the handle or its parts. If you're unsure, changing handle on toilet could solve the issue.
2. How do automatic flush systems compare to manual flush handles?
Automatic flush systems are touch-free, improving hygiene. They use smart sensors to save water, making them eco-friendly. While they cost more upfront, they save money and effort in the long run.
3. What are typical issues that can affect a toilet handle's performance?
Issues like wear and tear, loose connections, or high use can affect a handle. Spotting these problems early helps keep your toilet working well.
4. How do I know if there’s a problem with my toilet handle?
Change the handle if it's loose, broken, or snaps. Fixing these problems quickly stops further damage and keeps your toilet working right.
5. Do smart toilets still require changing handle on toilet?
Smart toilets operate without handles. The sensor-activated flushing system and foot touch controls and remote operation eliminate traditional toilet handle problems such as loose or broken handles.


Leave a comment
This site is protected by hCaptcha and the hCaptcha Privacy Policy and Terms of Service apply.