


A walk-in tub installation provides a safer and more comfortable bathing experience, especially when it comes to walk in bathtubs for seniors and individuals with limited mobility. As more people choose to age in place, the demand for accessible home improvements is growing. Understanding the methods, cost, and steps involved in a walk-in tub installation helps you make a smart, confident decision for your home. This guide breaks down everything you need to know about the entire installation process, from planning and preparation to the final safety check to install walk in tubs in your house.
Walk-In Tub Installation: An Overview
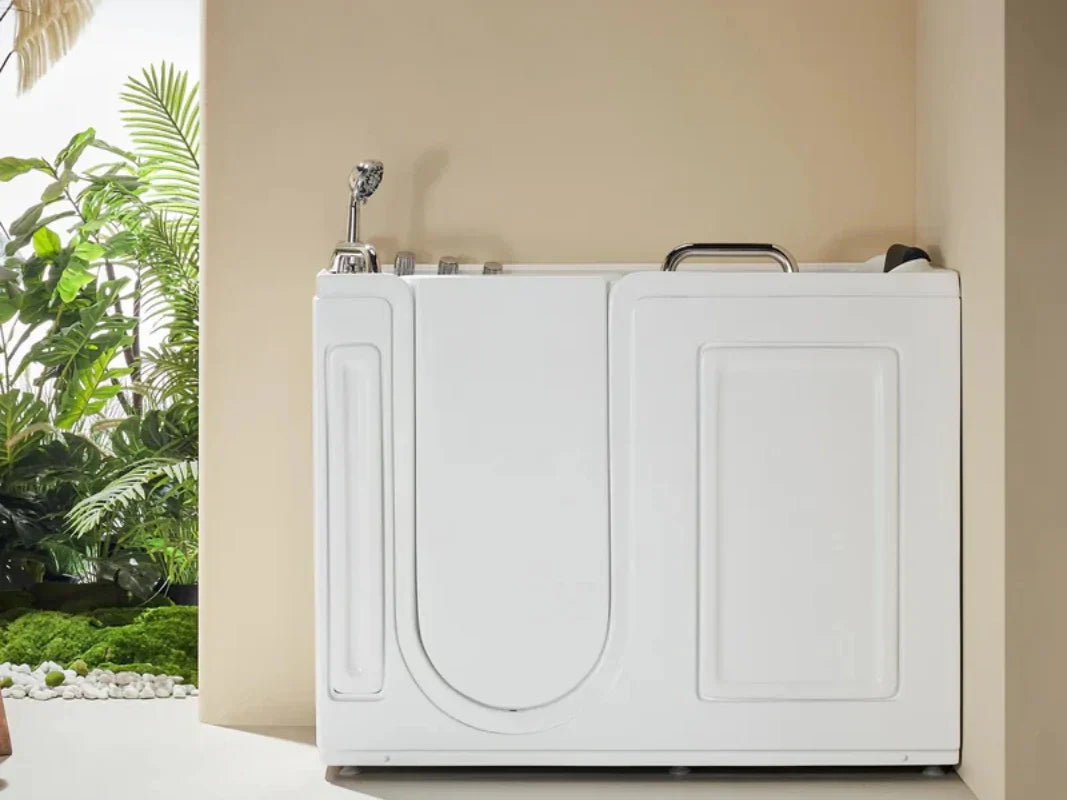
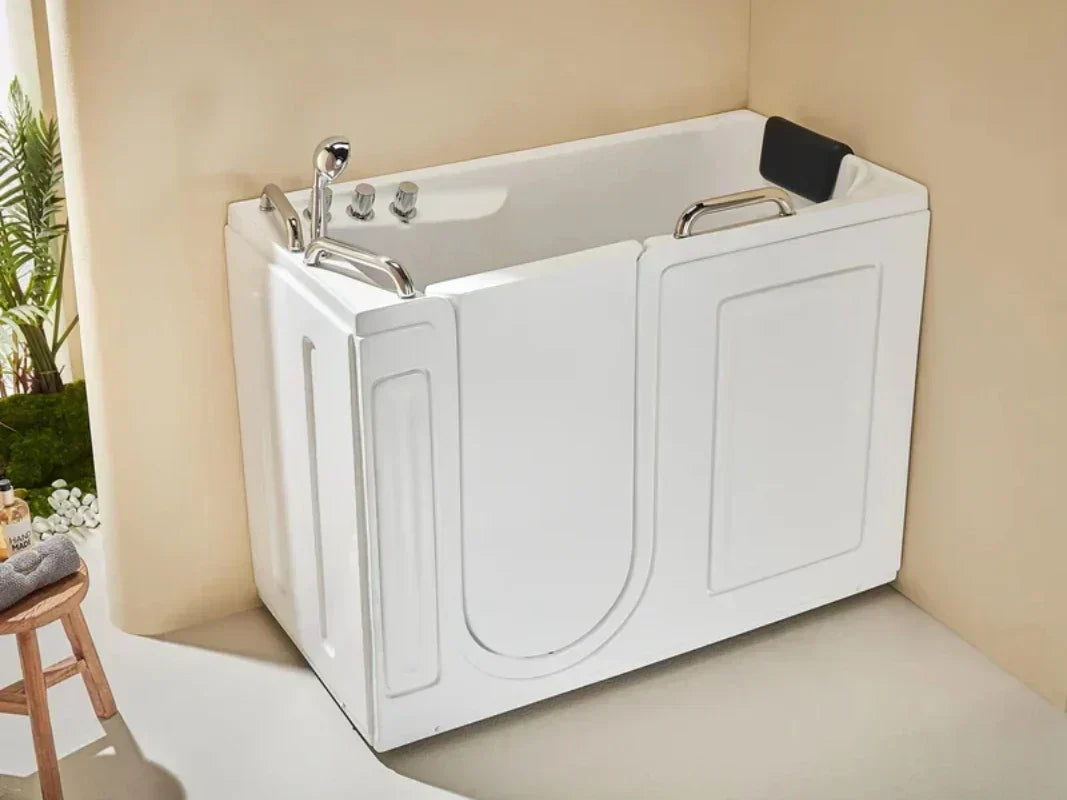
Walk-in tubs are essential for home accessibility because they remove the high barrier of a traditional bathtub, reducing the risk of slips and falls. The low entry threshold, built-in grab bars, and anti-slip floors offer significant peace of mind. This focus on safety is a primary reason for their rising popularity.
The total cost of getting a new walk-in tub can vary widely. A complete project, including the tub and professional labor, typically falls within a certain range.
Snapshot: The average total cost for a walk in tub installation ranges from $3,000 to $15,000. This price depends on the tub's features, the condition of your bathroom, and the complexity of the labor required.
When considering a walk-in tub, one of the first questions homeowners face is whether to hire a professional or attempt to install themselves. The choice has major implications for your budget, timeline, and warranty.
DIY vs. Professional Installation at a Glance
| Factor | DIY Installation | Professional Installation |
|---|---|---|
| Time | Several days to weeks, depending on skill level | Typically 1–3 days |
| Cost | Lower upfront labor cost | Higher upfront cost ($1,500–$3,200+ for labor) |
| Warranty | Often voids the manufacturer's warranty | Preserves and validates the manufacturer's warranty |
| Risk | High risk of leaks, water damage, electrical mistakes | Low risk; professionals are licensed and insured |
| Complexity | Requires advanced plumbing, electrical, and carpentry | Handled by experienced, certified installers |
Based on the table above, we can clearly see the different requirements for various factors when choosing to install by yourself or hiring a professional. DIY takes a long time (several days to several weeks, depending on skills), while professional installation is more efficient (1 - 3 days); the initial cost of self-installation is low, but there may be additional expenses, while professional installation is more expensive ($1,500–$3,200+) but the guarantee is sufficient; self-installation will invalidate the warranty, while professional installation will be effective; self-installation has high risks (leakage, electrical failure, etc. may cause losses), while professional installation has low risks and often includes insurance; self-installation requires high skills (plumbing, electrical, carpentry) and is quite difficult, while professional installation is completed by experienced and certified personnel, and there is no need to worry about quality and safety! Therefore, it would be recommended to have professional installation in your house so as to ensure you a comfortable experience with peace of mind. We will further compare the advantages and disadvantages of these two installation methods later.
Step-by-Step Walk-In Tub Installation Process
A professional walk-in tub installation follows a structured and precise process to ensure safety, function, and longevity. Here’s a detailed breakdown of each step.
Assessment and Planning
Before any work begins, a thorough assessment is crucial.
- Accurate measurement and path confirmation: An installer will firstly measure the adaptability of the bathroom space, check whether the door frames, corridors and other channels can be transported smoothly, and old houses may need to be widened or demolished.
- Water supply pipeline system assessment: They will then check if the current water supply lines, drain system, and electrical circuits can support the new walk-in tub, confirm the adaptability of hot and cold water pipes, drainage and water pressure (High-end models require ¾-inch water pipes) replace aging parts in advance to prevent water leakage.
- Power system inspection: Electric heating, massage and other functions require additional power supply, and some models require independent 20-amp circuits. The installer may install a leakage protection device (GFCI) to prevent leakage, in accordance with relevant regulations.
- Ground structure inspection: A full walk-in tub is very heavy (including the human body) and can bear more than 500 pounds. Old floors need professional assessment and reinforcement to ensure long-term safety.
- Ventilation and moisture-proof assessment: They need to confirm the efficiency of the exhaust fan. It is recommended to replace the fully enclosed bathroom with a high-power model to prevent mold and corrosion.
Comprehensive assessment and planning can prevent rework and hidden dangers, improve efficiency, and extend longevity, which is essential.
Pre-Installation Preparation
With a plan in place, the next stage involves getting the site ready.
- Permits: Before installation, it is necessary to confirm whether plumbing, electrical or structural changes are involved, and whether local government permits are required. The processing time is usually 2-4 weeks, and the fees vary. It is most common for contractors to handle it, but owners can also apply for it themselves. Failure to obtain a permit will face fines or the risk of suspension of work.
- Water Heater: Walk-in bathtubs require 40-80 gallons of hot water and your water heater must be large enough to fill the tub with sufficiently hot water. It is recommended to use a gas water heater with more than 60 gallons, or an instantaneous system with an independent circuit. Multi-family households should upgrade the water heater and increase the capacity by 10-20 gallons to meet simultaneous water demand.
- Disruption Plan: Clear the bathroom items, including towels, toiletries, rugs, and decore. Ensure that the equipment access path is at least 36 inches. Imagine a standard walk-in tub is about 30 inches wide. A standard interior doorway is also 30 inches. This leaves zero room for maneuvering. This is why many installers need to temporarily remove the door and sometimes the frame to safely move the tub into the room. Always confirm your tub’s exact dimensions with the pathway it must travel. Besides, your installation team should use drop cloths to protect floors and furniture from dust and debris. You also need to arrange backup bathing facilities, such as guest bathrooms, gyms or temporary toilets. An adult should be present during installation to ensure smooth construction communication and ensure the safety of children and pets.
- Structural and spatial preparation: Make sure the tub can pass through the doorway, which is 28–34 inches as standard, and some models require the removal of the door frame. A tub filled with water weighs up to 800 pounds, and old or mobile homes may need to reinforce the floor. Additionally, remember to check if the drainage system needs to be modified, and ventilation regulations must be met to prevent blockage.
- Electrical and safety upgrades: Install GFCI outlets to meet national electrical codes, each costing $150–$300. Bathtubs equipped with showerheads or heated seats require independent 15-amp circuits, and wiring costs $400–$1,200. Check lighting and ventilation, and it is recommended to install ≥80 CFM exhaust fans to prevent mold.
- Budget and Contract Coordination: The total budget is between $3,000–$15,000, including the bathtub, construction and upgrade costs. Reserve funds for unexpected repairs (such as replacing rotten floors). It is recommended to obtain more than 3 quotes to confirm the contractor's qualifications and warranty services. Coordinate the installation date and material delivery time in advance to ensure that the construction is not delayed.
Summary: Preparing for compliance, structure, electricity and living arrangements in advance is the key to ensuring the smooth installation and safe use of walk-in bathtubs. Systematic planning can significantly reduce risks and costs, improve construction efficiency and living comfort.

Installation Process
This is where physical work starts. After all the preliminary preparations are ready, the installation officially begins. The whole process usually follows the following steps:
Removal of old tub:
First, the team will carefully remove the old bathtub or shower fixture. For old houses, sometimes some tiles or even walls need to be removed. This stage is very critical because it can reveal hidden problems, such as whether the floor or wall is damp, rotten or moldy. Once a problem is found, it must be repaired in time before the installation of the new tub.

Site Modification and Framing:
The space must be perfectly prepared for the new walk-in. If the ground is not strong enough, the installer needs to reinforce the joists from below to ensure that the new bathtub can be installed steadily. At the same time, the frame of the wall must also be adjusted so that it can just accommodate the exact dimensions of the new tub you selected.
Plumbing and Electrical Adjustments:
Next is to rearrange the hot and cold water pipes and drainage system to ensure that they can be seamlessly connected to the interface of the new bathtub. Most walk-in tubs require updates to the existing utilities. The installer will reconfigure the hot and cold water supply lines and the drain assembly to match the connections on the walk-in tub. If you install a bathtub with features like hydrotherapy jets, air jets, or an inline heater, you need an electrician to connect it to a circuit with leakage protection. This is for your electrical safety and must not be ignored.
Placement and Connection:
This is the moment the new tub is in place. This step requires very careful movement of the bathtub into the bathroom, so the crew will carefully navigates the tub into the bathroomand and even the door frame must be removed if necessary. After the bathtub is placed, they will use the adjustable feet to adjust it to a horizontal state so that there will be no problems with drainage. Then, they will connect the water pipes, wires and drain pipes one by one. All connections must be firm and correct to avoid troubles such as water leakage and electric leakage in the future.
Sealing and Finishing:
With the tub connected to the plumbing, the final construction takes place. The edge of the bathtub should be sealed with mildew-proof silicone to prevent water from seeping into the wall. The wall should also be equipped with waterproof wall panels or tiles to create a fully enclosed waterproof area. Finally, the team will install the faucet, shower head and other hardware and finish the edges. Then the appearance and practicality of the entire bathroom will be greatly improved.
Final Testing and Safety Inspection:
After all the installations are completed, a comprehensive test must be carried out. Turn on the water and power to ensure that all functions can operate normally. The team will fill in the tub and test the drain, checking the fill time (usually 6–15 minutes) and drain time (5–10 minutes). Also, they will check the handrails, door seals and other safety parts to ensure they are strong and reliable and provide adequate protection for daily use.
Although the whole process may seem complicated, every step is crucial. Only by doing meticulous work can the new bathtub be truly safe, practical and durable.
Professional vs. DIY Walk-In Tub Installation
While the idea of saving money with a DIY install is appealing, a walk in tub installation is a complex home improvement project.
Professional installation services are highly recommended for most homeowners. The risks associated with improper installation are significant. A small mistake in sealing can lead to catastrophic water damage, and incorrect electrical work is a serious safety hazard. Most popular walk-in tub brands require certified professionals to provide professional installation to keep the warranty valid.
A DIY approach might be possible if you have extensive experience in plumbing, electrical work, and carpentry. You must be prepared to handle unexpected challenges, like rerouting pipes or repairing a damaged subfloor.
Pros & Cons: Choosing Your Installation Method
| Method | Pros | Cons |
| Professional Install | High-quality, guaranteed work. Fast completion (1-3 days). Warranty is protected. Safe and code-compliant. | Higher initial cost. You must schedule work with a contractor. |
| DIY Install | Saves money on a contractor's labor fees. You work on your own schedule. | Voids most warranties. High risk of costly mistakes. Takes much longer. Requires specialized tools. |
This table compares the pros and cons of hiring a professional to install versus installing it yourself: The advantages of professional installation are that the work is reliable, the quality is guaranteed, and the installation is fast, usually completed in 1 to 3 days. It is safe and compliant, and the product warranty will not be affected. But the disadvantage is that it costs a lot of money at the beginning, and you have to make time with the construction team. It is suitable for those who value quality and safety, have little time, and are willing to spend money to save trouble. Installing it yourself can save labor costs and have more freedom in time arrangement. But there are also many drawbacks. It is easy to invalidate the warranty. There is a high risk of mistakes during installation, and the loss may be greater if problems occur. It is also very time-consuming and requires special tools and techniques. It is suitable for people with relevant experience, limited budget but more time.
Pre-Installation Checklist
Feeling prepared? A checklist can ensure your home improvement project goes smoothly. Before you sign any contract, go through these points.
- Accurate Measurements: Have you measured the tub space, bathroom, doorways, and hallways?
- Water Heater Check: Is your water heater at least 40-50 gallons? Is it adequate for the water capacity of your chosen tub?
- Structural Review: Has a professional assessed your floor to confirm it can support the weight of the tub filled with water and a person?
- Permits and Codes: Have you or your contractor checked with your local municipality about permit requirements for the plumbing and electrical work?
- Installer Vetting: Have you chosen a licensed, insured, and certified installer?
- Clearance and Access: Is the path from the front door to the bathroom clear for the delivery team?
- Features Confirmation: Have you finalized all desired features (air jets, hydrotherapy, quick drain) with your provider?
Real-World Installation Insights
Every installation process is unique. Here are a few common scenarios homeowners encounter.
Case Study 1: The Subfloor Surprise
- The Plan: A homeowner in a 40-year-old house wanted to replace an old bathtub with a standard walk-in tub. The project seemed straightforward.
- The Surprise: After removing the old tub, the installer found the subfloor was soft and rotten from a slow, decades-old leak.
- The Solution: The project was paused for a day while the crew removed the damaged wood, replaced the subfloor, and ensured the area was structurally sound before proceeding with the tub install.
- The Takeaway: Always budget for the unexpected. Hidden damage is common in older bathrooms.
Case Study 2: The Narrow Doorway
- The Plan: A family purchased a bariatric walk-in tub, which is wider than standard models, for a small bathroom.
- The Surprise: Despite measuring the bathroom itself, they overlooked the narrow 28-inch doorway. The tub could not fit through.
- The Solution: The installation team had to remove the door and its frame, carefully guide the tub inside the tub area, and then rebuild the frame.
- The Takeaway: Measure every point of entry, not just the final destination.
Expert Quote: "The biggest mistake I see is homeowners underestimating the prep work. It's not just about swapping one tub for another. We often have to retrofit the space, reinforce floors, and upgrade plumbing. That's why a professional assessment is step one."
Cost Breakdown and Hidden Expenses
Understanding where your money goes is essential for budgeting. The total walk-in tub cost can be broken down into several parts.
Itemized Installation Cost Table
| Item / Service | Typical Cost Range | Notes |
| Walk-In Tub Unit | $1,500 – $11,500+ | A basic walk-in tub is at the low end; models with jets are higher. |
| Labor / Installation | $1,500 – $3,200+ | Covers demolition, placement, connection, and finishing. |
| Demolition | $150 – $500 | Cost of removing the old tub and surround. |
| Plumbing Work | $500 – $2,000 | For moving supply lines or upgrading the drain. |
| Electrical Work | $300 – $1,500 | For adding a new GFCI circuit for powered features. |
| Finishing Materials | $250 – $1,000 | Includes wall surrounds, caulk, and any necessary drywall repair. |
From this table, we can see that the installation costs of walk-in bathtubs are as follows:
Basic Cost Composition
The total cost of installing a walk-in bathtub generally includes the following:
- The walk tubs prices themselves (more than $1,500-11,500), the basic model is cheap, and the one with functions such as hydromassage is expensive.
- Installation labor costs (more than $1,500-3,200), including removing the old bathtub, installing a new one, connecting pipes, sealing, etc.
- Demolition costs (US$150-500), which means removing the original bathtub or shower device.
- Pipeline modification costs (US$500-2,000), which are only required to move the water pipe or upgrade the drainage system.
- Electrical engineering costs (US$300-1,500). If the bathtub has electric functions, a new circuit must be installed.
- Decoration material costs (US$250-1,000), used for wall enclosures, waterproof glue, etc.
These are basic budgets and must be planned according to actual needs.

Factors That Increase Your Installation Cost
- Major Bathroom Remodel: Large-scale renovation of the bathroom. If you decide to replace the toilet, vanity, or flooring at the same time.
- Structural Repairs: If the floor is rotten or the structure is unstable, it will cost extra to repair the foundation or wooden beams.
- Plumbing Reroutes: If the bathtub is installed far away from the original pipes, it will cost more to re-route the water pipes or drain lines to a new wall.
- Electrical Upgrades: If the capacity of the electrical box is not enough, it will cost extra to replace the electrical box, add a circuit or have an electrical panel upgrade.
- High-End Features: Hydro and air jets, chromatherapy, aromatherapy, and fast-drain technology all add to the price.
These additional expenses are often discovered during construction, so it is recommended to reserve 10%-20% of the budget for emergencies.
Financial Tip: While Medicare does not cover walk-in tubs, the cost may be partially tax-deductible as a medical expense if prescribed by a doctor for a specific medical condition. Consult a tax professional for advice.
Summary suggestions
The installation cost of walk-in bathtubs varies greatly, which is related to product configuration and construction conditions. When calculating the budget, in addition to equipment and installation fees, you must also consider possible structural, electrical, and plumbing renovation costs. By planning carefully, anticipating risks, and consulting professionals, you can install a safe and comfortable bathtub within your budget.
After Installation: Maintenance and Support
Your relationship with your walk-in tub doesn't end after the install. Proper care ensures it lasts for years.
Brand Warranty and Service Comparison
| Support Feature | What to Look For |
| Tub Shell Warranty | Lifetime warranties are common and a good sign of quality. |
| Door Seal Warranty | A lifetime guarantee on the door seal is critical. |
| Component Warranty | Check the warranty length for pumps, jets, and faucets (often shorter). |
| Labor Warranty | Look for installers who guarantee their workmanship for at least one year. |
First-Month Care Tips:
- Check for Leaks Regularly: Ensure that the installation and seal are in good condition. In the first few weeks of use, pay more attention to the bottom of the bathtub, the edge of the door, and the joints with the ground to see if there is any water seepage. Even a little water mark may be due to aging of the seal ring, loose drain pipes, or improper installation seams. Find an installer to repair it immediately to prevent the floor from getting damp and moldy, and the structure from breaking down over time.
- Clean Gently: Most walk-in bathtub shells are made of acrylic, which has a smooth and shiny surface, but can be easily damaged by hard cleaning tools or highly corrosive objects. It is recommended to wipe it every day with a soft cloth dipped in a PH-neutral, non-abrasive detergent. Do not use bleach, ammonia, or alcohol-based substances. Regular maintenance can prevent scaling, watermarks, and surface discoloration.
- Run the Jets: If the bathtub has a water jet or air jet, run a cleaning cycle at least once a month. Generally, after filling the system with water, add a special cleaning solution, and run the system for a few minutes to flush out the soap residue, skin oil and bacteria left inside. This can prevent strange odors, nozzle blockage, and make the water pump last longer.
Summary: The first month is a critical time to develop good usage habits and confirm product quality. Early inspection can nip problems in the bud; gentle wiping can make the appearance look new; and frequent maintenance can keep the system unobstructed. Adhere to these meticulous maintenance, not only will it be more comfortable and safe to use, but it will also lay a good foundation for long-term and reliable use in the future.

Interactive Tools & Homeowner Resources
Finally, here are some additional resources for your information. To help you plan, consider these resources:
Installation Cost Estimator To get a rough idea of your costs, consider these variables.
| Feature / Location | Lower Cost Estimate | Higher Cost Estimate |
| Tub Type | Soaker Tub ($1,500) | Hydrotherapy Combo ($8,000+) |
| Labor (Low COL Area) | ~$1,500 | ~$2,500 |
| Labor (High COL Area) | ~$2,200 | ~$3,500+ |
| Extra work | None | Plumbing & Electrical ($2,500+) |
| Total (Example) | ~$3,000 - $5,000 | ~$10,000 - $15,000+ |
How to Find a Certified Local Installer:
- Start with the manufacturer of the tub you want to buy. They often have a network of certified installers.
- Check for contractors with licenses for plumbing and electrical work.
- Ask for proof of insurance.
- Read reviews and ask for references from past walk-in tub installation jobs.
Walk-In Tub Installation FAQs
1. What is the average price of a walk-in bath?
The total price for a walk-in bathtub including installation is $3,000-15,000, depending on many factors. Basic models without nozzles and other functions are $2,500-5,000; mid-range models with bubble/spa nozzles, fast-charging faucets, and heated backrests are $6,000-10,000; high-end two-seater, wheelchair-accessible or dual-therapy models are over $12,000. The installation cost of a walk-in bathtub varies greatly depending on the complexity. The cost of installing a walk-in bathtub depends on the extent of the modification. It is cheaper to replace the same size, but the price will increase if the circuit, plumbing, permit or custom renovation are changed. Ask for detailed quotes for comparison. Part of the cost can be reimbursed when medically necessary, and related subsidies can also reduce the burden and make the bathroom safer. It is more cost-effective to sort out quotes.
2. Can I install a walk-in tub myself?
While it is technically possible for someone with advanced DIY skills, it is strongly discouraged. A walk in tub installation requires licensed plumbing and electrical work as well as structural assessments and compliance with local building codes. If you are not a certified expert, improper installation may cause leaks, electric shocks, and even damage to the floor. In addition, most manufacturers require professional installation to guarantee the warranty. If you damage the tub yourself, the cost of repairs may not be covered. Removing the old tub, adjusting the plumbing and electrical systems, reinforcing the floor, and doing a good job of drainage all require professional skills and tools. For peace of mind, safety, and ease of use, it is best to find a certified professional. Although it is more expensive upfront, it can save tens of thousands of dollars in future repair costs, and it will also be up to code.
3. How long does the installation take?
For most standard installations, replacing a walk-in bathtub of the same size only takes 1-2 days, including removing the old bathtub, installing the new bathtub, connecting water and electricity, leak testing and sealing. Complex walk-in tub installations can often extend beyond 3 to 5 days due to several factors. These include necessary adaptations to plumbing and electrical systems for advanced features like heated seats or hydrotherapy jets, ventilation and moisture control upgrades to prevent mold, and reinforcing the floor to support the tub’s substantial weight. Full bathroom renovations that accompany the installation will also add to the timeline. Projects that require permits and inspections may experience additional delays due to approvals and scheduling. Consulting with licensed professionals in advance can accurately assess the workload, set a reasonable deadline, and be prepared. This proactive planning can reduce unexpected delays and costs and ensure safe and efficient installation. Smooth communication between the owner and the construction party is the key to a smooth and successful project.
4. Does having a walk-in tub devalue your home?
A walk-in tub is a specialized feature. Elderly people or people with limited mobility particularly like walk-in bathtubs, which are safe, comfortable and considerate. Houses in communities with many elderly people or multiple generations living together are more popular. Young people or families with children think it is not practical enough and prefer ordinary bathtubs or shower combinations. Some people even think they have to replace it in the future. Overall, its impact on home value depends heavily on the target buyer. If you plan to care for or provide care for an elderly person, the comfort and security it brings will far outweigh these concerns when it comes time to sell your home.
5. Can any bathroom accommodate a walk-in tub?
Not always. Although many walk-in tubs (especially compact ones) can be installed in standard tub recesses, you need to consider the following points:
- Is there enough space: After the tub is installed in the recess, the door (opening inward or outward) must have enough space to open and close. In a small bathroom, if the door is open outward or there is a toilet or sink nearby, it will be very troublesome.
- Is the floor strong enough: When the tub is filled with water and someone is using it, the weight may exceed 500 pounds, so the floor and the beams below must be able to withstand it. Old houses may need reinforcement.
- Is the water and electricity remodelable: Usually the water pipes and drainage systems need to be replaced, and bathtubs with heating or massage functions need separate circuits. All modifications must comply with local regulations.
- Layout and access: If the hallway is narrow and the door size is too small, it may not be able to be carried in and needs to be modified.
It is recommended to ask a professional to evaluate on site, they can determine whether it is safe to install!
References
- U.S. Centers for Disease Control and Prevention: Older Adult Fall Prevention https://www.cdc.gov/falls/index.html
- U.S. Department of Housing and Urban Development: Residential Remodeling and Universal Design https://www.huduser.gov/portal/publications/destech/resid.html


Leave a comment
This site is protected by hCaptcha and the hCaptcha Privacy Policy and Terms of Service apply.