


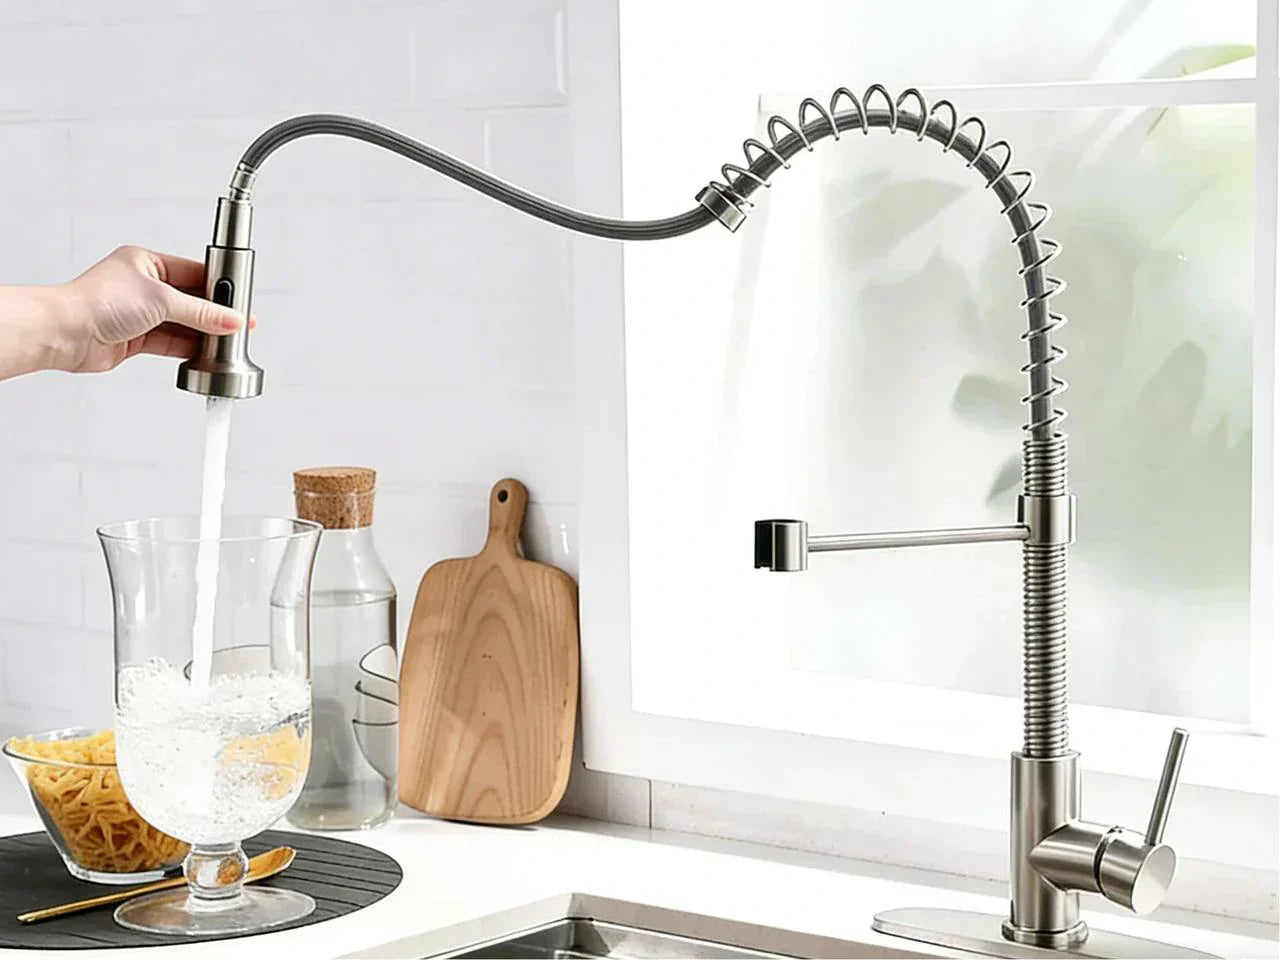
If you are searching for how to replace a pop up drain plug, you probably have a bathroom sink that is slow, leaking, or stuck shut. The good news is that most replacing pop up drain plug projects take 30–60 minutes, cost less than a takeout dinner, and do not require a licensed plumber or special skills. By learning how to replace sink stopper and handle replacing pop up drain plug, you can save time and money.
A pop-up drain plug (also called a pop-up sink stopper or bathroom sink drain stopper) is the small plug in the sink bowl that you open and close with the lift rod on your faucet. Over time, hair, soap scum, and minerals build up around the stopper and inside the drain assembly. The pivot rod that moves the stopper can wear out, the gasket can fail, or metal parts can corrode. That is why so many bathroom sinks with pop-up drains start to leak or jam after a few years.
Most U.S. bathroom sinks use some form of pop-up drain, and a large share of them develop problems every year. Learning to handle replacing pop up drain plug yourself can save you roughly $150–$250 compared with a typical plumbing visit. When you follow the steps carefully and understand how to install a pop up sink stopper, you have an excellent chance of a leak‑free, smooth result.
This guide walks you through everything: how to tell if you really need a new stopper, how to choose the right type and size, tools and prep, step‑by‑step removal and installation, troubleshooting, and when it does make sense to call a pro.
Quick Answer – How to Replace a Pop Up Bathroom Sink Drain Stopper (Step Overview)
Here is the fast overview before we go into full detail.
Time and difficulty:
About 30–60 minutes for most sinks. This is a beginner‑friendly home repair if you can kneel under a sink and use simple hand tools.
Core steps for how to replace a pop up drain plug:
-
Clear out the cabinet and place a bucket or pan under the sink drain and P-trap.
-
Underneath the sink, disconnect the lift rod linkage and pivot rod from the old stopper.
-
Loosen the P-trap and remove it or swing it out of the way.
-
Loosen the large locknut that holds the drain body, then remove the old drain body and stopper.
-
Clean all old plumber’s putty or silicone from the sink drain opening at the top of the sink.
-
Apply fresh sealant, install the new drain flange from above, and tighten the drain body from below.
-
Insert the new stopper into the drain opening, attach the pivot rod, then reconnect the lift rod linkage.
-
Reinstall the P-trap, run water, check for leaks, and test the pop-up action to make sure it opens and closes fully.
Most replacements do not involve cutting pipes or opening walls. If you can handle pliers and a wrench and you are willing to work beneath the sink for a bit, you can usually replace a bathroom sink pop-up drain stopper on your own.
Do You Really Need to Replace Your Bathroom Sink Pop Up Drain Plug?
Before you start pulling parts apart, it helps to know whether you truly need a full stopper replacement or if a quick clean or small adjustment will fix the issue.
Think about what your sink is doing right now. Does the pop-up drain stopper refuse to stay closed, so the water slowly drains away while you shave or wash your face? Does the stopper stay down when it should come up? Maybe it wobbles, or the finish is flaking off, or you see water dripping into the cabinet beneath the sink.
Signs you should replace the pop-up, not just clean it
You likely need to replace the stopper or full drain assembly if:
-
The stopper will not stay up or down. Often this means the pivot rod is worn, bent, or broken, or the base of the stopper is cracked where the rod connects.
-
You see corrosion, pitting, or peeling finish on the top cap or drain flange. At that point, cleaning will not restore the surface.
-
Water leaks around the drain opening at the top of the sink even after you have tried tightening from below.
-
The plastic parts around the pivot rod or nut are cracked, or water drips from the pivot rod nut every time you fill the sink.
-
You have repaired or re-sealed the same drain more than once, and the leak always comes back.
In these cases, replacing a pop up sink stopper or the entire pop-up assembly is easier and more reliable than more patching.
When a simple fix is enough
On the other hand, you may not need to replace the old stopper if:
-
The sink drains slowly but the stopper still opens and closes. In that case, you may only need to clean the drain stopper and remove hair and soap from inside the drain and P‑trap.
-
The stopper will not move much, but when you look under the sink you see the lift rod and clevis strap are loose. Tightening the clevis screw or moving the spring clip can often adjust the drain stopper without new parts.
-
Hard white buildup (minerals from hard water) is making the stopper stick. Soaking the stopper and pivot rod in white vinegar can help remove deposits and restore smooth motion.
A quick test: if the main issues are clogs and gunk, start with cleaning. If the problems are broken parts, rust, or leaks around joints, replacing the stopper or full drain assembly makes more sense.
Can You Replace a Bathroom Sink Pop-Up Drain Stopper Yourself?
Yes. In most homes, you can replace a pop-up sink plug yourself without calling a professional plumber. You do not need to cut into walls or glue pipes. You will be working with threaded nuts, washers, and gaskets that tighten and loosen with simple hand tools. As long as you move slowly, keep track of parts, and check for leaks, you can do it safely and confidently.
Pop-Up Drain Plug Types, Sizes & Compatibility (Before You Buy)
Before you buy a new stopper assembly or full pop-up drain, you should understand what is already in your sink. This helps you pick a new drain that actually fits and works with your faucet and basin.
Basic Anatomy of a Pop-Up Drain Assembly
If you look under the sink, you will see more than just a plug. A typical bathroom sink pop-up drain stopper has several sink stopper parts:
At the top of the sink, you have:
-
The drain flange or rim you can see in the sink bowl.
-
The stopper or sink plug itself, which moves up and down inside the drain opening.
At the bottom of the sink, on the underside, you have:
-
The drain body or tailpiece, which passes through the sink and connects to the P-trap.
-
A rubber gasket and sometimes a plastic washer between the bottom of the sink and the large locknut.
-
A large nut (locknut) that holds the drain body tight to the sink.
Sticking out of the back of the drain body is the horizontal pivot rod. This rod goes through a small ball joint and nut. When you move the rod, it lifts and lowers the stopper.
Above that, attached to the faucet, you have:
-
The lift rod, the small vertical rod you pull up or push down to open and close the stopper.
-
The clevis strap, a flat metal strip with holes, which connects the lift rod to the pivot rod with a spring clip.
All of these parts together form the pop-up assembly. When you replace the whole assembly, you remove almost all of this and install a new set.
Types of Bathroom Sink Drain Plugs
Not every bathroom sink uses the same kind of drain plug. Knowing which you have helps you choose a good match or an upgrade. The same principles for selecting the right drain and ensuring smooth water flow can apply when planning your bathtub or shower area.
Common types include:
-
Standard pop-up (rod-operated) This is the most common style you see in bathroom sinks. You pull the lift rod behind the faucet, and the pivot rod under the sink lifts the stopper. This guide focuses mainly on this type, because it is what most people mean by pop-up drain.
-
Clicker / push-button (push-down) This type has a push button on the top cap. You press down once to close the drain and again to open it. There is no pivot rod or lift rod under the sink. Many people switch to this style when they are tired of linkage parts. If you are wondering how to install a pop up drain plug push button, the steps are similar to installing a standard drain body, but you simply drop the push-button stopper into the drain body from above and do not connect any rods underneath.
-
Lift-turn You twist the stopper to open or close it. These are common in bathtubs but sometimes used in vessel sinks. They do not use a pivot rod either.
-
Grid strainer This has a grid instead of a stopper, so water always flows. It is meant for sinks where you do not need to hold water.
-
Silicone or universal plugs These are simple rubber or silicone disks or cups you press over the drain to seal it. They are easy and cheap but are more of a quick fix than a long‑term replacement for a built‑in pop-up.
Disadvantages of a standard pop-up drain:
Why do some people move away from classic pop‑ups? They do have a few downsides:
-
Hair and soap tend to collect around the stopper and inside the drain, so you need to clean it often.
-
The pivot rod and linkage have moving parts that can wear out or rust.
-
The pivot rod hole can be a leak point if the nut or washer fails.
-
Adjusting the linkage to open and close fully can take a bit of fine‑tuning.
On the other hand, they give you a clean look and easy control from the faucet. If you maintain them, they can last many years.
Sizing & Overflow vs. Non-Overflow
Most bathroom sinks in North America use a 1‑1/4 inch drain size, but some use 1‑1/2 inch drains, especially larger or specialty sinks.
To check your size:
-
Measure the diameter of the drain hole at the top of the sink.
-
Look at the threads of the drain body underneath the sink. Many product boxes list both the hole size and thread size, so matching those numbers matters.
You also need to match overflow style.
Most regular bathroom sinks have one or more small holes near the top inside the bowl. These are overflow holes. They connect to a channel that leads back to the drain, helping prevent spills if you leave the faucet on by mistake.
Drains are made either with overflow or without overflow. If your sink has overflow holes, you must buy a drain labeled “with overflow,” so the side openings in the drain body line up with the channel inside the sink. If your sink has no overflow (common with vessel sinks), use a “without overflow” drain. Mixing them can lead to slow draining or leaks.
Finish, Material & Durability
Pop-up drains come in different materials and finishes. You will often see:
-
All‑metal drains (often brass or steel) with a plated finish.
-
Plastic drains with a metal cap.
-
All‑plastic drains.
Metal drains, when cared for, often last five years or more before the finish starts to show wear. Cheaper all‑plastic pop-up sinks may only last a few years before the pivot rod hole wears out or the plastic becomes brittle, especially if exposed to strong cleaners.
Choose a finish that matches or at least blends with your faucet: chrome, brushed nickel, black, or bronze are common. This is cosmetic, but since the drain flange is very visible, matching makes the sink fixture look neater.

Tools, Materials & Prep Checklist
Having the right tools and layout before you start makes the job smoother and less messy. You do not need anything fancy, just typical household hand tools.
Tools You’ll Need
-
Channel‑lock or slip‑joint pliers (for nuts on the P-trap and drain body)
-
Adjustable wrench (helpful for stubborn nuts)
-
Needle‑nose pliers (for small clips and tight spots)
-
Putty knife or plastic scraper (for scraping away old sealant)
-
Bucket, pan, or large bowl (to catch water)
-
Rags or towels (for wiping up drips)
-
Flashlight or work light (to see beneath the sink)
-
Safety gear: light work gloves and eye protection
Materials & Replacement Parts
-
A new pop-up drain assembly or new stopper assembly Try to buy a kit that includes: drain body, flange, stopper, pivot rod and ball, rubber gasket, plastic washer, locknut, clevis strap, lift rod, and spring clip. Even if you only plan on replacing the stopper and pivot rod, having extra parts on hand is useful.
-
Plumber’s putty or bathroom‑grade silicone sealant Many professional plumbers still use plumber’s putty to seal the drain flange. Others like silicone because it cures to a flexible, waterproof bond. We will talk more about the choice in a later section.
-
Teflon tape or pipe joint compound (optional, for threaded joints if needed)
You may already own most of these tools. The cost of new parts is usually between $10 and $50, depending on whether you replace just the stopper or the entire pop-up assembly.
Safety & Setup
Before you start, look under the sink and clear out everything: cleaners, baskets, toilet paper, and anything else stored there. Lay down an old towel to protect the cabinet floor and to make kneeling more comfortable.
It is rarely required, but you may choose to turn off the shut‑off valves to the faucet. You are not opening water lines, but some people feel better closing them whenever they are working in a tight plumbing space.
A helpful tip is to take one or two photos of the underside of the sink before you remove anything. Make sure you capture how the pivot rod connects to the clevis strap and lift rod. These pictures are a handy reference when you reassemble the linkage.
Step-by-Step – Removing the Old Pop-Up Drain Plug
Now we will walk slowly through how to remove bathroom sink stopper parts and the old drain so you can install a new one.
Step 1 – Access the Drain and Disconnect the Pivot Rod
First, slide your bucket or pan under the P‑trap (the U‑shaped pipe) to catch any water.
Shine your light beneath the sink. On the back side of the drain body you will see a horizontal rod sticking out. This is the pivot rod. It goes into the drain body through a small ball and is held in place by a pivot rod nut.
Behind the sink, attached to your faucet, you will see the lift rod. It connects to a flat metal strip with holes (the clevis strap). Somewhere along the strap, a small spring clip connects the clevis strap to the pivot rod.
To remove the linkage:
-
Use your fingers or needle‑nose pliers to squeeze and slide off the spring clip from the pivot rod.
-
Slide the clevis strap off the rod and let it hang from the lift rod.
-
Use pliers or your hand to loosen the pivot rod nut where the rod enters the drain body. Unscrew the nut and pull the horizontal pivot rod straight out.
Once the pivot rod is out, go to the top of the sink. You should now be able to lift the old stopper straight up and out of the drain opening. This answers a common question: How do you remove a bathroom sink stopper?
For a standard pop‑up, you remove or loosen the pivot rod nut beneath the sink, slide the rod out, and then simply pull the stopper out from above.
If the stopper feels stuck because of gunk, wiggle it gently while pulling up. You might see a clump of hair and soap appear with it. That is normal, just a bit messy.
Step 2 – Remove (or Loosen) the P-Trap
Next, you need space to remove the drain body.
The P‑trap is the curved pipe section under the sink. Water stays in the bend to block sewer gases. It is usually held in place by two slip nuts, one on each end.
-
Position your bucket under the trap.
-
Use your hands or pliers to loosen and remove the slip nuts at each end of the P‑trap.
-
Carefully lower the trap and pour any water into the bucket.
You can now look inside the trap. Since you already have it off, it is a good time to clean it. You may find more hair or sludge here. Rinse it out in a different sink or with a small brush.
If your trap design allows it, you may only need to loosen one end and swing the trap down out of the way. That can still give you enough room to remove the drain body.
Step 3 – Loosen and Remove the Drain Body & Flange
With the trap out of the way, focus on the bottom of the sink drain.
You should see:
-
The bottom end of the drain body / tailpiece.
-
A large threaded section.
-
A washer or two and a large locknut holding everything tight against the sink’s underside.
To remove the drain body:
-
Hold the drain body with one hand to keep it from turning.
-
Use pliers or a wrench to loosen the large nut by turning it counterclockwise. Once it breaks free, you can usually turn the nut by hand the rest of the way.
-
Note the order of the rubber gasket, any plastic washer, and the nut as you remove them. This helps during reassembly.
Once the nut and gaskets are off, go to the top of the sink. Grasp the drain flange and try twisting it back and forth. It may be held in place by dried plumber’s putty or silicone, so it can feel stuck.
Use a putty knife to gently work around the edge of the flange if needed, breaking the old seal. Do not pry hard against the porcelain; work slowly so you do not chip the sink. When the seal breaks, you can lift the drain flange up and out.
Back under the sink, pull the drain body down and out through the drain hole.
Now you have fully handled removing stopper from bathroom sink and its related drain body, which is the hardest part of the job for many people.
Step 4 – Clean the Sink Drain Opening
With all parts removed, the sink will have a bare hole where the drain was.
Use your putty knife or plastic scraper to carefully remove all traces of old plumber’s putty, silicone, and grime from the rim of the drain hole. Wipe the area with a rag and a small amount of mild cleaner. The surface should be clean, smooth, and dry before you install a new drain.
If you see hard mineral buildup around the edge, a bit of white vinegar on a cloth can help soften it. This prep step helps the new seal sit flat and reduces the risk of leaks later.
Installing the New Pop-Up Drain Plug Assembly
Once the old sink drain stopper and body are out and the opening is clean, you are ready to install a new drain.
The installation steps are mostly the reverse of what you did, but we will walk through them slowly so nothing gets missed.
Step 5 – Apply Sealant and Seat the New Flange
Here, many people ask: Do I need plumber’s putty for a pop-up drain?
In most cases, yes, you should use either plumber’s putty or bathroom‑grade silicone sealant under the drain flange. This seals the joint between the metal or plastic flange and the porcelain sink, preventing leaks.
-
Plumber’s putty is a soft, non‑hardening compound. You roll it like clay into a rope and press it under the flange. It stays flexible and is easy to remove later.
-
Silicone sealant is a liquid that cures to a rubbery, waterproof seal. It is more permanent and a bit harder to remove, but works very well in wet areas.
Both are fine when used correctly. If your sink or drain manufacturer gives a clear rule, follow that. Some synthetic or special sinks do not allow plumber’s putty; in that case, use silicone.
To apply:
-
Take a piece of plumber’s putty and roll it between your hands into a rope about 1/4 inch thick. Lay this rope around the underside of the drain flange rim.
-
Or, if using silicone, run a continuous bead around the underside of the flange.
-
-
From the top of the sink, insert the flange into the drain hole and press down firmly and evenly. A little extra putty or sealant should squeeze out around the edge; you can wipe this later.
Leave the flange in place and do not twist it much now.
Step 6 – Attach the Drain Body and Tighten the Locknut
Next, go under the sink with the rest of the drain assembly.
-
Slide the rubber gasket up over the drain body so it will press against the underside of the sink. If your kit includes a plastic washer, that usually goes between the gasket and the nut.
-
Insert the drain body up through the hole from underneath so that its top threads engage with the flange thread above.
-
While holding the drain body, thread the large locknut onto the drain body by hand. Make sure the gasket is seated flat against the sink bottom.
Before you tighten fully, pay close attention to the pivot rod opening in the side of the drain body. It should be pointing straight back, toward the wall, so the pivot rod can move in a straight line to the clevis strap.
Once the alignment looks good:
-
Snug the nut by hand, then use pliers or a wrench to tighten the nut another small amount. Do not over‑tighten. You want it secure enough to squeeze the gasket and seal the flange, but not so tight that you crack the sink or deform the gasket.
Go back to the top of the sink and wipe away any excess putty or silicone that squeezed out around the flange.
Step 7 – Install the Stopper and Pivot Rod
Now it is time to insert the stopper into the drain and connect the moving parts. This is a critical step when replacing pop up drain plug because proper alignment ensures smooth operation. Follow the instructions carefully to complete how to install a pop up sink stopper correctly.
-
Drop the new stopper down into the drain flange from above. Some stoppers have a notch or flat side at the bottom that must face the back of the sink to receive the pivot rod. Check for any such feature and aim it toward the back.
-
Under the sink, slide the pivot rod into the opening on the side of the drain body. As you push the rod in, wiggle the stopper slightly up and down. You are aiming for the rod to go into the opening on the bottom of the stopper. When it connects, you will feel the stopper move as you move the rod in and out.
-
Once engaged, slide the pivot rod nut over the rod and thread it into the drain body by hand. Tighten it gently with pliers. It needs to be snug enough to hold the rod and ball in place, but not so tight that the stopper cannot move smoothly.
Test the action by pulling the pivot rod up and down by hand. The stopper should move up and down inside the drain. If it does not move or feels locked, remove the nut and try again until the rod seats in the stopper.
If the stopper is designed to be removable for cleaning, you should still be able to lift it out while depressing the pivot rod. Check your kit’s instructions for this detail.
Step 8 – Reconnect the Lift Rod and Clevis Strap
Now you will reconnect the control linkage so the faucet handle can move the stopper.
-
Slide the lift rod down through the hole in the top of the faucet (if it is not already there). Under the sink, the bottom of the lift rod should pass through one of the holes in the clevis strap. Secure it with the provided screw or clip.
-
Move the lift rod to its full “down” position (which is usually the drain open position).
-
Position the clevis strap so its bottom holes line up with the pivot rod. Slide the pivot rod through one of the holes in the clevis strap. Then reattach the spring clip by sliding it over the rod, clamping the strap between the two ends of the clip.
You may need to experiment with which hole in the clevis strap you use. The goal is simple: when the lift rod is fully up, the stopper should be fully closed and seal the water. When the lift rod is down, the stopper should pop up fully and let water drain freely.
This step is where you adjust the drain stopper to work just right.
Step 9 – Reinstall the P-Trap and Check Alignment
Finally, reconnect the drain to the rest of the plumbing.
-
Reinstall the P‑trap between the drain tailpiece and the wall pipe. Make sure each slip joint has its washer in the correct position.
-
Thread the slip nuts on by hand first to make sure they are not cross‑threaded. When they are fully engaged, snug them slightly with pliers if needed. Do not crank them down hard; hand tight plus a small tweak is usually enough.
-
Look at the trap and tailpiece. They should line up naturally without strain or bending. If the trap looks pulled to one side, loosen the nuts and adjust.
You have now finished the basic DIY pop-up drain installation.
Testing, Troubleshooting & Fine-Tuning
Before you pack up your tools, you need to test for both leaks and smooth movement.
Leak Test
Turn on the faucet and let the water run while you watch carefully beneath the sink. Check these spots:
-
Around the bottom of the drain flange at the top of the sink (look for water seeping around the rim).
-
Where the drain body meets the bottom of the sink, near the rubber gasket.
-
At the pivot rod nut.
-
At both slip joints on the P‑trap.
If you see drips:
-
At the top flange or where the drain body meets the sink: you may need to tighten the locknut a bit more or reseat the gasket. In some cases, removing the drain and reapplying putty or silicone is the best fix.
-
At the pivot rod nut: check that the washer or ball inside is sitting correctly, then tighten the nut gently. If it still leaks, the internal washer may be damaged and you might need to use the replacement from your kit.
-
At the P‑trap joints: check that the slip washers are facing the right direction and not twisted.
Run the water for a few minutes to make sure no slow leaks appear.
Function Test – Stopper Action
Next, test how the drain stopper works in real use.
-
Push the lift rod down so the stopper is open. Let the sink run and watch how quickly it drains.
-
Pull the lift rod up to close the stopper. Fill the sink halfway with water. Wait a couple of minutes and check whether the water level is holding. A small drop over time can be due to tiny air leaks, but significant loss means the stopper is not sealing well.
-
Open the stopper again and watch the water drain. It should pop up smoothly and allow water to run out at normal speed.
If the stopper does not fully close and leaks:
-
Move the pivot rod to a hole closer to the lift rod on the clevis strap. This gives you more pull and helps press the stopper down harder.
If the stopper does not fully open and drains slowly even when “open”:
-
Move the pivot rod to a hole farther from the lift rod or slightly lower on the clevis strap. This allows more travel upward.
Common Issues & Fixes
-
Stopper sticks or feels gritty when you open and close it Some debris may have fallen back inside the tailpiece. Remove the stopper and rinse both it and the inside of the drain. A thin layer of silicone‑safe plumber’s grease on the stopper stem (if allowed) can help.
-
New pop-up drains slowly even after a full replacement The issue may be farther down the line, in the wall drain or beyond. A small clog can remain in the line. You may need a small drain snake to clear this.
-
New leak at the pivot rod nut Make sure the small ball and washers on the rod are in the right order and that the nut is not cracked. Many new stopper assemblies include a spare rod and ball; swapping them in often solves stubborn leaks.

Best Replacement Pop-Up Drain Plugs & Alternatives (2025)
When you shop for a replacement bathroom sink drain plug, you will see many options. How do you decide what to buy?
How to Evaluate Pop-Up Replacements
Here are simple points to consider:
-
Material and durability – All‑metal units usually last longer than thin plastic ones, especially at the pivot rod opening and threads.
-
Type – Decide whether you want another standard rod‑operated pop‑up, a push‑button clicker, or even a simple silicone plug.
-
Overflow style – Match your sink: with overflow or without overflow.
-
Ease of cleaning – Some stoppers are designed to be pulled out easily for cleaning hair.
-
User reviews and ratings – If you shop online, read comments about leaks and finish wear.
Top 5 Common Replacement Styles Under $50
Here is a general comparison of the most common replacement pop-up drain plugs and alternatives you will see, without focusing on brand names.
| Product Type | Mechanism | Material / Finish Options | Price Range (approx.) | Key Benefit | Best For |
| Standard metal pop-up w/ overflow | Lift rod + pivot rod | Metal body, plated flange | $20–$40 | Long life, matches most faucets | Typical bathroom sinks with overflow |
| Standard plastic pop-up w/ overflow | Lift rod + pivot rod | Plastic body, metal cap | $10–$25 | Budget‑friendly, light weight | Guest baths, rentals, low‑use sinks |
| Push‑button clicker (with overflow) | Push to open / close | Metal or metal/plastic mix | $20–$45 | No under‑sink linkage to adjust | When lift rod parts are missing or broken |
| Non‑overflow clicker or grid drain | Push‑button or always open | Metal or plastic | $15–$35 | Simple, few moving parts | Vessel sinks without overflow |
| Universal silicone or rubber plug | Press‑down suction / seal | Silicone or rubber | $5–$15 | No tools, instant temporary solution | Quick fix, dorms, renters, travel |
When to Choose a Full Assembly vs. Just a Stopper
Should you replace just the pop-up drain stopper or install a new drain assembly?
Choose a full assembly when:
-
The visible drain flange is badly worn or corroded.
-
The gasket sealing area at the bottom of the sink is damaged.
-
The pivot rod connection or threads on the old drain body are cracked.
-
You have had repeated leaks around the drain body.
You can often replace only the stopper and pivot rod when:
-
The drain body and flange are solid, with no leaks.
-
The only problems are a broken stopper base, a worn pivot rod, or a missing clip.
-
You want a quick, cheaper fix and are happy with the current finish.
If your sink and faucet are older and you plan to keep them a while, installing a new drain at the same time gives you a fresh start and often looks better.
Maintenance Tips to Make Your New Pop-Up Last Longer
Once your sink pop-up works smoothly again after replacing pop up drain plug, a bit of simple care can keep it that way for years. Based on EPA, choosing and maintaining efficient bathroom fixtures such as WaterSense‑labeled faucets and aerators can reduce water waste and improve the overall performance of your sink drain system. If you are upgrading your bathroom, consider complementing your sink with a modern smart toilet for enhanced hygiene and easy maintenance. Regular checks and occasional cleaning of the stopper will prolong its life and prevent clogging. Understanding how to replace sink stopper properly makes this maintenance much easier.
Simple Monthly Maintenance
Every month or two, take a moment to:
-
Pull the stopper out of the drain (by disconnecting the pivot rod or lifting if it is a clicker type) and remove hair and debris from the stem and around the opening.
-
Rinse the stopper and the inside of the drain with warm water.
-
Wipe around the drain flange to remove soap scum.
This small habit stops clumps of hair from forming deep inside the tailpiece or P‑trap.
Avoid pouring harsh drain chemicals down a new pop‑up if you can. Enzyme‑based or gentle cleaners are kinder to rubber gaskets, plastic washers, and metal finish.
Preventing Corrosion and Mineral Buildup
If you live in a hard‑water area, white mineral spots around the sink drain are common. To reduce buildup:
-
Wipe standing water out of the sink after baths, face washing, or shaving.
-
Now and then, soak a cloth in white vinegar and lay it around the drain flange for a few minutes, then wipe clean. This helps reduce scale without strong acids.
Try not to scrub the drain with very rough pads, which can scratch the finish and make corrosion more likely later.
Signs It’s Time for Another Replacement
Over time, even a well‑maintained pop‑up can wear out. Watch for:
-
Growing leaks around the flange or gasket even after you re‑tighten nuts and refresh sealant.
-
A stopper that keeps sticking or jumping off the pivot rod, showing that internal parts are worn.
-
Finish on the stopper or flange that is peeling, chipping, or rusting, and is hard to clean.
When these signs appear, repeating the steps in this guide to replace the sink stopper or assembly will usually restore your bathroom sink to like‑new function.
When to Call a Plumber (and What It Costs)
Most people can handle replacing a pop up drain plug. Still, there are times when calling a professional plumber is the safer or faster path.
Situations Where DIY May Not Be Enough
Consider calling a pro if:
-
The metal drain body is so corroded that it twists or crumbles when you try to loosen the nut.
-
Your sink is mounted in a tight or unusual way, for example an underslung stone sink with very poor access.
-
There are visible cracks in the porcelain or around the drain opening of the sink.
-
Even after you install a new drain and check your work, you see water leaking not just at joints but deeper in the wall or floor.
In those situations, a licensed plumber has specialized tools and experience to handle stuck parts and hidden leaks without extra damage.
Typical Professional Costs
Plumbing prices vary by area, but to give a rough idea:
-
A basic service call and simple drain stopper replacement may cost around $150–$250, including labor and parts.
-
If the plumber needs to install a new drain assembly and possibly replace parts of the P‑trap or wall connection, costs can be higher.
-
If the plumber discovers deeper problems, like damaged drain lines in the wall, repair can cost much more.
By doing this project yourself, you usually pay only for the parts (often under $40) and maybe one or two small tools you do not already own.
How to Prepare If You Call a Pro
If you decide you want help:
-
Take clear photos of the top of the sink, the bottom of the sink, and all visible plumbing underneath.
-
Note whether the sink has overflow holes.
-
Decide what finish you want on the new drain so the plumber can bring a matching part.
This helps the plumber give you a more accurate estimate and complete the job in one visit.

Conclusion & Key Takeaways
Replacing pop up drain plug in a bathroom sink is a straightforward project for most homeowners. By following step-by-step instructions and understanding how to replace sink stopper, you can achieve professional results without hiring a plumber. Regular maintenance and care after replacing pop up drain plug ensures the sink remains fully functional for years. With basic tools, a little patience, and clear steps, you can fix leaks, sticky stoppers, and slow drains without calling a plumber.
Here are the key points to remember:
-
Match what you buy to what you have. Identify your drain type (rod‑operated, push‑button, etc.), size (often 1‑1/4"), and whether your sink has an overflow before shopping.
-
Follow the core steps. Clear the area, remove the old stopper and drain body, clean the drain opening, install the new flange and body with proper sealant, attach the stopper and linkage, then test for leaks.
-
Use sealant correctly. Plumber’s putty or silicone under the drain flange, combined with a properly seated rubber gasket, gives you a high chance of a leak‑free install.
-
Fine‑tune the linkage. Adjust the clevis strap and pivot rod so the stopper opens fully and closes tightly.
-
Keep it clean. Regularly remove and clean the stopper to prevent clogs and extend the life of your new drain.
You may want to bookmark this guide and keep it handy on your phone or printed out while you work, so you can glance at the steps in order. If you are a visual learner, you can also watch an official manufacturer installation video for a pop‑up drain while following along with this text. With both visual and written guidance, replacing the stopper becomes a simple, confidence‑building home improvement project.
FAQs About Replacing Bathroom Sink Pop-Up Drain Plugs
1. Can you replace a pop-up sink plug?
Yes, in most cases you can replace a pop-up sink plug without changing the entire drain assembly. If the drain body itself isn’t leaking, cracked, or corroded, you usually only need to swap out the stopper and the connecting parts, like the pivot rod. This is very common when the stopper no longer seals properly or gets stuck. Hardware stores sell small replacement kits that include just these parts, and they’re inexpensive. This approach saves time, avoids disturbing the drain pipes, and keeps the project beginner-friendly. As long as you match the size and style of the original stopper, replacing just the plug is a simple and practical fix for most bathroom sinks.
2. How to install pop up drain plug push button?
Installing a push-button pop-up drain plug is actually easier than installing a traditional lift-rod style. First, remove the old drain body and clean the sink hole thoroughly so there’s no old putty or debris left. Apply plumber’s putty or silicone sealant around the new drain flange, then insert it into the sink opening. From underneath, slide on the gasket and tighten the locknut until snug. Once the drain body is secured, simply drop the push-button stopper into the top opening. There are no pivot rods or lift rods to adjust, which makes installation quicker and cleaner. Most people can finish this job in under an hour.
3. How do you remove a bathroom sink stopper?
Removing a bathroom sink stopper depends on the type, but most standard pop-up stoppers follow the same process. Go under the sink and find the horizontal pivot rod entering the drain pipe. Remove the small spring clip holding the clevis strap, then slide the strap off the pivot rod. Next, unscrew the pivot rod nut and pull the rod straight out. Once the rod is removed, the stopper can be lifted out from the top of the sink. If it feels stuck, gently twist or wiggle it to loosen mineral buildup. This method lets you clean or replace the stopper without removing the entire drain assembly.
4. How to remove pop-up drain stopper from sink?
To remove a pop-up drain stopper from the sink, start underneath rather than pulling from above. The stopper is held in place by the pivot rod, so that connection must be released first. After loosening the pivot rod nut and removing the rod, the stopper will no longer be locked in. At that point, you can lift it straight out from the sink opening. Some stoppers may resist if soap scum or hair has built up around the seal, so slow, steady pulling works best. This process is simple, tool-light, and usually takes just a few minutes once you know where everything is located.
5. Do I need plumbers putty for a pop-up drain?
In most cases, yes—you should use plumber’s putty or bathroom-grade silicone to seal a pop-up drain flange. The seal prevents water from leaking between the sink and the drain body. Plumber’s putty is popular because it’s easy to work with and easy to remove if you ever replace the drain again. Silicone sealant creates a stronger, more permanent seal, but it’s harder to clean up later. Some sinks, especially stone or composite materials, recommend silicone instead of putty to prevent staining. Always check the manufacturer’s instructions before installing. Using the right sealant helps ensure a leak-free, long-lasting installation.
6. What are the disadvantages of a pop-up drain?
Pop-up drains look clean and convenient, but they do have a few downsides. Traditional pop-ups rely on multiple moving parts, like pivot rods and lift rods, which can loosen, corrode, or clog over time. Hair and soap scum often collect around the stopper, making cleaning more annoying than with an open drain. Push-button pop-ups reduce some of this complexity, but their spring mechanisms can fail after years of use. Pop-up drains can also drain slightly slower because the stopper blocks part of the opening. While they’re perfectly fine for most bathrooms, they do require occasional maintenance to stay working smoothly.
References


Leave a comment
This site is protected by hCaptcha and the hCaptcha Privacy Policy and Terms of Service apply.