


A kitchen faucet with sprayer speeds rinsing, cuts scrubbing time, and fits more kitchens than ever—thanks to smarter tech, easier installs, and durable designs. This guide shows you exactly which type to choose, how to fit it right, and how to maintain it for years.
Modern kitchens rely on a kitchen faucet with sprayer for flexibility, power, and hygiene. With pull-down, pull-out, side sprayer, commercial-style, and dedicated sprayer options—plus touchless and smart upgrades—the challenge is matching the right faucet to your sink, pressure, and household needs. We start with clear picks and an at-a-glance comparison, then cover types, buying criteria (fit, flow rate, finish), performance (spray modes, arc height, reach), installation, maintenance, and troubleshooting. You’ll also get verified guidelines, real-world tips, and pro advice to avoid leaks and maximize lifespan.
Quick picks and fast comparison
Before diving into detailed features and installation notes, here’s a quick snapshot of the best kitchen faucet with sprayer options. This overview helps you narrow choices fast so you know exactly where to start.
Best overall, budget, small-sink, and heavy-duty picks
-
Best overall (most kitchens): A modern pull-down with a medium-high arc, dual-spray head, strong magnetic docking, a braided hose, and ceramic disc valves. It balances reach, power, and splash control. Good for families and regular cooking.
-
Best budget: A pull-out or compact pull-down with a simple dual-spray head and standard 1.8 GPM flow. Look for metal mounting hardware even at the low end to resist wobble.
-
Best for apartment or small sink: A pull-out with a lower arc, shorter reach, and light spray head. Easier hose control in tight spaces. Keeps splash to a minimum.
-
Best for pro-style cooking and heavy use: A commercial-style spring-neck faucet with high reach, powerful spray, and rugged hose jacket. Great for deep sinks, meal prep, and big cookware.
Use cases:
-
Large family: Pull-down or commercial-style, dual-spray, strong docking, 1.8 GPM, ceramic discs.
-
Apartment/small sink: Pull-out, compact arc, gentle aerated mode, 1.5–1.8 GPM.
-
Rental-friendly: Pull-out or pull-down with deck plate, easy DIY install, sturdy plastic-free mounting nuts.
-
Pro-style cooking: Commercial-style with sweep or jet mode, long hose, stable base.
Tip: For long-term feel and reliability, prioritize a firm dock on the spray head, ceramic disc valves, and a braided nylon or stainless hose.
Key caveats before you buy
-
Backsplash clearance: The handle and spray head need space behind; tight backsplashes can block handle travel.
-
Deck plate needs: Single-hole faucets can fit 3-hole sinks with a deck plate; check length and finish match.
-
Hard water: Expect regular descaling; choose silicone nozzles and easy-clean spray faces.
-
Splashback: Shallow sinks and high arcs can splash; use aerated mode and aim the stream at the side of the bowl to soften impact.
Kitchen faucet with sprayer: types and best fit
Once you have a sense of the top picks, the next step is understanding which faucet style actually fits your sink, space, and daily tasks. Each type delivers different reach, comfort, and splash control.
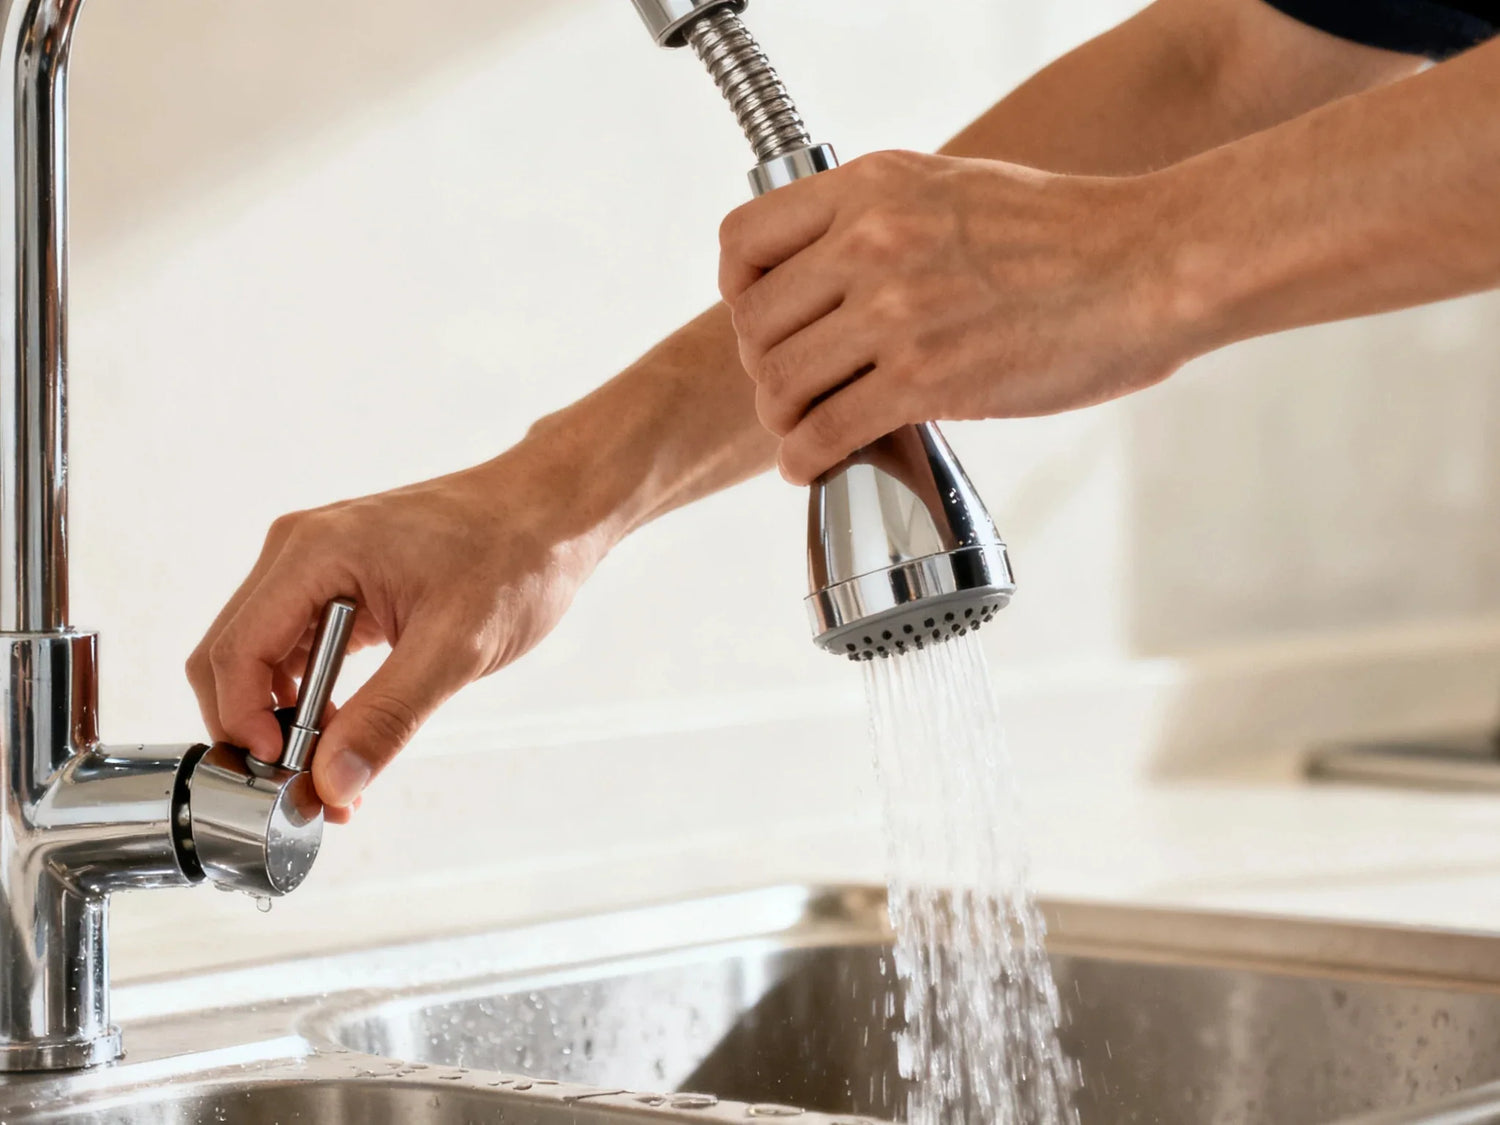
Integrated sprayers: pull-down vs. pull-out
A pull-down faucet places the sprayer in a high-arc spout. You pull the head down toward the sink for extra reach. This works well in deep sinks and wide basins because the high-arc spout creates space for tall pots. Many include multi-function spray heads with aerated stream, wide spray, or sweep. The main downside? A tall arc can splash in shallow bowls, and the heavier head can feel awkward for small children. In tight spaces, the head may also bump cabinets if you mis-measure height.

A pull-out faucet looks similar but uses a shorter body and a head that pulls out toward you. It is compact, easy to manage, and great in small kitchens. If you want steady flow and simple hose control without a tall arch, a pull-out fits the bill. The trade-off is shorter vertical reach inside deep sinks and fewer high-end spray modes. If you share a kitchen with kids or have limited space, the pull-out style often feels easier day-to-day.
Which is better? It depends on your sink and space. Pull-down shines in deep sinks and open layouts. Pull-out wins in small kitchens or shallow sinks where splash control is key.
Separate sprayers: side sprayer and dedicated sprayer
Side sprayer faucets add a second wand on the deck next to the spout. If you like a more classic look or want a helper wand for rinsing pans or produce while someone else uses the main stream, this setup can be a win. A deck-mount sprayer gives focused flow, but it adds another connection under the sink. That means one more potential leak point, so secure the hose and check it during clean-ups.
A dedicated sprayer setup combines a normal stream with a second, stronger spray function, either on the same head or a secondary outlet. This is useful for multi-user kitchens where one person needs a wide spray while another prefers a steady stream. It’s helpful for large households that run many dishes and want fewer pauses to switch modes.
Commercial-style faucets for home use
Commercial-style faucets bring professional-grade flexibility home. A spring-neck lets you move the head across the whole sink with ease. If you prep lots of veggies or clean heavy cookware, the powerful spray makes quick work of debris. They’re also built to be tough. The main thing to check is fit: spring-neck designs are tall, so measure from counter to cabinet and confirm the hole spacing and base diameter. If your sink is shallow, you may prefer a pull-out or lower arc to reduce splash.
How to choose (fit, performance, materials, compatibility)
After identifying your preferred sprayer style, compare the practical factors—clearance, flow rate, hose quality, and mounting needs—to make sure your faucet performs well in your real kitchen setup.
Fit and clearance: sink depth, arc height, and spout reach
Start with a tape measure. Measure sink depth, the distance from faucet hole to backsplash, and the space to the underside of your cabinet or shelf. A good spout reach is usually 7–10 inches; it should land water near the center of the bowl, not beyond it. Keep a 2–3 inch clearance behind the faucet for your handle swing. If space is tight, a forward-only handle helps. For arc height, pick the lowest arc that still fits your largest pot to reduce splash. Note base diameter too, so your deck plate or escutcheon covers any extra holes cleanly.
Fit checker quick test:
-
Does arc height clear the cabinet by 3 inches?
-
Does the handle move without hitting the backsplash?
-
Does the stream land at the bowl center?
-
Is the base wide enough to cover extra holes or do you need a deck plate?
Water pressure and flow rate (PSI, GPM) considerations
Most homes do well between 40–60 PSI. Above 80 PSI, many codes call for a pressure-reducing valve. If your home has low pressure (under ~40 PSI), avoid spray heads with ultra-fine patterns that need high pressure to fan out. Choose aerated or laminar stream modes and check if a flow restrictor can be adjusted or cleaned.
Kitchen faucets often run between 1.5–1.8 GPM, while federal rules cap them at 2.2 GPM at 60 PSI (eCFR, 1997). If you want to save water and still rinse well, 1.5–1.8 GPM with good spray design is a sweet spot. It’s powerful enough to blast debris and still efficient. If local rules require lower flow, choose a model with a compliant aerator.
Mounting and sink-hole compatibility (single vs. three-hole)
Faucets come in single-hole and three-hole setups. Many single-hole faucets ship with a deck plate so you can cover a 3-hole sink. If your sink is under-mount, check that the plate or base covers holes without hanging over the cutout edge. For drop-in sinks, confirm the plate sits flat. Side sprayers need their own hole; check if your sink has an extra hole or use a soap dispenser hole.

Can I add a sprayer to an existing faucet?
Sometimes. If your faucet body has a side-sprayer port (often capped under the deck), you can add a compatible sprayer and hose. If it lacks a port, adapters exist but can be finicky and may leak over time. In many cases, it’s cleaner and safer to replace the faucet with a model that includes an integrated or side sprayer.
Spray technology and real-world performance
With the right faucet selected, it’s equally important to understand how spray modes, docking systems, and hose construction affect day-to-day cleaning speed, splash control, and ease of use.
Spray modes explained: aerated, shower, jet, pause, sweep
-
Aerated stream: Mixes air with water for a soft but effective stream. Great for daily rinsing and lower splash.
-
Shower/wide spray: A wide pattern that covers more area. Ideal for rinsing plates and produce quickly.
-
Jet/power spray: A focused, strong stream for stuck-on bits and baking pans.
-
Pause: Temporarily stops flow to move between tasks without touching the handle.
-
Sweep/fan: A blade-like pattern that pushes debris toward the drain, helpful for large or farm sinks.
Choose a head with at least two modes (stream and spray). If you cook a lot, a “sweep” or high-pressure mode helps clean faster. If splash worries you, favor aerated stream.
Docking, hoses, and valves: durability factors that matter
Look for magnetic docking that snaps the head in place without fighting springs. A braided nylon or stainless-steel hose resists kinks and rub wear. Inside, ceramic disc cartridges deliver smooth handle feel and long-term drip resistance. An anti-kink hose guide under the sink can stop hoses from twisting around adjacent pipes or trash bins.
Splashback, reach, and cleaning power testing
A simple home test is to aim the spray at different parts of your sink and watch the backsplash zone. In a shallow bowl, a tall arc splashing straight down can throw water over the edge. Angle the spray toward the side of the bowl and use aerated mode for less bounce. For reach, see if the hose extends to every corner, plus a few inches over the counter for filling pots. A 60–68 inch hose usually covers most tasks.
Installation and setup (DIY or pro)
Once you’ve chosen the ideal model, the next question is installation. Whether you prefer DIY or hiring a plumber, the process is straightforward when you follow the right steps and prep properly.
Tools checklist and prep (supply lines, plumber’s putty, shut-off valves)
Gather these tools and parts:
-
Adjustable wrench, basin wrench, screwdriver set
-
Plumber’s putty or silicone (check manufacturer guidance)
-
Teflon tape for threaded connections (if required)
-
Bucket and towel
-
New supply lines if your old ones are worn (3/8-inch compression is typical)
-
Flashlight and mirror for under-sink visibility
Turn off water at the shut-off valves and open the faucet to relieve pressure. Clear the cabinet and lay down a towel to catch drips.
Step-by-step install: single-hole and multi-hole with deck plate
Single-hole install:
-
Remove the old faucet: Disconnect supply lines, sprayer hose (if present), and mounting nuts. Clean the deck.
-
Place gasket or apply a bead of silicone per instructions. Feed hoses and shank through the hole.
-
From below, slide the mounting plate and nut onto the shank. Hand-tighten, then a quarter-turn with a wrench. Do not overtighten.
-
Connect hot and cold supply lines to shut-off valves. If using Teflon tape, wrap clockwise on male threads.
-
Attach the sprayer hose weight at the marked point and ensure a free hang.
-
Turn on water, purge air by running the faucet, and check every joint for leaks.

Three-hole sink with deck plate:
-
Center the deck plate over the holes with gasket or silicone.
-
Feed the faucet through the center hole; repeat steps 3–6 above.
-
For a side sprayer, feed the sprayer hose through one of the extra holes and connect to the faucet’s side port.
Leak check:
-
Run both hot and cold.
-
Check under-sink joints and the sprayer hose connection.
-
While the head is docked, run water, then switch modes and look for drips.
Do I need a deck plate for a 3-hole sink?
If your faucet is a single-hole model and your sink has three holes, a deck plate neatly covers the extras. If you prefer a cleaner look, you can use individual hole covers and skip the plate. Deck plates hide more, but hole covers can look more minimal.
Maintenance, troubleshooting, and durability
Owning a kitchen faucet with sprayer is easier when you know how to maintain it. A few simple habits prevent leaks, keep spray patterns strong, and extend the life of hoses, cartridges, and O-rings.
Routine care for hard water: descaling and aerator cleaning
Hard water leaves mineral spots and can clog spray holes. Wipe the head after use, and once a month, soak the aerator or spray face in a 1:1 vinegar and water mix for 30 minutes. Many spray heads have silicone nozzles that you can rub with a fingertip to break up scale. This keeps flow even and prevents drift in the spray pattern.
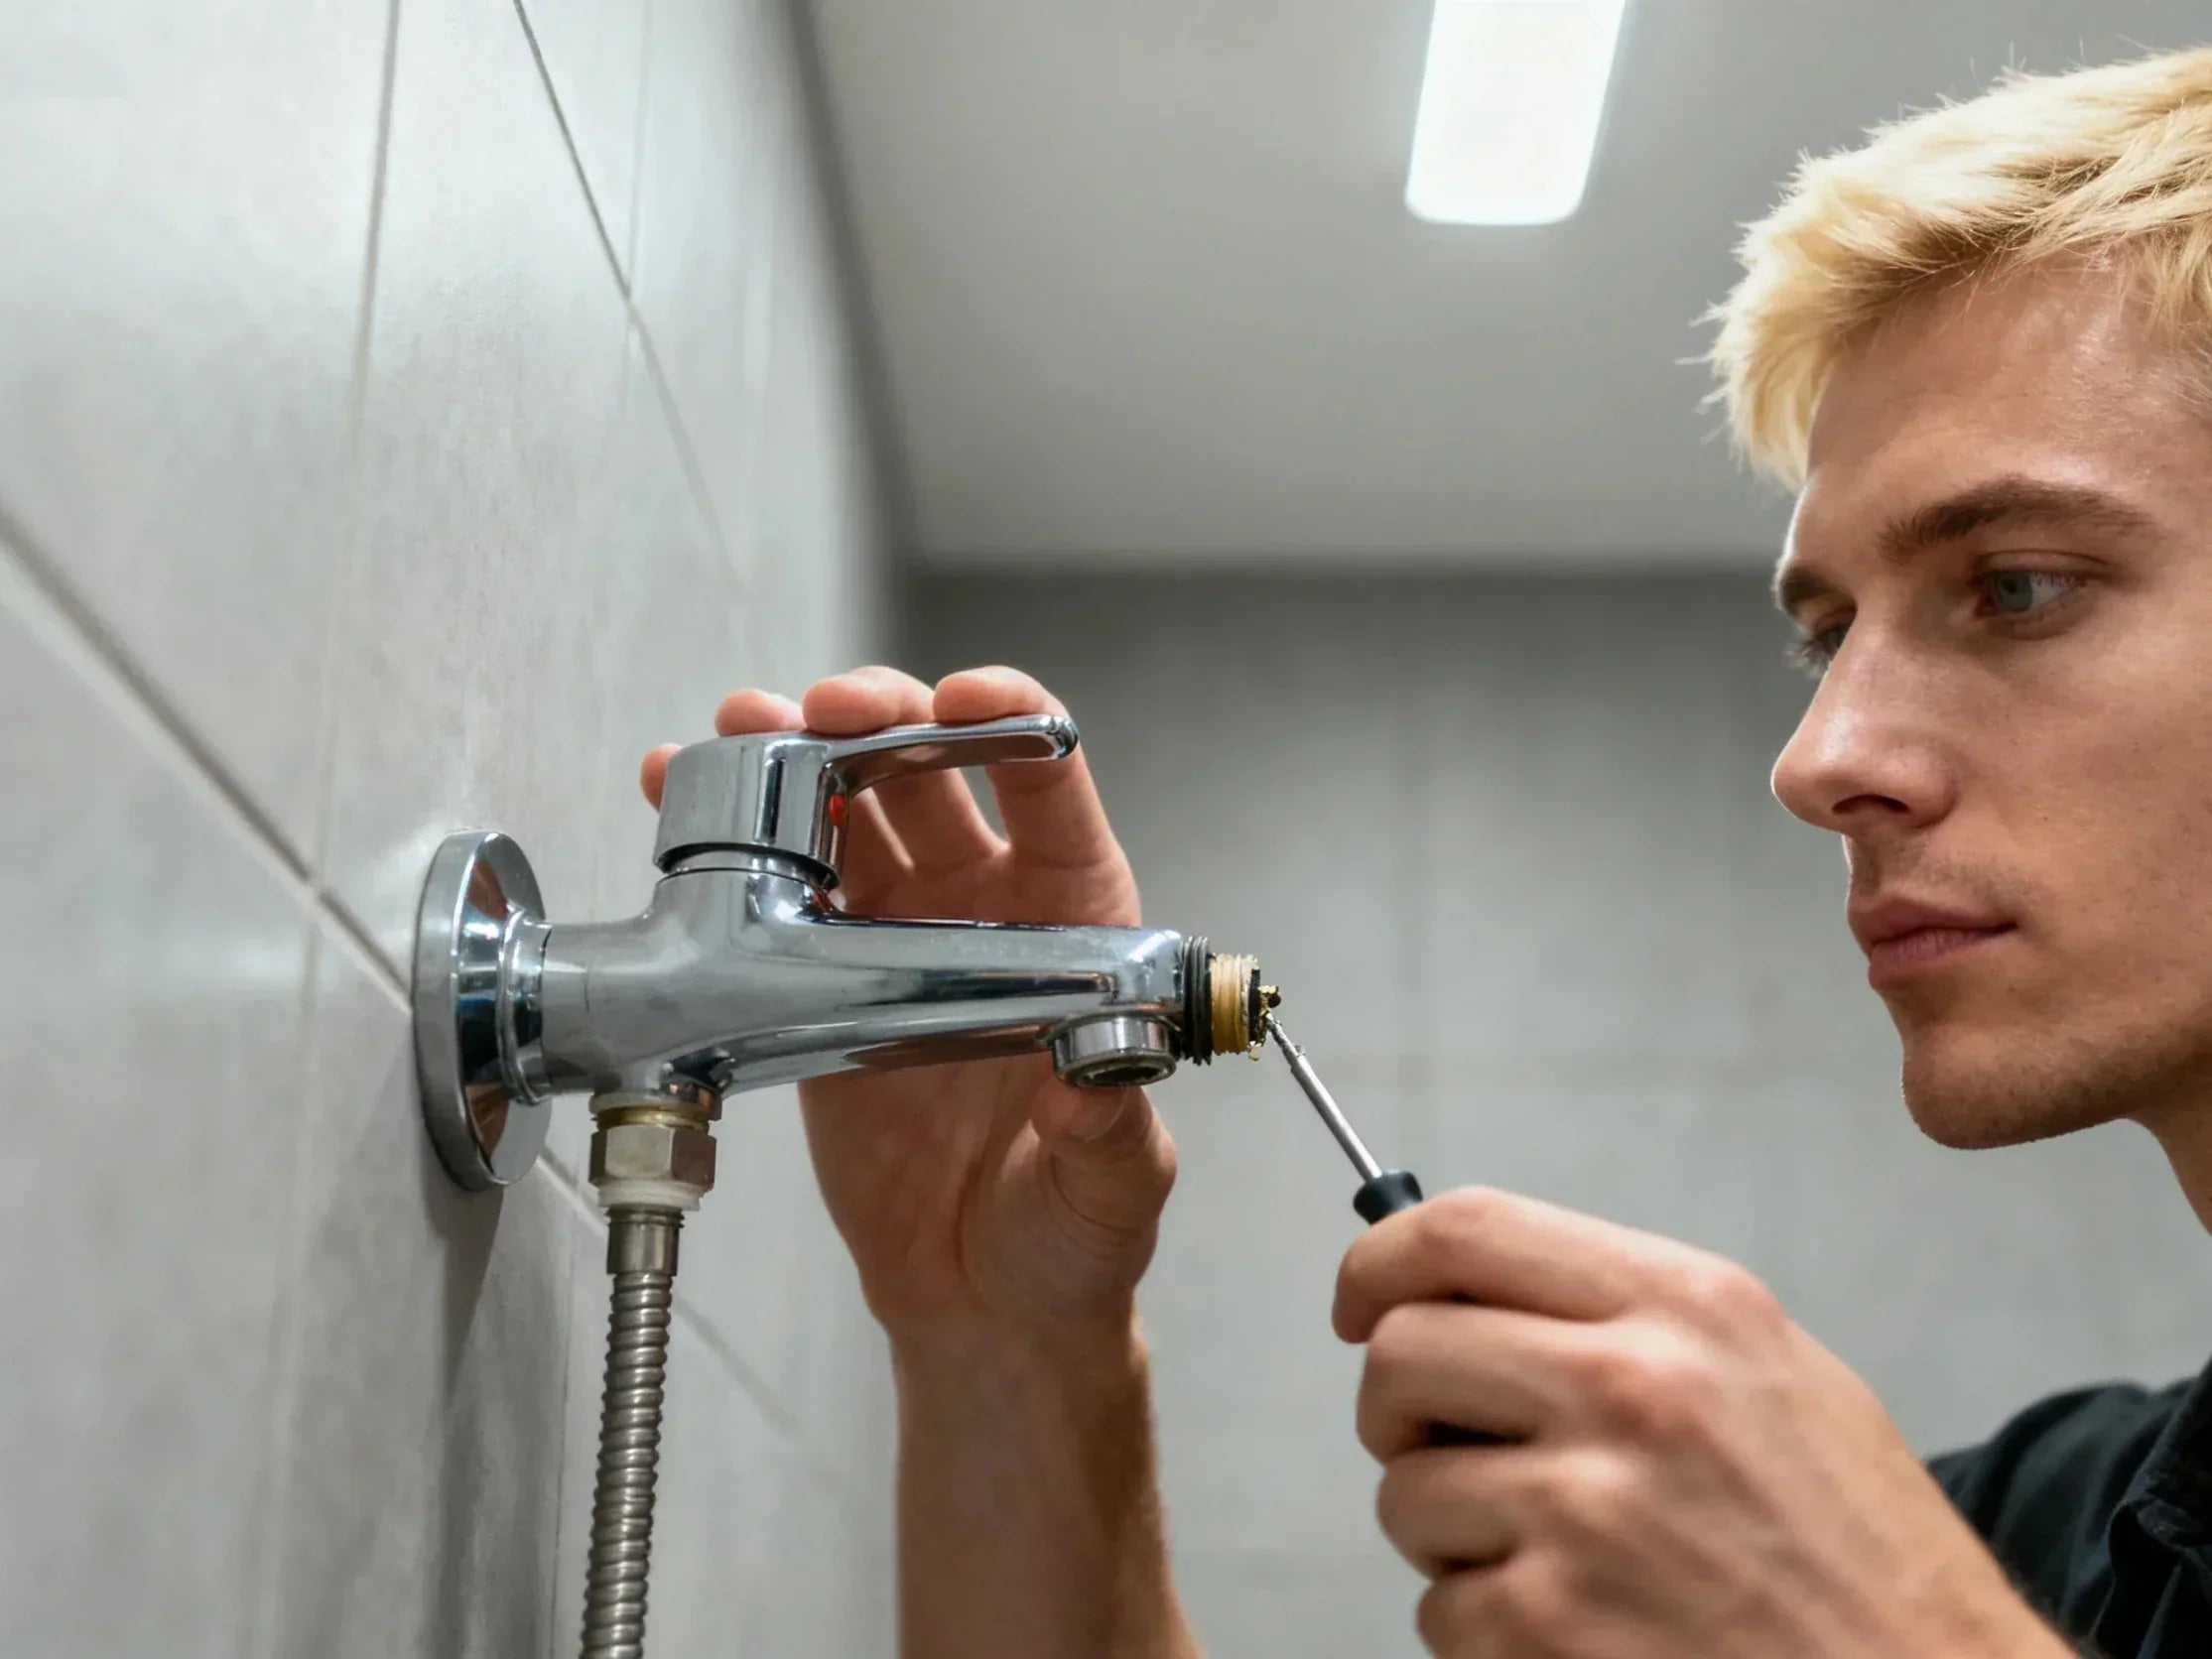
Common issues and quick fixes
-
Kitchen faucet sprayer leaking at the head: Check the O-ring and washer inside the head. Replace if cracked. Hand-tighten the head onto the hose; add a small amount of silicone grease on the O-ring.
-
Low flow from the sprayer: The diverter or aerator may be clogged. Soak in vinegar and rinse. Flush the hose by running water without the head attached for a few seconds.
-
Hose kinks or “hose slap”: Make sure the weight is at the marked spot and that no pipes or bins block the hose path. Add a smooth hose guide if needed.
-
Side sprayer drips: Check the connection at the faucet port and the hose at both ends. Replace washers or the hose if worn.
How to fix sprayer on kitchen faucet?
Start with the simple steps: clean the aerator, check the O-rings, confirm hose weight placement, and flush the line. Replace worn parts like the diverter or hose if cleaning does not restore normal function.
How long should a kitchen faucet last?
With normal use and basic care, a good kitchen faucet can last 10–15 years or more. Ceramic cartridges can go longer if water is clean and mineral buildup is controlled. Many makers offer long warranties on function and finish; keep your proof of purchase and model info handy for replacement parts.
Preventive upgrades: hose replacement, silicone grease, O-ring kits
-
Every 3–5 years in heavy-use kitchens, inspect and replace the hose if you see fraying, bulges, or stiffness.
-
Add a thin film of food-grade silicone grease to O-rings during service to improve feel and sealing.
-
Keep an O-ring kit and aerator washers on hand. These low-cost parts fix many drips fast.

Real-world insights, stats, and scenarios
Finally, real user experiences and industry data help you confirm your choice. These insights show how different households use sprayer faucets and what features matter most in everyday kitchens.
Key stats to cite for 2022–2025
-
About 65% of new kitchen installs include some form of sprayer faucet.
-
Sprayer models make up over 60% of category sales.
-
Touchless sprayers grew roughly 35% in the past two years. These figures reflect a clear move toward flexible, easy-clean setups and better hygiene.
Social takeaways (YouTube + Reddit)
Real users keep repeating the same themes:
-
Multi-spray heads bring faster rinsing and less stuck-on food.
-
Strong hoses and reliable docking matter more than fancy finishes.
-
Pull-down wins in deep sinks; compact pull-out wins in small apartments.
-
Side sprayers look classic but can leak at fittings if hoses aren’t maintained.
Best-match picks by household type
-
Large family: Pull-down or commercial-style, dual-spray, magnetic docking, braided hose, 1.8 GPM.
-
Gourmet cook: Commercial-style with sweep/jet mode, long hose, high arc for tall stock pots.
-
Rental: Pull-out or compact pull-down, easy install, deck plate for 3-hole sinks, simple care.
-
Small apartment: Pull-out with lower arc, aerated stream, lighter head for simple control.
-
Low-pressure home: Pull-out or moderate arc with aerated stream; avoid extra-restrictive spray patterns.
Visual: scenario-based recommendation matrix
| Sink Depth | Usage Intensity | Recommended Faucet Type | Must-Have Features |
|---|---|---|---|
| Shallow (<8 in) | Light–Moderate | Pull-Out | Aerated stream, compact arc, easy hose control |
| Shallow (<8 in) | Heavy | Pull-Down (low/med arc) | Aerated + wide spray, careful splash control |
| Deep (≥9 in) | Light–Moderate | Pull-Down | Dual-spray, magnetic docking |
| Deep (≥9 in) | Heavy/Pro | Commercial-Style | Spring neck, sweep/jet mode, long hose |
| Any depth | Low Pressure | Pull-Out or Low-Restrictor Pull-Down | Aerated/laminar stream, cleanable restrictor |
FAQs
1. How do you replace a kitchen sink sprayer?
To replace a kitchen sink sprayer, start by shutting off the hot and cold water valves under the sink. Pull out the old sprayer head and disconnect it from the hose. If you’re replacing the entire hose assembly, look for the sprayer port on the faucet body and unscrew the hose from that connection. Feed the new hose through the sink deck, attach it to the sprayer port, and add the weight at the marked position. Screw on the new sprayer head with the correct O-ring in place. Turn the water back on and test for leaks in both spray and stream modes. These steps work for most kitchen faucet with sprayer setups and also apply when learning how to replace the sprayer on kitchen sink systems.
2. What is the disadvantage of a pull-down faucet?
A pull-down faucet offers reach and flexibility, but it does come with a few downsides. The high arc can create splash issues in shallow sinks, especially in kitchens with strong water pressure. The spray head on a pull-down is often heavier, so younger users may find it slightly harder to control. It also requires more vertical clearance under cabinets, which can limit installation options in tight spaces. Compared with a compact pull-out or a simpler kitchen faucet with sprayer, pull-down models may feel bulkier. If you’re dealing with low water pressure or a sink that’s less than 8 inches deep, a pull-down faucet may not deliver the most comfortable experience. In those cases, knowing how to replace the sprayer on kitchen sink helps you switch to a style better suited to your layout.
3. How much will a plumber charge to change a kitchen faucet?
Most plumbers charge for one to two hours of labor to replace a kitchen faucet, depending on access, old hardware, and whether the shut-off valves need attention. In many regions, homeowners report total costs in the low to mid hundreds of dollars. If the job includes swapping a kitchen faucet with sprayer, adding new supply lines, or reinstalling a sprayer hose, the price may be slightly higher. Hard-to-reach areas, corrosion, or missing shut-off valves can also add time. If you already know how to replace the sprayer on kitchen sink systems, you may save labor by doing the sprayer portion yourself, but the faucet swap itself is still best handled by a pro if the plumbing is old or you’re unsure about fittings.
4. Which is better, a pull-out or a pull-down kitchen faucet?
Both styles work well, but the right choice depends on your sink depth and space. Pull-down faucets offer excellent in-sink reach and usually come with more spray modes. They perform best with deep sinks where splash isn’t an issue. Pull-out faucets have a lower profile, lighter spray heads, and better control in small or shallow sinks. In apartments and compact kitchen layouts, a pull-out often feels easier to manage than a tall kitchen faucet with sprayer in pull-down form. If you frequently fill tall pots, pull-down wins; if you want minimal splash and simple hose movement, pull-out wins. Understanding how to replace the sprayer on kitchen sink setups also helps you upgrade from one style to the other when your current faucet no longer fits your needs.
5. Can you just replace the sprayer on a kitchen faucet?
Yes—if your faucet body includes a sprayer port, you can usually replace just the sprayer head or hose. Unscrew the sprayer head from the hose and install a new one using the correct O-ring. For hose replacement, disconnect it from the sprayer port under the sink and feed in a new hose. This works well for most kitchen faucet with sprayer configurations. If your faucet doesn’t have a sprayer port, you can’t simply add a sprayer unless you use an adapter, and those can leak over time. In many cases, replacing the whole faucet is more reliable. Knowing how to replace the sprayer on kitchen sink systems lets you keep the faucet you like while fixing only the worn sprayer components.
6. Why is my kitchen faucet with pull-out spray not working properly?
If your pull-out sprayer isn’t working correctly, the most common causes are a clogged aerator, a dirty diverter, a kinked hose, or partially closed shut-off valves. Remove the aerator and soak it in vinegar to clear mineral buildup. If flow is still weak, flush the hose by running water with the sprayer head removed. Check the hose weight to ensure smooth retraction and confirm that nothing under the sink is catching the hose. Diverters inside kitchen faucet with sprayer systems can also stick; cleaning or replacing the diverter usually restores proper switching between stream and spray. If these steps fail, you may need to install a new sprayer hose assembly—helpful if you already know how to replace the sprayer on kitchen sink hardware.
References


Leave a comment
This site is protected by hCaptcha and the hCaptcha Privacy Policy and Terms of Service apply.