


Uninstalling a toilet seat is one of the fastest and most rewarding home maintenance tasks you can tackle. Whether you want to replace a broken toilet seat or deep clean your bathroom, knowing how to uninstall a toilet seat saves you time, money, and stress. This guide answers questions like “How do I take my toilet seat off?”, “How to remove seats with hidden fixings?”, and provides actionable steps for all seat styles — from classic bolt fixings to modern quick-release seats. Mastering how to uninstall a toilet seat ensures you handle any toilet seat removal with confidence and ease, no matter the model or mounting system.
Tools & Preparation for Removing a Toilet Seat
Getting the right tools and prepping your space makes the job easier, quicker, and more hygienic.
Essential Tools
- Flathead or Phillips screwdriver
- Adjustable wrench or pliers
- Penetrating oil (like WD-40) for stuck or rusty bolts
- Gloves for hygiene and grip
- Disinfectant spray or wipes
Optional: A mini hacksaw for stubborn or corroded bolts

Safety & Hygiene Tips
- Wear gloves to protect your hands.
- Clean the area around the toilet bowl to prevent slips or contamination.
- Clear away items from around the base of the toilet to get better access.
Quick Printable Checklist for Toilet Seat Removal
| Item | Got it? | Used for |
|---|---|---|
| Screwdriver | ☐ | Unscrewing bolts or screws |
| Wrench/Pliers | ☐ | Holding or turning nuts |
| Penetrating oil | ☐ | Releasing stuck or corroded bolts |
| Gloves | ☐ | Protecting hands from germs |
| Disinfectant | ☐ | Cleaning seat area and rim |
| Mini hacksaw | ☐ | Sawing stuck metal bolts (if needed) |
How to Identify Your Toilet Seat Type
Before you remove anything, check your toilet seat type. This helps you figure out which tools and techniques work best. Common questions include: “Can all toilet seats be removed?” and “How do I loosen toilet seat bolts that are hidden?” Use the images and descriptions below to match your type, so you can proceed smoothly and avoid unnecessary damage or frustration during the uninstall process. Identifying your seat type is the key first step before learning how to uninstall a toilet seat effectively.

Guide & Comparison Table
| Seat Type | Fixing Method | Difficulty | Special Tools? |
| Standard | Bottom-fix bolts | Low | No |
| Quick-release | Top-fix/buttons | Very Low | No |
| Soft-close | Hidden bolts | Moderate | Sometimes (see below) |
| Metal/Corroded/Old | Corroded bolts | High | Yes (oil, hacksaw, tools) |
Understanding Different Types of Toilet Seats Before Removal
Before you try to remove a toilet seat, it’s important to know which type you’re dealing with. Different seats are attached in different ways, and understanding the mechanism helps you avoid damaging the toilet bowl, wasting time, or using the wrong tool. Whether you want to remove or replace a toilet seat, these distinctions matter.
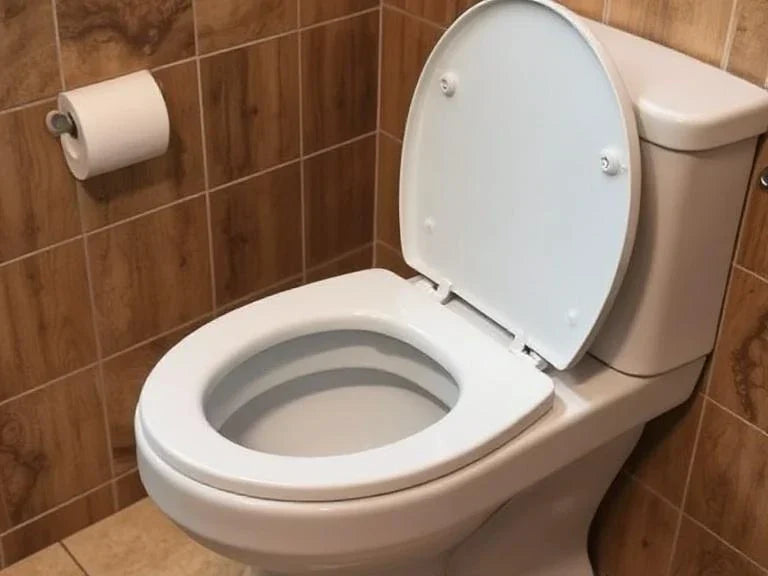
Standard Toilet Seats
These are the most common and easiest seats to work with. A standard toilet seat is typically secured with two bolts located at the back of the toilet seat, where it attaches to the toilet. These bolts are hidden under small plastic covers, which can be flipped up using your fingers or a screwdriver.
Beneath the toilet, plastic or metal nuts hold the bolts in place. To remove the bolts, use a screwdriver to turn them counterclockwise while you hold the nut in place with pliers or a wrench. If you’re planning to remove the old toilet seat, make sure to protect the toilet bowl from dropped tools with a towel.
Quick-Release Toilet Seats
These modern seats are designed for easy seat removal. You’ll often find them on newer or high-end toilets. Quick-release seats have buttons or sliding tabs located at the back of the seat—just press or slide them, and the seat will detach effortlessly. This design makes the seat easy to lift off, clean, and replace.
If you're looking to remove the seat quickly without tools, this type is ideal. Once the seat comes off, you may still need to unscrew or unclip the bolts and nuts that held the seat in place. Be sure to clean the toilet thoroughly before installing the new toilet seat.
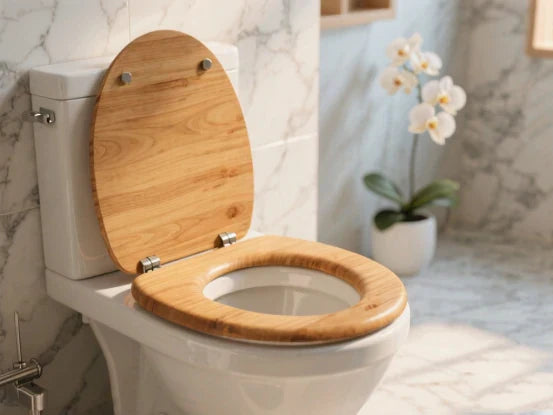
Soft-Close Toilet Seats
Soft-close seats slowly lower the lid and seat without slamming, but their fixings are usually more concealed. These wooden toilet seats or plastic models may appear seamless, but hidden plastic covers are often located at the back. Use a screwdriver to pry them open gently. Inside, you’ll find bolts connecting the seat that may require a wrench or screwdriver to unscrew.
When it comes to toilet seats like these, patience matters. You’ll need to carefully loosen the nut, possibly use a wrench, and make sure you don’t damage the finish as you remove the seat.
Metal or Corroded Fixings
If you're working with an old toilet seat or one that's been in place for years, chances are you’ll face metal bolts that have rusted or corroded. These rusty bolts are tough to deal with and often require more than just a screwdriver. Apply rust penetrant and wait 5–10 minutes. Then, use a screwdriver while holding the nuts underneath the bowl. If that doesn’t work, a basin wrench or even a hacksaw may be necessary.
Just be cautious not to damage or crack the porcelain—protect the porcelain by working slowly and placing a towel beneath your tools. Once the bolts are loose, remove the nut, detach the seat, and get ready to place the new seat securely.
How to Uninstall a Toilet Seat (Step-by-Step)
Ready to take off your seat? Here’s your step-by-step guide for how to uninstall a toilet seat, whether it’s plastic, wood, modern, or old.
Access the Seat Bolts
- Look for plastic or metal covers at the back of the seat, near where the seat meets the toilet bowl.
- Flip up or gently pry open any covers using your fingers or a flathead screwdriver.
- For hidden fixings, use a screwdriver to gently lift the cap—or try soaking with warm water to help loosen sticky covers.
- Wondering, "Why won't my toilet seat come off?"Hidden bolts or tough covers are a common reason. Gentle force and patience prevent damage.
Loosen and Remove Bolts
- Hold the nut underneath the toilet bowl with one hand or pliers.
- Use a screwdriver from above the seat hinge to unscrew the bolt counterclockwise.
- If your seat uses wing nuts, grip them firmly and turn.
- For quick-release seats, you may find only one fastener or buttons to press.
Troubleshooting Stuck or Rusty Bolts
- Apply penetrating oil to both the top and bottom of the bolt, especially where rust is visible. Wait about 5 to 10 minutes.
- Tap gently with your tool to help break the bond.
- For severe corrosion, carefully saw the bolt with a mini hacksaw. Always avoid scratching or cracking the porcelain.
Plastic Bolts with No Screws?
Often, plastic toilet seats have retaining lugs instead of screws. If you can't see any screws:
- Try twisting the plastic cap counterclockwise by hand or using pliers.
- Some may simply pop off when gently pulled.
Use the Quick-Release Mechanism (If Your Seat Has One)
- Press both release buttons at the back of the seat hinge.
- Lift the seat upwards; it should detach without force.
- Remove any hinge plates left behind by undoing their smaller screws or sliding them free.
Troubleshooting Problematic or Corroded Bolts
If you still can’t get it off: Reapply oil and wait. Try using a hairdryer on a low setting to heat the bolt for about 1–2 minutes; metal expands with heat and may loosen. If the bolt spins but won’t come free, hold the nut underneath tighter or wedge a flathead between the nut and the toilet’s underside. Still no luck? Using a hacksaw, carefully saw through the rusted bolt, using gentle, saw-like motions, and wielding patience to avoid damaging the toilet bowl. Tip: Have you spotted cracks, leaks, or signs of damage? This might be the time to get a professional.
Remove the Seat and Bolts
- After removing both bolts and nuts, lift the seat and lid off the toilet bowl.
- Remove any remaining fasteners or plate fixings.
- Sweep up or safely dispose of any washers, loose hardware, or bolt fragments.
Clean the Area
Now it’s time to clean the toilet rim thoroughly before installing a new toilet seat.
- Spray the exposed rim and holes with disinfectant.
- Wipe away dirt, grime, or residual oil, especially near the bolt holes.
- Ensure the area is completely dry before installing a new seat.
Expert Troubleshooting & Safety Tips
- Work slowly and with care. Forcing a bolt can crack porcelain.
- Have a new mounting kit ready—old nuts and bolts might not fit your new seat.
- Wear gloves and eye protection, especially when cutting rusty metal.
- Always use the right size screwdriver or wrench to avoid stripping bolts or damaging fixings.
- Protect the toilet bowl: Place a folded towel under the work area to catch dropped parts or tools.
Essential Safety, Cleanup, and Professional Tips for Toilet Seat Removal
Clean Up & Ready the Toilet for a New Seat
Clean the exposed area with disinfectant and rinse well. Ensure bolt holes are free from residue or damage to guarantee a secure fit for your new seat. When learning how to uninstall a toilet seat, proper cleaning and inspection after removal are essential steps to prepare for the replacement. Dispose of the old seat and parts responsibly—many components can be recycled. Check your local recycling guide for advice, as rules may vary regarding the recycling of plastic versus metal toilet seat fixtures. Proper disposal helps protect the environment while keeping your bathroom fresh and hygienic.
When Should You Call a Professional?
- If you spot cracks or leaks around the toilet bowl or bolts.
- If bolts are rusted beyond removal and you risk damaging the porcelain.
- If you don’t feel comfortable using cutting tools or force.
- Hiring a plumber is a smart choice in such scenarios for safe and effective resolution.

Final Steps and Next Guide
Taking off your toilet seat is a project you can finish quickly, even if you’ve never tried before. Pick the right tools, follow each step, and pay attention to stuck bolts and hygiene for the best results. If you encounter any issues, refer to the troubleshooting section or seek expert help. Learning how to uninstall a toilet seat is straightforward when you know the proper process.
Ready to install a new toilet seat? See our step-by-step installation guide for fitting your new seat and completing the task with ease and confidence.
Key Takeaways for DIY Toilet Seat Removal
Most removals take only 5–10 minutes, making it a quick and satisfying task. Stuck or rusted bolts are common but can be overcome with patience and the right tools. To ensure a smoother process, always identify your seat type before starting. This helps you choose the correct tools and techniques, especially when learning how to uninstall a toilet seat.
Always clean and dry the area before installing the new seat to maintain hygiene. DIY seat removal not only saves money but also helps keep your bathroom fresh and comfortable. Plus, you’ll feel accomplished after completing this easy home maintenance project!
FAQ
1. How do I take my toilet seat off?
To remove a toilet seat, start by locating the two bolts at the back of the seat that secure it to the toilet bowl. These bolts are often covered with plastic caps—pry them open with a flathead screwdriver. Then, use a screwdriver to turn the bolts while holding the nuts underneath the toilet bowl with pliers or your hand. Once both bolts are removed, you can lift the seat off easily. If the bolts are stuck, applying some WD-40 or penetrating oil can help loosen them.
2. How to remove toilet seats with hidden fixings?
Toilet seats with hidden fixings typically have a sleek design with no visible screws. Look closely at the back of the seat for small caps or buttons—these cover the hidden fastening system. Use a flathead screwdriver or your fingers to pop the caps open. Inside, you may find screws that can be loosened with a screwdriver or an Allen key. Some models also have a push-button release system—pressing the button will allow you to lift the seat off without any tools.
3. How to remove toilet seat plastic bolts with no screws?
Some toilet seats use plastic expansion bolts without traditional screws. These are usually installed by pushing the bolt through the hole and letting it expand to grip the underside. To remove them, reach under the toilet bowl and try to grip the plastic nut with pliers while gently twisting and pulling upward from the top. If they spin freely, you may need to carefully cut the bolt or apply pressure to collapse the expansion and remove the bolt.
4. Why won't my toilet seat come off?
If your toilet seat won’t come off, it’s likely due to rusted, overtightened, or corroded bolts, especially on older seats with metal fasteners. Sometimes, mineral buildup or years of grime can also "glue" the parts together. Try applying penetrating oil to the bolts and let it sit for a few minutes. Use pliers underneath and a screwdriver on top to turn the bolt. If it still doesn’t budge, you may need to carefully cut the bolt with a hacksaw or use a bolt extractor.
5. Which way do you loosen toilet seat bolts?
Toilet seat bolts typically loosen by turning them counterclockwise. If you're looking from the top down, use a screwdriver to turn left (anti-clockwise), while someone holds the nut from below. If you’re underneath the bowl, it may feel reversed, so always verify the direction. Some plastic nuts are hand-tightened and can be turned without tools, while others require pliers for extra grip.
6. Can all toilet seats be removed?
Toilets usually come with seats even if they seem fixed in place permanently.Most modern toilet seats now feature quick release or no loosen systems that make cleaning or replacing them a breeze.However some older or unique designs ( smart toilet seats)might need specific tools or guidance.If you're uncertain it's best to refer to the manufacturers manual or look up the model online.
7. What thread are toilet seat bolts?
Toilet seat bolts usually have a standard thread size—often 1/4" or 5/16" diameter in the U.S.—and are either coarse-threaded for plastic bolts or fine-threaded for metal bolts. They’re designed to match the universal holes in most toilet bowls. However, not all brands use identical thread types, so if you're replacing them, it’s best to bring the old bolt to a hardware store to ensure a proper match.
8. Why do my toilet bolts keep coming loose?
Toilet seat bolts becoming loose is an issue due to frequent use and the plastic components expanding and contracting in response to temperature fluctuations or inadequate tightening initially performed. If the bolts are not securely fastened or do not have locking washers installed t they might gradually loosen over time. One potential solution is to utilize rubber washers or a thread locking compound to prevent them from moving. Another option is to upgrade to a seat that features a "no fastening mechanism, for a more stable and durable attachment.

Leave a comment
This site is protected by hCaptcha and the hCaptcha Privacy Policy and Terms of Service apply.