


Is your toilet leaking from the base or rocking back and forth? These are classic signs of a failed wax seal. Learning how to replace wax ring on toilet is a fundamental DIY skill that can save you from costly water damage and plumber bills. This guide provides everything you need, from spotting the problem to completing the repair, with easy-to-follow instructions, troubleshooting tips, and advice on choosing the perfect replacement seal for a lasting fix.
Do You Need to Replace Your Toilet Wax Ring?
Before you start replacing toilet wax ring and disassembling things, it's critical to confirm that the toilet's wax ring is actually the problem, and that's the reason why we need to know how to replace wax ring on toilet. The wax seal is responsible for creating an airtight and watertight connection between the bottom of the toilet and the drainpipe in the floor. When it fails, the signs are usually quite clear.
Symptoms & Diagnostics: A Problem Checklist
Look for these telltale signs that you need to replace the wax seal:
- Persistent Water at the Toilet Base: You notice puddles or moisture seeping out from around the toilet base. This water is often dirty and appears after you flush the toilet.
- Unpleasant Sewer Odors: A distinct, foul smell like sewer gas in your bathroom is a strong indicator that the airtight seal has been compromised.
- A Rocking or Shifting Toilet: If your toilet moves, wobbles, or feels unstable when you sit on it, this movement can break the wax ring and cause leaks. A properly secure toilet should not move at all.
- Subfloor Dampness or Ceiling Stains: For toilets on an upper floor, water stains on the ceiling below are a serious red flag. For ground-floor toilets, the subfloor may feel soft or appear discolored near the toilet.
A wax ring for toilet issues typically lasts 10 to 20 years. Its lifespan can be shortened by improper installation or frequent movement of the toilet.
Is It the Wax Ring or Something Else that Causes Leaking?
Not every leak behind the toilet or near it is from the wax seal. Before you remove the toilet, perform these quick checks:
- Check the Supply Line: Examine the flexible hose that connects the wall valve behind the toilet to the toilet tank. Is it wet? Are there drips coming from the connection nuts? A loose connection here is a common and easy fix.
- Inspect the Tank-to-Bowl Bolts: Look at the bolts on the underside of the toilet tank that attach it to the toilet bowl. Sometimes the gaskets on these bolts can fail, causing water to drip down the back of the toilet bowl where it meets the floor.
- Look for Cracks: Carefully inspect the toilet flange and the porcelain of the toilet bowl and tank for any cracks. A cracked bowl will leak clean water and requires a new toilet entirely.
If these areas are dry and the leak only appears at the base of the toilet after flushing, you can be confident that replacing wax seal on toilet is the correct solution.

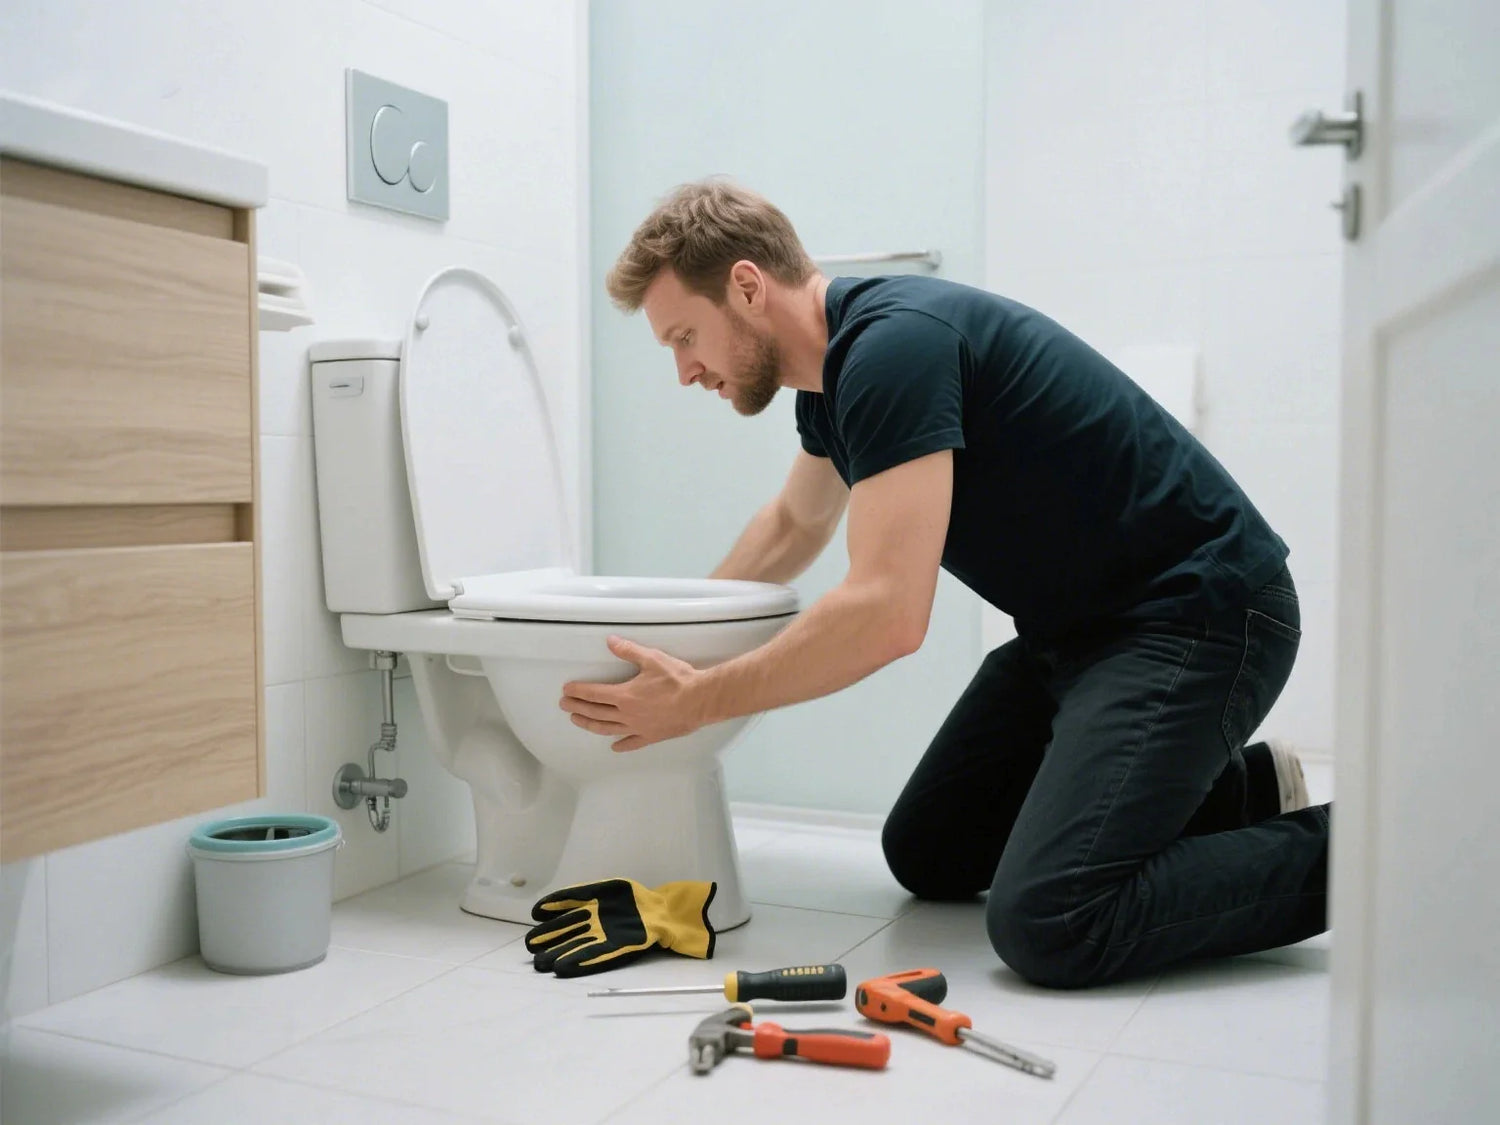
Tools, Materials & Safety Preparation
Gathering your tools and materials beforehand makes the job go smoothly. This project is a bit messy, so proper preparation is key.
Essential Tools & Materials Checklist:
- New Wax Ring: Standard, extra-thick, or waxless options are available.
- New Closet Bolts: Most wax rings kits come with new toilet mounting bolts, washers, and nuts. It's always a good idea to replace the T-bolts that attach the toilet.
- Adjustable Wrench or Socket Set: For removing the nuts from the closet bolts.
- Putty Knife: To scrape the old wax seal off the flange and toilet.
- Disposable Gloves: To protect your hands from wax and bacteria.
- Eye Protection: To safeguard against splashes.
- Old Towels or Cardboard: To protect your bathroom floor and provide a soft surface to set the toilet on.
- Bucket and Sponge or Shop Vac: To remove all remaining water from the toilet bowl and tank.
- Cleaning Wipes or Rags: For cleanup.

Preparation Steps for a Clean Job:
- Protect Your Floor: Use old towels, cardboard or plastic cloth around the toilet base to cover the water stains and scratches, which will save you much more worry. If it is a tiled floor, it is best to lay an anti-slip pad to avoid accidental slipping.
- Shut Off the Water: Find the shut-off valve by the wall behind the toilet, twist it clockwise to close it, then flush the water to confirm that the water is indeed broken.
- Empty the Toilet: Flush the toilet to drain as much water as possible, then clean the remaining water in the water tank and toilet with a sponge, cup or vacuum cleaner, so as to prevent water leakage and odor.
- Put on Safety Gear: It is important to have good safety protection. Wearing gloves can block bacteria, and when twisting bolts or dealing with old wax rings, goggles can protect your eyes from debris and dirty things splash in.
How to Replace Wax Ring on Toilet: Step-by-Step Wax Ring Replacement
With your area prepped and tools ready, it's time for the wax ring replacement. Follow these steps carefully for a leak-free result. The average DIYer can complete this in 60-120 minutes.
Turn Off Water & Empty Toilet
As detailed in the preparation, ensure the water is off and the toilet is completely drained. A water-filled toilet is extremely heavy and will spill dirty water everywhere.
Disconnect the Water Supply to the Toilet
Use your adjustable wrench to unscrew the nut connecting the water supply line to the bottom of the toilet tank. Have a small bucket or towel ready to catch any residual drips.
Remove the Old Toilet Closet Bolt Caps & Nuts
Pry off the plastic caps at the bolts at the toilet base. Use your wrench to loosen and remove the nuts from the T-bolts. If a bolt spins, you may need to use pliers to hold the top of the bolt while you turn the nut.
Lift the Toilet Carefully
This is often a two-person job. Stand over the toilet, grab it under the sides of the bowl, and rock the toilet gently side-to-side and front-to-back. This will break the old wax seal. Once loose, lift the toilet straight up to avoid smearing wax. Carefully lift the toilet and set it down on its side on the prepared towels or cardboard.
Remove the Old Wax Ring from the Toilet Flange
You will now see the old wax ring on the toilet flange or stuck to the bottom of the toilet.
- Use your putty knife to scrape the old wax seal completely off the flange and the toilet's outlet horn.
- Stuff a rag into the drainpipe opening to block sewer gases and prevent tools from falling in.
- Clean the flange and the area around the toilet base thoroughly.
- Inspect the toilet flange for any cracks, corrosion, or damage. A damaged flange will not hold the toilet securely and may need to replace the flange itself.

Install the New Wax Ring
There are two common methods for installing the new wax ring:
- On the Flange: Center and place a new wax ring directly on top of the toilet flange, ensuring it's centered with the toilet flange opening.
- On the Toilet: Press the wax ring to the bottom of the toilet's outlet, ensuring it adheres firmly.
Both methods work. Placing it on the toilet can help with alignment. Next, slide the new toilet mounting bolts into the slots on the toilet flange, with the heads down and the threads pointing up.
Lower & Secure the Toilet
This is the most critical step for a good seal.
- Remove the rag from the drainpipe.
- Carefully align the holes in the toilet base with the new bolts.
- Carefully lower the toilet onto the flange, keeping it as level as possible.
- Press down firmly on the toilet bowl with your body weight. You may need to sit on it and shift gently to compress the wax ring evenly. This creates a watertight seal between the toilet and the floor.
- Place the washers and nuts on the bolts. Tighten them by hand, alternating from side to side to apply even pressure. Then, use your wrench to give them another quarter to half turn. Do not overtighten! This is the number one mistake and can easily crack the porcelain base. The toilet should feel solid and not rock.
Reconnect Water & Test
Reconnect the water supply line to the tank. Turn the water supply valve back on (counter-clockwise). Let the tank fill completely. Now, flush the toilet several times and carefully inspect the base of the toilet for any signs of a leak. Use a dry paper towel and run it around the entire base to detect even the smallest amount of moisture.
Reinstall the Toilet Bolt Caps & Final Clean Up
If everything is dry and secure, use a small hacksaw to trim the bolts if they are too long for the caps to fit. Snap the bolt caps back on. Clean up your tools and remove the protective towels.
How to Replace Wax Ring on Toilet: Troubleshooting & Flange Repairs
Sometimes, a toilet wax ring replacement reveals other problems. Here's how to handle them.
Problem: The Flange is Too Low. If you've installed new, thicker flooring like tile, the toilet flange may now be below floor level. This creates a gap between the toilet and the floor that a standard wax ring isn't able to seal.
Solution: Use an extra-thick wax ring or stack two standard wax rings together. A better, more permanent solution is to install a flange extender or spacer ring, which raises the flange height to be level with the finished floor.
Problem: The Flange is Broken or Rotted. If the metal or PVC ring is cracked or the slots for the bolts are broken, it cannot secure the toilet.
Solution: Flange repair kits are available that can be installed over the existing flange to provide a solid new surface for the bolts. In severe cases of corrosion or rot, you may need to replace the flange entirely, which is a more advanced job that may require a plumber.
Problem: The Toilet Still Leaks. If you've correctly installed the new wax ring but a leak persists, double-check that you fully compressed the ring by pressing down on the toilet.
Solution: An uneven or incomplete compression is a common cause of failure. Also, re-verify there are no cracks in the porcelain.
Problem: The Toilet Won't Flush Properly. If your toilet doesn't flush with its usual power after replacing the wax seal, it's possible some of the wax was pushed into the drain opening during installation, creating a partial blockage.
Solution: You may have to remove the toilet and start the installation over, ensuring the wax ring is perfectly centered.
Wax Vs. Waxless Ring: Which to Choose?
The traditional wax ring for toilet models has been the industry standard for decades, but modern alternatives now exist. Here's how they compare.
| Feature | Standard Wax Ring | Waxless Seal (Rubber/Foam) |
| Reliability | Extremely reliable and long-lasting when installed correctly. | Very reliable; less prone to failure from minor toilet movement. |
| Ease of Install | Messy. You only get one shot to set the toilet correctly. | Clean and easy. Often repositionable if you don't get it right the first time. |
| Cost | Very inexpensive. | More expensive than wax. |
| Best For | Standard installations with a level floor and correct flange height. | DIY beginners, uneven floors, or when flange height is recessed. |
| Failure Scenarios | Can be compromised by heat (e.g., heated floors) or toilet rocking. | Can degrade over time, but generally more forgiving of movement. |
- According to this comparison table, traditional standard wax rings have a long history and are very reliable when installed properly. They are trusted by many plumbers. It is affordable and easy to buy, and is suitable for standard installation scenarios with flat floors and suitable flange height. However, it is quite dirty and messy when installed, and it cannot be adjusted once it is fixed. It would be easily affected by floor heating or displacement. Therefore, it is more suitable for a stable traditional bathroom layout.
- The waxless seal is made of rubber or foam, which makes it cleaner and easier to install and can be repositioned when not aligned well. It is suitable for households with uneven floors, sunken flanges or radiant floor heating. It is highly resistant to slight displacement, but it may compress or wear out for long-term use and eventually needs to be replaced.
Tips: If you pursue a low-cost, time-proven sealing effect, and the installation environment is stable and flat, choose a traditional wax sealing ring; if you value installation convenience, you are expected to have displacement on the ground, the flange height is not standard, or you hope to have less dirt and mess during installation, then waxless sealing ring is more suitable.
What is the alternative to a wax seal for toilets? Rubber gaskets and foam seals are the main alternatives. They provide a reliable seal, are much cleaner to work with, and can be repositioned, making the installation process less stressful for beginners.
How to Replace Wax Ring on Toilet: Expert Tips & Cost of Installation
A little extra knowledge about how to change wax ring on toilet can make the difference between a good job and a great one.
Pro Insights & Common Mistakes to Avoid
- Don't Overtighten the Bolts: This is the most critical piece of advice. Snug is enough. You can always tighten them a little more later if needed, but you can't un-crack a toilet.
- Cleanliness is Key: Failing to scrape the old wax seal off completely will prevent the new wax ring from sealing properly.
- Don't Ignore a Damaged Flange: A new wax ring on a broken flange is a wasted effort. Take the time to inspect the toilet flange and repair it if necessary.
- Check for Level: After setting the toilet, use a small level on the bowl rim to ensure it's sitting evenly. If not, you may need to use shims to stabilize it before caulking.
Cost Breakdown: DIY vs. Plumber
- DIY Cost: You can do this job for $10 - $25, which includes the wax ring kit, optional toilet bolts, gloves, and basic cleaning supplies. If you already have tools like wrenches and putty knives at home, you can spend even less and it's much more cost-effective.
- Plumber Cost: How much will a plumber charge to change the wax ring on a toilet? Professionals typically charge between $75 and $200, which depends on the region, the visit fee, and whether it includes removing the floor or replacing the flange.
- Additionally, be prepared that there would be additional costs. If you need to repair the damaged floor or replace the old flange, the total cost will exceed $300. Also, if structural work with permits is involved, the cost will be even higher, so you should be aware of this in advance.
Final Checks & Preventive Maintenance
After your successful toilet wax ring replacement, follow these final steps.
- Monitor for Leaks: For the next day or two, periodically check around the toilet base for any signs of water.
- Check Bolt Tightness: After a day of settling, gently check the nuts on the closet bolts. If they feel loose, give them a slight snug-up, but do not crank on them.
- To Caulk or Not to Caulk? Many plumbers caulk around the base of the toilet for a finished look and to prevent mop water from getting underneath. If you do, leave a small gap at the back of the toilet. This way, if the wax ring ever leaks in the future, the water has a place to escape, alerting you to the problem instead of being trapped under the toilet and rotting the floor.

Summary & Resources
You now have the knowledge of a successful toilet wax ring installation. By identifying the problem, preparing your workspace, and following the steps carefully, you can have a better command of how to replace wax ring on toilet so as to create a durable, leak-free seal.
Key Takeaways Recap:
- The main signs you need to replace a toilet wax ring are water at the base, sewer smells, and a rocking toilet.
- The most critical steps are completely removing the old wax ring, inspecting the flange, and setting the toilet straight down to evenly compress the wax ring.
- Never overtighten the toilet bolts, as this can crack the porcelain base.
- If you encounter a damaged flange, a rotten subfloor, or persistent leaks, it's best to call a professional.
If at any point you face unexpected damage, persistent leaks, or feel unsure about safely moving your toilet, contact a licensed plumber for help.
Frequently Asked Questions
1. Can you replace a toilet wax ring yourself?
Yes, absolutely. Most homeowners can replace the toilet wax ring themselves, requiring only basic tools and patience. This is a relatively simple DIY task, but it does require lifting the heavy toilet, so assistance is helpful. The steps include turning off the water, draining the toilet, removing the bolts, removing the toilet, scraping off the old wax and cleaning it, then installing the new wax ring and resetting it. Make sure the toilet is not wobbling, otherwise it will damage the seal. If you're unskilled or if you notice damage to the floor, it's safer to consult a professional.
2. How long does a wax ring last?
Wax rings create a durable, waterproof seal between the toilet and the drainpipe. Properly installed, they can last 10 to 20 years, often equaling the life of the toilet itself. But if the toilet is loose, wobbly, or installed incorrectly, or if the floor is damaged and it keeps moving around, its service life will definitely be shortened, so you have to pay much attention to this. If it is broken, water will accumulate in the base and there will be a strange smell. Leakage will also damage the floor, so be careful about these situations. The toilet must be installed securely and levelly, and you should check it regularly to prevent problems in advance.
3. What if my subfloor is soft or damaged?
If the flooring is soft, damp, or shows signs of water damage, immediately stop installing a new toilet. A damaged floor cannot bear weight, causing the toilet to wobble, leak, or even the structural problems. The toilet needs to be disassembled. The damaged parts needs to be removed, and then replaced with new waterproof materials to ensure safety. The flange should also be inspected and replaced with leaks checked. It is safer to have the repair done by professionals, which helps ensure the installation complies with all relevant regulations.
4. Does pouring hot water down the toilet ruin the wax seal?
Yes, pouring hot or boiling water down the toilet can damage the wax seal. While the wax seal is solid at room temperature and forms a waterproof barrier, high temperatures can soften, deform, or even partially melt it, leading to leaks, odors, and even water damage over time. While occasional use of warm water to clear a clog is generally fine, never pour boiling water directly into the toilet. If the toilet is clogged, just use an enzyme-based cleaner, a plunger or a special unclogging tool. Protecting the wax ring can save you money on repairs and keep your toilet leak-free.
5. What will dissolve a toilet wax ring?
When dissolving or removing toilet wax rings, while petroleum-based solvents like mineral spirits can break down the wax, their use is strictly prohibited. They are irritating, toxic, and can damage PVC pipes, leaving a pungent odor. The safest and most effective method is manual removal: Wearing gloves and using a putty knife to carefully scrape away the old wax ring from the toilet base and floor flange. Stubborn wax can be softened with heat from a hair dryer. Then use soapy water or vinegar water to clean the remaining residue so that the new seal can be installed more firmly and securely.


Leave a comment
This site is protected by hCaptcha and the hCaptcha Privacy Policy and Terms of Service apply.