


Replacing a worn toilet flapper is one of the fastest ways to stop a running toilet, cut water waste, and lower your water bill. This guide starts with a 10‑minute quick start so you can replace toilet flap parts right away. Then it moves into tools, correct sizing (2‑inch vs 3‑inch), chain adjustment, and valve-seat cleaning for a perfect seal. You’ll also see fixes for stubborn leaks, special notes for dual-flush and canister systems, and data-backed water savings and ROI. We wrap up with safety, maintenance that extends flapper life, real-world case studies, and quick FAQs. The goal is simple: give you clear steps, expert insights, and practical tips so you can DIY your toilet repair safely and confidently.
Quick start: how to replace toilet flap in 10 minutes
Most jobs take less than 15 minutes and need only simple tools. By following this quick step-by-step guide, you’ll learn exactly how to change toilet flapper correctly, stop the leak, and restore your toilet’s flush efficiency — all without calling a plumber.
Shut off, drain, and access the tank (running toilet basics)
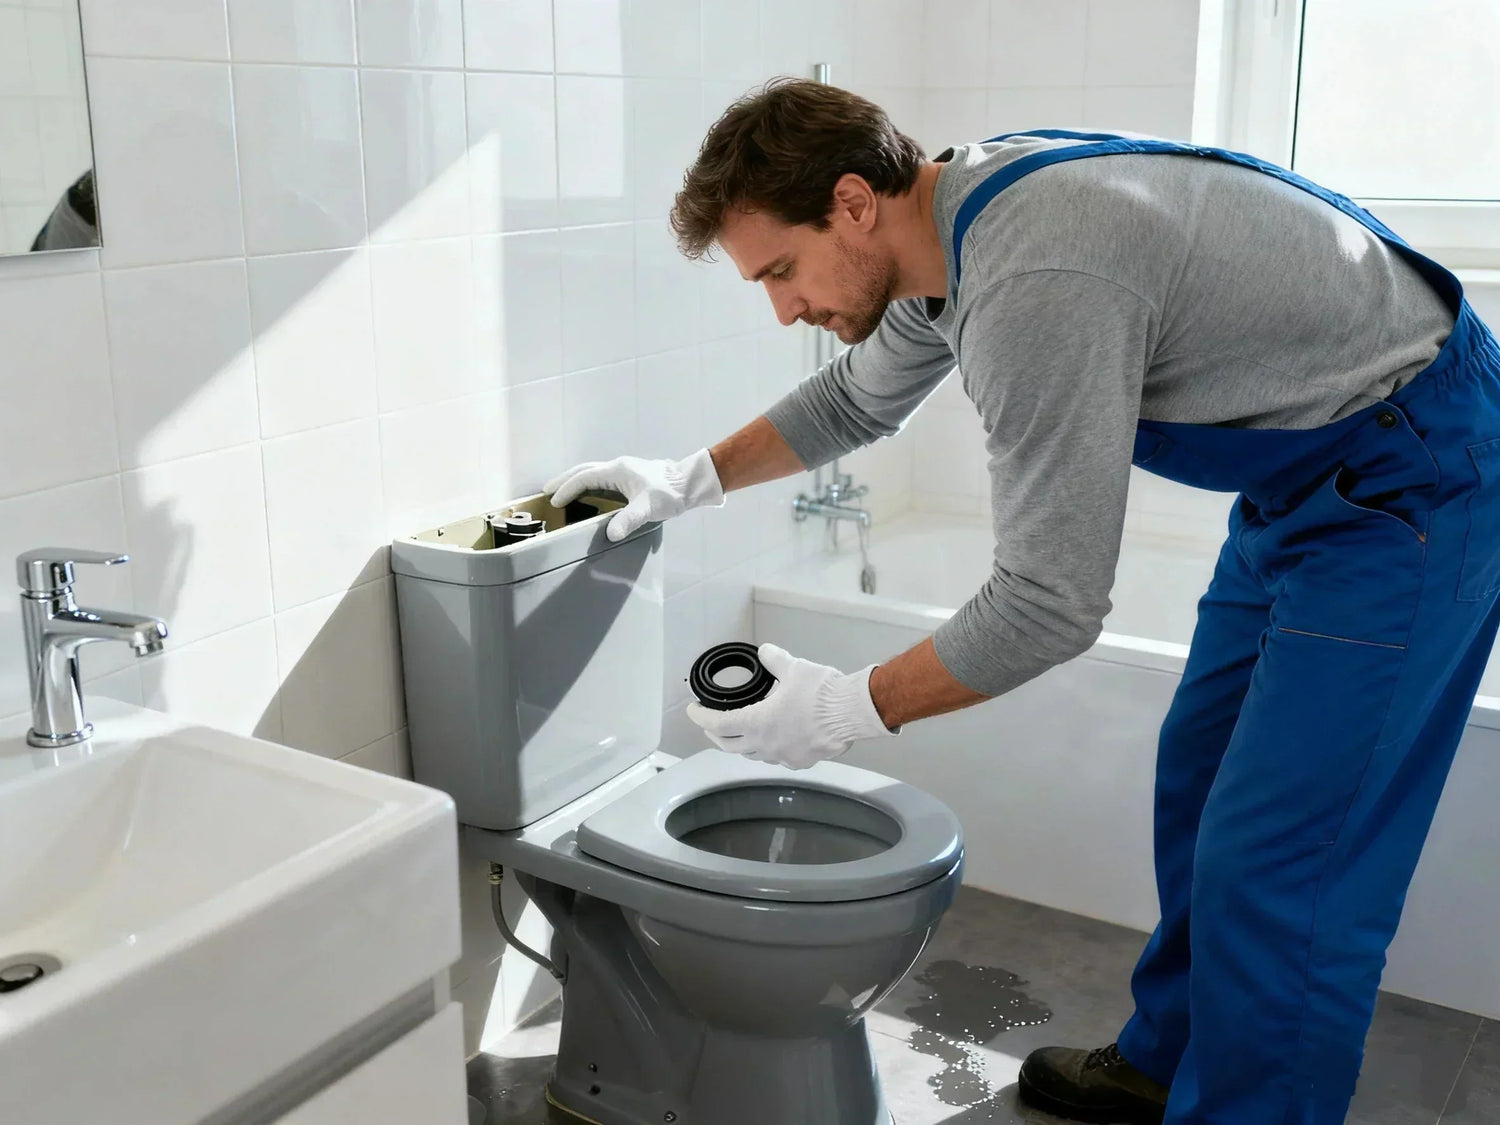
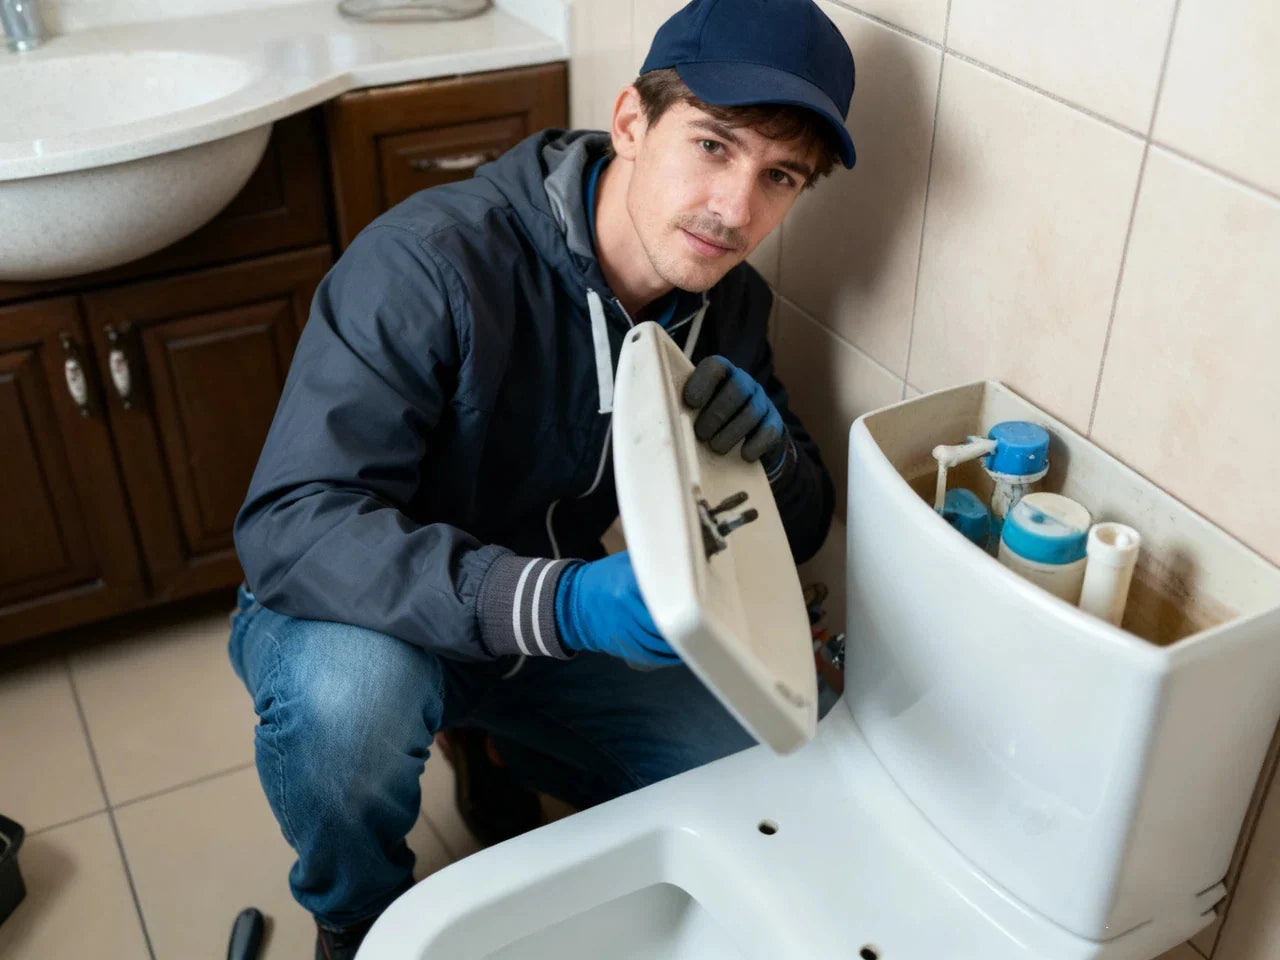
Stand beside the toilet and turn the small water supply valve at the wall clockwise until it stops. This will turn off the water to the toilet tank. Remove the tank lid and set it down on a towel to avoid chips. Now flush the toilet and hold the handle down so most water in the tank drains. Use a sponge or towel to soak up the last bit if needed. When the tank is empty, you’ll see the flapper at the bottom of the tank, hinged to the overflow tube and connected by a chain to the flush lever.
A quick tip before moving on: listen for any trickling sounds. If the toilet was running, the sound should stop once the tank is empty. That sound often points to a worn or warped flapper or a dirty valve seat.
Remove old flapper; match size (2" vs 3") and type (ears vs ring)
To remove the old flapper, start by unhooking the chain from the flush lever. Next, detach the flapper from the overflow tube. It will either clip onto two side pegs (“ears”) on the tube or slide over the tube using a round ring. As you lift it out, observe its shape and how it was mounted — this step is essential in learning how to remove the toilet flapper correctly. Once it’s out, check the flush valve opening size: most are either 2-inch or 3-inch. The quickest clue is usually the GPF stamp near the seat or on the bowl (common markings: 1.28, 1.6, or 3.5 gallons per flush). Many newer, higher-flow toilets use 3-inch parts. If you’re uncertain, measure the diameter of the opening with a ruler. Matching the right size is the key to a leak-free, lasting repair.
Yes, you can usually just replace flapper in toilet tanks without changing anything else. This is often all you need to stop a leaky toilet flapper from wasting water.
Install and adjust chain (about 1/2 inch slack), fill, and test reseat
Open the package of your new flapper. Clip or slide it onto the overflow tube exactly like the old one. Reattach the flapper chain to the flush handle arm so there’s about 1/2 inch of slack. Too tight and the flapper won’t seal; too loose and the flapper won’t lift high enough to flush. Turn the water back on and let the tank refill. Press the handle and watch the flapper: it should lift fully, then drop and seat smoothly. If you see small ripples or hear hissing after the tank fills, adjust the chain or clean the flush valve seat (details below) to help the flapper seals properly.
Visuals & interactive: checklist and GIF demo
-
Checklist:
-
Turn water supply valve clockwise to stop water
-
Lift tank lid and flush to drain
-
Disconnect chain from lever; unclip/remove old flapper
-
Confirm size (2" vs 3") and mount (ears vs ring)
-
Install new flapper; attach chain with ~1/2" slack
-
Turn water on; test multiple flushes; confirm full reseat
-
If leaking, clean valve seat and recheck chain slack
-
-
60‑second demo tip:
-
Record on your phone as you remove the old flapper so you can copy the mount style and chain connection during install.
-
Tools, parts, and compatibility (toilet flapper, flush valve, chain)
Having the right tools and part type makes replacing toilet flapper fast and clean. You do not need special plumbing gear for most tanks.
Toolkit & materials: adjustable wrench, towel/sponge, gloves, universal vs model-specific flappers
Set out your basics before you start so you don’t drip water across the floor hunting for supplies.
-
Tools/materials:
-
Adjustable pliers or wrench (for stiff shutoff valves)
-
Small towel and a sponge
-
Rubber gloves and eye protection
-
Ruler or tape measure
-
Non-scratch scrub pad and white vinegar (for mineral deposits)
-
Food coloring (for a quick dye test)
-
Replacement flapper with chain and hook
-
You will see two kinds of replacement parts: “universal” and model‑specific. Universal parts work on many standard 2‑inch or 3‑inch flush valves with “ears” or a ring mount. Model‑specific parts fit special tanks, including some dual-flush towers and canister style valves. If your current flapper does not look like a simple rubber cup, it may be a tower seal or canister seal rather than a classic flapper.

Identify your flapper: GPF stamp (1.28/1.6/3.5), mount style, brand-specific notes
Most tanks include a GPF number cast into the porcelain or printed on the bowl, such as 1.28 GPF or 1.6 GPF. This is a good clue to the right flapper size and type. Check:
-
The seat opening diameter (2" vs 3"). A larger opening usually means a 3" seal.
-
Mount style: side pegs (“ears”) vs a full ring that slides over the overflow tube.
-
Chain length path: straight to the lever, or angled? Angled runs need a chain that won’t kink.
Some toilets use proprietary seals or towers. If your old part is a tall cylinder (not a cup-shaped rubber flap), you likely need a tower or canister style seal, not a standard flapper. In that case, match the shape and diameter of the existing seal carefully.
Compatibility pitfalls: dual-flush, canister, pressure-assisted, specialty seal kits
A few tank types need special care:
-
Dual-flush: These often use a tower that lifts a seal straight up. You’ll replace a gasket, not a classic flapper.
-
Canister: The seal sits under a vertical canister, lifting straight up. You’ll replace a flat ring seal, not a cup.
-
Pressure-assisted: These have a sealed inner tank. Do not open the pressure vessel. For these, call a pro or follow the factory manual exactly.
-
Specialty kits: Some low-flow or older high-volume toilets need exact seals to maintain proper flush timing and prevent short flushes.
Visuals & interactive: flapper size finder table and brand/model cross-reference
Use this simple table to confirm size by measuring the flush valve opening.
| Flush valve opening (inside diameter) | Typical GPF marking | Likely flapper/seal size | Mount style hints |
| About 2 inches (≈ 50 mm) | Older 3.5 GPF, many 1.6 GPF | Standard 2" flapper | Ears or ring |
| About 3 inches (≈ 76 mm) | Many 1.28–1.6 GPF | 3" flapper or 3" tower/canister seal | Often ring or tower |
| About 4 inches (≈ 100 mm; less common) | Specialty high-efficiency | 3"–4" tower/canister seal | Tower/canister only |
Tip: When in doubt, remove the old part and take a clear photo next to a ruler. Matching on size and shape prevents repeat leaks.
Step-by-step with pro tips for a perfect seal
Slow down a bit here. The steps are simple, but small details—clean seats, straight chains—make the difference between a perfect fix and a return trip.
Tank anatomy 101: flapper, flush valve seat, overflow tube, fill valve, float
When you press the handle, the lever lifts the chain, lifting the flapper off the flush valve seat so water rushes from the tank to the toilet bowl. The overflow tube stands in the center and keeps water from rising too high. On the left side, the fill valve (with a float) controls when to stop filling. The thin refill tube sends a small stream into the overflow tube after each flush to refill the bowl.
Knowing this layout helps you spot misalignments, kinks, or worn parts. It also explains why chain slack matters: it must be long enough to let the flapper drop fully, but short enough to lift it cleanly.
Clean the valve seat: mineral deposits, hard-water scale, seat damage check
Even a brand‑new toilet flapper valve will leak if the seat is dirty or rough. After you remove the old flapper, run your finger around the valve seat. If you feel bumps or a rough edge, soak a paper towel in white vinegar and lay it around the seat for 5–10 minutes. Then scrub gently with a non-scratch pad. Do not use sharp tools; you can gouge the seat and cause permanent leaks.
Check for cracks, warped edges, or deep grooves. If the seat is damaged, consider a seat-repair kit that snaps over the old seat, or plan for a full flush valve replacement. Most people won’t need this, but it’s the fix when a new flapper still won’t seal.
Chain setup science: prevent kinks, proper slack, handle/lever alignment
Chain length is the most common source of post-replacement leaks or weak flushes. Aim for about 1/2 inch of slack when the flapper is seated. The chain should run straight up to the flush handle without snagging on the overflow tube or other parts. If your handle arm has multiple holes, pick the one that aligns the chain straight over the flapper. Make sure the hook faces away from the chain links so it doesn’t unhook during a flush.
If the chain sometimes tangles, add a small plastic bead or float on the chain to keep it centered. Also check the handle nut inside the tank: if it’s too loose, the lever can stick; if it’s too tight, it binds. A quarter turn at a time is enough. Hand-tight is usually best. Avoid over‑tightening plastic nuts.
Visuals & interactive: labeled tank diagram and seat-cleaning micro-guide
-
Diagram tip: Label five parts in your notes—flapper, flush valve seat, overflow tube, fill valve, float. When you know each part by name, troubleshooting gets fast.
-
Micro‑guide for seat cleaning:
-
Turn off water, drain tank
-
Lay vinegar‑soaked paper towel around seat, wait 10 minutes
-
Gently scrub with a non‑scratch pad
-
Rinse, reinstall flapper, test
-
Troubleshooting a running toilet after replacement
If your toilet still leaks or you hear hissing after the tank fills, don’t panic. Work through these checks in order.
Persistent leaks: wrong size, warped seat, misaligned ears, deteriorated gasket
A steady trickle points to the seal. Confirm you matched the right size (2" vs 3"). Make sure the flapper’s frame sits flat on the seat and that its “ears” are fully on the pegs. If you used a ring mount, the ring must sit level on the overflow tube without tilt. Clean the seat again and retest. If you see a groove in the seat or the flapper rubber looks deformed, replace the flapper with a fresh one and consider a seat-repair kit if the seat is visibly worn.
A quick dye test can help: add 5–10 drops of food coloring to the tank, wait 15 minutes without flushing. If colored water shows in the bowl, the flapper seals are not tight. Focus on seat cleanliness, size match, and chain slack.
Short/weak flush: chain too loose/tight, float level, fill valve calibration
If the flush is weak, the flapper may be closing too soon or not opening fully. Shorten the chain one link at a time until the flapper lifts high and stays up long enough for a full flush. If it slams shut too fast, lengthen the chain slightly or move the chain to a hole farther from the lever pivot to increase lift. Check the float and water level line on the tank: adjust the fill valve so the water stops at the marked line. If the water level is too low, you’ll get a weak flush even with a perfect flapper.
PAA: Why does my toilet keep running after I replace the flapper?
Common reasons include the wrong size flapper, a dirty or damaged seat, chain that’s too tight, a handle that binds, or water level set too high so it spills into the overflow tube. Fixes: match the proper flapper size, clean the seat, set 1/2 inch chain slack, make sure the handle moves freely, and adjust the water level so it’s about 1 inch below the top of the overflow tube.
Visuals & interactive: decision-tree flowchart and leak-dye test guide
-
Decision tree (quick version):
-
Still running? Do a dye test.
-
Dye in bowl? Reseat/resize flapper → Clean seat → Recheck chain slack
-
No dye in bowl? Check water level → Lower until 1" below overflow top
-
-
Handle sticky? Loosen nut slightly → Ensure lever moves freely
-
Intermittent trickle at night? Mineral buildup → Vinegar soak and scrub
-
-
Dye test steps:
-
Put coloring in tank, wait 15 minutes
-
Color in bowl = leak past flapper/seat
-
No color = look at fill valve, overflow level, or hairline cracks
-
Water savings, costs, and ROI (EPA WaterSense data)
A worn flapper is a tiny part with a big footprint. Leaks add up fast, and the savings from a simple replacement are real. According to the U.S. Environmental Protection Agency (EPA), a leaking toilet can waste up to 200 gallons of water per day, making it one of the most common sources of household water loss. Regularly checking and replacing a faulty flapper is among the simplest ways to cut water waste and lower monthly bills.
Fast facts: up to 200 gallons/day wasted; ~9,000 gallons/year; toilets = ~30% use
-
A single running toilet can waste up to about 200 gallons per day.
-
Households lose as much as 9,000 gallons per year to leaks from toilets and other fixtures.
-
Toilets account for roughly 30% of indoor household water use.
These figures come from national water‑efficiency resources and show why a replace toilet flap job delivers quick wins for your home and community.
Cost math: expected bill savings vs flapper price and payback timeline
Let’s run sample numbers. Local rates vary, so use your own bill for precise math.
-
Example leak: 200 gallons/day
-
Per month: about 6,000 gallons
-
Sample combined water/sewer rate: $10–$20 per 1,000 gallons
Monthly cost of that leak:
-
At $10/1,000 gal: ~$60/month
-
At $20/1,000 gal: ~$120/month
A quality flapper often costs $6–$20. Your payback is usually within the first month, sometimes within the first week. That’s one of the best ROI repairs in any home.
How much does a plumber charge to replace a toilet flapper? Typical service visits range from about $100 to $200 in many areas, and higher in some cities. If your shutoff valve is stuck or the tank has other issues, labor and parts can add to the total. For a simple flapper replacement, most homeowners can DIY and save the visit.
Conservation wins: WaterSense, hard-water care, skip drop-in bleach tablets
You can keep the savings going. Choose efficient settings that still give a good flush, clean mineral buildup so parts last longer, and avoid drop‑in bleach tablets in the tank. These tablets can break down rubber and shorten flapper life. If you want a cleaner tank, use mild cleaners and a soft brush during regular maintenance instead of harsh chemicals. If you want a cleaner, lower-maintenance bathroom, consider upgrading to a high-quality smart toilet with built-in self-cleaning and water-saving functions. These modern models use precise flushing technology to conserve water automatically while keeping the bowl fresh.

Visuals & interactive: water-savings calculator and monthly bill chart
-
Water savings quick calc:
-
Enter estimated leak (gallons/day): 50, 100, 200
-
Enter your rate ($ per 1,000 gal)
-
See monthly savings and payback time based on a $10 flapper
-
-
Monthly bill chart idea:
-
Before fix vs after fix bars to visualize the drop
-
Special cases: dual-flush, canister, and pressure-assisted toilets
Not all toilets use a classic rubber cup flapper. Before you install toilet flapper parts, compare your tank style.
Dual-flush specifics: tower seals, button linkages, volume calibration
Dual‑flush tanks often use a tower seal. You’ll replace a flat gasket at the bottom of the tower, not a cup flapper. Make sure the seal size matches the tower base. Check the push‑button or split‑handle linkages for smooth movement. After replacement, test both the reduced and full flush settings and confirm the tank refills to the correct mark. If the short flush feels weak, ensure the tower lifts high enough and that the refill tube directs water into the overflow.
Other canister systems: seal replacement vs standard flappers
Some tanks have a vertical canister that lifts straight up. The fix is replacing the ring seal at the canister base. The steps are similar: shut off water, drain the tank, remove the canister, swap the seal, clean the seat, reinstall, and test. Size matters here too. Bring the old seal or measure carefully to ensure a tight fit.
Pressure-assisted tanks: safety cautions and when to call a pro
If you see a sealed plastic tank inside the main tank, you likely have a pressure-assisted system. Do not open the pressurized vessel unless you’re trained and have the exact parts and instructions. For these systems, call a plumber or follow the official manual step by step. Safety comes first.
Visuals & interactive: compatibility matrix and close-up seal photos
-
Compatibility matrix tip: Note your tank style (classic flapper, tower, canister, pressure‑assisted) and match the correct gasket or flapper type before you buy.
-
Close‑up photos you can take: the base of your valve seat, the side pegs, the top of the tower or canister connection, and the old seal next to a ruler.
Safety, common mistakes, and preventive maintenance
A few small habits prevent most callbacks and keep your toilet working for years.
Avoid these errors: mismatched size, over-tightening, chain misadjustment
Most repeat leaks come from using the wrong size flapper or from skipping seat cleaning. Confirm 2" vs 3", clean the seat, and give the chain about 1/2 inch of slack. Do not crank down tank parts—plastic threads and porcelain crack easily. If a nut resists, stop and check alignment before applying more force.
Flapper lifespan 3–5 years: extend life by avoiding chlorine tablets
How long does a toilet flapper last? In many homes, flappers last about 3–5 years. Hard water, tank chemicals, and high use can shorten that time. To extend life, avoid drop‑in chlorine tablets, which can degrade rubber. Keep water chemistry gentle, and wipe down the seat if you see scale.
Maintenance plan: 6–12 month checks, seat cleaning, water-quality tips
Mark a date on your calendar every 6–12 months to lift the tank lid and do a quick check. Look for cracks in the flapper, a kinked chain, or white scale on the seat. If you have hard water, soak a paper towel in vinegar and set it on the seat for 10 minutes, then wipe clean. Test a flush and make sure the float stops the water about an inch below the top of the overflow tube. Small habits prevent big bills.
PAA: How long should a toilet flapper last?
Most flappers last 3–5 years. In harsh water or with tank chemicals, you may need to replace a toilet flapper sooner. If you hear random refills at night, see dye seeping into the bowl, or spot cracks in the rubber, it’s time.
Case studies and social proof (videos, forums, homeowner wins)
Seeing what worked for others helps you troubleshoot with confidence.
Video highlights: chain measurement and seat cleaning that stop leaks
Short DIY clips often show the same two winning moves: setting flapper chain slack to roughly 1/2 inch and cleaning the valve seat so the flapper sits flat. Many city utility workshops and how‑to channels in the world on YouTube feature fast demos you can follow. Notice how a tiny chain tweak removes a constant trickle right away.
Reddit/HomeImprovement takeaways: common pitfalls and quick fixes
Homeowners often report that leaks remain after they install the new flapper—only to find the flapper was the wrong size or the chain was too tight. Others find that the refill tube was shoved too far into the overflow tube, causing siphoning. Pulling it back and clipping it above the tube rim ends the phantom running. A quick dye test is another common tip that points straight to the problem.
Before/after results: leak rate drops and water-bill savings examples
Consider a rental unit where a toilet ran lightly for months. After a simple replace a toilet flapper task and seat scrub, the bill dropped by an estimated 4,000 to 6,000 gallons in the next cycle—saving $40–$120 depending on local rates. Another homeowner shared that a 10‑minute replace toilet flap job lowered a water bill spike the very next month. These “after” results align with national data on toilet leaks.

Visuals & interactive: photo gallery and “rate your fix” checklist
-
Photo ideas to capture:
-
Old vs new flapper side by side
-
Seat close‑up before and after cleaning
-
Chain slack measured with a ruler
-
-
“Rate your fix” mini‑checklist:
-
No hiss after fill
-
No dye entering bowl
-
Strong, complete flush
-
Water stops 1" below overflow
-
Full step-by-step instructions
Use this detailed version when you want the most reliable, “pro” finish.
Turn off water and drain the tank
- Turn the shutoff valve clockwise until it stops.
- Remove the tank lid, set it on a towel.
- Hold the handle down to drain as much water as possible.
- Mop out the last puddle with a sponge for a dry work area.
Disconnect and remove the old flapper
- Unhook the chain from the flush lever.
- If your flapper uses side pegs, pinch the ears and lift off.
- If it uses a ring, slide the ring up and off the overflow tube.
- Inspect the bottom of the tank seat for scale and grooves.
Clean the flush valve seat
- Lay vinegar‑soaked paper towel on the seat for 5–10 minutes.
- Scrub gently with a non‑scratch pad.
- Rinse with a damp cloth.
- Feel for smoothness; repeat if rough.
Identify and install the new flapper
- Confirm 2" vs 3" size with a ruler.
- Match mount style: ears or ring.
- Place the flapper so the hinge pivots freely and the seal sits flat.
- Clip the chain to the lever so there’s about 1/2" slack.
Adjust water level and test
- Turn the water supply back on.
- Let the tank refill to the line.
- Flush a few times. The flapper should lift fully and reseat smoothly.
- If you hear a hiss, lengthen the chain slightly or re‑clean the seat.
- Perform a dye test to confirm no seepage.
Final checks and cleanup
- Ensure the refill tube is clipped above the overflow and not shoved inside.
- Confirm the float stops water about 1" below the top of the overflow tube.
- Wipe up any water and replace the tank lid.
- Make sure everything is working and the toilet does not run.
Common questions answered in plain language
-
Are toilet flappers universal? Many are, but not all. Standard 2" and 3" valves accept universal options. For dual‑flush or canister systems, match the exact seal.
-
Can I replace a flapper without draining the tank? It’s not practical. Draining the tank gives you a clean seat and an easy install.
-
Do I need any special tools? Usually no. A towel, sponge, and basic pliers are enough. A ruler helps confirm size.
-
What if my shutoff valve won’t turn? Don’t force it. Try gently with adjustable pliers. If it’s stuck, turn off the house water or call a plumber to avoid damage.
-
How long does toilet flappers last? Most toilet flappers last around 3 to 5 years, depending on water quality and cleaning habits. Hard water and chlorine tablets can wear out rubber faster. Regular inspection and gentle cleaning help extend the flapper’s life and prevent unexpected leaks.

When to call a pro
Call in help when you have a stuck or leaking shutoff valve, a cracked tank, a pressure-assisted system, or if a new flapper won’t seal even after seat cleaning and correct sizing. Also call for signs of subfloor leaks or if water appears under the toilet base; that’s a separate seal issue at the bowl, not a flapper problem.
Glossary (fast refresher)
-
Flapper: The rubber valve that lifts to start a flush and seals to hold water in the tank.
-
Flush valve seat: The round opening the flapper seals against.
-
Overflow tube: Vertical tube that prevents overfilling.
-
Fill valve and float: The inlet valve and float that refill and stop the tank water.
-
Chain: The link between the handle lever and the flapper.
Final takeaways
-
You can replace a toilet flapper in under 15 minutes with basic tools.
-
Match the size and mount style; clean the valve seat; set chain slack to about 1/2 inch.
-
If the toilet keeps running, double‑check seat cleanliness, chain length, water level, and refill tube position.
-
Expect a flapper to last about 3–5 years—longer if you keep chemicals out of the tank and clean scale regularly.
-
The payoff is clear: a quiet toilet, fewer toilet leaks, lower bills, and less wasted water.
FAQs
1. Are toilet flappers universal?
Not all toilet flappers are universal, but most standard toilets use a 2-inch or 3-inch flapper that fits common brands. Universal models are designed to fit these sizes, making them an easy solution for most homeowners. However, if you have a dual-flush or canister-style toilet, you’ll need a specific seal or tower replacement kit that matches your toilet’s brand and model. The best way to know is to remove your old flapper, measure the valve opening, and note how it connects — either with side “ears” or a round ring that slides over the tube. Taking a quick photo before you go to the hardware store can help you match it perfectly. While universal flappers cover the majority of toilets, checking those small details ensures a snug fit and a leak-free repair.
2. Can you just replace the flapper in a toilet?
Yes — in most cases, replacing toilet flap is all you need to fix a running or leaking toilet. The flapper is what seals the tank after each flush, so if it’s warped or cracked, water keeps seeping into the bowl and the tank refills over and over. Changing the flapper restores that tight seal. However, if you notice damage to the flush valve seat (the plastic or brass ring under the flapper), you may also need a seat-repair kit. These are inexpensive and snap right over the old one. Only in rare situations — like a corroded valve or a very old toilet — will you need to replace the entire flush valve. For most people, swapping the flapper takes 10–15 minutes and instantly stops the leak.
3. How do I know what flapper to buy for my toilet?
Start by checking the size and shape. Most toilets use either a 2-inch or 3-inch flush valve opening — you can measure it with a ruler or check the GPF (gallons per flush) marking inside the tank. Toilets labeled 1.6 or 1.28 GPF usually use a 3-inch flapper. Next, look at how the old one was attached: does it clip onto two small pegs (“ears”) or slide over the overflow tube with a ring? That tells you the mounting type. Finally, match the flapper style — traditional rubber flappers are common, while newer models might use tower or canister seals for dual-flush systems. Taking your old flapper or a photo to the store is the easiest way to find an exact match.
4. How to tell if your toilet flapper is bad?
A bad flapper usually shows itself through subtle but persistent signs. You might hear your toilet refilling randomly, even when no one has flushed — that’s a sign of water slowly leaking from the tank into the bowl. You can also do a simple dye test: add a few drops of food coloring to the tank and wait 15–30 minutes. If the color seeps into the bowl without flushing, the flapper isn’t sealing properly. Physically inspect it too — if the rubber feels brittle, warped, or shows cracks, it’s time for a new one. Other clues include weak flushes, constant hissing sounds, or higher-than-usual water bills. Replacing a bad flapper quickly not only restores your toilet’s performance but also saves hundreds of gallons of water each month.
5. How often do toilet flappers need to be replaced?
Most toilet flappers last between three and five years, though their actual lifespan depends on water quality and cleaning habits. Hard-water minerals and chlorine tablets inside the tank can degrade the rubber faster, sometimes within a year or two. To keep your flapper in good condition, avoid harsh chemicals and use mild cleaners instead. Doing a quick inspection every six months — checking for cracks, buildup, or looseness — can catch issues before they become leaks. If you live in an area with hard water, consider cleaning the valve seat regularly with vinegar or a descaling solution. Replacing toilet flap on schedule is one of the simplest ways to keep your toilet running efficiently and your water bills low.
6. How much does a plumber charge to replace a toilet flapper?
Hiring a plumber for a simple replace toilet flap job usually runs between $75 and $150, depending on where you live and the plumber’s service call fees. That cost covers both the part and labor — but since a new flapper typically costs less than $10, most homeowners go the DIY route. The project takes less than 15 minutes, and you only need basic tools like a towel, sponge, and adjustable pliers. It’s one of the easiest plumbing repairs around. Still, if your shutoff valve is stuck, the flush valve is cracked, or your toilet uses a unique system (like a dual-flush or tower design), calling a pro can prevent further damage. Whether you decide to tackle it yourself or hire a plumber, learning how to replace toilet flap is a quick, low-cost fix that restores your toilet’s performance and helps stop water waste immediately.
References


Leave a comment
This site is protected by hCaptcha and the hCaptcha Privacy Policy and Terms of Service apply.