



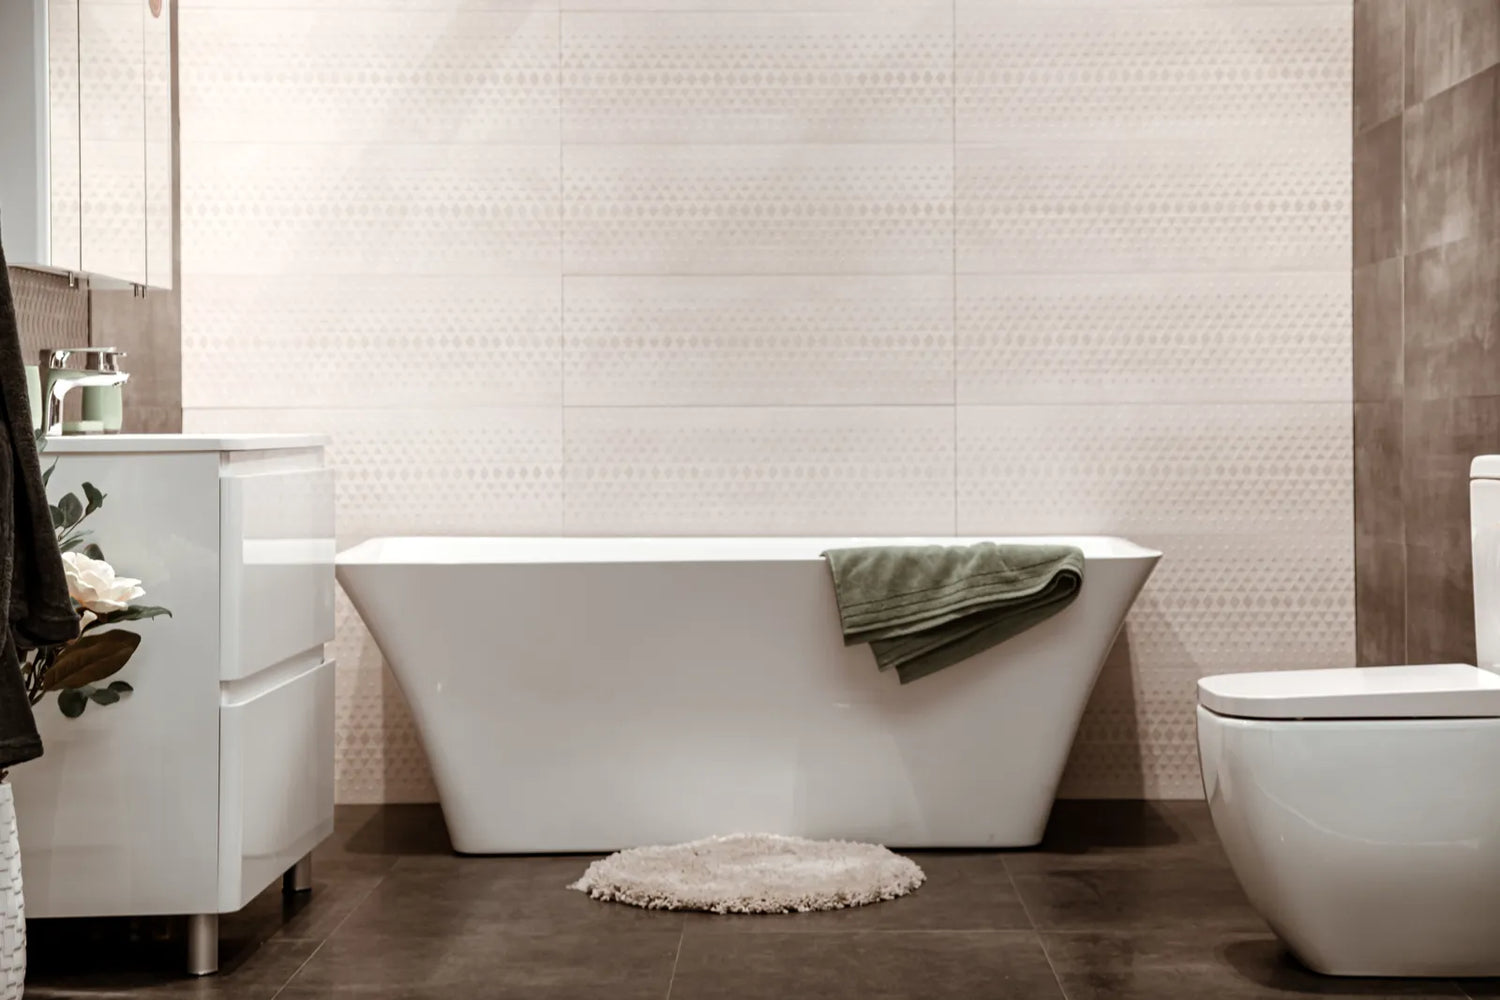
Bathtub removal sounds simple until the tub is loose but will not clear the walls, the drain will not come apart, or you find black subfloor rot under the apron. That is where most homeowners lose time and money.
A good diy bathtub removal guide for homeowners should not just tell you how to swing a pry bar. It should help you decide whether removal is realistic in your home, what extra work removal creates, and when the “cheap DIY” route stops being cheap.
This guide covers the real decision points: access, plumbing, wall damage, weight, disposal, hidden repairs, and the difference between removing an alcove tub, freestanding tub, drop-in tub, or old cast iron tub.
First-order go/no-go gates (pre-removal decision checkpoint)
Before any demolition starts, introduce a decision layer that determines whether removal is safe, practical, and reversible.
Gate 1: Confirm the replacement pathway (mandatory requirement)
Removal should only proceed if the post-removal plan is already clearly defined:
-
New bathtub or shower type selected with confirmed dimensions
-
Drain location confirmed (same position or planned relocation)
-
Existing plumbing inspected for compatibility
-
Slope and drainage requirements verified
-
-
Wall reconstruction plan established (tile, waterproofing, framing approach)
-
Floor condition strategy defined (leveling, reinforcement, or repair)
If any of these elements are unclear, bathtub removal should be paused until the design is finalized.
Gate 2: Standard removal vs retrofit removal classification
Standard removal (lower risk)
Proceed under standard conditions only if:
-
There is accessible space behind or beside the tub
-
Plumbing lines are visible or reachable through an access panel
-
No fully sealed ceiling or inaccessible lower-floor obstruction exists
-
Plumbing is not embedded in concrete or fully concealed structural cavities
This condition allows for conventional removal steps without major structural disruption.
Retrofit removal (high complexity)
Treat as retrofit if any of the following apply:
-
No physical access to plumbing behind or under the tub
-
Drainage or supply lines are fully hidden within walls or slab
-
Lower ceiling is fully finished with no inspection access
-
Evidence of multiple renovation layers or unknown construction history
If classified as retrofit, stop before demolition and obtain a professional inspection and cost estimate.
Decision Snapshot
Bathtub removal can look straightforward on the surface, but the real difficulty depends on access, plumbing layout, and the condition of what’s hidden behind the walls and floor. The following snapshot breaks down when the job is typically manageable, when it becomes risky, and when it may not be worth attempting without professional help.
Works best with open access
Bathtub removal is most workable when you have:
-
a standard alcove or freestanding tub
-
removable wall finish around the tub
-
visible or reachable plumbing access
-
a clear path through the bathroom door and hallway
-
a second full bathroom in the home
This is the setup where a homeowner can often handle demolition and basic disconnection safely.
Avoid in one-tub homes
If this is the only tub in the house, pause before starting. Removing the only tub may reduce appeal for future buyers, especially families with small children. If you are converting to a shower for safety or mobility, that may still be the right choice, but it is not a neutral remodel in resale terms.
Reconsider if hazards are likely
This job becomes a bad DIY candidate when:
-
the home is older and may contain asbestos or lead
-
the tub is cast iron and must be broken up
-
the tub is jetted and hardwired
-
access is so tight that the tub cannot come out whole
-
plumbing is buried in finished walls with no back access
Problems start with hidden rot
The biggest budget surprise is not usually the tub. It is what is under and behind it. Soft subfloor, leaking drain assemblies, mold, rusted framing hardware, cracked waste lines, and damaged studs often show up only after removal begins.
Decision line: If you need the bathroom back in service fast and cannot absorb hidden repair costs, tub removal is riskier than it first appears.
Is your bathroom a good removal candidate?
Bathtub removal is not just about whether you can physically take the tub out—it also depends on how the space is configured, what systems are connected to it, and how much risk you’re taking on with structure, plumbing, or electrical work. The following checks help you quickly judge whether your bathroom is a realistic candidate for safe and efficient removal, or if it’s likely to turn into a complicated project.

One full bath hurts resale
If your home has only one full bathroom, removing the tub can narrow your buyer pool. That does not mean “never do it.” It means do it with clear eyes. In homes with two or more full baths, removal is usually less of a resale problem if another tub remains elsewhere.
This matters most when your project is really a shower conversion. Many owners regret removing the only tub later, not during the remodel, but when selling.
Tight exits raise labor risk
Before you disconnect anything, measure the path out:
-
bathroom door width
-
hallway width
-
stair landings
-
turn radius at corners
-
distance between vanity and opposite wall
-
clearance past toilets and door casings
A tub may be 30 to 32 inches wide, but that does not mean it can pivot out through a 30-inch opening. You need room to tilt, rotate, and protect walls.
Add at least 6 inches of practical maneuvering buffer in your planning. More is better for cast iron, steel, and rigid acrylic tubs.
If your setup looks like this, it won’t work: narrow bath, inward-swinging door, vanity crowding the front edge, and no clear angle to tip the tub.
Older homes hide hazardous materials
If the house was built before 1980, assume there may be:
-
lead paint on trim or old wall layers
-
asbestos in mastic, drywall compound, flooring, insulation, or vinyl backing
-
old galvanized plumbing that snaps or spins when disturbed
You do not need to panic, but you do need to avoid blind demolition. If suspect materials will be cut, sanded, or broken, get them evaluated first.
Jetted tubs need licensed disconnects
Jetted and whirlpool tubs are not just plumbing fixtures. They may have:
-
hardwired pump motors
-
GFCI protection requirements
-
access panels
-
bonded metal components
-
dedicated circuits
Based on OSHA electrical safety standards, working on energized or improperly isolated circuits in wet environments significantly increases the risk of electric shock, which is why licensed electrical disconnection is required.
Practical electrical verification steps for non-professionals
-
Access verification
-
Identify whether an access panel exists near the tub
-
Confirm whether it can be opened without damaging finishes or walls
-
Power connection identification
-
Plug-in systems indicate lower complexity and easier disconnection
-
Hardwired systems require licensed electrical work and cannot be safely handled as DIY removal
-
Circuit verification
-
Confirm whether the system is connected to a dedicated breaker
-
Check for ground fault circuit interrupter protection in the electrical panel
-
Mandatory stop condition
If any of the following cannot be confirmed:
-
Power source type is unclear
-
Circuit breaker cannot be identified
-
Wiring path is inaccessible or unknown
The removal process should stop and a licensed electrician should be consulted.
What extra work does removal create?
Removing a bathtub almost always creates more work than just lifting out a single fixture. Once demolition begins, wall finishes, plumbing connections, subfloor conditions, and tight bathroom layouts all start to influence the scope of the project. The sections below break down the most common types of follow-up work that tend to appear once the tub comes out.
Wall demo usually comes first
Most alcove tubs are trapped by the wall finish and flange. That means the tub does not simply slide out. You usually need to remove tile, backer, drywall, or surround panels above the tub lip before the tub can move.
This is why how to remove a bathtub without damaging surrounding tile is often the wrong question. In many real bathrooms, some wall damage is unavoidable. The realistic goal is not “zero damage.” It is “controlled damage in the area that will be rebuilt anyway.”
If you must preserve tile, you need to know exactly how the tub was installed behind it. In older bathrooms, tile often overlaps the flange tightly, and attempts to save all of it usually crack more than expected.

Drain changes add hidden plumbing work
Tub drains do not always disconnect cleanly. Corrosion, putty, cross-threading, and limited access make the how to disconnect bathtub drain and overflow before removal stage one of the most common failure points.
Once the tub is out, you may also discover:
-
offset drains that do not match the new fixture
-
old trap connections that need replacement
-
venting limitations
-
drain height problems
-
code issues with old waste and overflow assemblies
This is where a “simple removal” turns into plumbing rework.
Drain alignment compatibility and rework prediction
-
Required measurement points before purchasing a new tub
Three measurements are essential before selecting replacement fixtures:
-
Distance from drain centerline to back wall
-
Distance from drain centerline to side wall
-
Drain height relative to finished floor level
These measurements define whether plumbing adjustments will be minor or structural.
-
Impact of misalignment levels
-
Small deviation within approximately two centimeters typically allows adjustment using flexible connectors or minor trap correction
-
Moderate deviation between two and five centimeters often requires repositioning of the trap or localized pipe modification
-
Large deviation beyond five centimeters or incorrect height alignment generally requires rerouting of drainage lines under the subfloor
-
Critical pre-purchase rule
A replacement bathtub should not be purchased until:
-
All rough-in plumbing measurements are verified
-
Drain compatibility is confirmed against the new fixture specifications
Failure to confirm this step is one of the most common causes of installation failure after demolition.
Unknown subfloors change the budget
Water often leaks slowly around tubs for years. Once the tub is removed, you may find:
-
blackened plywood
-
soft OSB
-
delaminated subfloor
-
loose fasteners
-
damaged joist tops
-
moldy insulation below
A few hundred dollars in demolition can quickly become a framing and subfloor repair project.
This is where most people get it wrong: they schedule the new tub or shower install before they know whether the floor is sound.
Small baths trigger finish damage
Even if the tub itself comes out, small bathrooms make collateral damage more likely:
-
broken tile outside the work area
-
chipped vanity corners
-
dented drywall at turns
-
damaged door jambs
-
cracked toilet bases from impact
-
gouged flooring in the exit path
Protecting the route out matters almost as much as removing the tub.
What does bathtub removal really cost?
Bathtub removal cost is not a single fixed number—it changes quickly depending on material, access, hidden damage, and how much of the surrounding bathroom ends up being affected. The breakdown below explains where the money actually goes, why DIY savings are often smaller than expected, and when professional removal becomes the more predictable option.
DIY saves only on labor
The common assumption is that DIY means “cheap.” More accurately, DIY usually saves only on labor for demolition and haul-out. You still pay for:
-
tools
-
disposal fees
-
dump or scrap transport
-
wall repair materials
-
plumbing parts
-
patching and repainting
-
subfloor repair if damage is found
-
dust control and cleanup
If everything goes smoothly, a homeowner may save a meaningful amount. If the drain is frozen, walls crack beyond the planned area, or the tub will not clear the door, savings shrink quickly.
Cast iron removal costs more
The best way to remove an old cast iron bathtub is often not to carry it out whole. Cast iron tubs are extremely heavy and frequently must be sectioned for safe removal. That means:
-
more labor
-
floor protection
-
heavy debris handling
-
noise
-
flying sharp fragments
-
more cleanup
If you are searching how to cut a cast iron tub for removal, understand that this is not the same as slicing thin steel. Cast iron is usually broken into sections or cut with heavy-duty tools, and both methods create hazards. Eye, face, hand, hearing, and respiratory protection matter.
Tight access extends haul-out time
A tub on a ground floor with wide access is one thing. A tub in an older upstairs bath with narrow stairs and turns is another. Tight access often adds:
-
extra demolition
-
more people for lifting
-
more time protecting finishes
-
more debris handling
-
sectional removal instead of one-piece removal
That is why bathtub removal cost vs diy removal is not just labor rate math. Access changes the whole job.
Professional help pays off sooner
The cost to have a bathtub professionally removed depends on region, tub type, access, disposal, and whether plumbing or wall repair is included. In simple cases, labor may look manageable. In difficult cases, pro help pays off because it reduces:
-
plumbing breakage
-
accidental wall damage
-
stalled projects
-
injury risk
-
disposal headaches
-
rework delays for the next trade
If your tub is cast iron, jetted, in a one-bath home, or in an old house with unknown conditions, getting a quote before you start is usually smart.
Will the tub clear walls and doorways?
Bathtub removal often looks simple until you map the actual exit path and realize the tub must move through a series of tight clearances, turns, and obstacles. Whether the fixture can realistically clear the bathroom door, hallway, and corners depends less on its listed dimensions and more on the true usable space and how much maneuvering is required during removal.
Measure exits before any demo
Before you pick up a pry bar, write down:
-
tub length
-
tub width at the widest point
-
tub height/depth
-
apron projection if any
-
bathroom door opening width, with door removed if needed
-
narrowest hallway point
-
stair width
-
landing dimensions
-
ceiling height at turns
Do not trust nominal sizes. Measure the actual fixture and actual path.
Add buffer for tilt and turning
A tub rarely leaves in the same orientation it was installed. You may need to:
-
tilt it on edge
-
rotate it around the toilet or vanity
-
lift one side first
-
pass it through a doorway diagonally
That movement takes extra room. A useful rule is to add at least 6 inches of planning space for turning and hand clearance. More is needed for rigid tubs and tight doors.
Freestanding tubs need swing clearance
How to remove a freestanding tub without damaging plumbing is mostly about controlled lifting and line protection. Freestanding tubs are not trapped by wall flanges the same way alcove tubs are, but they can still fail removal if:
-
supply risers are exposed and easily bent
-
the drain connection is hidden and hard to reach
-
the tub must swing near stone, tile, or vanity edges
-
the floor finish around the feet is fragile
Protecting the floor and keeping the drain connection from twisting is critical.
True clear opening measurement
Accurate assessment requires measuring usable space, not nominal door width:
-
Remove the door before measuring the opening
-
Account for door casing and stops, which reduce usable width
-
Measure at the narrowest point rather than frame edge
The smallest measured clearance should be used as the controlling value.
Turning and tilt clearance evaluation
A bathtub must be evaluated for movement, not only straight-line passage:
-
Determine whether the tub must be tilted vertically or diagonally during entry
-
Check whether rotation space is blocked by toilet, vanity, or wall protrusions
-
Confirm whether the entry corridor allows pivoting movement
Most installation failures occur due to insufficient turning radius rather than insufficient width.
Safe handling versus theoretical fit
A distinction must be made between dimensional fit and actual installability:
-
Fits on paper means the measurements match the opening
-
Actually movable means it can be transported without forced bending, scraping, or structural contact
High-risk indicators include:
-
Requires forced diagonal insertion with minimal clearance
-
Requires repeated rotation in confined space
-
Requires temporary removal of trim or partial framing elements
If these conditions exist, the installation should be considered high-risk even if the dimensions technically match.
Can this work in a small bathroom?
Sometimes yes, but not cleanly.
In a small bathroom, the tub may need to be:
-
slid after toilet removal
-
cut or broken into pieces
-
taken out after vanity removal
-
removed only after wider wall demo
If your path out requires too many sharp turns, whole-tub removal may not be realistic.
Decision line: If the tub cannot be carried out without hitting something valuable, plan on extra demolition or sectional removal.
Fit and requirement summary
Before removal, confirm these basics:
| Item | What to verify | Why it matters |
| Access path | Door, hall, stairs, turn clearance | Tub may not come out whole |
| Wall release | Tile/drywall removed above flange | Alcove tubs stay trapped otherwise |
| Plumbing access | Drain, overflow, supply access | Prevents broken pipes and hidden leaks |
| Electrical | Jetted tubs fully isolated | Avoids shock risk |
| Floor condition | Subfloor firmness around tub | Rot may require repair before replacement |
| Disposal plan | Scrap, dump, pickup rules | Old tub can block the project |
| Dust control | Plastic barriers, vent sealing | Demo dust spreads through the house |
Minimum practical conditions for DIY:
-
clear shutoff access
-
a reachable drain/overflow assembly
-
a protected exit route
-
enough labor to move the tub safely
-
willingness to repair wall finishes after removal
How do you remove different tub types?
Different bathtub types are removed in very different ways, and the approach depends less on “lifting it out” and more on how it was originally installed and what is supporting it. The steps below show how alcove, freestanding, drop-in, and cast iron tubs each require a different removal strategy, with varying levels of demolition, risk, and preparation.
Alcove tubs need flange exposure
For most homeowners asking how to remove a bathtub step by step, the tub is an alcove model set between three walls.
Typical sequence:
-
Shut off water to the bathroom or house.
-
Remove trim, spout, and visible fittings as needed.
-
Cut caulk lines and score surrounding finish.
-
Open the wall above the tub flange, usually 6 to 8 inches or more.
-
Remove drain and overflow components.
-
Disconnect any fasteners through the flange.
-
Free the tub from the framing.
-
Lift and slide the tub out carefully.
The key point: alcove tubs are usually fastened through the flange and trapped by wall materials. If the flange is still covered, the tub is not ready to move.
Freestanding tubs need line protection
Freestanding tubs often look easier because there are no surrounding walls, but the hidden drain can still be awkward. Some sit over a floor-mounted waste connection that can be damaged if the tub is rocked too hard during lifting.
This works only if the tub can be lifted straight enough to release the drain connection without twisting the piping below.
Drop-in tubs require deck demolition
Drop-in tubs are built into a platform or deck. Removal often means the deck, tile, stone, or access panels must come apart first. The tub itself is only part of the job.
This becomes a problem when homeowners expect to preserve the entire surrounding deck. In many remodels, some or all of that finish is sacrificed.
Cast iron often needs sectioning
If you need to know how to cut a cast iron tub for removal, first decide whether it can be removed intact with proper equipment. Often it cannot, especially upstairs or in tight baths.
Sectioning or breaking cast iron is common because of weight, but it adds:
-
sharp edges
-
heavy fragments
-
high noise
-
vibration
-
risk to nearby finishes
-
risk to floors if pieces are dropped
Protect the floor heavily and seal nearby vents before starting. Fine dust and debris travel farther than expected.
Structural load and breakage risk control
-
Pre-removal structural assessment
-
Check for floor deflection or bounce under weight
-
Identify signs of aging joists or weakened subfloor conditions
-
Look for previous structural modifications or reinforcement patches
-
Fragment handling safety
-
Avoid concentrating heavy cast iron sections in one area
-
Distribute weight evenly during removal
-
Prevent localized overload on weakened subfloor sections
-
Stop conditions
Immediately stop work if:
-
Flooring shows instability or noticeable movement
-
Joists display visible cracking, rot, or deterioration
-
Upper-floor structural conditions cannot be verified
In such cases, structural evaluation is required before proceeding.
What fails during plumbing disconnection?
Plumbing disconnection is often the point where bathtub removal stops being straightforward, because many of the key connections are hidden, corroded, or harder to reach than expected. Whether the drain, overflow, or supply lines cooperate depends heavily on age, access, and installation quality, and small issues at this stage can quickly escalate into wall or pipe damage.
Drain and overflow seize often
The how to safely disconnect tub plumbing stage is where many DIY removals stall.
Common problems:
-
drain flange will not turn
-
overflow screws strip
-
shoe spins below the tub
-
putty and corrosion lock parts together
-
hidden connections are not reachable
If the assembly is badly corroded, forcing it can damage the waste arm in the wall or the trap below.

Supply lines must be fully isolated
Most tub removals are drain-side work, but if the project includes faucet body changes or freestanding supplies, verify water is truly off and lines are depressurized.
Do not assume a local stop works just because the handle turns.
Cap open lines immediately
After disconnecting, cap or plug open plumbing right away. This prevents:
-
sewer gas
-
accidental debris in the line
-
leaks if water is turned back on
-
forgotten open piping during a long remodel
A surprising number of post-demo water problems happen because a line was left open “just for a day.”
How do you access hidden plumbing?
If you are wondering how to access plumbing behind a bathtub before removal, the best answer depends on your house layout:
-
from the room behind the tub
-
through an existing access panel
-
from below, if there is unfinished space
-
by opening the tub surround wall
Retrofit homes are often harder than new construction because plumbing is buried in finished surfaces with no service access.
This is usually where installation fails: the owner assumes the drain can be disconnected from above, then learns the shoe or overflow cannot be held in place without opening a wall.
What to do before removing a bathtub for remodel
Bathtub removal for a remodel is much smoother when the preparation is done in the right order, because most failures happen before demolition actually begins. A clear replacement plan, verified measurements, proper identification of the tub type, and early utility and access preparation all determine whether the removal is straightforward or turns into unexpected repair work.
Before demolition, do these checks in order:
-
Confirm your replacement plan. Do not remove the tub first and figure out the next fixture later. Drain location, wall condition, and floor level matter.
-
Measure the exit path. Include doors, turns, stairs, and obstacles.
-
Identify tub type. Alcove, freestanding, drop-in, steel, acrylic, fiberglass, cast iron, or jetted.
-
Shut off utilities. Water first. Electrical too for jetted tubs.
-
Protect the house. Cover floors, remove doors if needed, seal HVAC vents, and isolate dust.
-
Plan disposal. Know how to dispose of an old bathtub after removal before the tub is in your hallway.
-
Check for hazards. Older finishes, mastics, and wall materials may need testing.
-
Open access as needed. Wall first, then drain and overflow access.
Tools needed
For many standard jobs, the tools needed to remove an alcove bathtub include:
-
utility knife
-
pry bar
-
screwdrivers
-
drill/driver
-
adjustable wrench
-
drain removal tool
-
reciprocating saw for surrounding materials
-
hammer
-
protective sheets or plywood
-
heavy gloves, eye protection, hearing protection, and dust protection
For cast iron or difficult steel removal, heavier cutting or breaking tools may be needed. That is where DIY risk rises fast.
Basic removal sequence
Here is a practical how to remove a bathtub step by step sequence for a standard alcove tub:
-
Shut off water.
-
Remove trim pieces and spout if they block access.
-
Cut all caulk lines.
-
Remove wall finish above the tub flange.
-
Take out drain and overflow trim.
-
Access and disconnect the waste/overflow assembly if reachable.
-
Remove screws or nails securing the flange.
-
Cut any adhesive or mortar contact points if present.
-
Lift the front edge slightly and check for remaining fasteners.
-
Slide the tub away from the wall and out of the alcove.
-
Move it along the protected exit route.
-
Cap open plumbing and inspect the exposed framing and floor.
What problems show up after removal?
Bathtub removal doesn’t end when the fixture comes out—what’s underneath often determines whether the project stays on budget or turns into a repair job. Hidden structural damage, finish failures, and disposal logistics frequently appear only after demolition, so the post-removal stage is where careful inspection and planning really matter.
Subfloor rot may need framing repair
Once the tub is gone, inspect:
-
around the drain opening
-
under the overflow wall
-
front apron area
-
corners where water can sit
-
any spongy spots at joists or seams
If a screwdriver easily sinks into the subfloor, you are not ready for a new fixture yet.

Inspection criteria and repair thresholds
-
Basic structural probing method
-
Apply pressure using a screwdriver or similar probe
-
Assess whether wood resists or compresses easily
-
Check for delayed rebound after pressure is released
-
Signs of structural degradation
-
Softened or darkened wood near drainage zones
-
Uneven or sagging floor surfaces
-
Visible moisture damage or decay in joist structures
-
Repair threshold rules
Installation must be paused if:
-
Any load-bearing section feels structurally soft
-
Joists show visible cracking or rot
-
Support around the drain opening is compromised
-
Critical installation rule
Until structural issues are fully repaired:
-
Do not install a new bathtub
-
Do not proceed with floor sealing or finishing work
Tile edges rarely survive cleanly
Even careful demo often leaves:
-
chipped tile edges
-
torn drywall paper
-
broken backer board
-
missing waterproofing
-
cracked grout lines beyond the tub area
That is normal. Plan for finish repair. Do not build your budget around perfect preservation unless a pro has confirmed the install method supports it.
Disposal rules vary by material
How to dispose of an old bathtub after removal depends on the material:
-
cast iron may be recyclable as scrap metal
-
steel tubs may also be accepted as scrap
-
fiberglass or composite tubs often go to bulk waste or landfill
-
local pickup rules may require sectioning or scheduled collection
Do not assume curb pickup will take a full tub.
When should you hire a contractor?
When to hire a contractor for bathtub removal is not just about skill. It is about consequences.
Hire help when:
-
the tub is cast iron
-
the tub is jetted or hardwired
-
the house is old enough for lead or asbestos concerns
-
plumbing must be rerouted
-
the tub is on an upper floor with tight stairs
-
you need to preserve nearby finishes
-
this is the only bathing fixture in the home
-
the schedule cannot tolerate surprises
If the cost of one mistake exceeds the labor savings, hire the contractor.
Common problems homeowners do not expect
Even a carefully planned bathtub removal can produce surprises that only appear once demolition is underway. Some issues are hidden behind finishes, some are tied to plumbing connections, and others only become obvious when the tub is finally lifted out and surrounding conditions are exposed.
The tub is loose but still stuck
Usually this means one of three things:
-
a hidden flange fastener remains
-
tile or wall board still overlaps the tub lip
-
the drain assembly is still holding from below
The drain hole starts weeping
If water or residue appears after the flange is pulled, cap or isolate the drain right away. Do not leave it open while the room sits unfinished.
The floor feels weaker after removal
Sometimes the tub was spanning over damaged subfloor that only stayed “fine” because the fixture covered it. Once exposed, the floor may flex. That needs repair before anything new goes in.
Dust spreads through the house
Demo dust gets into returns and supply vents quickly. Seal vents before starting and use dust containment, especially if you are breaking cast iron or cutting old wall materials.
Before You Buy checklist
If you are planning tub removal as part of a remodel, confirm these before you spend money on the next fixture:
-
I measured the tub and the full exit path.
-
I know what type of tub I have.
-
I know whether the tub can come out whole.
-
I know where the drain and overflow connect.
-
I know whether there is electrical for a jetted tub.
-
I have checked for likely lead or asbestos risk in older materials.
-
I expect some wall repair and have budgeted for it.
-
I have a plan if the subfloor is rotten.
-
I know how the old tub will be disposed of.
-
I understand the resale impact if this removes the only tub.
-
I have enough help to move the tub safely.
-
I know when I will stop and call a contractor.
FAQs
1. Can I remove a bathtub by myself?
Yes, you can handle a DIY bathtub removal guide on your own, but it depends on the tub type and your comfort level with basic plumbing and demolition. A lightweight fiberglass unit is usually manageable for most homeowners, especially with careful prep and proper shutdown of water lines. The main challenges come from tight spaces, hidden fasteners, and heavy lifting, which can quickly turn the job into a two-person task if things get complicated.
2. How hard is it to remove an alcove tub?
Removing an alcove tub can feel straightforward at first, but it often becomes more involved once you start opening the surrounding walls. The real difficulty comes from safely disconnecting fixtures, breaking seals, and maneuvering the tub out without damaging tiles or drywall. For most people, the job sits in the moderate difficulty range and may require patience rather than advanced skills.
3. Best way to cut up a steel bathtub?
When dealing with heavier materials like steel or cast iron, cutting is sometimes the only practical option, especially in older homes. Cutting a cast iron tub for removal usually involves an angle grinder or reciprocating saw with metal blades, along with full protective gear due to sparks and dust. Breaking the tub into smaller sections makes it much easier to carry out of tight bathroom spaces.
4. How long does it take to remove a tub?
A standard bathtub removal guide timeline usually ranges from a few hours to a full day, depending on conditions. Simple setups with accessible plumbing and lightweight tubs can be finished relatively quickly, while older installations with tile surrounds or corrosion can significantly extend the process. Preparation and experience are the biggest factors in reducing total time.
5. What tools do I need for tub demo?
The essential tools for removing alcove tub setups include a pry bar, utility knife, drill, wrench, and reciprocating saw, along with safety gear like gloves and goggles. Depending on the material, you may also need heavier equipment such as an angle grinder for metal tubs. Having the right tools ready before starting makes the process smoother and reduces the risk of damaging surrounding structures.
6. Cost of professional bathtub removal?
The cost to have a tub removed typically falls between a few hundred to over a thousand dollars, depending on labor, location, and tub type. Heavier materials, tight bathroom layouts, or added plumbing work can increase pricing. Many homeowners choose professional help when they want to avoid demolition risks or don’t want to deal with disposal logistics.
7. How to remove a tub without damaging walls?
The key to a clean removal is careful prep for freestanding tub install or replacement work, even if you’re not installing a freestanding model. Start by removing trim, cutting caulk lines cleanly, and loosening the tub evenly from all sides before applying force. Slow, controlled movement greatly reduces the chance of cracking tile or tearing drywall during extraction.
8. How to avoid plumbing damage during tub removal?
Safely disconnecting tub plumbing is the most important step in preventing costly damage during removal. Always shut off water supply fully, release pressure, and carefully detach drain and overflow connections using the proper tools instead of force. Supporting nearby pipes and working slowly helps prevent bending, cracking, or accidental leaks that could complicate the project.
9. How to dispose of an old bathtub?
Disposing of an old bathtub requires planning ahead, especially for heavy materials like cast iron or steel. Disposing of an old bathtub often involves arranging bulk waste pickup, visiting a recycling center, or hiring a haul-away service if the tub is too large to transport. Proper disposal ensures compliance with local regulations and avoids leaving heavy debris on-site.
References



Leave a comment
This site is protected by hCaptcha and the hCaptcha Privacy Policy and Terms of Service apply.