


Planning to install a bath tub? This pro-grade DIY guide gives you time and cost ranges up front, then walks you through freestanding, undermount, and built-in installs. Learn leveling, plumbing, and waterproofing best practices so you avoid leaks, rot, and repeat work.
Quick Answer: How to install a bath tub
Featured snippet checklist (5–7 steps):
- Turn off water, remove old tub, and repair any water damage.
- Measure, dry-fit, and align the drain and overflow to the P-trap.
- Build a level base (mortar bed or adjustable feet) and set the new bathtub.
- Level and secure the tub to studs, brackets, or deck per the manufacturer’s instructions.
- Connect the drain assembly, overflow, and faucet; fill and leak-test.
- Install waterproofing (membrane/backer board) and finish the surround or deck.
- Apply silicone at all joints, allow to cure, and recheck for movement or gaps.
Who should DIY vs. hire a pro:
- DIY-friendly: basic alcove replacement, lightweight acrylic or fiberglass, no plumbing relocation.
- Pro recommended: undermount/built-in decks, cast iron/stone, subfloor repairs, plumbing moves, install jetted tub (electrical and dedicated circuits).
Time and difficulty:
- Removal: 2–6 hours
- Install (simple alcove or installing freestanding tub): 4–10 hours
- Undermount/built-in with deck/waterproofing: 1–3 days
2025 cost snapshot (U.S.):
- Replacement average: ~$2,100
- Basic alcove: $800–$2,000
- Freestanding (all-in): $1,500–$5,000
- Undermount/built-in: $2,500+
Must-have checks:
- Floor structure supports tub + water + bather
- Level base; leak-free drain/overflow
- Proper waterproofing for undermount/built-in
Tools, Materials, and Budget Checklist
Keep this short checklist handy. It covers standard bathtub installation and notes add-ons for freestanding, alcove, and undermount work.
Tools
- Adjustable wrench, basin wrench, screwdrivers
- Level, shims, tape measure, pencil
- Hole saw, oscillating tool, drill/driver
- Caulk gun, utility knife, putty knife
- Pry bar, buckets, shop vac
- PPE: gloves, safety glasses, knee pads, dust mask
- Optional: stud finder, reciprocating saw, multi-bit screw set
Materials
- Tub (right size and type of tub for your space)
- Drain and overflow kit, P-trap, supply lines, shutoff valves
- Mortar (or feet-leveling system), disposable mixing tray
- Waterproof membrane and tape (for undermount/built-in)
- 100% silicone sealant, plumber’s putty
- Ledger board/stringer and/or brackets; backer board (not drywall) for wet zones
- Fasteners: galvanized screws, nails as specified
- Tile, grout, stone or deck materials (as needed)
- Framing lumber (2x4) for deck or structural frame reinforcement
- Access panel materials for behind-the-tub service
Budget line items
- Tub cost
- Plumbing parts (valve, drain kit, fittings, PVC or ABS pipe)
- Mortar/membrane/sealants
- Disposal fees for the old tub
- Permit fees (if applicable)
- Delivery and moving help
- Reinforcement lumber, backer board, and finish materials (tile/stone/trim)

Plan and Measure for Success (structural + layout)
Good planning avoids surprises. Start by measuring the bathroom space and the route to it. Will the tub fit through doors and around corners? Make sure the subfloor is clean and flat. Measure the alcove or floor area, and check where the water lines, vent, and drainpipe currently sit. If you need to move the drain or valve, set time and budget for rough-in changes and a permit.
Now look under the surface. The tub, water, and a person can weigh a lot. A cast iron soaker can top 600 pounds when filled. Check joist span and spacing if you can access below. If you see sagging, rot, or notched joists, plan to reinforce. A simple rule: the tub will sit only as well as the support below it.
Dry-fit the new tub before you open glue or mortar. Place cardboard on the floor, set the tub down gently, and align the drain opening and overflow drain with your P-trap and back wall studs. Mark tub flange heights, ledger board locations, stud attachment points, and faucet centerlines. These marks guide every next step.
Picking your type of tub is part looks, part layout, and part skill:
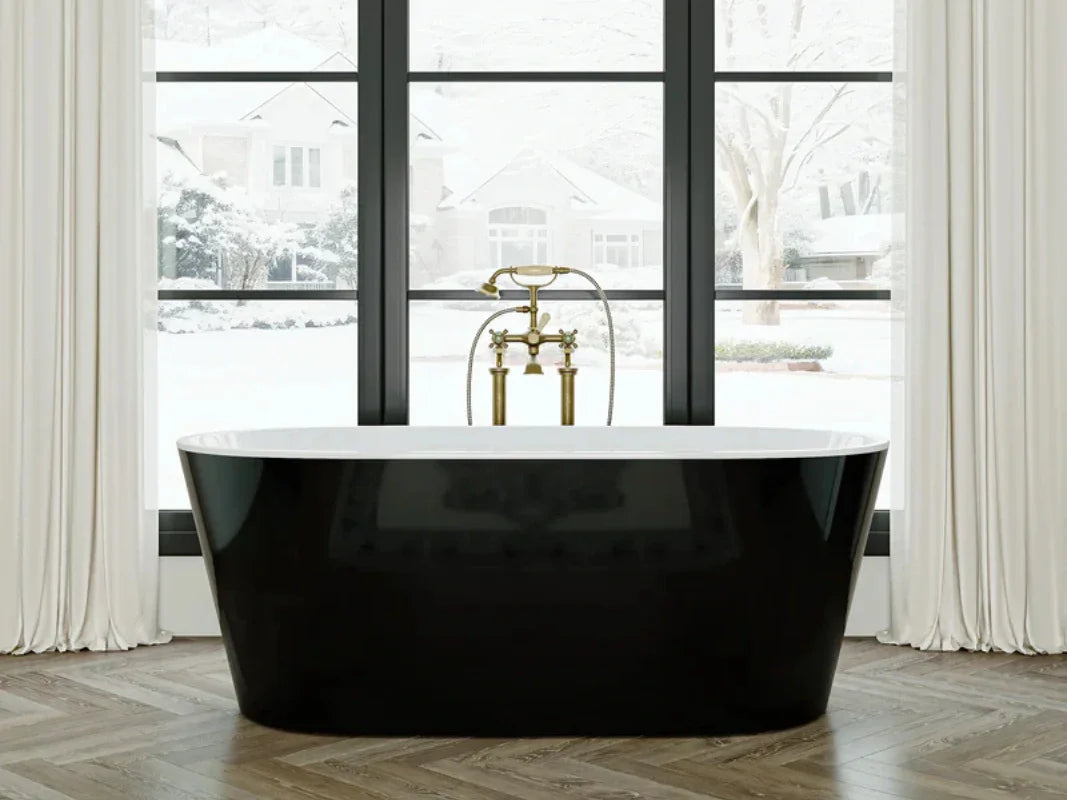
- Freestanding has flexible placement and open décor options but leaves plumbing visible or under the floor. It often uses feet, brackets, or adhesive to secure.
- Built-in/alcove saves space and hides service lines. It attaches to studs and pairs with a surround.
- Undermount sits below a deck for a premium, seamless look. It needs careful waterproofing, solid deck framing, and a watertight bond at the rim.
Can you install a bathtub by yourself? Yes, for a light acrylic alcove or a basic freestanding unit, many owners do. On the other hand, heavy stone, cast iron, jetted tubs, or undermount decks are better for a team or a licensed contractor.
Remove the Old Tub and Prep the Space
Work slow here to protect the subfloor and studs. Turn off the water and open a faucet to release pressure. Drain the lines and put down towels. Cut the old caulk. Remove trim and any surround panels or tile as needed. Use a wrench to disconnect the drain and overflow behind the access panel or from below. Older homes may have stuck fittings or galvanized parts; flexibility helps, so keep several fitting options nearby.
With a helper, lift or slide the tub out. Use cardboard to protect the floor and the edge of the tub as you move it. Once the tub is out, clean up debris and check for water damage. Repair soft subfloor, replace moldy insulation, and sister any weak joist sections. Square up stud walls, and attach blocking where you will later screw a ledger or stringer.
Rough-in Plumbing and Dry-Fit
Now set the drain assembly on the tub. Use the rubber gasket and putty or silicone called out by the maker. Align the drain and overflow and tighten to a snug, watertight fit. At the floor, align the P-trap so the outlet falls under the drain opening. Keep the trap accessible where local code allows. If valves are old, now is the time to replace the valve and add shutoffs you can reach behind the tub.
Dry-fit the tub again. Mark final ledger height lines on the studs, note where brackets or screws will go, and trace the bead of silicone you plan to run at the front of the tub and the top of the tub flange. You are getting ready to set the tub in one clean move.
Set, Level, and Secure the Tub
A tub that is off by even a few millimeters can hold water at the rim or stress the drain. So take your time on this part.
Base options
- Mortar bed: Many acrylic and fiberglass tubs need a mortar bed for full support. Mix to a peanut-butter feel and set it in mounds or a bed per the manufacturer’s sheet. This removes flex, which helps stop future leak points at the drain.
- Adjustable feet: Many freestanding tubs have feet you can micro-adjust. Add shims if your floor is uneven.
- Deck supports: For undermount, the deck cutout and the rim support must be dead level before the tub goes in.
Level checking
Check both axes: front-to-back and side-to-side with a long level. Correct even small tilt with shims or by adjusting feet before any sealant cures.
Anchoring and securing
- Alcove/built-in: Set the ledger board at the marked line. Lower the tub so its tub flange rests on the ledger, then attach it to the studs with the approved screws or clips. Do not crush the flange. Run the silicone bead where the flange meets the wall surface.
- Freestanding: Use concealed brackets or adhesive as stated in the manual. Some models include a floor plate, others use screws and anchors. For “freestanding tub flexible drain hose installation,” follow the included kit carefully; guard against sag in the hose, and confirm the P-trap stays below the drain.
- Undermount: The deck must support the rim on all sides. Add 2x4 blocking under the deck edge if needed, so the tub rim bears evenly. Dry-fit the deck panel to ensure a snug, even reveal around the opening.
Connect drain and overflow
Tighten the fittings gently but firmly. Over-tightening can warp an acrylic shoe or cut a gasket. Fill the tub and perform a full leak test. Check every joint you can see or touch.

Waterproofing and Sealing (critical for undermount/built-in)
Water finds any weak point. In wet zones, avoid drywall. Install backer board and a continuous waterproof membrane or vapor barrier from the surround down to the tub edge. Tape seams, outside corners, and all penetrations with approved membrane tape. Where a tub meets tile or a deck, use high-quality, 100% silicone. For undermount, the bond at the rim is vital. You need a clean, dust-free surface, the proper adhesive/epoxy, and a consistent, watertight seal under the deck material (Source: CDC, 2024, Mold).
Think about future service. Use an access panel where code allows so you can reach the drain, overflow, and water supply later. This small step can save a wall if a leak appears years from now.
Finishing Touches: Surrounds, Decks, Trim, and Caulk
Tile and stone bring the room together. Keep expansion gaps at edges. Use a grout suited for wet zones. At every transition—deck-to-tub, surround-to-tub, corners—apply a clean silicone bead, not grout. Smooth it with a finger dipped in water and let it cure fully before the first soak. Wipe the tub and fittings with a soft cloth so there is no film left that could weaken future caulk bonds.
How to Install Different Tubs
Rough Step-by-Step: Alcove (Standard Acrylic)
Use this when you want a simple, clear path to replace your old tub. Keep the maker’s sheet in hand for exact heights and fasteners.
- Shut off water, open a faucet to relieve pressure, remove trim and caulk, and disconnect drain/overflow.
- Pull the old tub and repair subfloor/stud issues.
- Mark ledger height and drain center. Set the P-trap.
- Set mortar mounds; lower the tub in, seat the tub flange on the ledger.
- Level both axes; add shims as needed; secure flange to studs.
- Connect drain and overflow; fill the bath and leak-test.
- Install backer board, waterproof seams, and finish the surround.
- Run final silicone beads at all joints.
Rough Step-by-Step: Installing Freestanding Tub
- Plan rough-in: drain center and water lines location (floor or wall).
- Dry-fit with cardboard pads; mark bracket points.
- Adjust feet to level; add shims to low spots in the floor.
- Secure with concealed brackets or adhesive per instructions.
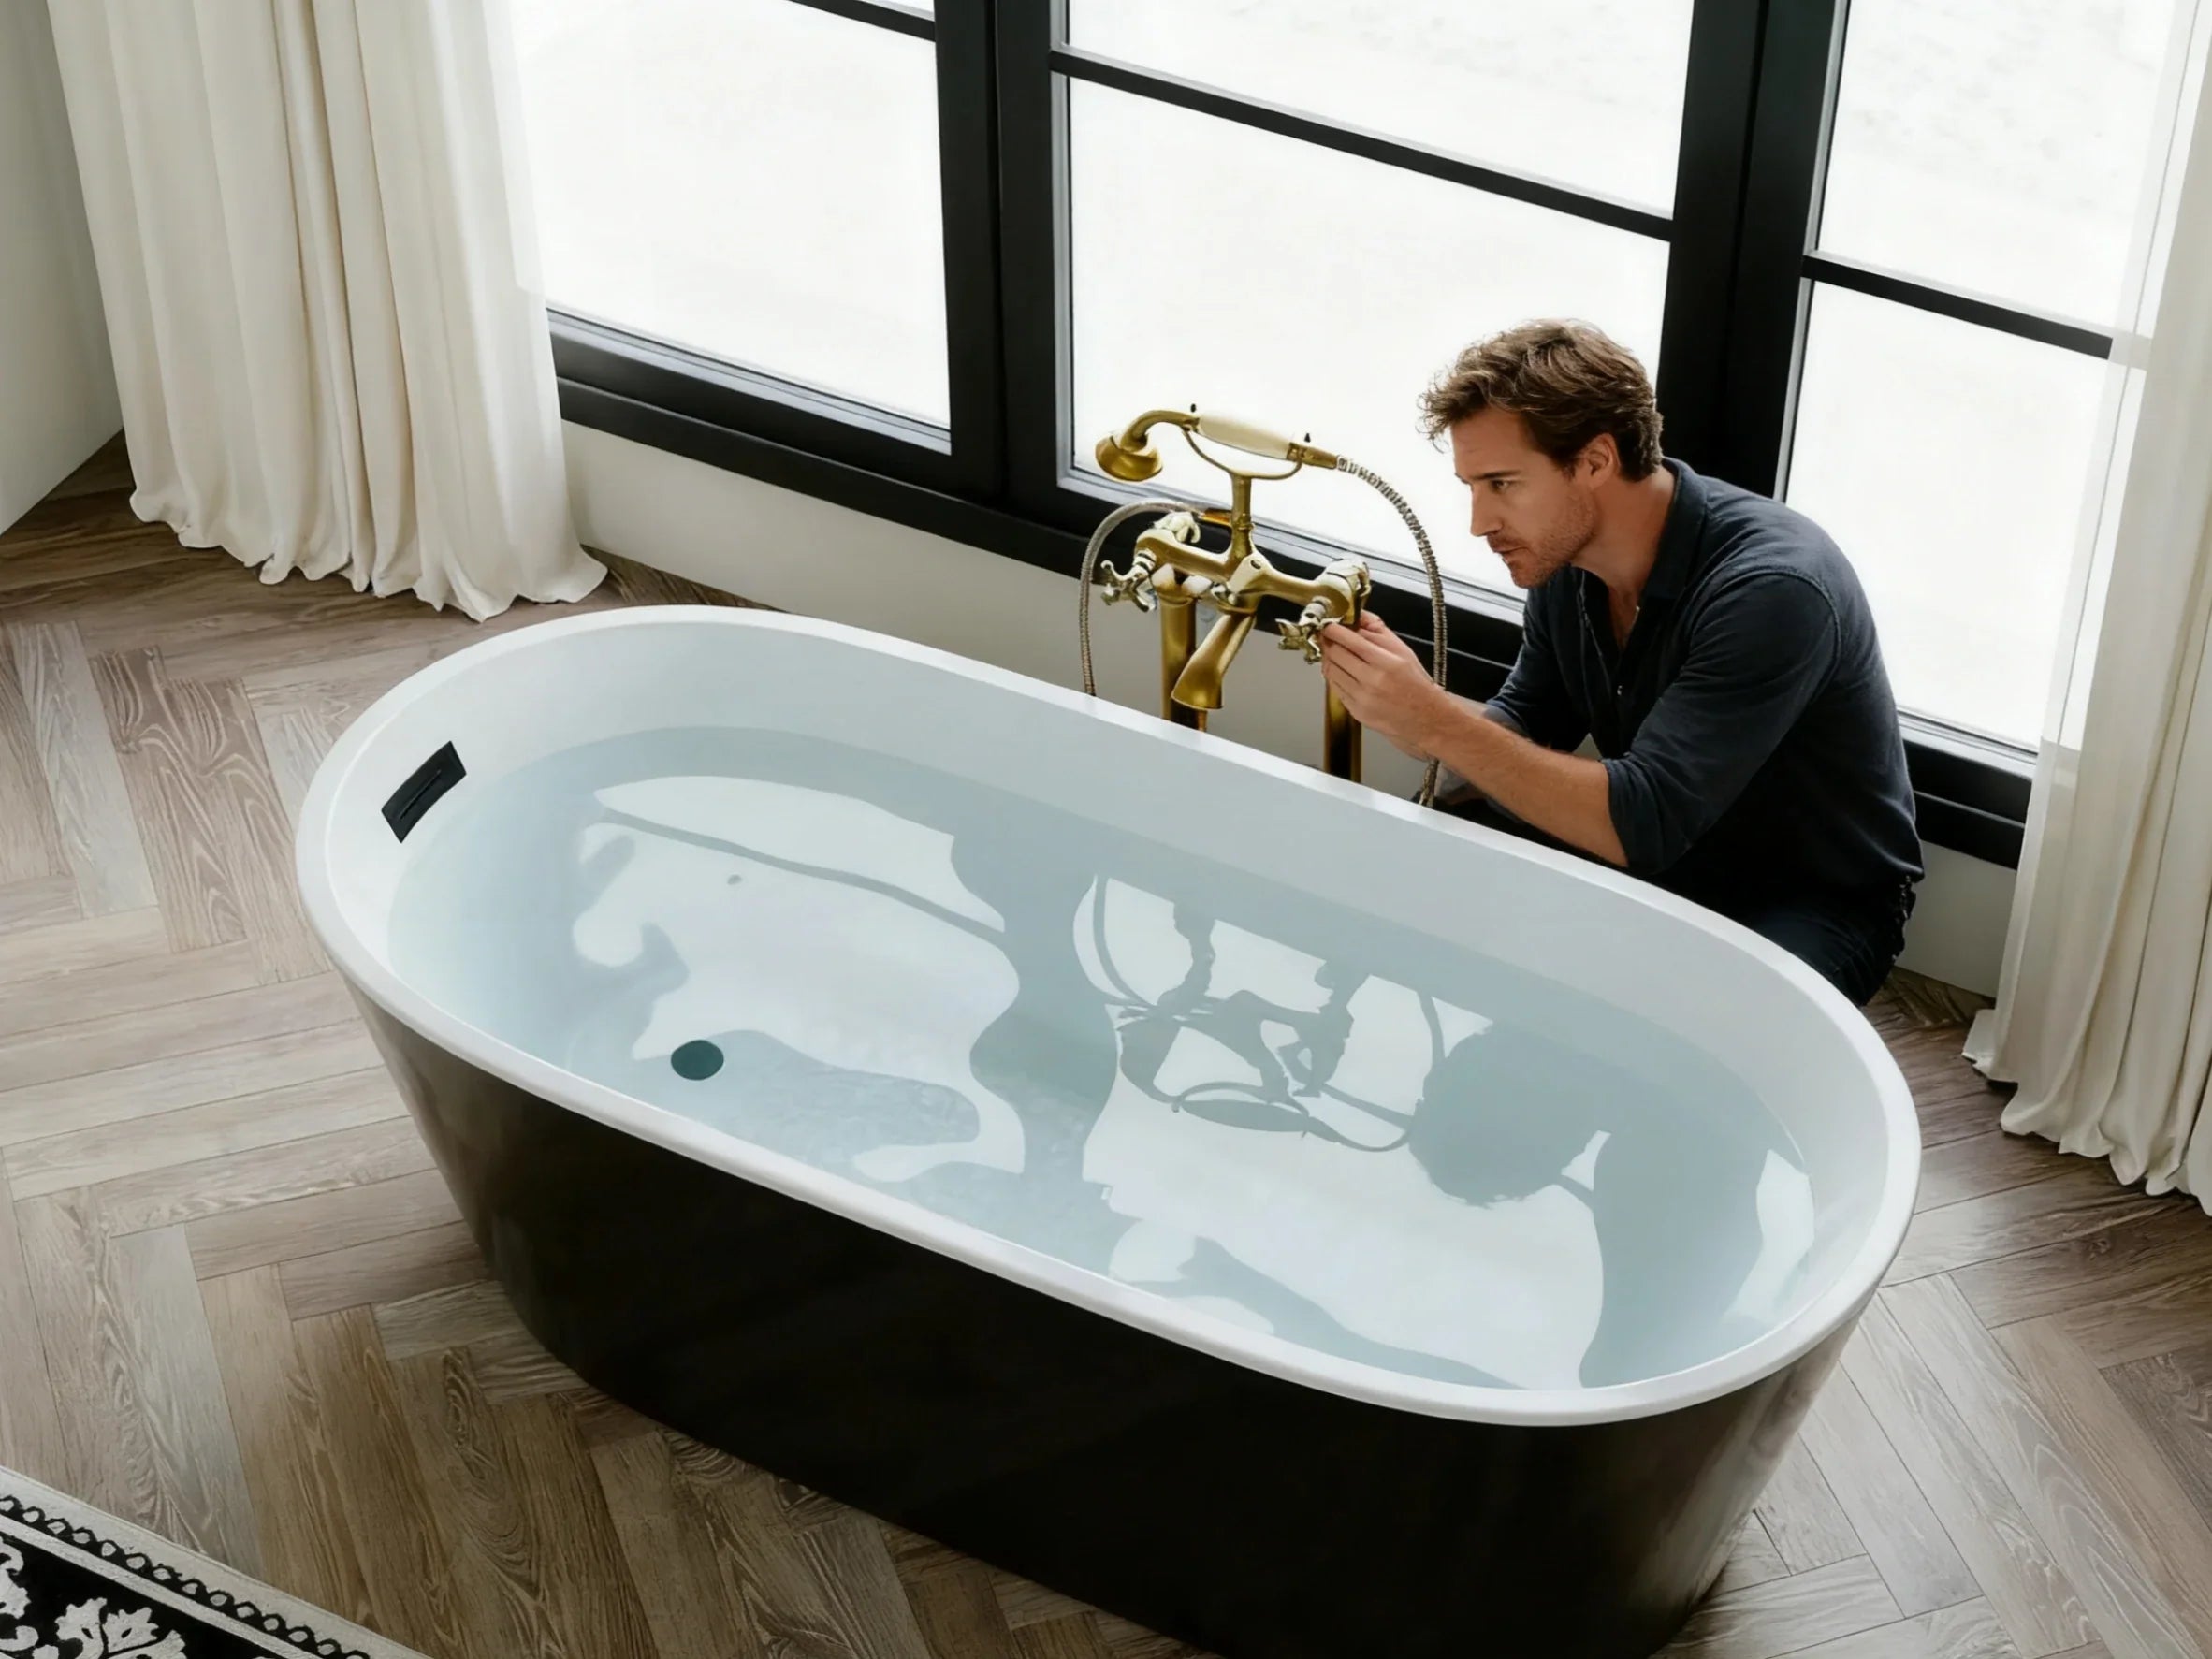
- Connect drain; for flexible hoses, support the run; test under a full fill.
- Seal at floor contact with silicone where the maker requires.
Rough Step-by-Step: Undermount/Drop-In
- Frame the deck with 2x4s, check for no bounce. Install backer and membrane.
- Cut the deck opening per template; dry-fit the tub and deck panel.
- Set the tub in mortar or per-spec supports; level and secure.
- Bond the rim to the deck using the specified adhesive/epoxy.
- Seal all seams; finish tile/stone with a flush, clean edge.
Real-World Lessons (case studies you can use)
A homeowner replacing a light acrylic alcove tub marked every drain and overflow centerline during the dry-fit. This simple habit helped them drill only once, set the stringer at the right height, and avoid wasted time. They also used a full mortar bed, which stopped base flex and kept the drain from loosening.
In another case, a couple tried an undermount finish without a full membrane. Small splashes reached wood under the deck. Three months later, paint below the bathroom ceiling bubbled. The fix meant removing stone, lifting the tub, and replacing parts of the subfloor. The lesson is clear: waterproofing is not where you cut corners.
On a freestanding install, a DIYer used two people to lift, protected the floor with cardboard, and added blocking where the floor felt bouncy. They did a full-fill leak test before closing an access panel. Their only note: take extra time to level across all corners. Even a slight tilt is easy to see in a freestanding piece.
Common posts from community forums call out three pain points: uneven subfloor, old drain stacks that crumble once disturbed, and skipped membranes. Plan time for these surprises so your bathroom remodel stays calm.

Permits, Codes, and Safety Essentials
When do you need a permit? If you move plumbing, cut or reinforce structure, add a new electrical circuit (for a jetted tub), or change venting, expect to file. Many towns also require a final inspection for new valves, traps, or major fixture changes.
Top code and safety checks:
- Accessible shutoff valves you can reach without breaking walls
- Proper trap and vent layout so the drain flows and seals
- GFCI protection where required for pump motors or outlets near water
- Approved materials: use listed PVC or ABS and proper glue/primer
- Slope-to-drain on any new lines so you avoid standing water
Lift with help. Heavy tubs can injure your back or shoulders. Wear gloves and eye protection when cutting or setting tile and when handling old fittings.
Do you need a plumber to install a tub? Not always. For simple swaps, many capable DIYers succeed. If you are moving the drain, changing the main valve, adding pumps, or unsure about venting, calling a licensed pro is smart—and often required by code.
Bathtub Materials and Types: Pros, Cons, DIY Difficulty
Here is a quick comparison to help you choose your type of tub and plan the install effort.
| Material/Type | Weight | Pros | Cons | DIY Difficulty |
| Acrylic/Fiberglass | Light | Warm to touch, repairable, budget-friendly | Can flex without mortar bed | Easy to Moderate |
| Cast Iron | Heavy | Very durable, classic look | Very heavy, may need floor reinforcement | Hard (often Pro) |
| Stone/Composite | Very Heavy | Premium look, long life | Costly, structural checks needed | Hard (Pro) |
| Alcove/Built-in | Medium | Space-saving, easy to surround | Needs framing, tub flange fastening | Moderate |
| Freestanding | Varies | Flexible layout, strong style | Floor plumb work and anchoring | Moderate |
| Drop-in/Undermount | Medium–Heavy | Clean deck look | Detailed waterproofing, exact framing | Hard (Pro) |
| Jetted/Soaking | Medium–Heavy | Comfort features | Power/GFCI, service access | Hard (often Pro) |
Troubleshooting and Common Mistakes
- Tub won’t sit level: Re-check your mortar bed and shims. Verify the floor is flat. Adjust feet on freestanding units.
- Slow drain or leak at shoe: Reseat the drain with plumber’s putty (unless the maker calls for silicone). Confirm the P-trap aligns with the drain opening and that gaskets sit square.
- Flexing acrylic base: There is not enough support. Remove and reset with a full-coverage mortar bed per the guide.
- Mold risk at walls: No membrane or gaps in waterproofing. Stop, dry the area, and install a proper waterproof membrane before you tile.
- Rattling faucet or spout: The valve or spout arm lacks blocking. Add solid backing and secure with the right screws.
- Caulk cracking: Movement or wrong sealant. Use 100% silicone made for baths, allow cure time, and support the joint properly.
Accessibility and Small-Bath Solutions
You can upgrade your bathtub for safer entry without a full gut. Step-in conversions lower the sidewall. Walk-in tubs add doors and seats. Plan grab bars where hands reach as you enter and stand; add solid blocking now so future bars screw into wood, not just tile. In tight rooms, a compact alcove or corner tub can free floor space. Another trick is an off-wall freestanding tub with the drain set in the floor and a slimline filler.
Eco & Water-Saving Upgrades
Efficient tub fillers and thermostatic valves control flow and temperature so you waste less. Pair them with a high-efficiency water heater sized for the tub’s gallon capacity. Seal with low-VOC silicone and adhesives. Some tub shells include insulation; this keeps water warm longer and reduces reheating. In large homes, a hot-water recirculation line can shorten wait times at the faucet while using less water.
When to Hire a Pro (and how to choose)
Call a licensed pro when you see structural damage, need to relocate the drain or water lines, plan an undermount deck, set a very heavy tub, or install jetted tub systems with pumps and new circuits.
Must-ask questions:
- Are you licensed and insured for plumbing in this city?
- How will you waterproof the surround or deck? Which membrane will you use?
- What’s covered under the leak and workmanship warranty?
- How will you secure the tub and ensure it’s level?
- What timeline and inspection steps should I expect?

Cost Breakdown and Budget Planner (2025)
Typical ranges (all-in, U.S.)
- Basic alcove: $800–$2,000
- Freestanding: $1,500–$5,000
- Undermount/built-in: $2,500+
- Replacement average: ~$2,100
Key variables
- Type of tub and weight
- Subfloor/joist reinforcing
- Local labor rates and permit costs
- Waterproofing and deck materials
- Disposal and delivery
Simple calculator
Tub + Drain/Valve/Lines + Mortar/Membrane/Sealants + Framing/Backer + Finish (Tile/Stone/Trim) + Labor (if hired) + Contingency (10–15%)
What do you put under a bathtub when installing it? Most acrylic tubs sit on a mortar bed for full support. Some freestanding models use adjustable feet plus shims. Decked tubs use a rim support under the edge of the tub attached to the frame.
What is the average cost of a bathtub installation? In 2025, U.S. tub replacement averages around $2,100, with simple jobs near the low end and decked or heavy installs higher.
Can bathtub hardware be replaced? Yes. Drains, overflow covers, spouts, and valves can be swapped later. Always use compatible gaskets, trim, and thread sealant. If finishes are outdated, a new trim kit can refresh the look during a remodel or even a rental turnover.
Do I need a plumber to install a tub? A practical answer
Think about three questions:
- Are you moving the drain or water supply?
- Is the tub very heavy, or does it include jets/pumps?
- Are you unsure about venting or trap height?
If yes to any, a pro saves time and can keep you on code. If not, and you are comfortable with pipe work and leveling a bathtub, you can do a clean, safe DIY installation.
Conclusion: Your path to a leak-free, level install
To put it simply: measure well, confirm structure, build a level base, secure the tub the right way, and do thorough waterproofing before you close anything. Test with a full tub of water and check every joint. If you hit complex plumbing, a heavy shell, or an undermount deck, hire a licensed pro. A careful approach now means a quiet, clean soak later.
FAQs
1. How long does a bathtub installation take?
The time needed to install a bathtub depends on the type of tub and the condition of the bathroom. A simple alcove tub replacement, where the drain and plumbing are already in place, can usually be completed in a single day by an experienced installer. However, freestanding tubs or undermount tubs require more work. These often involve building a deck, adding extra waterproofing, and carefully leveling the tub, which can extend the job to 2–3 days. If structural changes, plumbing relocations, or tile work are required, the timeline may stretch longer. Homeowners should also factor in drying time for adhesives, mortar, or waterproofing layers before the tub can be used safely. Planning for a few days rather than rushing ensures the installation is both watertight and durable.
2. Do I need a mortar bed under an acrylic tub?
Yes, most acrylic bathtubs benefit from being set in a mortar bed during installation. Acrylic is lightweight and flexible, which means without a solid base, the tub may shift, squeak, or put stress on the plumbing connections over time. A properly mixed mortar bed creates a supportive cradle that distributes the tub’s weight evenly, prevents flexing, and keeps the drain assembly tight to avoid future leaks. This is especially important for larger or deeper acrylic tubs that hold more water and therefore add more weight. Manufacturers almost always recommend this step in their installation guides, and skipping it can void warranties. The mortar also helps eliminate hollow spots under the tub, giving a more solid feel when standing inside. Although it takes extra effort, installing the mortar bed is a proven way to extend the life and comfort of your acrylic bathtub.
3. Can I install a freestanding tub on a second floor?
Yes, freestanding tubs can be installed upstairs, but you need to verify that the floor structure is adequate to support the combined weight of the tub, water, and a person. Many freestanding tubs—especially cast iron or stone—can weigh hundreds of pounds before they’re even filled, so total loads can exceed 800–1,000 pounds. Start by checking the joist size, spacing, and span of your second-floor framing. Look for signs of weakness such as sagging, squeaking, or prior water damage. In many cases, reinforcement like blocking or sistering joists may be required. An engineer or contractor can confirm whether the floor meets the standard 40 pounds per square foot residential load rating. With proper planning, freestanding tubs are safe for second floors, but ignoring floor support can lead to structural problems, costly repairs, and safety risks.
4. What waterproofing is best for a tub surround?
The best practice for waterproofing a tub surround is to use cement backer board combined with a continuous waterproof membrane system. Cement board is far more resistant to moisture damage than standard drywall, making it the right substrate for tile. Over the board, apply a liquid-applied waterproofing membrane or a sheet system, ensuring all seams and joints are fully sealed. Corners and transitions should be taped and treated with the membrane as well. Around the tub flange and edges, use 100% silicone sealant to prevent water penetration into the wall cavity. If tile is used as the finish, it is important to remember that grout is not waterproof, so the membrane underneath does the real protective work. With proper waterproofing, the tub surround will last for decades without leaks, mold, or rot, even in bathrooms with heavy daily use.


Leave a comment
This site is protected by hCaptcha and the hCaptcha Privacy Policy and Terms of Service apply.